VUE安装
安装node.js(https://nodejs.org/en/download/)内置npm
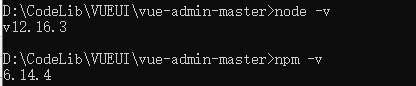
检测进入cmd node-v 出现版本号即可
修改npm文件缓存及模块下载位置
npm config set cache "D:\Software\Node\npm_cache"
npm config set prefix "D:\Software\Node\npm_global"
配置npm国内镜像
//NPM国内镜像
npm config set registry https://registry.npm.taobao.org
//安装CNPM(用法与NPM一致,为淘宝的国内镜像)
npm install cnpm -g --registry=https://registry.npm.taobao.org

任选其一即可
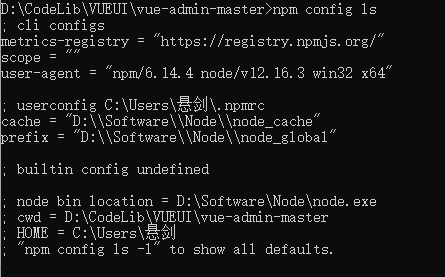
检查
npm config ls
配置环境变量
D:\Software\Node\npm_global

一、手动安装
安装vue
npm install vue
生成package.json
npm init -y
在dependencies中加入以下依赖
"vue": "^2.6.11",
"@vue/cli-service": "^4.4.6",
"vue-router": "^3.3.4",
"vue-template-compiler": "^2.6.10"
在scripts中添加
"serve": "vue-cli-service serve",
"build": "vue-cli-service build"
安装依赖
npm install
根目录新建src/
main.js
import Vue from 'vue'
import App from './App.vue'
import Route from 'vue-router'

Vue.use(Route);
import Index from '../pages/index/index.vue';
import Test from '../pages/index/test.vue';

Vue.config.productionTip = false
const router = new Route({
  mode: 'history',
  routes: [
    { path: '/', component: Index },
    { path: '/test', component: Test }
  ]
})


new Vue({
  render: h => h(App),
  router
}).$mount('#app')
src/
App.vue
<template>
    <div>
        <!-- <div>4566464</div> -->
        <div>
            <!-- <Index/> -->
            <router-view></router-view>
        </div>
    </div>
</template>

<script>
export default {
}
</script>

<style>
</style>
根目录新建pages/index/
index.vue
<template>
    <div>
        <button @click="tt()">跳转</button>
    </div>
</template>

<script>
    export default {
        data() {
            return {}
        },
        created() {
            setTimeout(() => {
                this.tt();
            }, 2000)
        },
        methods: {
            tt() {
                this.$router.push('/test');
            }
        }
    }
</script>

<style>
</style>
test.vue
<template>
    <div>456456</div>
</template>

<script>
</script>

<style>
</style>
简单的基础页面结构完成
(做复杂应用的话直接用Hbuilder生成vue-cli项目脚手架)
二、脚手架安装
安装脚手架
npm install -g @vue/cli
1、命令行安装
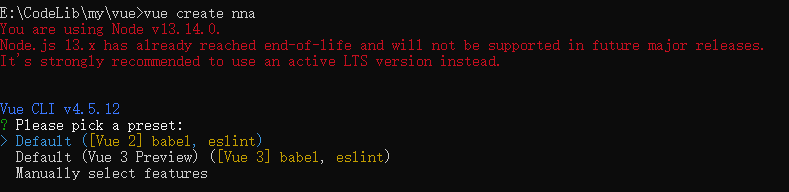
创建项目(注意项目名不允许大写)
vue create porjectName
运行后将选择项目 preset (预设) 可选择手动设置,也可选择默认模板
1、图形化界面安装
vue ui
运行后将在默认浏览器中打开图形化安装
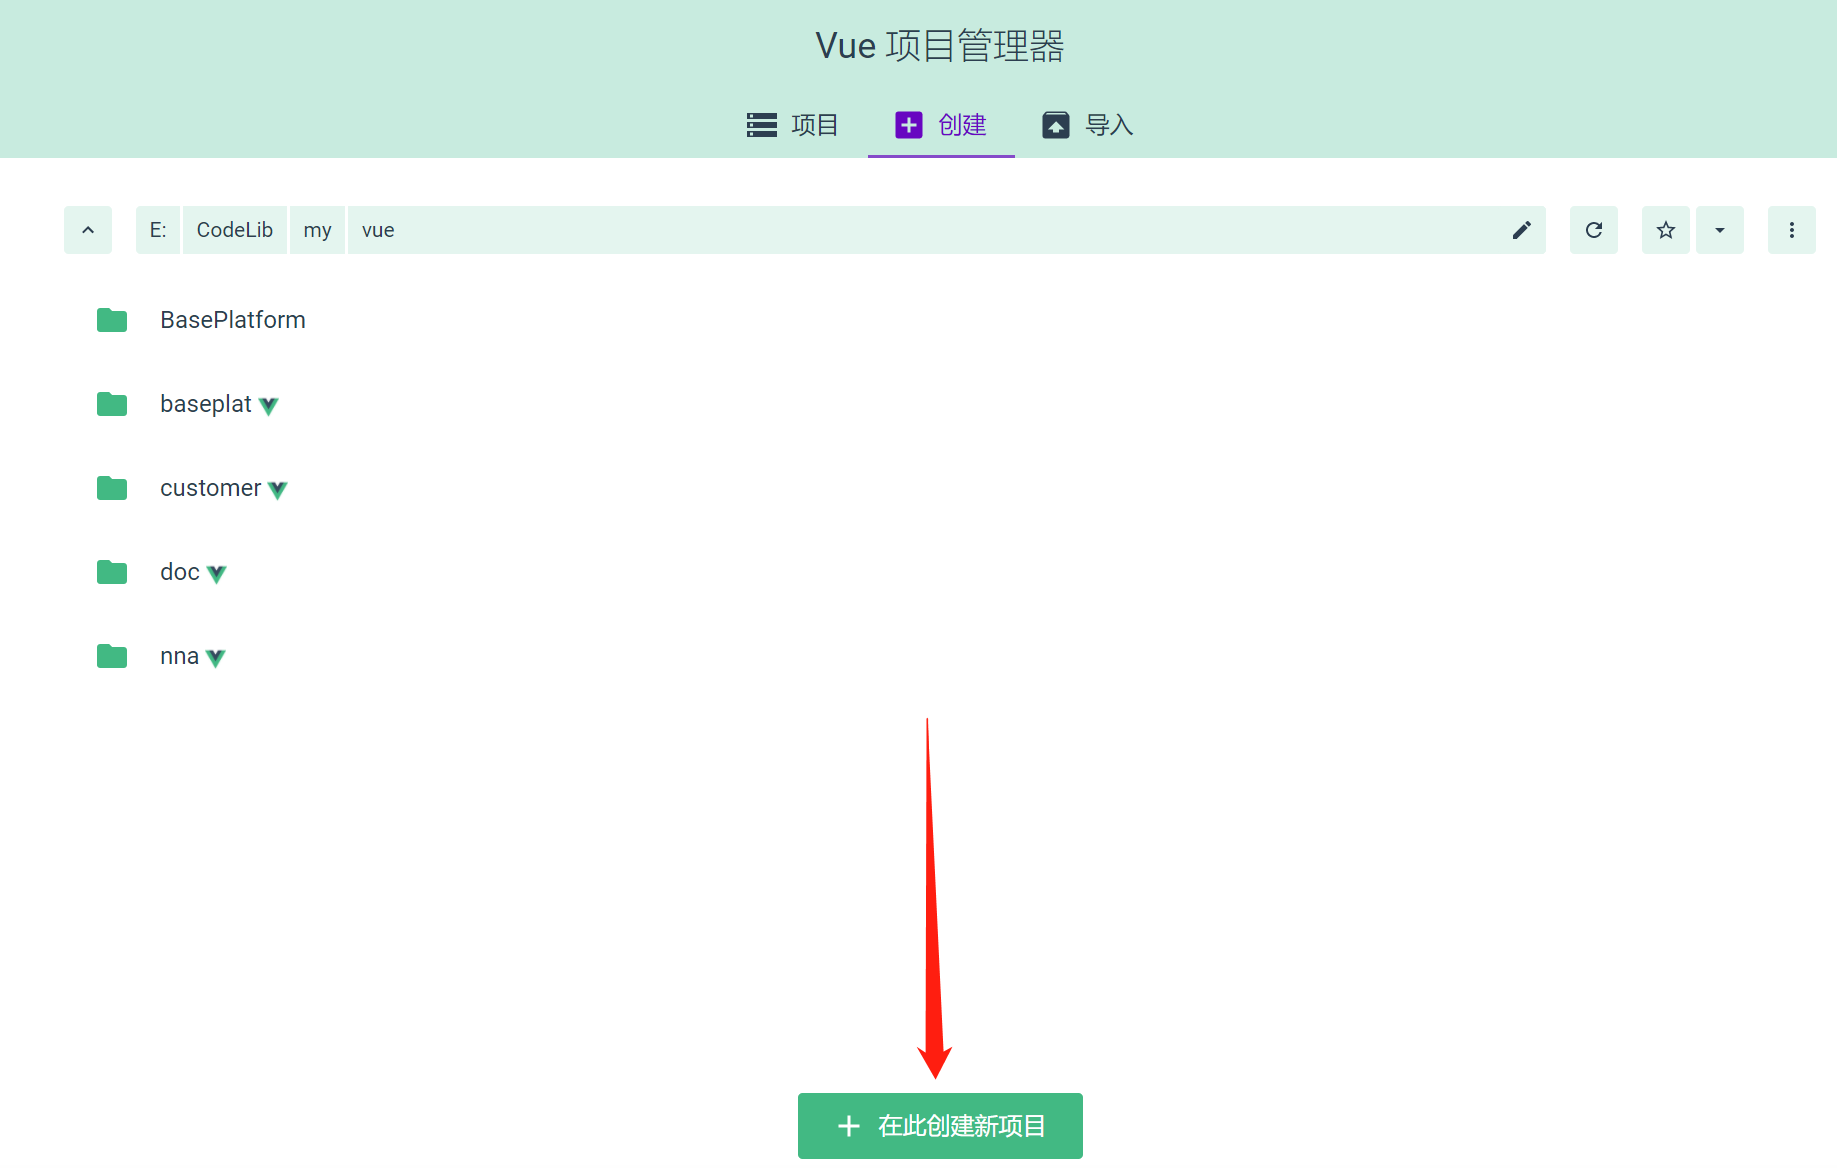
根据提示安装所需依赖即可
三、运行
运行
npm run serve
打包
npm run build
