kali Linux系列教程之BeFF安装与集成Metasploit
文/玄魂
kali Linux系列教程之BeFF安装与集成Metasploit
1.1 apt-get安装方式
1.2 启动
1.3 基本测试
1.4 异常信息
1.5 从源码安装BeEF
1.5.1 安装curl git
1.5.2 安装rvm
1.5.3 安装依赖项
1.5.4 安装ruby
1.5.5 安装bundler
1.5.6下载beef
1.5.7 安装和启动
1.6 集成metasploit
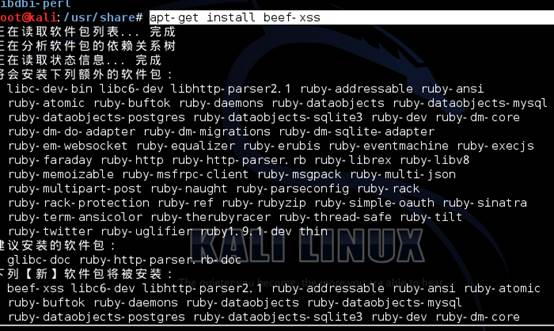
打开终端,输入如下命令:
apt-get install beef-xss
切换到BeEF安装目录。

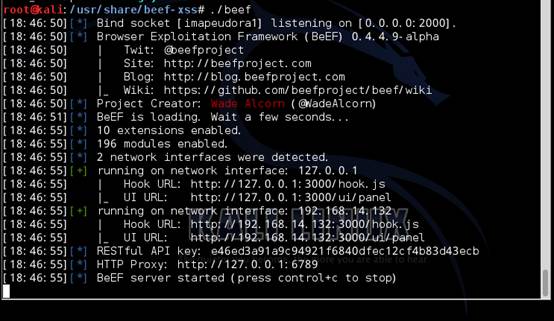
启动beef。
root@kali:/usr/share/beef-xss# ./beef
显示结果:
[18:46:50][*] Bind socket [imapeudora1] listening on [0.0.0.0:2000].
[18:46:50][*] Browser Exploitation Framework (BeEF) 0.4.4.9-alpha
[18:46:50] | Twit: @beefproject
[18:46:50] | Site: http://beefproject.com
[18:46:50] | Blog: http://blog.beefproject.com
[18:46:50] |_ Wiki: https://github.com/beefproject/beef/wiki
[18:46:50][*] Project Creator: Wade Alcorn (@WadeAlcorn)
[18:46:51][*] BeEF is loading. Wait a few seconds...
[18:46:55][*] 10 extensions enabled.
[18:46:55][*] 196 modules enabled.
[18:46:55][*] 2 network interfaces were detected.
[18:46:55][+] running on network interface: 127.0.0.1
[18:46:55] | Hook URL: http://127.0.0.1:3000/hook.js
[18:46:55] |_ UI URL: http://127.0.0.1:3000/ui/panel
[18:46:55][+] running on network interface: 192.168.14.132
[18:46:55] | Hook URL: http://192.168.14.132:3000/hook.js
[18:46:55] |_ UI URL: http://192.168.14.132:3000/ui/panel
[18:46:55][*] RESTful API key: e46ed3a91a9c94921f6840dfec12cf4b83d43ecb
[18:46:55][*] HTTP Proxy: http://127.0.0.1:6789
[18:46:55][*] BeEF server started (press control+c to stop)
打开浏览器输入:http://127.0.0.1:3000/ui/authentication
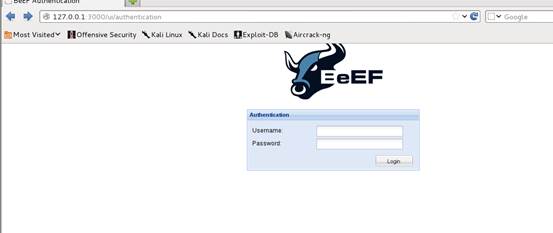
用户名和密码都是beef。输入完毕点击Login,登录。
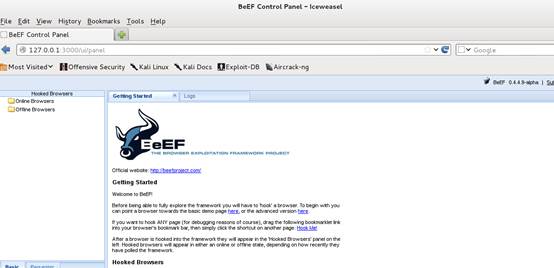
在浏览器打开默认测试页面。
http://192.168.14.132:3000/demos/butcher/index.html

在目标系统访问测试页面之后,在beef管理页面可以看到收集的信息,此时也可以发送一些攻击命令了。详细内容可以参考我的在线视频教程:Kali Linux Web 渗透测试视频教程—第16课 BeEF基本使用
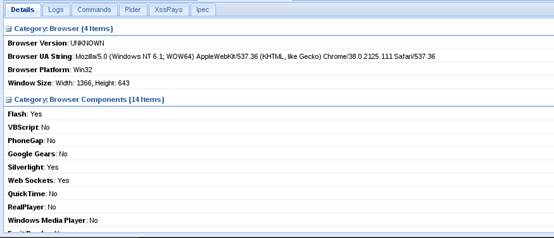
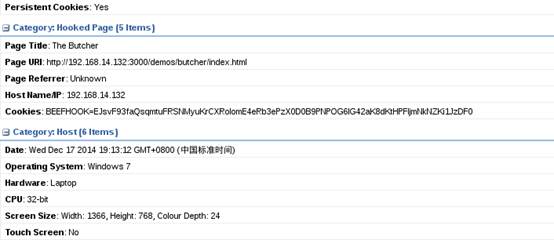
控制台会显示相应的信息:

我测试了几次重新安装和卸载之后再安装,大概1/5的概率会出现下面的问题,尤其是将metasploit集成到BeFF之后,问题出现的概率会增加。大概的错误信息如下:
NameError - uninitialized constant BeEF::Core::Command::Site_redirect:
/usr/share/beef-xss/core/main/handlers/modules/command.rb:33:in `const_get'
/usr/share/beef-xss/core/main/handlers/modules/command.rb:33:in `add_command_instructions'
/usr/share/beef-xss/core/main/handlers/hookedbrowsers.rb:80:in `block (2 levels) in <class:HookedBrowsers>'
/usr/lib/ruby/vendor_ruby/dm-core/collection.rb:508:in `block in each'
/usr/lib/ruby/vendor_ruby/dm-core/support/lazy_array.rb:411:in `block in each'
/usr/lib/ruby/vendor_ruby/dm-core/support/lazy_array.rb:411:in `each'
/usr/lib/ruby/vendor_ruby/dm-core/support/lazy_array.rb:411:in `each'
/usr/lib/ruby/vendor_ruby/dm-core/collection.rb:505:in `each'
/usr/share/beef-xss/core/main/handlers/hookedbrowsers.rb:80:in `block in <class:HookedBrowsers>'
/usr/lib/ruby/vendor_ruby/sinatra/base.rb:1603:in `call'
/usr/lib/ruby/vendor_ruby/sinatra/base.rb:1603:in `block in compile!'
/usr/lib/ruby/vendor_ruby/sinatra/base.rb:966:in `[]'
/usr/lib/ruby/vendor_ruby/sinatra/base.rb:966:in `block (3 levels) in route!'
/usr/lib/ruby/vendor_ruby/sinatra/base.rb:985:in `route_eval'
/usr/lib/ruby/vendor_ruby/sinatra/base.rb:966:in `block (2 levels) in route!'
/usr/lib/ruby/vendor_ruby/sinatra/base.rb:1006:in `block in process_route'
/usr/lib/ruby/vendor_ruby/sinatra/base.rb:1004:in `catch'
/usr/lib/ruby/vendor_ruby/sinatra/base.rb:1004:in `process_route'
/usr/lib/ruby/vendor_ruby/sinatra/base.rb:964:in `block in route!'
/usr/lib/ruby/vendor_ruby/sinatra/base.rb:963:in `each'
/usr/lib/ruby/vendor_ruby/sinatra/base.rb:963:in `route!'
/usr/lib/ruby/vendor_ruby/sinatra/base.rb:1076:in `block in dispatch!'
/usr/lib/ruby/vendor_ruby/sinatra/base.rb:1058:in `block in invoke'
/usr/lib/ruby/vendor_ruby/sinatra/base.rb:1058:in `catch'
/usr/lib/ruby/vendor_ruby/sinatra/base.rb:1058:in `invoke'
/usr/lib/ruby/vendor_ruby/sinatra/base.rb:1073:in `dispatch!'
/usr/lib/ruby/vendor_ruby/sinatra/base.rb:898:in `block in call!'
/usr/lib/ruby/vendor_ruby/sinatra/base.rb:1058:in `block in invoke'
/usr/lib/ruby/vendor_ruby/sinatra/base.rb:1058:in `catch'
/usr/lib/ruby/vendor_ruby/sinatra/base.rb:1058:in `invoke'
/usr/lib/ruby/vendor_ruby/sinatra/base.rb:898:in `call!'
/usr/lib/ruby/vendor_ruby/sinatra/base.rb:886:in `call'
/usr/lib/ruby/vendor_ruby/rack/nulllogger.rb:9:in `call'
/usr/lib/ruby/vendor_ruby/rack/head.rb:9:in `call'
/usr/lib/ruby/vendor_ruby/sinatra/base.rb:180:in `call'
/usr/lib/ruby/vendor_ruby/sinatra/base.rb:2014:in `call'
/usr/lib/ruby/vendor_ruby/rack/urlmap.rb:64:in `block in call'
/usr/lib/ruby/vendor_ruby/rack/urlmap.rb:49:in `each'
/usr/lib/ruby/vendor_ruby/rack/urlmap.rb:49:in `call'
/usr/lib/ruby/vendor_ruby/thin/connection.rb:80:in `block in pre_process'
/usr/lib/ruby/vendor_ruby/thin/connection.rb:78:in `catch'
/usr/lib/ruby/vendor_ruby/thin/connection.rb:78:in `pre_process'
/usr/lib/ruby/vendor_ruby/thin/connection.rb:53:in `process'
/usr/lib/ruby/vendor_ruby/thin/connection.rb:38:in `receive_data'
/usr/lib/ruby/vendor_ruby/eventmachine.rb:187:in `run_machine'
/usr/lib/ruby/vendor_ruby/eventmachine.rb:187:in `run'
/usr/lib/ruby/vendor_ruby/thin/backends/base.rb:61:in `start'
/usr/lib/ruby/vendor_ruby/thin/server.rb:159:in `start'
/usr/share/beef-xss/core/main/server.rb:122:in `start'
./beef:140:in `<main>'
解决方案是从源码安装,更新ruby的版本。
从源码安装BeEF比较繁琐,我也是摸索了整整一天,才安装成功。
首先安装curl git。
apt-get install curl git
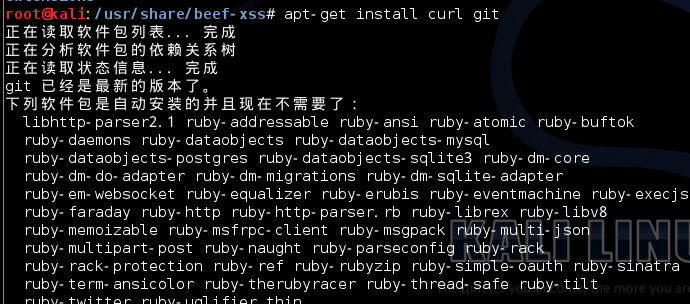
输出信息:
正在读取软件包列表... 完成
正在分析软件包的依赖关系树
正在读取状态信息... 完成
git 已经是最新的版本了。
下列软件包是自动安装的并且现在不需要了:
libhttp-parser2.1 ruby-addressable ruby-ansi ruby-atomic ruby-buftok
ruby-daemons ruby-dataobjects ruby-dataobjects-mysql
ruby-dataobjects-postgres ruby-dataobjects-sqlite3 ruby-dm-core
ruby-dm-do-adapter ruby-dm-migrations ruby-dm-sqlite-adapter
ruby-em-websocket ruby-equalizer ruby-erubis ruby-eventmachine ruby-execjs
ruby-faraday ruby-http ruby-http-parser.rb ruby-librex ruby-libv8
ruby-memoizable ruby-msfrpc-client ruby-msgpack ruby-multi-json
ruby-multipart-post ruby-naught ruby-parseconfig ruby-rack
ruby-rack-protection ruby-ref ruby-rubyzip ruby-simple-oauth ruby-sinatra
ruby-term-ansicolor ruby-therubyracer ruby-thread-safe ruby-tilt
ruby-twitter ruby-uglifier thin
Use 'apt-get autoremove' to remove them.
下列软件包将被升级:
curl libcurl3
升级了 2 个软件包,新安装了 0 个软件包,要卸载 0 个软件包,有 147 个软件包未被升级。
需要下载 601 kB 的软件包。
解压缩后会消耗掉 0 B 的额外空间。
获取:1 http://security.kali.org/kali-security/ kali/updates/main curl amd64 7.26.0-1+wheezy11 [270 kB]
获取:2 http://security.kali.org/kali-security/ kali/updates/main libcurl3 amd64 7.26.0-1+wheezy11 [331 kB]
下载 601 kB,耗时 23秒 (25.8 kB/s)
读取变更记录(changelogs)... 完成
(正在读取数据库 ... 系统当前共安装有 325894 个文件和目录。)
正预备替换 curl 7.26.0-1+wheezy10 (使用 .../curl_7.26.0-1+wheezy11_amd64.deb) ...
正在解压缩将用于更替的包文件 curl ...
正预备替换 libcurl3:amd64 7.26.0-1+wheezy10 (使用 .../libcurl3_7.26.0-1+wheezy11_amd64.deb) ...
正在解压缩将用于更替的包文件 libcurl3:amd64 ...
正在处理用于 man-db 的触发器...
正在设置 libcurl3:amd64 (7.26.0-1+wheezy11) ...
正在设置 curl (7.26.0-1+wheezy11) ...
在终端输入如下命令:
bash -s stable < <(curl -s https://raw.github.com/wayneeseguin/rvm/master/binscripts/rvm-installer)
source /etc/profile.d/rvm.sh
再输入下面的命令:
rvm –v

输出信息:
rvm 1.26.5 (latest) by Wayne E. Seguin <wayneeseguin@gmail.com>, Michal Papis <mpapis@gmail.com> [https://rvm.io/]
执行命令:
for package in zlib openssl libxslt libxml2; do rvm pkg install $package; done
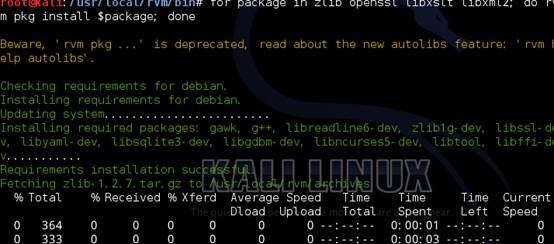
输出信息如下:
Beware, 'rvm pkg ...' is deprecated, read about the new autolibs feature: 'rvm help autolibs'.
Checking requirements for debian.
Installing requirements for debian.
Updating system........................
Installing required packages: gawk, g++, libreadline6-dev, zlib1g-dev, libssl-dev, libyaml-dev, libsqlite3-dev, libgdbm-dev, libncurses5-dev, libtool, libffi-dev...........
Requirements installation successful.
Fetching zlib-1.2.7.tar.gz to /usr/local/rvm/archives
% Total % Received % Xferd Average Speed Time Time Time Current
Dload Upload Total Spent Left Speed
0 364 0 0 0 0 0 0 --:--:-- 0:00:01 --:--:-- 0
0 333 0 0 0 0 0 0 --:--:-- 0:00:03 --:--:-- 0
100 547k 100 547k 0 0 35733 0 0:00:15 0:00:15 --:--:-- 219k
No checksum for downloaded archive, recording checksum in user configuration.
Extracting zlib to /usr/local/rvm/src/zlib-1.2.7....
Configuring zlib in /usr/local/rvm/src/zlib-1.2.7...
Compiling zlib in /usr/local/rvm/src/zlib-1.2.7......
Installing zlib to /usr/local/rvm/usr..
Please note that it's required to reinstall all rubies:
rvm reinstall all --force
Beware, 'rvm pkg ...' is deprecated, read about the new autolibs feature: 'rvm help autolibs'.
Checking requirements for debian.
Requirements installation successful.
Fetching openssl-1.0.1i.tar.gz to /usr/local/rvm/archives
% Total % Received % Xferd Average Speed Time Time Time Current
Dload Upload Total Spent Left Speed
100 4318k 100 4318k 0 0 132k 0 0:00:32 0:00:32 --:--:-- 447k
Extracting openssl to /usr/local/rvm/src/openssl-1.0.1i....
Configuring openssl in /usr/local/rvm/src/openssl-1.0.1i...................................
Compiling openssl in /usr/local/rvm/src/openssl-1.0.1i.............................................................................................................................
Installing openssl to /usr/local/rvm/usr.................................................................................................................................................................................
Please note that it's required to reinstall all rubies:
rvm reinstall all --force
Updating openssl certificates..
Beware, 'rvm pkg ...' is deprecated, read about the new autolibs feature: 'rvm help autolibs'.
Checking requirements for debian.
Requirements installation successful.
Fetching libxslt-1.1.26.tar.gz to /usr/local/rvm/archives
% Total % Received % Xferd Average Speed Time Time Time Current
Dload Upload Total Spent Left Speed
100 3321k 100 3321k 0 0 36585 0 0:01:32 0:01:32 --:--:-- 35940
100 3321k 100 3321k 0 0 36390 0 0:01:33 0:01:33 --:--:-- 36390No checksum for downloaded archive, recording checksum in user configuration.
Extracting libxslt to /usr/local/rvm/src/libxslt-1.1.26....
Prepare libxslt in /usr/local/rvm/src/libxslt-1.1.26.......
Configuring libxslt in /usr/local/rvm/src/libxslt-1.1.26...................
Error running './configure --prefix=/usr/local/rvm/usr --enable-shared --with-libxml-prefix=/usr/local/rvm/usr',
showing last 15 lines of /usr/local/rvm/log/1419127437/libxslt_configure.log
checking for snprintf... yes
checking for vfprintf... yes
checking for vsprintf... yes
checking for vsnprintf... yes
checking for sscanf... yes
checking for perl... perl
checking for python... /usr/bin/python
PYTHON is pointing at /usr/bin/python
Found Python version 2.7
Found libxml2-python module
could not find python2.7/Python.h
checking for libgcrypt-config... no
Crypto extensions will not be available. Install libgcrypt and reconfigure to make available.
Enabling debugger
checking for libxml libraries >= 2.6.27... configure: error: Could not find libxml2 anywhere, check ftp://xmlsoft.org/.
Compiling libxslt in /usr/local/rvm/src/libxslt-1.1.26..
Error running '__rvm_make -j2',
showing last 15 lines of /usr/local/rvm/log/1419127437/libxslt_make.log
[2014-12-21 10:04:12] __rvm_make
__rvm_make ()
{
\make "?
}
current path: /usr/local/rvm/src/libxslt-1.1.26
PATH=/usr/local/sbin:/usr/local/bin:/usr/sbin:/sbin:/bin:/usr/local/rvm/bin:/usr/bin
command(2): __rvm_make -j2
+ make -j2
make: *** 没有指明目标并且找不到 makefile。 停止。
+ return 2
Please note that it's required to reinstall all rubies:
rvm reinstall all --force
Beware, 'rvm pkg ...' is deprecated, read about the new autolibs feature: 'rvm help autolibs'.
Checking requirements for debian.
Requirements installation successful.
Fetching libxml2-2.7.3.tar.gz to /usr/local/rvm/archives
% Total % Received % Xferd Average Speed Time Time Time Current
Dload Upload Total Spent Left Speed
100 4677k 100 4677k 0 0 154k 0 0:00:30 0:00:30 --:--:-- 343k
No checksum for downloaded archive, recording checksum in user configuration.
Extracting libxml2 to /usr/local/rvm/src/libxml2-2.7.3....
Prepare libxml2 in /usr/local/rvm/src/libxml2-2.7.3...
Configuring libxml2 in /usr/local/rvm/src/libxml2-2.7.3..........................
Compiling libxml2 in /usr/local/rvm/src/libxml2-2.7.3..................................................
Installing libxml2 to /usr/local/rvm/usr...............
Please note that it's required to reinstall all rubies:
rvm reinstall all –force
执行命令:
rvm install 1.9.3
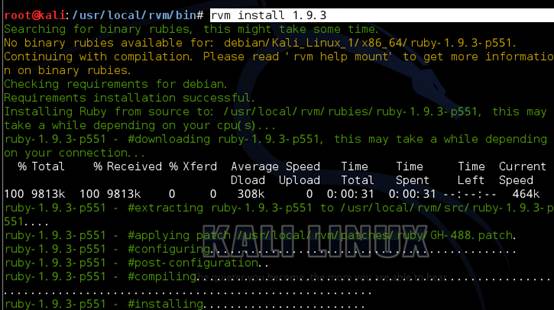
输出信息如下:
Searching for binary rubies, this might take some time.
No binary rubies available for: debian/Kali_Linux_1/x86_64/ruby-1.9.3-p551.
Continuing with compilation. Please read 'rvm help mount' to get more information on binary rubies.
Checking requirements for debian.
Requirements installation successful.
Installing Ruby from source to: /usr/local/rvm/rubies/ruby-1.9.3-p551, this may take a while depending on your cpu(s)...
ruby-1.9.3-p551 - #downloading ruby-1.9.3-p551, this may take a while depending on your connection...
% Total % Received % Xferd Average Speed Time Time Time Current
Dload Upload Total Spent Left Speed
100 9813k 100 9813k 0 0 308k 0 0:00:31 0:00:31 --:--:-- 464k
ruby-1.9.3-p551 - #extracting ruby-1.9.3-p551 to /usr/local/rvm/src/ruby-1.9.3-p551....
ruby-1.9.3-p551 - #applying patch /usr/local/rvm/patches/ruby/GH-488.patch.
ruby-1.9.3-p551 - #configuring.............................................
ruby-1.9.3-p551 - #post-configuration..
ruby-1.9.3-p551 - #compiling..........................................................................................................
ruby-1.9.3-p551 - #installing........................
ruby-1.9.3-p551 - #making binaries executable..
ruby-1.9.3-p551 - #downloading rubygems-2.4.5
% Total % Received % Xferd Average Speed Time Time Time Current
Dload Upload Total Spent Left Speed
100 436k 100 436k 0 0 16680 0 0:00:26 0:00:26 --:--:-- 78678
No checksum for downloaded archive, recording checksum in user configuration.
ruby-1.9.3-p551 - #extracting rubygems-2.4.5....
ruby-1.9.3-p551 - #removing old rubygems.........
ruby-1.9.3-p551 - #installing rubygems-2.4.5..................
ruby-1.9.3-p551 - #gemset created /usr/local/rvm/gems/ruby-1.9.3-p551@global
ruby-1.9.3-p551 - #importing gemset /usr/local/rvm/gemsets/global.gems...........................................................
ruby-1.9.3-p551 - #generating global wrappers........
ruby-1.9.3-p551 - #gemset created /usr/local/rvm/gems/ruby-1.9.3-p551
ruby-1.9.3-p551 - #importing gemsetfile /usr/local/rvm/gemsets/default.gems evaluated to empty gem list
ruby-1.9.3-p551 - #generating default wrappers........
ruby-1.9.3-p551 - #adjusting #shebangs for (gem irb erb ri rdoc testrb rake).
Install of ruby-1.9.3-p551 - #complete
WARNING: Please be aware that you just installed a ruby that is no longer maintained (2014-02-23), for a list of maintained rubies visit:
http://bugs.ruby-lang.org/projects/ruby/wiki/ReleaseEngineering
Please consider upgrading to ruby-2.1.5 which will have all of the latest security patches.
Ruby was built without documentation, to build it run: rvm docs generate-ri
执行命令,设置ruby版本:
rvm 1.9.3 –default

执行命令:
echo "gem: --no-rdoc --no-ri" > ~/.gemrc

输出信息如下:
Fetching: bundler-1.7.9.gem (100%)
Successfully installed bundler-1.7.9
1 gem installed
执行命令:
git clone git://github.com/beefproject/beef.git

输出信息如下:
正克隆到 'beef'...
remote: Counting objects: 22584, done.
remote: Compressing objects: 100% (47/47), done.
remote: Total 22584 (delta 29), reused 0 (delta 0)
Receiving objects: 100% (22584/22584), 9.20 MiB | 208 KiB/s, done.
Resolving deltas: 100% (11229/11229), done.
进入beef源码目录:
cd beef

安装
bundle install
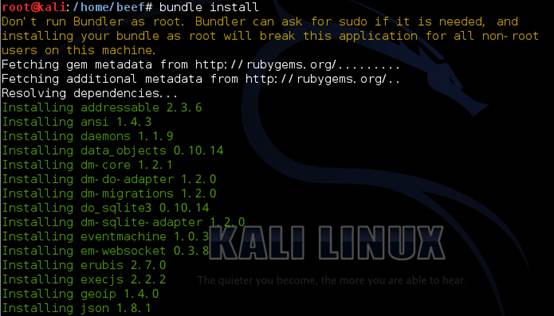
输出信息如下:
Don't run Bundler as root. Bundler can ask for sudo if it is needed, and
installing your bundle as root will break this application for all non-root
users on this machine.
Fetching gem metadata from http://rubygems.org/.........
Fetching additional metadata from http://rubygems.org/..
Resolving dependencies...
Installing addressable 2.3.6
Installing ansi 1.4.3
Installing daemons 1.1.9
Installing data_objects 0.10.14
Installing dm-core 1.2.1
Installing dm-do-adapter 1.2.0
Installing dm-migrations 1.2.0
Installing do_sqlite3 0.10.14
Installing dm-sqlite-adapter 1.2.0
Installing eventmachine 1.0.3
Installing em-websocket 0.3.8
Installing erubis 2.7.0
Installing execjs 2.2.2
Installing geoip 1.4.0
Installing json 1.8.1
Installing librex 0.0.999
Installing libv8 3.11.8.17
Installing msgpack 0.5.9
Installing msfrpc-client 1.0.3
Installing multi_json 1.10.1
Installing parseconfig 1.0.6
Installing rack 1.5.2
Installing rack-protection 1.5.3
Installing rainbow 2.0.0
Installing ref 1.0.5
Installing rexec 1.6.3
Installing rubydns 0.7.0
Installing rubyzip 1.1.6
Installing tilt 1.4.1
Installing sinatra 1.4.2
Installing tins 1.3.3
Installing term-ansicolor 1.3.0
Installing therubyracer 0.11.3
Installing thin 1.6.3
Installing uglifier 2.2.1
Using bundler 1.7.9
Your bundle is complete!
Use `bundle show [gemname]` to see where a bundled gem is installed.
启动beef。
ruby beef

成功信息:
[10:34:13][*] Bind socket [imapeudora1] listening on [0.0.0.0:2000].
[10:34:14][*] Browser Exploitation Framework (BeEF) 0.4.5.1-alpha
[10:34:14] | Twit: @beefproject
[10:34:14] | Site: http://beefproject.com
[10:34:14] | Blog: http://blog.beefproject.com
[10:34:14] |_ Wiki: https://github.com/beefproject/beef/wiki
[10:34:14][*] Project Creator: Wade Alcorn (@WadeAlcorn)
[10:34:14][*] BeEF is loading. Wait a few seconds...
[10:34:17][*] 11 extensions enabled.
[10:34:17][*] 221 modules enabled.
[10:34:17][*] 2 network interfaces were detected.
[10:34:17][+] running on network interface: 127.0.0.1
[10:34:17] | Hook URL: http://127.0.0.1:3000/hook.js
[10:34:17] |_ UI URL: http://127.0.0.1:3000/ui/panel
[10:34:17][+] running on network interface: 192.168.1.103
[10:34:17] | Hook URL: http://192.168.1.103:3000/hook.js
[10:34:17] |_ UI URL: http://192.168.1.103:3000/ui/panel
[10:34:17][*] RESTful API key: 80ae1fc7f98ff50ab97593e55c822fa9474889a7
[10:34:17][*] DNS Server: 127.0.0.1:5300 (udp)
[10:34:17] | Upstream Server: 8.8.8.8:53 (udp)
[10:34:17] |_ Upstream Server: 8.8.8.8:53 (tcp)
[10:34:17][*] HTTP Proxy: http://127.0.0.1:6789
[10:34:17][*] BeEF server started (press control+c to stop)
[10:34:21][*] New Hooked Browser [id:1, ip:192.168.1.104, type:IE-6, os:Windows XP], hooked domain [192.168.1.103:3000]
如果是使用apt-get install 安装,从 /usr/share/beef-xss 目录下开始配置。如果是源码安装,从源码目录下进行配置。
在根目录下配置config.yaml,将extension下面的metasploit值设置为true。
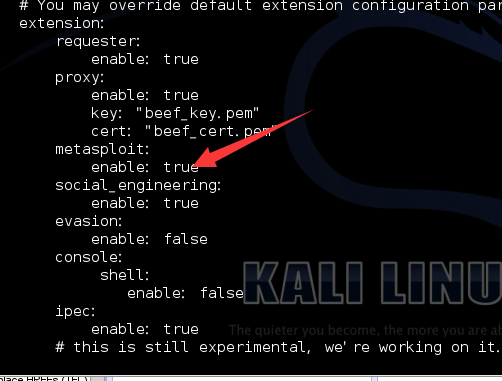
切换目录到beef文件根目录下的extensions/metasploit下,配置config.yaml,主要注意ip地址和mspath下 custom的选项,见标黄的部分。
#
# Copyright (c) 2006-2014 Wade Alcorn - wade@bindshell.net
# Browser Exploitation Framework (BeEF) - http://beefproject.com
# See the file 'doc/COPYING' for copying permission
#
# Enable MSF by changing extension:metasploit:enable to true
# Then set msf_callback_host to be the public IP of your MSF server
#
# Ensure you load the xmlrpc interface in Metasploit
# msf > load msgrpc ServerHost=IP Pass=abc123
# Please note that the ServerHost parameter must have the same value of host and callback_host variables here below.
# Also always use the IP of your machine where MSF is listening.
beef:
extension:
metasploit:
name: 'Metasploit'
enable: true
host: "192.168.1.103"
port: 55552
user: "msf"
pass: "abc123"
uri: '/api'
# if you need "ssl: true" make sure you start msfrpcd with "SSL=y", like:
# load msgrpc ServerHost=IP Pass=abc123 SSL=y
ssl: false
ssl_version: 'TLSv1'
ssl_verify: true
callback_host: "192.168.1.103"
autopwn_url: "autopwn"
auto_msfrpcd: false
auto_msfrpcd_timeout: 120
msf_path: [
{os: 'osx', path: '/opt/local/msf/'},
{os: 'livecd', path: '/opt/metasploit-framework/'},
{os: 'bt5r3', path: '/opt/metasploit/msf3/'},
{os: 'bt5', path: '/opt/framework3/msf3/'},
{os: 'backbox', path: '/opt/backbox/msf/'},
{os: 'kali', path: '/usr/share/metasploit-framework/'},
{os: 'pentoo', path: '/usr/lib/metasploit'},
{os: 'win', path: 'c:\\metasploit-framework\\'},
{os: 'custom', path: '/usr/share/metasploit-framework/'}
]
启动metasploit之后,输入如下命令:
load msgrpc ServerHost=192.168.1.103 Pass=abc123
serverhost 和pass选项对应上面配置中的host和pass(标红的部分)。
metasploit msgrpc连接成功之后,再启动BeEF,会看到加载metasploit组件成功的信息。
原文参考:http://www.xuanhun521.com/Blog/c4d6efbc-9db2-4fcb-b6b8-9eae85cb3fc0
ps:对此文章感兴趣的读者,可以加qq群:Hacking:303242737(已满);Hacking-2群:147098303;Hacking-3群:31371755;hacking-4群:201891680;Hacking-5群:316885176
作者:玄魂
出处:http://www.cnblogs.com/xuanhun/
原文链接:http://www.cnblogs.com/xuanhun/
更多内容,请访问我的个人站点 对编程,安全感兴趣的,加qq群:hacking-1群:303242737,hacking-2群:147098303,nw.js,electron交流群 313717550。
本文版权归作者和博客园共有,欢迎转载,但未经作者同意必须保留此段声明,且在文章页面明显位置给出原文连接,否则保留追究法律责任的权利。
关注我:


【推荐】国内首个AI IDE,深度理解中文开发场景,立即下载体验Trae
【推荐】编程新体验,更懂你的AI,立即体验豆包MarsCode编程助手
【推荐】抖音旗下AI助手豆包,你的智能百科全书,全免费不限次数
【推荐】轻量又高性能的 SSH 工具 IShell:AI 加持,快人一步
· AI与.NET技术实操系列:向量存储与相似性搜索在 .NET 中的实现
· 基于Microsoft.Extensions.AI核心库实现RAG应用
· Linux系列:如何用heaptrack跟踪.NET程序的非托管内存泄露
· 开发者必知的日志记录最佳实践
· SQL Server 2025 AI相关能力初探
· 震惊!C++程序真的从main开始吗?99%的程序员都答错了
· 【硬核科普】Trae如何「偷看」你的代码?零基础破解AI编程运行原理
· 单元测试从入门到精通
· 上周热点回顾(3.3-3.9)
· winform 绘制太阳,地球,月球 运作规律
2009-01-05 Web安全实践(13)嗅探,arp欺骗,会话劫持与重放攻击(上)