
Ubuntu16 Nginx的安装与基本配置
关于Nginx
它是一个轻量级、高性能、稳定性高、并发性好的HTTP和反向代理服务器,当我们搭建自己的应用时,通常用它作为反向代理服务器,图片服务器和负载均衡。
1.Ubuntu 16安装 Nginx
这里有2种方式可以安装:
1.从互联网中的软件仓库安装
直接使用命令行:sudo apt-get install nginx
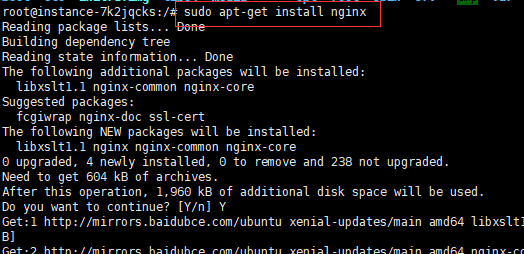
安装好后(这里应该是帮你安装了nginx所需要的依赖库),测试:sudo service nginx start

可以看到默认的80端口已经处于监听状态了。
注: ,可以看到,自动下载的版本较低。
nginx的卸载(按顺序执行):
sudo apt-get remove nginx nginx-common # 卸载删除除了配置文件以外的所有文件。
sudo apt-get purge nginx nginx-common # 卸载所有东东,包括删除配置文件。
sudo apt-get autoremove # 在上面命令结束后执行,主要是卸载删除Nginx的不再被使用的依赖包。
sudo apt-get remove nginx-full nginx-common #卸载删除两个主要的包。
2.推荐去官网下载tar包,手动配置依赖环境(参考:https://www.cnblogs.com/EasonJim/p/7806879.html)
1.安装gcc g++的依赖库
sudo apt-get install build-essential(c语言的编译环境)
sudo apt-get install libtool(脚本库)
安装pcre依赖库(正则表达式库)
sudo apt-get update
sudo apt-get install libpcre3 libpcre3-dev
安装zlib依赖库(压缩解压用)
sudo apt-get install zlib1g-dev
安装SSL依赖库(16默认已经安装了)
sudo apt-get install openssl
如果没有ftp可以使用rz命令上传文件。
#解压:
tar -zxvf nginx-1.14.2.tar.gz
#进入解压目录:
cd nginx-1.14.2
#编译:
make
#安装:
sudo make install
#启动:
sudo /usr/local/nginx/sbin/nginx -c /usr/local/nginx/conf/nginx.conf
注意:-c 指定配置文件的路径,不加的话,nginx会自动加载默认路径的配置文件,可以通过-h查看帮助命令。
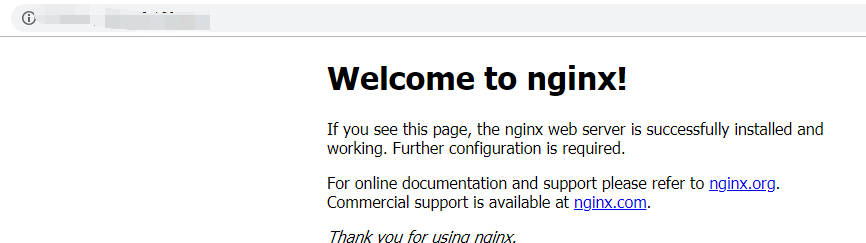
nginx默认是80端口,输入地址即可看到nginx首页:
2.nginx基本配置
参考(https://blog.csdn.net/david_xtd/article/details/16967837)(https://carrot.is/coding/nginx_introduction)
nginx的配置文件默认位于/usr/local/nginx/conf下的nginx.conf。先看一下它的默认配置:
 server {
        listen       80;
        server_name  localhost;

        #charset koi8-r;

        #access_log  logs/host.access.log  main;

        location / {
            root   html;
            index  index.html index.htm;
        }

        #error_page  404              /404.html;

        # redirect server error pages to the static page /50x.html
        #
        error_page   500 502 503 504  /50x.html;
        location = /50x.html {
            root   html;
        }
        ...
}
nginx.conf配置功能的格式像css,打开nginx.conf,其中重点是作为服务器的配置的server:
LISTEN:
server{
  listen 80;
}
listen代表服务器的监听端口,默认是80.一般来说这个默认的端口不是必须的。
SERVER_NAME:
server_name localhost;
server_name也是一个很重要的参数,任意请求经过该nginx服务器,都会去匹配这个server_name对应的域名,并被匹配到不同的server。
比如我们可以这样设置:
    server {
        listen       80;
        server_name  localhost1;

        location / {
            root   html;
            index  index1.html index1.htm;
        }
        error_page   500 502 503 504  /50x.html;
        location = /50x.html {
            root   html;
       }

   }
   server {
        listen       80;
        server_name  localhost2;

        location / {
            root   html;
            index  index2.html index2.htm;
        }
        error_page   500 502 503 504  /50x.html;
        location = /50x.html {
            root   html;
       }
   }
上面设置了2个server。location是路由配置,index指的是该服务器的默认首页。
这样设置以后,当我们本地配置了host,访问localhost1这个域名就会进入index1.html这个主页,访问localhost2会访问index2.html。
这个功能很强大,它可以让你在一个配置文件里管理不同的站点,使用不同的域名,并给予它们不同的规则。
LOCATION:
server_name  letsdoit.com;

        location / {
            root   html;
            index  index.html index.htm;
        }
...
location是一个对url访问的路由,它可以配置多个,并用正则匹配。让不同的路径访问到不同的应用。
比如上面的配置,location后面跟单独的"/" ,表示该地址下任意路径都匹配到其中的应用。访问www.letsdoit.com/asdf 就会匹配到这个 index.html。.
location中的“root”代表资源的路径(做图片服务器时有用)。“index”代表默认主页。
下面介绍一点常用的配置:(示例来源:https://blog.51cto.com/superpcm/2092317)
location = / { [ configuration A ] }                     #用户请求"/"时,匹配A,例如:www.pcm.com/
location / { [ configuration B ] }                       #当用户请求"/index.html"时,匹配B,例如:www.pcm.com/index.html
location /documents/ { [ configuration C ] }             #当用户请求"/documents/"时,匹配C,例如:www.pcm.com/documents/index.html
location ^~ /images/ { [ configuration D ] }             #当用户请求"/images/"时,匹配D,:www.pcm.com/images/1.jpg
location ~* \.(gif|jpg|jpeg)$ { [ configuration E ] }    #当用户请求".gif|.jpg|.jpeg"时,匹配E,例如:www.pcm.com/documents/1.jpg
                                                         #上面的反斜杠是转义字符,$的意思是结尾
上面的是一些基本的配置,还有些重要的配置,当nginx做代理或者负载的时候会用到。
3.nginx作为图片服务器的例子
nginx作为静态资源服务器的性能也很强大,我们常常把它作为图片服务器使用。
我们可以利用location的规则,把单独的一个应用作为静态资源访问:
配置文件如下:
 server {
        listen       80;
        server_name  localhost;

        location /images/ {
            root   /home/ftp/;
        }
        error_page   500 502 503 504  /50x.html;
        location = /50x.html {
            root   html;
       }

   }
我们以地址/imgages/ 开头的url作为资源访问路径。并通过root,做访问路径的映射:
这样配置以后,在 /home/ftp/images文件夹上传一张图片做测试:

重启nginx : ./usr/local/nginx/sbin/nginx -s reload
通过浏览器访问,测试成功:

注意这里新手可能会出现404的情况。我之前认为root映射的路径就是url的访问路径,
于是我这样设置:
 location /images/ {
       root   /home/ftp/images/;
 }
但这样访问的路径其实是 /home/ftp/images/images/。
配置root的话, 访问后会在root配置的目录后跟上URL,组成一个文件路径。
如果不想在路径上加上url,可以使用“alias”(参考:https://www.cnblogs.com/jiongchen/p/9139156.html)
 location /images/ {
       alias /home/ftp/images/;
 }
这样就不会拼接上url。
注:
root响应的路径:配置的路径(root指向的路径)+完整访问路径(location的路径)+静态文件
alias响应的路径:配置路径+静态文件(去除location中配置的路径)
