springmvc实例之添加雇员相关信息(二)
接上一节。
添加雇员信息有两个操作:
- 首先在显示页面中添加--添加雇员信息连接。
- 然后通过发送请求到Handler,在Handler中跳转到添加信息的页面。
- 需要注意的是使用springmvc自带的form标签来进行添加页面的编写。同时在toAddEmployeePage需要传入departmen的信息,因为这是要进行选择的。springmvc自带的form是会进行回显的,因此还要传入一个新建的Employee对象,指定的名字要与fomr中指定的modelAttribute属性中的相同,否则会抛出异常。
首先在list.jsp中末尾加入:
<a href="emp">Add new employee</a>
然后在EmployHandler.java加如跳转到添加页面的方法:
    @RequestMapping(value="/emp",method=RequestMethod.GET)
    public String toAddEmployeePage(Map<String,Object> map) {
        map.put("departments", departmentDao.getDepartments());
        //这里需要传一个Employee对象给前端,绑定相关的属性
        map.put("employee", new Employee());
        return "add";
    }
然后我们在views文件夹下新建一个add.jsp
<%@ page language="java" contentType="text/html; charset=UTF-8"
    pageEncoding="UTF-8"%>
<%@page import="java.util.*" %>
<%@ taglib prefix="form" uri="http://www.springframework.org/tags/form" %>
<!DOCTYPE html PUBLIC "-//W3C//DTD HTML 4.01 Transitional//EN" "http://www.w3.org/TR/html4/loose.dtd">
<html>
<head>
<meta http-equiv="Content-Type" content="text/html; charset=UTF-8">
<title>Insert title here</title>
</head>
<body>
    <!--
        1. WHY 使用 form 标签呢 ?
        可以更快速的开发出表单页面, 而且可以更方便的进行表单值的回显
        2. 注意:
        可以通过 modelAttribute 属性指定绑定的模型属性,
        若没有指定该属性,则默认从 request 域对象中读取 command 的表单 bean
        如果该属性值也不存在,则会发生错误。
    -->
    <form:form action="emp" method="POST"
        modelAttribute="employee">
        <!-- path属性对应html标签的name属性 -->
        LastName: <form:input path="lastName"/>
        <br>
        Email: <form:input path="email"/>
        <br>
        <%
            Map<String, String> genders = new HashMap();
            genders.put("1", "Male");
            genders.put("0", "Female");
            request.setAttribute("genders", genders);
        %>
        Gender:
        <br>
        <form:radiobuttons path="gender" items="${genders }" delimiter="<br>"/>
        <br>
        Department: <form:select path="department.id"
            items="${departments}" itemLabel="departmentName" itemValue="id"></form:select>
        <br>
        <input type="submit" value="Submit"/>
    </form:form>
</body>
</html>
需要注意在jsp中使用java要引入:
<%@page import="java.util.*" %>
使用form要引入:
<%@ taglib prefix="form" uri="http://www.springframework.org/tags/form" %>
接下来在EmployeeHandler.java中编写最后保存添加雇员信息的方法:
    @RequestMapping(value="/emp",method=RequestMethod.POST)
    public String save(Employee employee) {
        employeeDao.save(employee);
        return "redirect:/emps";
    }
启动服务器之后:

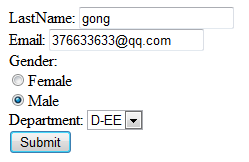
点击Add new employee,跳转到添加页面:输入相关信息

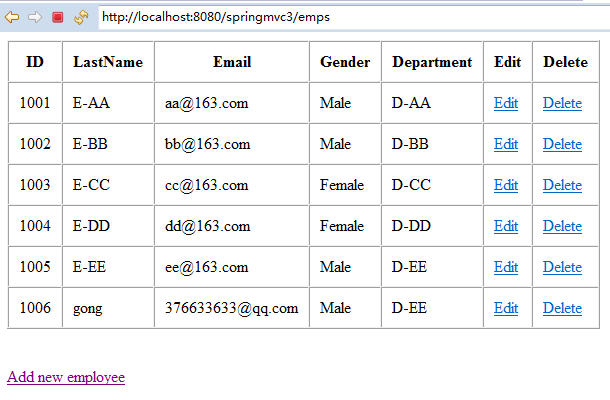
点击提交后会调用save方法,在save执行完毕后重定向到/emps,即显示界面。

说明添加雇员功能是成功的。


