
OpenCV 虽然是计算机视觉库,但也有一些计算机图形学的功能,本文将介绍几种常用绘图函数:直线、圆、椭圆、长方形、多边形等。
1 数据结构
1.1 二维向量
cv::Point 代表的是二维点 (int 型),可用来表示图像坐标 (x, y)
// one way
Point pt;
pt.x = 10;
pt.y = 8;

// another way
Point pt = Point(10, 8);
OpenCV 中,二维点类型可分为 Point2i, Point2l, Point2f, Point2d 四种,各自定义如下:
// 4 type of Point
typedef Point_<int>    cv::Point2i
typedef Point_<int64>  cv::Point2l
typedef Point_<float>  cv::Point2f
typedef Point_<double> cv::Point2d

// cv::Point
typedef Point2i cv::Point
1.2 四维向量
cv::Scalar 代表的是四维向量,常用来传递像素值,尤其是 BGR 通道的像素值 (最后一个元素不用,则不定义)
$\texttt{Scalar} (blue \_ component, green \_ component, red \_ component)$
2 绘图函数
2.1 line()
OpenCV 中,绘制直线段较简单,就是过两点画一条直线,函数为 line()
// pt1, first point
// pt2, second point
void cv::line (InputOutputArray img, Point pt1, Point pt2, const Scalar& color, int thickness = 1, int lineType = LINE_8, int shift = 0)
2.2 circle() 和 ellipse()
知道圆心和半径,就可以绘制圆了,函数为 circle()
void cv::circle (
       InputOutputArray   img,
       Point           center,         // center of the circle
       int             radius,         // radius of the circle
       const Scalar &     color,
       int      thickness = 1,
       int      lineType = LINE_8,
       int      shift = 0
)
椭圆稍微复杂,椭圆中心,长、短轴半径,以及椭圆弧的旋转角度,则可得到一段椭圆弧 ellipse()
void cv::ellipse (
    InputOutputArray   img,
    Point       center,         // center of the ellipse
    Size        axes,           // half size of the main axes
    double      angle,          // ellipse rotation angle in degrees
    double      startAngle,
    double      endAngle,
    const Scalar &   color,
    int      thickness = 1,
    int      lineType = LINE_8,
    int      shift = 0
)
2.3 rectangle()
长方形的绘制,主要是靠其对角线上的两个点 pt1 和 pt2,函数为 rectangle()
void cv::rectangle (
    InputOutputArray  img,
    Point      pt1,          // vertex of the rectangle
    Point      pt2,          // vertex of the rectangle opposite to pt1
    const Scalar &    color,
    int      thickness = 1,
    int      lineType = LINE_8,
    int      shift = 0
)
2.4 fillpoly()
void cv::fillPoly (
    InputOutputArray  img,
    const Point **   pts,   //
    const int *      npts,  //
    int      ncontours,
    const Scalar &  color,
    int      lineType = LINE_8,
    int      shift = 0,
    Point    offset = Point()
)
3 代码示例
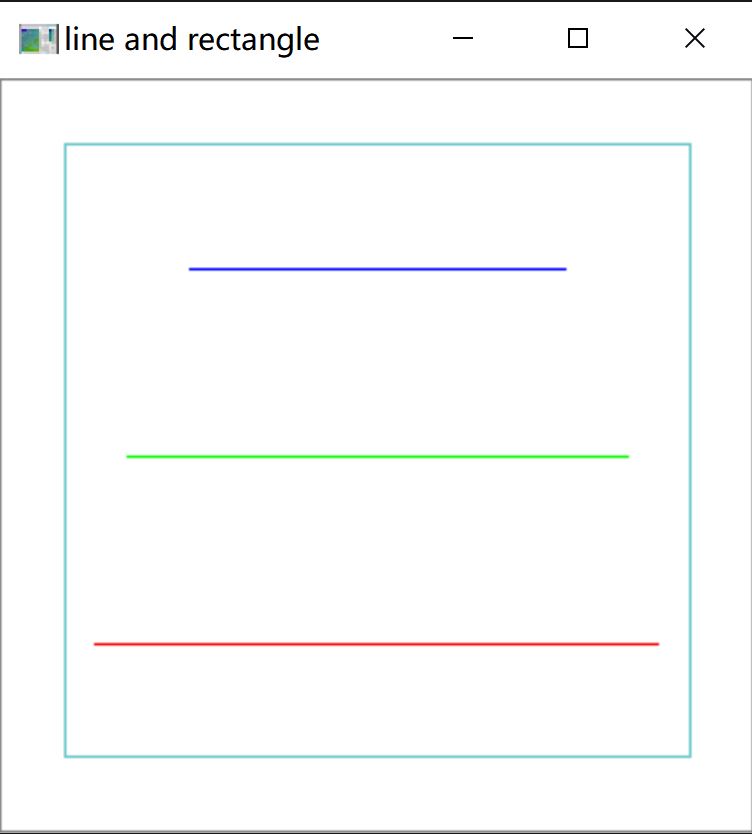
3.1 直线和长方形
#include <opencv2/core.hpp>
#include <opencv2/imgproc.hpp>
#include <opencv2/highgui.hpp>

using namespace cv;

#define w 300

int main()
{
    // creat a white background image
    Mat img;
    img.create(w,w,CV_8UC3);
    img.setTo(Scalar(255,255,255));

    // draw lines
    line(img, Point(w/4,w/4), Point(3*w/4, w/4), Scalar(255, 0, 0));
    line(img, Point(w/6,w/2), Point(5*w/6, w/2), Scalar(0, 255, 0));
    line(img, Point(w/10,3*w/4), Point(9*w/10, 3*w/4), Scalar(0, 0, 255));

    // draw rectangle
    rectangle(img,Point(w/12,w/12),Point(11*w/12,9*w/10),Scalar(200,200,100));

    // show lines in the image
    imshow("line and rectangle", img);

    waitKey(0);
}
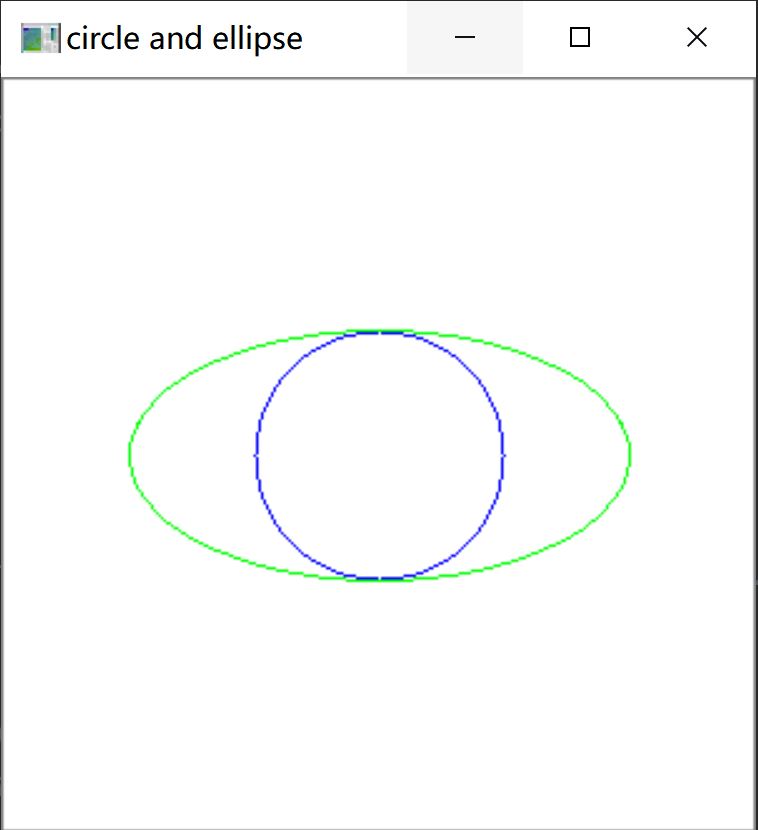
3.2 圆和椭圆
// draw circle and ellipse
circle(img, Point(w/2,w/2), 50, Scalar(255, 0, 0));
ellipse(img, Point(w/2,w/2), Size(100,50), 0, 0, 360, Scalar(0, 255, 0));
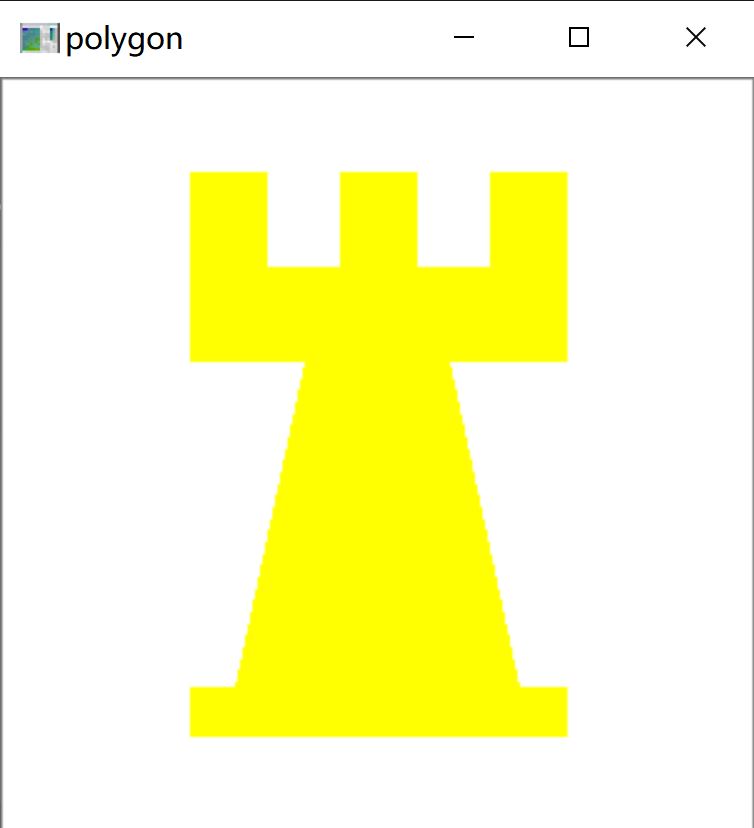
3.3 多边形
Point rook_points[1][20];
rook_points[0][0]  = Point(    w/4,   7*w/8 );
rook_points[0][1]  = Point(  3*w/4,   7*w/8 );
rook_points[0][2]  = Point(  3*w/4,  13*w/16 );
rook_points[0][3]  = Point( 11*w/16, 13*w/16 );
rook_points[0][4]  = Point( 19*w/32,  3*w/8 );
rook_points[0][5]  = Point(  3*w/4,   3*w/8 );
rook_points[0][6]  = Point(  3*w/4,     w/8 );
rook_points[0][7]  = Point( 26*w/40,    w/8 );
rook_points[0][8]  = Point( 26*w/40,    w/4 );
rook_points[0][9]  = Point( 22*w/40,    w/4 );
rook_points[0][10] = Point( 22*w/40,    w/8 );
rook_points[0][11] = Point( 18*w/40,    w/8 );
rook_points[0][12] = Point( 18*w/40,    w/4 );
rook_points[0][13] = Point( 14*w/40,    w/4 );
rook_points[0][14] = Point( 14*w/40,    w/8 );
rook_points[0][15] = Point(    w/4,     w/8 );
rook_points[0][16] = Point(    w/4,   3*w/8 );
rook_points[0][17] = Point( 13*w/32,  3*w/8 );
rook_points[0][18] = Point(  5*w/16, 13*w/16 );
rook_points[0][19] = Point(    w/4,  13*w/16 );

const Point* ppt[1] = { rook_points[0]};
int npt[] = { 20 };

// draw polygon
fillPoly(img, ppt, npt, 1, Scalar(0, 255, 255 ));
3.4 显示效果
参考资料:
OpenCV Tutorials / imgproc module / Basic Drawing
原文链接: http://www.cnblogs.com/xinxue/
专注于机器视觉、OpenCV、C++ 编程

 浙公网安备 33010602011771号