
7. Android Basic UI的布局 WidgetDemo基本组件演示
WidgetDemo主界面
- 创建项目WidgetDemo
-
编辑main.xml
<?xml version="1.0" encoding="utf-8"?>
<ScrollView xmlns:android="http://schemas.android.com/apk/res/android"
android:layout_width="fill_parent"
android:layout_height="wrap_content"
>
<LinearLayout
android:orientation="vertical"
android:layout_width="fill_parent"
android:layout_height="fill_parent"
>
<Button android:id="@+id/button"
android:layout_width="wrap_content"
android:layout_height="wrap_content"
android:text="这是button" />
<Button android:id="@+id/text_view_button"
android:layout_width="wrap_content"
android:layout_height="wrap_content"
android:text="TextView" />
<Button android:id="@+id/edit_view_button"
android:layout_width="wrap_content"
android:layout_height="wrap_content"
android:text="EditView" />
<Button android:id="@+id/check_box_button"
android:layout_width="wrap_content"
android:layout_height="wrap_content"
android:text="CheckBox" />
<Button android:id="@+id/radio_group_button"
android:layout_width="wrap_content"
android:layout_height="wrap_content"
android:text="RadioGroup" />
<Button android:id="@+id/spinner_button"
android:layout_width="wrap_content"
android:layout_height="wrap_content"
android:text="Spinner" />
<Button android:id="@+id/auto_complete_button"
android:layout_width="wrap_content"
android:layout_height="wrap_content"
android:text="AutoCompleteTextView" />
<Button android:id="@+id/date_picker_button"
android:layout_width="wrap_content"
android:layout_height="wrap_content"
android:text="DatePicker" />
<Button android:id="@+id/time_picker_button"
android:layout_width="wrap_content"
android:layout_height="wrap_content"
android:text="TimePicker" />
<Button android:id="@+id/progress_bar_button"
android:layout_width="wrap_content"
android:layout_height="wrap_content"
android:text="ProgressBar" />
<Button android:id="@+id/seek_bar_button"
android:layout_width="wrap_content"
android:layout_height="wrap_content"
android:text="SeekBar" />
<Button android:id="@+id/rating_bar_button"
android:layout_width="wrap_content"
android:layout_height="wrap_content"
android:text="RatingBar" />
<Button android:id="@+id/image_view_button"
android:layout_width="wrap_content"
android:layout_height="wrap_content"
android:text="ImageView" />
<Button android:id="@+id/image_button_button"
android:layout_width="wrap_content"
android:layout_height="wrap_content"
android:text="ImageButton" />
<Button android:id="@+id/image_show_button"
android:layout_width="wrap_content"
android:layout_height="wrap_content"
android:text="ImageSwitcher Gallery"/>
<Button android:id="@+id/grid_view_button"
android:layout_width="wrap_content"
android:layout_height="wrap_content"
android:text="GridView"/>
<Button android:id="@+id/tab_demo_button"
android:layout_width="wrap_content"
android:layout_height="wrap_content"
android:text="TabView"/>
</LinearLayout>
</ScrollView>
Button 控件代码演示
编辑WidgetDemo类如下代码:
public class WidgetDemo extends Activity {
/** Called when the activity is first created. */
@Override
public void onCreate(Bundle savedInstanceState) {
super.onCreate(savedInstanceState);
setContentView(R.layout.main);
ButtonEventBind();
}
//绑定Button
private void ButtonEventBind(){
Button btn = (Button)findViewById(R.id.button);
btn.setOnClickListener(button_listener);
}
private Button.OnClickListener button_listener = new Button.OnClickListener(){
public void onClick(View v){
setTitle("Button Click");
Toast.makeText(WidgetDemo.this, "Button按钮演示", Toast.LENGTH_SHORT).show();
}
};
}
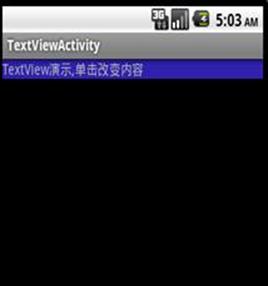
TextView控件演示
-
在res/layout新建textview.xml文件,内容如下:
<?xml version="1.0" encoding="UTF-8"?>
<LinearLayout android:id="@+id/LinearLayout01"
android:layout_width="fill_parent" android:layout_height="fill_parent"
xmlns:android="http://schemas.android.com/apk/res/android">
<TextView android:text="TextView演示,单击改变内容" android:id="@+id/TextView01"
android:layout_width="match_parent" android:layout_height="wrap_content" android:background="#3322aa"></TextView>
</LinearLayout>
2. 创建TextViewActivity类继承自Activity类:
public class TextViewActivity extends Activity {
@Override
protected void onCreate(Bundle savedInstanceState) {
// TODO Auto-generated method stub
super.onCreate(savedInstanceState);
setTitle("TextViewActivity");
setContentView(R.layout.textview);
//find TextView by id
final TextView view = (TextView)findViewById(R.id.TextView01);
view.setOnClickListener(new TextView.OnClickListener(){
@Override
public void onClick(View v) {
// TODO Auto-generated method stub
view.setText("新的内容!");
}
});
}
}
上面的代码为id为TextView01的TextView添加的单击事件,当单击TextView时改变显示的文字。
3. 在AndroidManifest.xml中配置
<activity android:name=".TextViewActivity"></activity>
4. 在主程序中调用显示:
//TextView Demo
Button text_view_button = (Button)findViewById(R.id.text_view_button);
text_view_button.setOnClickListener(text_view_button_listener);
//textView Demo
private Button.OnClickListener text_view_button_listener = new Button.OnClickListener(){
public void onClick(View v){
Intent intent = new Intent();
intent.setClass(WidgetDemo.this, TextViewActivity.class);
startActivity(intent);
}
};
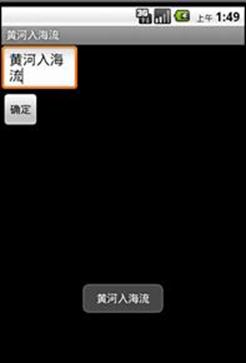
EditText演示
-
在res/loayout下添加edittext.xml布局文件:
<?xml version="1.0" encoding="UTF-8"?>
<LinearLayout xmlns:android="http://schemas.android.com/apk/res/android"
android:layout_width="fill_parent" android:layout_height="fill_parent"
android:orientation="vertical"
>
<EditText android:id="@+id/edit"
android:layout_width="100dip" android:layout_height="wrap_content"></EditText>
<Button android:text="确定" android:id="@+id/button"
android:layout_width="wrap_content" android:layout_height="wrap_content"></Button>
</LinearLayout>
添加一个输入框和按钮,当我们单击按钮的时候,设置标题为输入框中的文字。
2. 添加EditTextActivity类继承Activity类。
public class EditTextActivity extends Activity{
@Override
protected void onCreate(Bundle savedInstanceState) {
// TODO Auto-generated method stub
super.onCreate(savedInstanceState);
setTitle("EditTextActivity");
setContentView(R.layout.edittext);
Button btn = (Button)findViewById(R.id.button);
btn.setOnClickListener(new Button.OnClickListener(){
@Override
public void onClick(View v) {
// TODO Auto-generated method stub
EditText text = (EditText)findViewById(R.id.edit);
CharSequence str = text.getText();
setTitle(str);
}
});
}
}
3. 在AndroidManifest.xml中添加配置
<activity android:name=".EditTextActivity"></activity>
4. 在主程序中调用,onCreate方法添加代码:
//EditText Demo
Button edit_text_button =(Button)findViewById(R.id.edit_view_button);
edit_text_button.setOnClickListener(edit_text_button_listener);
添加成员变量edit_text_button_listener并绑定事件。
//edittext view
private Button.OnClickListener edit_text_button_listener = new Button.OnClickListener(){
@Override
public void onClick(View v) {
// TODO Auto-generated method stub
Intent intent = new Intent();
intent.setClass(WidgetDemo.this, EditTextActivity.class);
startActivity(intent);
}
};
CheckBox多选按钮演示
1. 在res/layout文件夹下新建checkbox.xml 布局文件:
<?xml version="1.0" encoding="UTF-8"?>
<LinearLayout android:id="@+id/LinearLayout01"
android:layout_width="fill_parent" android:layout_height="fill_parent"
xmlns:android="http://schemas.android.com/apk/res/android"
android:orientation="vertical">
<CheckBox android:text="红色" android:id="@+id/check_red"
android:layout_width="wrap_content" android:layout_height="wrap_content"
android:tag="#FF0000"></CheckBox>
<CheckBox android:text="绿色" android:id="@+id/check_green"
android:layout_width="wrap_content" android:layout_height="wrap_content"
android:tag="#00FF00"></CheckBox>
<CheckBox android:text="蓝色" android:id="@+id/check_blue"
android:layout_width="wrap_content" android:layout_height="wrap_content"
android:tag="#0000FF"></CheckBox>
<Button android:text="确认选中的颜色" android:id="@+id/Button01"
android:layout_width="wrap_content" android:layout_height="wrap_content"></Button>
</LinearLayout>
添加了3个CheckBox表示red,green,blue三种颜色,添加一个button按钮,当单击按钮后,按钮及Toast的背景颜色发生改变。
2. 添加CheckBoxActivity类继承自Activity类,为Button按钮添加事件:
public class CheckBoxActivity extends Activity {
private CheckBox checkRed;
private CheckBox checkGreen;
private CheckBox checkBlue;
@Override
protected void onCreate(Bundle savedInstanceState) {
// TODO Auto-generated method stub
super.onCreate(savedInstanceState);
setTitle("CheckBox演示");
setContentView(R.layout.checkbox);
checkRed = (CheckBox)findViewById(R.id.check_red);
checkGreen = (CheckBox)findViewById(R.id.check_green);
checkBlue = (CheckBox)findViewById(R.id.check_blue);
Button btn = (Button)findViewById(R.id.Button01);
btn.setOnClickListener(new OnClickListener(){
@Override
public void onClick(View v) {
// TODO Auto-generated method stub
int red=0,green=0,blue=0;
CharSequence str="选择";
if(checkRed.isChecked()){
red=255;
str=str+"红色 ";
}
if(checkGreen.isChecked()){
green=255;
str=str+"绿色 ";
}
if(checkBlue.isChecked()){
blue=255;
str=str+"蓝色 ";
}
int color = android.graphics.Color.rgb(red, green, blue);
v.setBackgroundColor(color);
Toast toast = Toast.makeText(CheckBoxActivity.this, str, Toast.LENGTH_SHORT);
toast.getView().setBackgroundColor(color);
toast.show();
}
});
}
}
3. 配置AndroidMannifest.xml
<activity android:name=".CheckBoxActivity"></activity>
4. 主程序中调用:
ButtonEventBind()方法中添加如下代码:
//CheckBox Demo
Button check_box_button = (Button)findViewById(R.id.check_box_button);
check_box_button.setOnClickListener(check_box_button_listener);
为类WedgitDemo类添加check_box_button_listener侦听事件来启动CheckBox演示:
//Checkbox demo
private Button.OnClickListener check_box_button_listener = new Button.OnClickListener(){
@Override
public void onClick(View v) {
// TODO Auto-generated method stub
Intent intent = new Intent();
intent.setClass(WidgetDemo.this,CheckBoxActivity.class);
startActivity(intent);
}
};

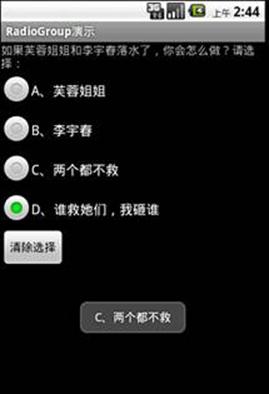
RadioGroup演示
RadioGroup是多选一组件。
-
在res/layout下创建布局文件radiogroup.xml:
<?xml version="1.0" encoding="utf-8"?>
<RadioGroup android:id="@+id/RadioGroup01"
android:layout_width="fill_parent" android:layout_height="fill_parent"
xmlns:android="http://schemas.android.com/apk/res/android">
<TextView android:text="如果芙蓉姐姐和李宇春落水了,你会怎么做?请选择:" android:id="@+id/TextView01"
android:layout_width="wrap_content" android:layout_height="wrap_content"></TextView>
<RadioButton android:text="A、芙蓉姐姐" android:id="@+id/RadioButton01"
android:layout_width="wrap_content" android:layout_height="wrap_content"></RadioButton>
<RadioButton android:text="B、李宇春" android:id="@+id/RadioButton02"
android:layout_width="wrap_content" android:layout_height="wrap_content"></RadioButton>
<RadioButton android:text="C、两个都不救" android:id="@+id/RadioButton03"
android:layout_width="wrap_content" android:layout_height="wrap_content"></RadioButton>
<RadioButton android:text="D、谁救她们,我砸谁" android:id="@+id/RadioButton04"
android:layout_width="wrap_content" android:layout_height="wrap_content"></RadioButton>
<Button android:id="@+id/clear_button" android:text="清除选择"
android:layout_height="wrap_content" android:layout_width="wrap_content" />
</RadioGroup>
在RadioGroup中添加一个TextView用于显示题目,4个RadioButton显示答案,Toast显示用户选择的答案。当单击清楚选择按钮后调用RadioGroup.clearCheck()方法,清除用户的选择。
-
添加GroupRadioActivity类继承自 Activity和接口 View.OnClickListener:
import android.app.Activity;
import android.os.Bundle;
import android.widget.Button;
import android.widget.RadioButton;
import android.widget.RadioGroup;
import android.widget.Toast;
import android.view.*;
public class RadioGroupActivity extends Activity implements View.OnClickListener {
RadioGroup radioGroup;
@Override
protected void onCreate(Bundle savedInstanceState) {
// TODO Auto-generated method stub
super.onCreate(savedInstanceState);
setTitle("RadioGroup演示");
setContentView(R.layout.radiogroup);
//get RadioGroup
radioGroup = (RadioGroup)findViewById(R.id.RadioGroup01);
radioGroup.setOnCheckedChangeListener(new RadioGroup.OnCheckedChangeListener(){
@Override
public void onCheckedChanged(RadioGroup group, int checkedId) {
RadioButton rbtn = (RadioButton)findViewById(checkedId);
if(rbtn!=null)
Toast.makeText(RadioGroupActivity.this, rbtn.getText(), Toast.LENGTH_SHORT).show();
else
Toast.makeText(RadioGroupActivity.this, "NoChecked", Toast.LENGTH_SHORT).show();
}
});
//clear button click listener
Button clearBtn = (Button)findViewById(R.id.clear_button);
clearBtn.setOnClickListener(this);
}
@Override
public void onClick(View v) {
// TODO Auto-generated method stub
radioGroup.clearCheck();
}
}
为RadioGroup添加OnCheckedChangeListener侦听事件,当用户改变RadioButton的状态时发生。
为Button按钮添加单击事件的侦听。
-
在AndroidManifest.xml中配置
<activity android:name=".RadioGroupActivity"></activity>
-
在主程序中调用
ButtonEventBind()方法中添加
//RadioGroup Demo
Button radio_group_button = (Button)findViewById(R.id.radio_group_button);
radio_group_button.setOnClickListener(radio_group_button_listener);
在WidgetDemo类中添加radio_group_button_listener侦听事件
//RadioGroup demo
private Button.OnClickListener radio_group_button_listener = new Button.OnClickListener(){
@Override
public void onClick(View v) {
// TODO Auto-generated method stub
Intent intent = new Intent();
intent.setClass(WidgetDemo.this,RadioGroupActivity.class);
startActivity(intent);
}
};
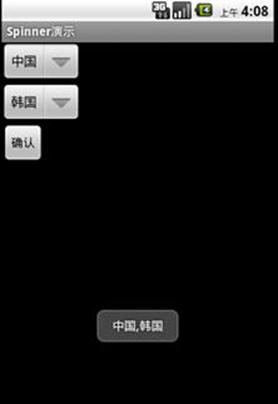
Spinner演示
Spinner是一种下拉列表的输入方式。
-
在res/layout/ 新建spinner.xml布局文件
<?xml version="1.0" encoding="utf-8"?>
<LinearLayout xmlns:android="http://schemas.android.com/apk/res/android"
android:layout_width="wrap_content" android:layout_height="wrap_content"
android:orientation="vertical">
<Spinner android:id="@+id/Spinner01" android:layout_width="wrap_content"
android:layout_height="wrap_content"></Spinner>
<Spinner android:id="@+id/Spinner02" android:layout_width="wrap_content"
android:layout_height="wrap_content"></Spinner>
<Button android:id="@+id/spinnerBtn" android:layout_width="wrap_content" android:layout_height="wrap_content" android:text="确认"/>
</LinearLayout>
两个Spinner组件,一个Button按钮。当单击按钮后Toast显示选中的项。
2. 新建SpinnerActivity类,继承自Activity类
import java.util.ArrayList;
import java.util.List;
import android.app.Activity;
import android.os.Bundle;
import android.view.View;
import android.widget.ArrayAdapter;
import android.widget.Button;
import android.widget.Spinner;
import android.widget.Toast;
public class SpinnerActivity extends Activity{
Spinner spinner1;
Spinner spinner2;
List<String>allCountries;
static final String[]mCountries={"中国","美国","法国","德国","俄罗斯","英国","巴西"};
@Override
protected void onCreate(Bundle savedInstanceState) {
// TODO Auto-generated method stub
super.onCreate(savedInstanceState);
setTitle("Spinner演示");
setContentView(R.layout.spinner);
findAndModifyView();
}
private void findAndModifyView(){
allCountries = new ArrayList<String>();
for(int i=0;i<mCountries.length;i++){
allCountries.add(mCountries[i]);
}
spinner1 = (Spinner)findViewById(R.id.Spinner01);
ArrayAdapter<String> adapter1 = new ArrayAdapter<String>(this,android.R.layout.simple_spinner_item,allCountries);
adapter1.setDropDownViewResource(android.R.layout.simple_spinner_dropdown_item);
spinner1.setAdapter(adapter1);
//使用配置文件中的数据填充Spinner
spinner2 = (Spinner)findViewById(R.id.Spinner02);
ArrayAdapter<CharSequence>adapter2 = ArrayAdapter.createFromResource(this, R.array.countries,android.R.layout.simple_spinner_item);
adapter2.setDropDownViewResource(android.R.layout.simple_spinner_dropdown_item);
spinner2.setAdapter(adapter2);
Button btn = (Button)findViewById(R.id.spinnerBtn);
btn.setOnClickListener(new Button.OnClickListener(){
@Override
public void onClick(View v) {
// TODO Auto-generated method stub
Toast.makeText(SpinnerActivity.this, spinner1.getSelectedItem().toString()+","+spinner2.getSelectedItem().toString(), Toast.LENGTH_SHORT).show();
}
});
}
}
使用两种方式加载Spinner中的数据,第一方式使用硬编码:
List<String>allCountries;
static final String[]mCountries={"中国","美国","法国","德国","俄罗斯","英国","巴西"};
for循环将mCountries的值幅值给allCountries,然后使用ArrayAdapter的构造函数关联spinner_item和allCountries。
spinner1 = (Spinner)findViewById(R.id.Spinner01);
ArrayAdapter<String> adapter1 = new ArrayAdapter<String>(this,android.R.layout.simple_spinner_item,allCountries);
adapter1.setDropDownViewResource(android.R.layout.simple_spinner_dropdown_item);
spinner1.setAdapter(adapter1);
第二种方式是在res/values下新建arrays.xml文件,使用ArrayAdapter.createFromResource方法关联spiner_item和arrays.xml中的数据。
<?xml version="1.0" encoding="utf-8"?>
<resources>
<string-array name="countries">
<item>泰国</item>
<item>缅甸</item>
<item>韩国</item>
<item>日本</item>
</string-array>
</resources>
//使用配置文件中的数据填充Spinner
spinner2 = (Spinner)findViewById(R.id.Spinner02);
ArrayAdapter<CharSequence>adapter2 = ArrayAdapter.createFromResource(this, R.array.countries,android.R.layout.simple_spinner_item);
adapter2.setDropDownViewResource(android.R.layout.simple_spinner_dropdown_item);
spinner2.setAdapter(adapter2);
3. 在AndroidManifest.xml中添加配置
<activity android:name=".SpinnerActivity"></activity>
4. 在主程序中调用
ButtonEventBind()方法中添加如下代码:
//Spinner Demo
Button spinner_button = (Button)findViewById(R.id.spinner_button);
spinner_button.setOnClickListener(spinner_button_listener);
在WidgetDemo类中增加如下代码:
//Spinner Demo
private Button.OnClickListener spinner_button_listener = new Button.OnClickListener(){
@Override
public void onClick(View v) {
// TODO Auto-generated method stub
Intent intent = new Intent();
intent.setClass(WidgetDemo.this, SpinnerActivity.class);
startActivity(intent);
}
};
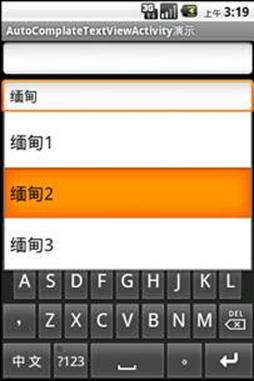
AutoCompleteTextView演示
AutoCompleteTextView是辅助用户输入的自动完成输入框。
-
在res/layout添加布局文件autocompletetextview.xml
<?xml version="1.0" encoding="utf-8"?>
<LinearLayout
xmlns:android="http://schemas.android.com/apk/res/android"
android:layout_width="match_parent"
android:layout_height="match_parent"
android:orientation="vertical"
>
<AutoCompleteTextView android:id="@+id/auto_complete" android:layout_width="match_parent" android:layout_height="wrap_content"></AutoCompleteTextView>
<AutoCompleteTextView android:id="@+id/auto_complete2" android:layout_width="match_parent" android:layout_height="wrap_content"></AutoCompleteTextView>
</LinearLayout>
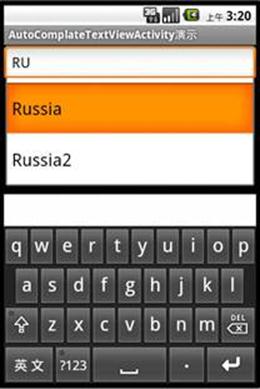
添加两个AutoCompleteTextView组件。测试一个显示英文一个显示中文。
2. 添加类AutoCompleteTextViewActivity类继承自 Activity
import android.app.Activity;
import android.os.Bundle;
import android.widget.ArrayAdapter;
import android.widget.AutoCompleteTextView;
public class AutoCompleteTextViewActivity extends Activity {
static final String[]COUNTRIES = new String[]{
"China","Russia","Germany","Ukranie","Belarus","Chinal","Russia2"
};
@Override
protected void onCreate(Bundle savedInstanceState) {
// TODO Auto-generated method stub
super.onCreate(savedInstanceState);
setTitle("AutoComplateTextViewActivity演示");
setContentView(R.layout.autocompletetextview);
ArrayAdapter<String>adapter = new ArrayAdapter<String>(this,android.R.layout.simple_dropdown_item_1line,COUNTRIES);
AutoCompleteTextView textView = (AutoCompleteTextView)findViewById(R.id.auto_complete);
textView.setAdapter(adapter);
ArrayAdapter<CharSequence>adapter2 = ArrayAdapter.createFromResource(this,R.array.countries, android.R.layout.simple_dropdown_item_1line);
AutoCompleteTextView textView2 = (AutoCompleteTextView)findViewById(R.id.auto_complete2);
textView2.setAdapter(adapter2);
}
}
关联内置数据,使用硬编码。
ArrayAdapter<String>adapter = new ArrayAdapter<String>(this,android.R.layout.simple_dropdown_item_1line,COUNTRIES);
AutoCompleteTextView textView = (AutoCompleteTextView)findViewById(R.id.auto_complete);
textView.setAdapter(adapter);
使用配置文件关联数据,xml文件参见
ArrayAdapter<CharSequence>adapter2 = ArrayAdapter.createFromResource(this,R.array.countries, android.R.layout.simple_dropdown_item_1line);
AutoCompleteTextView textView2 = (AutoCompleteTextView)findViewById(R.id.auto_complete2);
textView2.setAdapter(adapter2);
3. 在AndroidManifest.xml中配置Activity
<activity android:name=".AutoCompleteTextViewActivity"></activity>
4. 主程序中调用
ButtonEventBind()方法中增加:
//AutoCompleteTextView
Button auto_complete_button = (Button)findViewById(R.id.auto_complete_button);
auto_complete_button.setOnClickListener(auto_complete_button_listener);
为类WidgetDemo类中添加:
//AutoCompleteButton demo
private Button.OnClickListener auto_complete_button_listener = new Button.OnClickListener(){
@Override
public void onClick(View arg0) {
// TODO Auto-generated method stub
Intent intent = new Intent();
intent.setClass(WidgetDemo.this,AutoCompleteTextViewActivity.class);
startActivity(intent);
}
};
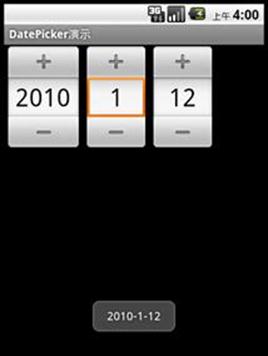
DatePicker 演示
-
在res/layout下新建datepicker.xml布局文件
<?xml version="1.0" encoding="utf-8"?>
<LinearLayout
xmlns:android="http://schemas.android.com/apk/res/android"
android:layout_width="wrap_content"
android:layout_height="wrap_content">
<DatePicker android:id="@+id/date_picker" android:layout_width="wrap_content" android:layout_height="wrap_content"></DatePicker>
</LinearLayout>
2. 新建类DatePickerActivity类继承自Activity
import android.app.Activity;
import android.os.Bundle;
import android.widget.DatePicker;
import android.widget.Toast;
import android.widget.DatePicker.OnDateChangedListener;
public class DatePickerActivity extends Activity {
@Override
protected void onCreate(Bundle savedInstanceState) {
// TODO Auto-generated method stub
super.onCreate(savedInstanceState);
setTitle("DatePicker演示");
setContentView(R.layout.datepicker);
DatePicker dp = (DatePicker)findViewById(R.id.date_picker);
dp.init(2010, 1, 12,onDateChangedListener);
}
private DatePicker.OnDateChangedListener onDateChangedListener = new OnDateChangedListener(){
@Override
public void onDateChanged(DatePicker view, int year, int monthOfYear,
int dayOfMonth) {
// TODO Auto-generated method stub
CharSequence str = String.format("%d-%d-%d", year,monthOfYear+1,dayOfMonth);
Toast.makeText(DatePickerActivity.this, str, Toast.LENGTH_SHORT).show();
}
};
}
为DatePicker处理onDateChangedListener事件。
3. 在AndroidManifest.xml中添加配置
<activity android:name=".DatePickerActivity"></activity>
4. 在主程序中调用
ButtonEventBind()方法中添加如下代码:
//PickDate demo
Button date_picker_button = (Button)findViewById(R.id.date_picker_button);
date_picker_button.setOnClickListener(date_picker_button_listener);
在WidgetDemo类中添加如下代码:
//DatePicker
private Button.OnClickListener date_picker_button_listener = new Button.OnClickListener(){
@Override
public void onClick(View v) {
// TODO Auto-generated method stub
Intent intent = new Intent();
intent.setClass(WidgetDemo.this,DatePickerActivity.class);
startActivity(intent);
}
};
TimePicker 演示
-
在res/layout中新建timepicker.xml布局文件
<?xml version="1.0" encoding="utf-8"?>
<LinearLayout
xmlns:android="http://schemas.android.com/apk/res/android"
android:layout_width="wrap_content"
android:layout_height="wrap_content">
<TimePicker android:id="@+id/timepicker" android:layout_width="wrap_content" android:layout_height="wrap_content"></TimePicker>
</LinearLayout>
2. 新建TimePickerActivity类继承自Activity
import android.app.Activity;
import android.os.Bundle;
import android.widget.TimePicker;
public class TimePickerActivity extends Activity {
@Override
protected void onCreate(Bundle savedInstanceState) {
// TODO Auto-generated method stub
super.onCreate(savedInstanceState);
setTitle("TimePicker演示");
setContentView(R.layout.timepicker);
TimePicker tp = (TimePicker)findViewById(R.id.timepicker);
tp.setIs24HourView(true);
}
}
3. 为AndroidManifest.xml添加配置文件
<activity android:name=".TimePickerActivity"></activity>
4. 在主程序中调用
ButtonEventBind()方法中添加如下代码:
//TimePicker demo
Button time_picker_button = (Button)findViewById(R.id.time_picker_button);
time_picker_button.setOnClickListener(time_picker_button_listener);
为类WidgetDemo添加如下代码:
//TimePicker
private Button.OnClickListener time_picker_button_listener = new Button.OnClickListener(){
@Override
public void onClick(View v) {
// TODO Auto-generated method stub
Intent intent = new Intent();
intent.setClass(WidgetDemo.this,TimePickerActivity.class);
startActivity(intent);
}
};

ScrollView演示
-
在res/layout 新建 scrollview.xml布局文件
<?xml version="1.0" encoding="utf-8"?>
<LinearLayout xmlns:android="http://schemas.android.com/apk/res/android"
android:layout_width="match_parent" android:layout_height="match_parent"
android:orientation="vertical">
<TextView android:text="ScrollView演示ScrollView演示" android:id="@+id/TextView01"
android:layout_width="wrap_content" android:layout_height="wrap_content"></TextView>
<ScrollView android:id="@+id/ScrollView01"
android:layout_width="wrap_content" android:layout_height="200dip">
<LinearLayout android:id="@+id/LinearLayout01"
android:layout_width="wrap_content" android:layout_height="wrap_content"
android:orientation="vertical">
<TextView android:text="Text文字文字" android:id="@+id/TextView02"
android:layout_width="wrap_content" android:layout_height="wrap_content"></TextView>
<Button android:text="ScrollView演示ScrollView演示" android:id="@+id/Button01"
android:layout_width="wrap_content" android:layout_height="wrap_content"></Button>
<Button android:text="ScrollView演示" android:id="@+id/Button02"
android:layout_width="wrap_content" android:layout_height="wrap_content"></Button>
<Button android:text="ScrollView演示ScrollView演示" android:id="@+id/Button03"
android:layout_width="wrap_content" android:layout_height="wrap_content"></Button>
<RadioButton android:text="ScrollView演示ScrollView演示"
android:id="@+id/RadioButton01" android:layout_width="wrap_content"
android:layout_height="wrap_content"></RadioButton>
<RadioButton android:text="ScrollView演示" android:id="@+id/RadioButton02"
android:layout_width="wrap_content" android:layout_height="wrap_content"></RadioButton>
<RadioButton android:text="ScrollView演示ScrollView演示"
android:id="@+id/RadioButton03" android:layout_width="wrap_content"
android:layout_height="wrap_content"></RadioButton>
</LinearLayout>
</ScrollView>
</LinearLayout>
在ScrollView中添加了若干组件,设定ScrollView的高度为200dip高度,使其出现滚动条。
2. 新建ScrollViewActivity类继承自Activity
import android.app.Activity;
import android.os.Bundle;
public class ScrollViewActivity extends Activity {
@Override
protected void onCreate(Bundle savedInstanceState) {
// TODO Auto-generated method stub
super.onCreate(savedInstanceState);
setTitle("ScrollView 演示");
setContentView(R.layout.scrollview);
}
}
3. 配置AndroidManifest.xml文件
<activity android:name=".ScrollViewActivity"></activity>
4. 在主程序中调用
ButtonEventBind()方法添加代码:
//ScrollView demo
Button scroll_view_button = (Button)findViewById(R.id.scroll_view_button);
scroll_view_button.setOnClickListener(scroll_view_button_listener);
为类WidgetDemo类添加代码:
//ScrollView
private Button.OnClickListener scroll_view_button_listener= new Button.OnClickListener(){
@Override
public void onClick(View v) {
// TODO Auto-generated method stub
Intent intent = new Intent();
intent.setClass(WidgetDemo.this, ScrollViewActivity.class);
startActivity(intent);
}
};

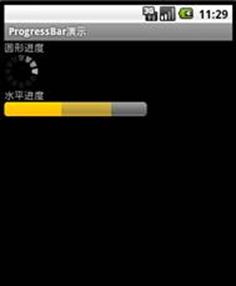
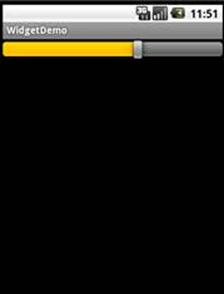
ProgressBar演示
-
在res/layout新建progressbar.xml布局文件
<?xml version="1.0" encoding="utf-8"?>
<LinearLayout xmlns:android="http://schemas.android.com/apk/res/android"
android:layout_width="wrap_content" android:layout_height="wrap_content"
android:orientation="vertical">
<TextView android:id="@+id/TextView01" android:layout_width="wrap_content"
android:layout_height="wrap_content" android:text="圆形进度"></TextView>
<ProgressBar android:id="@+id/ProgressBar01"
android:layout_width="wrap_content" android:layout_height="wrap_content"></ProgressBar>
<TextView android:id="@+id/TextView02" android:layout_width="wrap_content"
android:layout_height="wrap_content" android:text="水平进度"></TextView>
<ProgressBar android:id="@+id/ProgressBar02"
android:layout_width="200dip" android:layout_height="wrap_content"
style="?android:attr/progressBarStyleHorizontal" android:max="100"
android:progress="50" android:secondaryProgress="75"></ProgressBar>
</LinearLayout>
创建了两个ProgressBar组件,一个是圆形进度,一个是水平进度。水平进度条设置初始的进度位置是50,第二进度是75.
2. 新建ProgressBarActivity类继承自Activity类
import java.util.Random;
import android.app.Activity;
import android.os.Bundle;
import android.os.Handler;
import android.widget.ProgressBar;
public class ProgressBarActivity extends Activity {
private ProgressBar mProgress;
private int mProgressStatus = 0;
private int mWork = 0;
private Handler mHandler = new Handler();
@Override
protected void onCreate(Bundle savedInstanceState) {
// TODO Auto-generated method stub
super.onCreate(savedInstanceState);
setTitle("ProgressBar演示");
setContentView(R.layout.progressbar);
mProgress = (ProgressBar)findViewById(R.id.ProgressBar02);
//后台线程长时间的操作
new Thread(new Runnable(){
@Override
public void run() {
while(mProgressStatus<100){
mProgressStatus = doWork();
//Update the progress bar
mHandler.post(new Runnable(){
public void run(){
mProgress.setProgress(mProgressStatus);
}
});
}
}
}).start();
}
private int doWork(){
try {
Random rnd = new Random();
Thread.sleep(rnd.nextInt(200));
} catch (InterruptedException e) {
// TODO Auto-generated catch block
e.printStackTrace();
}
return mWork++;
}
}
使用线程后台更新进度条。
3. 在AndroidManifest.xml中配置
<activity android:name=".ProgressBarActivity"></activity>
4. 在主程序中调用
ButtonEventBind()方法添加如下代码:
//ProgressBar Demo
Button progress_bar_button= (Button)findViewById(R.id.progress_bar_button);
progress_bar_button.setOnClickListener(progress_bar_button_listener);
WidgetDemo添加代码:
//ProgressBar
private Button.OnClickListener progress_bar_button_listener = new Button.OnClickListener(){
@Override
public void onClick(View v) {
// TODO Auto-generated method stub
Intent intent = new Intent();
intent.setClass(WidgetDemo.this, ProgressBarActivity.class);
startActivity(intent);
}
};
SeekBar演示
SeekBar与ProgressBar相似,只是多了一个可以拖动的块。
-
在res/layout新建seekbar.xml布局文件
<?xml version="1.0" encoding="utf-8"?>
<LinearLayout xmlns:android="http://schemas.android.com/apk/res/android"
android:layout_width="match_parent" android:layout_height="wrap_content">
<SeekBar android:id="@+id/seek" android:layout_width="match_parent"
android:layout_height="wrap_content"
android:max="100"
android:progress="50"
android:thumb="@drawable/seeker"
></SeekBar>
</LinearLayout>
添加了一个SeekBar,当前进度为50. android:progress="50"
. 滑块是用的自定义的图片android:thumb="@drawable/seeker"。
2. 添加SeekBarActivity类继承自Activity
import android.app.Activity;
import android.os.Bundle;
public class SeekBarActivity extends Activity {
@Override
protected void onCreate(Bundle savedInstanceState) {
// TODO Auto-generated method stub
super.onCreate(savedInstanceState);
setContentView(R.layout.seekbar);
}
}
3. 在AndroidManifest.xml中配置
<activity android:name=".SeekBarActivity"></activity>
4. 在主程序中调用
ButtonEventBind()方法添加如下代码:
//SeekBar demo
Button seek_bar_button = (Button)findViewById(R.id.seek_bar_button);
seek_bar_button.setOnClickListener(seek_bar_button_listener);
WidgetDemo类添加如下代码:
//SeekBar
private Button.OnClickListener seek_bar_button_listener = new Button.OnClickListener(){
@Override
public void onClick(View v) {
Intent intent = new Intent();
intent.setClass(WidgetDemo.this, SeekBarActivity.class);
startActivity(intent);
}
};
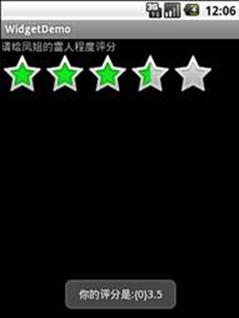
RatingBar 演示
RatingBar是评分软件
-
在res/layout新建ratingbar.xml布局文件
<?xml version="1.0" encoding="utf-8"?>
<LinearLayout xmlns:android="http://schemas.android.com/apk/res/android"
android:layout_width="wrap_content" android:layout_height="wrap_content"
android:orientation="vertical">
<TextView android:text="请给凤姐的雷人程度评分" android:id="@+id/TextView01"
android:layout_width="wrap_content" android:layout_height="wrap_content"></TextView>
<RatingBar android:id="@+id/ratingbar" android:layout_width="wrap_content"
android:layout_height="wrap_content"
ratingBarStyleSmall="true"
></RatingBar>
</LinearLayout>
2. 新建RatingBarActivity类,继承自Activity:
import android.app.Activity;
import android.os.Bundle;
import android.widget.RatingBar;
import android.widget.Toast;
public class RatingBarActivity extends Activity {
@Override
protected void onCreate(Bundle savedInstanceState) {
// TODO Auto-generated method stub
super.onCreate(savedInstanceState);
setContentView(R.layout.ratingbar);
RatingBar ratingBar = (RatingBar)findViewById(R.id.ratingbar);
ratingBar.setOnRatingBarChangeListener(new RatingBar.OnRatingBarChangeListener() {
@Override
public void onRatingChanged(RatingBar ratingBar, float rating,
boolean fromUser) {
// TODO Auto-generated method stub
CharSequence txt = "你的评分是:{0}"+rating;
Toast.makeText(RatingBarActivity.this, txt, Toast.LENGTH_SHORT).show();
}
});
}
}
上面的代码处理了OnRatingBarChangeListener侦听事件来获取用户选择的评分数据。
3. 在AndroidManifest.xml中配置
<activity android:name=".RatingBarActivity"></activity>
4. 在主程序中调用
ButtonEventBind()方法中添加代码:
//RatingBar demo
Button rating_bar_button = (Button)findViewById(R.id.rating_bar_button);
rating_bar_button.setOnClickListener(rating_bar_button_listener);
在WidgetDemo类中添加代码:
//RatingBar
private Button.OnClickListener rating_bar_button_listener = new Button.OnClickListener(){
@Override
public void onClick(View v) {
Intent intent = new Intent();
intent.setClass(WidgetDemo.this, RatingBarActivity.class);
startActivity(intent);
}
};
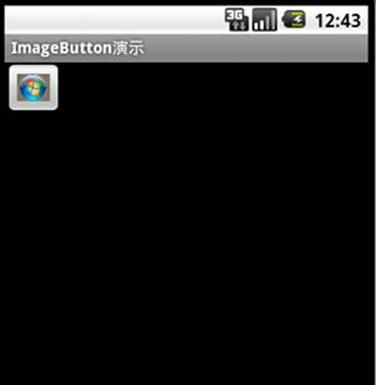
ImageButton演示
-
在res/laout新建imagebutton.xml布局文件
<?xml version="1.0" encoding="utf-8"?>
<LinearLayout
xmlns:android="http://schemas.android.com/apk/res/android"
android:layout_width="wrap_content"
android:layout_height="wrap_content">
<ImageButton android:id="@+id/ImageButton01"
android:src="@drawable/imgbtn"
android:layout_width="wrap_content" android:layout_height="wrap_content"></ImageButton>
</LinearLayout>
2. 新建ImageButtonActivity类,继承自Activity
import android.app.Activity;
import android.os.Bundle;
public class ImageButtonActivity extends Activity {
@Override
protected void onCreate(Bundle savedInstanceState) {
// TODO Auto-generated method stub
super.onCreate(savedInstanceState);
setTitle("ImageButton演示");
setContentView(R.layout.imagebutton);
}
}
3. 在AndoridManifest.xml中添加配置
<activity android:name=".ImageButtonActivity"></activity>
4. 在主程序中调用
在ButtonEventBind()添加如下代码:
//ImageButton demo
Button image_button_button = (Button)findViewById(R.id.image_button_button);
image_button_button.setOnClickListener(image_button_button_listener);
在WidgetDemo类中添加如下代码:
//ImageButton demo
Button image_button_button = (Button)findViewById(R.id.image_button_button);
image_button_button.setOnClickListener(image_button_button_listener);
ImageSwitcher 和 Gallery 演示
本演示实现在屏幕上显示大图,下面显示可以滚动的画廊。
-
在res/laout 下新建imageswitch_galler.xml布局文件
<?xml version="1.0" encoding="utf-8"?>
<RelativeLayout android:id="@+id/RelativeLayout01"
android:layout_width="fill_parent" android:layout_height="fill_parent"
xmlns:android="http://schemas.android.com/apk/res/android">
<ImageSwitcher android:id="@+id/switcher"
android:layout_width="fill_parent"
android:layout_height="fill_parent" />
<Gallery android:background="#55000000"
android:id="@+id/gallery"
android:layout_width="fill_parent"
android:layout_height="60dp"
android:layout_alignParentBottom="true"
android:layout_alignParentLeft="true"
android:gravity="center_vertical"
android:spacing="16dp"/>
</RelativeLayout>
2. 将图片文件(sample_01.jpg-sample_09.jpg),背景pictury_frame.jpg复制到res/drawable目录
3. 新建ImageSwitcherGalleryActivity类继承自Activity,接口AdapterView.OnItemSelectedListener, ViewSwitcher.ViewFactory。
import android.app.Activity;
import android.content.Context;
import android.os.Bundle;
import android.view.View;
import android.view.ViewGroup;
import android.view.Window;
import android.view.animation.AnimationUtils;
import android.widget.AdapterView;
import android.widget.BaseAdapter;
import android.widget.Gallery;
import android.widget.ImageSwitcher;
import android.widget.ImageView;
import android.widget.ViewSwitcher;
import android.widget.Gallery.LayoutParams;
public class ImageSwitcherGalleryActivity extends Activity implements
AdapterView.OnItemSelectedListener, ViewSwitcher.ViewFactory {
private ImageSwitcher mSwitcher;
private Integer[] mThumbIds = {
R.drawable.sample_thumb_0, R.drawable.sample_thumb_1,
R.drawable.sample_thumb_2, R.drawable.sample_thumb_3,
R.drawable.sample_thumb_4, R.drawable.sample_thumb_5,
R.drawable.sample_thumb_6, R.drawable.sample_thumb_7};
private Integer[] mImageIds = {
R.drawable.sample_0, R.drawable.sample_1, R.drawable.sample_2,
R.drawable.sample_3, R.drawable.sample_4, R.drawable.sample_5,
R.drawable.sample_6, R.drawable.sample_7};
@Override
protected void onCreate(Bundle savedInstanceState) {
// TODO Auto-generated method stub
super.onCreate(savedInstanceState);
requestWindowFeature(Window.FEATURE_NO_TITLE);
setTitle("ImageSwitcher演示");
setContentView(R.layout.imageswitch_gallery);
mSwitcher = (ImageSwitcher)findViewById(R.id.switcher);
mSwitcher.setFactory(this);
mSwitcher.setInAnimation(AnimationUtils.loadAnimation(this, android.R.anim.fade_in));
mSwitcher.setOutAnimation(AnimationUtils.loadAnimation(this, android.R.anim.fade_out));
Gallery g = (Gallery)findViewById(R.id.gallery);
g.setAdapter(new ImageAdapter(this));
g.setOnItemSelectedListener(this);
}
@Override
public void onItemSelected(AdapterView<?> parent, View v, int position,
long id) {
// TODO 在Gallery里选中后,设置ImageSwitcher的背景图
mSwitcher.setImageResource(mImageIds[position]);
}
@Override
public void onNothingSelected(AdapterView<?> arg0) {
// TODO Auto-generated method stub
}
@Override
public View makeView() {
ImageView i = new ImageView(this);
i.setBackgroundColor(0xFF000000);
i.setScaleType(ImageView.ScaleType.FIT_CENTER);
i.setLayoutParams(new ImageSwitcher.LayoutParams(LayoutParams.FILL_PARENT,
LayoutParams.FILL_PARENT));
return i;
}
public class ImageAdapter extends BaseAdapter {
public ImageAdapter(Context c) {
mContext = c;
}
public int getCount() {
return mThumbIds.length;
}
public Object getItem(int position) {
return position;
}
public long getItemId(int position) {
return position;
}
public View getView(int position, View convertView, ViewGroup parent) {
ImageView i = new ImageView(mContext);
i.setImageResource(mThumbIds[position]);
i.setAdjustViewBounds(true);
i.setLayoutParams(new Gallery.LayoutParams(
LayoutParams.WRAP_CONTENT, LayoutParams.WRAP_CONTENT));
i.setBackgroundResource(R.drawable.picture_frame);
return i;
}
private Context mContext;
}
}
说明:
mSwitcher = (ImageSwitcher)findViewById(R.id.switcher);
mSwitcher.setFactory(this);
mSwitcher.setInAnimation(AnimationUtils.loadAnimation(this, android.R.anim.fade_in));
mSwitcher.setOutAnimation(AnimationUtils.loadAnimation(this, android.R.anim.fade_out));
Gallery g = (Gallery)findViewById(R.id.gallery);
g.setAdapter(new ImageAdapter(this));
g.setOnItemSelectedListener(this);
使用setInAnimation和setOutAnimation设置图片进入和离开的动画效果。
设置图片资源前必须先调用setFactory. ImageSwitcherGalleryActivity实现了ViewFacotry接口的makeView方法。此方法为ImageSwitcher提供一个View。
@Override
public View makeView() {
ImageView i = new ImageView(this);
i.setBackgroundColor(0xFF000000);
i.setScaleType(ImageView.ScaleType.FIT_CENTER);
i.setLayoutParams(new ImageSwitcher.LayoutParams(LayoutParams.FILL_PARENT,
LayoutParams.FILL_PARENT));
return i;
}
接着Gallery使用SetAdapter()方法设置与资源的关联
g.setAdapter(new ImageAdapter(this));
ImageAdapter是内部类继承自BaseAdapter。
getView方法里动态生成一个ImageView,使用setLayoutParams设置图片大小,使用setImageResource设置图片资源文件,使用setBackgroundResource设置图片背景。
ImageView i = new ImageView(mContext);
i.setImageResource(mThumbIds[position]);
i.setAdjustViewBounds(true);
i.setLayoutParams(new Gallery.LayoutParams(
LayoutParams.WRAP_CONTENT, LayoutParams.WRAP_CONTENT));
i.setBackgroundResource(R.drawable.picture_frame);
4. 在AndroidManifest.xml中配置Activity
<activity android:name=".ImageSwitcherGalleryActivity"></activity>
5. 在主程序中调用
在ButtonEventBind()方法中添加如下代码:
//ImageSwitcher Gallery
Button image_switch_button = (Button)findViewById(R.id.image_show_button);
image_switch_button.setOnClickListener(image_switch_button_listener);
为WidgetDemo类添加代码:
//ImageSwitcher Gallery
private Button.OnClickListener image_switch_button_listener = new Button.OnClickListener(){
@Override
public void onClick(View v) {
Intent intent = new Intent();
intent.setClass(WidgetDemo.this, ImageSwitcherGalleryActivity.class);
startActivity(intent);
}
};

GridView 演示
-
在res/layout新建gridview.xml布局文件
<?xml version="1.0" encoding="utf-8"?>
<GridView xmlns:android="http://schemas.android.com/apk/res/android"
android:id="@+id/grid_view"
android:layout_width="fill_parent"
android:layout_height="fill_parent"
android:numColumns="auto_fit"
android:verticalSpacing="10dp"
android:horizontalSpacing="10dp"
android:columnWidth="90dp"
android:stretchMode="columnWidth"
android:gravity="center"
/>
2. 新建类GridViewActivity类继承自Activity
import android.app.Activity;
import android.content.Context;
import android.os.Bundle;
import android.view.View;
import android.view.ViewGroup;
import android.widget.BaseAdapter;
import android.widget.GridView;
import android.widget.ImageView;
public class GridViewActivity extends Activity {
@Override
protected void onCreate(Bundle savedInstanceState) {
// TODO Auto-generated method stub
super.onCreate(savedInstanceState);
setTitle("GridView演示");
setContentView(R.layout.gridview);
GridView gv = (GridView)findViewById(R.id.grid_view);
gv.setAdapter(new ImageAdapter(this));
}
public class ImageAdapter extends BaseAdapter {
private Context mContext;
public ImageAdapter(Context c) {
mContext = c;
}
public int getCount() {
return mThumbIds.length;
}
public Object getItem(int position) {
return null;
}
public long getItemId(int position) {
return 0;
}
public View getView(int position, View convertView, ViewGroup parent) {
ImageView imageView;
if (convertView == null) { // if it's not recycled, initialize some attributes
imageView = new ImageView(mContext);
imageView.setLayoutParams(new GridView.LayoutParams(85, 85));
imageView.setScaleType(ImageView.ScaleType.CENTER_CROP);
imageView.setPadding(8, 8, 8, 8);
} else {
imageView = (ImageView) convertView;
}
imageView.setImageResource(mThumbIds[position]);
return imageView;
}
// references to our images
private Integer[] mThumbIds = {
R.drawable.sample_1,
R.drawable.sample_2, R.drawable.sample_3,
R.drawable.sample_4, R.drawable.sample_5,
R.drawable.sample_6, R.drawable.sample_7,
R.drawable.sample_8, R.drawable.sample_9,
R.drawable.sample_1,
R.drawable.sample_2, R.drawable.sample_3,
R.drawable.sample_4, R.drawable.sample_5,
R.drawable.sample_6, R.drawable.sample_7,
R.drawable.sample_8, R.drawable.sample_9
};
}
}
使用自定的类ImageAdapter来关联图片资源
3. 在AndroidManifest.xml中配置Activity
<activity android:name=".GridViewActivity"></activity>
4. 在主程序中调用
ButtonEventBind()方法中添加代码:
//GridView
Button grid_view_button = (Button)findViewById(R.id.grid_view_button);
grid_view_button.setOnClickListener(grid_view_button_listener);
WidgetDemo类添加代码:
//GridView
private Button.OnClickListener grid_view_button_listener = new Button.OnClickListener(){
@Override
public void onClick(View v) {
// TODO Auto-generated method stub
Intent intent = new Intent();
intent.setClass(WidgetDemo.this, GridViewActivity.class);
startActivity(intent);
}
};

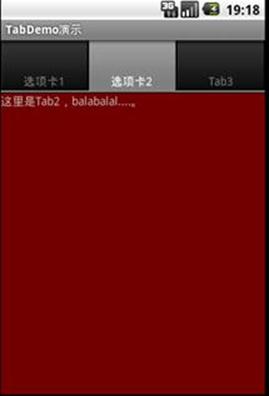
Tab 演示
-
在res/layout新建tab.xml布局文件
<?xml version="1.0" encoding="utf-8"?>
<FrameLayout xmlns:android="http://schemas.android.com/apk/res/android"
android:layout_width="fill_parent"
android:layout_height="fill_parent">
<TextView android:id="@+id/view1"
android:background="@drawable/blue"
android:layout_width="fill_parent"
android:layout_height="fill_parent"
android:text="这里是Tab1里的内容。"/>
<TextView android:id="@+id/view2"
android:background="@drawable/red"
android:layout_width="fill_parent"
android:layout_height="fill_parent"
android:text="这里是Tab2,balabalal....。"/>
<TextView android:id="@+id/view3"
android:background="@drawable/green"
android:layout_width="fill_parent"
android:layout_height="fill_parent"
android:text="Tab3"/>
</FrameLayout>
2. 新建TabDemoActivity类继承自TabActivity
import android.app.TabActivity;
import android.os.Bundle;
import android.view.LayoutInflater;
import android.widget.TabHost;
public class TabDemoActivity extends TabActivity {
@Override
protected void onCreate(Bundle savedInstanceState) {
// TODO Auto-generated method stub
super.onCreate(savedInstanceState);
setTitle("TabDemo演示");
TabHost tabHost = getTabHost();
LayoutInflater.from(this).inflate(R.layout.tab, tabHost.getTabContentView(),true);
tabHost.addTab(tabHost.newTabSpec("选项卡1").setIndicator("选项卡1").setContent(R.id.view1));
tabHost.addTab(tabHost.newTabSpec("选项卡2").setIndicator("选项卡2").setContent(R.id.view2));
tabHost.addTab(tabHost.newTabSpec("选项卡3").setIndicator("Tab3").setContent(R.id.view3));
}
}
上面的代码在OnCreate方法中添加Tab选项卡。
3. 在AndroidManifest.xml中配置
<activity android:name=".TabDemoActivity"></activity>
4. 在主程序中调用
在ButtonEventBind()方法中添加代码:
//TabDemo
Button tab_demo_button = (Button)findViewById(R.id.tab_demo_button);
tab_demo_button.setOnClickListener(tab_demo_button_listener);
在WidgetDemo类中添加如下代码:
//TabDemo
private Button.OnClickListener tab_demo_button_listener = new Button.OnClickListener(){
@Override
public void onClick(View v) {
// TODO Auto-generated method stub
Intent intent =new Intent();
intent.setClass(WidgetDemo.this, TabDemoActivity.class);
startActivity(intent);
}
};
http://www.cnblogs.com/xingquan im@xingquan.org

