基于ESP32的桌面小屏幕实战[7]:第一个工程Hello world!以及打印日志
摘要
本文构建下载了示例工程hello world,并在其中调用esp_log.h中的日志函数打印日志。
1. 创建工程
打开esp目录,把hello world文件夹复制到当前文件夹,并打开hello world文件夹。
cd ~/esp
cp -r esp-idf/examples/get-started/hello_world .
cd ~/esp/hello_world
使用命令行工具idf.py set-target为项目设置特定的芯片目标esp32
idf.py set-target esp32
执行 idf.py set-target esp32 命令后,项目的编译环境会根据 ESP32 芯片的架构、指令集、外围设备等特性进行设置。
2. 工程源码
/* Hello World Example

   This example code is in the Public Domain (or CC0 licensed, at your option.)

   Unless required by applicable law or agreed to in writing, this
   software is distributed on an "AS IS" BASIS, WITHOUT WARRANTIES OR
   CONDITIONS OF ANY KIND, either express or implied.
*/
#include <stdio.h>
#include "sdkconfig.h"
#include "freertos/FreeRTOS.h"
#include "freertos/task.h"
#include "esp_system.h"
#include "esp_spi_flash.h"

void app_main(void)
{
    printf("Hello world!\n");

    /* Print chip information */
    esp_chip_info_t chip_info;
    esp_chip_info(&chip_info);
    printf("This is %s chip with %d CPU core(s), WiFi%s%s, ",
            CONFIG_IDF_TARGET,
            chip_info.cores,
            (chip_info.features & CHIP_FEATURE_BT) ? "/BT" : "",
            (chip_info.features & CHIP_FEATURE_BLE) ? "/BLE" : "");

    unsigned major_rev = chip_info.full_revision / 100;
    unsigned minor_rev = chip_info.full_revision % 100;
    printf("silicon revision v%d.%d, ", major_rev, minor_rev);

    printf("%dMB %s flash\n", spi_flash_get_chip_size() / (1024 * 1024),
            (chip_info.features & CHIP_FEATURE_EMB_FLASH) ? "embedded" : "external");

    printf("Minimum free heap size: %d bytes\n", esp_get_minimum_free_heap_size());

    for (int i = 10; i >= 0; i--) {
        printf("Restarting in %d seconds...\n", i);
        vTaskDelay(1000 / portTICK_PERIOD_MS);
    }
    printf("Restarting now.\n");
    fflush(stdout);
    esp_restart();
}
3. 编译工程
在终端中输入:
idf.py fullclean
idf.py clean
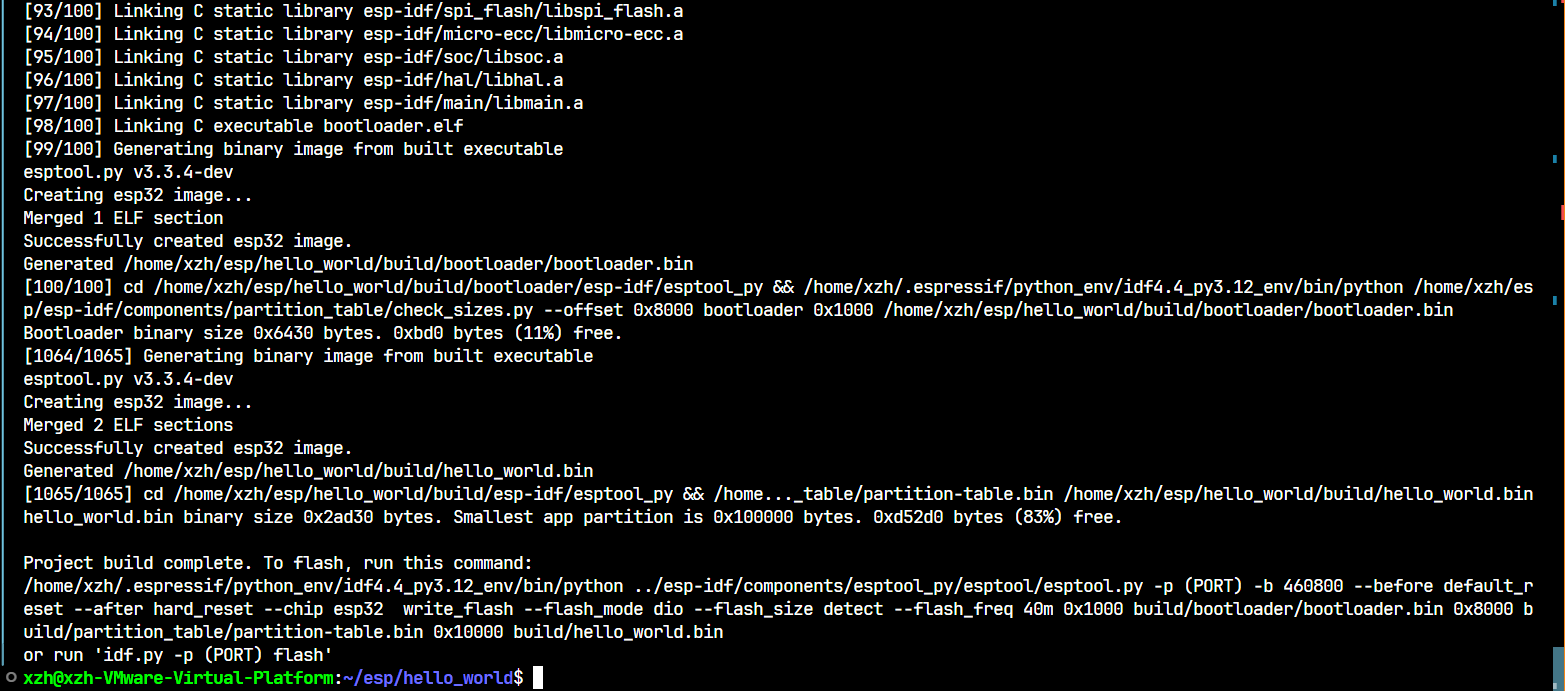
idf.py build
然后等待程序编译。
如果出现idf.py: command not found需要重新安装编译链
cd ~/esp/esp-idf
export IDF_GITHUB_ASSETS="dl.espressif.com/github_assets"
./install.sh
然后设置环境
. /home/xzh/esp/esp-idf/export.sh
回到hello_world工程文件夹
cd ~/esp/hello_world
再次在终端中输入:
idf.py fullclean
idf.py clean
idf.py build
4. 下载运行
4.1 查看设备号
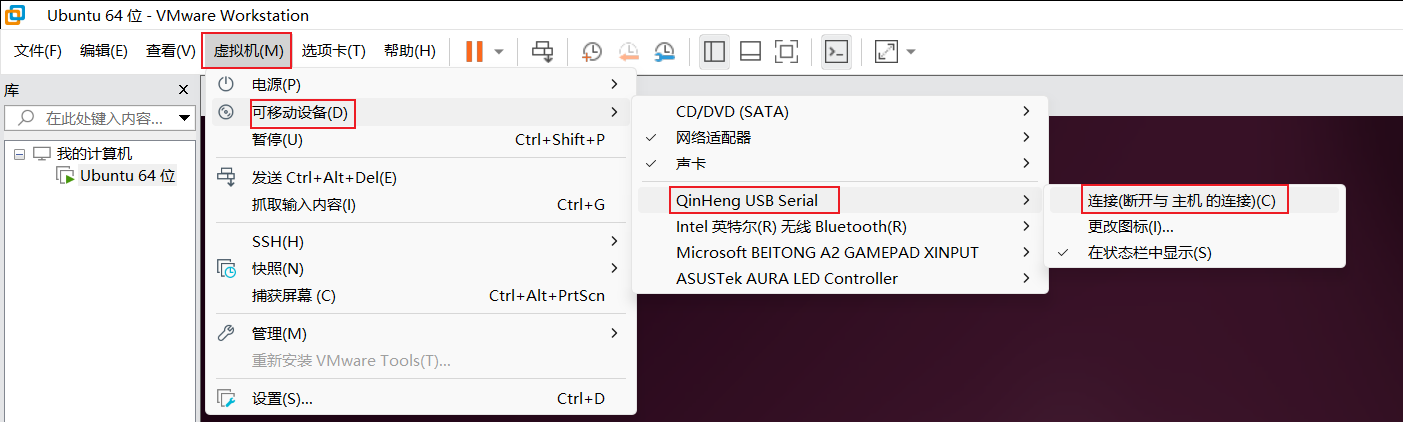
把板子连上电脑,然后在VMware Workstation中点击“虚拟机(M)”——“可移动设备(D)”——“QinHeng USB Serial”——“连接(断开与主机的连接)”
然后在VSCode中输入ls /dev/ttyUSB*查看设备号

如果拔掉USB或者在VMware Workstation中断开连接,输入ls /dev/ttyUSB0就会显示下面的情况

4.2 下载程序
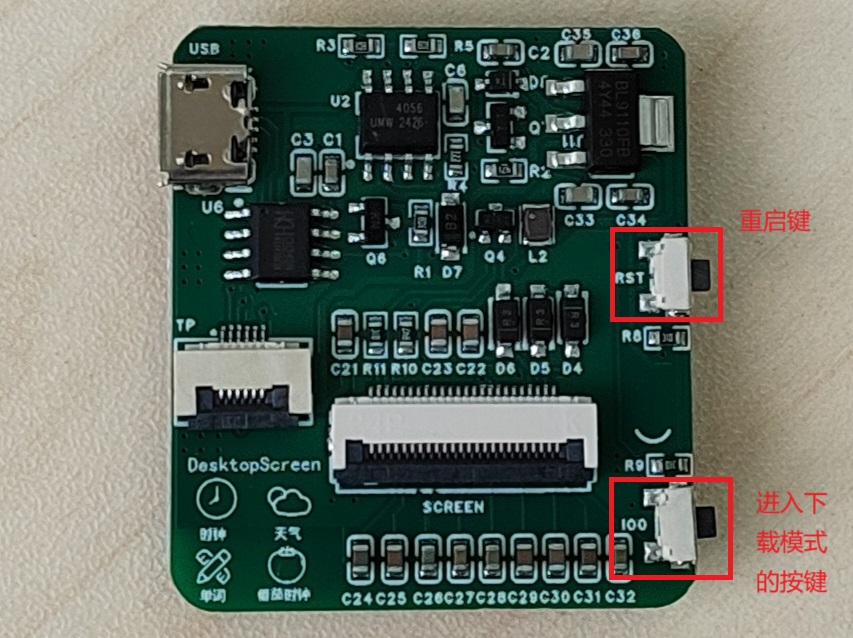
下载程序时按住IO0,轻按RST,2个按键同时放开,在终端中输入命令:
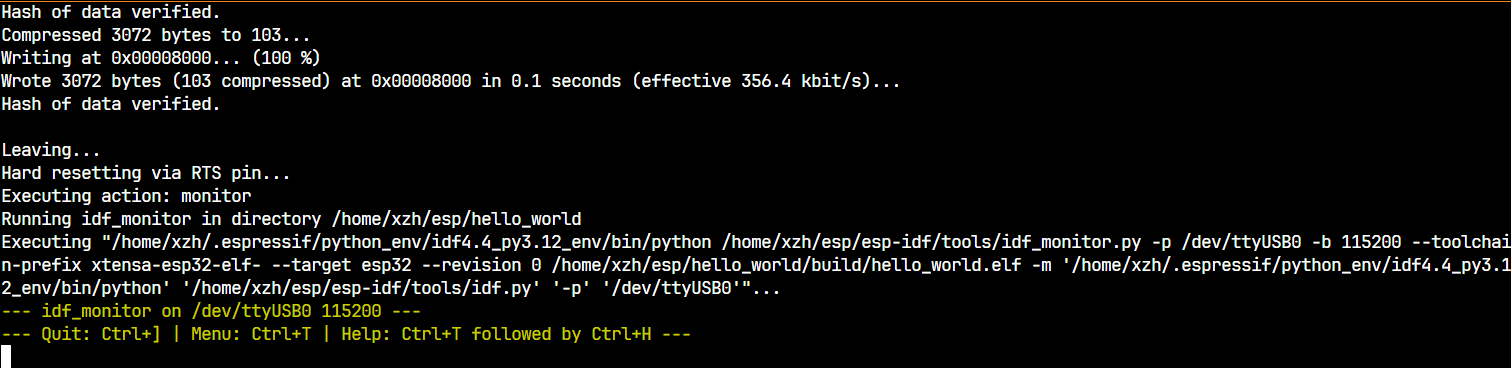
idf.py -p /dev/ttyUSB0 flash
即可下载程序。
下面的命令是运行监视器:
idf.py -p /dev/ttyUSB0 monitor
可以用一条命令实现构建、下载、监视:
idf.py -p /dev/ttyUSB0 flash monitor
但出现了错误:
Usage: idf.py [OPTIONS] COMMAND1 [ARGS]... [COMMAND2 [ARGS]...]...
Try 'idf.py --help' for help.

Error: Invalid value for '-p' / '--port': Path '/dev/ttyUSB0' is not readable.
这是一些权限问题导致的。需要在终端中输入下面命令,然后重启:
sudo usermod -aG dialout $USER
注意:要把$USER换成自己的用户名。
重启后再次按住IO0,轻按RST,2个按键同时放开,在终端中输入命令:
idf.py -p /dev/ttyUSB0 flash monitor
按下RST键,可以看到程序跑起来了
4.3 查看日志
按下Ctrl+]可以停止程序。在终端里看一下日志。
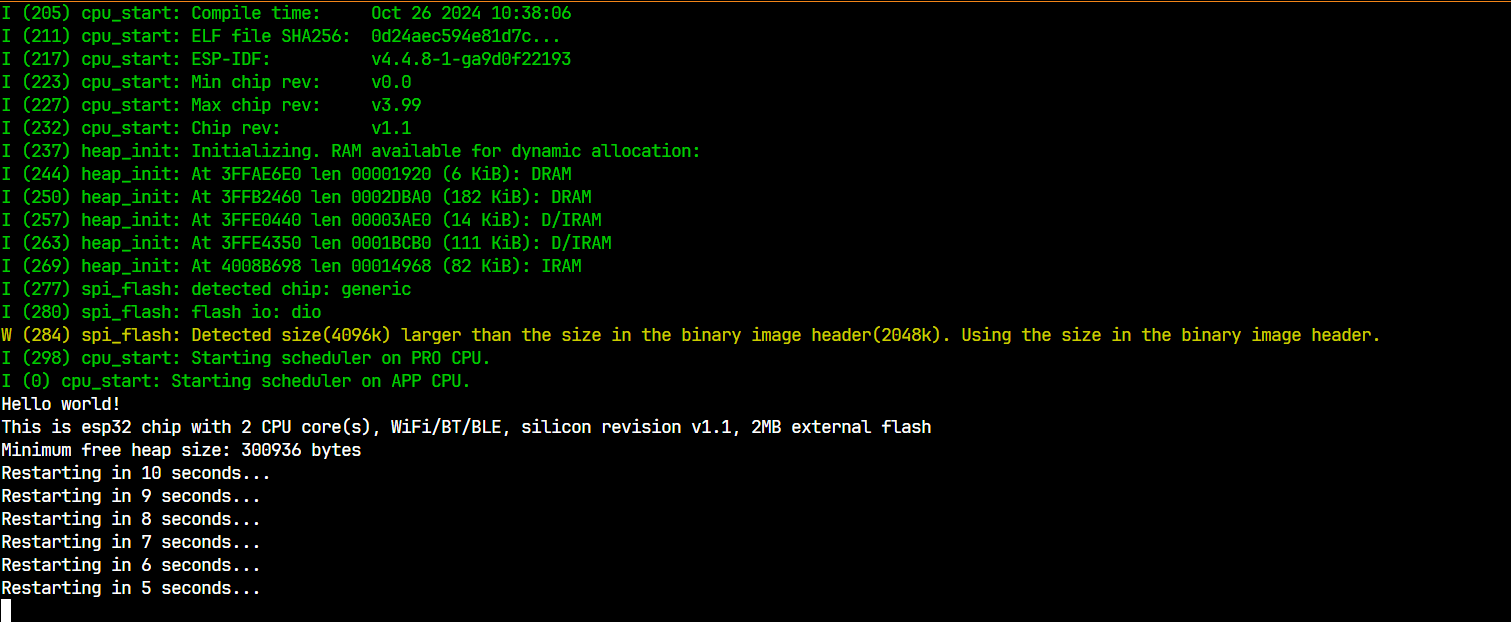
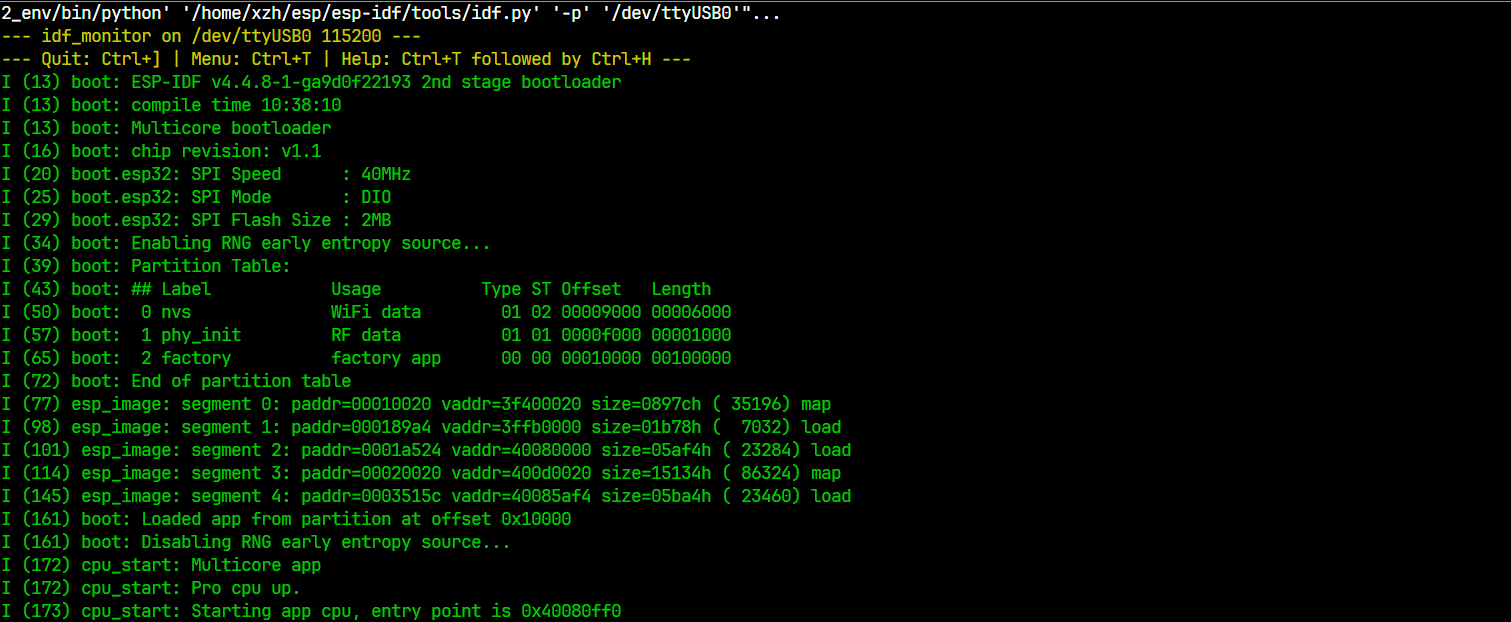
首先是boot一堆东西
然后打印堆栈相关的数据
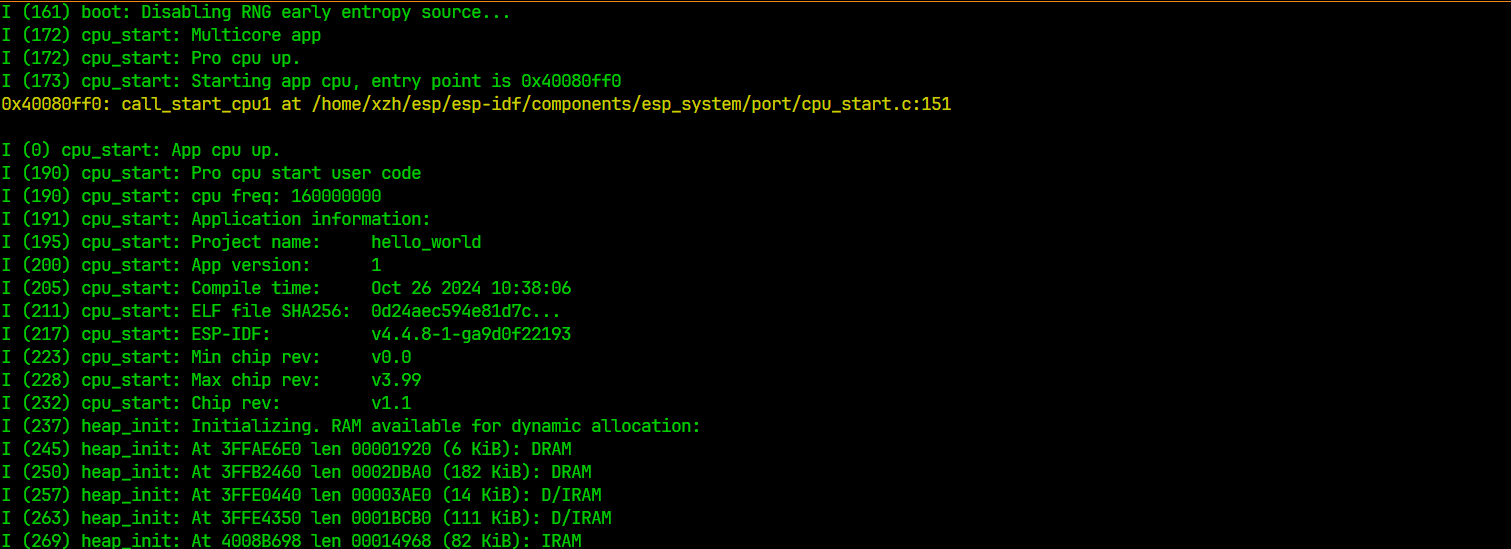
然后Hello World!

然后是芯片相关的数据内容

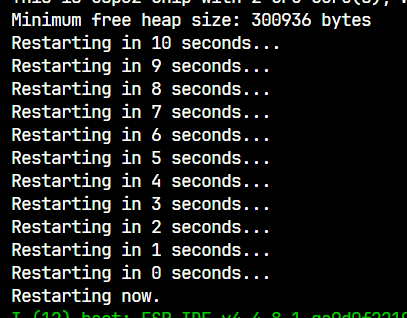
然后程序进入for循环,10秒倒计时后重启
5. 打印日志
开发嵌入式系统或类似的硬件项目时,仿真和日志打印是两种常用的调试和测试工具。日志打印更加高效,仿真调试能看到更多底层的东西。在调试多任务、带操作系统的程序时,仿真难度较大。用日志打印解决不了的问题,再考虑仿真。
用esp_log.h中的日志函数打印日志,不同日志类别会有不同颜色,比用printf清晰。
在hello_world_main.c文件中包含头文件
#include "esp_log.h"
定义一个静态的常量字符串指针 TAG,并将其指向字符串 "MAIN APP"
static const char *TAG = "MAIN APP";
调用esp_log.h中的日志函数
ESP_LOGI(TAG, "system init V1.1");//打印日志
输入idf.py build编译一下
下载,长按IO0不松手,轻按RST,一起松开,在终端输入:
idf.py -p /dev/ttyUSB0 flash monitor
下载好后,按RST。
可以看到多了一行I (331) MAIN APP: system init V1.1
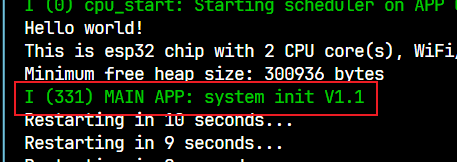
I 表示日志级别(Info)。
(331) 是时间戳。
MAIN APP 是 TAG 的内容,用于指示日志消息的模块或来源。
完整源码
/* Hello World Example

   This example code is in the Public Domain (or CC0 licensed, at your option.)

   Unless required by applicable law or agreed to in writing, this
   software is distributed on an "AS IS" BASIS, WITHOUT WARRANTIES OR
   CONDITIONS OF ANY KIND, either express or implied.
*/
#include <stdio.h>
#include "sdkconfig.h"
#include "freertos/FreeRTOS.h"
#include "freertos/task.h"
#include "esp_system.h"
#include "esp_spi_flash.h"
#include "esp_log.h"

static const char *TAG = "MAIN APP";

static void test_task_example(void* arg)
{
    for(;;) {
        vTaskDelay(1000 / portTICK_PERIOD_MS);
        printf("task run \n");
    }
}

void app_main(void)
{
    printf("Hello world!\n");

    /* Print chip information */
    esp_chip_info_t chip_info;
    esp_chip_info(&chip_info);
    printf("This is %s chip with %d CPU core(s), WiFi%s%s, ",
            CONFIG_IDF_TARGET,
            chip_info.cores,
            (chip_info.features & CHIP_FEATURE_BT) ? "/BT" : "",
            (chip_info.features & CHIP_FEATURE_BLE) ? "/BLE" : "");

    unsigned major_rev = chip_info.full_revision / 100;
    unsigned minor_rev = chip_info.full_revision % 100;
    printf("silicon revision v%d.%d, ", major_rev, minor_rev);

    printf("%dMB %s flash\n", spi_flash_get_chip_size() / (1024 * 1024),
            (chip_info.features & CHIP_FEATURE_EMB_FLASH) ? "embedded" : "external");

    printf("Minimum free heap size: %d bytes\n", esp_get_minimum_free_heap_size());

    ESP_LOGI(TAG, "system init V1.1");//打印日志

    xTaskCreate(test_task_example, "test_task_example", 2048, NULL, 10, NULL);//创建任务

    while(1)
    {
    	printf("system run ...\n");
	vTaskDelay(1000 / portTICK_PERIOD_MS);
    }
}

 浙公网安备 33010602011771号