Sentinel中的流量控制(十九)
Sentinel中的流量控制
- 并发线程数
- QPS
- resource :资源名,即限流规则的作用对象
- count : 限流阈值
- grade : 限流阈值类型(QPS 或并发线程数)
- limitApp : 流控针对的调用来源,若为 default 则不区分调用来源
- strategy : 调用关系限流策略
- controlBehavior : 流量控制效果(直接拒绝、Warm Up、匀速排队)
如果想要查看实时的统计信息,可以运行上篇中的代码然后访问http://localhost:8719/cnode?id=doTest 就可以查看

- thread: 代表当前处理该资源的并发数;
- pass: 代表一秒内到来到的请求;
- blocked: 代表一秒内被流量控制的请求数量;
- success: 代表一秒内成功处理完的请求;
- total: 代表到一秒内到来的请求以及被阻止的请求总和;
- RT: 代表一秒内该资源的平均响应时间;
- 1m-pass: 则是一分钟内到来的请求;
- 1m-block: 则是一分钟内被阻止的请求;
- 1m-all: 则是一分钟内到来的请求和被阻止的请求的总和;
- exception: 则是一秒内业务本身异常的总和。
并发线程数控制
QPS流量控制
直接拒绝
//单机限流
public class SentinelDemo {
    public static void main(String[] arg) {
        initFlowRule(); //初始化限流规则
        while(true){
            //ResourceName表示资源,控制访问流量的点
            try(Entry entry= SphU.entry("helloWorld")){
                System.out.println("hello world");
            }catch (BlockException e){
                System.out.println("被拒绝");
            }
//            if (SphO.entry("helloWorld")) {
//                System.out.println("Hello World");
//                SphO.exit();
//            }
        }
    }
    private static void initFlowRule(){
        List<FlowRule> rules=new ArrayList<> ();
        FlowRule flowRule=new FlowRule();
        flowRule.setResource("helloWorld"); //针对那个资源设置规则
        flowRule.setGrade( RuleConstant.FLOW_GRADE_QPS);//QPS或者并发数
        flowRule.setCount(5); //QPS=5
        flowRule.setControlBehavior ( RuleConstant.CONTROL_BEHAVIOR_DEFAULT );//直接拒绝
        rules.add(flowRule);
        FlowRuleManager.loadRules(rules);
    }
}
Warm Up
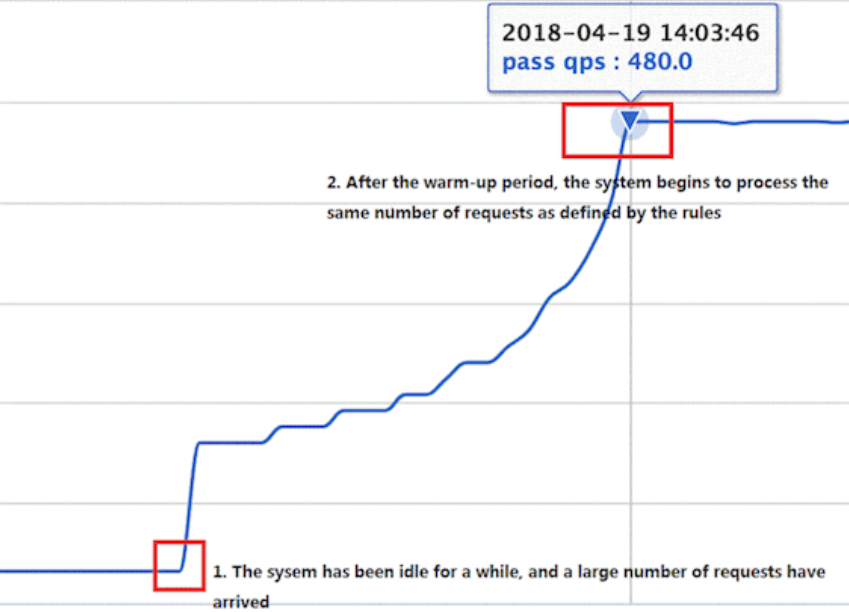
匀速排队

基于调用关系的流量控制
- 根据调用方限流
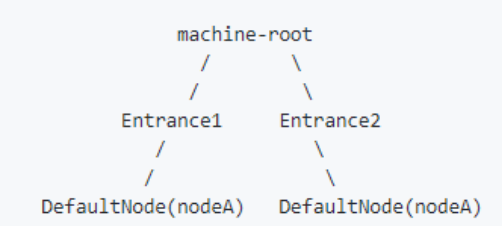
- 根据调用链路入口限流
- 具有关系的资源流量控制
根据调用方限流
- default :表示不区分调用者,来自任何调用者的请求都将进行限流统计。如果这个资源名的调用总和超过了这条规则定义的阈值,则触发限流。
- {some_origin_name} :表示针对特定的调用者,只有来自这个调用者的请求才会进行流量控制。例如 NodeA 配置了一条针对调用者 caller1 的规则,那么当且仅当来自 caller1 对NodeA 的请求才会触发流量控制。
- other :表示针对除 {some_origin_name} 以外的其余调用方的流量进行流量控制。例如,资源 NodeA 配置了一条针对调用者 caller1 的限流规则,同时又配置了一条调用者为 other 的规则,那么任意来自非 caller1 对 NodeA 的调用,都不能超过 other 这条规则定义的阈值。
根据调用链路入口限流
具有关系的资源流量控制
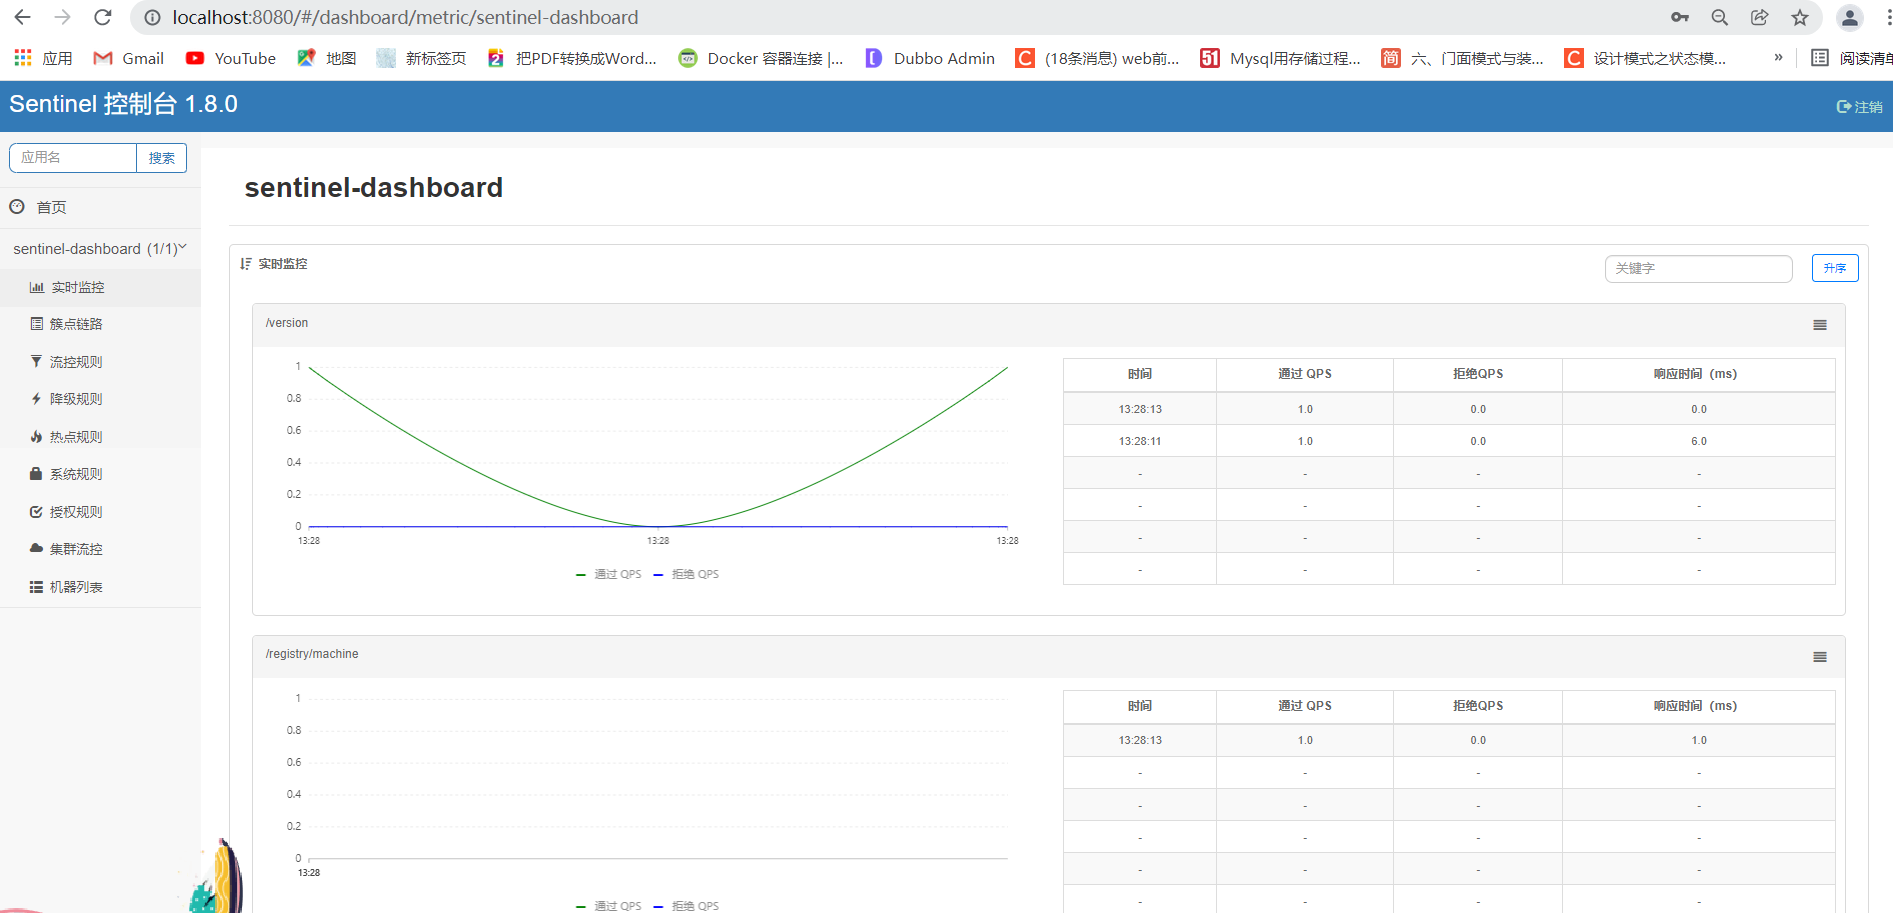
Sentinel控制台
sentine他有自己的监控平台,可以去官网下载然后安装就行,启动后他可以监控平台的运行情况,这个很简单,提供下网址自已进去按流程做就可以了
https://github.com/alibaba/Sentinel/releases
动态限流规则
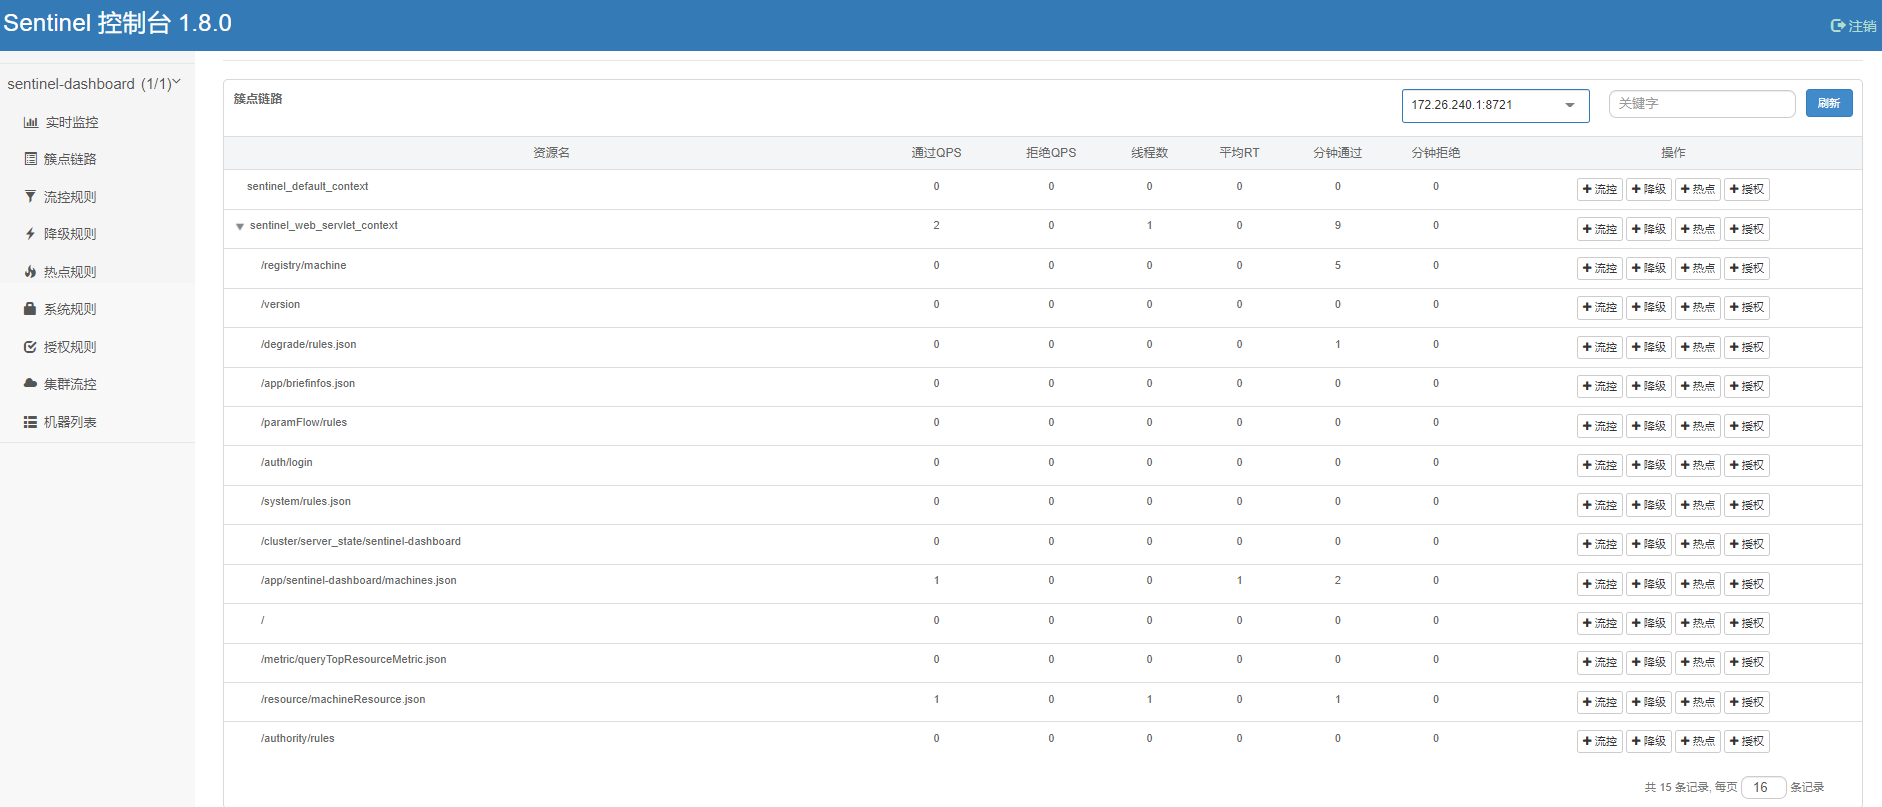
通过控制表可以知道可以配置很多流程规则,这些是存在内存中的,如果服务器重启了这些规则就会丢失,这些是肯定不能接受的,那么接下来要做的是如果持久化存储,把他做成动态规则;动态规则保存的地方有很多;例如zookeeper / apollo / etcd / redis / Consul / Eureka;下图是从官网上拉的图,下图说的流程很简单,步骤1说的就是有一个控制台这个控制台能够更改规则,然后可以将规则发送到Nacos/Zookeeper上,这样第一步保存就完成了;接下来就是应用端的动态更新规则了,说的就是2的配置的动态更新变化
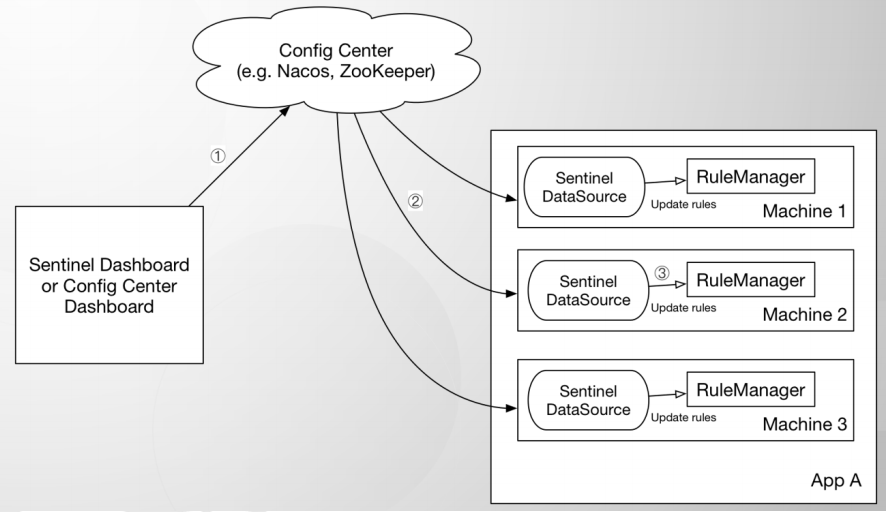
动态数据源演示
导入pom
        <dependency>
            <groupId>com.alibaba.csp</groupId>
            <artifactId>sentinel-datasource-nacos</artifactId>
            <version>1.8.0</version>
        </dependency>
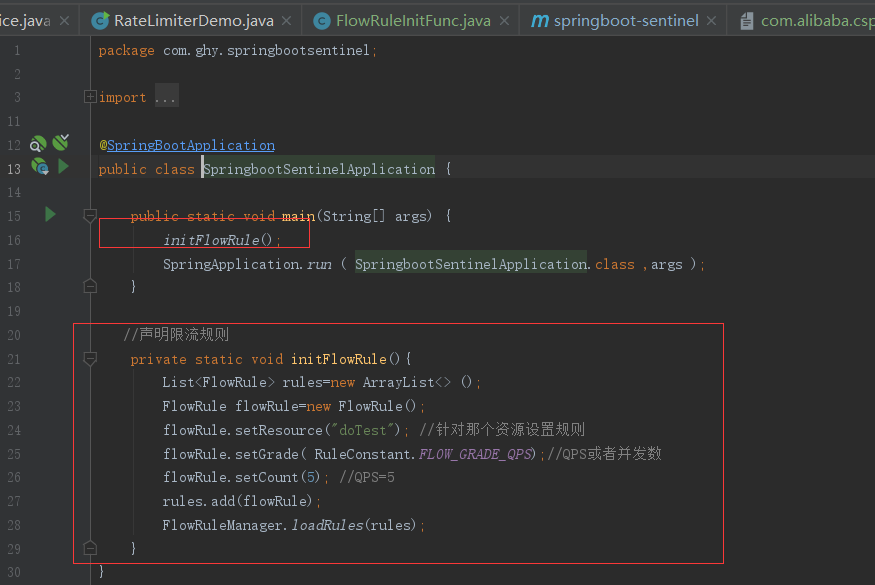
如下图所示,在上篇中我是把规则写在如下位置,如果配置规则多了放在这里维护也不方便,下面把这部分写死的规则给隐藏,通过sentinel的SPI的扩展进行优化
通过前面篇幅可以知道竟然是spi的扩展就要创建如下东西
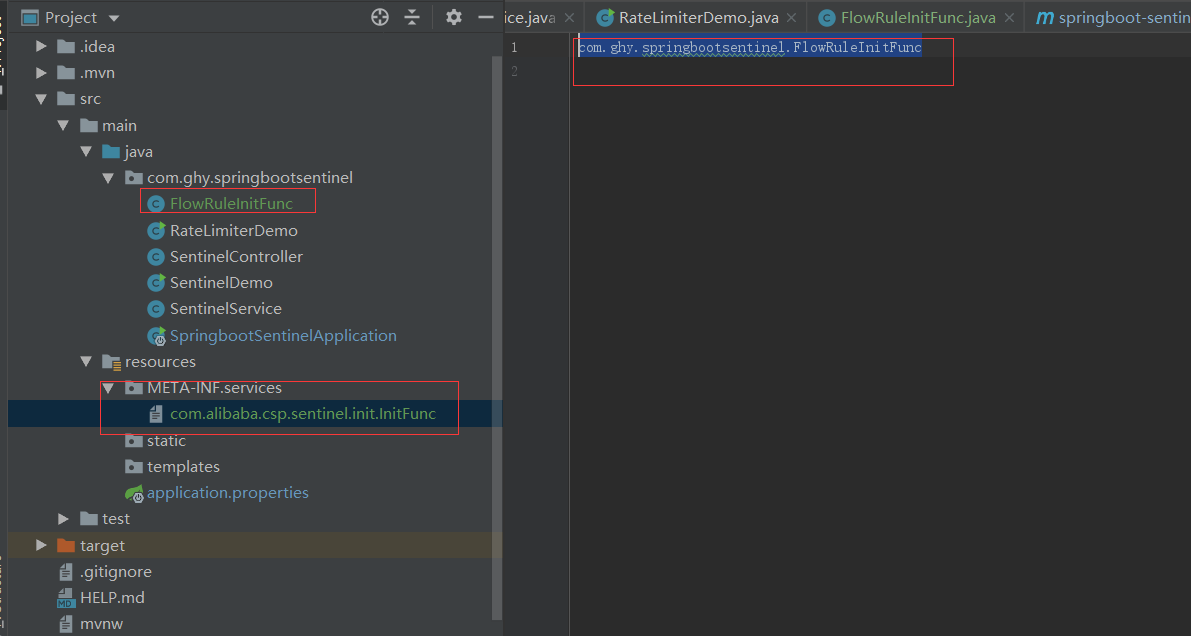
public class FlowRuleInitFunc  implements InitFunc {


    @Override
    public void init() throws Exception {
        initFlowRule();
        //loadClusterConfig();
       // registerFlowRule();
    }
    private static void initFlowRule(){
        List<FlowRule> rules=new ArrayList<> ();
        FlowRule flowRule=new FlowRule();
        flowRule.setResource("doTest"); //针对那个资源设置规则
        flowRule.setGrade( RuleConstant.FLOW_GRADE_QPS);//QPS或者并发数
        flowRule.setCount(5); //QPS=5
        rules.add(flowRule);
        FlowRuleManager.loadRules(rules);
    }
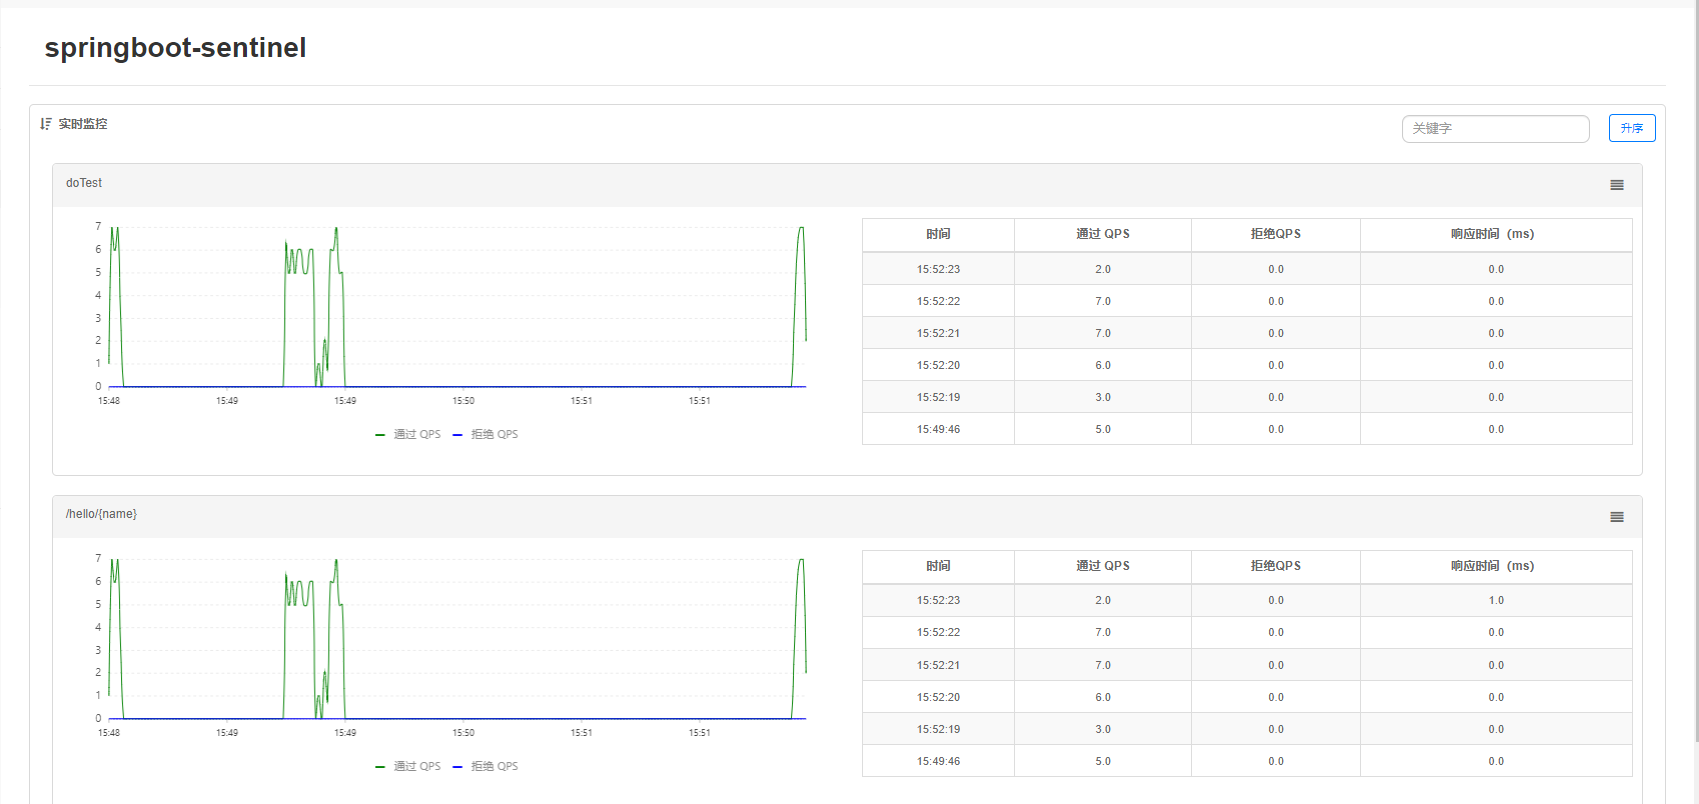
然后启动项目访问,通过JMeter进行压测可以看到如下结果
写到这里只是把配置放到了FlowRuleInitFunc 类中,还是没达到动态配置规则,接下来就是从远程服务器加载配置规则,我选择用nacos;在nacos上配置动态数据源
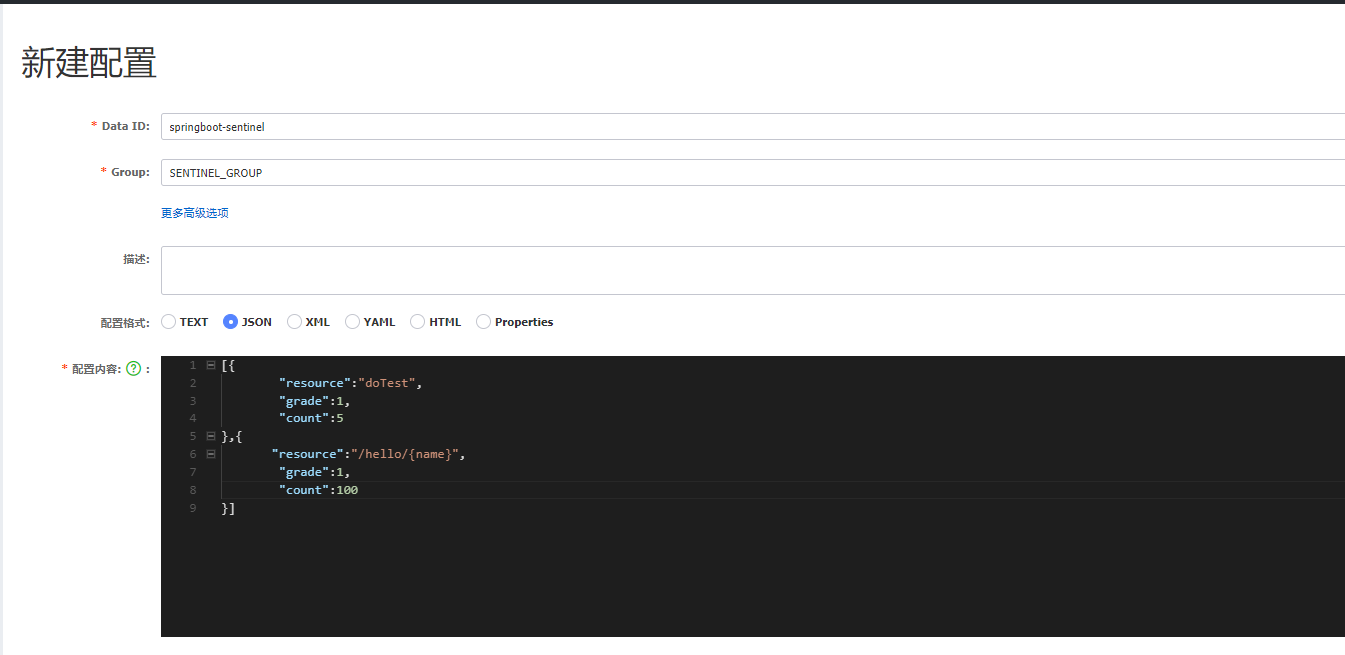
修改FlowRuleInitFunc类,从nacos上拉取配置
public class FlowRuleInitFunc  implements InitFunc {

    private final String nacosAddress="localhost:8848";
    private final String groupId="SENTINEL_GROUP";//nacos分组
    private final String dataId="springboot-sentinel";//nacos的data Id配置

    @Override
    public void init() throws Exception {
       // initFlowRule();
        //loadClusterConfig();
        registerFlowRule();
    }
    private static void initFlowRule(){
        List<FlowRule> rules=new ArrayList<> ();
        FlowRule flowRule=new FlowRule();
        flowRule.setResource("doTest"); //针对那个资源设置规则
        flowRule.setGrade( RuleConstant.FLOW_GRADE_QPS);//QPS或者并发数
        flowRule.setCount(5); //QPS=5
        rules.add(flowRule);
        FlowRuleManager.loadRules(rules);
    }

    private void registerFlowRule(){
        //从远程服务器上加载规则(nacos)
        ReadableDataSource<String, List<FlowRule>> flowRuleDs=
                new NacosDataSource<List<FlowRule>>(nacosAddress,groupId,dataId,
                        source-> JSON.parseObject(source,new TypeReference<List<FlowRule>> (){}));
        FlowRuleManager.register2Property(flowRuleDs.getProperty());
    }
}
启动项目验证,可以手动访问接口也可以用JMeter进行压测,可以看到监控面板上有出现配置的两个限流策略结果,说明动态配置成功
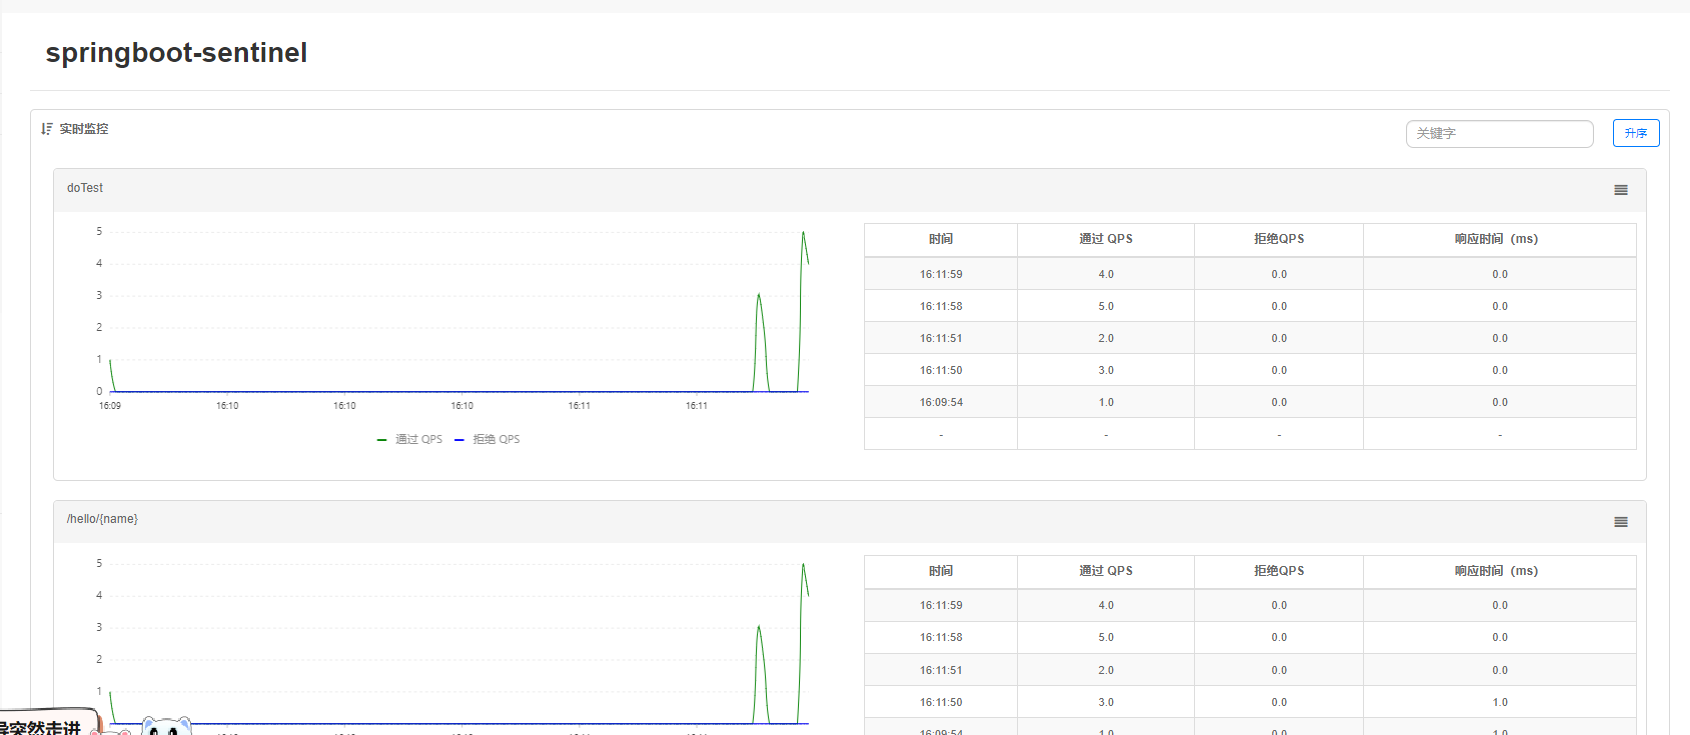
虽然上面的步骤已经实现了动态的配置,但是还是要在类中写代码,其实这个步骤在springcloud集成中也是不用的,下面写下在springcloud中通过配置文件实现动态过程;实现前先把前面的代码和services文件给隐藏掉
在和springcloud集成中只用一个配置信息就解决所有代码,配置如下:
spring.cloud.sentinel.datasource.ds1.nacos.server-addr=localhost:8848
spring.cloud.sentinel.datasource.ds1.nacos.data-id=springboot-sentinel
spring.cloud.sentinel.datasource.ds1.nacos.group-id=SENTINEL_GROUP
spring.cloud.sentinel.datasource.ds1.nacos.data-type=json
spring.cloud.sentinel.datasource.ds1.nacos.rule-type=flow
spring.cloud.sentinel.datasource.ds1.nacos.username=nacos
spring.cloud.sentinel.datasource.ds1.nacos.password=nacos
集成的内容搞完了,接下来要搞的就是另一件事,上面的一系列步骤完成了动态配置的持久化,但是又引来了一个新的问题,那就是现在sentinel的流控规则可以从nacos上读取没问题了,但新问题是如果我在sentinel上修改了流控规则后,nacos上怎么同步更新。这个问题如果要解决需要去改sentinel源码触发调用nacos的监听,由于今天想把这个专题结束,后面有空我补充下。
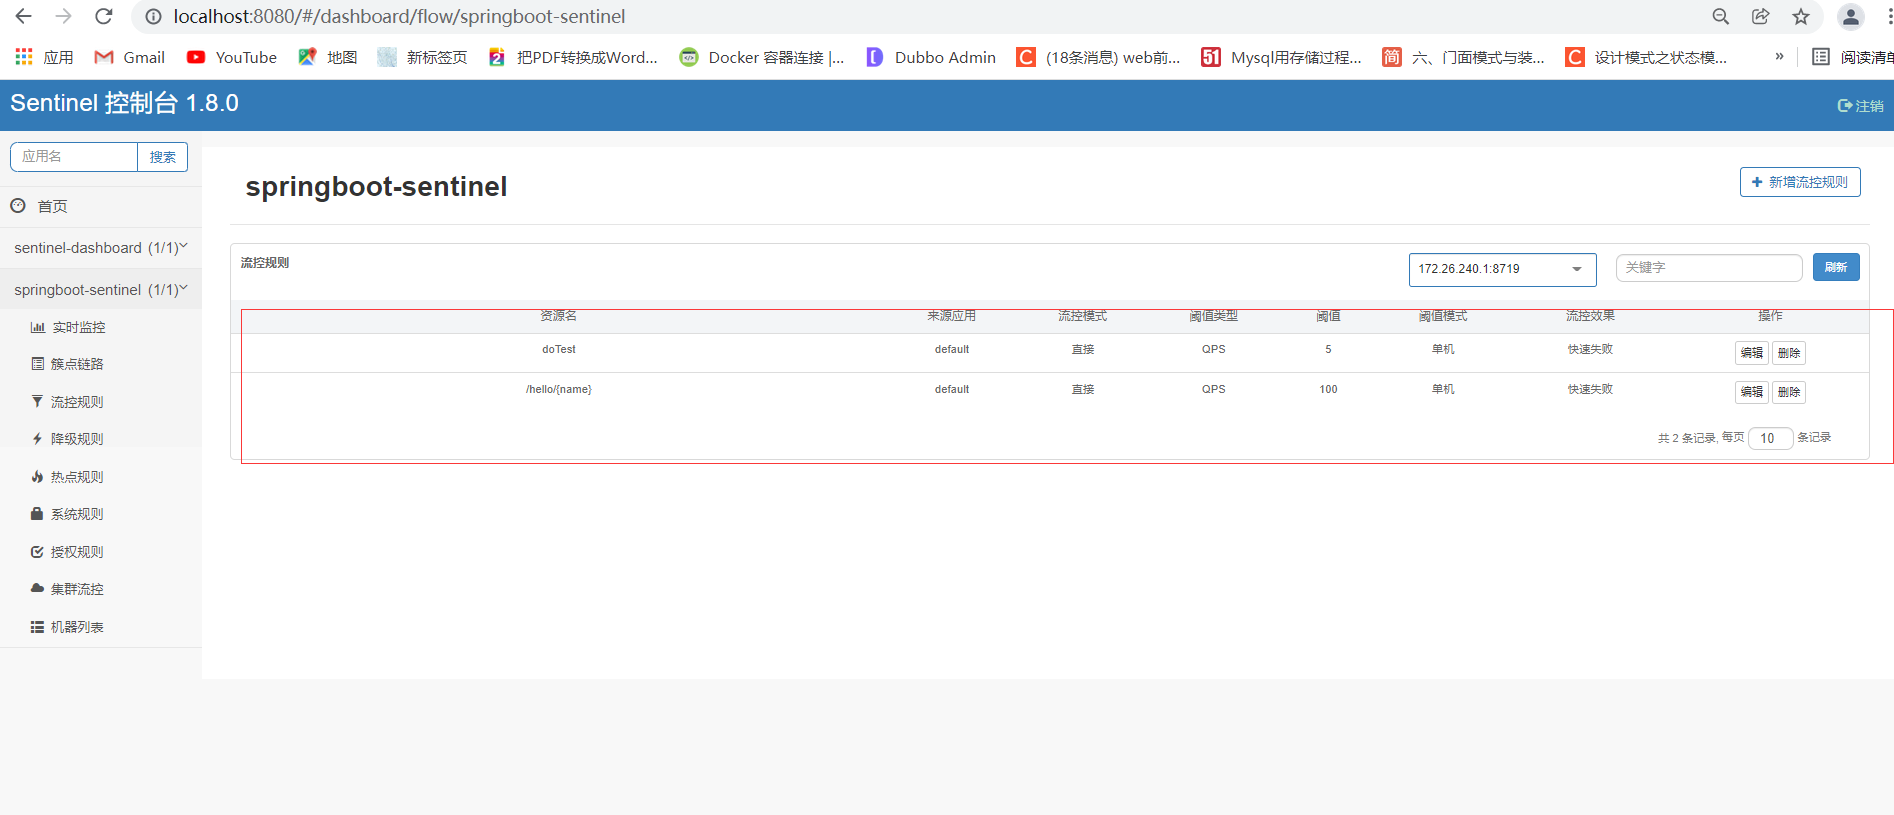
集群限流
- Token Client:集群流控客户端,用于向所属 Token Server 通信请求 token。集群限流服务端会返回给客户端结果,决定是否限流。
- Token Server:即集群流控服务端,处理来自 Token Client 的请求,根据配置的集群规则判断是否应该发放 token(是否允许通过)。
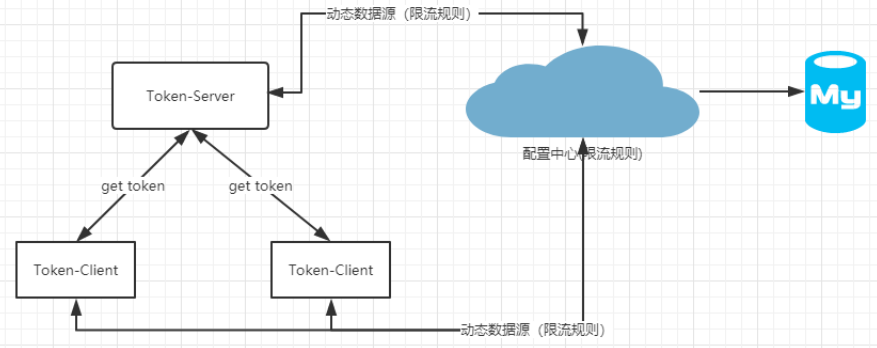
下面就来写个demo来实现集群限流,新建一个maven工程sentinel-token-server
导入pom
    <dependency>
      <groupId>com.alibaba.csp</groupId>
      <artifactId>sentinel-cluster-server-default</artifactId>
      <version>1.8.0</version>
    </dependency>
    <dependency>
      <groupId>com.alibaba.csp</groupId>
      <artifactId>sentinel-datasource-nacos</artifactId>
      <version>1.8.0</version>
    </dependency>
    <dependency>
      <groupId>com.alibaba.csp</groupId>
      <artifactId>sentinel-transport-simple-http</artifactId>
      <version>1.8.0</version>
    </dependency>
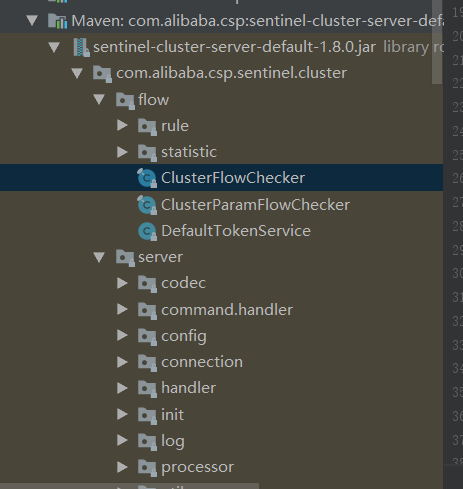
下面是服务端作为一个token-server的一个核心服务包,这里面提供了一些API给我们,我们可以通过这个API进行调用,下面就是抄代码了
public class ClusterServer {
    public static void main(String[] args) throws Exception {
        ClusterTokenServer tokenServer=new SentinelDefaultTokenServer ();
        //手动载入namespace和serverTransportConfig的配置到ClusterServerConfigManager
        //集群限流服务端通信相关配置
        ClusterServerConfigManager.loadGlobalTransportConfig(
                new ServerTransportConfig ().setIdleSeconds(600).setPort(9999));
        //加载namespace集合列表() , namespace也可以放在配置中心
        ClusterServerConfigManager.loadServerNamespaceSet( Collections.singleton("App-Test"));
        tokenServer.start();
        //Token-client会上报自己的project.name到token-server。Token-server会根据namespace来统计连接数
    }
}
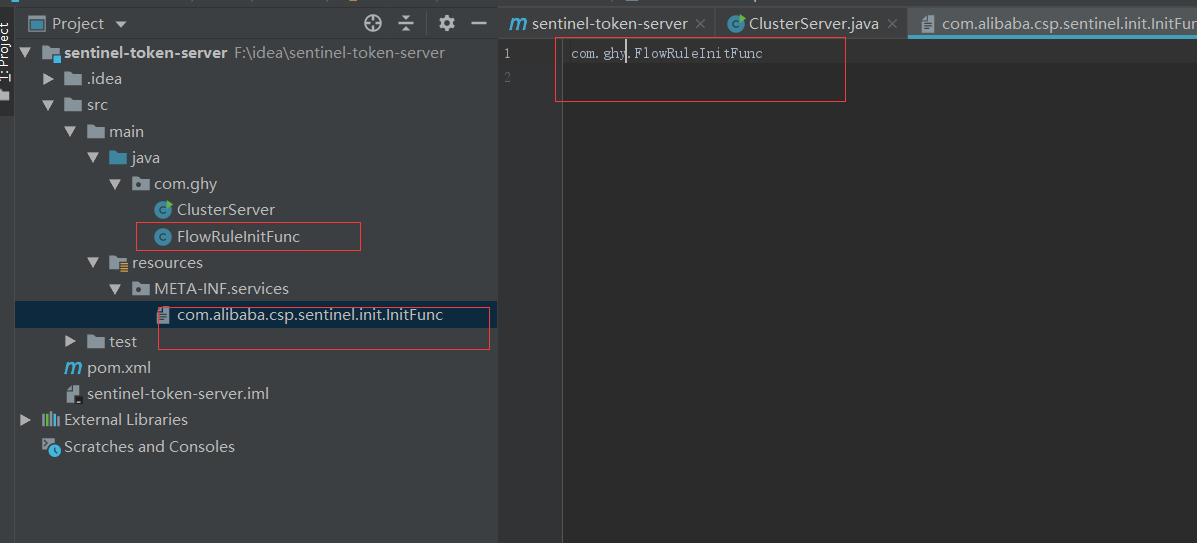
public class FlowRuleInitFunc implements InitFunc {

    private final String nacosAddress="localhost:8848";
    private final String groupId="SENTINEL_GROUP";//nacos分组
    private final String dataId="-flow-rules";//nacos的data Id配置


    @Override
    public void init() throws Exception {
        registerFlowRule();
    }
    private static void initFlowRule(){
        List<FlowRule> rules=new ArrayList<> ();
        FlowRule flowRule=new FlowRule ();
        flowRule.setResource("doTest"); //针对那个资源设置规则
        flowRule.setGrade( RuleConstant.FLOW_GRADE_QPS);//QPS或者并发数
        flowRule.setCount(5); //QPS=5
        rules.add(flowRule);
        FlowRuleManager.loadRules(rules);
    }

    private void registerFlowRule(){
        ClusterFlowRuleManager.setPropertySupplier( namespace->{
            ReadableDataSource<String,List<FlowRule>> flowRuleDs=
                    new NacosDataSource<List<FlowRule>>(nacosAddress,groupId,namespace+dataId,
                            source-> JSON.parseObject(source,new TypeReference<List<FlowRule>>(){}));
            return flowRuleDs.getProperty();
        });
    }
}
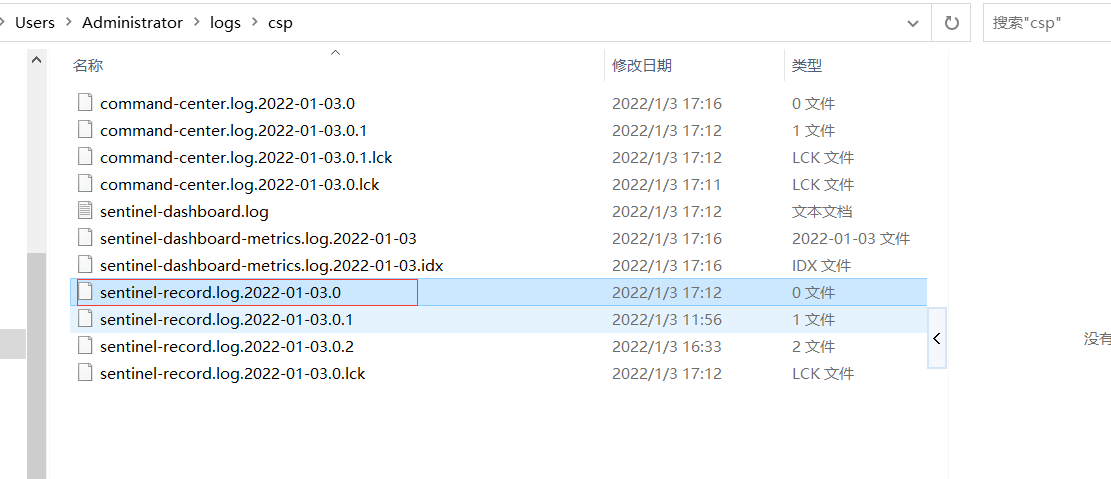
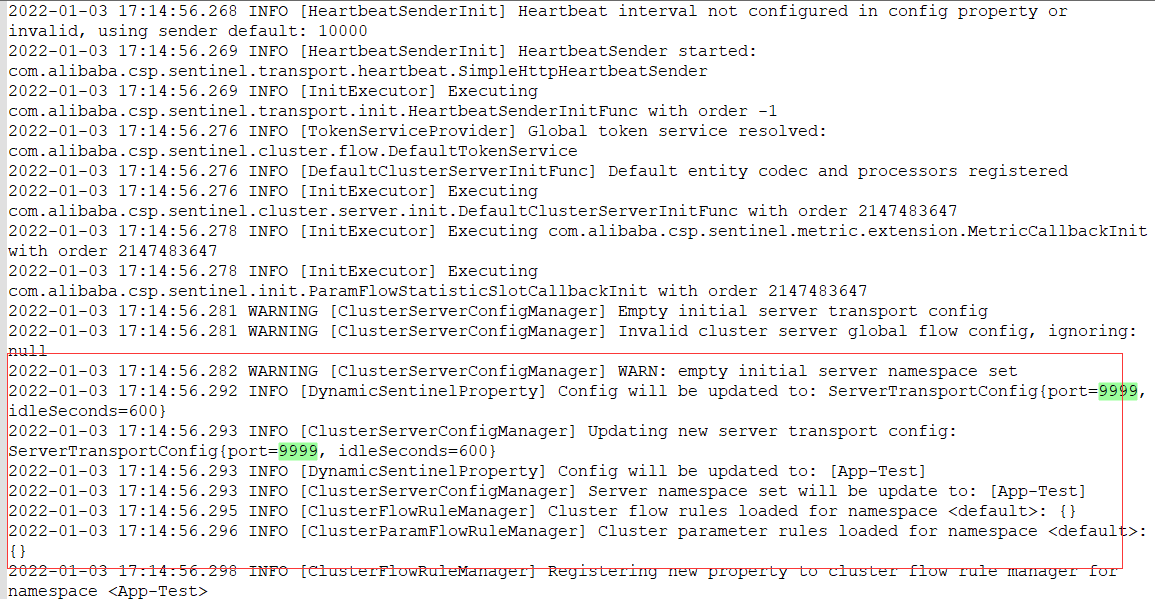
然后 启动maven项目在本地日志中可以发现端口已监听
然后在nacos上根据FlowRuleInitFunc类中的dataId配置规则
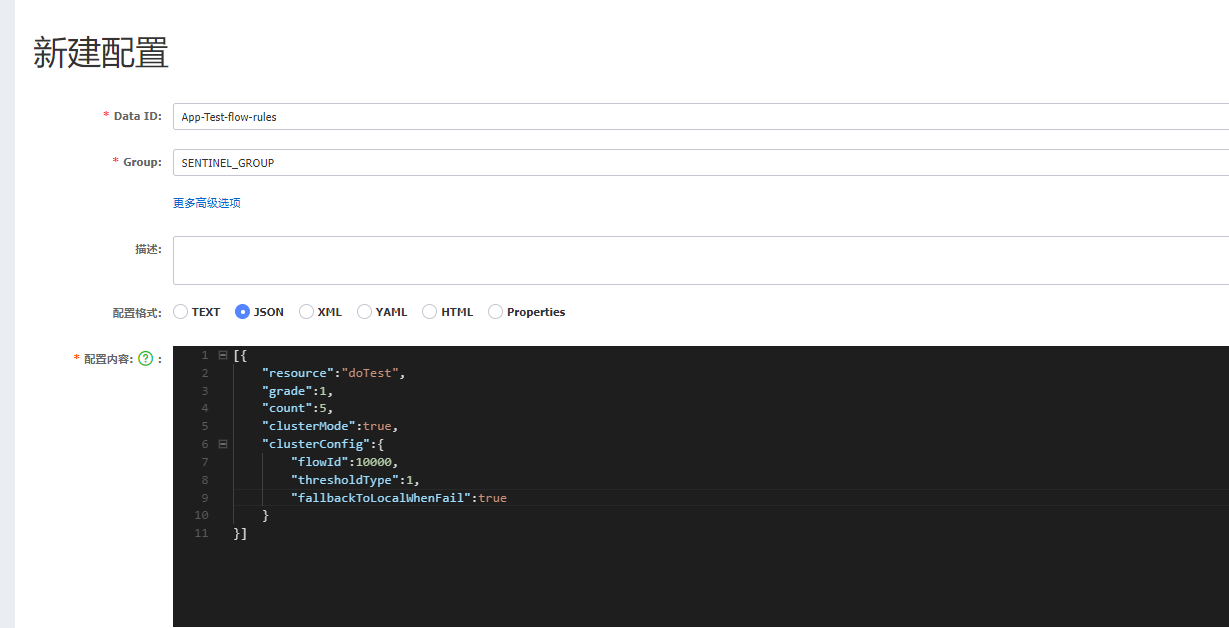
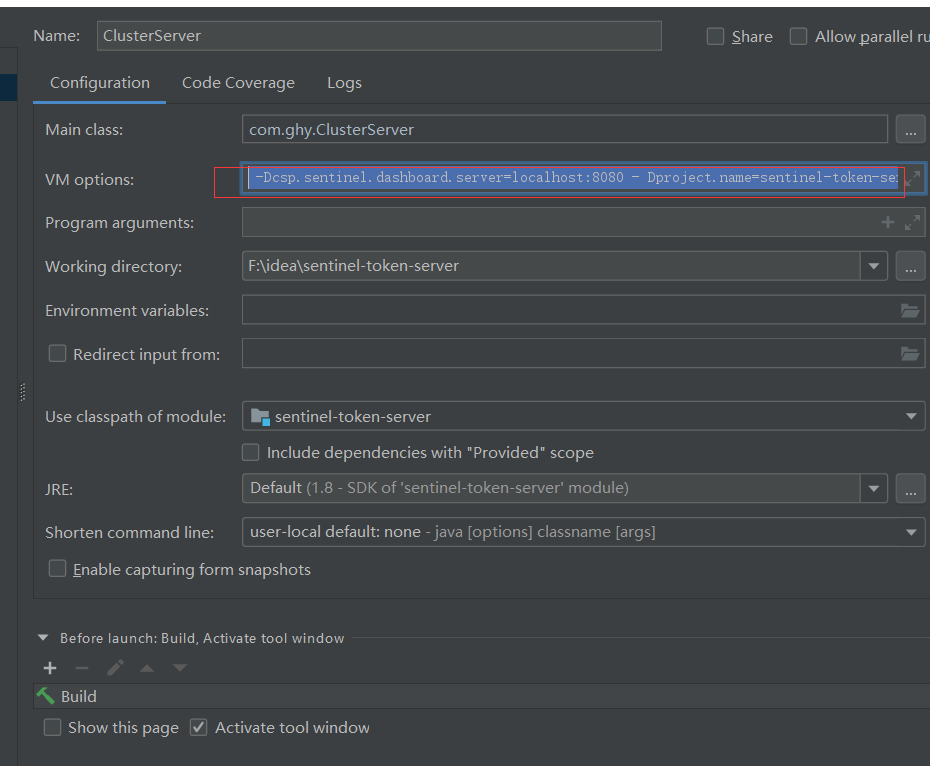
然后在VM中加入下面话加入监控
-Dcsp.sentinel.dashboard.server=localhost:8080 -Dproject.name=sentinel-token-server
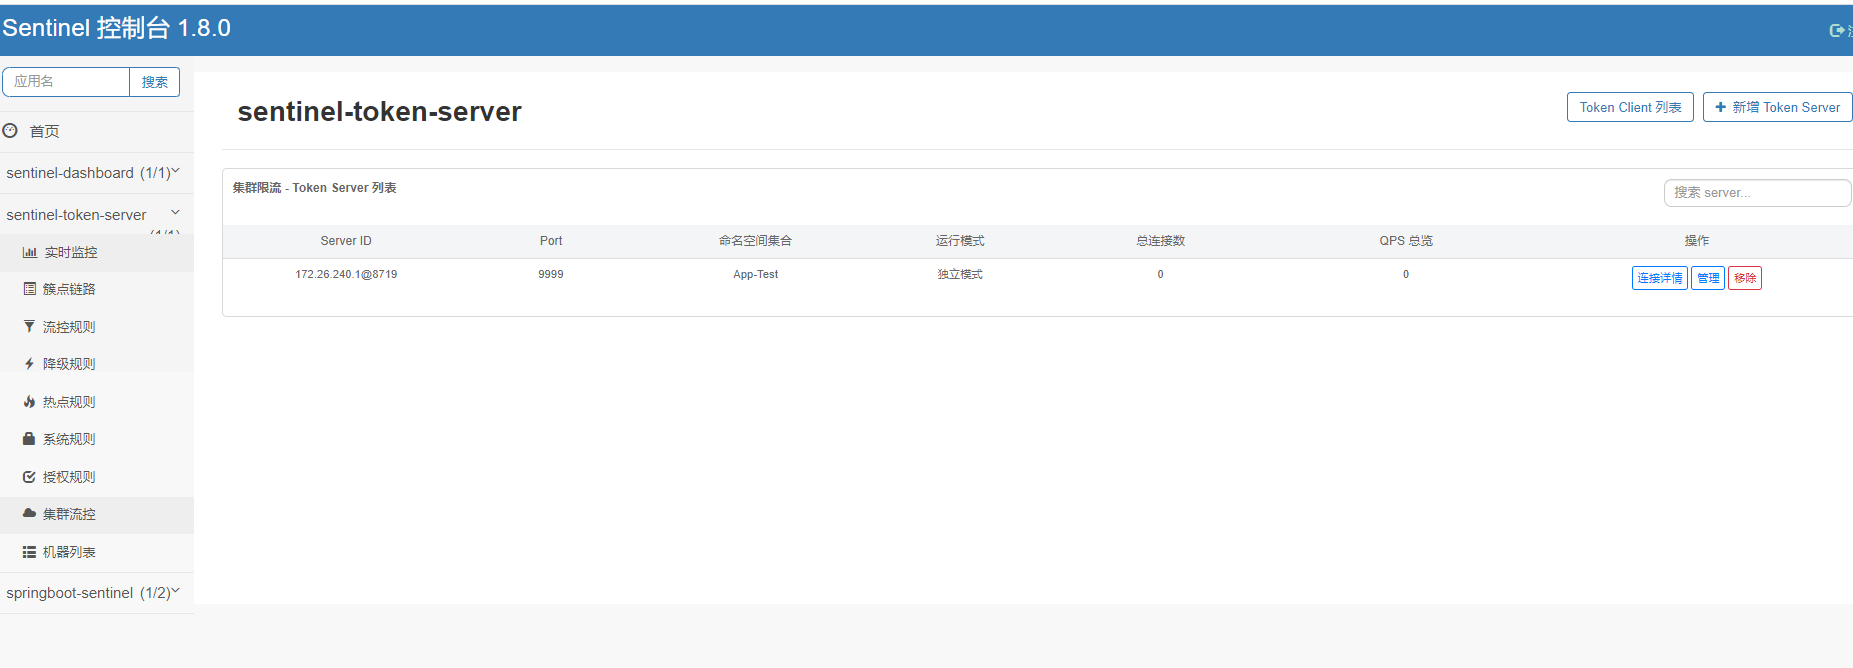
然后启动maven项目运行,就可以发现控制面板上数据上来了
然后来改springboot-sentinel项目,红框内配置删除,因为加载规则改成了要先拿tocker-server信息,所以修改FlowRuleInitFunc类;
public class FlowRuleInitFunc  implements InitFunc {

    private final String nacosAddress="localhost:8848";
    private final String groupId="SENTINEL_GROUP";//nacos分组
    private final String dataId="-flow-rules";//nacos的data Id配置

    private final String clusterServerHost="localhost";
    private final int clusterServerPort=9999;
    private final int requestTimeOut=20000;
    private final String appName="App-Test";

    @Override
    public void init() throws Exception {
       // initFlowRule();
        loadClusterConfig();
        registerFlowRule();
    }

    private static void initFlowRule(){
        List<FlowRule> rules=new ArrayList<> ();
        FlowRule flowRule=new FlowRule();
        flowRule.setResource("doTest"); //针对那个资源设置规则
        flowRule.setGrade( RuleConstant.FLOW_GRADE_QPS);//QPS或者并发数
        flowRule.setCount(5); //QPS=5
        rules.add(flowRule);
        FlowRuleManager.loadRules(rules);
    }
    //加载集群限流配置
    private void loadClusterConfig(){
        ClusterClientAssignConfig assignConfig=new ClusterClientAssignConfig();
        assignConfig.setServerHost(clusterServerHost); //放到配置中心
        assignConfig.setServerPort(clusterServerPort);
        ClusterClientConfigManager.applyNewAssignConfig(assignConfig);
        ClusterClientConfig clientConfig=new ClusterClientConfig();
        clientConfig.setRequestTimeout(requestTimeOut);  //放到配置中心
        ClusterClientConfigManager.applyNewConfig(clientConfig);
    }
    //回退
    private void registerFlowRule(){
        //从远程服务器上加载规则(nacos)
        ReadableDataSource<String, List<FlowRule>> flowRuleDs=
                new NacosDataSource<List<FlowRule>>(nacosAddress,groupId,appName+dataId,
                        source-> JSON.parseObject(source,new TypeReference<List<FlowRule>> (){}));
        FlowRuleManager.register2Property(flowRuleDs.getProperty());
    }
}
因为是集群是根据应用名称统计的,所以修改VM开启两个
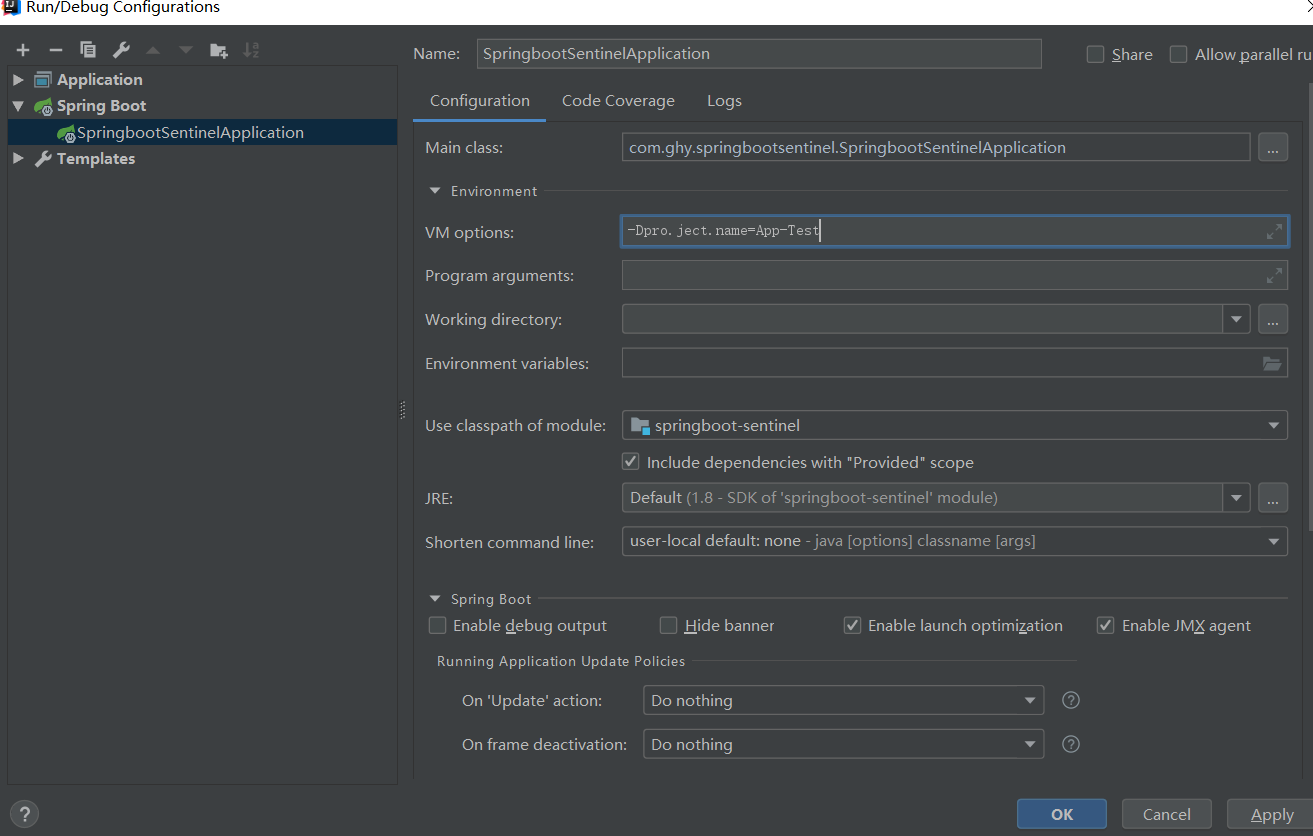
修改启动类,声明状态
@SpringBootApplication
public class SpringbootSentinelApplication {

    public static void main(String[] args) {
        //设置应用状态,表示是客户端
        ClusterStateManager.applyState ( ClusterStateManager.CLUSTER_CLIENT );
//        initFlowRule();
        SpringApplication.run ( SpringbootSentinelApplication.class ,args );
    }
然后启动项目,就完成了集成
git代码:https://gitee.com/TongHuaShuShuoWoDeJieJu/sentinel-token-server.git


