Ansible整合
一、安装Ansible
Ansible官网文档:https://docs.ansible.com
ubuntu 安装ansible
依次执行以下命令,安装ansible:

apt update
apt install software-properties-common
apt-add-repository --yes --update ppa:ansible/ansible
apt install ansible
安装完成后,查看ansible的版本:
ansible --version
mac安装
brew install ansible
或者
pip install ansible
二、创建“密钥对”
Ansible是基于SSH远程管理服务实现远程主机批量管理的
1、注意:这里使用的是root用户,Ubuntu18.04默认root用户没有密码,并且不能使用SSH远程,(需要设置root密码,使用命令:sudo passwd root,需要开启root用户SSH远程权限,在配置文件/etc/ssh/sshd_config里加入PermitRootLogin yes配置,重启SSH服务生效即可)
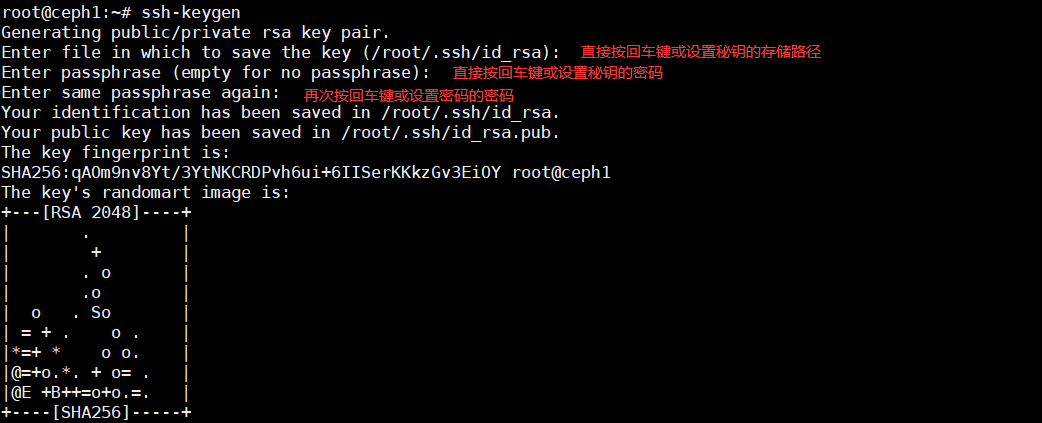
ssh-keygen(也可以使用-t选项指定秘钥的类型,如:ssh-keygen -t rsa或ssh-keygen -t dsa)
/etc/ansible/ansible.cfg # ansible服务配置文件
/etc/ansible/hosts # 主机清单文件,定义可以管理的主机信息
/etc/ansible/roles # 角色配置文件
2、向主机分发公钥
ansible ssh-copy-id root@192.168.37.122
ansible ssh-copy-id root@192.168.37.133
三、环境配置
| 主机名称IP地址 | ||
|---|---|---|
| 主机名称 | 操作系统 | IP地址 |
| Ansible管理端服务器 | mac | 192.168.0.134 |
| Ansible被管理端服务器 | Ubuntu18.04 | 192.168.37.122,192.168.37.133 |
打开配置文件:vim /etc/ansible/hosts
在配置文件最后,输入所有Ansible被管理端服务器的IP地址
[root@server ~]# vim /etc/ansible/hosts
	[web]
	192.168.37.122
	192.168.37.133
四、ansible 常用模块
1、主机连通性测试
我们使用ansible web -m ping命令来进行主机连通性测试,效果如下:
[root@server ~]# ansible web -m ping
192.168.37.122 | SUCCESS => {
    "changed": false,
    "ping": "pong"
}
192.168.37.133 | SUCCESS => {
    "changed": false,
    "ping": "pong"
}
2、command 模块
这个模块可以直接在远程主机上执行命令,并将结果返回本主机。举例如下:
[root@server ~]# ansible web -m command -a 'ss -ntl'
192.168.37.122 | SUCCESS | rc=0 >>
State      Recv-Q Send-Q Local Address:Port               Peer Address:Port
LISTEN     0      128          *:111                      *:*
LISTEN     0      5      192.168.122.1:53                       *:*
LISTEN     0      128          *:22                       *:*
LISTEN     0      128    127.0.0.1:631                      *:*
LISTEN     0      128          *:23000                    *:*
LISTEN     0      100    127.0.0.1:25                       *:*
LISTEN     0      128         :::111                     :::*
LISTEN     0      128         :::22                      :::*
LISTEN     0      128        ::1:631                     :::*
LISTEN     0      100        ::1:25                      :::*

192.168.37.133 | SUCCESS | rc=0 >>
State      Recv-Q Send-Q Local Address:Port               Peer Address:Port
LISTEN     0      128          *:111                      *:*
LISTEN     0      128          *:22                       *:*
LISTEN     0      128    127.0.0.1:631                      *:*
LISTEN     0      128          *:23000                    *:*
LISTEN     0      100    127.0.0.1:25                       *:*
LISTEN     0      128         :::111                     :::*
LISTEN     0      128         :::22                      :::*
LISTEN     0      128        ::1:631                     :::*
LISTEN     0      100        ::1:25                      :::*
下面来看一看该模块下常用的几个命令:
chdir # 在执行命令之前,先切换到该目录
executable # 切换shell来执行命令,需要使用命令的绝对路径
free_form # 要执行的Linux指令,一般使用Ansible的-a参数代替。
creates # 一个文件名,当这个文件存在,则该命令不执行,可以
用来做判断
removes # 一个文件名,这个文件不存在,则该命令不执行
下面我们来看看这些命令的执行效果:
[root@server ~]# ansible web -m command -a 'chdir=/data/ ls'	#先切换到/data/ 目录,再执行“ls”命令
192.168.37.122 | SUCCESS | rc=0 >>
aaa.jpg
fastdfs
mogdata
tmp
web
wKgleloeYoCAMLtZAAAWEekAtkc497.jpg

192.168.37.133 | SUCCESS | rc=0 >>
aaa.jpg
fastdfs
mogdata
tmp
web
wKgleloeYoCAMLtZAAAWEekAtkc497.jpg
[root@server ~]# ansible web -m command -a 'creates=/data/aaa.jpg ls'		#如果/data/aaa.jpg存在,则不执行“ls”命令
192.168.37.122 | SUCCESS | rc=0 >>
skipped, since /data/aaa.jpg exists

192.168.37.133 | SUCCESS | rc=0 >>
skipped, since /data/aaa.jpg exists
[root@server ~]# ansible web -m command -a 'removes=/data/aaa.jpg cat /data/a'		#如果/data/aaa.jpg存在,则执行“cat /data/a”命令
192.168.37.122 | SUCCESS | rc=0 >>
hello

192.168.37.133 | SUCCESS | rc=0 >>
hello
3、shell 模块
shell模块可以在远程主机上调用shell解释器运行命令,支持shell的各种功能,例如管道等。
[root@server ~]# ansible web -m shell -a 'cat /etc/passwd |grep "keer"'
192.168.37.122 | SUCCESS | rc=0 >>
keer:x:10001:1000:keer:/home/keer:/bin/sh

192.168.37.133 | SUCCESS | rc=0 >>
keer:x:10001:10001::/home/keer:/bin/sh
只要是我们的shell命令,都可以通过这个模块在远程主机上运行,这里就不一一举例了。
4、copy 模块
这个模块用于将文件复制到远程主机,同时支持给定内容生成文件和修改权限等。
其相关选项如下:
src#被复制到远程主机的本地文件。可以是绝对路径,也可以是相对路径。如果路径是一个目录,则会递归复制,用法类似于"rsync"
content#用于替换"src",可以直接指定文件的值
dest#必选项,将源文件复制到的远程主机的绝对路径
backup#当文件内容发生改变后,在覆盖之前把源文件备份,备份文件包含时间信息
directory_mode#递归设定目录的权限,默认为系统默认权限
force#当目标主机包含该文件,但内容不同时,设为"yes",表示强制覆盖;设为"no",表示目标主机的目标位置不存在该文件才复制。默认为"yes"
others#所有的 file 模块中的选项可以在这里使用
用法举例如下:
① 复制文件:
[root@server ~]# ansible web -m copy -a 'src=~/hello dest=/data/hello'
192.168.37.122 | SUCCESS => {
    "changed": true,
    "checksum": "22596363b3de40b06f981fb85d82312e8c0ed511",
    "dest": "/data/hello",
    "gid": 0,
    "group": "root",
    "md5sum": "6f5902ac237024bdd0c176cb93063dc4",
    "mode": "0644",
    "owner": "root",
    "size": 12,
    "src": "/root/.ansible/tmp/ansible-tmp-1512437093.55-228281064292921/source",
    "state": "file",
    "uid": 0
}
192.168.37.133 | SUCCESS => {
    "changed": true,
    "checksum": "22596363b3de40b06f981fb85d82312e8c0ed511",
    "dest": "/data/hello",
    "gid": 0,
    "group": "root",
    "md5sum": "6f5902ac237024bdd0c176cb93063dc4",
    "mode": "0644",
    "owner": "root",
    "size": 12,
    "src": "/root/.ansible/tmp/ansible-tmp-1512437093.74-44694985235189/source",
    "state": "file",
    "uid": 0
}
② 给定内容生成文件,并制定权限
[root@server ~]# ansible web -m copy -a 'content="I am keer\n" dest=/data/name mode=666'
192.168.37.122 | SUCCESS => {
    "changed": true,
    "checksum": "0421570938940ea784f9d8598dab87f07685b968",
    "dest": "/data/name",
    "gid": 0,
    "group": "root",
    "md5sum": "497fa8386590a5fc89090725b07f175c",
    "mode": "0666",
    "owner": "root",
    "size": 10,
    "src": "/root/.ansible/tmp/ansible-tmp-1512437327.37-199512601767687/source",
    "state": "file",
    "uid": 0
}
192.168.37.133 | SUCCESS => {
    "changed": true,
    "checksum": "0421570938940ea784f9d8598dab87f07685b968",
    "dest": "/data/name",
    "gid": 0,
    "group": "root",
    "md5sum": "497fa8386590a5fc89090725b07f175c",
    "mode": "0666",
    "owner": "root",
    "size": 10,
	    "src": "/root/.ansible/tmp/ansible-tmp-1512437327.55-218104039503110/source",
    "state": "file",
    "uid": 0
}
我们现在可以去查看一下我们生成的文件及其权限:
[root@server ~]# ansible web -m shell -a 'ls -l /data/'
192.168.37.122 | SUCCESS | rc=0 >>
total 28
-rw-rw-rw-   1 root root   12 Dec  6 09:45 name

192.168.37.133 | SUCCESS | rc=0 >>
total 40
-rw-rw-rw- 1 root     root       12 Dec  5 09:45 name
可以看出我们的name文件已经生成,并且权限为666。
③ 关于覆盖
我们把文件的内容修改一下,然后选择覆盖+备份:
[root@server ~]# ansible web -m copy -a 'content="I am keerya\n" backup=yes dest=/data/name mode=666'
192.168.37.122 | SUCCESS => {
    "backup_file": "/data/name.4394.2017-12-06@09:46:25~",
    "changed": true,
    "checksum": "064a68908ab9971ee85dbc08ea038387598e3778",
    "dest": "/data/name",
    "gid": 0,
    "group": "root",
    "md5sum": "8ca7c11385856155af52e560f608891c",
    "mode": "0666",
    "owner": "root",
    "size": 12,
    "src": "/root/.ansible/tmp/ansible-tmp-1512438383.78-228128616784888/source",
    "state": "file",
    "uid": 0
}
192.168.37.133 | SUCCESS => {
    "backup_file": "/data/name.5962.2017-12-05@09:46:24~",
    "changed": true,
    "checksum": "064a68908ab9971ee85dbc08ea038387598e3778",
    "dest": "/data/name",
    "gid": 0,
    "group": "root",
    "md5sum": "8ca7c11385856155af52e560f608891c",
    "mode": "0666",
    "owner": "root",
    "size": 12,
    "src": "/root/.ansible/tmp/ansible-tmp-1512438384.0-170718946740009/source",
    "state": "file",
    "uid": 0
}
现在我们可以去查看一下:
[root@server ~]# ansible web -m shell -a 'ls -l /data/'
192.168.37.122 | SUCCESS | rc=0 >>
total 28
-rw-rw-rw-   1 root root   12 Dec  6 09:46 name
-rw-rw-rw-   1 root root   10 Dec  6 09:45 name.4394.2017-12-06@09:46:25~

192.168.37.133 | SUCCESS | rc=0 >>
total 40
-rw-rw-rw- 1 root     root       12 Dec  5 09:46 name
-rw-rw-rw- 1 root     root       10 Dec  5 09:45 name.5962.2017-12-05@09:46:24~
可以看出,我们的源文件已经被备份,我们还可以查看一下name文件的内容:
[root@server ~]# ansible web -m shell -a 'cat /data/name'
192.168.37.122 | SUCCESS | rc=0 >>
I am keerya

192.168.37.133 | SUCCESS | rc=0 >>
I am keerya
证明,这正是我们新导入的文件的内容。
5、file 模块
该模块主要用于设置文件的属性,比如创建文件、创建链接文件、删除文件等。
下面是一些常见的命令:
force#需要在两种情况下强制创建软链接,一种是源文件不存在,但之后会建立的情况下;另一种是目标软链接已存在,需要先取消之前的软链,然后创建新的软链,有两个选项:yes|no
group#定义文件/目录的属组。后面可以加上mode:定义文件/目录的权限
owner#定义文件/目录的属主。后面必须跟上path:定义文件/目录的路径
recurse#递归设置文件的属性,只对目录有效,后面跟上src:被链接的源文件路径,只应用于state=link的情况
dest#被链接到的路径,只应用于state=link的情况
state#状态,有以下选项:
directory:如果目录不存在,就创建目录
file:即使文件不存在,也不会被创建
link:创建软链接
hard:创建硬链接
touch:如果文件不存在,则会创建一个新的文件,如果文件或目录已存在,则更新其最后修改时间
absent:删除目录、文件或者取消链接文件
用法举例如下:
① 创建目录:
[root@server ~]# ansible web -m file -a 'path=/data/app state=directory'
192.168.37.122 | SUCCESS => {
    "changed": true,
    "gid": 0,
    "group": "root",
    "mode": "0755",
    "owner": "root",
    "path": "/data/app",
    "size": 6,
    "state": "directory",
    "uid": 0
}
192.168.37.133 | SUCCESS => {
    "changed": true,
    "gid": 0,
    "group": "root",
    "mode": "0755",
    "owner": "root",
    "path": "/data/app",
    "size": 4096,
    "state": "directory",
    "uid": 0
}
我们可以查看一下:
[root@server ~]# ansible web -m shell -a 'ls -l /data'
192.168.37.122 | SUCCESS | rc=0 >>
total 28
drwxr-xr-x   2 root root    6 Dec  6 10:21 app

192.168.37.133 | SUCCESS | rc=0 >>
total 44
drwxr-xr-x 2 root     root     4096 Dec  5 10:21 app
可以看出,我们的目录已经创建完成。
② 创建链接文件
[root@server ~]# ansible web -m file -a 'path=/data/bbb.jpg src=aaa.jpg state=link'
192.168.37.122 | SUCCESS => {
    "changed": true,
    "dest": "/data/bbb.jpg",
    "gid": 0,
    "group": "root",
    "mode": "0777",
    "owner": "root",
    "size": 7,
    "src": "aaa.jpg",
    "state": "link",
    "uid": 0
}
192.168.37.133 | SUCCESS => {
    "changed": true,
    "dest": "/data/bbb.jpg",
    "gid": 0,
    "group": "root",
    "mode": "0777",
    "owner": "root",
    "size": 7,
    "src": "aaa.jpg",
    "state": "link",
    "uid": 0
}
我们可以去查看一下:
[root@server ~]# ansible web -m shell -a 'ls -l /data'
192.168.37.122 | SUCCESS | rc=0 >>
total 28
-rw-r--r--   1 root root 5649 Dec  5 13:49 aaa.jpg
lrwxrwxrwx   1 root root    7 Dec  6 10:25 bbb.jpg -> aaa.jpg

192.168.37.133 | SUCCESS | rc=0 >>
total 44
-rw-r--r-- 1 root     root     5649 Dec  4 14:44 aaa.jpg
lrwxrwxrwx 1 root     root        7 Dec  5 10:25 bbb.jpg -> aaa.jpg
我们的链接文件已经创建成功。
③ 删除文件
[root@server ~]# ansible web -m file -a 'path=/data/a state=absent'
192.168.37.122 | SUCCESS => {
    "changed": true,
    "path": "/data/a",
    "state": "absent"
}
192.168.37.133 | SUCCESS => {
    "changed": true,
    "path": "/data/a",
    "state": "absent"
}
我们可以查看一下:
[root@server ~]# ansible web -m shell -a 'ls /data/a'
192.168.37.122 | FAILED | rc=2 >>
ls: cannot access /data/a: No such file or directory

192.168.37.133 | FAILED | rc=2 >>
ls: cannot access /data/a: No such file or directory
发现已经没有这个文件了。
6、fetch 模块
该模块用于从远程某主机获取(复制)文件到本地。
有两个选项:
dest:用来存放文件的目录
src:在远程拉取的文件,并且必须是一个file,不能是目录
具体举例如下:
[root@server ~]# ansible web -m fetch -a 'src=/data/hello dest=/data'
192.168.37.122 | SUCCESS => {
    "changed": true,
    "checksum": "22596363b3de40b06f981fb85d82312e8c0ed511",
    "dest": "/data/192.168.37.122/data/hello",
    "md5sum": "6f5902ac237024bdd0c176cb93063dc4",
    "remote_checksum": "22596363b3de40b06f981fb85d82312e8c0ed511",
    "remote_md5sum": null
}
192.168.37.133 | SUCCESS => {
    "changed": true,
    "checksum": "22596363b3de40b06f981fb85d82312e8c0ed511",
    "dest": "/data/192.168.37.133/data/hello",
    "md5sum": "6f5902ac237024bdd0c176cb93063dc4",
    "remote_checksum": "22596363b3de40b06f981fb85d82312e8c0ed511",
    "remote_md5sum": null
}
我们可以在本机上查看一下文件是否复制成功。要注意,文件保存的路径是我们设置的接收目录下的被管制主机ip目录下:
[root@server ~]# cd /data/
[root@server data]# ls
1  192.168.37.122  192.168.37.133  fastdfs  web
[root@server data]# cd 192.168.37.122
[root@server 192.168.37.122]# ls
data
[root@server 192.168.37.122]# cd data/
[root@server data]# ls
hello
[root@server data]# pwd
/data/192.168.37.122/data
7、cron 模块
该模块适用于管理cron计划任务的。
其使用的语法跟我们的crontab文件中的语法一致。

 浙公网安备 33010602011771号