Spring Cloud 学习笔记一
一、spring cloud 搭建注册中心(Eureka server)
1、spring cloud中提供了多种分步式服务组件,其都依赖于注册中心(eureka),注册中心的服务者与发现者都通过Eureka server相互通信,服务者与发现者都是Eureka client,同时注册到Eureka server 中,然后通过服务名相互调用接口,故我们需要首先搭建注册中心(Eureka Server),以下以inlij idea 为例:
a、inlij idea新建项目->选择spring initializer->next->next->选择web web、cloud discovery Eureka server->完成
b、打开项目pom文件,可以看到已自动添加Eureka server服务:
<dependency>
<groupId>org.springframework.boot</groupId>
<artifactId>spring-boot-starter-web</artifactId>
</dependency>
<dependency>
<groupId>org.springframework.cloud</groupId>
<artifactId>spring-cloud-starter-netflix-eureka-server</artifactId>
</dependency>
C、打开application.properties文件,配置注册中心地址,如下:
spring.application.name=euraka-service
server.port=8088
eureka.instance.hostname=localhost
eureka.client.register-with-eureka=false
eureka.client.fetch-registry=false
eureka.client.serviceUrl.defaultZone=http://${eureka.instance.hostname}:${server.port}/eureka/
D、配置运行项目,打开localhost:8088/, 出现发下界面表示成功:
@SpringBootApplication
@EnableEurekaServer
public class EurakaServiceApplication {
public static void main(String[] args) {
SpringApplication.run(EurakaServiceApplication.class, args);
}
}

注:上面已注册了client,第一次运行应只注册了自已
1、搭建Eureka client(服务提供者)
A、inlij idea新建项目->选择spring initializer->next->next->选择web web、cloud discovery Eureka discovery->完成
B、打开项目pom文件,可以看到已自动添加Eureka client服务:
<dependency>
<groupId>org.springframework.boot</groupId>
<artifactId>spring-boot-starter-web</artifactId>
</dependency>
<dependency>
<groupId>org.springframework.cloud</groupId>
<artifactId>spring-cloud-starter-netflix-eureka-client</artifactId>
</dependency>
C、打开application.properties文件,配置注册中心地址,如下:
spring.application.name=euraka-client
server.port=8089
eureka.instance.hostname=localhost //注册中心地址,这里是本地
eureka.client.serviceUrl.defaultZone=http://${eureka.instance.hostname}:8088/eureka/
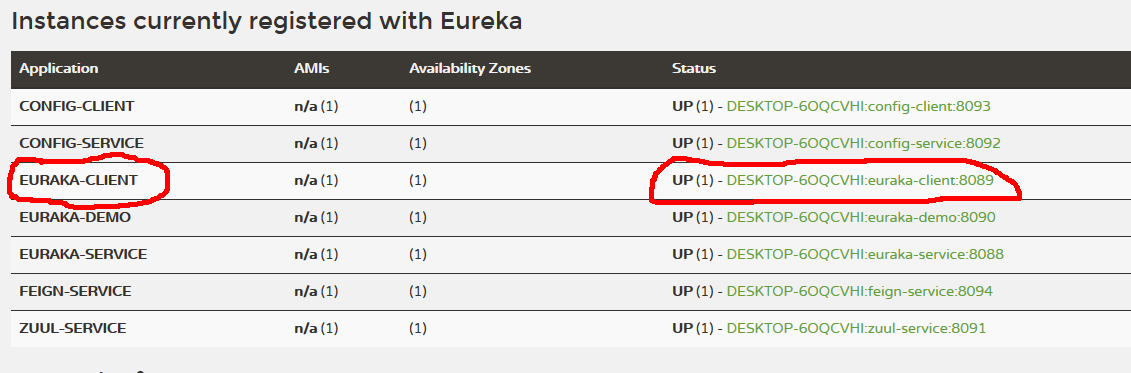
C、配置运行项目后,可在注册中心务中看到,如下图:
@SpringBootApplication
@EnableEurekaClient
public class EurekaClientApplication {
public static void main(String[] args) {
SpringApplication.run(EurekaClientApplication.class, args);
}
}
1、搭建注册中心(服务发现者)Eureka client,创建项目如2所示,所有都不变,然后运行如下图:
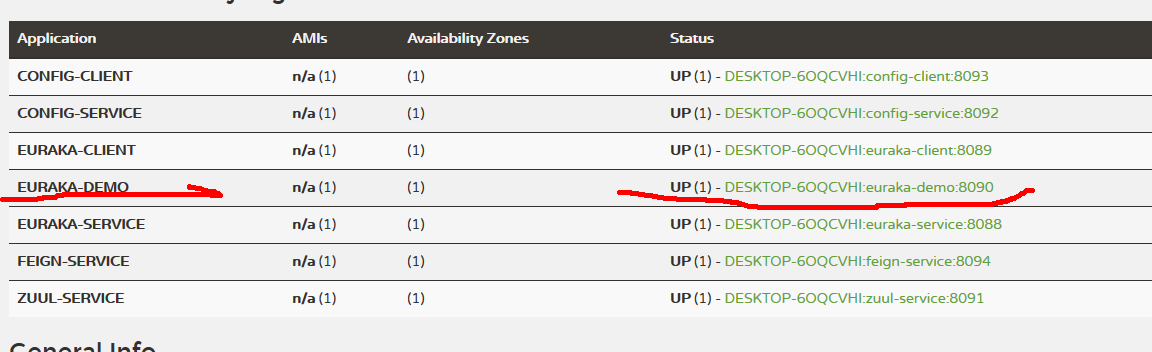
注:现在eureka demo 就可以访问Eureka client 中的接口了,后面我们将使用feign来访问
二、使用feign来现实访问服务者之间的接口
1、feign是spring cloud 中用于服务之间访问最简单的方式,使用起来非常方便,用使接口加注解就可完成服务间调用,当然这里不讲原理,只讲用法
A、inlij idea新建项目->选择spring initializer->next->next->选择web web、Cloud routing feign->完成。
B、打开项目pom文件,可以看到已自动添加feign服务:
<dependency>
<groupId>org.springframework.boot</groupId>
<artifactId>spring-boot-starter-web</artifactId>
</dependency>
<dependency>
<groupId>org.springframework.cloud</groupId>
<artifactId>spring-cloud-starter-netflix-eureka-client</artifactId>
</dependency>
<dependency>
<groupId>org.springframework.cloud</groupId>
<artifactId>spring-cloud-starter-openfeign</artifactId>
</dependency>
C、打开application.properties文件,配置注册中心地址,如下:
spring.application.name=feign-service
server.port=8094
eureka.instance.hostname=localhost
eureka.client.serviceUrl.defaultZone=http://${eureka.instance.hostname}:8088/eureka/
D、配置feign,eureka client
@SpringBootApplication
@EnableEurekaClient
@EnableFeignClients
public class FeignServiceApplication {
public static void main(String[] args) {
SpringApplication.run(FeignServiceApplication.class, args);
}
}
E、添加接口,并使用注解配置访问eureka client 服务,调用getdemoData方法
@FeignClient(value = "euraka-client")
public interface feignInterface {
@RequestMapping("/getdemoData")
public String getEurekaClient();
}
F、编写controller,如下图
@RestController
public class feignContrller {
@Autowired
private feignInterface feignInterfaces;
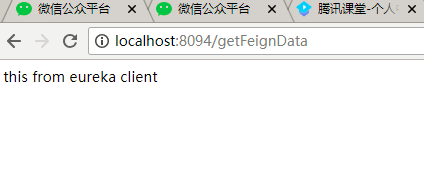
@GetMapping("/getFeignData")
public String getFeignData(){
return feignInterfaces.getEurekaClient();
}
}
G、运行访问是否成功
三、注册配置中心
1、配置中心是用来统一管理配置,配置文件可以放在git上,也可以放在本地,也可以布署在另一台服务器上,这样我们在更改配置而不影响原有代码,也不必重新打包项目
2、开始搭建配置中心服务项目(config server)
A、inlij idea新建项目->选择spring initializer->next->next->选择web web、cloud cofing config server->完成
A、打开pom文件,查看引用
<dependency>
<groupId>org.springframework.boot</groupId>
<artifactId>spring-boot-starter-web</artifactId>
</dependency>
<dependency>
<groupId>org.springframework.cloud</groupId>
<artifactId>spring-cloud-config-server</artifactId>
</dependency>
<dependency>
<groupId>org.springframework.cloud</groupId>
<artifactId>spring-cloud-starter-netflix-eureka-server</artifactId>
</dependency>
C、打开application.properties文件,配置注册中心地址,如下:
spring.application.name=config-service
server.port=8092
eureka.instance.hostname=localhost
eureka.client.serviceUrl.defaultZone=http://${eureka.instance.hostname}:8088/eureka/
spring.profiles.active = native
spring.cloud.config.server.native.searchLocations=classpath:/resources/config-service/
注:这里首先把项目注册到注册中心,然后开启本地配置中心,配置本地路径
D、编写本地配置文件resources\config-service\config-dev.yml
config:
userName: whc
password: 123456
E、注解配置中心
@SpringBootApplication
@EnableEurekaClient
@EnableConfigServer
public class ConfigServiceApplication {
public static void main(String[] args) {
SpringApplication.run(ConfigServiceApplication.class, args);
}
}
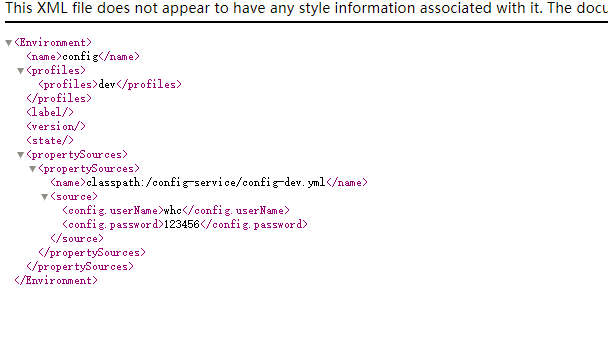
F、运行配置中心,输入如下地址:
http://localhost:8092/config/dev
结果如下,表示成功:
2、注册配置中心客户端(config client)
A、inlij idea新建项目->选择spring initializer->next->next->选择web web、cloud cofing config Client->完成
B、打开pom文件,查看配置引用
<dependency>
<groupId>org.springframework.boot</groupId>
<artifactId>spring-boot-starter-web</artifactId>
</dependency>
<dependency>
<groupId>org.springframework.cloud</groupId>
<artifactId>spring-cloud-starter-config</artifactId>
</dependency>
<dependency>
<groupId>org.springframework.cloud</groupId>
<artifactId>spring-cloud-starter-netflix-eureka-client</artifactId>
</dependency>
A、由于spring cloud会先去读bootstrap.properties文件,不能直接配置applicat
ion.properties文件,我们需要新建bootstrap.properties文件,配置如下:
spring.application.name=config-client
server.port=8093
eureka.instance.hostname=localhost
eureka.client.serviceUrl.defaultZone=http://${eureka.instance.hostname}:8088/eureka/
spring.cloud.config.enabled=true
spring.cloud.config.discovery.enabled=true
spring.cloud.config.discovery.serviceId=config-service
spring.cloud.config.name=config
spring.cloud.config.profile=dev
注:首先配置了注册中心,然后配置了配置中心项目的serviceId,指明了配置文件名name,再指明了配置环境dev,spring cloud 会自动去找config-service服务下的配置文件config-dev.yml文件
B、配置注解,如下:
@SpringBootApplication
@EnableEurekaClient
public class ConfigClientApplication {
public static void main(String[] args) {
SpringApplication.run(ConfigClientApplication.class, args);
}
}
注:发现我们只配置了注册中心
C、编写读取配置文件controller,如下:
@RestController
public class demoController {
@Value("${config.userName}")
private String userName;
@Value("${config.password}")
private String userPwd;
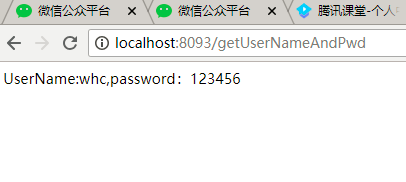
@GetMapping("/getUserNameAndPwd")
public String getUserNameAndPwd(){
return "UserName:"+userName+",password:"+userPwd;
}
}
D、运行结果如下:
四、配置网关(zuul-service)
1、网关是spring cloud中很重要的角色,它可以解决跨域的问题;网关可以把请求映射到多个地址,通过项目名来区分请求,并转发给对应的服务
A、inlij idea新建项目->选择spring initializer->next->next->选择web web、cloud routing Zuul->完成
B、打开pom文件,查看引用
<dependency>
<groupId>org.springframework.boot</groupId>
<artifactId>spring-boot-starter-web</artifactId>
</dependency>
<dependency>
<groupId>org.springframework.cloud</groupId>
<artifactId>spring-cloud-starter-netflix-eureka-client</artifactId>
</dependency>
<dependency>
<groupId>org.springframework.cloud</groupId>
<artifactId>spring-cloud-starter-netflix-zuul</artifactId>
</dependency>
C、打开application.properties文件,配置注册中心地址,如下:
spring.application.name=zuul-service
server.port=8091
eureka.instance.hostname=localhost
eureka.client.serviceUrl.defaultZone=http://${eureka.instance.hostname}:8088/eureka/
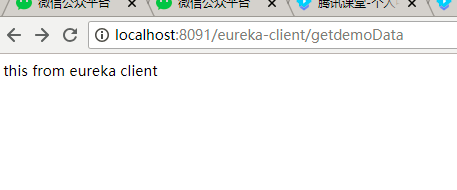
zuul.routes.api-a.path=/eureka-client/**
zuul.routes.api-a.serviceId=euraka-client
zuul.routes.api-b.path=/eureka-demo/**
zuul.routes.api-b.serviceId=euraka-demo
注:首先配置注册中心,然后配置zuul 路由项目,就可以完成网关映射
D、注解配置
@SpringBootApplication
@EnableEurekaClient
@EnableZuulProxy
public class ZuulServiceApplication {
public static void main(String[] args) {
SpringApplication.run(ZuulServiceApplication.class, args);
}
}
E、运行查看结果

 浙公网安备 33010602011771号