springboot高级(条件注解 Enable*注解 自动配置 事件监听 监控actuator)
ConditionalOnProperty:判断配置文件中是否有对应属性和值才初始化Bean
ConditionalOnClass:判断环境中是否有对应字节码文件才初始化Bean
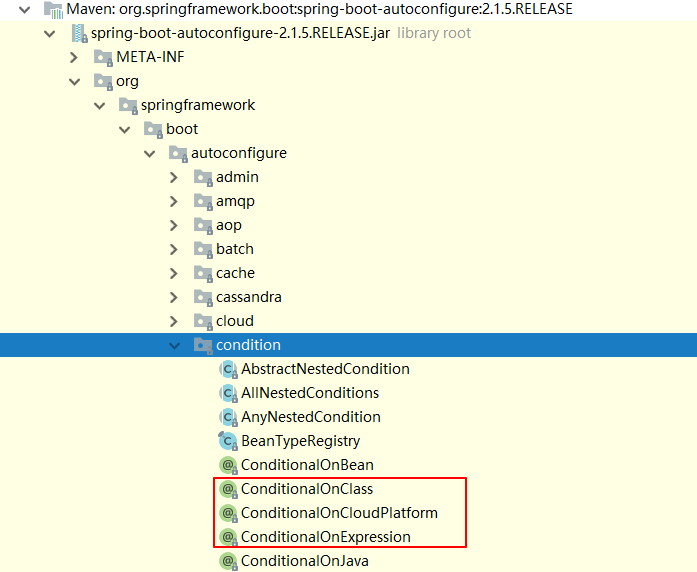
条件注解源码位置:

示例:当配置文件中有 xin = laoyang 时,才创建User对象的Bean。
@Configuration
public class UserConfig {

    @Bean
    @ConditionalOnProperty(name = "xin",havingValue = "laoyang")
    public User user2(){
        return new User();
    }

}
2.SpringBoot 切换内置的web容器:
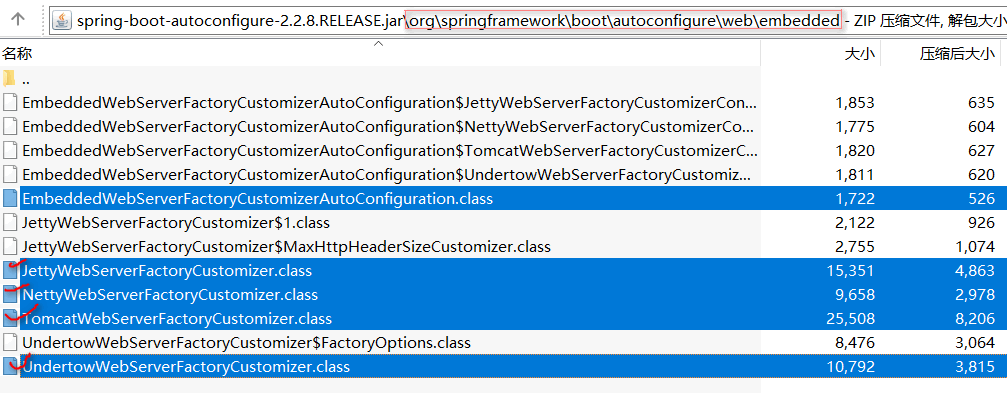
springboot内置了4种web容器可供切换 spring-boot-autoconfigure-2.2.8.RELEASE.jar

切换方式: 示例切换到jetty容器
添加排除时,也可以在org.springframework.boot右键Diagrams-->Show Dependencies...找到spring-boot-starter-tomcat右键Exclude
       <dependency>
            <groupId>org.springframework.boot</groupId>
            <artifactId>spring-boot-starter-web</artifactId>
            <!--排除tomcat依赖-->
            <exclusions>
                <exclusion>
                    <artifactId>spring-boot-starter-tomcat</artifactId>
                    <groupId>org.springframework.boot</groupId>
                </exclusion>
            </exclusions>
        </dependency>

        <!--引入jetty的依赖-->
        <dependency>
            <artifactId>spring-boot-starter-jetty</artifactId>
            <groupId>org.springframework.boot</groupId>
        </dependency>
3.SpringBoot Enable注解原理:
三种解决方案:
1.使用@ComponentScan扫描com.laoyang.config包
2.可以使用@Import注解,加载类。这些类都会被Spring创建,并放入IOC容器
3.可以对Import注解进行封装,写成EnableXXX。
Import 4种用法
- @EnableAutoConfiguration 注解内部使用 @Import(AutoConfigurationImportSelector.**class**)来加载配置类。
- 配置文件位置:META-INF/spring.factories,该配置文件中定义了大量的配置类,当 SpringBoot 应用启动时,会自动加载这些配置类,初始化Bean
- 并不是所有的Bean都会被初始化,在配置类中使用Condition来加载满足条件的Bean

我们可以在resource目录下创建META-INF文件夹并创建spring.factories 注意:”\ “是换行使用的
如:
org.springframework.boot.autoconfigure.EnableAutoConfiguration=\
com.laoyang.redis.config.RedisAutoConfiguration
4.SpringBoot 事件监听:
-
ApplicationContextInitializer、
-
SpringApplicationRunListener、
-
CommandLineRunner、
-
ApplicationRunner
@Component
public class MyCommandLineRunner implements CommandLineRunner {
    @Override
    public void run(String... args) throws Exception {
        System.out.println("CommandLineRunner...run");
        System.out.println(Arrays.asList(args));
    }
}
MyApplicationContextInitializer的使用要在resource文件夹下添加META-INF/spring.factories
org.springframework.context.ApplicationContextInitializer=\
com.itheima.springbootlistener.listener.MyApplicationContextInitializer
@Component
public class MyApplicationContextInitializer implements ApplicationContextInitializer {
    @Override
    public void initialize(ConfigurableApplicationContext applicationContext) {
        System.out.println("ApplicationContextInitializer....initialize");
    }
}
public class MySpringApplicationRunListener implements SpringApplicationRunListener {

    public MySpringApplicationRunListener(SpringApplication application, String[] args) {
    }

    @Override
    public void starting() {
        System.out.println("starting...项目启动中");
    }

    @Override
    public void environmentPrepared(ConfigurableEnvironment environment) {
        System.out.println("environmentPrepared...环境对象开始准备");
    }

    @Override
    public void contextPrepared(ConfigurableApplicationContext context) {
        System.out.println("contextPrepared...上下文对象开始准备");
    }

    @Override
    public void contextLoaded(ConfigurableApplicationContext context) {
        System.out.println("contextLoaded...上下文对象开始加载");
    }

    @Override
    public void started(ConfigurableApplicationContext context) {
        System.out.println("started...上下文对象加载完成");
    }

    @Override
    public void running(ConfigurableApplicationContext context) {
        System.out.println("running...项目启动完成,开始运行");
    }

    @Override
    public void failed(ConfigurableApplicationContext context, Throwable exception) {
        System.out.println("failed...项目启动失败");
    }
}
<dependency> <groupId>org.springframework.boot</groupId> <artifactId>spring-boot-starter-actuator</artifactId> </dependency>
②访问
spring-boot-admin 提供了图形化的方式查看上述的一些信息。
    <dependency>
            <groupId>de.codecentric</groupId>
            <artifactId>spring-boot-admin-starter-server</artifactId>
    </dependency>
在引导类上启用监控功能@EnableAdminServer
    <dependency>
            <groupId>de.codecentric</groupId>
            <artifactId>spring-boot-admin-starter-client</artifactId>
    </dependency>
配置相关信息
# 执行admin.server地址
spring.boot.admin.client.url=http://localhost:9000

management.endpoint.health.show-details=always
management.endpoints.web.exposure.include=*
启动server和client服务,访问server即可。
当然,ieda在控制台旁边的Endpoints也能看到这些相关信息.


未经作者 https://www.cnblogs.com/xin1006/ 梦相随1006 同意,不得擅自转载本文,否则后果自负


