Zabbix安装部署
环境准备
- OS:CentOS 7.2 64bit
- Zabbix版本:3.0.12
- MySQL版本:5.6
注意:zabbix3.0相关要求 mysql5.0以上版本、apache1.3以上版本、php5.4以上版本。
版本选择
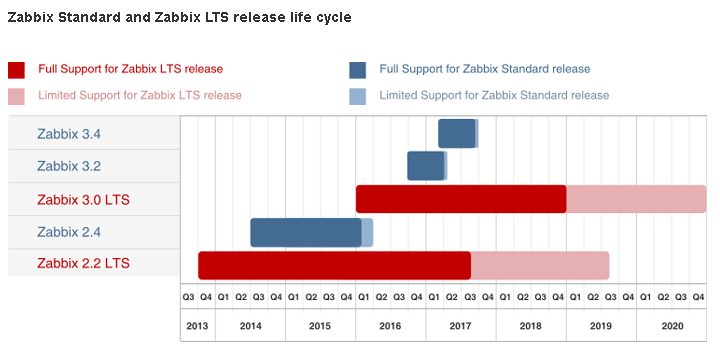
在版本选择建议选择官方技术支持时间较长(LTS)的稳定版本,从上图我我们可以看到没有最新最稳定的是Zabbix3.0
About Zabbix LTS

LTS stands for "Long Term Support". Zabbix LTS version is released every year and a half (1,5) and offers Zabbix customers Support services for five (5) years:

3 years of Full support – support of general, critical and security issues fixing
2 additional years of Limited Support – support of critical and security issues only
安装步骤
一,关闭selinux和iptables
[root@linux-node2 ~]# systemctl stop firewalld.service
[root@linux-node2 ~]# setenforce 0
setenforce: SELinux is disabled
二,安装Zabbix rpm包仓库
[root@linux-node2 ~]# rpm -vhi http://repo.zabbix.com/zabbix/3.0/rhel/7/x86_64/zabbix-release-3.0-1.el7.noarch.rpm
三,安装zabbix-server-mysql和zabbix-web-mysql
[root@linux-node2 ~]# yum install -y zabbix-server-mysql zabbix-web-mysql
四,安装并且启动mysql5.6及初始化数据库信息
[root@linux-node2 ~]# rpm -ivh http://repo.mysql.com/yum/mysql-5.6-community/el/6/x86_64/mysql-community-release-el6-5.noarch.rpm
[root@linux-node2 ~]# yum install -y mysql-community-server
[root@linux-node2 ~]# systemctl start mysqld
[root@linux-node2 ~]# /sbin/chkconfig mysqld on #开机启动
[root@linux-node2 ~]# mysql_secure_installation #初始化数据库信息
...
五,创建zabbix数据库,创建zabbix账号
[root@linux-node2 ~]# mysql -uroot -p
...
mysql>  create database zabbix character set utf8 collate utf8_bin;
Query OK, 1 row affected (0.00 sec)

mysql> grant all privileges on zabbix.* to 'zabbix'@'localhost' identified by 'zabbix';
Query OK, 0 rows affected (0.00 sec)

mysql> flush privileges;
Query OK, 0 rows affected (0.01 sec)
六,导入默认的zabbix数据库信息
[root@linux-node2 zabbix-server-mysql-3.0.12]# zcat /usr/share/doc/zabbix-server-mysql-3.0.12/create.sql.gz | mysql zabbix -uzabbix -pzabbix
七,修改zabbix_server.conf的配置文件
[root@linux-node2 ~]# grep ^DB /etc/zabbix/zabbix_server.conf
DBHost=localhost
DBName=zabbix
DBUser=zabbix
DBPassword=zabbix
八,修改配置文件/etc/httpd/conf.d/zabbix.conf,时区改成 Asia/Shanghai
php_value max_execution_time 300
php_value memory_limit 128M
php_value post_max_size 16M
php_value upload_max_filesize 2M
php_value max_input_time 300
php_value always_populate_raw_post_data -1
php_value date.timezone Asia/Shanghai
九,启动apache/zabbix-server服务并设置为开机启动
[root@linux-node2 ~]# systemctl start httpd
[root@linux-node2 ~]# systemctl enable httpd
[root@linux-node2 ~]# netstat -an |grep 80
tcp        0      0 192.168.56.11:80        0.0.0.0:*               LISTEN
[root@linux-node2 ~]# systemctl start zabbix-server
[root@linux-node2 ~]# systemctl enable zabbix-server
查看zabbix-server日志

[root@linux-node1 ~]# tailf  /var/log/zabbix/zabbix_server.log

  6516:20171029:091122.131 Starting Zabbix Server. Zabbix 3.0.12 (revision 73586).
  6516:20171029:091122.131 ****** Enabled features ******
  6516:20171029:091122.131 SNMP monitoring:           YES
  6516:20171029:091122.131 IPMI monitoring:           YES
  6516:20171029:091122.131 Web monitoring:            YES
  6516:20171029:091122.131 VMware monitoring:         YES
  6516:20171029:091122.131 SMTP authentication:       YES
  6516:20171029:091122.131 Jabber notifications:      YES
  6516:20171029:091122.131 Ez Texting notifications:  YES
  6516:20171029:091122.131 ODBC:                      YES
  6516:20171029:091122.131 SSH2 support:              YES
  6516:20171029:091122.131 IPv6 support:              YES
  6516:20171029:091122.131 TLS support:               YES
zabbix-server的web目录

[root@linux-node1 zabbix]# ls /usr/share/zabbix
actionconf.php                 app                 chart.php            hostgroups.php               index.php           popup_media.php    scripts_exec.php  tr_events.php
adm.gui.php                    applications.php    charts.php           hostinventoriesoverview.php  items.php           popup.php          search.php        trigger_prototypes.php
adm.housekeeper.php            audio               conf                 hostinventories.php          js                  popup_right.php    services.php      triggers.php
adm.iconmapping.php            auditacts.php       conf.import.php      host_prototypes.php          jsLoader.php        popup_trexpr.php   setup.php         tr_logform.php
adm.images.php                 auditlogs.php       dashconf.php         host_screen.php              jsrpc.php           profile.php        slideconf.php     tr_status.php
adm.macros.php                 authentication.php  discoveryconf.php    hosts.php                    latest.php          queue.php          slides.php        tr_testexpr.php
adm.other.php                  browserwarning.php  disc_prototypes.php  httpconf.php                 local               report2.php        srv_status.php    usergrps.php
adm.regexps.php                chart2.php          events.php           httpdetails.php              locale              report4.php        styles            users.php
adm.triggerdisplayoptions.php  chart3.php          favicon.ico          image.php                    maintenance.php     robots.txt         sysmap.php        zabbix.php
adm.triggerseverities.php      chart4.php          fonts                images                       map.import.php      screenconf.php     sysmaps.php
adm.valuemapping.php           chart5.php          graphs.php           img                          map.php             screenedit.php     templates.php
adm.workingtime.php            chart6.php          history.php          imgstore.php                 overview.php        screen.import.php  toptriggers.php
api_jsonrpc.php                chart7.php          host_discovery.php   include                      popup_httpstep.php  screens.php        tr_comments.php
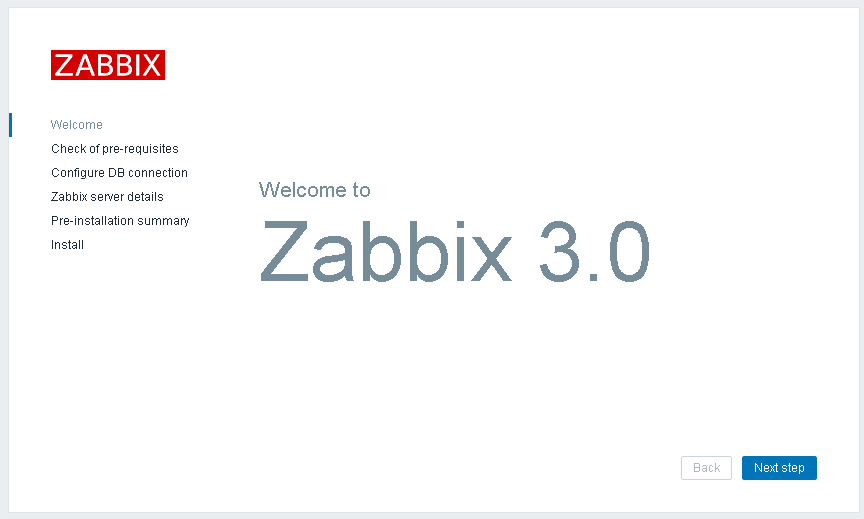
十,访问网站,例如:http://本机IP/zabbix,如下图所示:
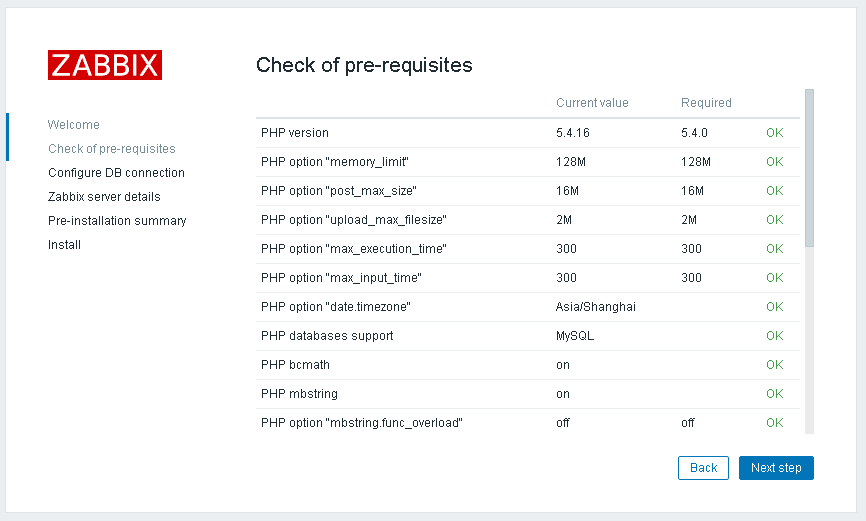
十一,选择下一步,Check of pre-requisites,如图所示:
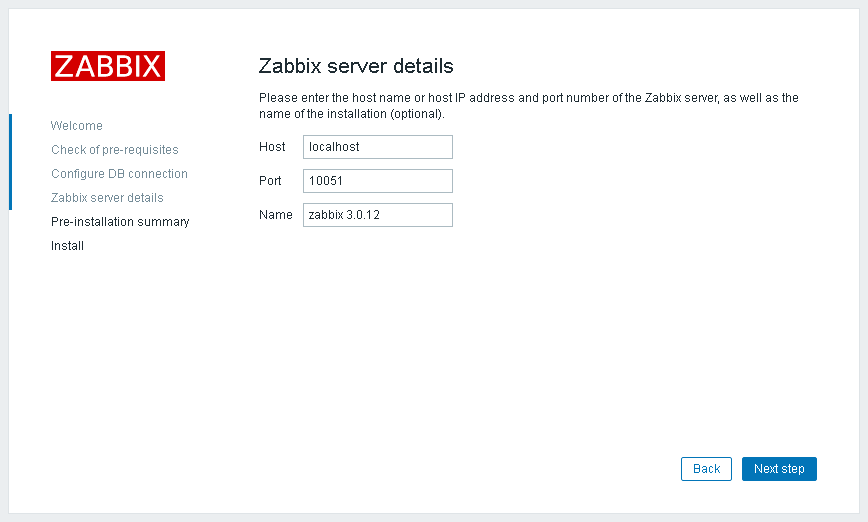
十二,选择下一步,配置zabbix server detail,如下图所示:
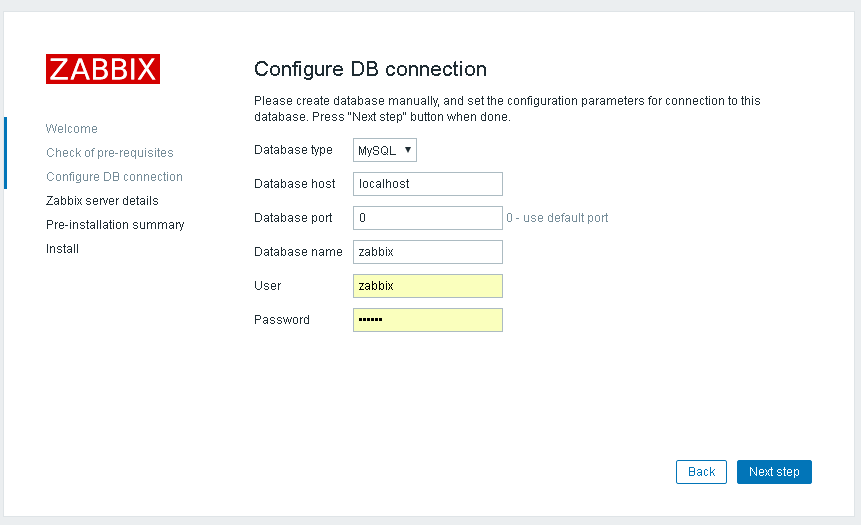
十三,选择下一步,配置zabbix server detail,如下图所示:
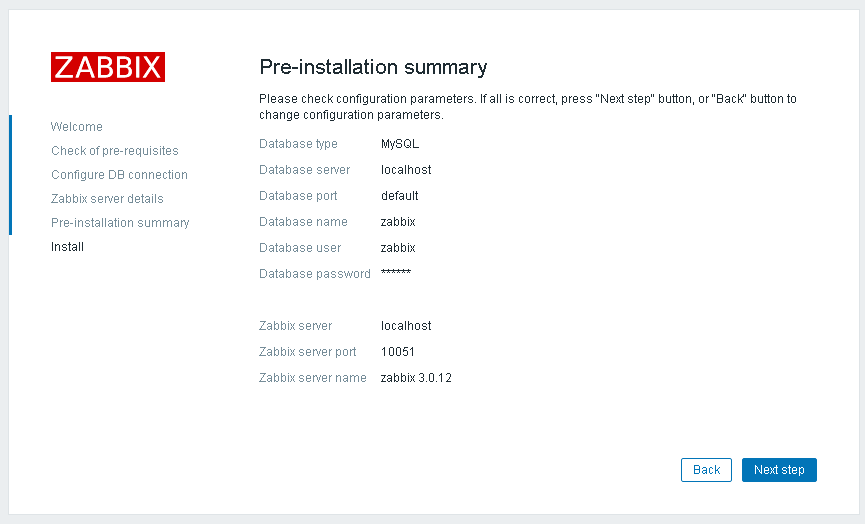
十四:点击下一步,便完成安装,安装完成的界面如下图所示:
十五,安装完成,如下图所示:
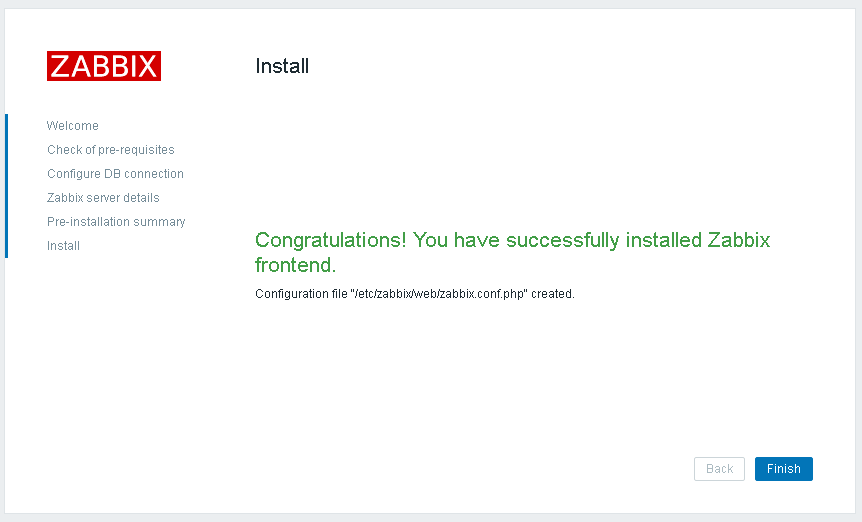
根据提示可以看到上面图形界面的操作都写到一个配置文件中
[root@linux-node1 zabbix]# more /etc/zabbix/web/zabbix.conf.php
<?php
// Zabbix GUI configuration file.
global $DB;

$DB['TYPE']     = 'MYSQL';
$DB['SERVER']   = 'localhost';
$DB['PORT']     = '0';
$DB['DATABASE'] = 'zabbix';
$DB['USER']     = 'zabbix';
$DB['PASSWORD'] = '123456';

// Schema name. Used for IBM DB2 and PostgreSQL.
$DB['SCHEMA'] = '';

$ZBX_SERVER      = 'localhost';
$ZBX_SERVER_PORT = '10051';
$ZBX_SERVER_NAME = 'zabbix 3.0.12';

$IMAGE_FORMAT_DEFAULT = IMAGE_FORMAT_PNG;
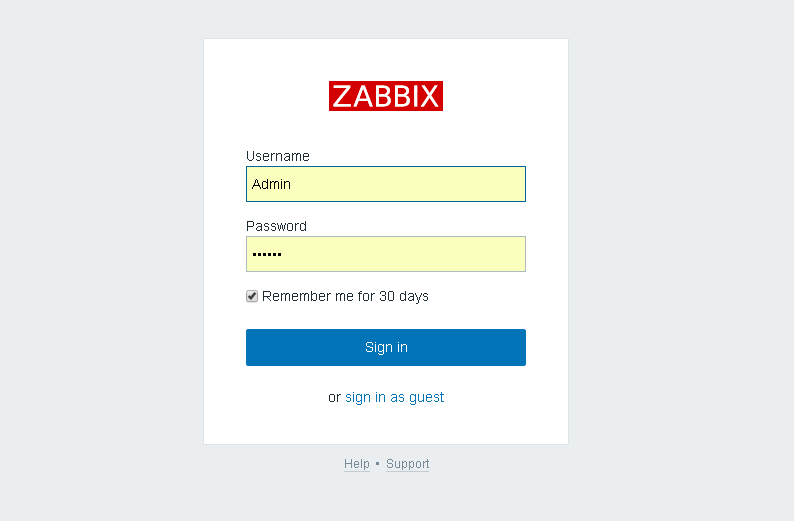
十六:Zabbix·server的默认账号Admin 密码zabbix,如图所示:
十七,默认登陆首页,如下图所示:
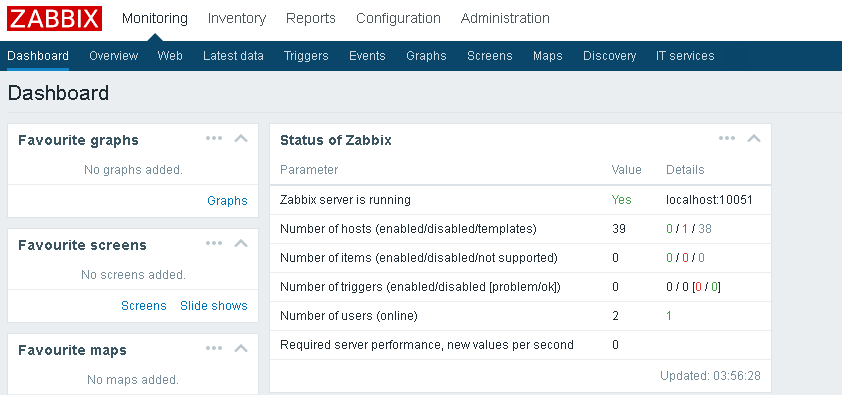
十八,移除或改名web目录下面的setup.php文件
[root@linux-node2 zabbix]# pwd
/usr/share/zabbix
[root@linux-node2 zabbix]# mv setup.php setup.php.bak
十九,更改web登陆的Admin默认密码
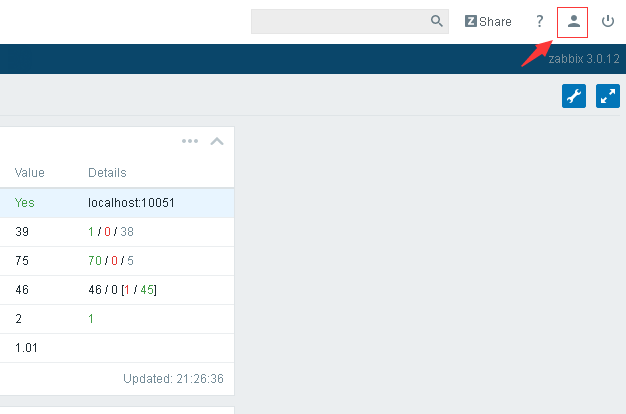
二十,设置新的密码,这里也可以设置界面的主题、语言和登陆后显示的默认界面等
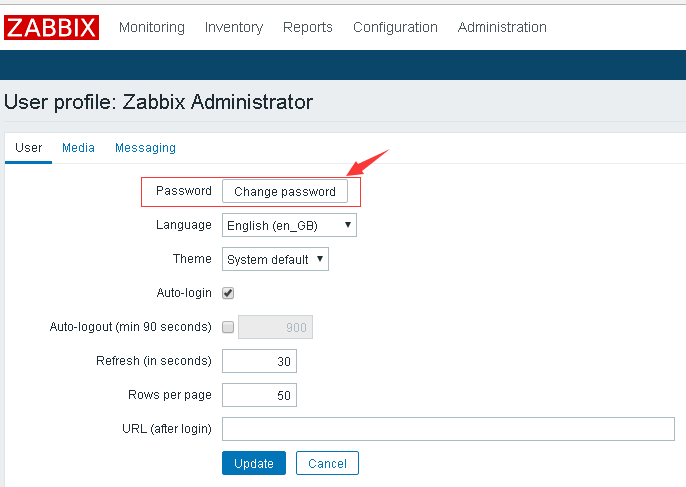
至此安装部分结束
附 官方英文版文档
https://www.zabbix.com/documentation/3.0/manual/installation
志不强者智不达

