CentOS7系统安装及环境初始化
操作系统安装:
将网卡名称设置为eth*,不使用CentOS 7默认的网卡命名规则。所以需要在安装的时候,增加内核参数。
1. 光标选择“Install CentOS 7”
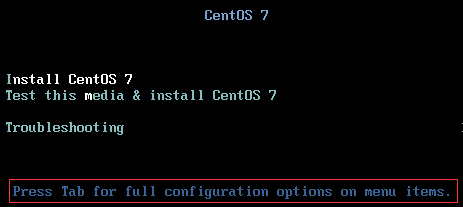
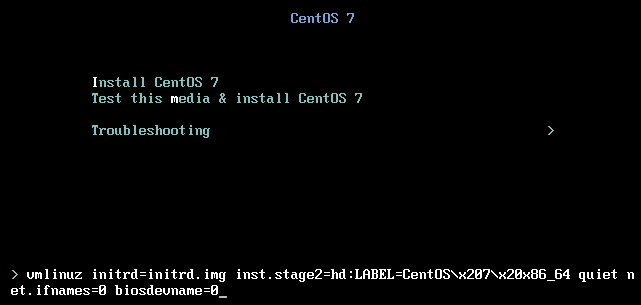
2. 点击Tab,打开kernel启动选项后,增加net.ifnames=0 biosdevname=0,如下图所示。
系统安装完成以后:
1.配置主机名称,因域名解析不支持下划线这里我们使用中横线
hostnamectl set-hostname xxx-xxx-xxx-xxx.deamon.com
查看主机名称文件
[root@192-168-x-163 network-scripts]# more /etc/hostname
192-168-x-163.deamon.com
2.配置IP地址
[root@192-168-x-163 network-scripts]# more ifcfg-eth0
TYPE=Ethernet
BOOTPROTO=static
NAME=eth0
DEVICE=eth0
ONBOOT=yes
IPADDR=192.168.x.163
NETMASK=255.255.255.0
GATEWAY=192.168.x.1
3.安装EPEL仓库和常用命令
rpm -ivh http://mirrors.aliyun.com/epel/epel-release-latest-7.noarch.rpm
yum install -y net-tools vim lrzsz tree screen lsof tcpdump telnet
4.关闭NetworkManager和防火墙
systemctl disable firewalld
systemctl stop NetworkManager
5.关闭SELinux
[root@192.168.x.163 ~]# vim /etc/sysconfig/selinux SELINUX=disabled #修改为disabled
检查结果如下
6.更新系统并重启
yum update -y && reboot
ps:系统完成安装后一般都会写在一个脚本里面初始化一些常规配置
CentOS7和6的一些基本工具对比:http://blog.csdn.net/u012486840/article/details/53161574
添加yum源
wget -O /etc/yum.repos.d/epel.repo http://mirrors.aliyun.com/repo/epel-7.repo
yum update
志不强者智不达
