Nginx Web应用深入
1. 企业常用的Nginx重要功能模块
1.1 Nginx核心功能模块(Core functionality)
Nginx核心功能模块负责Nginx的全局应用,主要对应主配置文件的Main区块和Events区块区域,这里有很多Nginx必须的全局参数配置。
详情见:nginx.org/en/docs/ngx_core_module.html
1.2 标准的HTTP功能模块集合
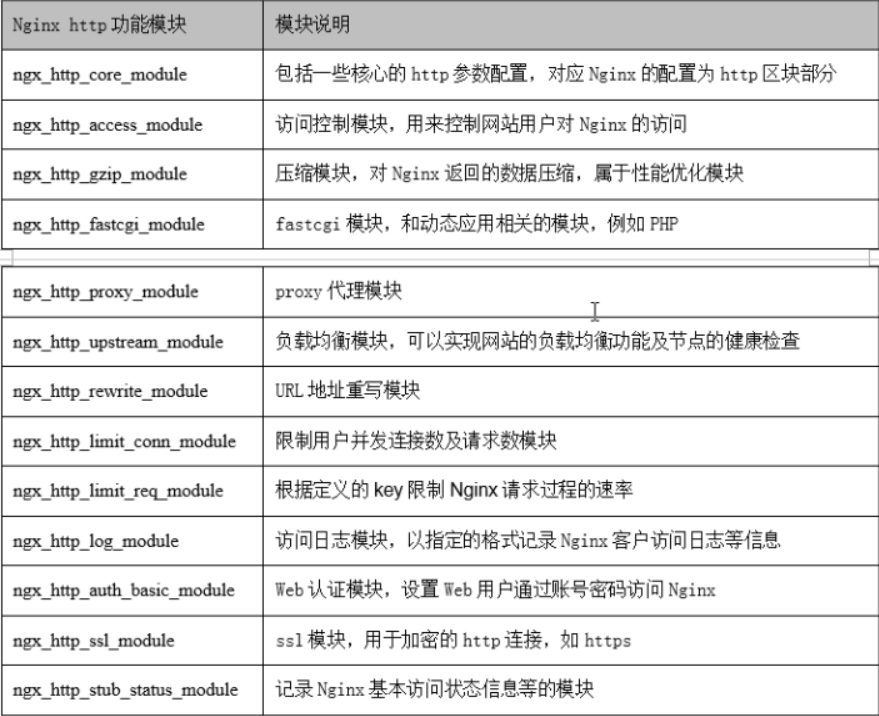
上述这些模块,大部分在默认情况下都安装好了,新手不建议擅自改动。
通过http://nginx.org/en/docs可查看到上述更多模块的详细使用。
2. nginx相关文件介绍
# rpm -ql 查看整体目录结构及对应功能

###############主配置文件
/etc/nginx/nginx.conf	                   #主配置文件
/etc/nginx/conf.d/default.conf		   #默认网站配置文件

###############nginx代理相关参数文件
/etc/nginx/fastcgi_params		    #php代理文件
/etc/nginx/scgi_params			    #AJAX前后分离
/etc/nginx/uwsgi_params			    #Python代理文件

###############nginx编码相关参数文件
/etc/nginx/win-utf			    #Nginx编码转换映射文件
/etc/nginx/koi-utf			    #Nginx编码转换映射文件
/etc/nginx/koi-win			    #Nginx编码转换映射文件

###############浏览器支持的直接打开的文件格式
/etc/nginx/mime.types

###############nginx管理相关命令
/usr/sbin/nginx			            #Nginx命令行管理终端工具
/usr/sbin/nginx-debug		            #Nginx命令行与终端调试工具

###############nginx日志相关目录与文件
/var/log/nginx				    #Nginx默认存放日志目录
/etc/logrotate.d/nginx		            #Nginx默认的日志切割
3. Nginx主配置文件(nginx.conf)介绍
[root@web01 ~]# egrep -v "^$|#" /application/nginx/conf/nginx.conf|cat -n
     1	worker_processes  auto;                # worker进程的数量,可以配置具体的数字,但不要超过系统cpu核数,也可以写auto,nginx会自动检测系统cpu核数。
        worker_cpu_affinity auto; # 将工作进程和CPU核心进行自动1对1绑定(并不是单独占用1C),从而避免重启或者用户访问时,工作进程漂移到其他cpu核心上时,频繁的向内核申请内存空间与释放内存空间,一定程度上减少了系统的性能开销,算是一种传统的性能优化手段。
     2	events {                               # 事件区块开始。提供配置文件上下文,在其中指定影响连接处理的指令。
     3	    worker_connections  1024;          # 单个worker进程支持最大连接数,该配置不能超过系统的最大文件打开数。查看系统文件描述符:ulimit -n。查看已使用的文件描述符:lsof -u <username> | wc -l。查看当前系统连接数:ss -s。
     4	}                                      # 事件区块结束。
     5	http {                                 # HTTP区块开始。
     6	    include       mime.types;          # Nginx支持的媒体类型库文件。
     7	    default_type  application/octet-stream;  # 默认的媒体类型。
     8	    sendfile        on;                # 开启高效传输模式,开启后可以加快静态文件的传输,也算是一个系统优化的参数。
     9	    keepalive_timeout  65;             # 长连接超时时间,当前版本默认65秒,只要超过65s没有数据传输就断开连接。这个参数一定要加,不然会有大量链接占用系统资源。
    10	    server {                           # 第一个server区块的开始,表示第一个独立的虚拟主机站点,一个server中可以包含多个location模块。
    11	        listen       80;               # 提供服务的端口,默认为80。
    12	        server_name  localhost;        # 提供服务的域名主机名,这里的配置可以有多重形式,比如正则等,详细可以看官方文档。
    13	        location / {                   # location其实是server的一个指令,为nginx服务器提供比较多而目灵活的指令,都是在location中体现的,主要是基于nginx接受到的请求字符串,对用户请求的URL进行匹配,并对特定的指令进行处理,包括地址重定向、数据缓存和应答控制等功能都是在这部分实现,另外很多第三方模块的配置也是在location模块中配置。
    14	            root   html;               # root表示站点的根目录配置,也就是请求的根目录,相当于nginx的安装目录,假设编译安装的nginx,安装目录在/app/nginx下,那这个html目录就在/app/nginx/下,除了相对路径外,也可以写绝对路径。
    15	            index  index.html index.htm; # 默认的网站首页文件,多个文件用多个空格分开,这里的路径就相当于/app/nginx/html。
    16	        }                              # location区块结束。
    17	        error_page   500 502 503 504  /50x.html;  # 出现对应的http状态码时,就重定向location到/50x.html。该状态码仅仅是nginx自己产生的可以识别,如果是后端服务产生的,那么它识别不了。
    18	        location = /50x.html {         # 当访问的location是/50x.html时。
    19	            root   html;               # 就去html目录下找50x.html,然后返回对应内容给客户端。
    20	        }                              # location区块结束。
                location ~ /\.ht {             # 如果不想站点下的某个文件被访问或下载,可以添加该配置来拒绝访问。
                    deny all;
                }
    21	    }                                  # server区块结束。
    22	}                                      # http区块结束
nginx官网

3.1 nginx访问流程
客户端通过域名发起请求,nginx主进程收到请求后,会把请求交给子进程处理,子进程会先根据server name(请求头中的host)进行判断,然后再加载对应location的配置。
主进程:master进程的主要目的是读取和评估配置, 并维护工作进程。
工作进程:工作进程实际处理请求。
nginx 采用基于事件的模型和依赖于操作系统的机制来高效地 在工作进程之间分配请求。
3.2 Nginx核心配置详解-全局配置
user nginx nginx; # 启动nginx工作进程时,使用的用户和组,默认是nobody。
worker_processes [number | auto]; # 启动Nginx工作进程的数量
worker_cpu_affinity 00000001 00000010 00000100 00001000; # 将Nginx工作进程绑定到指定的CPU核心,默认Nginx是不进行进程绑定的,绑定并不是意味着当前nginx进程独占以一核心CPU,但是可以保证此进程不会运行在其他核心上,这就极大减少了nginx的工作进程在不同的cpu核心上的来回跳转,减少了CPu对进程的资源分配与回收以及内存管理等,因此可以有效的提升nginx服务器的性能。

error_log /var/log/nginx/error.log; # 错误日志相关配置,级别的话有debug、info、notice、warn、error等,默认为error,一般info就够用。
error_log /var/log/nginx/error.log notice;
error_log /var/log/nginx/error.log error;
error_log /var/log/nginx/error.log info;

pid logs/nginx.pid; # nginx主进程pid文件路径,这个一般不用动。

worker_priority 0; # 定义工作进程的调度优先级,就像nice命令所做的那样:负数意味着更高的优先级。允许范围通常在-20到20之间。是个优化选项,一般这个不用动,除非机器上除了nginx还运行了很多其他服务。
worker_rlimit_nofile 65536; # 这个数字包含了nginx的所有链接(例如与代理服务器的链接等),而不仅仅是与客户端的链接,另一个考虑因素是实际的并发连接数,不能超过系统的最大打开文件数(文件描述符)的限制。c7系统默认应该是能打开2^20=1048576个文件描述符。

daemon off; # 前台运行nginx,一般在docker环境这样用。默认是on,后台运行。

master_process on | off; # 是否开启nginx的master-work工作模式,仅用于开发调试场景,千万不要上生产。默认是on,配置成off后,就只有一个nginx主进程了,性能超级差。

events { # 事件模型配置
    worker_connections 65536; # 设置单个工作进程的最大并发连接数。
    user epoll; 使用epoll事件驱动,nginx还支持如select、poll等驱动,该配置只能在events中配置。
    accept_mutex off; # 默认配置,还可以配置为on。优化同一时刻只有一个请求,而避免多个睡眠进程被唤醒的设置,on为防止同时被唤醒。全部唤醒也称为“惊群”,因此nginx刚安装完后应该把该值的配置为on,也算是一个优化选项。正常来说,不管是tob还是toc请求量都不小,所以不会存在太多睡眠进程,如果有很多睡眠进程,说明访问量也不是很大。
    multi_accept off; # 默认配置。配置为on后,nginx服务器的每个工作进程可以同时接受多个新的网络连接。off状态下,一个工作进程一次只能接受一个新的请求。可以打开,提升系统性能。
}
3.2.1 进程不绑定CPU演示
3.2.1.1 调整配置
[root@localhost ~]# grep worker_ /etc/nginx/nginx.conf
worker_processes 2;
#worker_cpu_affinity 0101 1010;

[root@localhost ~]# nginx -t
nginx: the configuration file /etc/nginx/nginx.conf syntax is ok
nginx: configuration file /etc/nginx/nginx.conf test is successful

[root@localhost ~]# nginx -s reload


[root@localhost ~]# ps -ef |grep nginx
root       1306      1  0 00:38 ?        00:00:00 nginx: master process /usr/sbin/nginx
nginx      1307   1306  0 00:38 ?        00:00:00 nginx: worker process
nginx      1308   1306  0 00:38 ?        00:00:00 nginx: worker process
3.2.1.2 发起请求
[root@localhost ~]# while true; do curl 192.168.1.2;sleep 0.5;done
3.2.1.3 新开一个窗口,查看nginx工作进程和cpu绑定情况
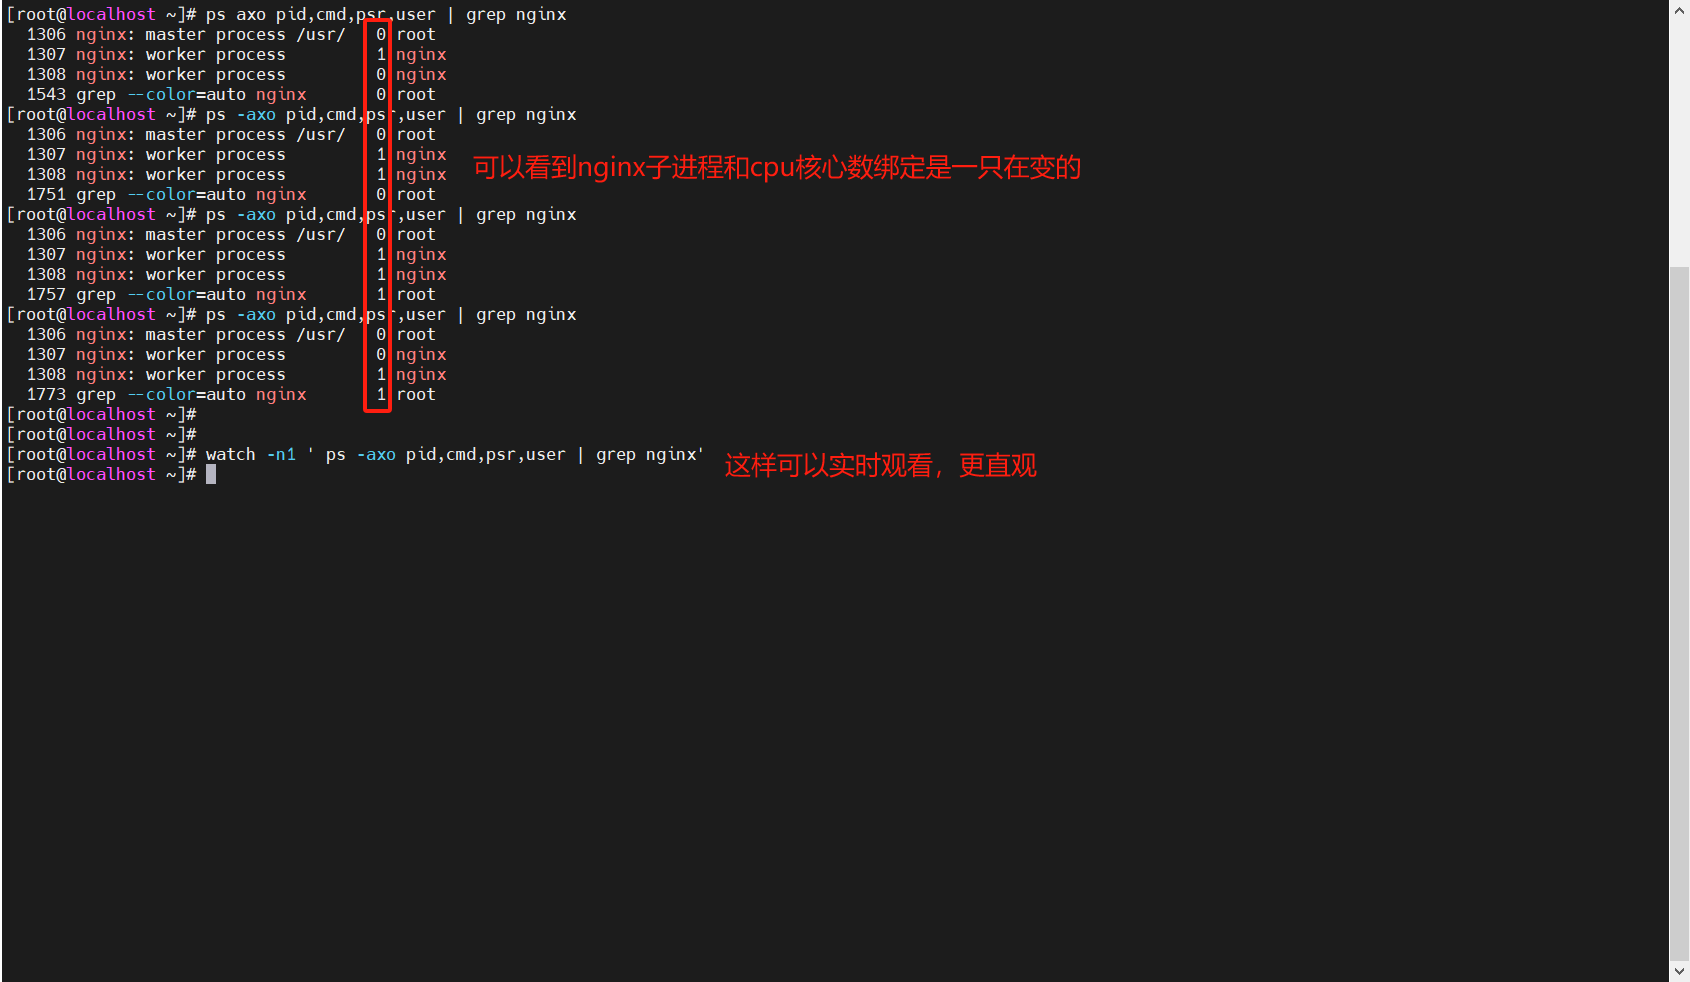
3.2.2 进程绑定CPU演示
3.2.2.1 调整配置
[root@localhost ~]# grep worker_ /etc/nginx/nginx.conf
worker_processes 2;
worker_cpu_affinity 0101 1010;

[root@localhost ~]# nginx -t
nginx: the configuration file /etc/nginx/nginx.conf syntax is ok
nginx: configuration file /etc/nginx/nginx.conf test is successful
[root@localhost ~]# nginx -s reload
3.2.2.2 持续请求
[root@localhost ~]# while true; do curl 192.168.1.2;sleep 0.5;done
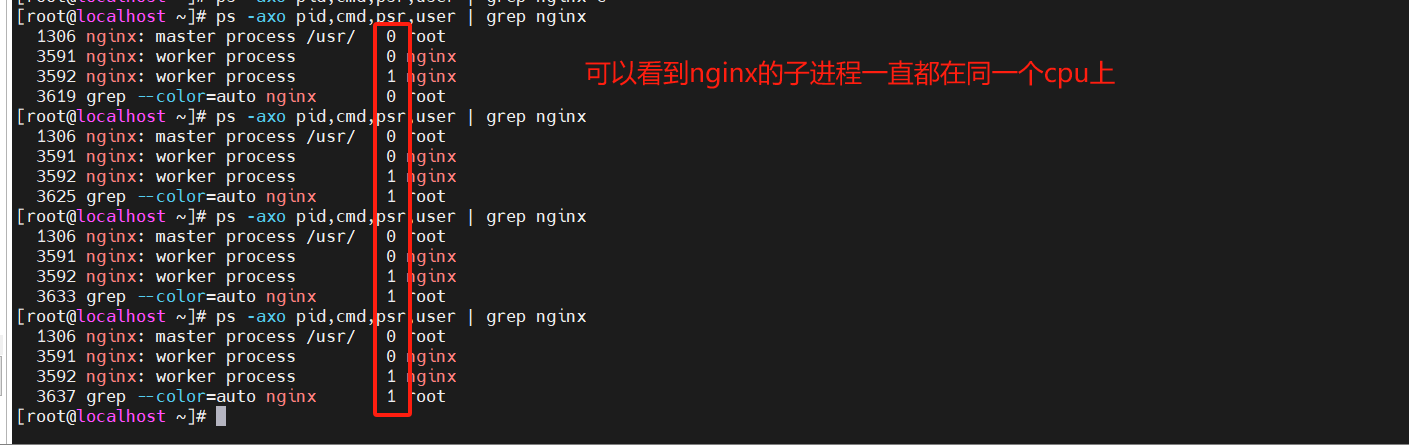
3.2.2.3 新开一个窗口查看进程和cpu的绑定情况
3.2.3 关于nginx连接数的问题
当nginx作为负载均衡时,它的连接数会受到一些影响。
假设worker_connections 1000,如果有4个工作进程,那么就代表该nginx服务可以承受4000个请求同时过来,但实际不是这样,如果nginx还需要反向代理请求到后端服务,那么这个连接数会相对的减少(worker_connections / 2),因为这个时候nginx除了要和客户端保持一个链接,还需要好后端服务保持一个链接,也就是一个用户请求,nginx要消耗2个链接。
并且还有一个问题要注意,那就是同时连接的数量不能超过当前打开文件数量的最大限制。
官方原话:It should be kept in mind that this number includes all connections (e.g. connections with proxied servers, among others), not only connections with clients. Another consideration is that the actual number of simultaneous connections cannot exceed the current limit on the maximum number of open files, which can be changed by worker_rlimit_nofile.
3.3 Nginx核心配置详解-http配置
http {
  include mime.types; # 支持导入的文件类型。这个文件中定义了很多很多不同的文件类型,在系统上可以看到。基本不用改
  default_type application/octet-stream; # 设置默认的类型,会提示下载不匹配的类型文件。基本不用改

  # 日志部分,后续细讲

  # 自定义优化参数
  sendfile on; # 实现文件零拷贝;
  tcp_nopush          on; # 在开启了sendfile 的情况下,会合并请求后统一发送给客户端。节省带宽开,想用户体验好关。

  tcp_nodelay         on; # 在开启了keepalived模式下的链接,是否启用tcp_nodelay选项,当为off时,延迟0.2s发送,默认为on时,不延迟发送,就是立即发送用户响应报文。默认为on。
  keepalive_timeout 65 65; # 设置会话保持时间(长连接时间)。第二个65是把keepalive_timeout打包到响应报文中,这样浏览器上就能看到了。

  gizp on; # 文件压缩。
}
4. Nginx虚拟主机配置实战
4.1 虚拟主机概念及类型介绍
所谓虚拟主机,就是Web服务里一个独立的网站站点,它可以对应独立的域名(也可能是IP或端口),具有独立的程序及资源,又可以独立的对外提供服务供用户访问。
Nginx使用server{}标签来表示一个虚拟主机,一个Web服务里可以有多个虚拟主机标签,即可以同时支持多个虚拟主机站点。
Apache使用<VirtuaHost></VirtuaHost>表示虚拟主机。
4.2 虚拟主机类型
(1)基于域名的虚拟主机(重点)
基于域名的虚拟主机,就是通过不同的域名区分不同的虚拟主机。
是企业应用最广的虚拟主机类型。
(2)基于端口的虚拟主机
基于端口的虚拟主机,就是通过不同的端口来区分不同的虚拟主机。
主要应用于公司内部网站,或不希望对外提供服务用户访问的网站后台等,访问基于端口的虚拟主机地址里要带有端口,
如:http://www.etiantian.org:9000
(3)基于IP的虚拟主机
基于IP的虚拟主机,就是通过不同的IP来区分不同的虚拟主机,企业应用较少。
4.3 基于域名的虚拟主机配置
(1)配置基于域名的nginx.conf内容
[root@web01 /application/nginx/conf]# egrep -v "#|^$" nginx.conf.default > nginx.conf
[root@web01 /application/nginx/conf]# vim nginx.conf
[root@web01 /application/nginx/conf]# cat nginx.conf
worker_processes  1;
events {
    worker_connections  1024;
}
http {
    include       mime.types;
    default_type  application/octet-stream;
    sendfile        on;
    keepalive_timeout  65;
    server {
        listen       80;
        server_name  www.etiantian.org;    # 添加域名
        location / {
            root   html/www;               # 添加虚拟主机目录
            index  index.html index.htm;
        }
        error_page   500 502 503 504  /50x.html;
        location = /50x.html {
            root   html;
        }
    }
}
(2)创建域名对应的站点目录文件
[root@web01 /application/nginx/conf]# mkdir -p ../html/www                                      # 创建www站点目录。
[root@web01 /application/nginx/conf]# echo "http://www.etiantian.org" > ../html/www/index.html  # 追加内容到首页文件,也就是网页显示的内容。
[root@web01 /application/nginx/conf]# cat ../html/www/index.html                                # 检查
http://www.etiantian.org
(3)设置环境变量
[root@web01 /application/nginx/conf]# echo 'PATH="/application/nginx/sbin/:$PATH"' >> /etc/profile
[root@web01 /application/nginx/conf]# tail -1 /etc/profile
PATH="/application/nginx/sbin/:$PATH"
[root@web01 /application/nginx/conf]# . /etc/profile                           # 重载配置文件,使配置生效
[root@web01 /application/nginx/conf]# echo $PATH
/application/nginx/sbin/:/usr/local/sbin:/usr/local/bin:/usr/sbin:/usr/bin:/root/bin   # 只要出现/application/nginx/sbin/,就表示配置成功
(3)检查语法并重新加载Nginx
[root@web01 /application/nginx/conf]# nginx -t # 检查修改后的Nginx配置文件语法是否正确
nginx: the configuration file /application/nginx-1.18.0//conf/nginx.conf syntax is ok # syntax is ok 表示正确
nginx: configuration file /application/nginx-1.18.0//conf/nginx.conf test is successful # successful 表示正确
[root@web01 /application/nginx/conf]# nginx -s reload # 平滑重启Nginx,即重新加载配置文件,确认是否reload成功可以查看工作进程启动时间,因为reload会创建新的工作进程,来替换旧的工作进程
[root@web01 /application/nginx/conf]# netstat -lntup|grep 80 # 检查端口和进程是否正常
tcp 0 0 0.0.0.0:80 0.0.0.0:* LISTEN 6727/nginx: master
[root@web01 /application/nginx/conf]# echo "192.168.1.51 www.etiantian.org" >> /etc/hosts # 追加www.etiantian.org到hosts文件进行测试
[root@web01 /application/nginx/conf]# tail -1 /etc/hosts
192.168.1.51 www.etiantian.org
[root@web01 /application/nginx/conf]# ping www.etiantian.org # ping通,并且解析的IP为本机IP,表示成功
PING www.etiantian.org (192.168.1.51) 56(84) bytes of data.
64 bytes from www.etiantian.org (192.168.1.51): icmp_seq=1 ttl=64 time=0.015 ms
64 bytes from www.etiantian.org (192.168.1.51): icmp_seq=2 ttl=64 time=0.030 ms
^C
--- www.etiantian.org ping statistics ---
2 packets transmitted, 2 received, 0% packet loss, time 999ms
rtt min/avg/max/mdev = 0.015/0.022/0.030/0.008 ms
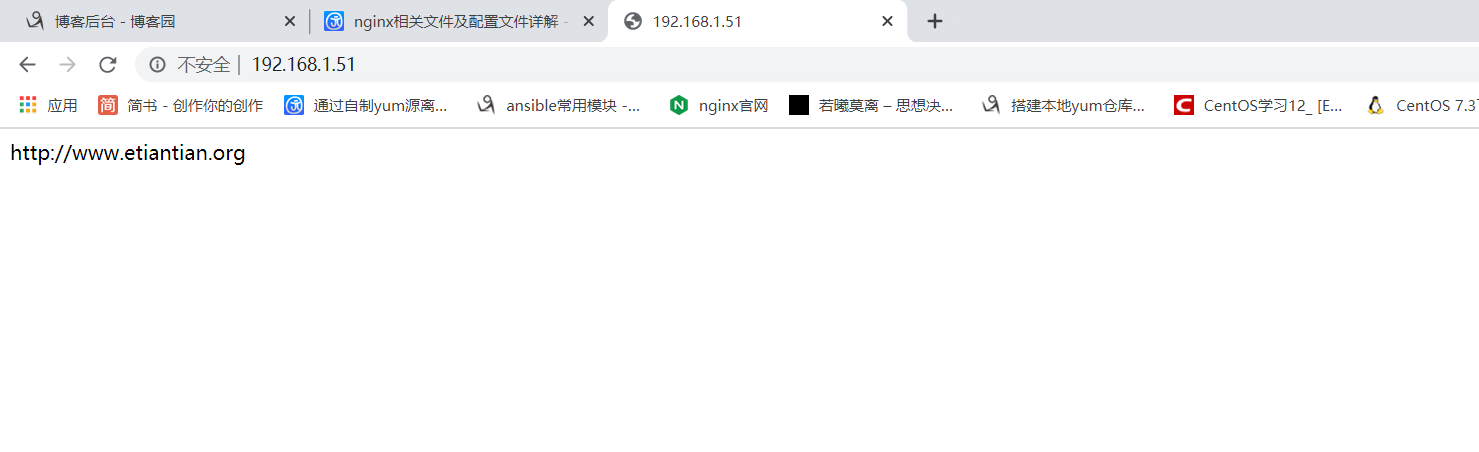
[root@web01 /application/nginx/conf]# curl -I www.etiantian.org # 访问测试,只要返回的状态码为200,表示成功
HTTP/1.1 200 OK
Server: nginx/1.18.0
Date: Wed, 20 May 2020 15:24:59 GMT
Content-Type: text/html
Content-Length: 25
Last-Modified: Wed, 20 May 2020 15:20:35 GMT
Connection: keep-alive
ETag: "5ec54ac3-19"
Accept-Ranges: bytes
win10电脑端访问测试
先修改hosts文件,把IP和域名加入进去
路径为:C盘>Windows>System32>drivers>etc>hosts
hosts文件介绍
不管是WIN和Linux,只要域名访问,都要在客户端配置hosts文件做解析。
hosts文件一般比喻为本地DNS文件,功能是把域名解析成IP,多个域名可以对应一个IP。
默认情况下,hosts文件中配置的解析优先于DNS服务器,多用于公司中开发测试使用。
4.4 配置多个基于域名的虚拟主机
(1)增加新域名对应的配置
增加bbs.etiantian.org和blog.etiantian.org

[root@web01 /application/nginx/conf]# vim nginx.conf
[root@web01 /application/nginx/conf]# cat nginx.conf
worker_processes  1;
events {
    worker_connections  1024;
}
http {
    include       mime.types;
    default_type  application/octet-stream;
    sendfile        on;
    keepalive_timeout  65;
    server {
        listen       80;
        server_name  www.etiantian.org;
        location / {
            root   html/www;
            index  index.html index.htm;
        }
        error_page   500 502 503 504  /50x.html;
        location = /50x.html {
            root   html;
        }
    }
    server {                                           # 新增加的server标签
        listen       80;
        server_name  blog.etiantian.org;               # 新增加的域名
        location / {
            root   html/blog;                          # 新增加的站点目录
            index  index.html index.htm;
        }
        error_page   500 502 503 504  /50x.html;
        location = /50x.html {
            root   html;
        }
    }
    server {                                          # 新增加的server标签
        listen       80;
        server_name  bbs.etiantian.org;               # 新增加的域名
        location / {
            root   html/bbs;                          # 新增加的站点目录
            index  index.html index.htm;
        }
        error_page   500 502 503 504  /50x.html;
        location = /50x.html {
            root   html;
        }
    }
}
(2)创建新的虚拟主机对应的站点目录和首页文件
[root@web01 /application/nginx/conf]# mkdir ../html/blog -p
[root@web01 /application/nginx/conf]# mkdir ../html/bbs -p
[root@web01 /application/nginx/conf]# echo 'http://blog.etiantian.org' > ../html/blog/index.html
[root@web01 /application/nginx/conf]# echo 'http://bbs.etiantian.org' > ../html/bbs/index.html
[root@web01 /application/nginx/conf]# cat ../html/blog/index.html
http://blog.etiantian.org
[root@web01 /application/nginx/conf]# cat ../html/bbs/index.html
http://bbs.etiantian.org
(3)重载Nginx配置
[root@web01 /application/nginx/conf]# nginx -t
nginx: the configuration file /application/nginx-1.18.0//conf/nginx.conf syntax is ok
nginx: configuration file /application/nginx-1.18.0//conf/nginx.conf test is successful
[root@web01 /application/nginx/conf]# nginx -s reload

# 每次更改Nginx的配置后都需要用管理员重新加载配置文件,让配置生效。
# 因为Nignx在启动时,已经把所有配置都加载到内存中了,若更改了主配置文件,都需要重新加载一下,让新的配置加载到内存中。
# 大幅度提升了nginx的性能。
(4)添加域名到hosts文件中
[root@web01 /application/nginx/conf]# vim /etc/hosts
[root@web01 /application/nginx/conf]# cat /etc/hosts
127.0.0.1   localhost localhost.localdomain localhost4 localhost4.localdomain4
::1         localhost localhost.localdomain localhost6 localhost6.localdomain6
192.168.1.51 www.etiantian.org bbs.etiantian.org blog.etiantian.org             # 同一个IP,不同域名的情况下,可以写一行,空格分开域名即可。
(5)在客户端测试访问
# Linux客户端
[root@web01 /application/nginx/conf]# curl www.etiantian.org
http://www.etiantian.org
[root@web01 /application/nginx/conf]# curl bbs.etiantian.org
http://bbs.etiantian.org
[root@web01 /application/nginx/conf]# curl blog.etiantian.org
http://blog.etiantian.org
Win客户端
4.5 基于域名的虚拟主机通信原理介绍
Nginx客户端发起请求过程如下:
(1)浏览器输入www.etiantian.org,并回车。
(2)浏览器请求LDNS,通过LDNS最终找到授权DNS获取IP。
(3)请求Web服务器发起TCP三次握手。
(4)建立HTTP请求(192.168.1.51的80端口)
(5)发起HTTP请求报文(请求头携带:host www.etiantian.org 字段)
Nginx服务端处理请求过程如下:
(1)监听本地所有网卡上对80端口的请求
(2)读取接收到的HTTP请求报文里的信息。
(3)读取Nginx配置文件虚拟主机Server标签。
(4)先匹配Server标签中请求的端口号。
(5)相同端口再去匹配Server标签对应server_name指定的域名(和读取请求头里host字段对比)。
(6)把对应域名下面站点目录下的首页文件(index.html)发给客户端。
(7)如果没有匹配的域名,就把排在第一个顺序的Server标签虚拟机对应的内容发给客户端。
4.6 基于端口的虚拟主机配置
(1)修改配置文件
[root@web01 ~]# cp /application/nginx/conf/nginx.conf{,_basename}   # 备份原有配置文件
[root@web01 ~]# vim /application/nginx/conf/nginx.conf
[root@web01 ~]# cat /application/nginx/conf/nginx.conf
worker_processes  1;
events {
    worker_connections  1024;
}
http {
    include       mime.types;
    default_type  application/octet-stream;
    sendfile        on;
    keepalive_timeout  65;
    server {
        listen       80;
        server_name  www.etiantian.org;
        location / {
            root   html/www;
            index  index.html index.htm;
        }
        error_page   500 502 503 504  /50x.html;
        location = /50x.html {
            root   html;
        }
    }
    server {
        listen       81;                                  # 更改端口
        server_name  blog.etiantian.org;
        location / {
            root   html/blog;
            index  index.html index.htm;
        }
        error_page   500 502 503 504  /50x.html;
        location = /50x.html {
            root   html;
        }
    }
    server {
        listen       82;                                  # 更改端口
        server_name  bbs.etiantian.org;
        location / {
            root   html/bbs;
            index  index.html index.htm;
        }
        error_page   500 502 503 504  /50x.html;
        location = /50x.html {
            root   html;
        }
    }
}
(2)检查端口和配置,并重载配置文件
[root@web01 ~]# netstat -lntup|grep nginx
tcp        0      0 0.0.0.0:80              0.0.0.0:*               LISTEN      6766/nginx: master
tcp        0      0 0.0.0.0:81              0.0.0.0:*               LISTEN      6766/nginx: master
tcp        0      0 0.0.0.0:82              0.0.0.0:*               LISTEN      6766/nginx: master
[root@web01 ~]# nginx -t
nginx: the configuration file /application/nginx-1.18.0//conf/nginx.conf syntax is ok
nginx: configuration file /application/nginx-1.18.0//conf/nginx.conf test is successful
[root@web01 ~]# nginx -s reload
(3)访问测试
[root@web01 ~]# curl www.etiantian.org
http://www.etiantian.org
[root@web01 ~]# curl blog.etiantian.org:81
http://blog.etiantian.org
[root@web01 ~]# curl bbs.etiantian.org:82
http://bbs.etiantian.org
4.7 基于IP的虚拟主机配置
(1)在服务器网卡上增加多个IP地址
[root@web01 ~]# ip addr add 192.168.1.52/24 dev eth0 label eth0:9                    # 临时添加的辅助IP
[root@web01 ~]# ip addr add 192.168.1.53/24 dev eth0 label eth0:10                   # 临时添加的辅助IP
[root@web01 ~]# ip a
1: lo: <LOOPBACK,UP,LOWER_UP> mtu 65536 qdisc noqueue state UNKNOWN group default qlen 1000
    link/loopback 00:00:00:00:00:00 brd 00:00:00:00:00:00
    inet 127.0.0.1/8 scope host lo
       valid_lft forever preferred_lft forever
    inet6 ::1/128 scope host
       valid_lft forever preferred_lft forever
2: eth0: <BROADCAST,MULTICAST,UP,LOWER_UP> mtu 1500 qdisc pfifo_fast state UP group default qlen 1000
    link/ether 00:0c:29:f9:89:43 brd ff:ff:ff:ff:ff:ff
    inet 192.168.1.51/24 brd 192.168.1.255 scope global noprefixroute eth0
       valid_lft forever preferred_lft forever
    inet 192.168.1.52/24 scope global secondary eth0:9                    # 添加成功
       valid_lft forever preferred_lft forever
    inet 192.168.1.53/24 scope global secondary eth0:10                   # 添加成功
       valid_lft forever preferred_lft forever
    inet6 fe80::1c4b:d47c:218a:daf1/64 scope link noprefixroute
       valid_lft forever preferred_lft forever

[root@web01 ~]# ping 192.168.1.52                                         # 连通性测试
PING 192.168.1.52 (192.168.1.52) 56(84) bytes of data.
64 bytes from 192.168.1.52: icmp_seq=1 ttl=64 time=0.026 ms
^C
--- 192.168.1.52 ping statistics ---
1 packets transmitted, 1 received, 0% packet loss, time 0ms
rtt min/avg/max/mdev = 0.026/0.026/0.026/0.000 ms
[root@web01 ~]# ping 192.168.1.53                                         # 连通性测试
PING 192.168.1.53 (192.168.1.53) 56(84) bytes of data.
64 bytes from 192.168.1.53: icmp_seq=1 ttl=64 time=0.027 ms
^C
--- 192.168.1.53 ping statistics ---
1 packets transmitted, 1 received, 0% packet loss, time 0ms
rtt min/avg/max/mdev = 0.027/0.027/0.027/0.000 ms
(2)更改主配置文件
[root@web01 ~]# cp /application/nginx/conf/nginx.conf{,_basePort}         # 先备份
[root@web01 ~]# vim /application/nginx/conf/nginx.conf
nginx.conf           nginx.conf_basename  nginx.conf_basePort  nginx.conf.default
[root@web01 ~]# vim /application/nginx/conf/nginx.conf
[root@web01 ~]# cat /application/nginx/conf/nginx.conf
worker_processes  1;
events {
    worker_connections  1024;
}
http {
    include       mime.types;
    default_type  application/octet-stream;
    sendfile        on;
    keepalive_timeout  65;
    server {
        listen       192.168.1.51:80;                                   # 添加IP,并把监听端口改成80(默认的80端口,不加也行)
        server_name  www.etiantian.org;
        location / {
            root   html/www;
            index  index.html index.htm;
        }
        error_page   500 502 503 504  /50x.html;
        location = /50x.html {
            root   html;
        }
    }
    server {
        listen       192.168.1.52:80;                                   # 添加IP,并把监听端口改成80(默认的80端口,不加也行)
        server_name  blog.etiantian.org;
        location / {
            root   html/blog;
            index  index.html index.htm;
        }
        error_page   500 502 503 504  /50x.html;
        location = /50x.html {
            root   html;
        }
    }
    server {
        listen       192.168.1.53:80;                                   # 添加IP,并把监听端口改成80(默认的80端口,不加也行)
        server_name  bbs.etiantian.org;
        location / {
            root   html/bbs;
            index  index.html index.htm;
        }
        error_page   500 502 503 504  /50x.html;
        location = /50x.html {
            root   html;
        }
    }
}
[root@web01 ~]# nginx -t                                                     # 检查配置是否正确
nginx: the configuration file /application/nginx-1.18.0//conf/nginx.conf syntax is ok
nginx: configuration file /application/nginx-1.18.0//conf/nginx.conf test is successful
[root@web01 ~]# nginx -s reload                                              # 重载配置文件
[root@web01 ~]# netstat -lntup|grep nginx                                    # 这里出现了问题,监听端口没有改变,而且新的配置也没有生效。解决办法如下:
tcp        0      0 0.0.0.0:80              0.0.0.0:*               LISTEN      6766/nginx: master
tcp        0      0 0.0.0.0:81              0.0.0.0:*               LISTEN      6766/nginx: master
tcp        0      0 0.0.0.0:82              0.0.0.0:*               LISTEN      6766/nginx: master

# 重启Nignx
[root@web01 ~]# nginx -s stop
[root@web01 ~]# nginx
[root@web01 ~]# netstat -lntup|grep nginx
tcp        0      0 192.168.1.53:80         0.0.0.0:*               LISTEN      7025/nginx: master
tcp        0      0 192.168.1.52:80         0.0.0.0:*               LISTEN      7025/nginx: master
tcp        0      0 192.168.1.51:80         0.0.0.0:*               LISTEN      7025/nginx: master
(3)访问测试
[root@web01 ~]# curl 192.168.1.51
http://www.etiantian.org
[root@web01 ~]# curl 192.168.1.52
http://blog.etiantian.org
[root@web01 ~]# curl 192.168.1.53
http://bbs.etiantian.org
防止网站被恶意解析优化
(1)更改配置文件
[root@web01 ~]# cat /application/nginx/conf/nginx.conf
worker_processes  1;
events {
    worker_connections  1024;
}
http {
    include       mime.types;
    default_type  application/octet-stream;
    sendfile        on;
    keepalive_timeout  65;
    server {                          # 新添加一个server标签
       listen 80;
       server_name _default;
       return 500;
    }
    server {
        listen       80;
        server_name  www.etiantian.org;
        location / {
            root   html/www;
            index  index.html index.htm;
        }
        error_page   500 502 503 504  /50x.html;
        location = /50x.html {
            root   html;
        }
    }
    server {
        listen       80;
        server_name  blog.etiantian.org;
        location / {
            root   html/blog;
            index  index.html index.htm;
        }
        error_page   500 502 503 504  /50x.html;
        location = /50x.html {
            root   html;
        }
    }
    server {
        listen       80;
        server_name  bbs.etiantian.org;
        location / {
            root   html/bbs;
            index  index.html index.htm;
        }
        error_page   500 502 503 504  /50x.html;
        location = /50x.html {
            root   html;
        }
    }
}
(2)重启nginx
[root@web01 ~]# nginx -s stop
[root@web01 ~]# nginx
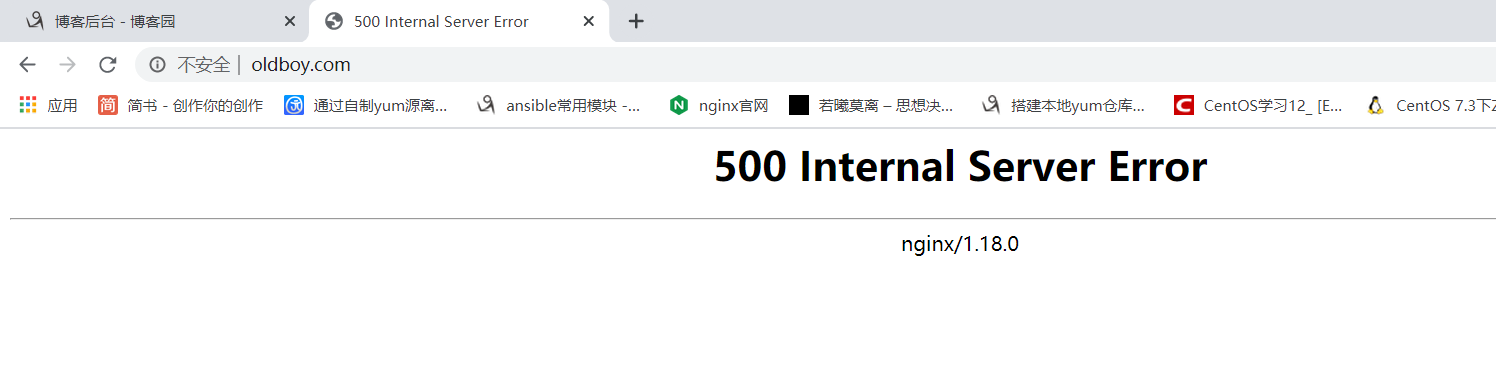
(3)在客户端hosts添加一个新域名
如:www.oldboy.com
(4)访问测试
恶意解析扩展
一:什么是恶意域名解析
        一般情况下,要使域名能访问到网站需要两步,第一步,将域名解析到网站所在的主机,第二步,在web服务器中将域名与相应的网站绑定。但是,如果通过主机IP能直接访问某网站,那么把域名解析到这个IP也将能访问到该网站,而无需在主机上绑定,也就是说任何人将任何域名解析到这个IP就能访问到这个网站。

二:恶意域名解析的危害
        可能您并不介意通过别人的域名访问到您的网站,但是如果这个域名是未备案域名呢?

        假如那域名是不友善的域名,比如曾经指向非法网站,容易引发搜索引擎惩罚,连带IP受到牵连。即使域名没什么问题,但流量也会被劫持到别的域名,从而遭到广告联盟的封杀。

三:防止域名恶意解析方法,配置第一个server标签如下:
    server {
       listen 80;
       server_name _default;
       return 500;
    }
4.8 root与alias
4.8.1 root使用
root:指定web的家目录,在定义location的时候,文件的绝对路径等于root+location,如下示例
[root@localhost ~]# cd /etc/nginx/conf.d/
[root@localhost conf.d]# ls
[root@localhost conf.d]# vim pc.conf
[root@localhost conf.d]# cat pc.conf
server {
  listen 80;
  server_name www.pc.com;
  location /linux {
    root /data/nginx/html/pc; # 访问www.pc.com/linux就相当于是/data/nginx/html/pc/linux/index.html,也就是上面说的root + lication
  }
}
[root@localhost conf.d]# mkdir -p /data/nginx/html/pc
[root@localhost conf.d]# nginx -t
nginx: the configuration file /etc/nginx/nginx.conf syntax is ok
nginx: configuration file /etc/nginx/nginx.conf test is successful
[root@localhost conf.d]# nginx -s reload

# 访问测试
[root@localhost conf.d]# curl www.pc.com/linux/
linux-pc
4.8.2 alias使用
alias:定义路径别名,会把访问的路径重新定义到指定的路径,如下:
工作中用的不多,推荐使用root。
[root@localhost conf.d]# cat pc.conf
server {
  listen 80;
  server_name www.pc.com;

  location /linux { # 使用alias的时候,uri后面如果加了/,则下面的路径配置必须加/,否则403。
    alias /data/nginx/html/pc; # 当访问/linux时,会显示alias定义的/data/nginx/html/pc里面的内容。
    index index.html;
  }
}
[root@localhost conf.d]# nginx -t
nginx: the configuration file /etc/nginx/nginx.conf syntax is ok
nginx: configuration file /etc/nginx/nginx.conf test is successful
[root@localhost conf.d]# nginx -s reload

# 访问测试
[root@localhost conf.d]# echo '../pc' > /data/nginx/html/pc/index.html
[root@localhost conf.d]# cat /data/nginx/html/pc/index.html
../pc

[root@localhost conf.d]# cat /data/nginx/html/pc/linux/index.html
linux-pc

# 那现在访问究竟是显示linux-pc呢还是../pc呢?答案是../pc,这就符合上面说的:当访问/linux时,会显示alias定义的/data/nginx/html/pc里面的内容。
# 就相当于访问ww.pc.com/linux/,就是访问/data/nginx/html/pc/index.html
[root@localhost conf.d]# curl www.pc.com/linux/
../pc
5. Nginx常用功能配置
5.1 规范优化Nginx配置文件(include file | mask;)
优化步骤如下:
[root@web01 ~]# cd /application/nginx/conf/
[root@web01 /application/nginx/conf]# mkdir extra
[root@web01 /application/nginx/conf]# /bin/cp nginx.conf_basename nginx.conf        # 强制覆盖不提示,这里采用基于域名的虚拟主机为例

# 打印www.etiantian.org虚拟主机配置内容
[root@web01 /application/nginx/conf]# sed -n '10,21p' nginx.conf
    server {
        listen       80;
        server_name  www.etiantian.org;
        location / {
            root   html/www;
            index  index.html index.htm;
        }
        error_page   500 502 503 504  /50x.html;
        location = /50x.html {
            root   html;
        }
    }
[root@web01 /application/nginx/conf]# sed -n '10,21p' nginx.conf > extra/01_www.conf   # 把www.etiantian.org虚拟主机的配置写入extra/01_www.conf中。

# 打印blog.etiantian.org虚拟主机配置内容
[root@web01 /application/nginx/conf]# sed -n '22,33p' nginx.conf
    server {
        listen       80;
        server_name  blog.etiantian.org;
        location / {
            root   html/blog;
            index  index.html index.htm;
        }
        error_page   500 502 503 504  /50x.html;
        location = /50x.html {
            root   html;
        }
    }
[root@web01 /application/nginx/conf]# sed -n '22,33p' nginx.conf > extra/02_blog.conf  # 把blog.etiantian.org虚拟主机的配置写入extra/01_www.conf中。

# 打印bbs.etiantian.org虚拟主机配置内容
[root@web01 /application/nginx/conf]# sed -n '34,45p' nginx.conf
    server {
        listen       80;
        server_name  bbs.etiantian.org;
        location / {
            root   html/bbs;
            index  index.html index.htm;
        }
        error_page   500 502 503 504  /50x.html;
        location = /50x.html {
            root   html;
        }
    }
[root@web01 /application/nginx/conf]# sed -n '34,45p' nginx.conf > extra/03_bbs.conf  # 把bbs.etiantian.org虚拟主机的配置写入extra/01_www.conf中。

# 删除主配置文件nginx.conf中所有虚拟主机配置,这里是10到45行,需要提前确认好行号
[root@web01 /application/nginx/conf]# sed -n '10,45p' nginx.conf
    server {
        listen       80;
        server_name  www.etiantian.org;
        location / {
            root   html/www;
            index  index.html index.htm;
        }
        error_page   500 502 503 504  /50x.html;
        location = /50x.html {
            root   html;
        }
    }
    server {
        listen       80;
        server_name  blog.etiantian.org;
        location / {
            root   html/blog;
            index  index.html index.htm;
        }
        error_page   500 502 503 504  /50x.html;
        location = /50x.html {
            root   html;
        }
    }
    server {
        listen       80;
        server_name  bbs.etiantian.org;
        location / {
            root   html/bbs;
            index  index.html index.htm;
        }
        error_page   500 502 503 504  /50x.html;
        location = /50x.html {
            root   html;
        }

[root@web01 /application/nginx/conf]# sed -i '10,45d' nginx.conf    # 删除主配置文件中的3个server标签
[root@web01 /application/nginx/conf]# cat nginx.conf                # 删除后的效果
worker_processes  1;
events {
    worker_connections  1024;
}
http {
    include       mime.types;
    default_type  application/octet-stream;
    sendfile        on;
    keepalive_timeout  65;
}

# 添加虚拟主机配置文件信息到nginx.cof中,这里有两种办法,此处采取第一种方法
# 方法1
include extra/01_www.conf;
include extra/02_blog.conf;
include extra/03_bbs.conf;

#方法2
include extra/*.conf   # 这样配置后,默认按照文件名开头的数字顺序加载

# 最终效果如下
[root@web01 /application/nginx/conf]# cat nginx.conf
worker_processes  1;
events {
    worker_connections  1024;
}
http {
    include       mime.types;
    default_type  application/octet-stream;
    sendfile        on;
    keepalive_timeout  65;
include extra/01_www.conf;
include extra/02_blog.conf;
include extra/03_bbs.conf;
}

# 重新加载配置,并测试结果
[root@web01 /application/nginx/conf]# nginx -t
nginx: the configuration file /application/nginx-1.18.0//conf/nginx.conf syntax is ok
nginx: configuration file /application/nginx-1.18.0//conf/nginx.conf test is successful
[root@web01 /application/nginx/conf]# nginx -s reload
[root@web01 /application/nginx/conf]# curl www.etiantian.org
http://www.etiantian.org
[root@web01 /application/nginx/conf]# curl blog.etiantian.org
http://blog.etiantian.org
[root@web01 /application/nginx/conf]# curl bbs.etiantian.org
http://bbs.etiantian.org
5.2 Nginx虚拟主机的别名配置
(1)虚拟主机别名介绍
所谓虚拟主机别名,就是为虚拟主机设置出了主域名以外的一个或多个域名的名名字,这样就能实现用户访问的多个域名对应同一个虚拟主机网站的功能。
如www.etiantian.org,增加一个别名为etiantian.org,而后用户不管访问的是哪个域名,最终访问的内容都一样。
(2)配置过程
[root@web01 /application/nginx/conf/extra]# vim 01_www.conf
[root@web01 /application/nginx/conf/extra]# cat 01_www.conf
    server {
        listen       80;
        server_name  www.etiantian.org               # 去掉最后的分号
                     etiantian.org;                   # 增加的别名,并在最后加上结尾分号
        location / {
            root   html/www;
            index  index.html index.htm;
        }
        error_page   500 502 503 504  /50x.html;
        location = /50x.html {
            root   html;
        }
    }

# 重新加载配置文件
[root@web01 /application/nginx/conf/extra]# nginx -t
nginx: the configuration file /application/nginx-1.18.0//conf/nginx.conf syntax is ok
nginx: configuration file /application/nginx-1.18.0//conf/nginx.conf test is successful
[root@web01 /application/nginx/conf/extra]# nginx -s reload

# 添加新域名到hosts
[root@web01 /application/nginx/conf/extra]# tail -1 /etc/hosts
192.168.1.51 www.etiantian.org bbs.etiantian.org blog.etiantian.org etiantian.org

# 访问测试
[root@web01 /application/nginx/conf/extra]# curl etiantian.org
http://www.etiantian.org
[root@web01 /application/nginx/conf/extra]# curl  www.etiantian.org
http://www.etiantian.org
5.3 Nginx状态信息配置
该 ngx_http_stub_status_module 模块提供对基本状态信息的访问。
默认情况下不构建此模块,应使用 --with-http_stub_status_module 配置参数启用它。
(1)Nginx status配置过程
[root@web01 ~]# vim /application/nginx/conf/nginx.conf
[root@web01 /application/nginx/conf/extra]# cat ../nginx.conf
worker_processes  1;
events {
    worker_connections  1024;
}
http {
    include       mime.types;
    default_type  application/octet-stream;
    sendfile        on;
    keepalive_timeout  65;
include extra/01_www.conf;
include extra/02_blog.conf;
include extra/03_bbs.conf;
include extra/04_status.conf;           # 新添加一个include
}

[root@web01 /application/nginx/conf/extra]# vim 04_status.conf        # 新添加一个status.conf文件
[root@web01 /application/nginx/conf/extra]# cat 04_status.conf
# status
server {
         listen 80;
         server_name status.etiantian.org;
         location / {
                      stub_status; # 1.7.5 版本需要添加on参数
                      access_log off;
    }
}

[root@web01 /application/nginx/conf/extra]# nginx -t          # 检查语法
nginx: the configuration file /application/nginx-1.18.0//conf/nginx.conf syntax is ok
nginx: configuration file /application/nginx-1.18.0//conf/nginx.conf test is successful
[root@web01 /application/nginx/conf/extra]# nginx -s reload   # 重载配置文件

[root@web01 /application/nginx/conf/extra]# cat /etc/hosts
127.0.0.1   localhost localhost.localdomain localhost4 localhost4.localdomain4
::1         localhost localhost.localdomain localhost6 localhost6.localdomain6
192.168.1.51 www.etiantian.org bbs.etiantian.org blog.etiantian.org etiantian.org blog bbs status.etiantian.org # 新添加status.etiantian.org域名

[root@web01 /application/nginx/conf/extra]# curl status.etiantian.org   # 访问测试
Active connections: 1
server accepts handled requests
 1 1 1
Reading: 0 Writing: 1 Waiting: 0

# status显示结果详解
server:表示Nginx启动到现在共处理了多少个请求,此处为1。
accepts:表示Nginx启动到现在共成功创建了多少次握手,此处为1。请求丢失数=握手数-连接数。
handled requests:表示总共处理了多少次请求。此处为1。
Reading:为Nginx读取到客户端的Header信息数。
Writing:为Nginx返回给客户端的Header信息数。
Waiting:为Nginx已经处理完正在等候下一次请求指令的驻留连接。在开启keep-alive的情况下,这个值等于active-(reading+writing)。

# 提示:为了安全起见,这个值要防止被外部用户查看。
# 可以配置allow和deny来控制用户访问。
5.4 为Nginx增加错误日志(error_log)
5.4.1 Nginx错误日志介绍
Nginx错误日志属于核心功能模块(ngx_core_module)的参数,名为error_log,可以放在Main区块中全局配置,也可以放在不同的虚拟主机中单独记录虚拟主机的错误信息。

# error_log的语法格式及参数如下:
error_log filr level;
error_log:关键字
file:日志文件
level:错误日志级别

上述error_log是不能改变的固定写法,日志文件的路径可自定义,错误日志级别常见的有[debug|info|notice|warn|error|crit|alert|emerg],级别越高记录的信息越少。
生产场景一般用warn|error|crit这三个级别,注意不要配置info等较低级别,会带来巨大磁盘IO和空间占用。

# error_log的默认值为:
error_log logs/error.log error;

# 可放置的标签段为:
main、http、server、location
5.4.2 Nginx错误日志配置
[root@web01 /application/nginx/conf/extra]# vim ../nginx.conf
[root@web01 /application/nginx/conf/extra]# cat -n ../nginx.conf
     1	worker_processes  1;
     2	error_log logs/error.log;                          # 配置这一行即可,在主配置里增加,所有虚拟主机都生效。
     3	events {
     4	    worker_connections  1024;
     5	}
     6	http {
     7	    include       mime.types;
     8	    default_type  application/octet-stream;
     9	    sendfile        on;
    10	    keepalive_timeout  65;
    11	include extra/01_www.conf;
    12	include extra/02_blog.conf;
    13	include extra/03_bbs.conf;
    14	include extra/04_status.conf;
    15	}
6. Nginx访问日志(access_log)
6.1 Nginx访问日志介绍
主要作用是分析用户浏览行为。
由ngx_http_log_module模块负责。
6.2 Nginx访问日志参数
Nginx访问日志的主要又下列两个参数控制
| 参数 | 说明 |
|---|---|
| log_format | 用来定义记录日志的格式(可以定义多种日志格式,取不同名字即可) |
| access_log | 用来指定日志文件的路径及使用的何种日志格式记录日志 |
Nginx错误日志记录格式与记录日志默认的参数配置如下:
[root@web01 /application/nginx/conf]# cat nginx.conf.default
……省略部分内容
 #log_format  main  '$remote_addr - $remote_user [$time_local] "$request" '
    #                  '$status $body_bytes_sent "$http_referer" '
    #                  '"$http_user_agent" "$http_x_forwarded_for"';

    #access_log  logs/access.log  main;
……省略部分内容
6.3 访问日志变量说明
log_format  main  '$remote_addr - $remote_user [$time_local] "$request" '
                      '$status $body_bytes_sent "$http_referer" '
                      '"$http_user_agent" "$http_x_forwarded_for"';
| Nginx日志变量 | 说明 |
|---|---|
| $remote_addr | 记录访问网站的客户端地址 |
| $http_x_forwarded_for | 当前端有代理服务器时,设置web节点记录客户端地址的配置,此参数生效的前提是代理服务器上也要进行相关的x_forwarded_for设置 |
| $remote_user | 记录客户端用户名称 |
| $time_local | 记录访问时间与时区 |
| $request | 用户的http请求起始行信息 |
| $status | HTTP状态码,记录请求返回的状态 |
| $body_bytes_sent | 服务器发给客户端的响应body字节数 |
| $http_referer | 记录此次请求是从哪个链接访问过来的,可以根据referer进行防盗链设置 |
| $http_user_agent | 记录客户端访问信息,如浏览器、手机客户端等 |
| 在没有特殊的要求下,采用默认配置即可 |
6.4 配置Nginx访问日志
[root@web01 /application/nginx/conf]# cat nginx.conf.default
……省略部分内容
 #log_format  main  '$remote_addr - $remote_user [$time_local] "$request" '
    #                  '$status $body_bytes_sent "$http_referer" '
    #                  '"$http_user_agent" "$http_x_forwarded_for"';

    #access_log  logs/access.log  main;
……省略部分内容

# 把上述内容放到nginx.conf中
[root@web01 /application/nginx/conf]# cat nginx.conf
worker_processes  1;
error_log logs/error.log;
events {
    worker_connections  1024;
}
http {
    include       mime.types;
    default_type  application/octet-stream;
    sendfile        on;
    keepalive_timeout  65;
    log_format  main  '$remote_addr - $remote_user [$time_local] "$request" '        # 加在http标签的这个位置
                      '$status $body_bytes_sent "$http_referer" '
                      '"$http_user_agent" "$http_x_forwarded_for"';
include extra/01_www.conf;
include extra/02_blog.conf;
include extra/03_bbs.conf;
include extra/04_status.conf;
}

# 然后编辑虚拟主机配置文件,添加记录日志参数
[root@web01 /application/nginx/conf/extra]# cat 01_www.conf
    server {
        listen       80;
        server_name  www.etiantian.org
                     etiantian.org;
        location / {
            root   html/www;
            index  index.html index.htm;
        }
        error_page   500 502 503 504  /50x.html;
        location = /50x.html {
            root   html;
        }
        access_log logs/access_www.log main;             # 添加在此处
    }
检查语法,并重启nginx
[root@web01 /application/nginx/conf/extra]# nginx -t
nginx: the configuration file /application/nginx-1.18.0//conf/nginx.conf syntax is ok
nginx: configuration file /application/nginx-1.18.0//conf/nginx.conf test is successful
[root@web01 /application/nginx/conf/extra]# nginx -s stop
[root@web01 /application/nginx/conf/extra]# nginx
Linux访问测试
[root@web01 /application/nginx/conf/extra]# curl www.etiantian.org
http://www.etiantian.org
[root@web01 /application/nginx/conf/extra]# cat ../../logs/access_www.log
192.168.1.51 - - [26/May/2020:00:05:44 +0800] "GET / HTTP/1.1" 200 25 "-" "curl/7.29.0" "-"
谷歌浏览器访问测试

[root@web01 /application/nginx/conf/extra]# cat ../../logs/access_www.log
192.168.1.51 - - [26/May/2020:00:05:44 +0800] "GET / HTTP/1.1" 200 25 "-" "curl/7.29.0" "-"
192.168.1.1 - - [26/May/2020:00:07:27 +0800] "GET / HTTP/1.1" 200 25 "-" "Mozilla/5.0 (Windows NT 10.0; Win64; x64) AppleWebKit/537.36 (KHTML, like Gecko) Chrome/79.0.3945.88 Safari/537.36" "-"
192.168.1.1 - - [26/May/2020:00:07:27 +0800] "GET /favicon.ico HTTP/1.1" 404 555 "http://www.oldboy.com/" "Mozilla/5.0 (Windows NT 10.0; Win64; x64) AppleWebKit/537.36 (KHTML, like Gecko) Chrome/79.0.3945.88 Safari/537.36" "-"
192.168.1.1 - - [26/May/2020:00:07:28 +0800] "GET / HTTP/1.1" 304 0 "-" "Mozilla/5.0 (Windows NT 10.0; Win64; x64) AppleWebKit/537.36 (KHTML, like Gecko) Chrome/79.0.3945.88 Safari/537.36" "-"
192.168.1.1 - - [26/May/2020:00:07:28 +0800] "GET /favicon.ico HTTP/1.1" 404 555 "http://www.etiantian.org/" "Mozilla/5.0 (Windows NT 10.0; Win64; x64) AppleWebKit/537.36 (KHTML, like Gecko) Chrome/79.0.3945.88 Safari/537.36" "-"
日志格式说明
192.168.1.1 - - [26/May/2020:00:07:27 +0800] "GET / HTTP/1.1" 200 25 "-" "Mozilla/5.0 (Windows NT 10.0; Win64; x64) AppleWebKit/537.36 (KHTML, like Gecko) Chrome/79.0.3945.88 Safari/537.36" "-"

# $remote_addr:对应的是真实日志里的客户端IP,192.168.1.1。
# $remote_user:对应的是第二个中杠"-",没有远程用户,所以用"-"填充。
# $time_local:对应的是[26/May/2020:00:07:27 +0800]。
# $request:对应的是"GET / HTTP/1.1"。
# $status:对应的是200状态码
# body_bytes_sent:对应的是25字节,响应body的大小。
# $http_referer:对应的是“-”,直接打开的域名浏览,因此没有值。
# $http_user_agent:对应的是"Mozilla/5.0 (Windows NT 10.0; Win64; x64) AppleWebKit/537.36 (KHTML, like Gecko) Chrome/79.0.3945.88 Safari/537.36"。
# $http_x_forwarded_for:对应的是“-”,因为web服务器没有使用代理,所以此处为“-”。
扩展:可以在记录日志参数中加上buffer和flush选项,可以在高并发场景下提升网站访问性能。
[root@web01 /application/nginx/conf/extra]# cat 01_www.conf
    server {
        listen       80;
        server_name  www.etiantian.org
                     etiantian.org;
        location / {
            root   html/www;
            index  index.html index.htm;
        }
        error_page   500 502 503 504  /50x.html;
        location = /50x.html {
            root   html;
        }
        access_log logs/access_www.log main gzip buffer=32k flush=5s;            # 配置如此处,gzip:压缩日志。buffer:缓冲压缩的日志。flush=5s:每5秒刷新一次缓冲到磁盘
    }
6.5 Nginx访问日志轮询切割
(1)什么进行日志切割
默认情况下Nginx会把所有访问日志都写到一个文件中,时间久了,该文件就会越来越大,不利于后期的查看和处理。
(2)编写切割脚本,并手动执行查看结果
[root@web01 /application/nginx/logs]# vim cut_nginx_log.sh
#!/bin/bash
Date=`date +%F -d -1day`
Basedir="/application/nginx"
Nginxlogdir="$Basedir/logs"
Logname="access_www.log"

[ -d $Nginxlogdir ] && cd $Nginxlogdir || exit 1
[ -f $Logname ] || exit 1
/bin/mv $Logname ${Date}_${Logname}
${Basedir}/sbin/nginx -s reload

[root@web01 /application/nginx/logs]# sh cut_nginx_log.sh
[root@web01 /application/nginx/logs]# ls
2020-06-03_access_www.log    # 这就是执行脚本后,生成的脚本
access.log
cut_nginx_log.sh
error.log  nginx.pid
(3)编写定时任务,每天0点执行
[root@web01 /application/nginx/logs]# crontab -e
# Every day at 0, cut the Nginx access log
00 00 * * * /bin/sh /application/nginx/logs/cut_nginx_log.sh &> /dev/null
7. Nginx Location
7.1 Location的作用
根据用户请求的网站地址URL匹配,匹配成功即进行相关操作。
在没有使用正则表达式的时候,nginx会先在server中的多个location中,选取匹配度最高的一个uri,uri是用户请求的字符串(域名后面的路径),即域名后面的web文件路径,然后使用该location模块中的正则url和字符串,如果配成功就结束搜索,并使用此location处理此请求。
7.2 Location语法
Location语法示例
location [ = | ~ | ~* | ^~ ] uri {
    …………
}
Location语法含义
location:指令。
[ = | ~ | ~* | ^~ ]:匹配标识。
uri:匹配的网站地址。
{…………}:匹配URI后要执行的配置段,也就是要显示给用户的内容。
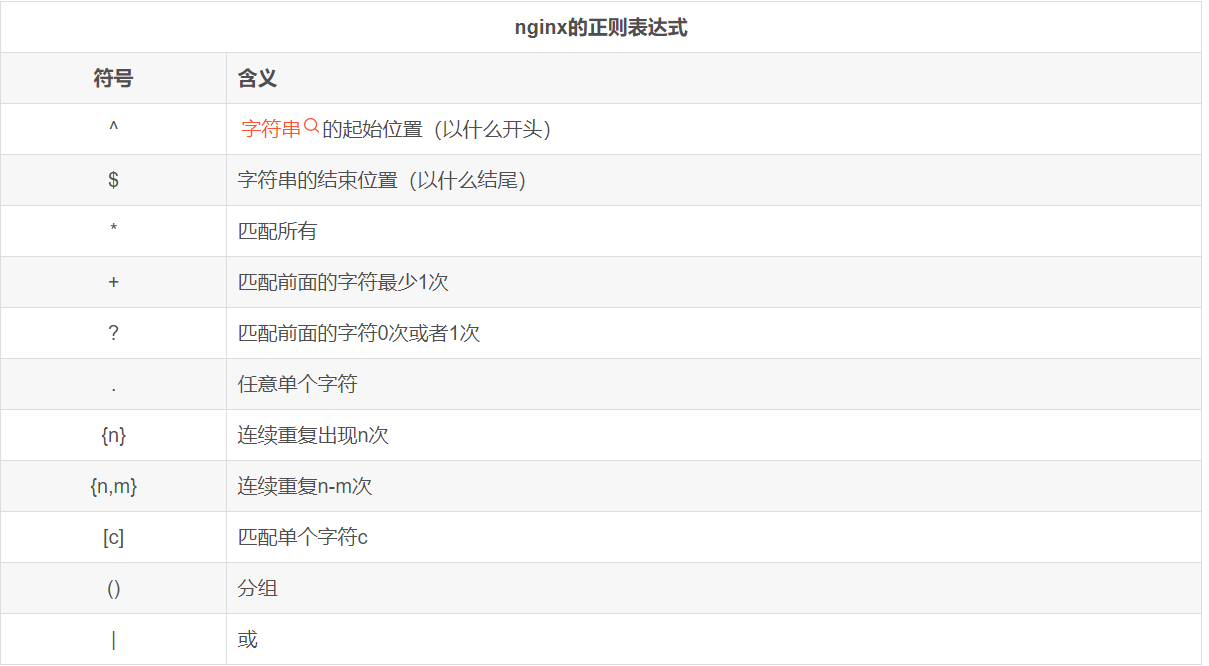
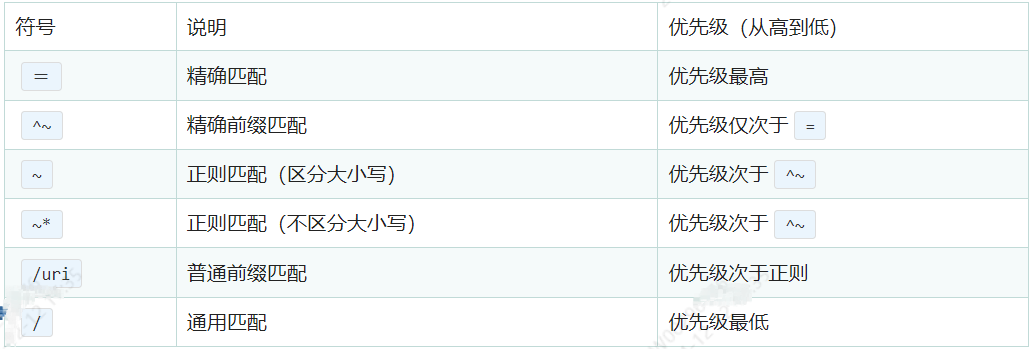
7.3 Location参数与正则表达式介绍
| 匹配符 | 作用 |
|---|---|
| = | 精确匹配=,使用 = 前缀的location表达式,只有当请求的路径与给定字符串完全匹配时才生效。这是最高优先级的匹配。 |
| ^~ | 用于标准uri前,表示包含正则表达式,且匹配以什么开头。 |
| ~ | 用于标准uri前,表示包含正则表达式,且“区分大小写”,并且要匹配成功,然后才处理请求。 |
| !~ | 用于标准uri前,表示包含正则表达式,且区分大小写,但是不能匹配成功,然后才处理请求。这个一般都不用,取反的范围太广,不好控制。 |
| ~* | 用于标准uri前,表示包含正则表达式,且“不区分大写”,匹配成功,处理请求。 |
| !~* | 用于标准uri前,表示包含正则表达式,且不区分大小写,且不匹配。 |
| / | 普通前缀匹配,如果所有的location都没有匹配成功,则使用 / 作为默认的匹配项,它会匹配所有未被其他location匹配的请求。 |
| $ | 用于标准uri前,表示包含正则表达式,且匹配以什么结尾。 |
| * | 用于标准uri前,表示包含正则表达式,且能够匹配任意长度字符。 |
7.4 location匹配示例
7.4.1 精确匹配 =
精确匹配前
[root@www conf.d]# cat pc.conf
server {
  listen 80;
  server_name www.pc.com;

  location / {
    root /data/nginx/html/pc;
    index index.html;
  }

  #location = /1.jpg {
  #  root /data/nginx/static;
  #  index index.html;
  #}
}

精确匹配后
[root@www conf.d]# cat pc.conf
server {
  listen 80;
  server_name www.pc.com;

  location / {
    root /data/nginx/html/pc;
    index index.html;
  }

  location = /1.jpg {
    root /data/nginx/static;
    index index.html;
  }
}

7.4.2 区分大小写 ~
如果uri中包含大写字母,则以下location匹配Ax.jpg条件不成功,因为~为区分大小写,那么当用户的请求被执行匹配时发现location中定义的是大写的A,则匹配失败,即要么继续往下匹配其他的location (如果有) ,要么报错给客户端。
[root@www conf.d]# cat pc.conf
server {
  listen 80;
  server_name www.pc.com;

  location / {
    root /data/nginx/html/pc;
    index index.html;
  }

  location = /1.jpg {
    root /data/nginx/static;
    index index.html;
  }

  location ~ /A.?\.jpg {
    index index.html;
    root /data/nginx/html/image;
  }

}

[root@www conf.d]# mkdir /data/nginx/html/image
[root@www conf.d]# cd /data/nginx/html/image
[root@www image]# wget https://webstatic.mihoyo.com/upload/contentweb/2022/06/30/b51565c6f1298e534e90b6e63332e9c1_6618231443033589469.png

[root@www image]# ll -rt
total 352
-rw-r--r-- 1 root root 356697 Jun 30  2022 b51565c6f1298e534e90b6e63332e9c1_6618231443033589469.png
[root@www image]# mv b51565c6f1298e534e90b6e63332e9c1_6618231443033589469.png Ab.jpg
[root@www image]# ll
total 352
-rw-r--r-- 1 root root 356697 Jun 30  2022 Ab.jpg
访问测试

改成小写测试
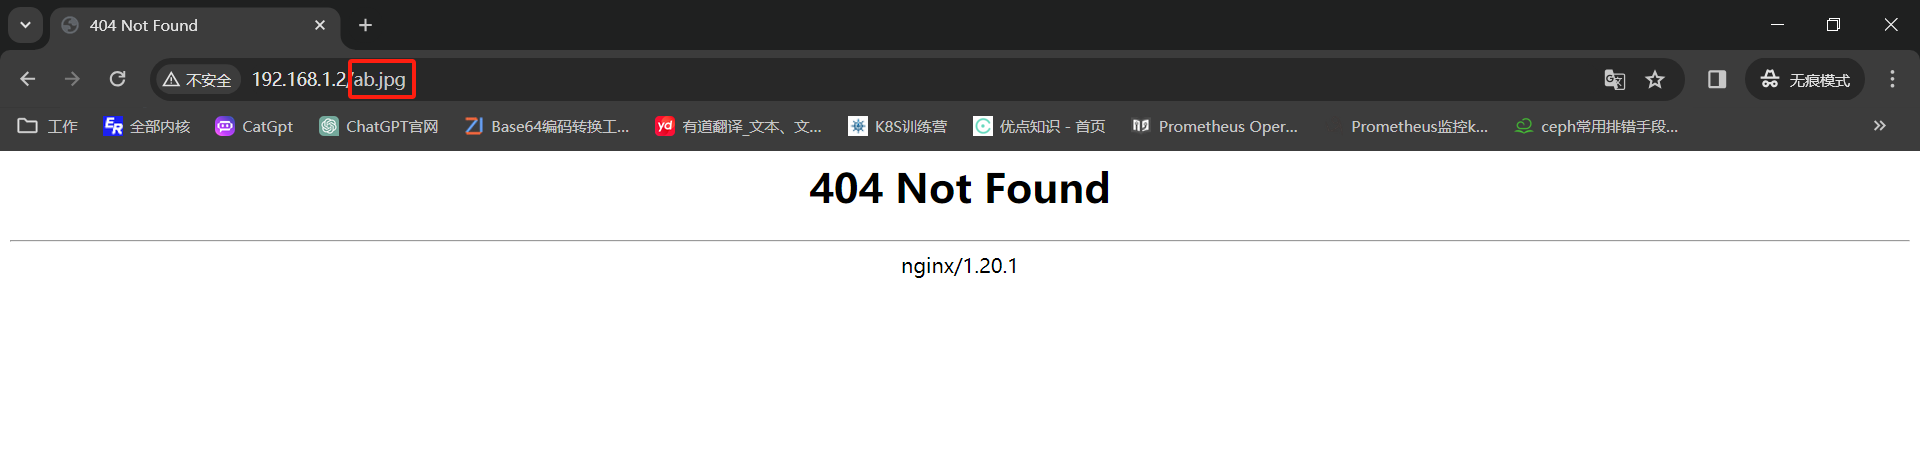
为什么请求ab.jpg会404?
[root@www conf.d]# cat pc.conf
server {
listen 80;
server_name www.pc.com;
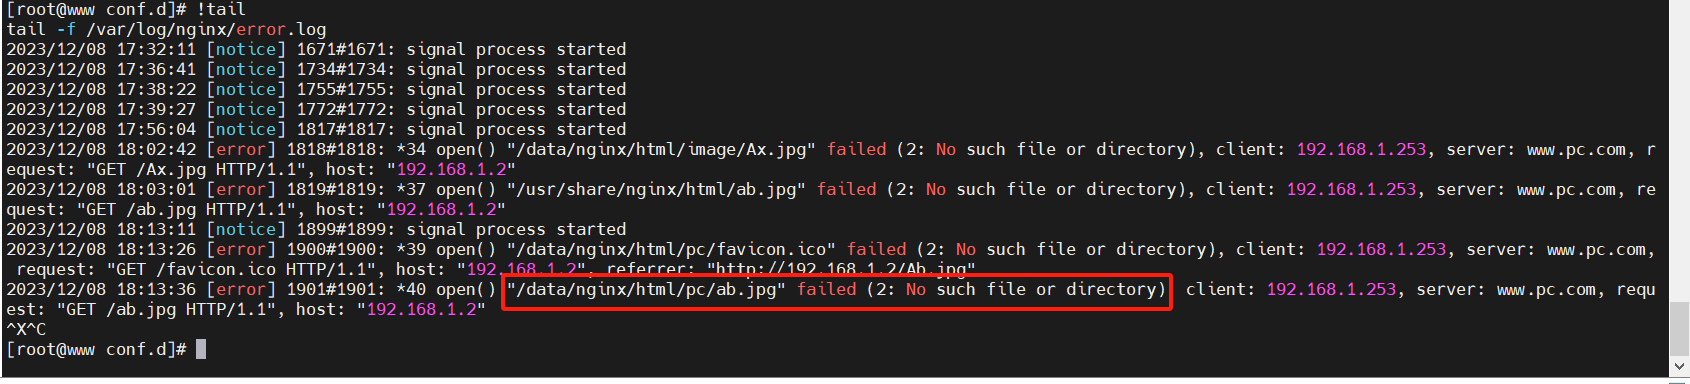
location / { # (3)最后,就到了/这里进行匹配,这个时候会尝试去加载/data/nginx/html/pc/ab.jpg,但由于该目录下根本没有ab.jpg文件,所以返回了404给客户端。这里的过程在错误日志中是有明显体现的。
root /data/nginx/html/pc;
index index.html;
}
location = /1.jpg { # (1)首先我的ab.jpg到了nginx后,会先到=这里进行匹配,因为它优先级最高,但是匹配不上,开始去到优先级第二高的location。
root /data/nginx/static;
index index.html;
}
location ~ /A.?\.jpg { # (2)然后,我的ab.jpg又到~这里进行匹配,因为它优先级在当前文件中第二高,但是也匹配不上,因为区分大小写了,开始去到优先级第3高的location。
index index.html;
root /data/nginx/html/image;
}
}
错误日志
7.4.3 不区分大小写 ~*
工作中一般都不会区分大小写
[root@www conf.d]# cat pc.conf
server {
  listen 80;
  server_name www.pc.com;

  location / {
    root /data/nginx/html/pc;
    index index.html;
  }

  location = /1.jpg {
    root /data/nginx/static;
    index index.html;
  }

  location ~ /A.?\.jpg {
    index index.html;
    root /data/nginx/html/image;
  }

  location ~* /A.?\.jpg { # 不区分大小写配置
    index index.html;
    root /data/nginx/html/image;
  }

}
[root@www conf.d]# nginx -t
nginx: the configuration file /etc/nginx/nginx.conf syntax is ok
nginx: configuration file /etc/nginx/nginx.conf test is successful
[root@www conf.d]# nginx -s reload
访问测试
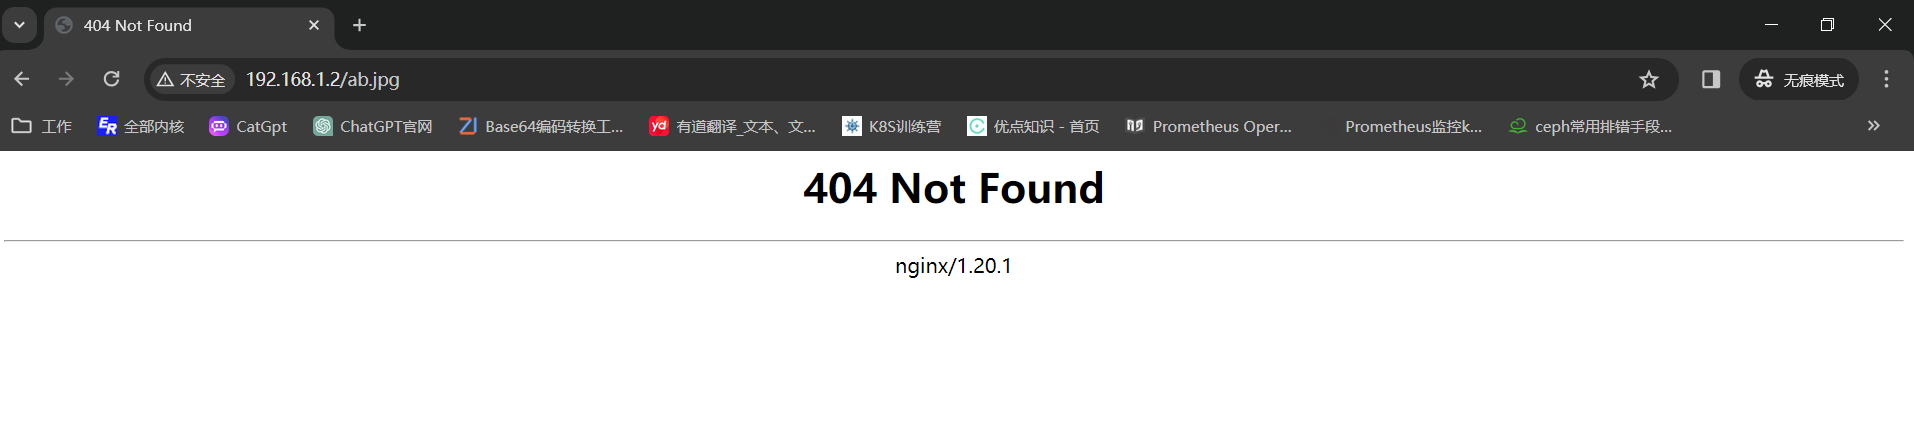
为啥上面还是404呢?虽然大小写现在不区分了,但是访问的ab.jpg在服务器上是不存在的,这点在错误日志中也能看到。只要复制一个文件改下名就可以访问了。

[root@www conf.d]# cp /data/nginx/html/image/Ab.jpg /data/nginx/html/image/ab.jpg
访问测试

7.4.4 前缀匹配 ^~
该模式一般动静分离用的比较多
[root@www conf.d]# cat pc.conf
server {
  listen 80;
  server_name www.pc.com;

  location / {
    root /data/nginx/html/pc;
    index index.html;
  }

  location = /1.jpg {
    root /data/nginx/static;
    index index.html;
  }

  location ~ /A.?\.jpg {
    index index.html;
    root /data/nginx/html/image;
  }

  location ~* /A.?\.jpg {
    index index.html;
    root /data/nginx/html/image;
  }

  location ^~ /images { # 这里只要访问的前缀是images开头的,就都可以匹配到
    index index.html;
    root /data/nginx;
  }
}
[root@www conf.d]# nginx -t
nginx: the configuration file /etc/nginx/nginx.conf syntax is ok
nginx: configuration file /etc/nginx/nginx.conf test is successful
[root@www conf.d]# nginx -s reload

[root@www conf.d]# mkdir /data/nginx/images1
[root@www conf.d]# echo 'images1!!!' > /data/nginx/images/index.html
[root@www conf.d]# cat /data/nginx/images/index.html
images1!!!
访问测试

7.4.5 文件名后缀匹配 ~*
该模式工作中常用
[root@www conf.d]# cat pc.conf
server {
  listen 80;
  server_name www.pc.com;

  location / {
    root /data/nginx/html/pc;
    index index.html;
  }

# 注释一下下面的配置,防止冲突
  #location = /1.jpg {
  #  root /data/nginx/static;
  #  index index.html;
  #}

  #location ~ /A.?\.jpg {
  #  index index.html;
  #  root /data/nginx/html/image;
  #}

  #location ~* /A.?\.jpg {
  #  index index.html;
  #  root /data/nginx/html/image;
  #}

  location ^~ /images {
    index index.html;
    root /data/nginx;
  }


  location ^~ /images {
    index index.html;
    root /data/nginx;
  }

  location ~* \.(gif|jpg|jpeg|bmp|png|tiff|tif|ico|wmf|js)$ { # \.表示把.转义成一个普通字符。()这是一个元组,中间可以有多个字符,$表示结尾。
    index index.html;
    root /data/nginx/images1;
  }
}


[root@www conf.d]# nginx -t
nginx: the configuration file /etc/nginx/nginx.conf syntax is ok
nginx: configuration file /etc/nginx/nginx.conf test is successful
[root@www conf.d]# nginx -s reload

[root@www conf.d]# cd /data/nginx/images1/
[root@www images1]# wget https://webstatic.mihoyo.com/upload/contentweb/2022/07/04/6f0ef40157e95b0d59455c12f4d3f270_3262958961633311108.png
[root@www images1]# mv 6f0ef40157e95b0d59455c12f4d3f270_3262958961633311108.png 123.png
访问测试

7.5 location匹配优先级
精确匹配的优先级最高——正则匹配——一般匹配优先级最低
location = 完整路径 > location ^~ > location ~,~* > location /test > location /
- 如果有多个精确匹配,则选择第一个精确匹配的location。
- 如果有多个前缀匹配,则选择最长的前缀匹配。
- 如果有多个正则表达式匹配,则选择第一个匹配的location。
7.6 生产环境使用建议
server {
  listen 80;
  server_name 192.168.1.2;

  location / { # 当其他lcoation都匹配不上的时候,会加载这个默认配置返回给客户端。
    root /data/nginx/html;
    index index.html;
  }

  location = /index.html { # 加快网站首页访问速度,一旦匹配成功,就停止匹配。
    root /data/nginx/html;
  }

# 动静分离配置
## 静态资源配置
  location ^~ /static/ {
    ........;
  }
## 或者
  location ~* \.(gif|jpg|jpeg|bmp|png|tiff|tif|ico|wmf|js)$ {
      index index.html;
      root /data/nginx/images1;
    }

}
8. Nginx Rewrite
8.1 什么是 Nginx Rewrite
URL地址重写,典型的企业应用就是做伪静态。
需要PCRE软件支持。
8.2 Rewrite作用
(1)80强转443。
(2)提高用户体验。
(3)伪静态。
8.3 Rewrite的使用
(1)Rewrite语法
指令语法:Rewrite regex replacement [flag];
默认值:none;
应用位置:server、location、if。

# 具体语法如下
rewrite ^/(.*) http://www.etiantian.org/$1 permanent;

# rewrite: 固定关键字,表示开启一条Rewrite匹配规则。
# ^/(.*):正则表达式,这里表示匹配所有。
# http://www.etiantian.org/$1:匹配成功后跳转到这个地址。这里的$1是取regex部分()括号里的内容。
permanent:表示永久301重定向标记,即跳转到http://www.etiantian.org/$1地址上。
8.4 Rewrite 指令结尾的flag标记说明
| flag 标记符号 | 说明 |
|---|---|
| last | 本条规则匹配完后,不再匹配后面的任何规则,但是会重新向服务器发起一次页面请求。 |
| break | 本条规则匹配完即终止,不再匹配后面的任何规则。 |
| redirect | 返回302临时重定向,浏览器地址栏会显示跳转后的URL地址。如果nginx服务关闭,则地址跳转失效。 |
| permanent | 返回301永久重定向,浏览器地址栏会显示跳转后的URL地址。只要不清空浏览器缓存,就算nginx服务关闭,地址跳转依然生效。 |
9. Nginx访问认证
9.1 语法示例
location / {
    auth_basic "closed site";
    auth_basic_user_file conf/httpasswd;
}

# 参数说明
## auth_basic:
语法:auth_basic string | off;
默认值:auth_basic off;
使用位置:http,server,location,limit_except

## auth_basic_user_file
语法:auth_basic_user_file;
默认值:-
使用位置:http,server,location,limit_except

# auth_basic_user_file参数后面接认证密码文件,file的内容如下
name1:password1
name2:password2
name3:password3
9.2 配置开始
9.2.1 修改配置文件
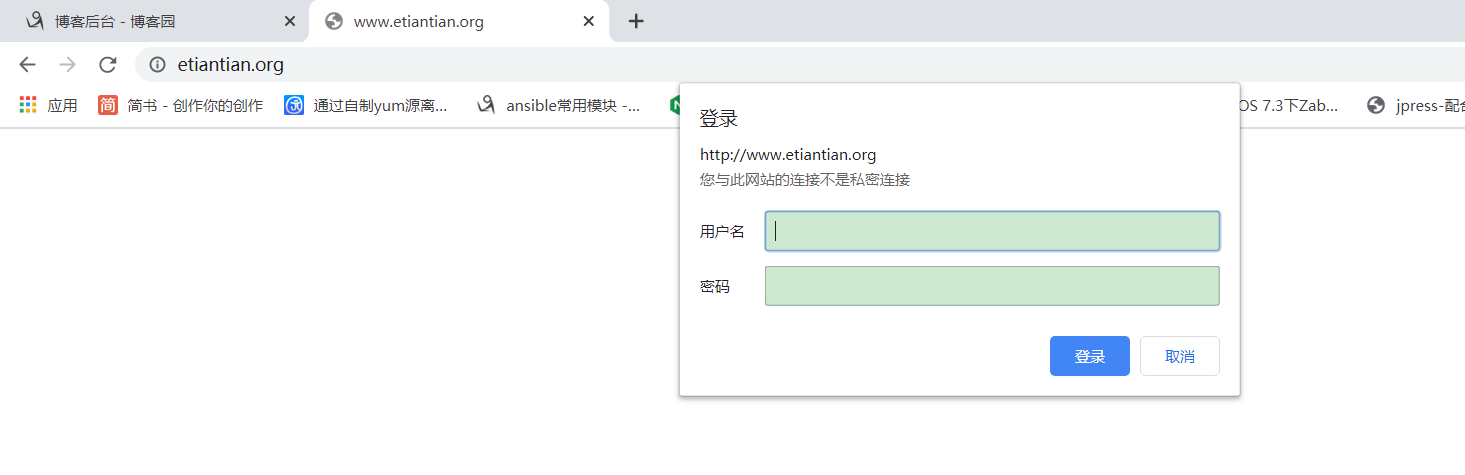
[root@web01 /application/nginx/conf/extra]# cat 01_www.conf
    server {
        listen       80;
        server_name  www.etiantian.org;
        location / {
            root   html/www;
            index  index.html index.htm;
            auth_basic    "xietangsheng";                              # 设置认证提示字符串“xietangsheng”
            auth_basic_user_file /application/nginx/conf/htpasswd;     # 设置认证的密码文件,登录的时候会去比对这个文件里面的内容。
        }
        error_page   500 502 503 504  /50x.html;
        location = /50x.html {
            root   html;
        }
        access_log logs/access_www.log main gzip buffer=32k flush=5s;
    }
9.2.2 获取htpasswd设置账号密码命令
[root@web01 /etc/yum.repos.d]# yum -y install httpd-tools  # 安装软件包
[root@web01 /etc/yum.repos.d]# which htpasswd
/usr/bin/htpasswd
9.2.3 创建登录时的账号密码
[root@web01 /etc/yum.repos.d]# htpasswd -bc /application/nginx/conf/htpasswd xietangsheng 123456
Adding password for user xietangsheng
[root@web01 /etc/yum.repos.d]# chmod 400 /application/nginx/conf/htpasswd.pass
[root@web01 /etc/yum.repos.d]# chown nginx /application/nginx/conf/htpasswd.pass
[root@web01 /etc/yum.repos.d]# cat /application/nginx/conf/htpasswd.pass
xietangsheng:$apr1$UtxFLnQJ$QIk8FcwHD2mQklaXQXsJR0
9.2.4 生效配置
[root@web01 /etc/yum.repos.d]# nginx -s reload
9.2.5 浏览器访问测试
10. 基于客户端IP的访问控制
访问控制基于模块ngx_http_access_module实现,可以通过匹配客户端源IP地址进行限制。
10.1 配置示例
比如说有一个uri比较重要,需要指定IP才能访问到,那么可以进行如下配置。

server {
  listen 80;
  server_name 192.168.1.2;

  location / {
    root /data/nginx/html;
    index index.html;
  }

  location /about {
    alias /data/nginx/html/pc;
    index index.html;
    deny 192.168.1.1;
    allow 192.168.1.0/24;
    deny all; # 拒绝所有永远放在最后。
  }
}

上述配置:
先拒绝了192.168.1.1访问/data/nginx/html/pc/about/index.html,
再允许1.0段的其他地址访问,
最后拒绝了其他地址访问。
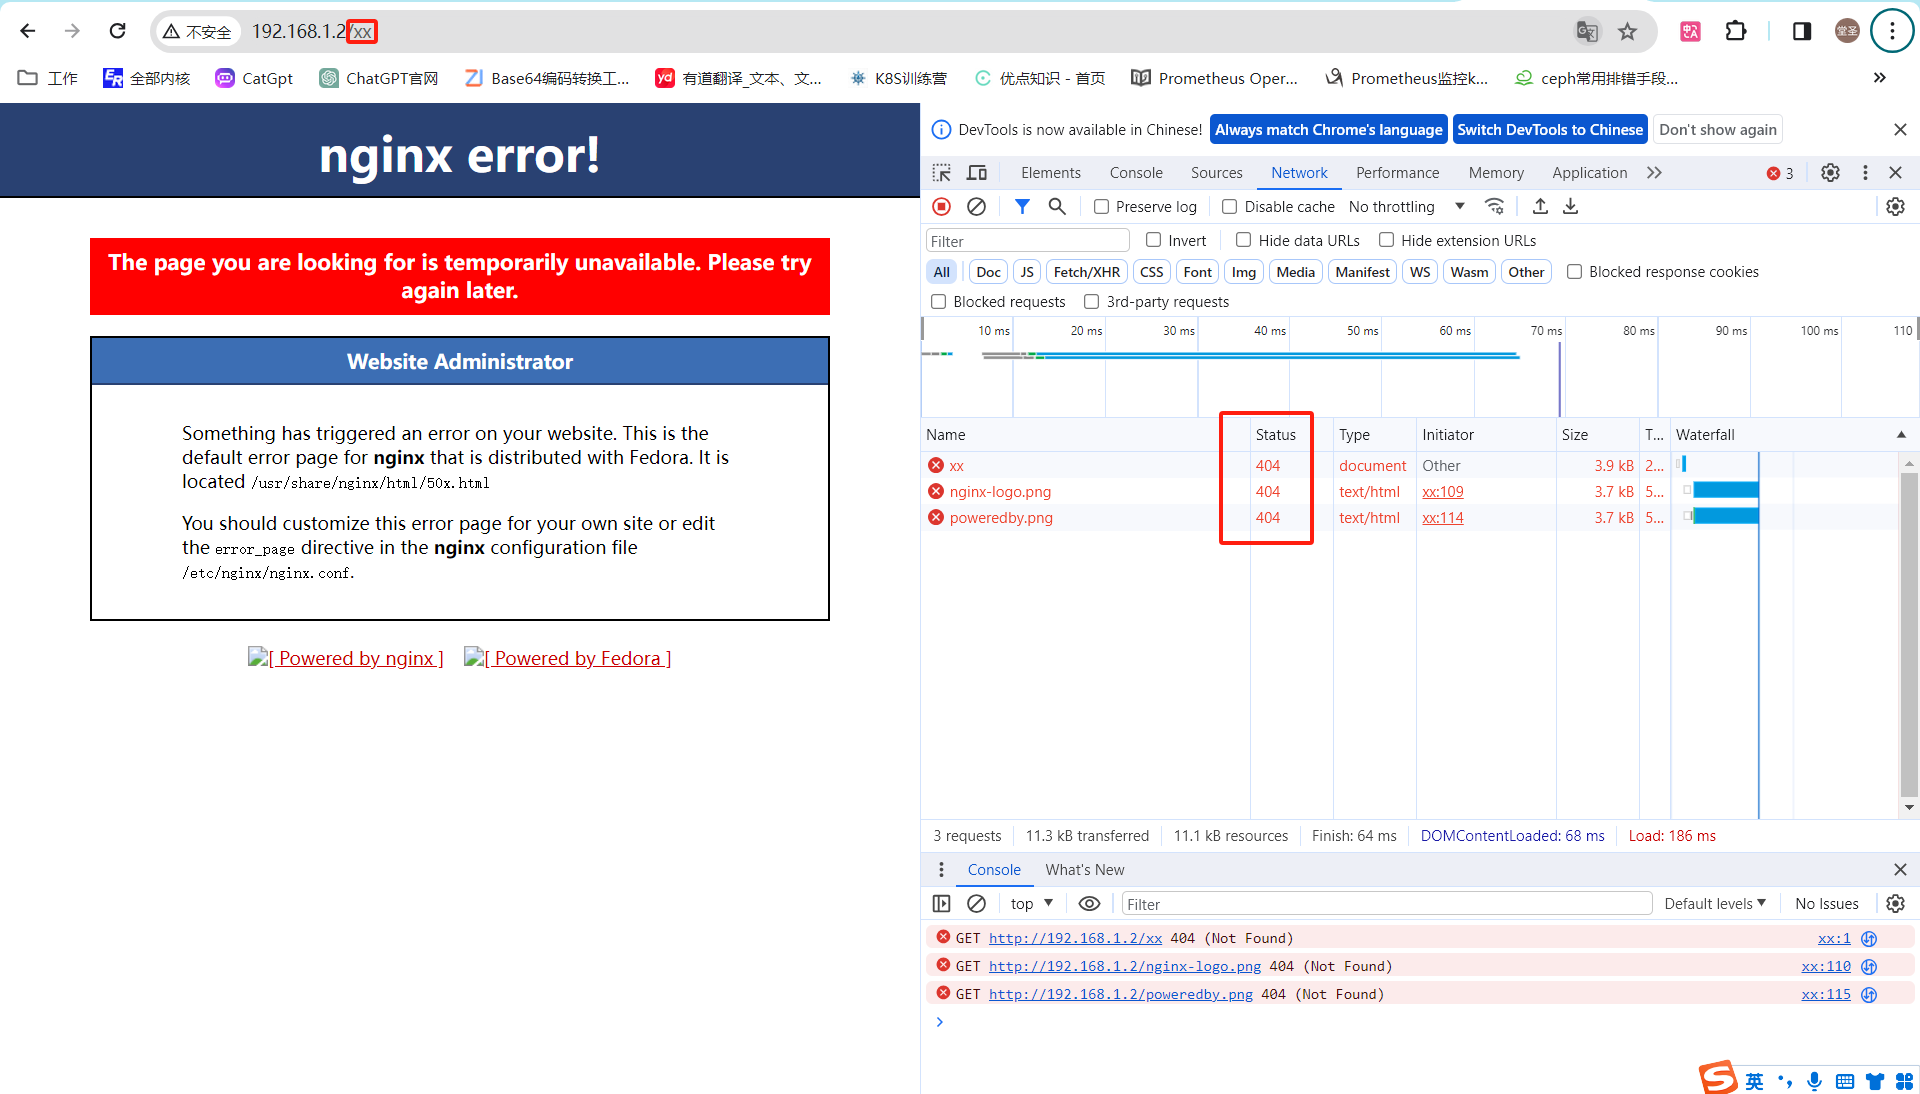
11. 自定义错误页面
实际工作中,错误页面会由开发去写,进行更友好的显示。
[root@www conf.d]# cat pc.conf
server {
  listen 80;
  server_name 192.168.1.2;

  location / {
    root /data/nginx/html;
    index index.html;
  }

  error_page 500 502 503 504 404 /50x.html; # 当访问一个不存在的前缀时,会直接显示50x.html的内容
  location = /50x.html {
    root /data/nginx/html/error;
  }

}
12. 自定义server_name级别的日志
访问日志和错误日志默认是全局的,可以针对server_name定义局部的。
实际工作中,配置局部的访问日志较多。
[root@www conf.d]# cat pc.conf
server {
  listen 80;
  server_name 192.168.1.2;

  access_log /data/nginx/logs/192.168.1.2-access.log main; # 访问日志。这里需要注意,日志格式如果有要求的话,需要在主配置文件中定义好后,在这里进行引用,此处的main就是引用的主配置文件中的日志格式。
  error_log /data/nginx/logs/192.168.1.2-error.log; # 错误日志

  location / {
    root /data/nginx/html;
    access_log xxx main; # locaiton级别的访问日志
    index index.html;
  }

  error_page 500 502 503 504 404 /50x.html;
  location = /50x.html {
    root /data/nginx/html/error;
  }

}
13. 检测用户访问的文件是否存在 try_files
正常情况下,当用户访问一个不存在的文件时,就直接返回404或者指定的错误页面了,但是也可以提前检测,检测到不存在时直接跳转到网站首页或者返回指定状态码。
13.1 try_files介绍
该模块实际工作中用的较多
try_files会按我们的配置顺序检查"文件或者目录"是否存在,返回第一个找到的文件或文件夹 (结尾加斜线表示为文件夹)。如果所有文件或文件夹都找不到,会进行一个内部重定向到最后一个参数。
只有最后一个参数可以引起一个内部重定向,之前的参数只设置内部URI的指向。
最后一个参数是回退URI且必须存在,否则会出现内部500错误。
13.2 配置演示
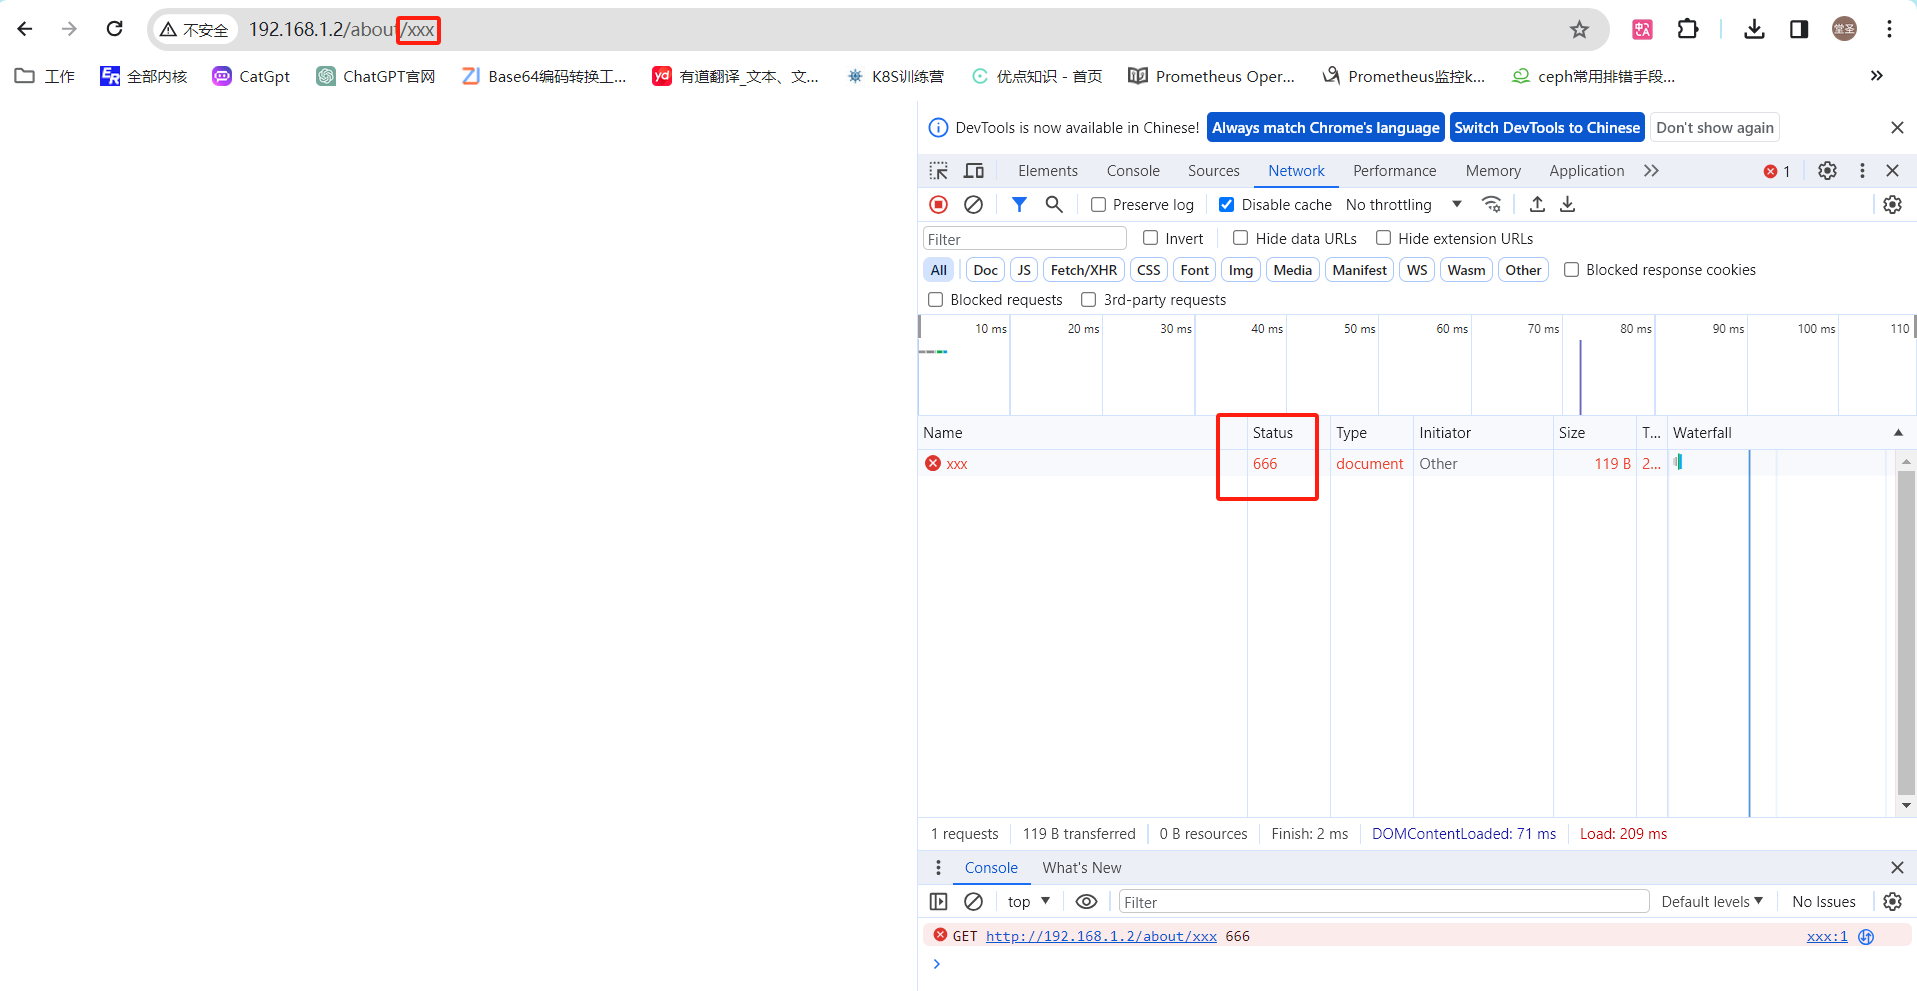
13.2.1 访问一个不存在资源,返回指定状态码
13.2.1.1 配置文件
[root@www conf.d]# cat pc.conf
server {
  listen 80;
  server_name 192.168.1.2;

  location / {
    root /data/nginx/html;
    index index.html;
  }

  location /about {
    root /data/nginx/html/pc;
    index index.html;
    try_files $uri $uri/ =666; # uri变量会自动截取请求前缀。假如我请求192.168.1.2/about,那第一个$uri表示文件,try_files 会检查/data/nginx/html/pc下,有没有about这个文件,注意是文件,不是目录。如果没有,会检查第二个参数$uri/,这个$uri/表示目录,如果有about这个目录,那就直接返回数据给客户端,如果依然没有,就直接返回状态码666给客户端。
    #try_files $uri $uri/ /about/default.html;
  }

}
13.2.1.2 访问测试
正常的请求

请求一个不存在的资源
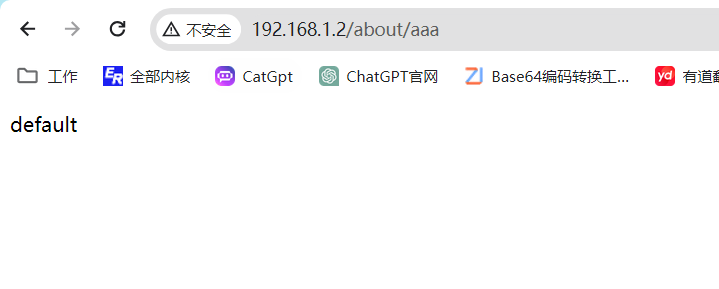
13.2.2 访问一个不存在资源,返回指定页面
13.2.2.1 配置展示
[root@www conf.d]# cat pc.conf
server {
  listen 80;
  server_name 192.168.1.2;

  location / {
    root /data/nginx/html;
    index index.html;
  }

  location /about {
    root /data/nginx/html/pc;
    index index.html;
    #try_files $uri $uri/ =666;
    try_files $uri $uri/ /about/default.html;
  }

}
[root@www conf.d]# cat /data/nginx/html/pc/about/default.html
default
13.2.2.2 访问测试
正常请求

正请求一个不存在的资源
14. 长连接配置
keepalive_timeout number; # 设定保持连接超时时长,0表示禁止长连接,默认为75s,通常配置在http字段作为站点全局配置。
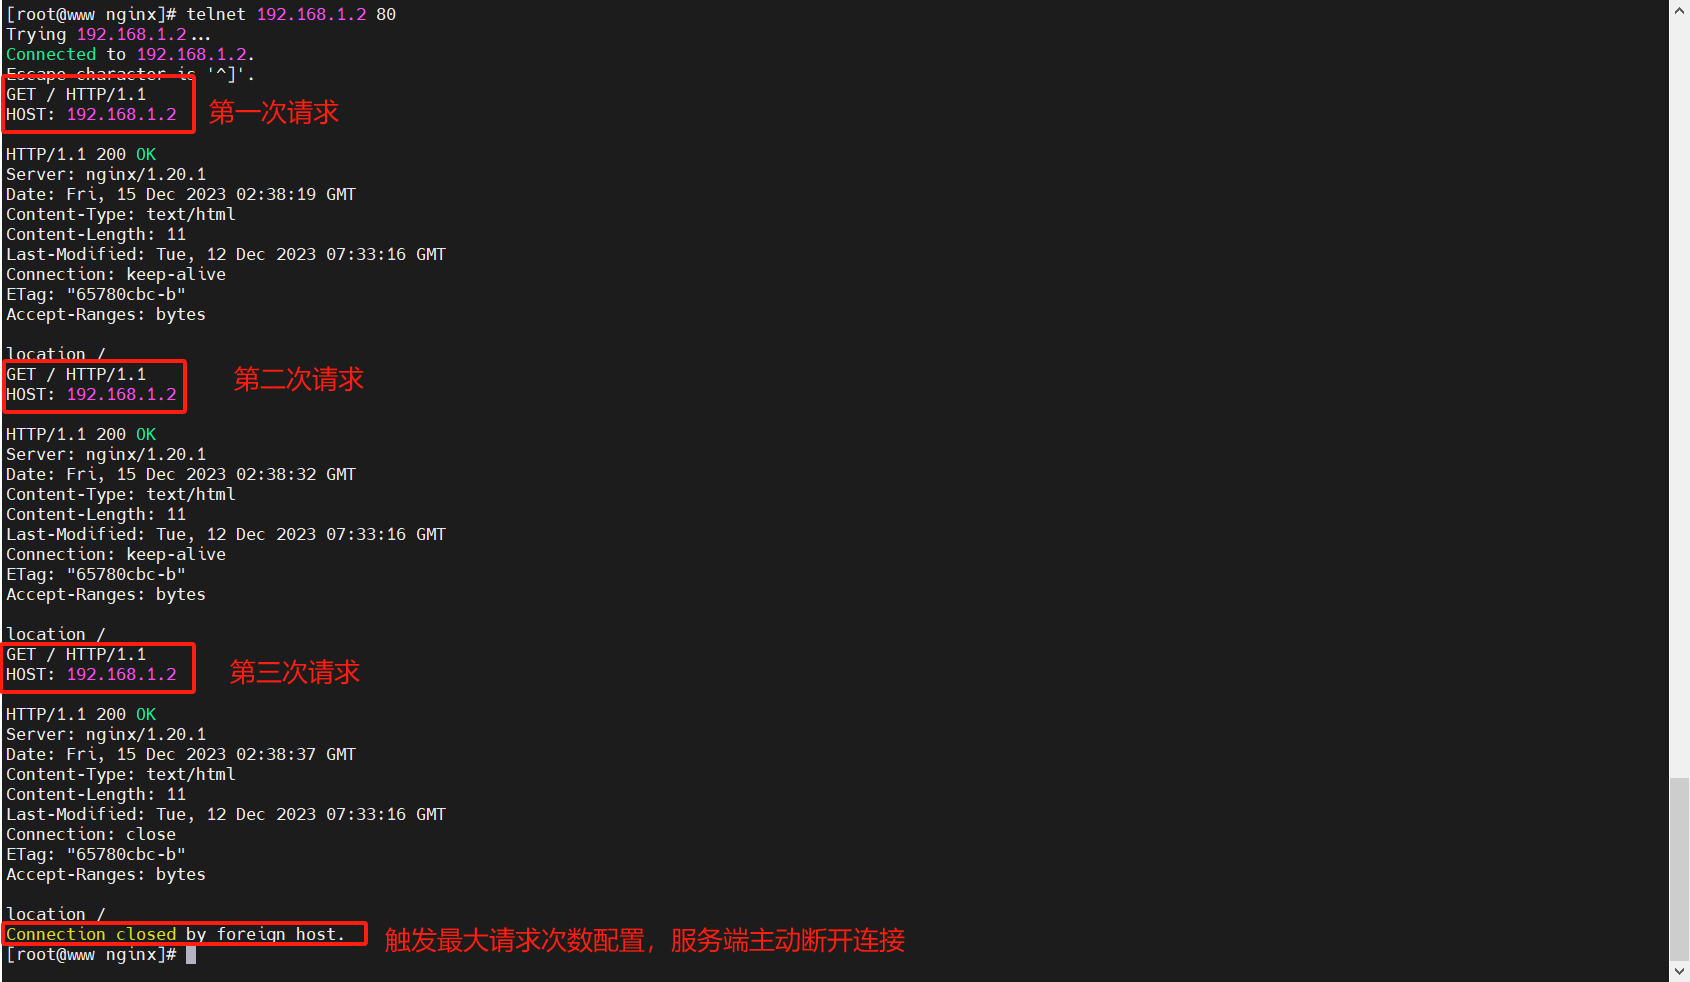
keepalive_requests number; # 在一次长连接上所允许请求的资源的最大数量,默认为100次,相当于一个链接,最多可以请求100个文件,超过100次后就断开连接,然后重新进行三次握手链接。这个值可以和前端一起确认下,看一次请求会加载多少个小文件,以及用户登录后,点击页面会加载多少文件。
注意:使用最大请求数时,为了释放每个连接的内存分配,必须定期关闭连接。因此,使用过高的最大请求数可能会导致过多的内存使用,不建议使用。
上面2个参数加在一起,就是默认75s内,一个链接最大允许发起100次请求,超过请求次数,就算没到75s,服务器也会主动断开连接。或者超过75s断开连接。
长连接配置一般都是加到主配置文件中,全局生效。
14.1 演示
14.1.1 配置调整
[root@www nginx]# grep keepalive nginx.conf
    keepalive_timeout   75;
    keepalive_requests   3; # 调整最大请求次数为3次,方便演示

[root@www nginx]# nginx -t
nginx: the configuration file /etc/nginx/nginx.conf syntax is ok
nginx: configuration file /etc/nginx/nginx.conf test is successful
[root@www nginx]# nginx -s reload
14.1.2 测试
14. nginx上传下载
14.1 nginx作为下载服务器
注意下载服务器有多台时,一定要保证数据一致性,也就是多个nginx共用一个存储服务器
14.1.1 调整配置
# 创建下载页面,不需要index.html
[root@www ~]# mkdir /data/nginx/html/pc/download
# 调整配置
[root@www ~]# cat /etc/nginx/conf.d/pc.conf
server {
listen 80;
server_name 192.168.1.2;
location / {
root /data/nginx/html;
index index.html;
}
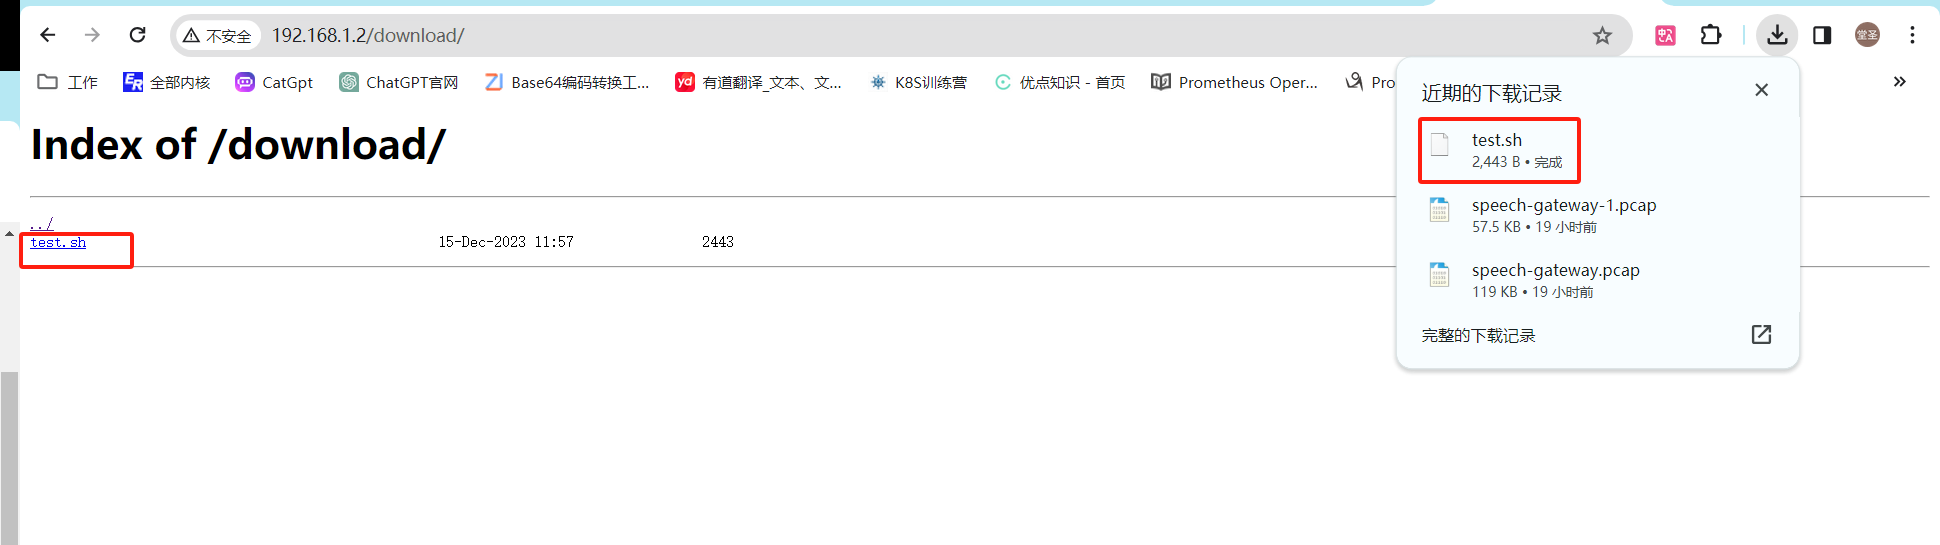
location /download {
autoindex on; # 自动索引功能。就是自动识别download目录下的文件,然后在页面进行展示。
autoindex_exact_size on; # 计算目录下的文件大小,默认单位是字节bytes,off只显示大概大小,单位kb、mb、gb
autoindex_localtime on; # 显示本机时间
root /data/nginx/html/pc;
}
}
[root@www ~]# nginx -t
nginx: the configuration file /etc/nginx/nginx.conf syntax is ok
nginx: configuration file /etc/nginx/nginx.conf test is successful
[root@www ~]# nginx -s reload
# 复制一个文件到下载目录
[root@www ~]# cp test.sh /data/nginx/html/pc/download/
[root@www ~]# ll /data/nginx/html/pc/download/
total 4
-rw-r--r-- 1 root root 2443 Dec 15 11:57 test.sh
14.1.2 下载测试
14.1.3 开启nginx下载限速
开启限速,防止出站带宽打满
[root@www ~]# cat /etc/nginx/conf.d/pc.conf
server {
  listen 80;
  server_name 192.168.1.2;

  location / {
    root /data/nginx/html;
    index index.html;
  }

  location /download {
    autoindex on;
    autoindex_exact_size off;
    autoindex_localtime on;
    root /data/nginx/html/pc;

    # 限制向客户端传输响应的速率。速率以字节/秒指定。0值禁用速率限制。该限制是根据每个请求设置的,因此如果客户端同时打开两个连接,则总速率将是指定限制的两倍。
    limit_rate 10k;
  }

}
14.2 nginx作为上传服务器
由于需要前端开发才能完成文件上传,所以这里只讲下具体参数。
# nginx允许客户端上传的单个文件大小,如果超过,则返回413 (request Entity Too Large)错误给客户端(浏览器可能看不到)。默认大小为1m。
# 一般可以把这个配置调大一点,防止上传文件时一直报错。
# 可以配置在http, server, location中,一般无特殊要求,就配置在http全局配置中。
client_max_body_size 1m;

# 用于接收每个客户端请求报文的body部分的缓冲区大小,默认在x86、其他32位平台和x86-64平台上是8K。在其他64位平台上通常是16K。
# 超出此大小时,将被暂存到磁盘上由下面client_body_temp_path指令所定义的位置。
client_body_buffer_size size;

# 定义用于存储包含客户端请求主体的临时文件的目录。在指定目录下最多可以使用三层子目录层次结构。
client_body_temp_path path [level1 [level2 [level3]]];

 浙公网安备 33010602011771号