12.centos7 基于Docker搭建node-exporter+Prometheus+Grafana服务器监控平台
基于Docker搭建node-exporter+Prometheus+Grafana服务器监控平台
基于Docker搭建node-exporter+Prometheus+Grafana服务器监控平台 - 1、node-exporter安装
- 2、Prometheus安装及配置
- 3、 mysqld_exporter安装
- 4、Grafana安装
- 5、Grafana配置
- 6、实现对Linux某个进程的监控
1、node-exporter安装
- 拉取镜像
[root@localhost ~]# docker pull prom/node-exporter
Using default tag: latest
latest: Pulling from prom/node-exporter
dc6dd4561653: Pull complete
613f88646930: Pull complete
edad907fb257: Pull complete
Digest: sha256:22fbde17ab647ddf89841e5e464464eece111402b7d599882c2a3393bc0d2810
Status: Downloaded newer image for prom/node-exporter:latest
docker.io/prom/node-exporter:latest
- 生成容器
[root@localhost ~]# docker run -d -p 9100:9100 prom/node-exporter
cd7f165e33062838c0acbde540f2539e759dba202680b104d42e98c2d5dc4686
-d 以后台模式运行
-p 9100:9100端口映射
netstat -anpt ----查看端口是否启动1466/docker-proxy
tcp6 0 0 :::9100 ::😗 LISTEN
[root@localhost ~]# netstat -anpt
Active Internet connections (servers and established)
Proto Recv-Q Send-Q Local Address           Foreign Address         State       PID/Program name
tcp        0      0 0.0.0.0:5001            0.0.0.0:*               LISTEN      1460/docker-proxy
tcp        0      0 0.0.0.0:9100            0.0.0.0:*               LISTEN      62225/docker-proxy
tcp        0      0 0.0.0.0:22              0.0.0.0:*               LISTEN      907/sshd
tcp        0      0 127.0.0.1:8088          0.0.0.0:*               LISTEN      20970/influxd
tcp        0      0 127.0.0.1:25            0.0.0.0:*               LISTEN      1137/master
tcp        0      0 0.0.0.0:8800            0.0.0.0:*               LISTEN      1421/docker-proxy
tcp        0      0 192.168.222.128:22      192.168.222.1:52544     ESTABLISHED 60821/sshd: root@pt
tcp        0      0 192.168.222.128:22      192.168.222.1:61203     ESTABLISHED 49722/sshd: root@pt
tcp        0      0 192.168.222.128:40900   34.120.177.193:443      ESTABLISHED 26566/grafana-serve
tcp        0      0 192.168.222.128:22      192.168.222.1:51117     ESTABLISHED 60826/sshd: root@no
tcp        0      0 192.168.222.128:22      192.168.222.1:50607     ESTABLISHED 61621/sshd: root@no
tcp        0      0 192.168.222.128:22      192.168.222.1:63654     ESTABLISHED 49726/sshd: root@no
tcp        0      0 192.168.222.128:22      192.168.222.1:50601     ESTABLISHED 61604/sshd: root@pt
tcp6       0      0 :::5001                 :::*                    LISTEN      1466/docker-proxy
tcp6       0      0 :::9100                 :::*                    LISTEN      62229/docker-proxy
tcp6       0      0 :::8086                 :::*                    LISTEN      20970/influxd
tcp6       0      0 :::22                   :::*                    LISTEN      907/sshd
tcp6       0      0 :::3000                 :::*                    LISTEN      26566/grafana-serve
tcp6       0      0 ::1:25                  :::*                    LISTEN      1137/master
tcp6       0      0 :::8800                 :::*                    LISTEN      1435/docker-proxy
tcp6       0      0 ::1:8086                ::1:33978               ESTABLISHED 20970/influxd
tcp6       0      0 ::1:33978               ::1:8086                ESTABLISHED 50249/influx
另外一个种查看方法:
[root@localhost ~]# ss -naltp |grep 9100
LISTEN     0      32768        *:9100                     *:*                   users:(("docker-proxy",pid=71223,fd=4))
LISTEN     0      32768     [::]:9100                  [::]:*                   users:(("docker-proxy",pid=71227,fd=4))
- 验证是否安装成功
访问url http://服务器ip:9100/metrics
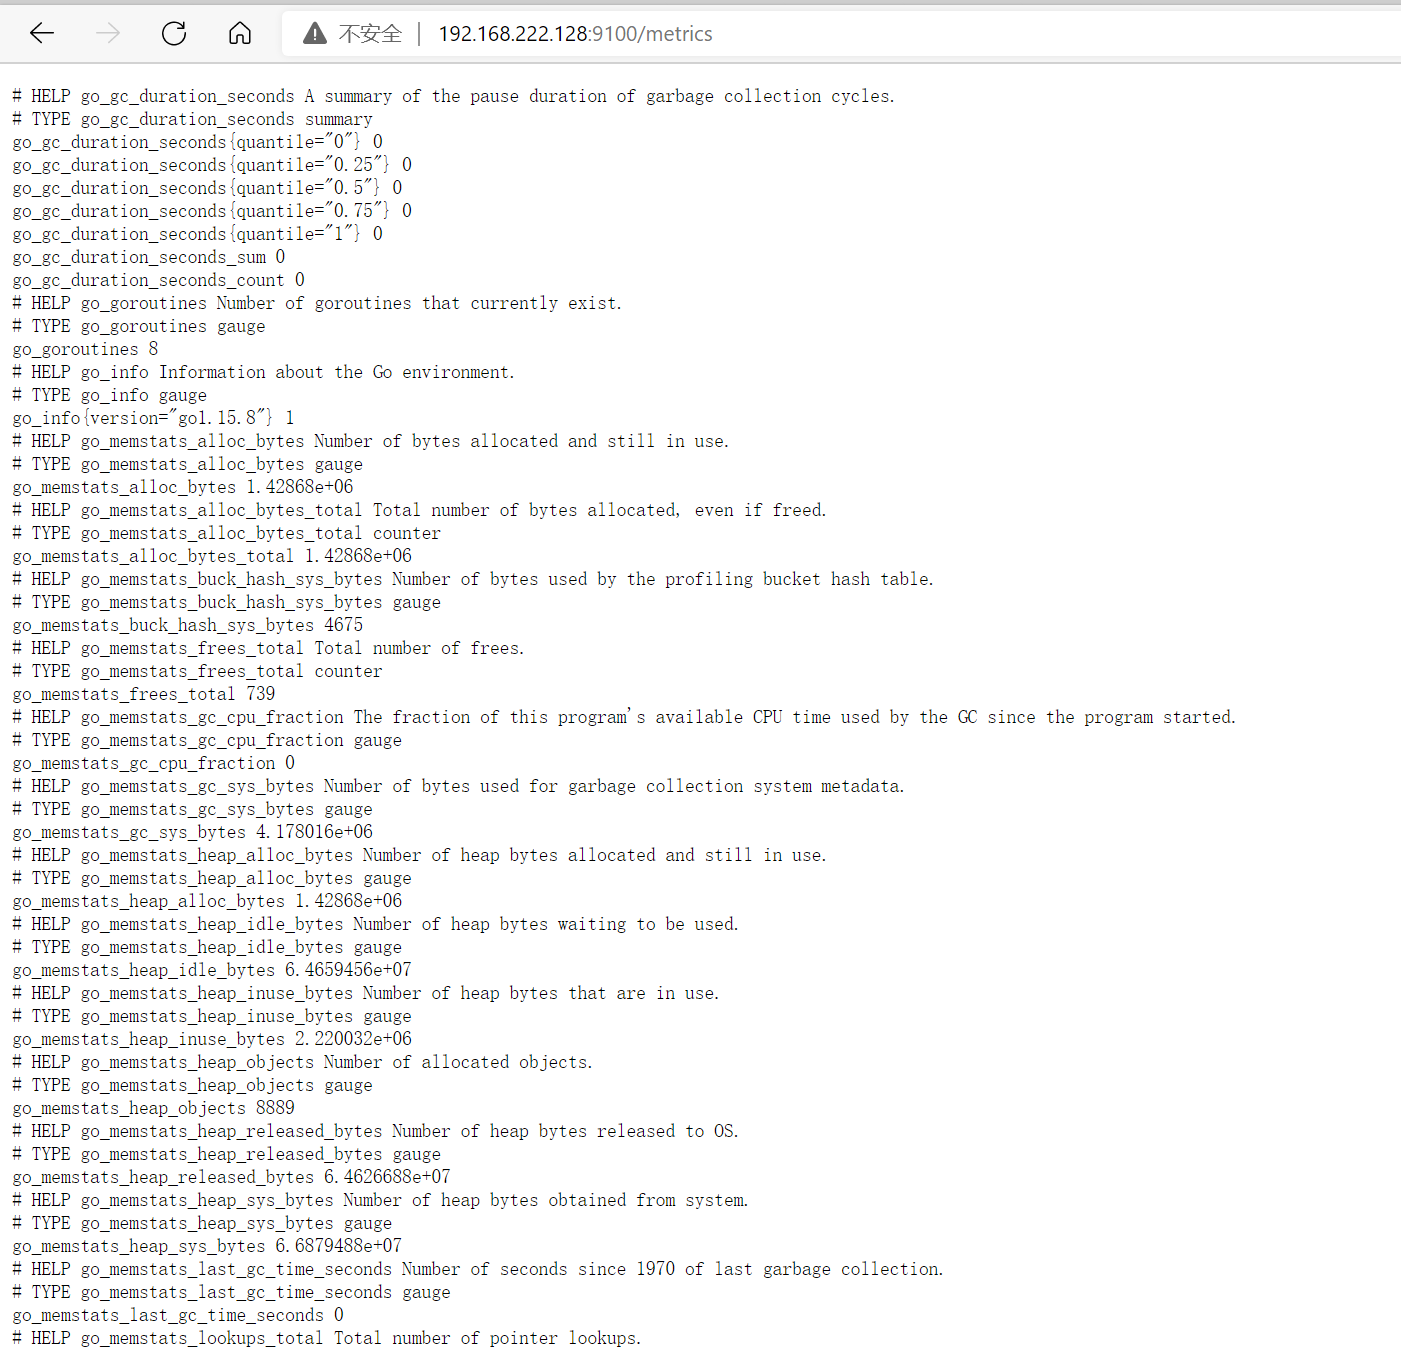
直接输命令也可以
[root@localhost ~]# curl http://192.168.222.128:9100/metrics
2、Prometheus安装及配置
- 设置配置文件
- 其中IP地址填写要监控的服务器的IP地址,也就是前面安装node-exporter的服务器的IP地址
global:
  scrape_interval: 60s
  evaluation_interval: 60s

scrape_configs:
  - job_name: prometheus
    static_configs:
      - targets: ['localhost:9090']
        labels:
          instance: prometheus

  - job_name: centos701
    static_configs:
      - targets: ['192.168.222.128:9100']
        labels:
          instance: centos701

  - job_name: mysql
    static_configs:
      - targets: ['192.168.222.128:9104']
        labels:
          instance: mysql
- 拉取镜像
[root@localhost ~]# docker pull prom/prometheus
Using default tag: latest
latest: Pulling from prom/prometheus
aa2a8d90b84c: Pull complete
b45d31ee2d7f: Pull complete
c061e0b064d6: Pull complete
ae1159a2e3fb: Pull complete
5869f35ecb91: Pull complete
c9881093e46c: Pull complete
855890aebaee: Pull complete
ae8d2d5b1b57: Pull complete
fb6d39ef80a0: Pull complete
370124796b10: Pull complete
43865548f309: Pull complete
d15c091f95c7: Pull complete
Digest: sha256:d5db4b724a53ec7135df90bdb908e00439522539156df2697d969c5931c673a4
Status: Downloaded newer image for prom/prometheus:latest
docker.io/prom/prometheus:latest
- 生成容器
-v /opt/prometheus/prometheus.yml:/etc/prometheus/prometheus.yml
宿主机文件目录:docker容器目录

[root@localhost prometheus]# docker run -d -p 9090:9090 -v /opt/prometheus/prometheus.yml:/etc/prometheus/prometheus.yml prom/prometheus
9e048b6776291c7c312dd2bb41a2bba87e5dac4fdfdb5cb310161d049f0c53f6
查看容器有没有启动
[root@localhost prometheus]# docker ps -a
CONTAINER ID   IMAGE                COMMAND                  CREATED             STATUS                      PORTS                                                                                  NAMES
9e048b677629   prom/prometheus      "/bin/prometheus --c…"   9 seconds ago       Up 7 seconds                0.0.0.0:9090->9090/tcp, :::9090->9090/tcp                                              elegant_bouman
- 验证是否安装成功
访问url:http://192.168.222.128:9090/graph
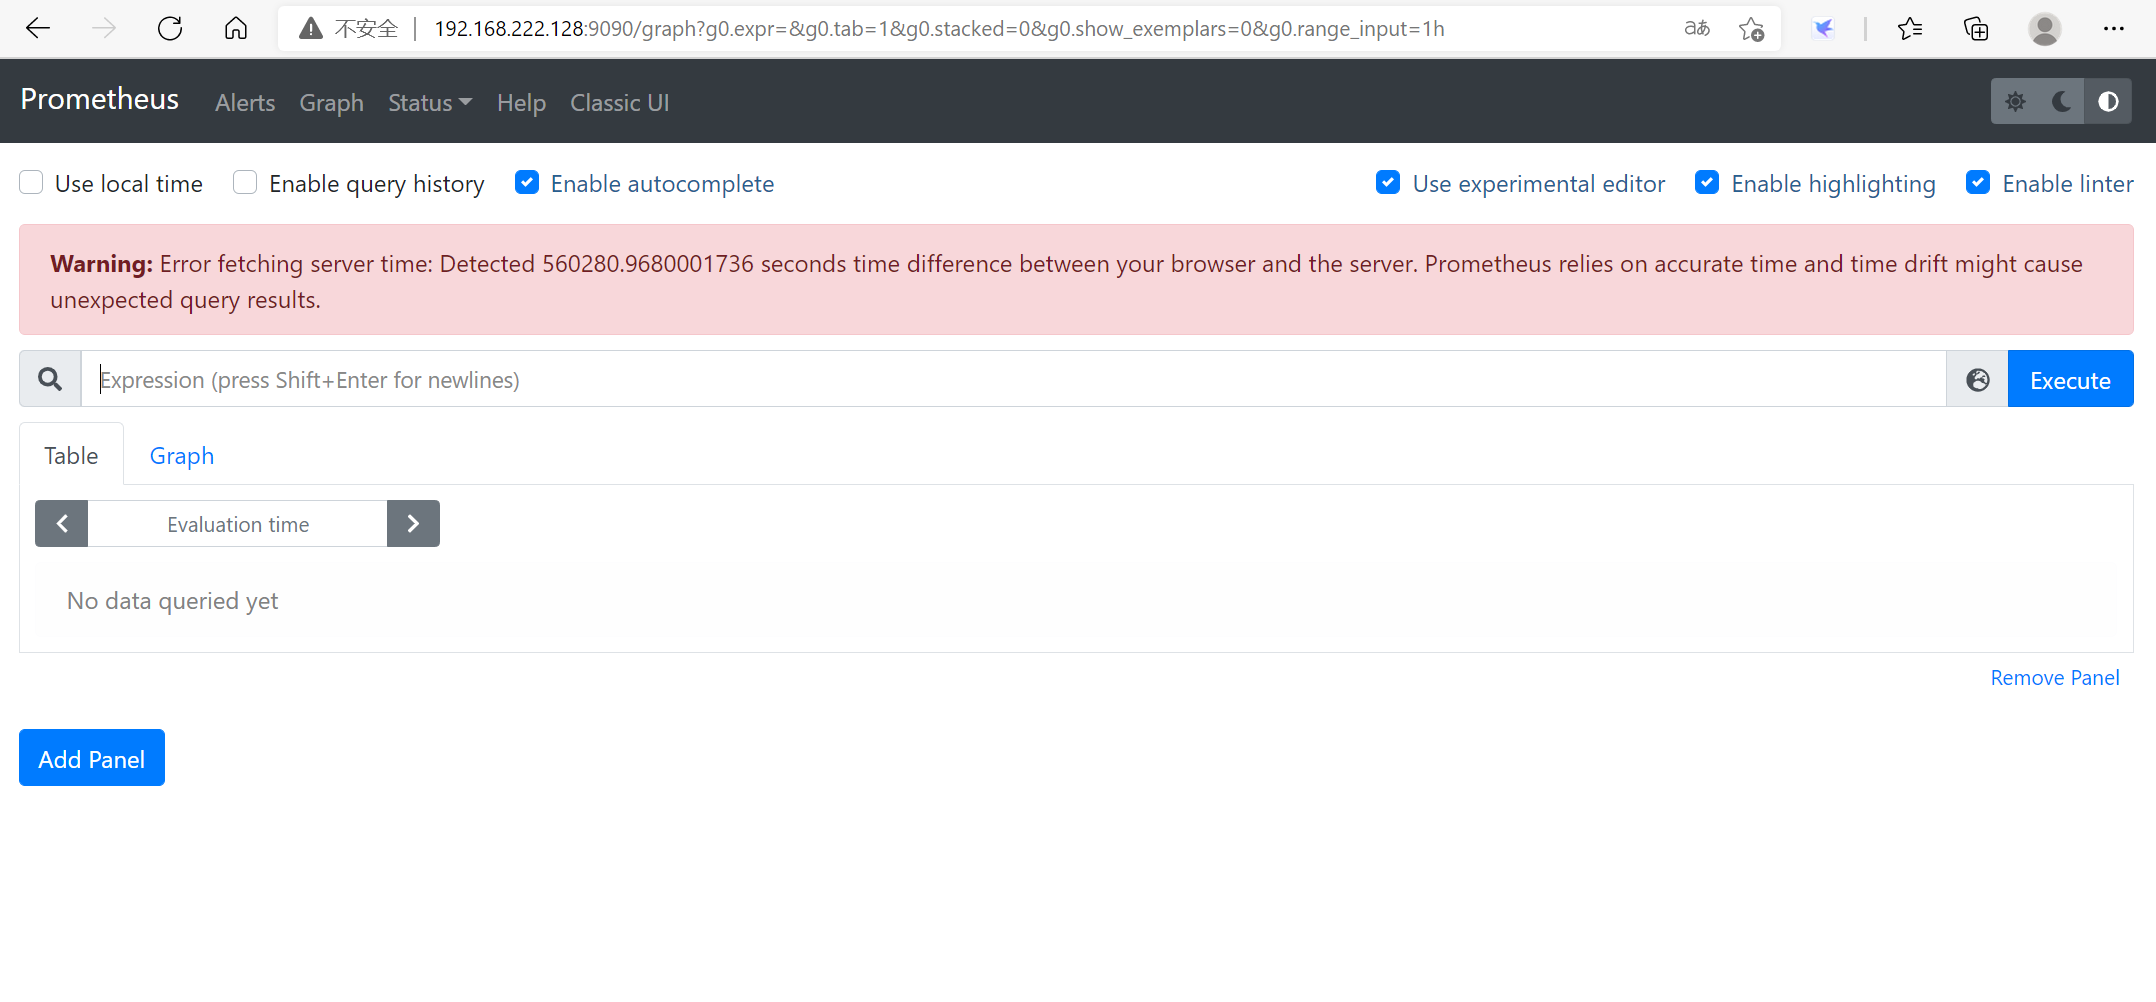
web 界面出现:Warning! Detected 437.83 seconds time difference between your browser and the server. Prometheus relies on accurate time and time drift might cause unexpected query results.

 是因为时间不同步导致的。

解决方法:运行prmetheus的linux(centos)主机同步时间:

[root@prometheus-node ~]# yum -y install ntp

[root@prometheus-node ~]# systemctl enable ntpd

[root@prometheus-node ~]# ntpdate time1.aliyun.com
————————————————

原文链接:https://blog.csdn.net/eastyell/article/details/112232691
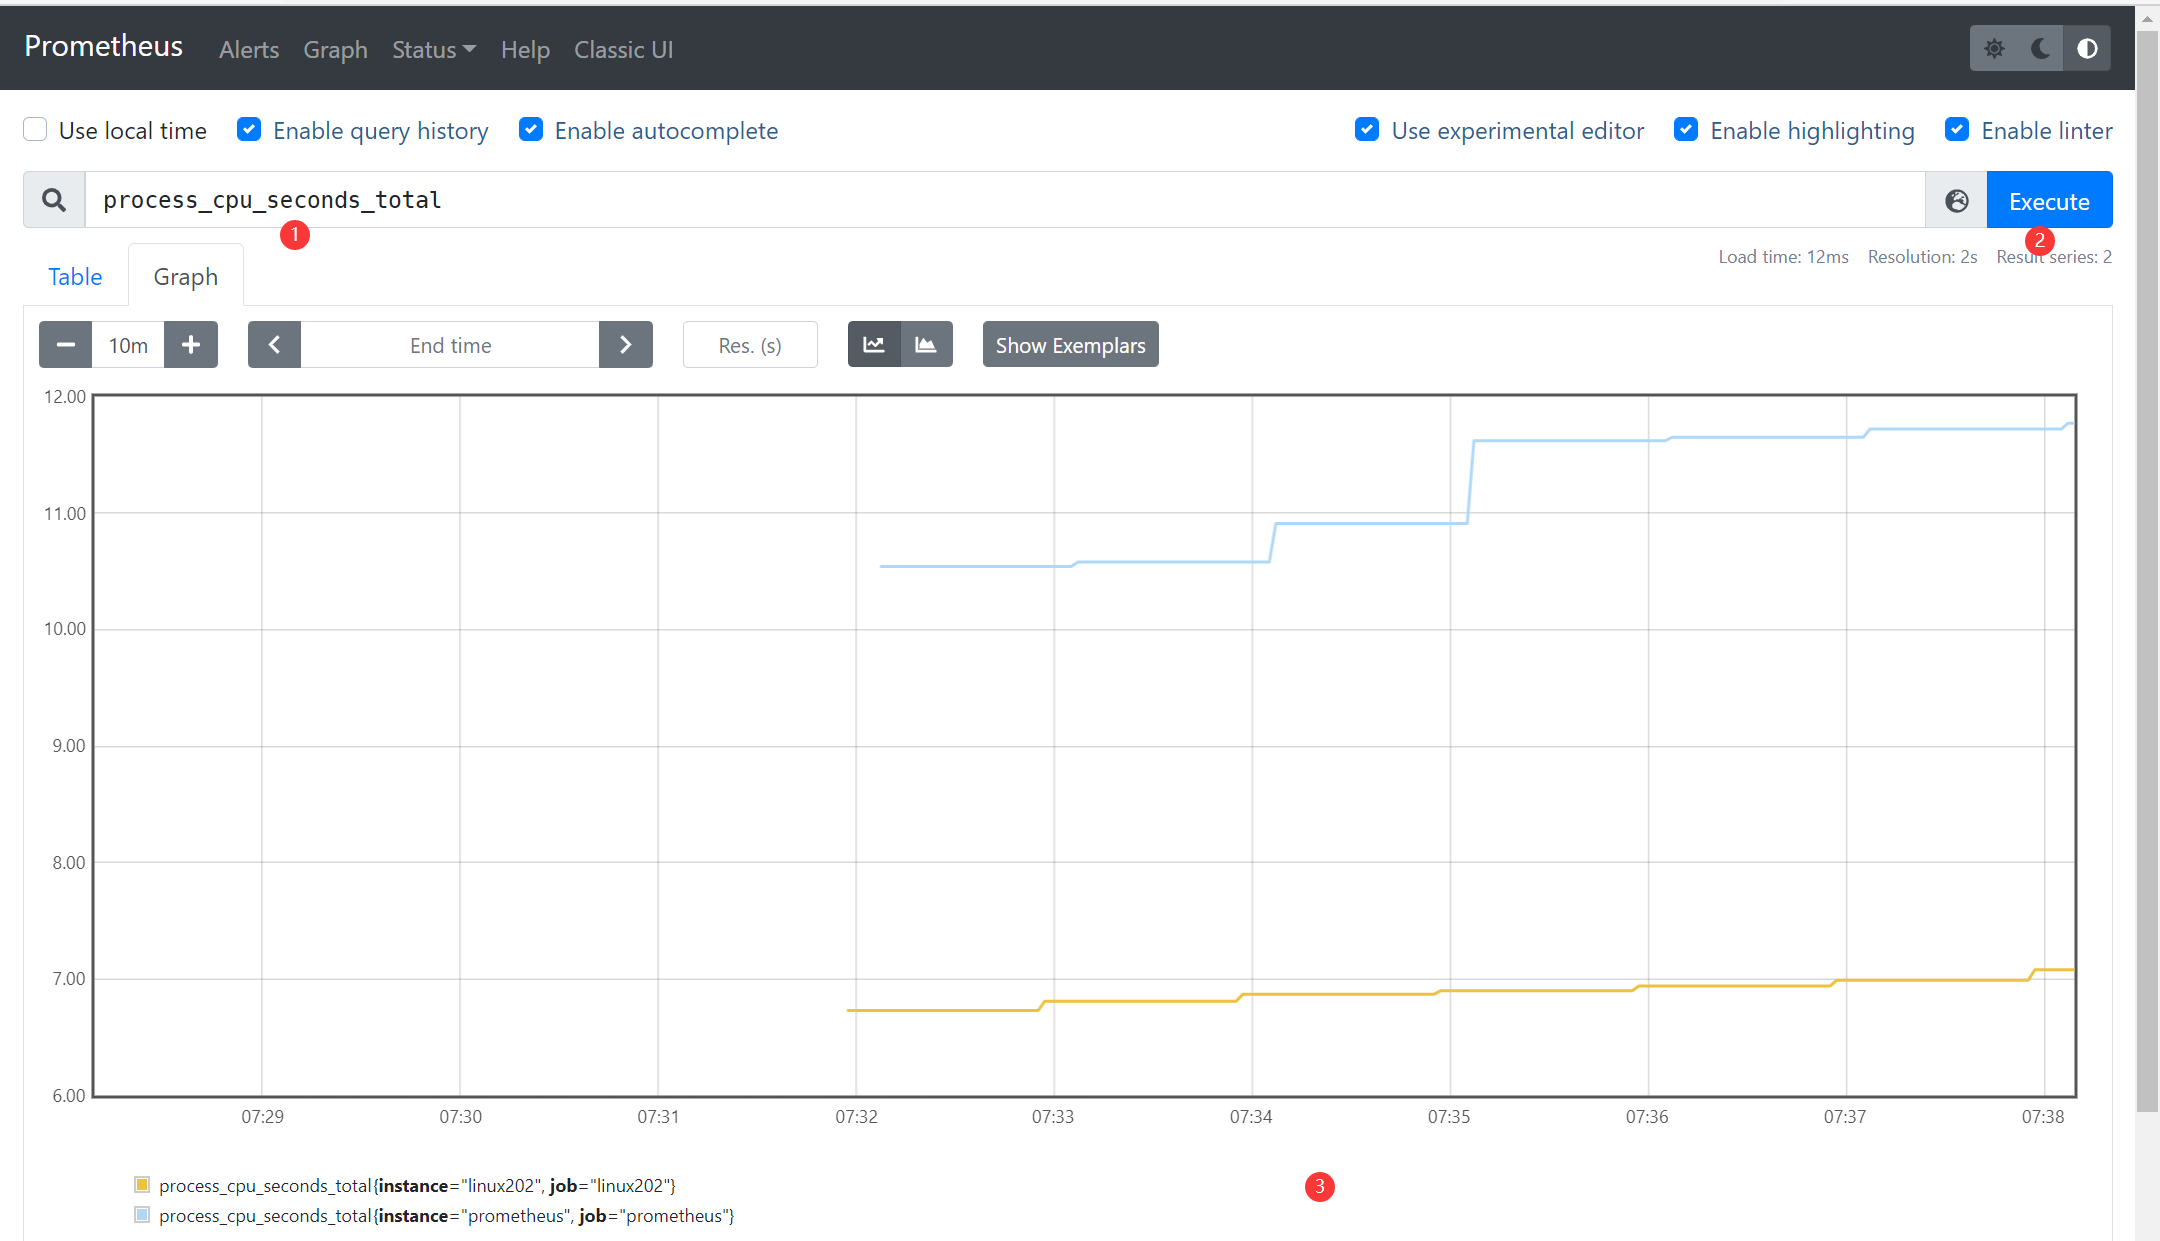
curl http://192.168.222.128:9090/graph
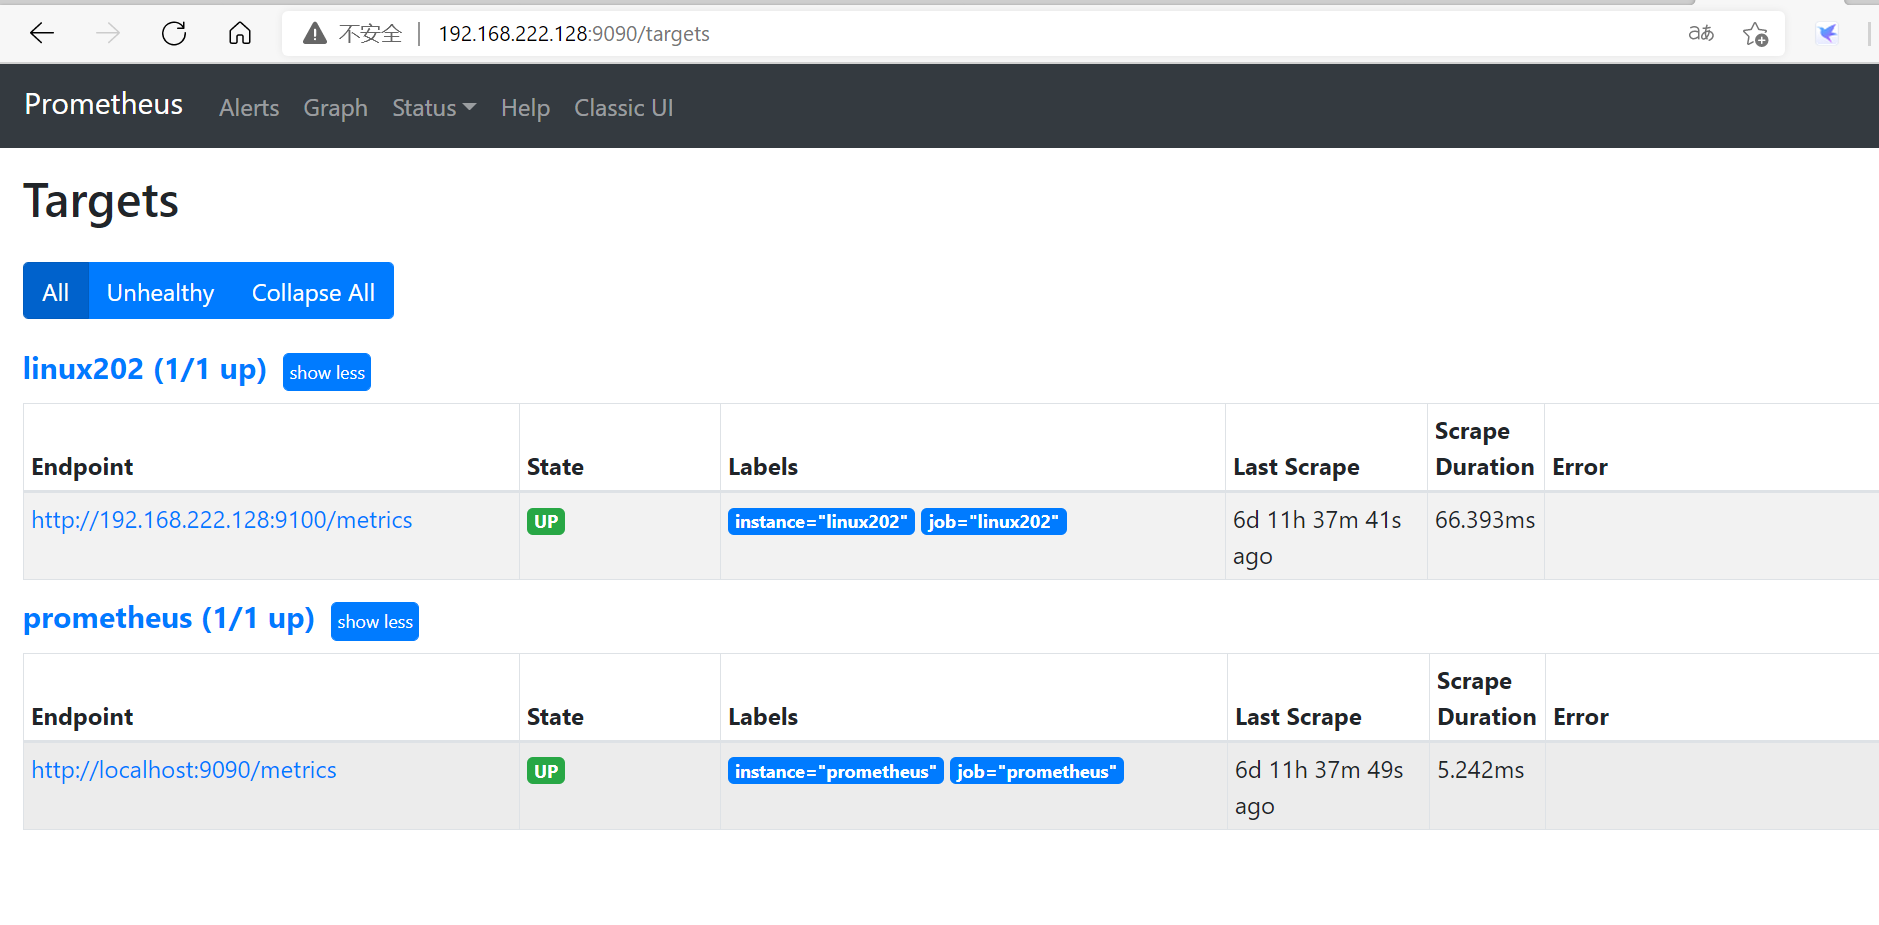
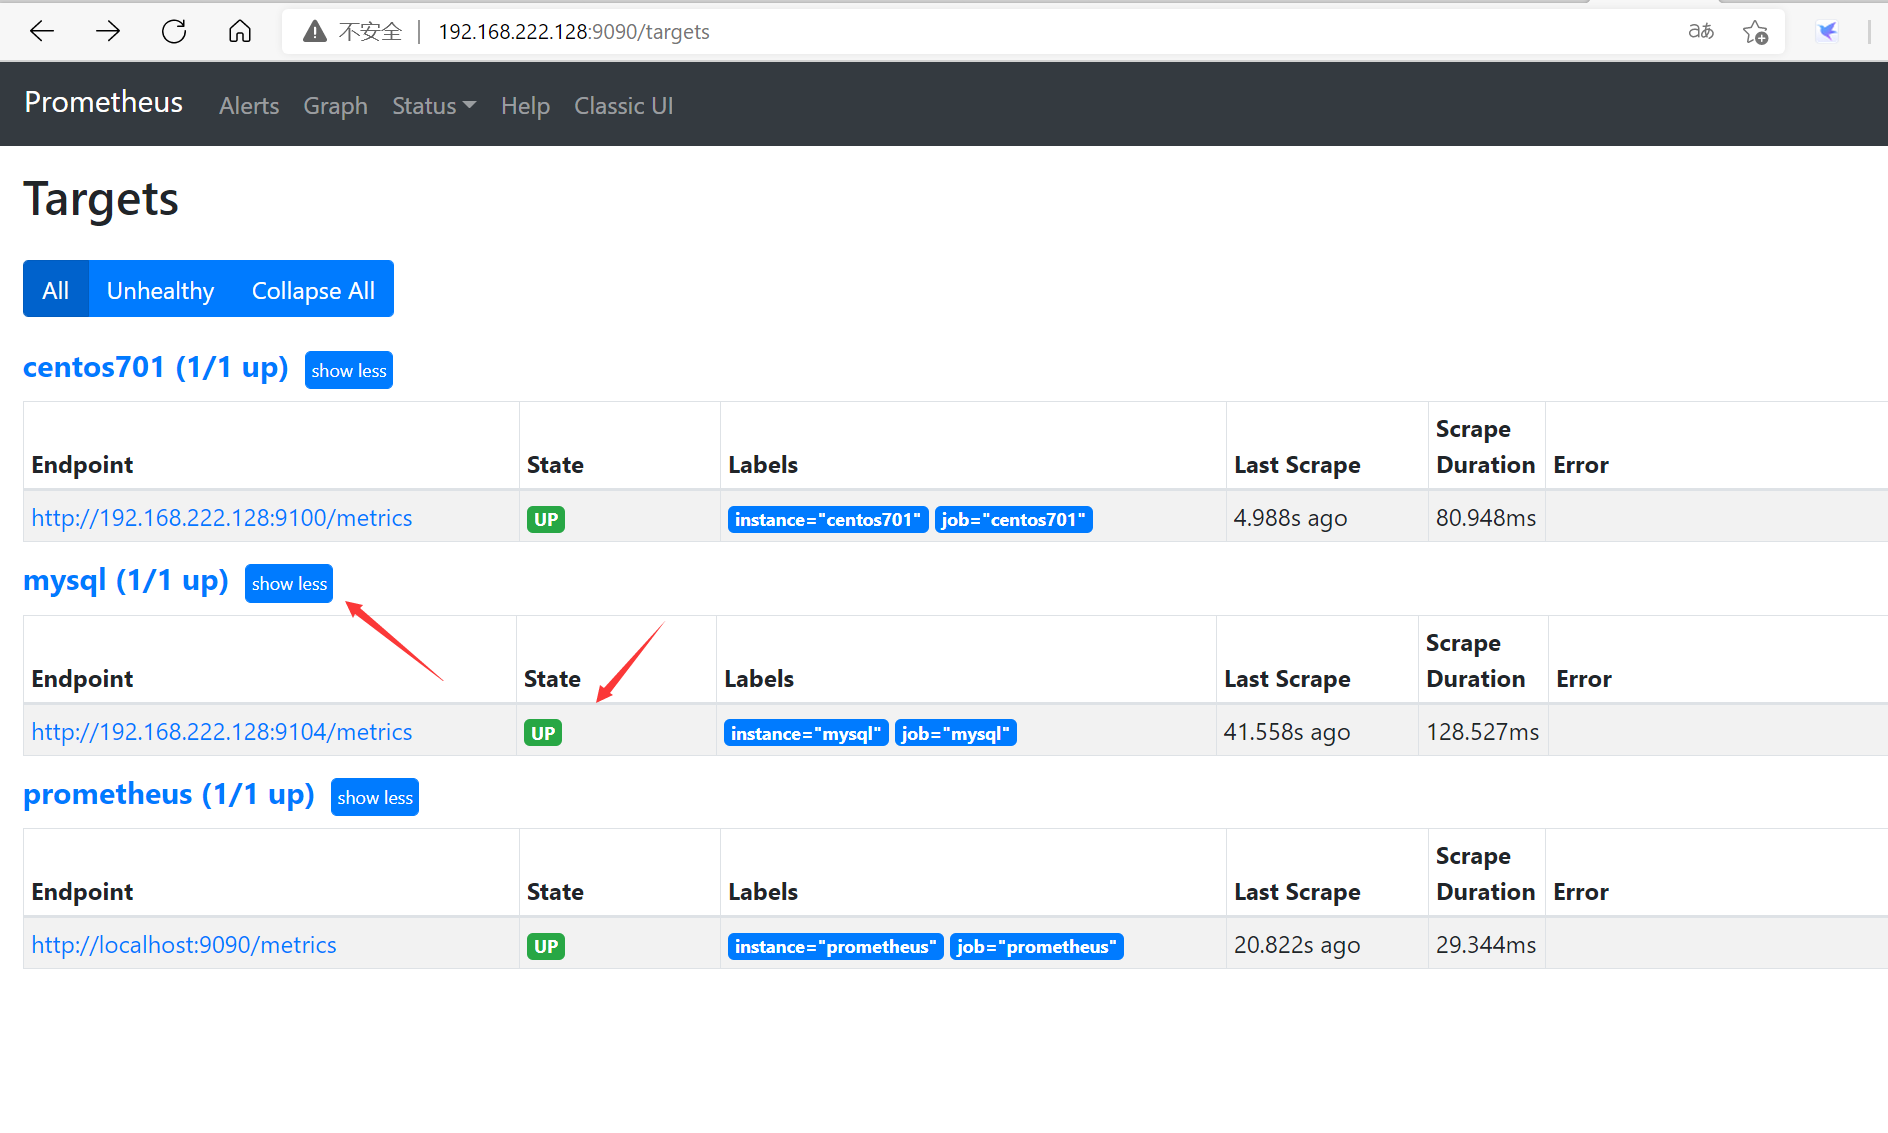
http://192.168.222.128:9090/targets
3、 mysqld_exporter安装
- 拉取镜像
[root@localhost ~]# docker pull prom/mysqld-exporter
Using default tag: latest
latest: Pulling from prom/mysqld-exporter
aa2a8d90b84c: Already exists
b45d31ee2d7f: Already exists
e65c338b31c3: Pull complete
Digest: sha256:a8af600c3ef1c8df179b736b94d04dc5ec209be88407a4c1c1bd0fc6394f56e8
Status: Downloaded newer image for prom/mysqld-exporter:latest
docker.io/prom/mysqld-exporter:latest
- 生成容器
官网安装方法:
docker network create my-mysql-network
docker pull prom/mysqld-exporter

docker run -d \
  -p 9104:9104 \
  --network my-mysql-network  \
  -e DATA_SOURCE_NAME="user:password@(hostname:3306)/" \
  prom/mysqld-exporter
docker run -d \
 --restart=always \
 --name mysqld-exporter \
 -p 9104:9104 \
 -e DATA_SOURCE_NAME="root:123456@(192.168.222.128:3306)/" \
 prom/mysqld-exporter
docker run -d --restart=always --name mysqld-exporter -p 9104:9104 -e DATA_SOURCE_NAME="root:123456@(192.168.222.128:3306)/" prom/mysqld-exporter
————————————————
版权声明:本文为CSDN博主「爱是与世界平行」的原创文章,遵循CC 4.0 BY-SA版权协议,转载请附上原文出处链接及本声明。
原文链接:https://blog.csdn.net/An1090239782/article/details/103406062
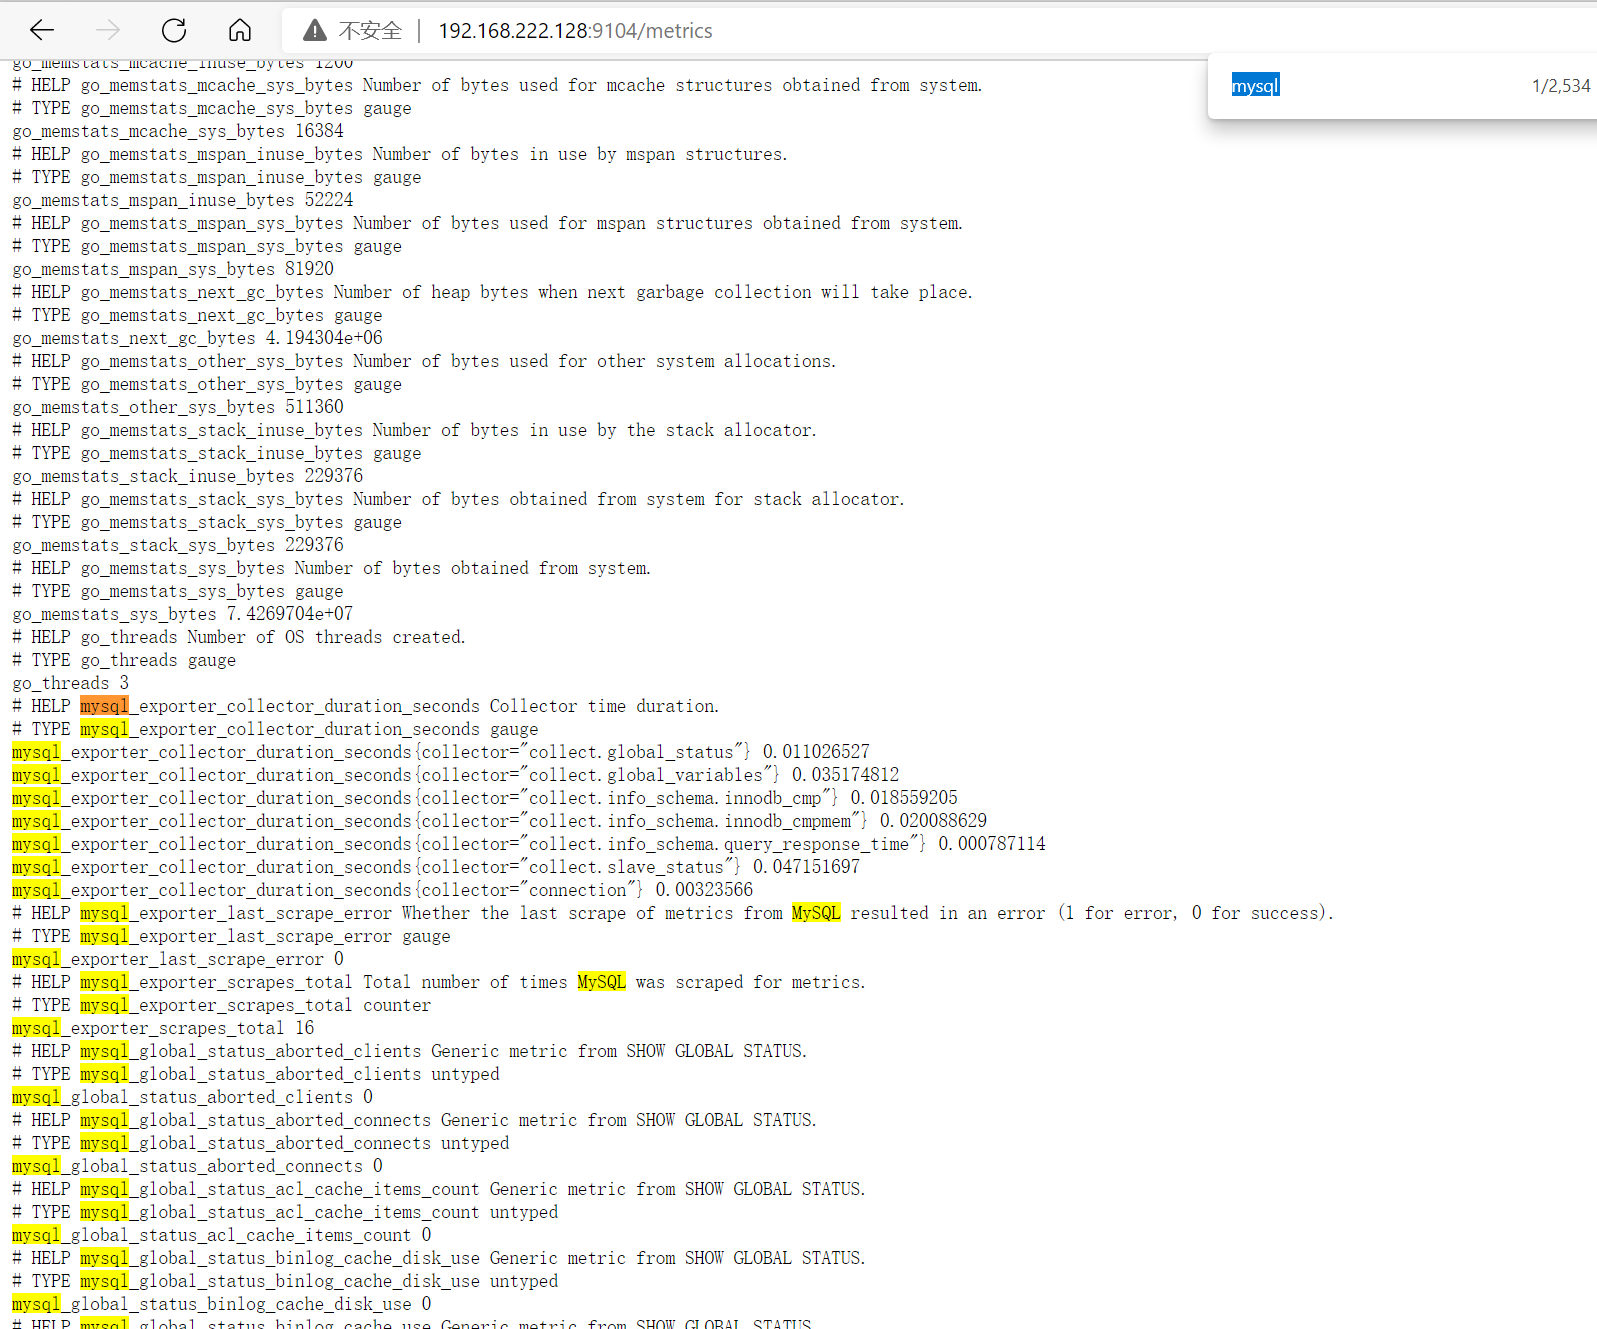
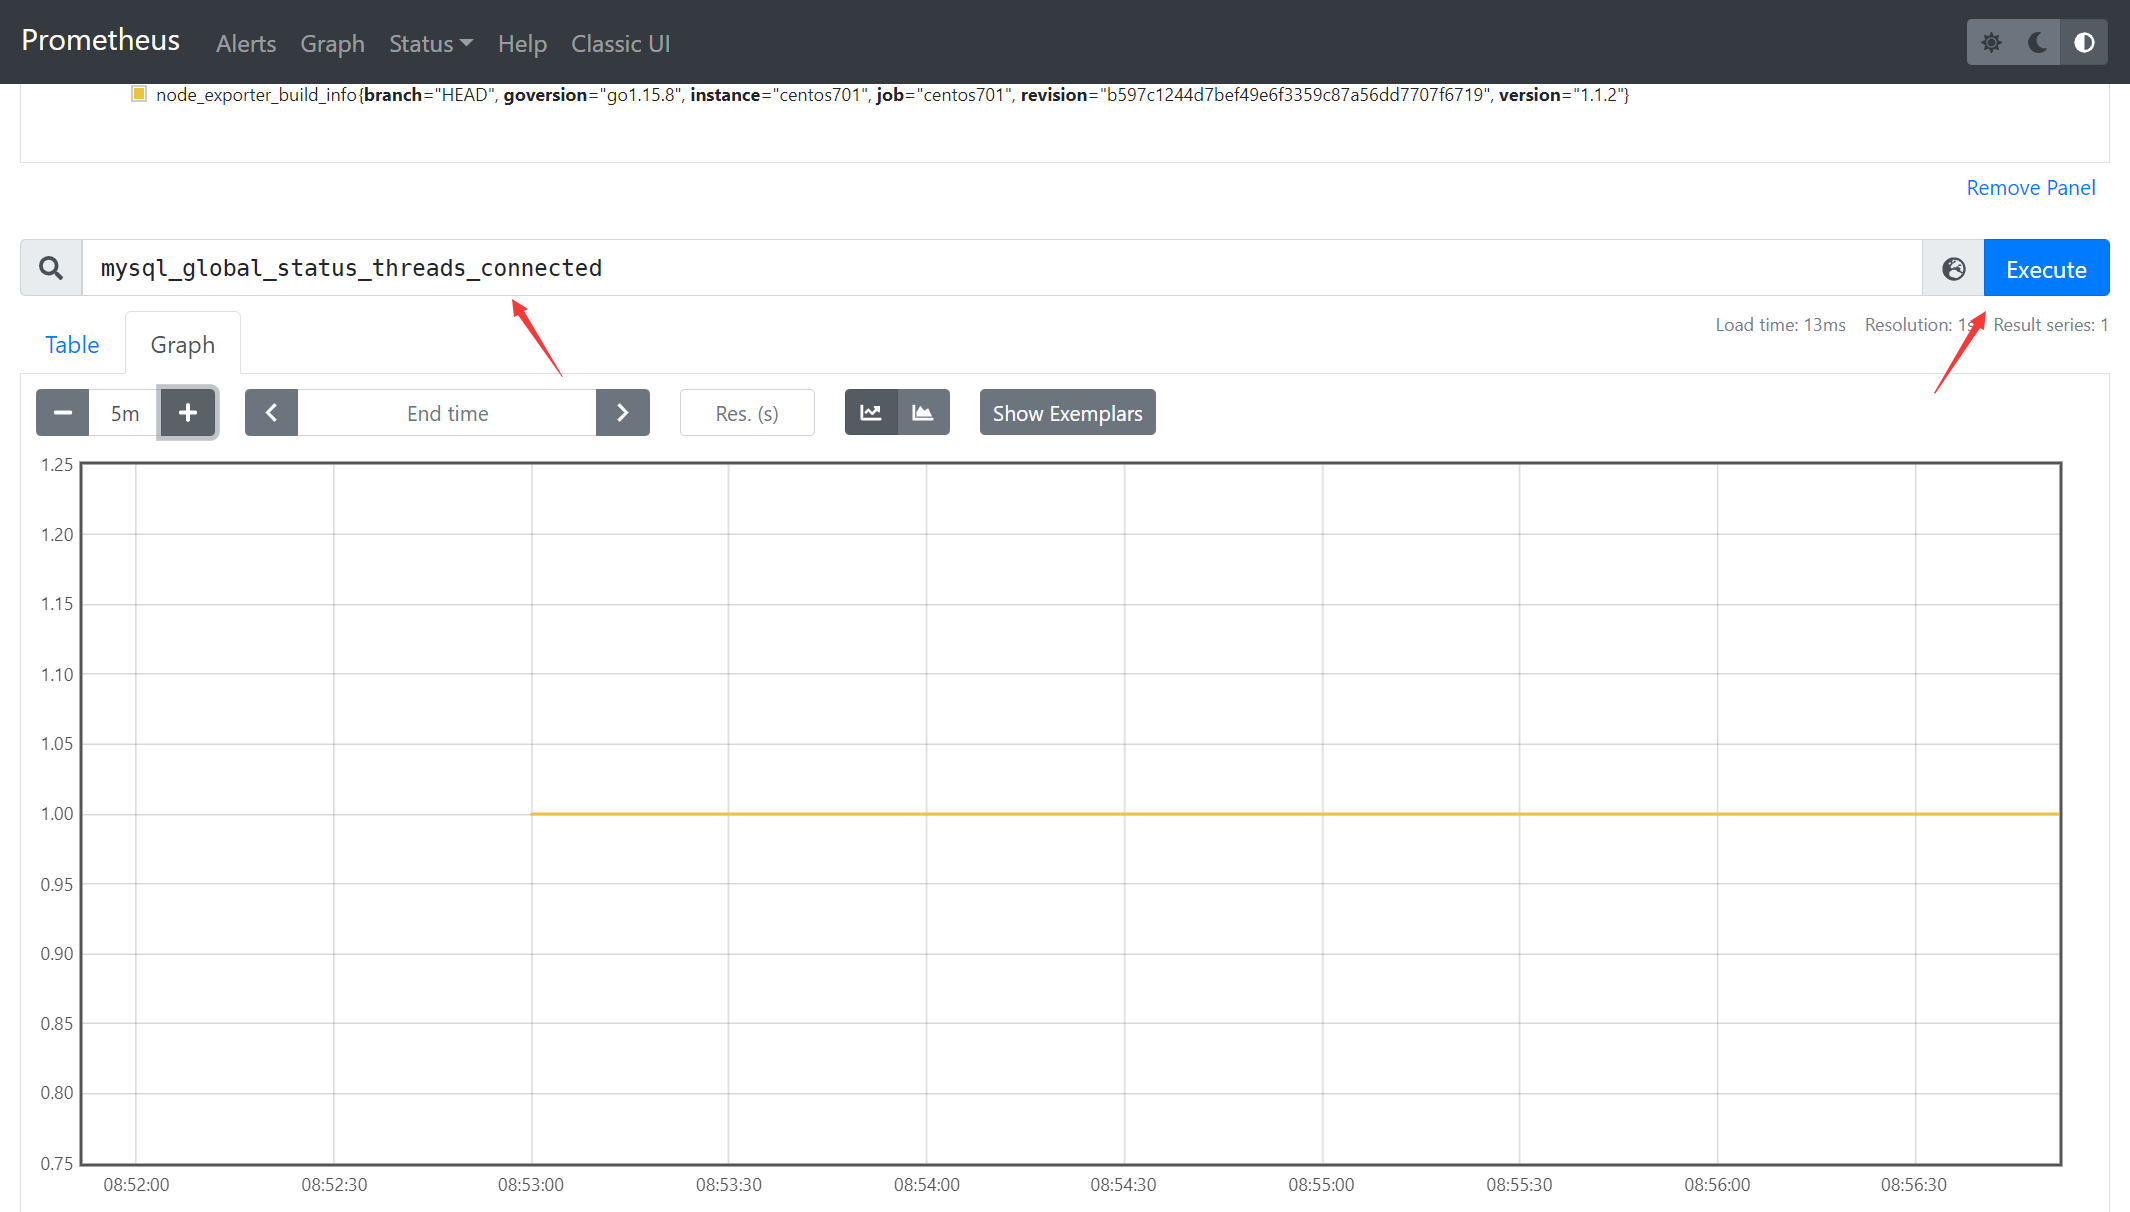
- 验证是否安装成功
http://192.168.222.128:9104/metrics
4、Grafana安装
- 拉取镜像
[root@localhost ~]# docker pull grafana/grafana
Using default tag: latest
latest: Pulling from grafana/grafana
540db60ca938: Pull complete
4699cf19c56b: Pull complete
212510161c0c: Pull complete
7d565cd102fb: Pull complete
6e82b8ccd446: Pull complete
4f4fb700ef54: Pull complete
91cdc87529b7: Pull complete
20cb314c7cbb: Pull complete
Digest: sha256:696823fbc561638e5aa8d3e02a08a7bfc19ae3d9250d0b33314922b1ad16c3d7
Status: Downloaded newer image for grafana/grafana:latest
docker.io/grafana/grafana:latest
- 生成容器
[root@localhost prometheus]# docker run -d -p 3001:3000 grafana/grafana
73e09d3e278931e5afc6f3ce5325c1a65a230814dfe1261cef0d282d02d4bfde
查看容器启动状态
[root@localhost prometheus]# docker ps
CONTAINER ID   IMAGE             COMMAND                  CREATED         STATUS              PORTS                                                                                  NAMES
73e09d3e2789   grafana/grafana   "/run.sh"                7 seconds ago   Up 4 seconds        0.0.0.0:3001->3000/tcp, :::3001->3000/tcp
- 验证是否安装成功
http://192.168.222.128:3001/login
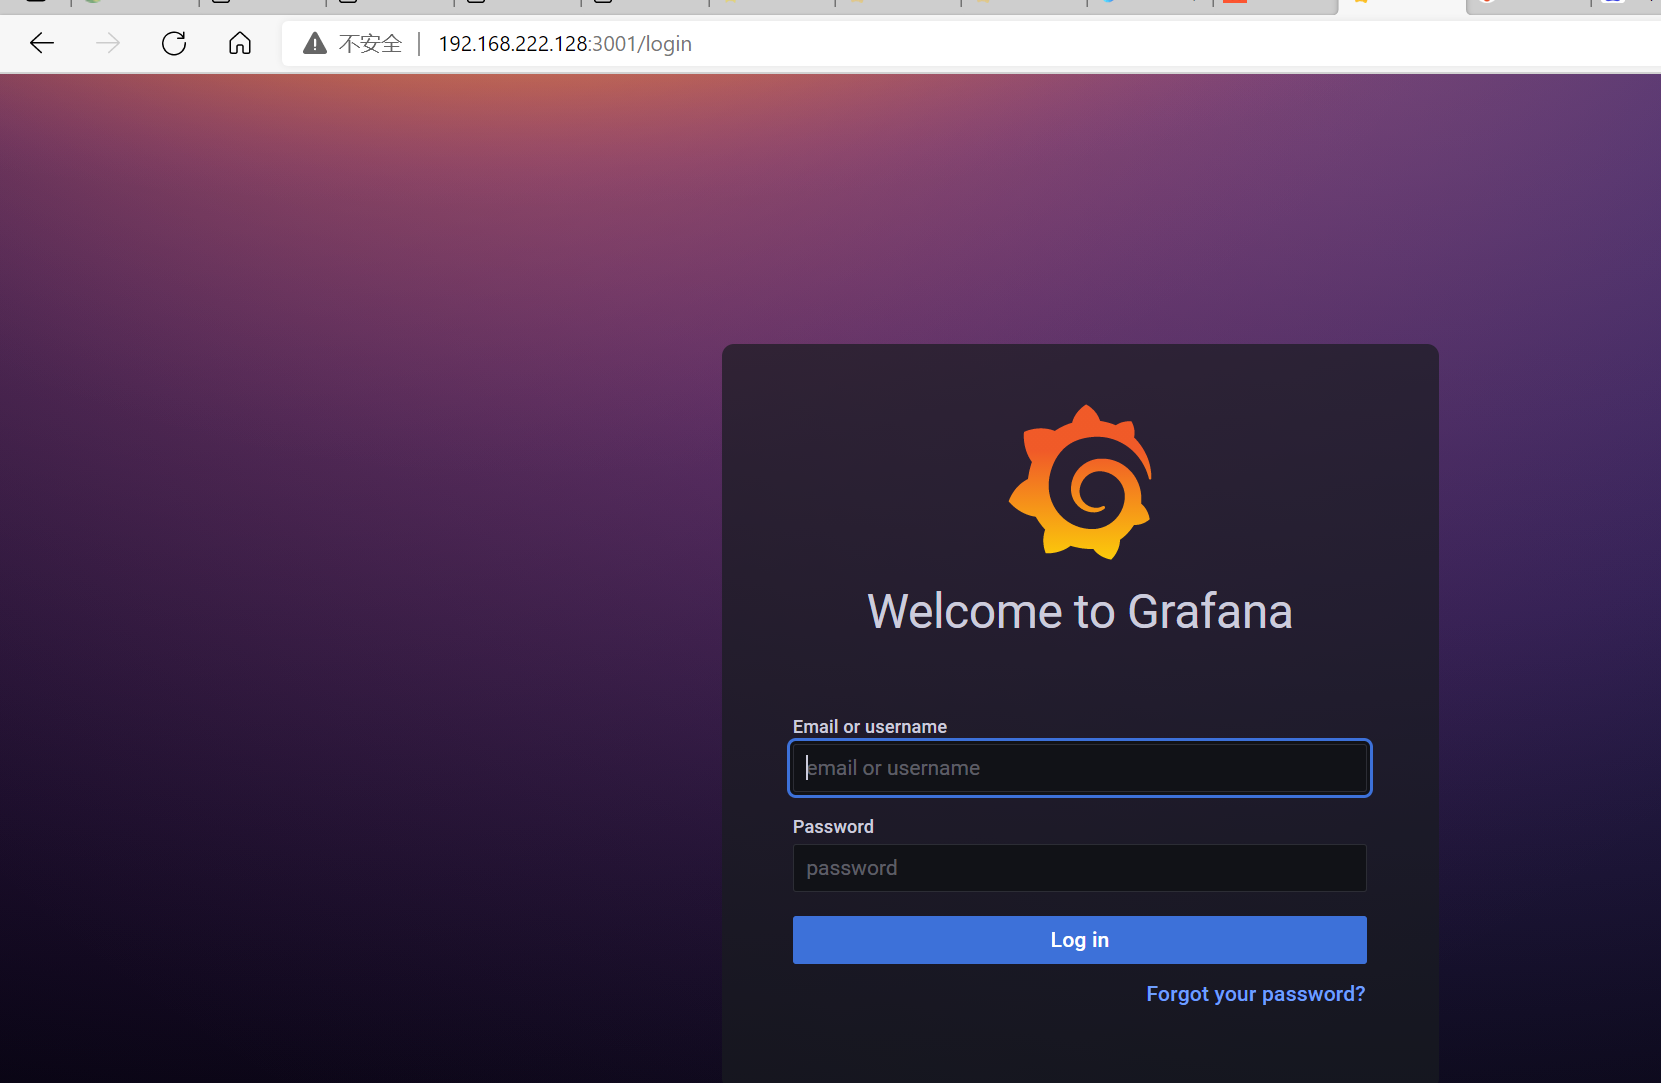
用户名和密码:admin,会提示修改密码
5、Grafana配置
- grafana配置Prometheus
-
添加数据源,并选择Prometheus
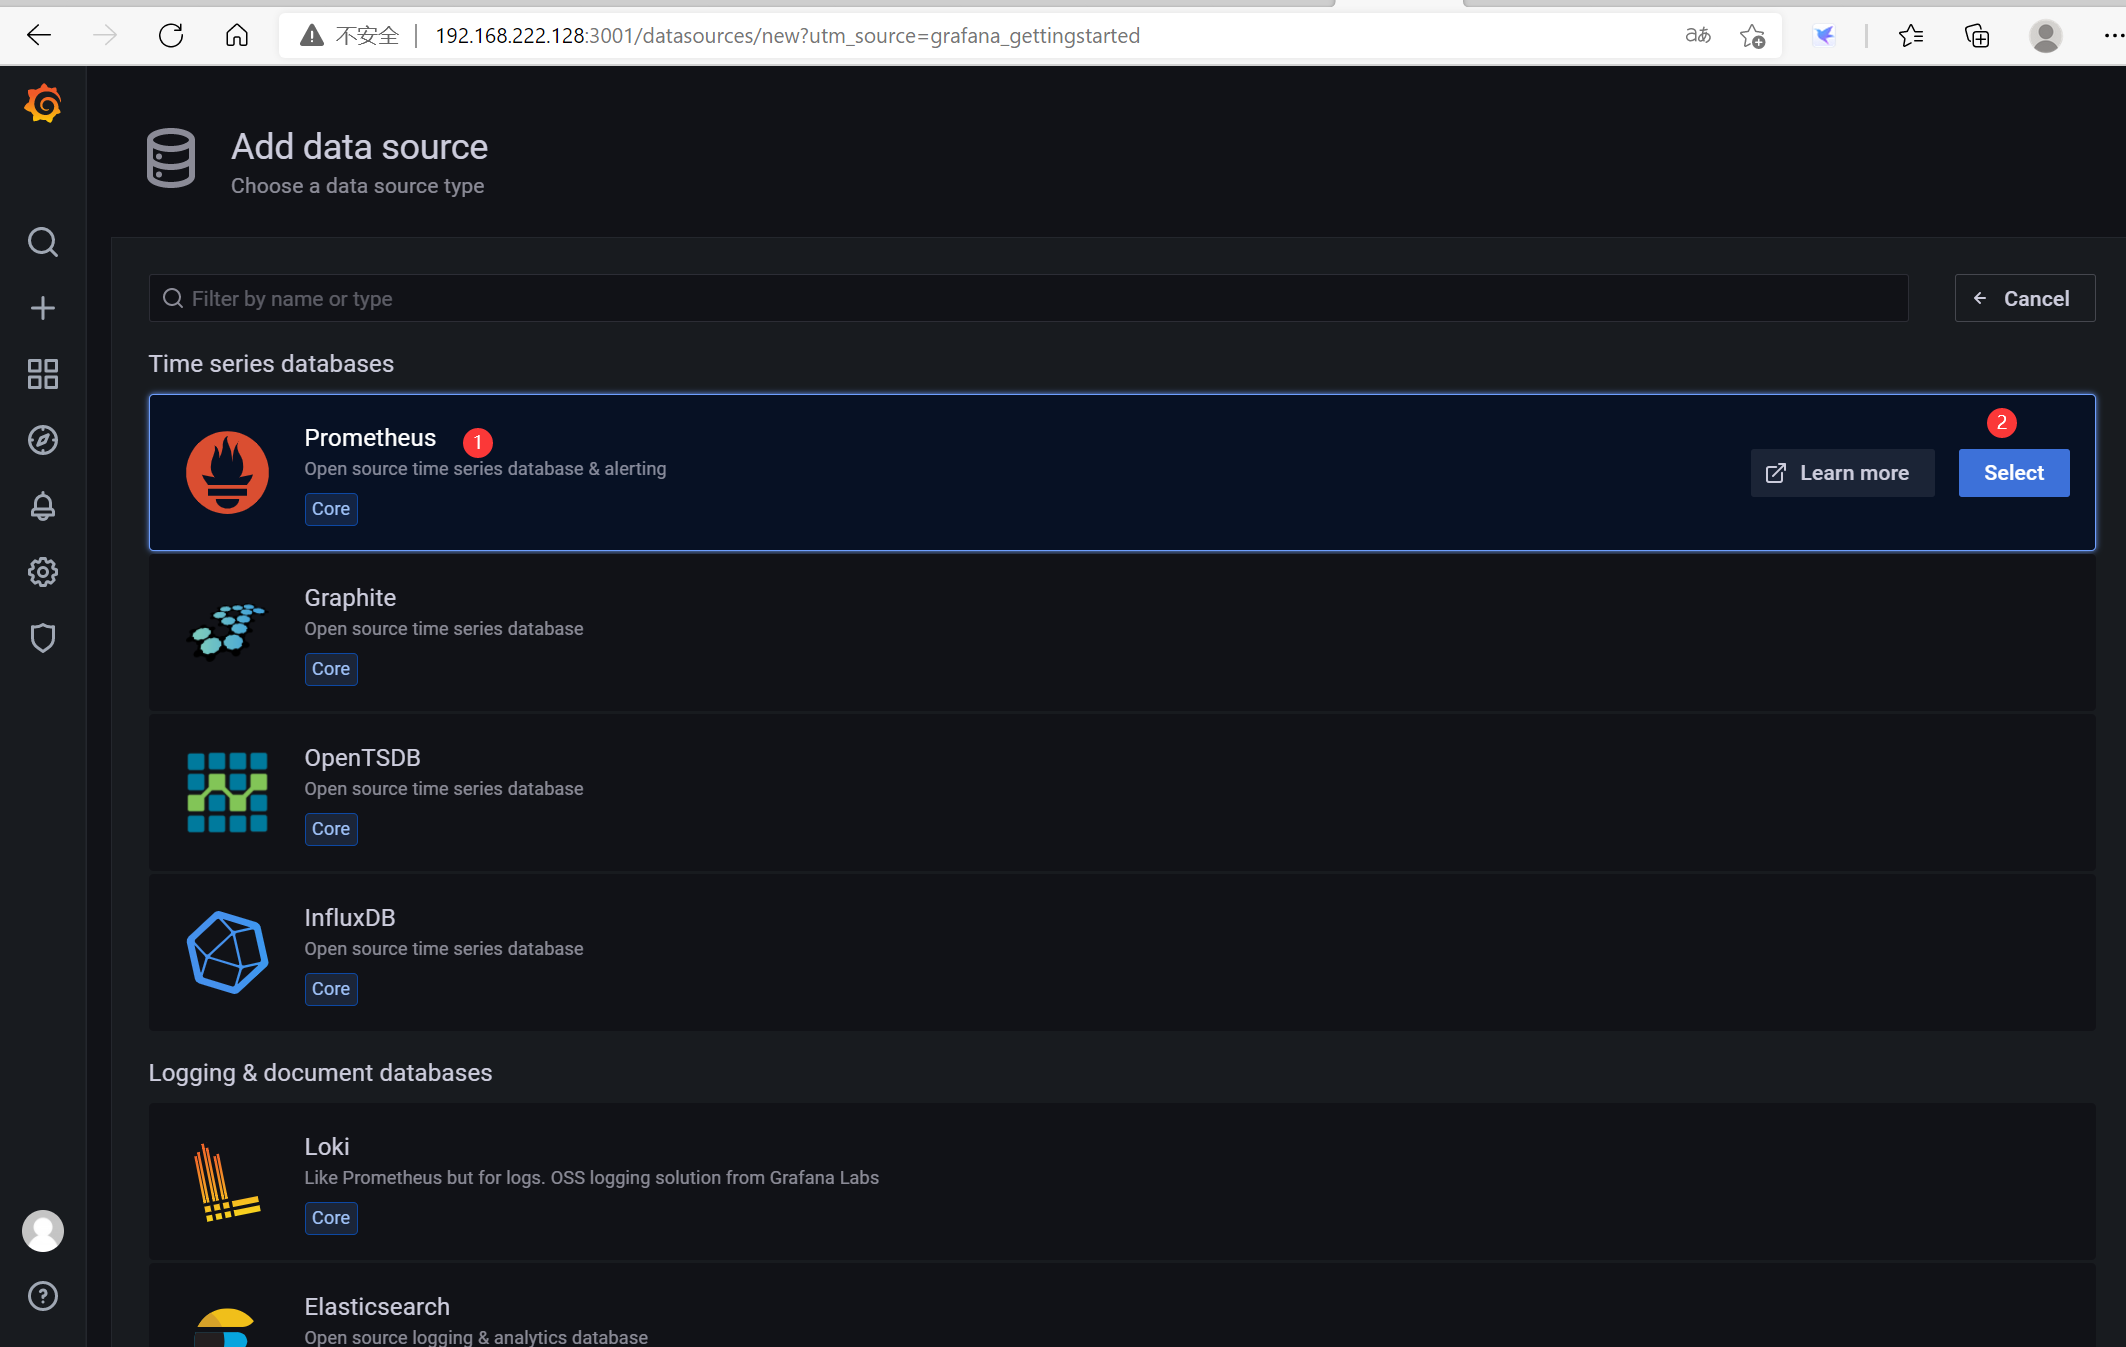
-
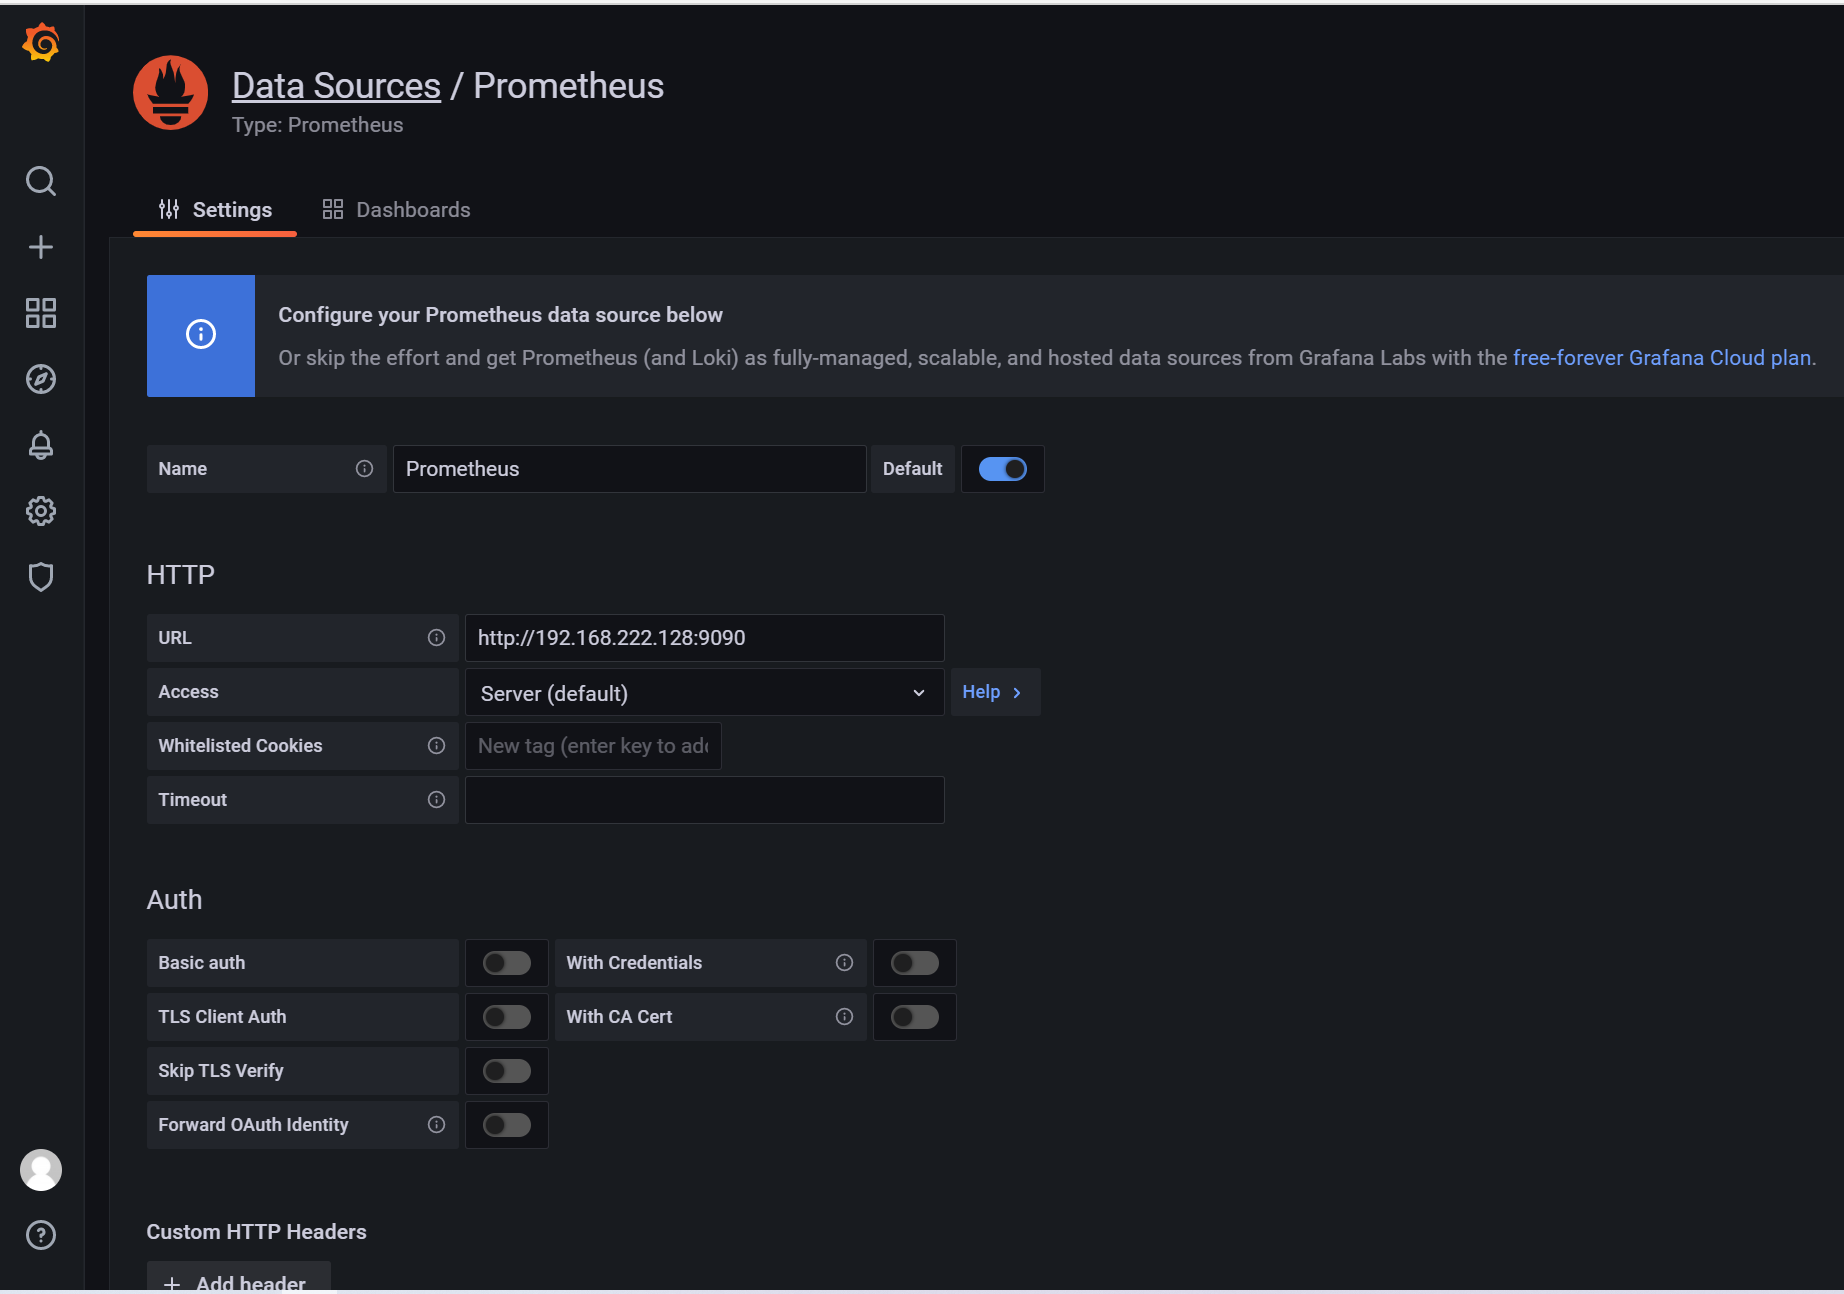
配置Prometheus相关数据
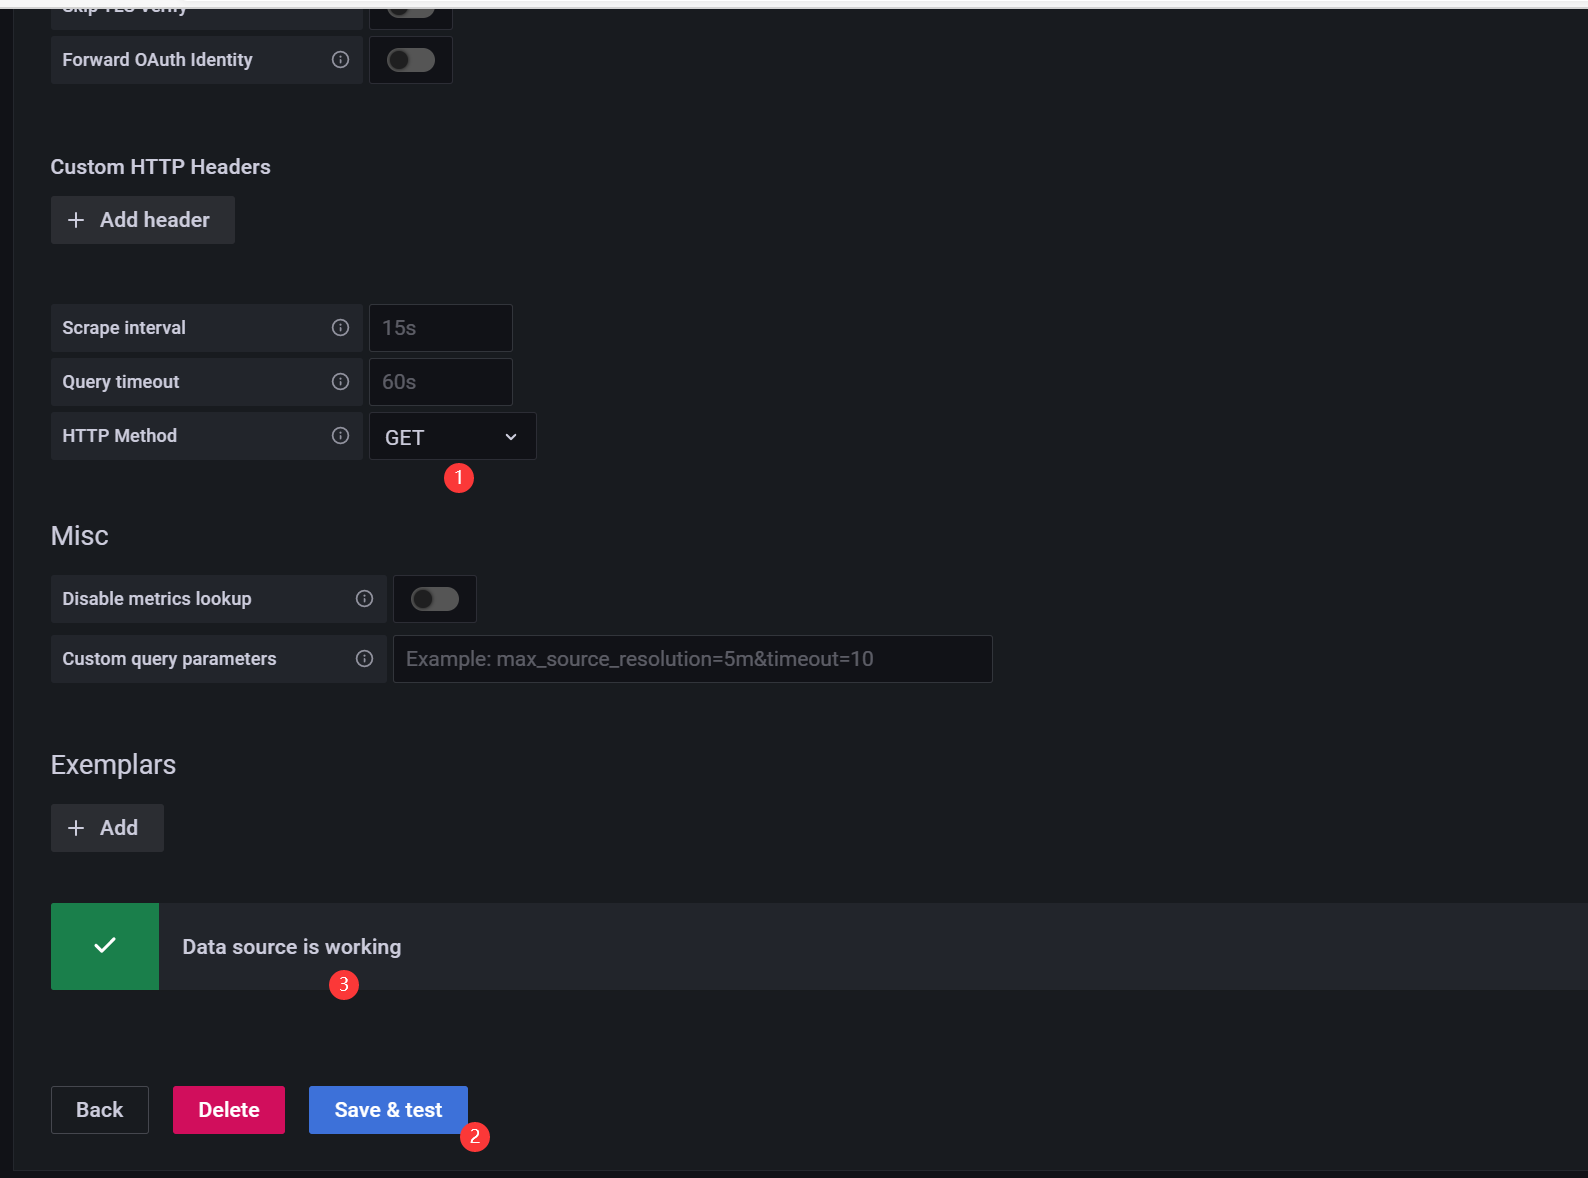
-
下载模板并创建仪表盘
-
从github下载模板
https://github.com/percona/grafana-dashboards/tree/master
https://github.com/percona/grafana-dashboards
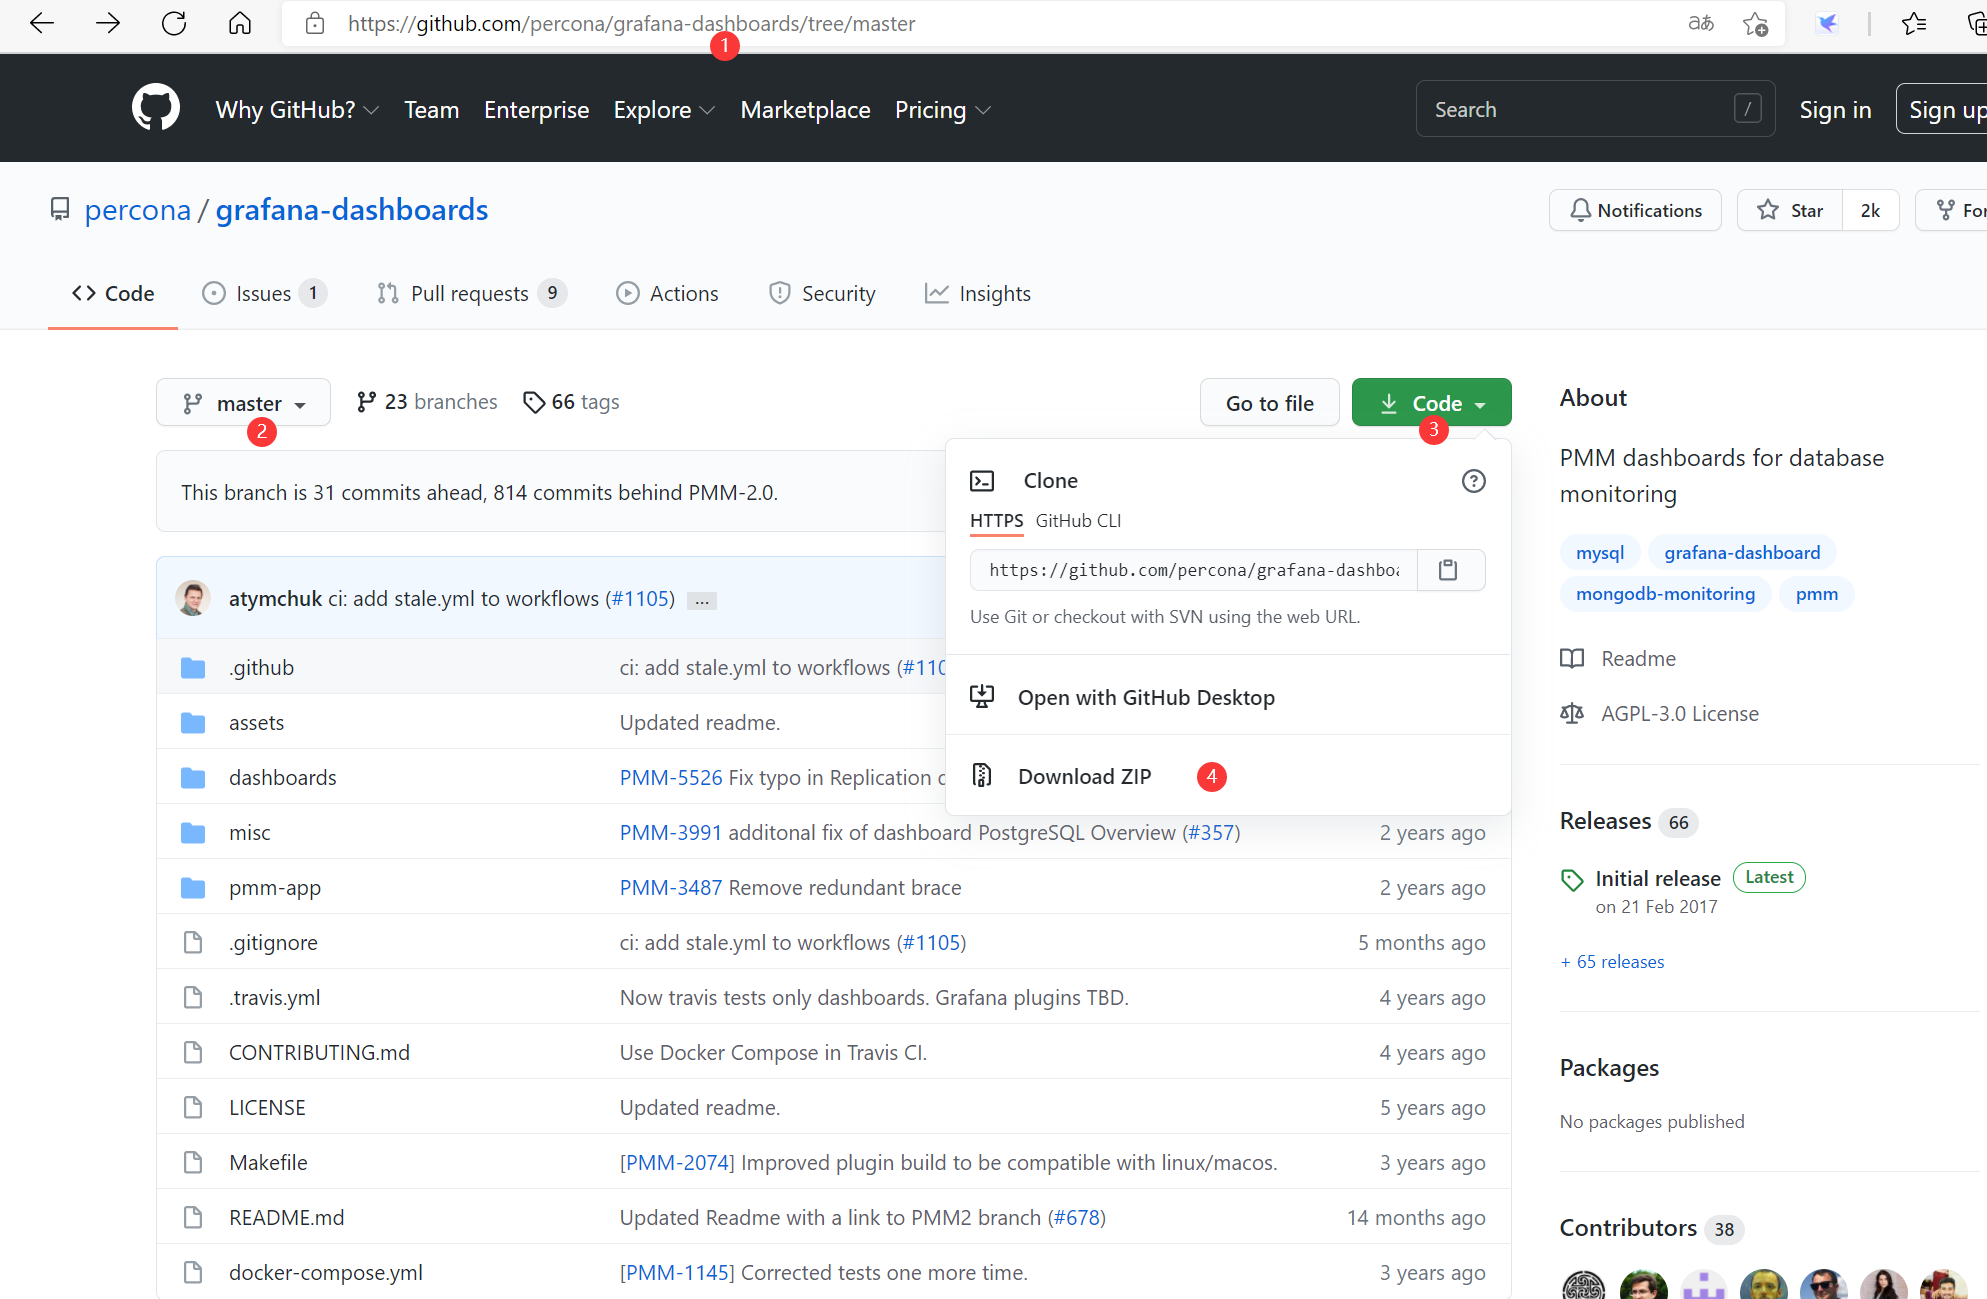
11074/8919
下载ID为11074的模板文件,下载链接为:https://grafana.com/grafana/dashboards/11074
联网:直接复制id就可以,以这个为例
离线:先下载好json文件
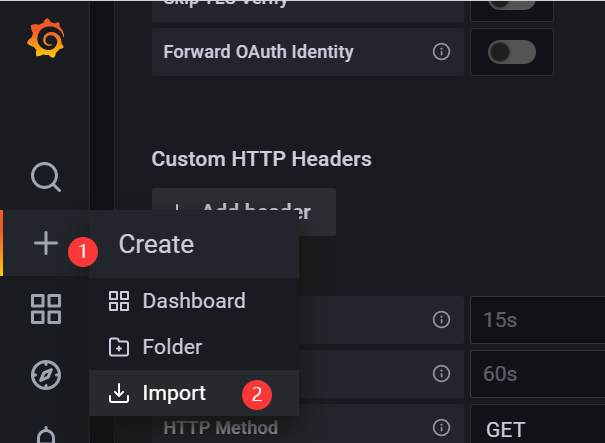
* 点击侧边栏+-->import
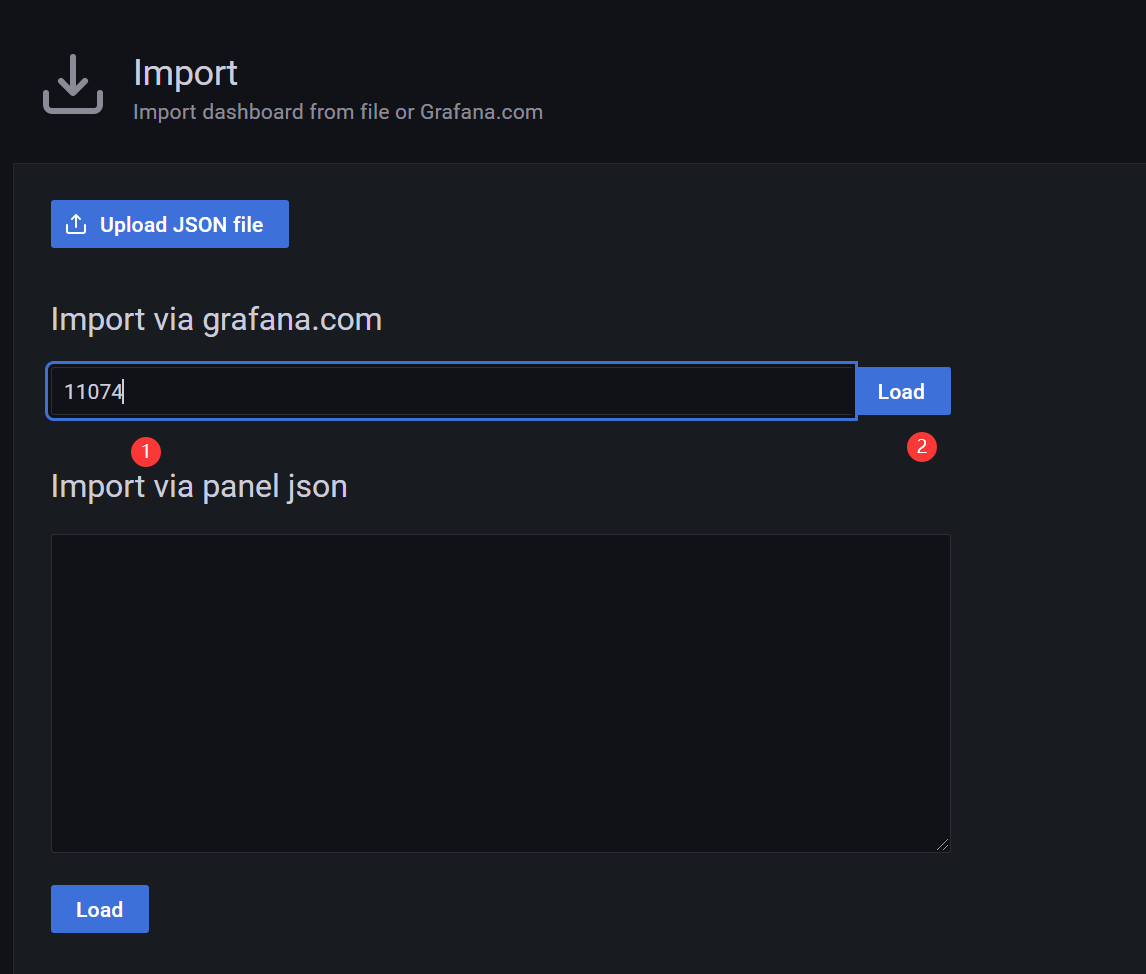
* 输入id,点击load
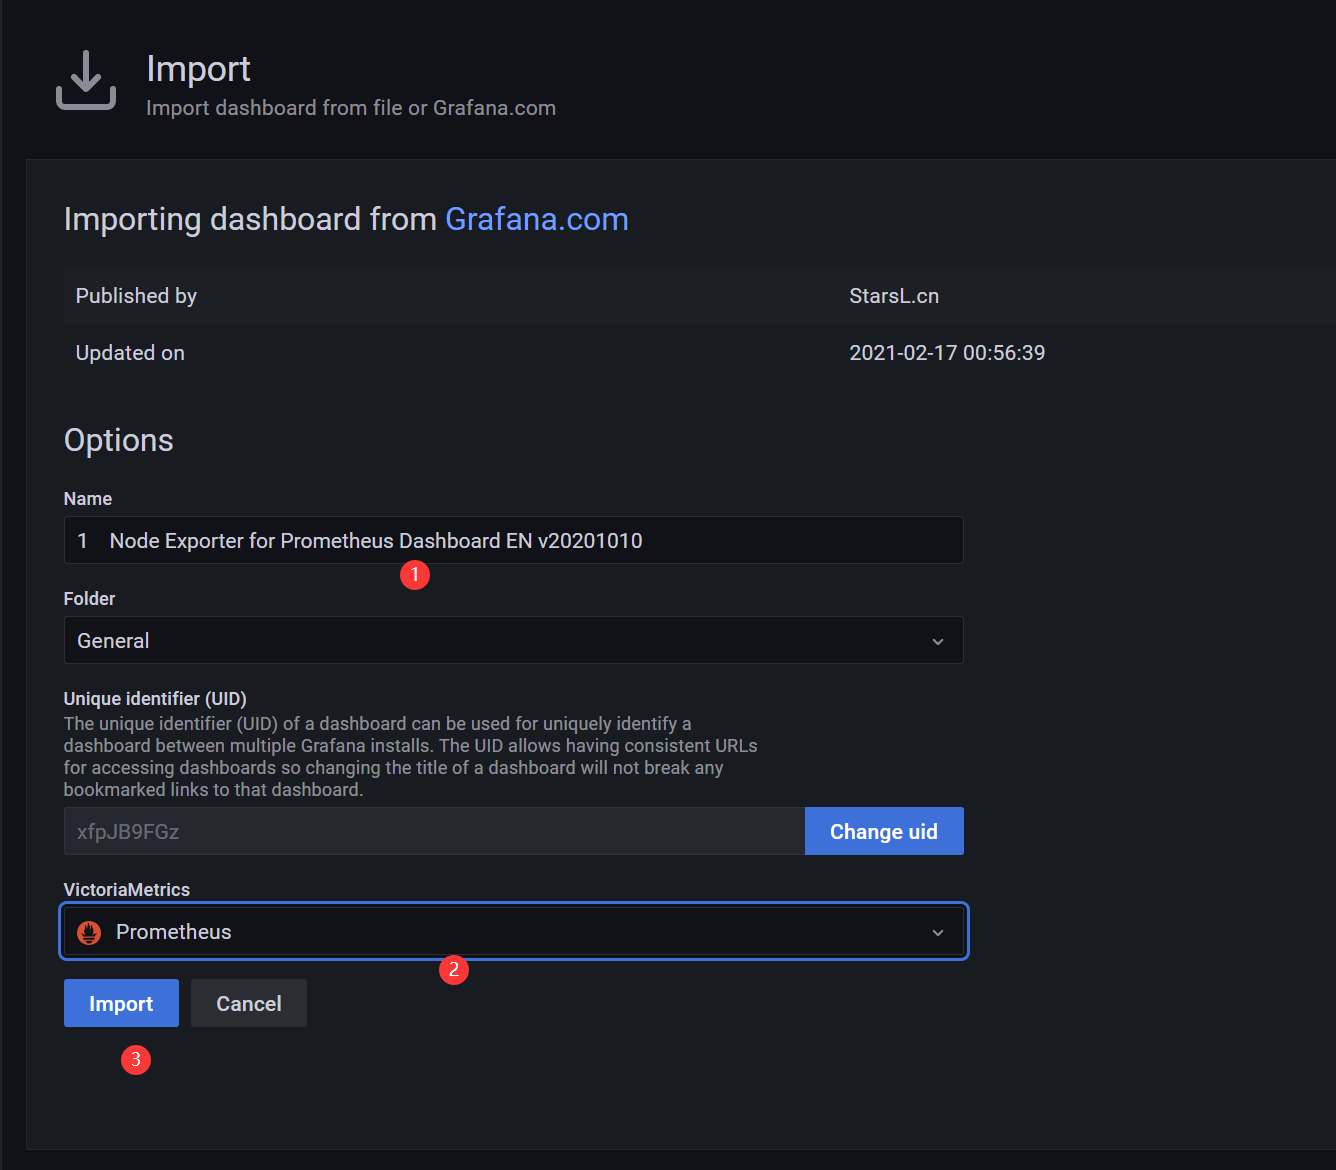
* 修改名字,选择数据源,点击import
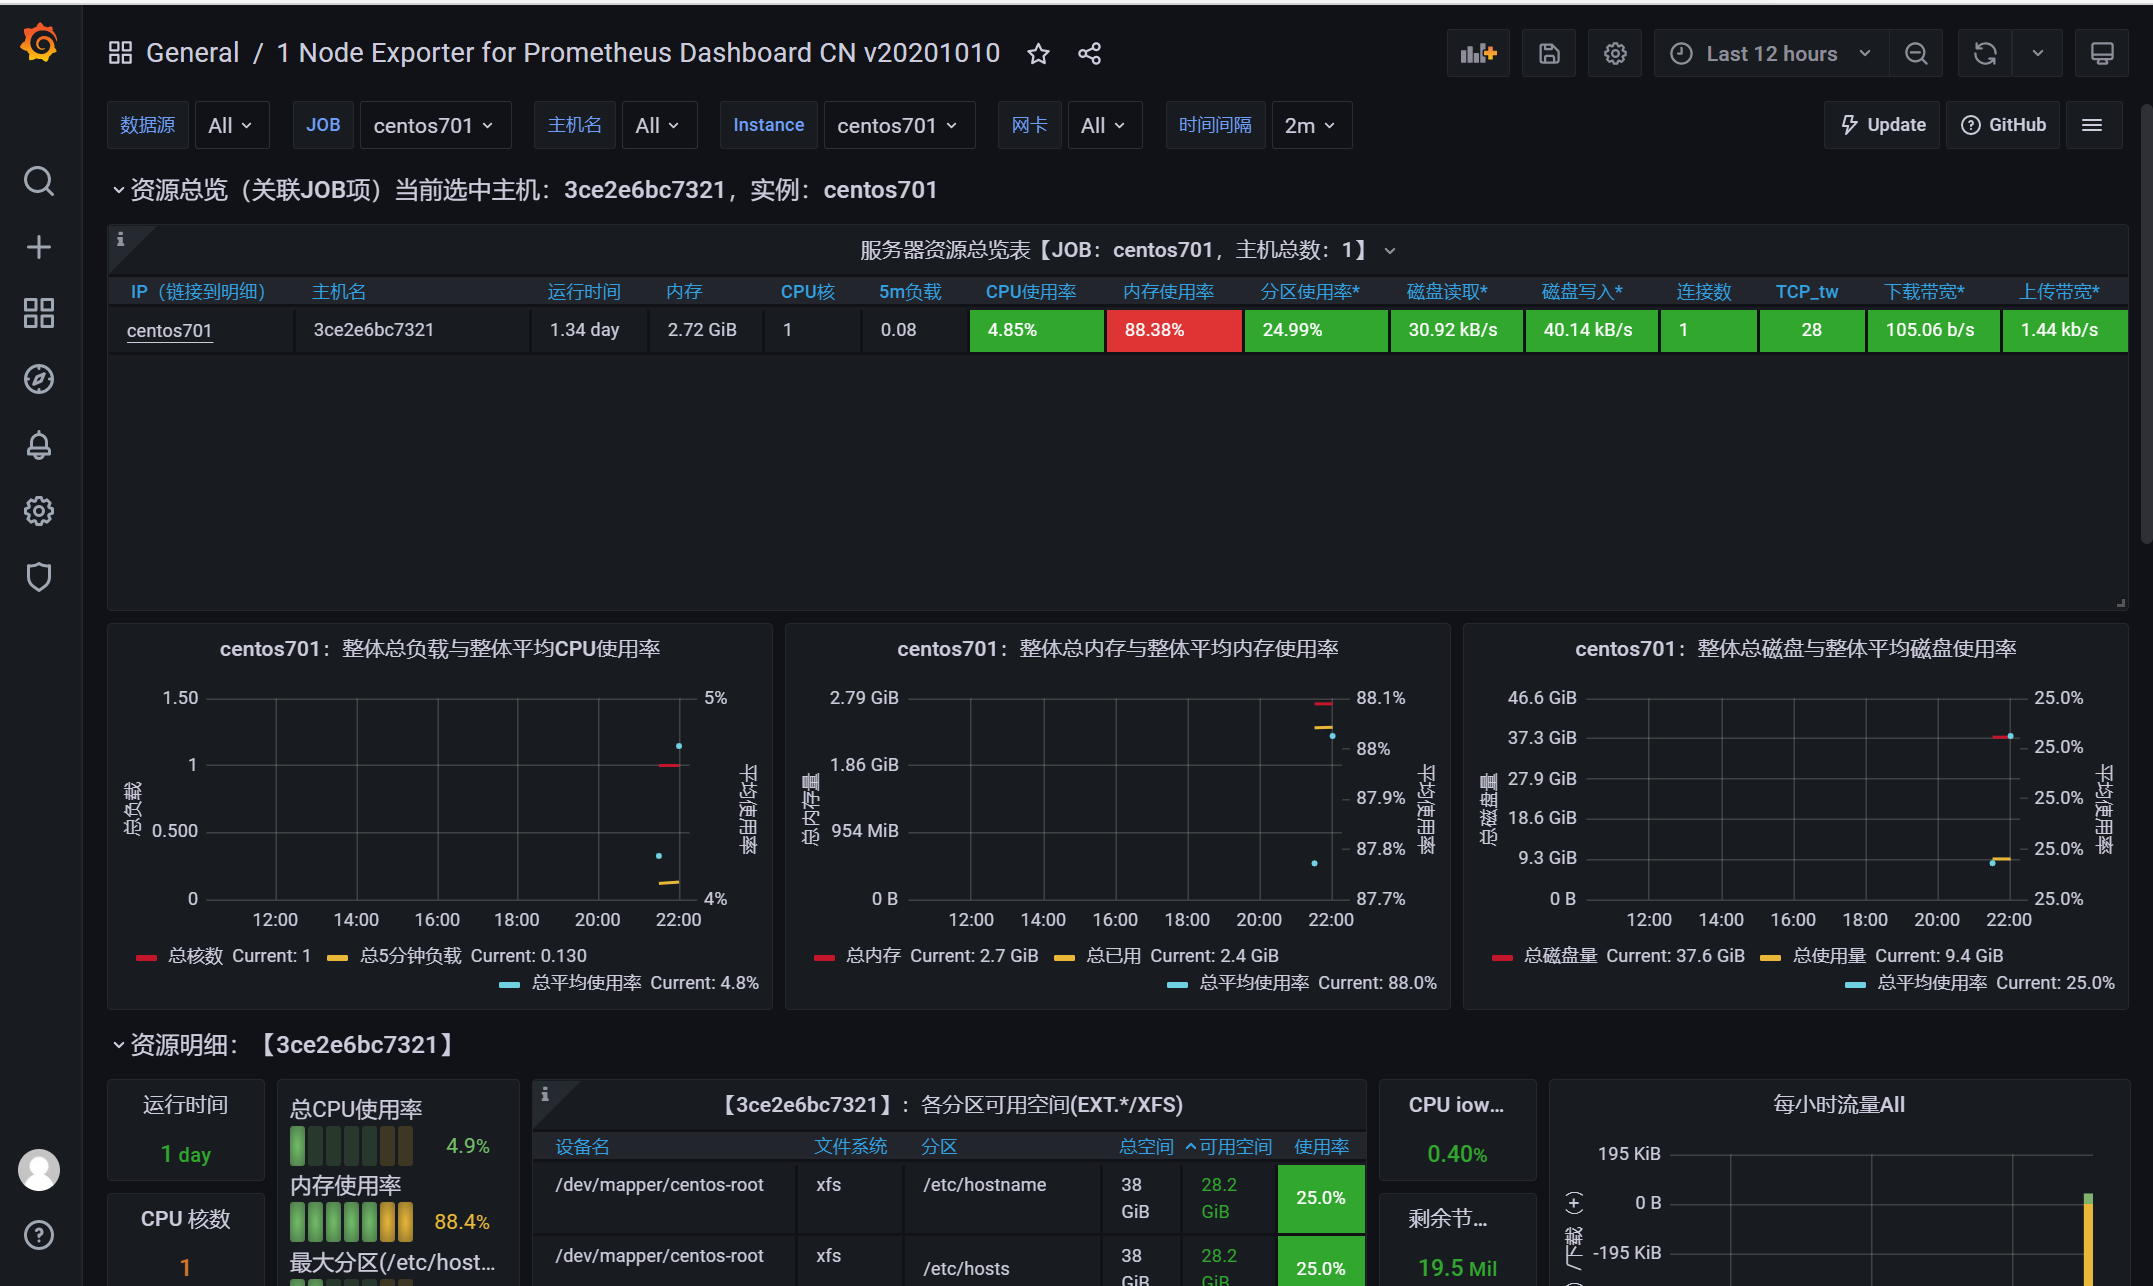
- 安装需要的插件
docker exec -it grafana bash
grafana-cli plugins install grafana-piechart-panel
docker stop grafana
docker start grafana


bash-5.1$ grafana-cli plugins install grafana-singlestat-panel
✔ Downloaded grafana-singlestat-panel v1.0.0 zip successfully

Please restart Grafana after installing plugins. Refer to Grafana documentation for instructions if necessary.

6、实现对Linux某个进程的监控
-
1、pushgateway安装
直接下载:
https://github.com/prometheus/pushgateway/releases/download/v0.8.0/pushgateway-0.8.0.linux-amd64.tar.gz -
2、解压并启动服务
解压
[root@localhost opt]# tar xvzf pushgateway-0.8.0.linux-amd64.tar.gz
pushgateway-0.8.0.linux-amd64/
pushgateway-0.8.0.linux-amd64/LICENSE
pushgateway-0.8.0.linux-amd64/pushgateway
pushgateway-0.8.0.linux-amd64/NOTICE
[root@localhost opt]# cd pushgateway-0.8.0.linux-amd64

启动
[root@localhost pushgateway-0.8.0.linux-amd64]# INFO[0000] Starting pushgateway (version=0.8.0, branch=HEAD, revision=d90bf3239c5ca08d72ccc9e2e2ff3a62b99a122e)  source="main.go:65"
INFO[0000] Build context (go=go1.11.8, user=root@00855c3ed64f, date=20190413-11:29:19)  source="main.go:66"
INFO[0000] Listening on :9091.                           source="main.go:108"
- 3、创建一个脚本文件
赋给一些权限然后切换至该位置
[root@localhost opt]# touch better-top

[root@localhost opt]# chmod u+x better-top
如果你想用作收集内存使用率,将 “cpu_usage” 标签修改为 “memory_usage” 然后 $3z 改为 $4z
[root@localhost opt]# vi better-top
[root@localhost opt]# cat better-top
#!/bin/bash
z=$(ps aux)
while read -r z
do
var=$var$(awk '{print "cpu_usage{process=\""$11"\", pid=\""$2"\"}", $3z}');
done <<< "$z"
curl -X POST -H "Content-Type: text/plain" --data "$var
" http://localhost:9091/metrics/job/top/instance/machine
!/bin/bash
z=$(ps aux)
while read -r z
do
var=$var$(awk '{print "cpu_usage{process=""$11"", pid=""$2""}", $3z}');
done <<< "$z"
curl -X POST -H "Content-Type: text/plain" --data "$var
" http://localhost:9091/metrics/job/top/instance/machine
- 4、启动该脚本
while sleep 1; do ./better-top; done;
- 5、修改Prometheus的yml配置文件
[root@localhost prometheus]# vi prometheus.yml
[root@localhost prometheus]# cat prometheus.yml
global:
  scrape_interval: 60s
  evaluation_interval: 60s

scrape_configs:
  - job_name: prometheus
    static_configs:
      - targets: ['localhost:9090']
        labels:
          instance: prometheus

  - job_name: centos701
    static_configs:
      - targets: ['192.168.222.128:9100']
        labels:
          instance: centos701
  - job_name: mysql
    static_configs:
      - targets: ['192.168.222.128:9104']
        labels:
          instance: mysql

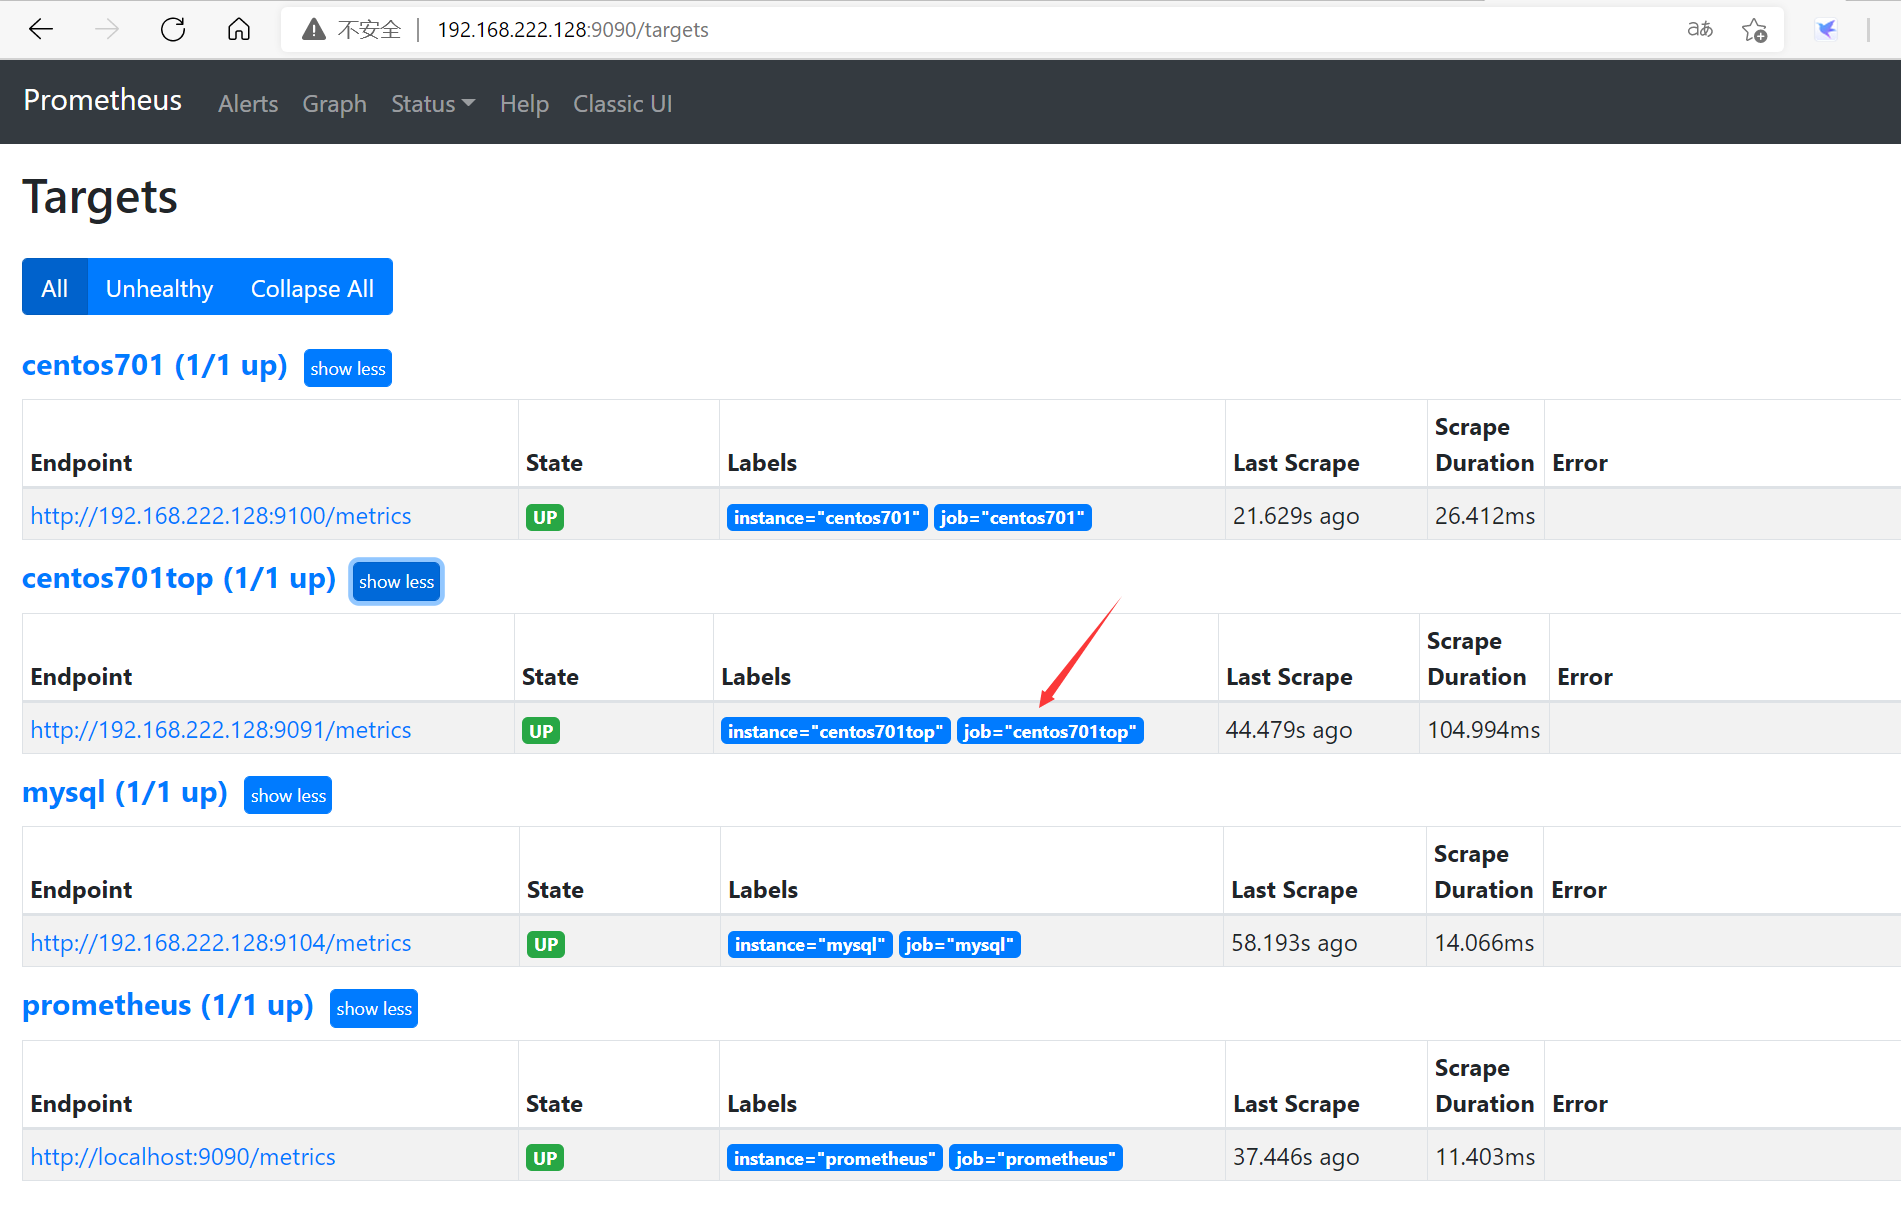
  - job_name: centos701top
    static_configs:
      - targets: ['192.168.222.128:9091']
        labels:
          instance: centos701top
- 6、重新启动Prometheus
docker restart Prometheus(容器名或者id)
[root@localhost prometheus]# docker restart f3a
f3a
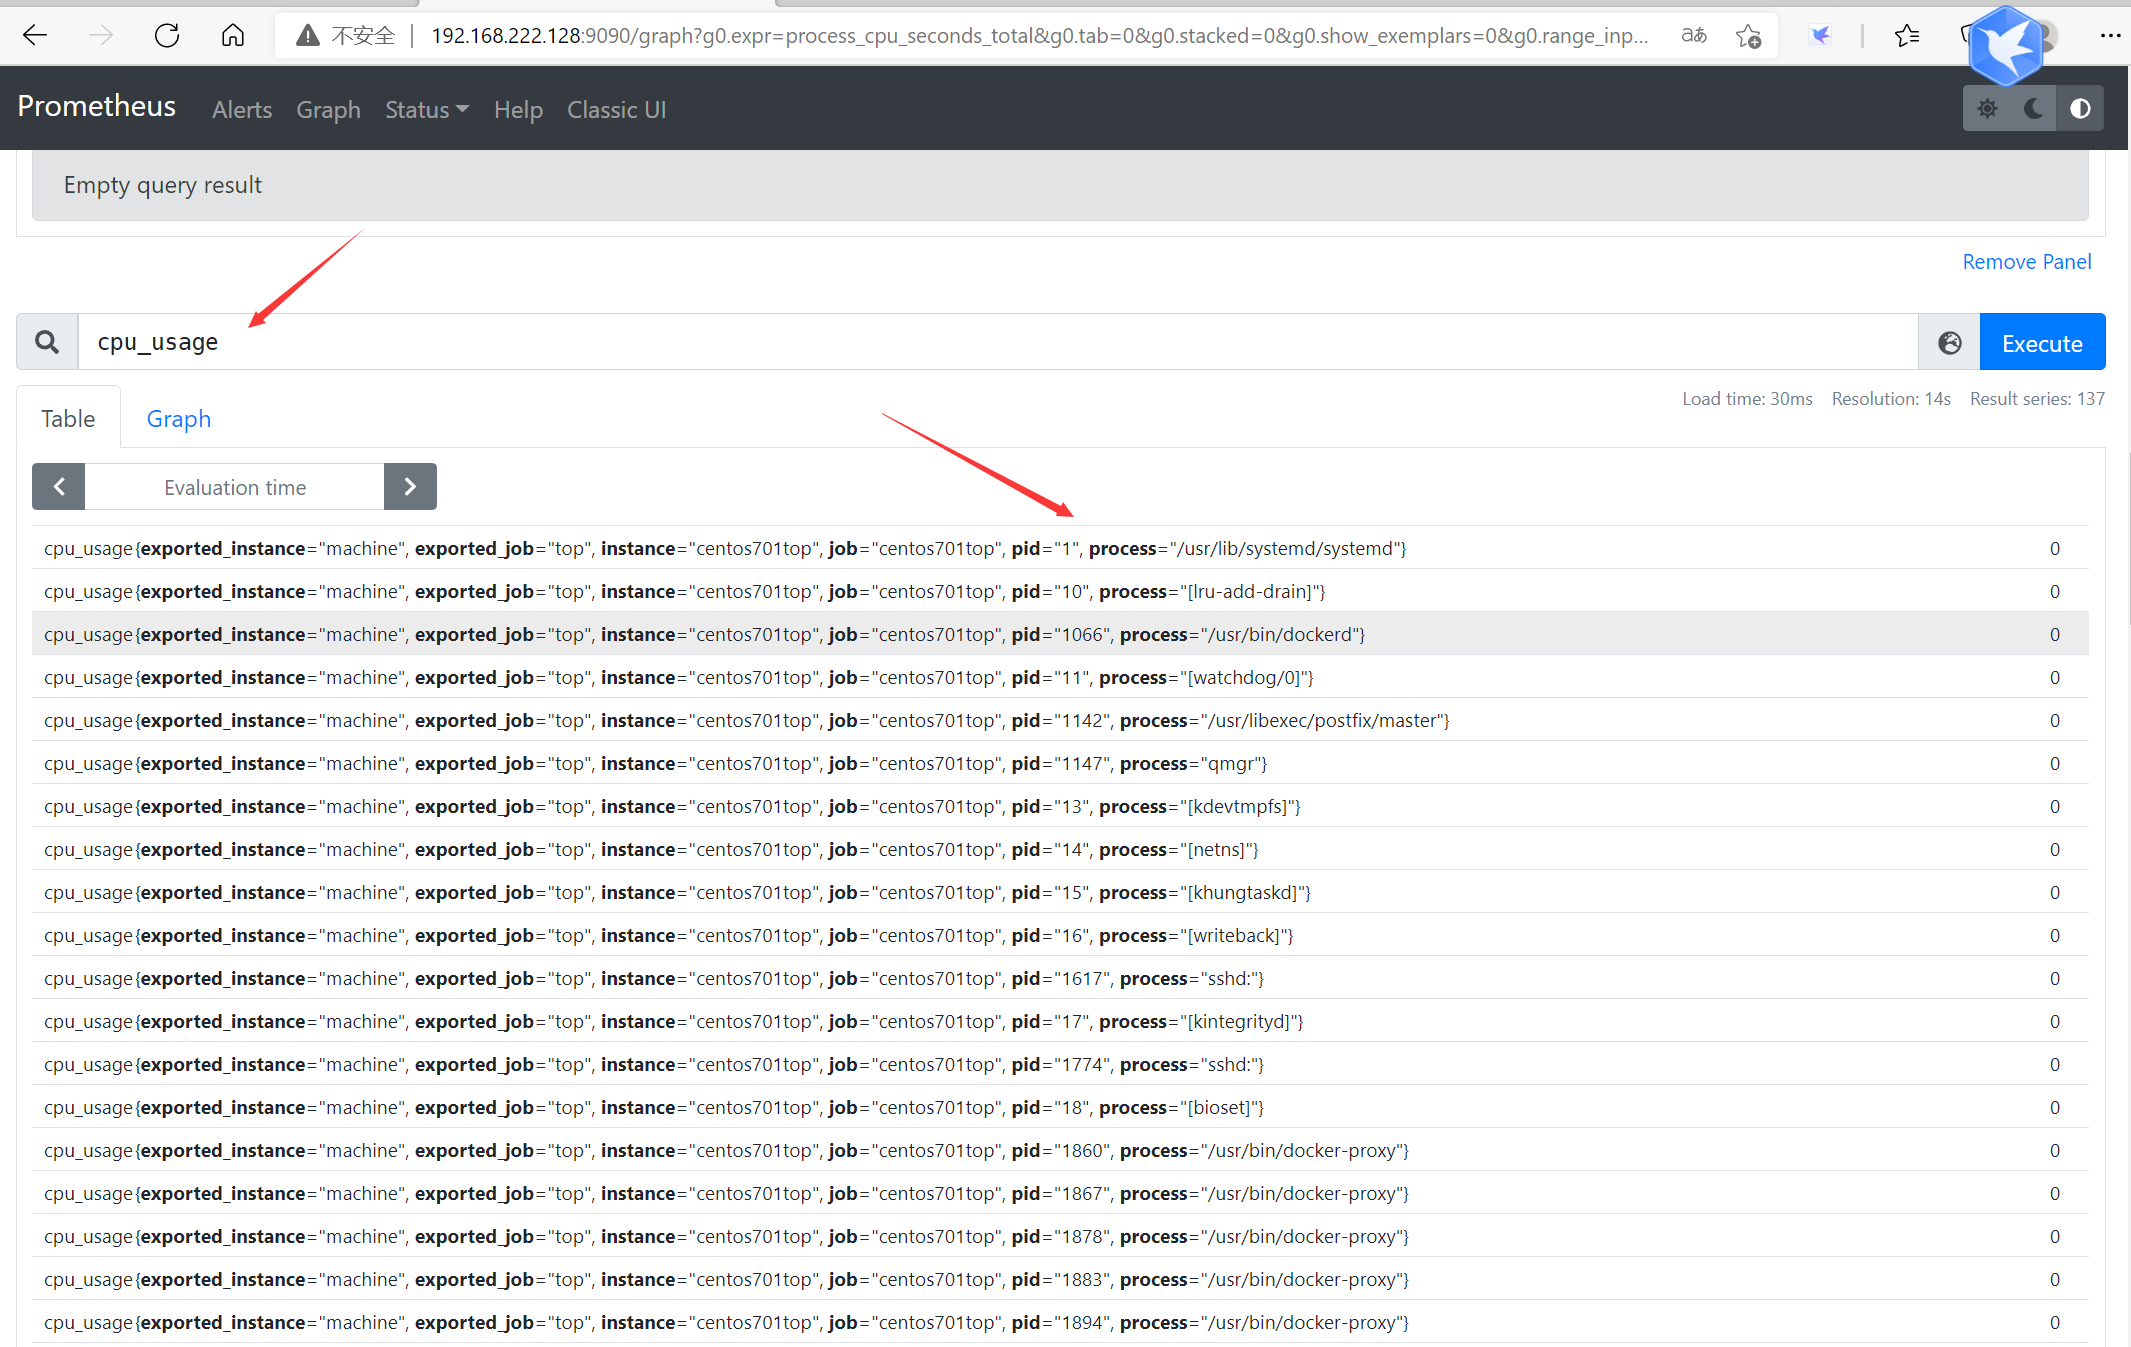
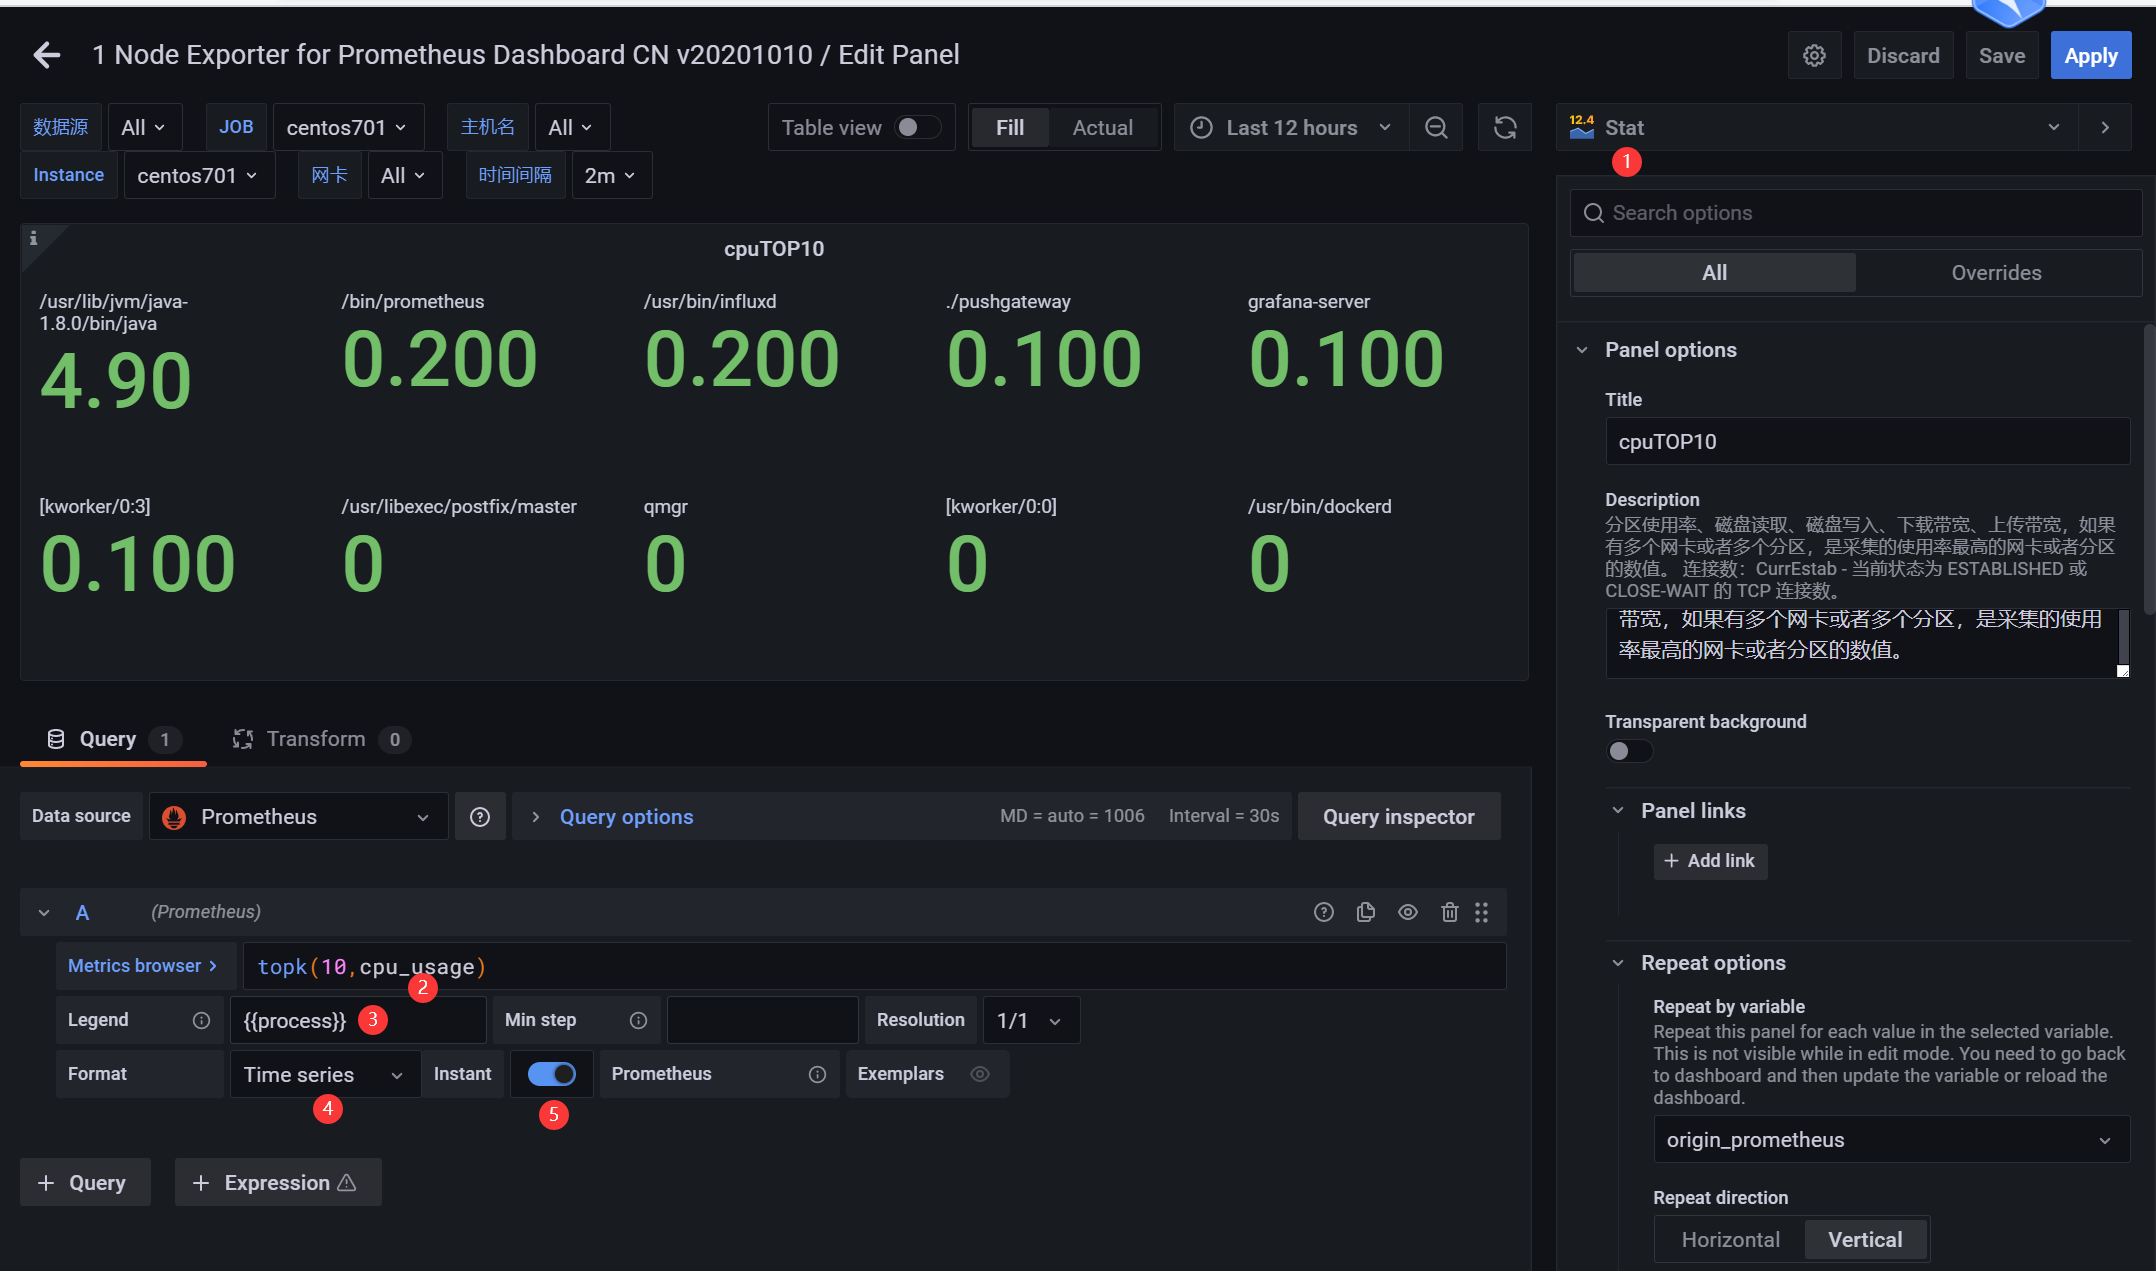
- 7、验证是否运行成功
- 8、增加内存监控
在同一个目录增加一个新的脚本better-top-memory
!/bin/bash
z=$(ps aux)
while read -r z
do
var=$var$(awk '{print "memory_usage{process=""$11"", pid=""$2""}", $4z}');
done <<< "$z"
curl -X POST -H "Content-Type: text/plain" --data "$var
" http://localhost:9091/metrics/job/top/instance/machine
while sleep 1; do ./better-top-memory; done;
#!/bin/bash
z=$(ps aux)
while read -r z
do
var=$var$(awk '{print "memory_usage{process=\""$11"\", pid=\""$2"\"}", $4z}');
done <<< "$z"
curl -X POST -H "Content-Type: text/plain" --data "$var
" http://localhost:9091/metrics/job/top/instance/machine

while sleep 1; do ./better-top-memory; done;

