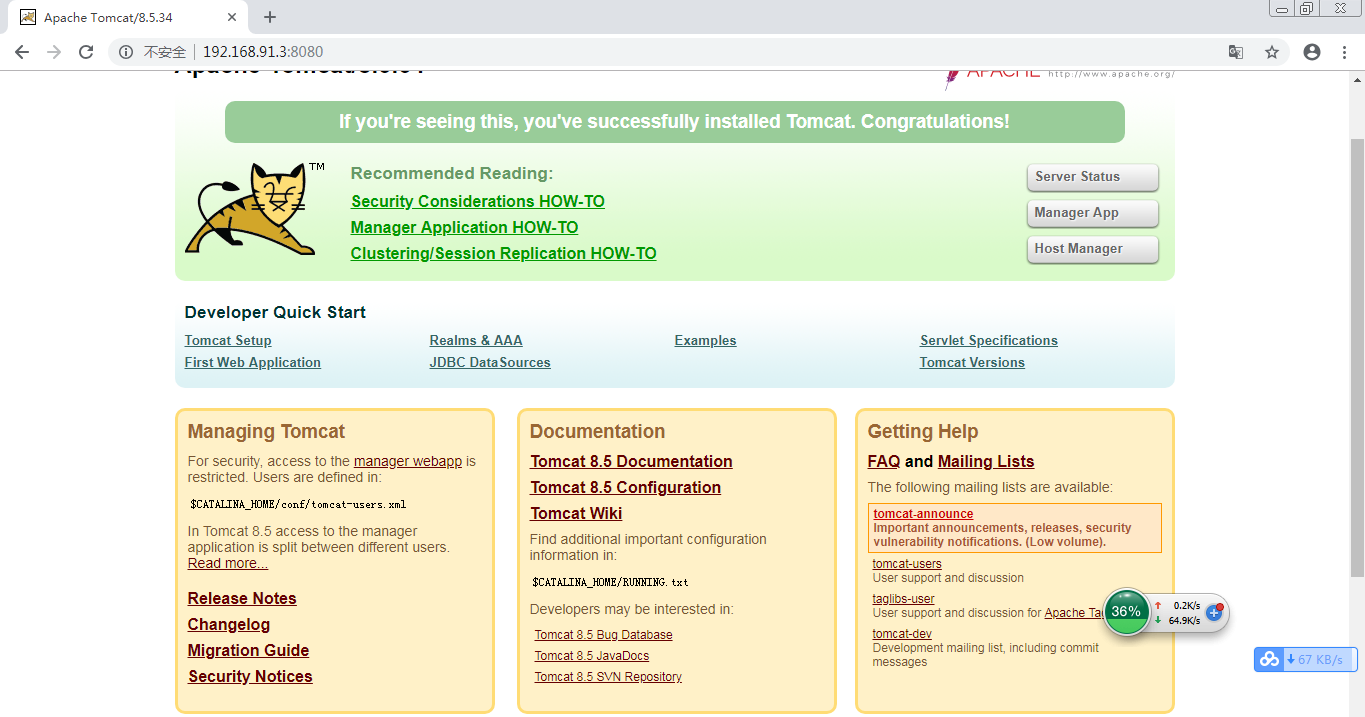
dubbo环境搭建
一、搭建Windows环境
1、安装zookeeper
1)、下载zookeeper网址:https://archive.apache.org/dist/zookeeper/zookeeper-3.4.13/
2)、解压完成后运行bin路径下的zkServer.cmd,初次运行会报错,因为没有zoo.cfg配置文件
3)、修改zoo.cfg配置文件
将conf下的zoo_sample.cfg复制一份改名为zoo.cfg即可。
注意几个重要位置:
dataDir=./ 临时数据存储的目录(可写相对路径)
clientPort=2181 zookeeper的端口号
修改完成后再次启动运行zookeeper
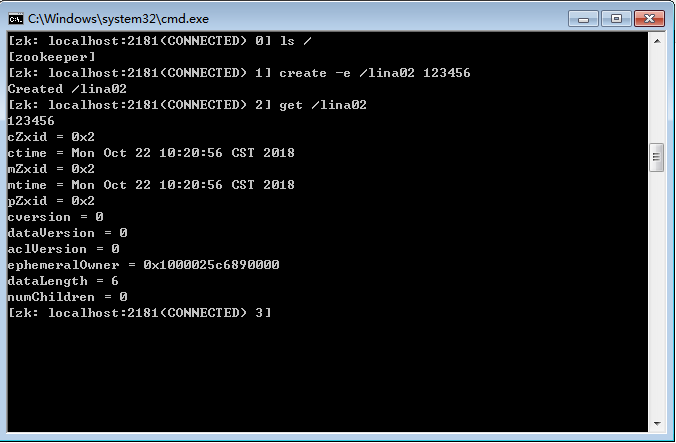
4)、使用zookeeper客户端zkCli.cmd测试服务端
启动运行bin路径下的zkCli.cmd
ls /:列出zookeeper根下保存的所有节点
create –e /lina02 123456:创建一个lina02节点,值为123456
get lina02:获取/lina02节点的值
2、安装dubbo-admin管理控制台
dubbo本身并不是一个服务软件。它其实就是一个jar包能够帮你的java程序连接到zookeeper,并利用zookeeper消费、提供服务。所以你不用在Linux上启动什么dubbo服务。
但是为了让用户更好的管理监控众多的dubbo服务,官方提供了一个可视化的监控程序,不过这个监控即使不装也不影响使用。
1)、下载dubbo-admin
网址:https://github.com/apache/incubator-dubbo-ops
2)、修改dubbo-admin配置
进入src\main\resources\application.properties文件 指定root、guest用户密码以及zookeeper地址等
#
# Licensed to the Apache Software Foundation (ASF) under one or more
# contributor license agreements.  See the NOTICE file distributed with
# this work for additional information regarding copyright ownership.
# The ASF licenses this file to You under the Apache License, Version 2.0
# (the "License"); you may not use this file except in compliance with
# the License.  You may obtain a copy of the License at
#
#     http://www.apache.org/licenses/LICENSE-2.0
#
# Unless required by applicable law or agreed to in writing, software
# distributed under the License is distributed on an "AS IS" BASIS,
# WITHOUT WARRANTIES OR CONDITIONS OF ANY KIND, either express or implied.
# See the License for the specific language governing permissions and
# limitations under the License.
#

server.port=7001
spring.velocity.cache=false
spring.velocity.charset=UTF-8
spring.velocity.layout-url=/templates/default.vm
spring.messages.fallback-to-system-locale=false
spring.messages.basename=i18n/message
spring.root.password=root
spring.guest.password=guest

dubbo.registry.address=zookeeper://127.0.0.1:2181
3)、打包dubbo-admin
进入pom.xml文件所在目录进行打包 mvn clean package -Dmaven.test.skip=true
4)、运行dubbo-admin
进入dubbo-admin-0.0.1-SNAPSHOT.jar这个jar包所在的目录执行java -jar dubbo-admin-0.0.1-SNAPSHOT.jar命令,运行dubbo-admin
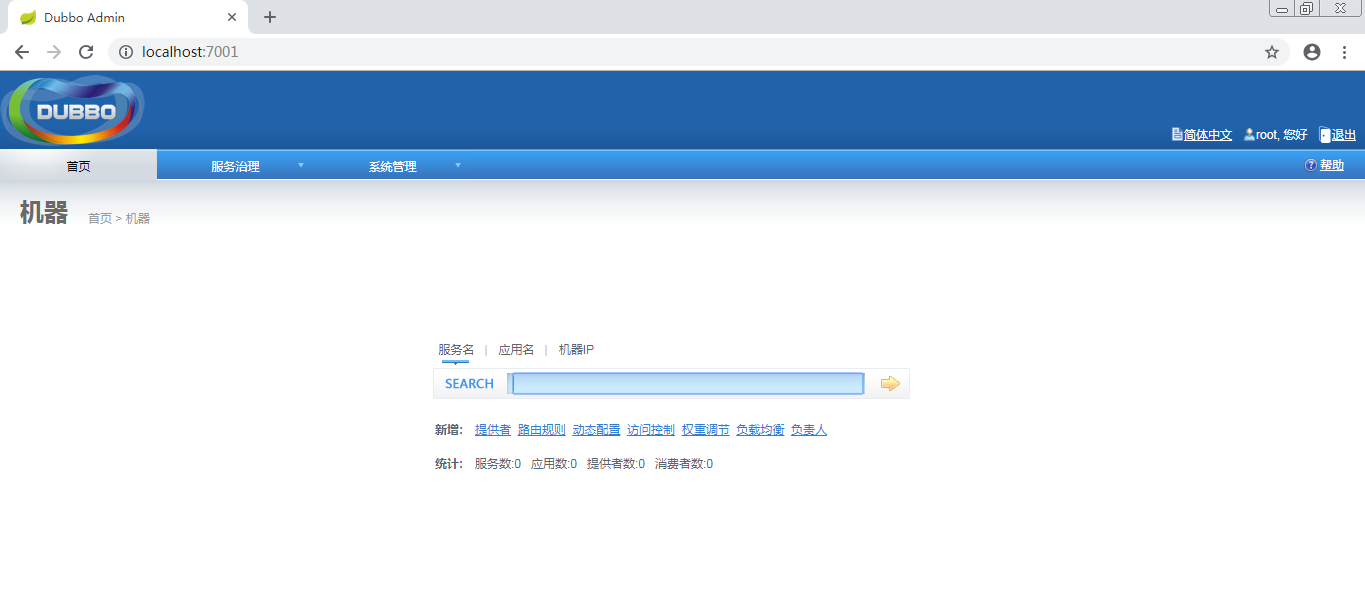
注意:[有可能控制台看着启动了,但是网页打不开,需要在控制台按下ctrl+c即可],默认使用root/root 登陆
二、搭建Linux环境
1、安装jdk
1)、下载jdk 网址:http://www.oracle.com/technetwork/java/javase/downloads/jdk8-downloads-2133151.html
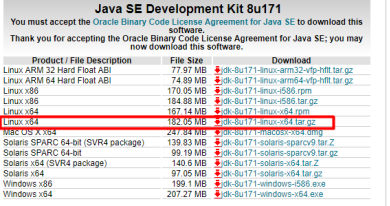
不要使用wget命令获取jdk链接,这是默认不同意,导致下载来的jdk压缩内容错误
2)、上传到服务器并解压

3)、设置环境变量
/home/java/jdk1.8.0_191

文件末尾加入下面配置:
export JAVA_HOME=/home/java/jdk1.8.0_191
export JRE_HOME=${JAVA_HOME}/jre
export CLASSPATH=.:${JAVA_HOME}/lib:${JRE_HOME}/lib
export PATH=${JAVA_HOME}/bin:$PATH

4)、使环境变量生效&测试JDK

2、安装zookeeper
1)、下载zookeeper
网址 https://archive.apache.org/dist/zookeeper/zookeeper-3.4.13/
wget https://archive.apache.org/dist/zookeeper/zookeeper-3.4.11/zookeeper-3.4.13.tar.gz
2)、解压zookeeper

3)、重命名为zookeeper
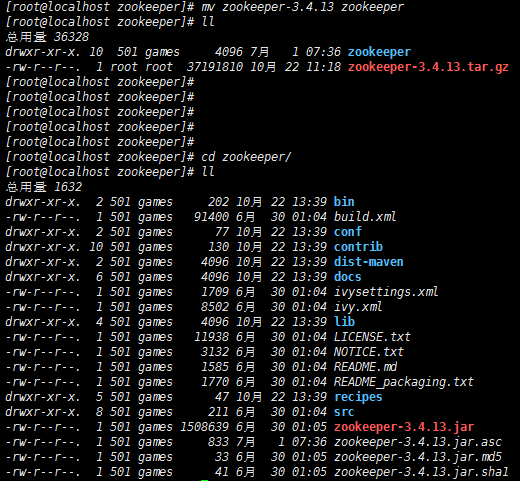
4)、初始化zookeeper配置文件
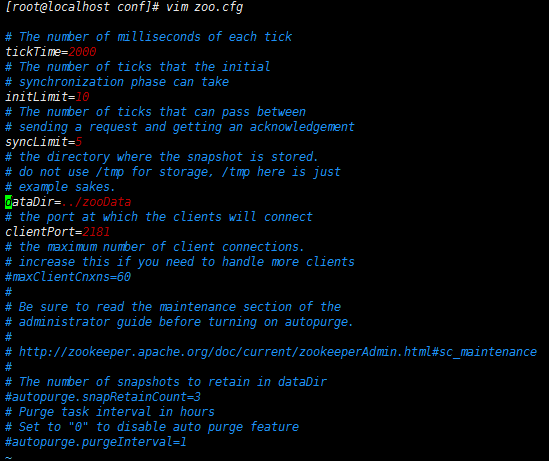
把/home/zookeeper/zookeeper/conf目录下面的zoo_sample.cfg文件copy一份并重命名为zoo.cfg

5)、修改zoo.cfg配置文件(也可以不改)
设置dataDir和clientPort
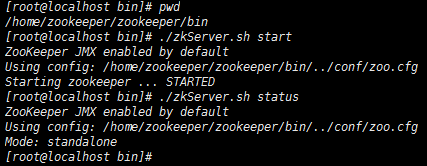
6)、启动zookeeper
进入bin目录,执行./zkServer.sh start命令启动zookeeper
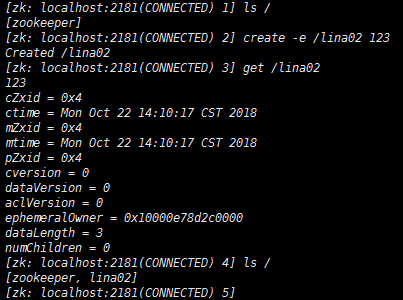
7)、使用zookeeper客户端zkCli.sh测试服务端

3、设置zookeeper开机自启动
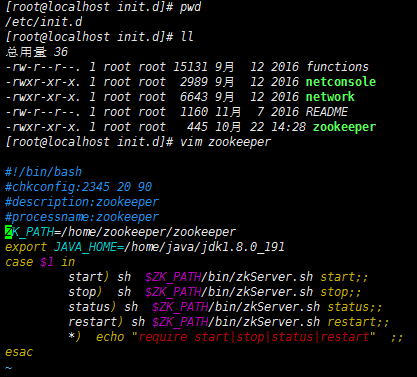
1)、在/etc/init.d/目录下面新建文件zookeeper并添加如下内容:
#!/bin/bash
#chkconfig:2345 20 90
#description:zookeeper
#processname:zookeeper
ZK_PATH=/home/zookeeper/zookeeper
export JAVA_HOME=/home/java/jdk1.8.0_191
case $1 in
         start) sh  $ZK_PATH/bin/zkServer.sh start;;
         stop)  sh  $ZK_PATH/bin/zkServer.sh stop;;
         status) sh  $ZK_PATH/bin/zkServer.sh status;;
         restart) sh $ZK_PATH/bin/zkServer.sh restart;;
         *)  echo "require start|stop|status|restart"  ;;
esac
2)、把脚本注册为service

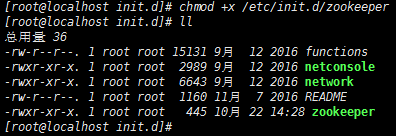
3)、增加权限
4)、启动zookeeper

5)、测试zookeeper服务


4、安装dubbo-admin管理控制台
dubbo本身并不是一个服务软件。它其实就是一个jar包能够帮你的java程序连接到zookeeper,并利用zookeeper消费、提供服务。所以你不用在Linux上启动什么dubbo服务。
但是为了让用户更好的管理监控众多的dubbo服务,官方提供了一个可视化的监控程序,不过这个监控即使不装也不影响使用。
1)、下载dubbo-admin
网址:https://github.com/apache/incubator-dubbo-ops
2)、修改dubbo-admin配置
进入src\main\resources\application.properties文件 指定root、guest用户密码以及zookeeper地址等
#
# Licensed to the Apache Software Foundation (ASF) under one or more
# contributor license agreements.  See the NOTICE file distributed with
# this work for additional information regarding copyright ownership.
# The ASF licenses this file to You under the Apache License, Version 2.0
# (the "License"); you may not use this file except in compliance with
# the License.  You may obtain a copy of the License at
#
#     http://www.apache.org/licenses/LICENSE-2.0
#
# Unless required by applicable law or agreed to in writing, software
# distributed under the License is distributed on an "AS IS" BASIS,
# WITHOUT WARRANTIES OR CONDITIONS OF ANY KIND, either express or implied.
# See the License for the specific language governing permissions and
# limitations under the License.
#

server.port=7001
spring.velocity.cache=false
spring.velocity.charset=UTF-8
spring.velocity.layout-url=/templates/default.vm
spring.messages.fallback-to-system-locale=false
spring.messages.basename=i18n/message
spring.root.password=root
spring.guest.password=guest

dubbo.registry.address=zookeeper://127.0.0.1:2181
3)、打包dubbo-admin
进入pom.xml文件所在目录进行打包 mvn clean package -Dmaven.test.skip=true
4)、上传并运行dubbo-admin
把打包好的dubbo-admin-0.0.1-SNAPSHOT.jar这个jar包上传到/home/dubbo-admin目录下面,执行java -jar dubbo-admin-0.0.1-SNAPSHOT.jar命令,运行dubbo-admin
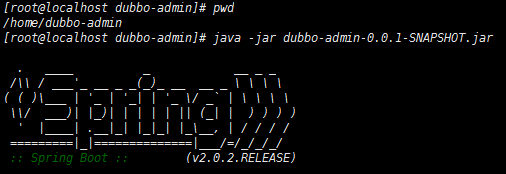
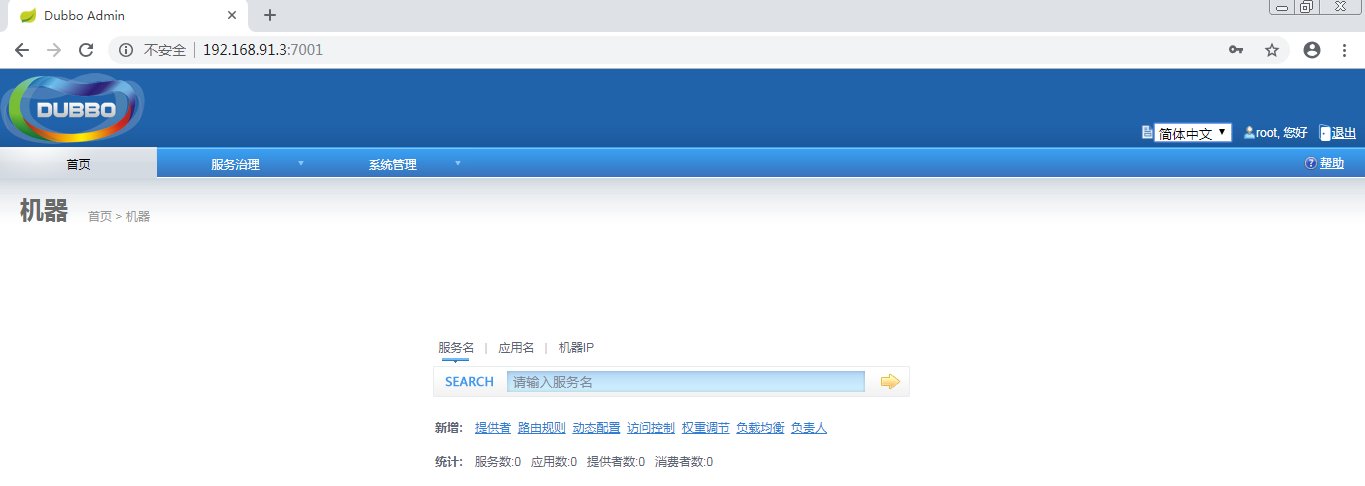
注意:[有可能控制台看着启动了,但是网页打不开,需要在控制台按下ctrl+c即可],默认使用root/root 登陆
安装Tomcat及设置其开机启动(旧版dubbo-admin是war,新版是jar不需要安装Tomcat)
1、下载Tomcat8并解压
https://tomcat.apache.org/download-80.cgi
wget https://mirrors.tuna.tsinghua.edu.cn/apache/tomcat/tomcat-8/v8.5.34/bin/apache-tomcat-8.5.34.tar.gz

2、开机启动Tomcat8
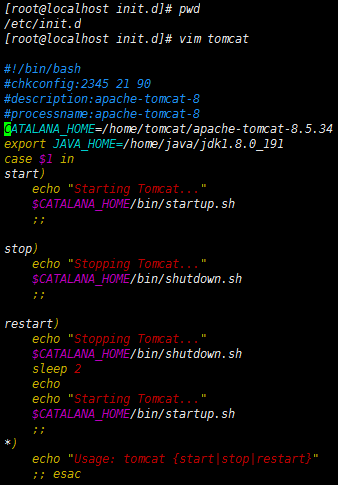
在/etc/init.d/路径下新建文件tomcat并复制如下内容:
#!/bin/bash
#chkconfig:2345 21 90
#description:apache-tomcat-8
#processname:apache-tomcat-8
CATALANA_HOME=/opt/apache-tomcat-8.5.32
export JAVA_HOME=/opt/java/jdk1.8.0_171
case $1 in
start)
    echo "Starting Tomcat..."
    $CATALANA_HOME/bin/startup.sh
    ;;

stop)
    echo "Stopping Tomcat..."
    $CATALANA_HOME/bin/shutdown.sh
    ;;

restart)
    echo "Stopping Tomcat..."
    $CATALANA_HOME/bin/shutdown.sh
    sleep 2
    echo
    echo "Starting Tomcat..."
    $CATALANA_HOME/bin/startup.sh
    ;;
*)
    echo "Usage: tomcat {start|stop|restart}"
    ;; esac
3、注册服务并添加权限

4、启动服务

5、访问tomcat测试
在浏览器中输入http://192.168.91.3:8080/
