本文着重讲述如何用Restful方式调用WCFl进行文件的上传和下载。在前面的文章中,曾经写过Restful的WCF支持两种格式的请求和响应的数据格式:1)XML 2) JSON。事实上WCF不光支持上述两种格式,它还支持原生数据(Raw,来源于Carlos' blog)。这样一来,WCF的Restful方式实际上支持任意一种格式的,因为原生的即表明可以是任意一种格式,WCF从客户端到服务端,从服务端到客户端都会保持这种数据的原来的数据格式。通过查阅MSDN中WebMessageEncodingBindingElement 类的说明:也能找到上述的论证
首先总结一下如何在Restful的WCF的服务端和客户端传递原生的数据(Raw),在WCF中,返回值或者参数为System.IO.Stream或者System.IO.Stream的派生类型的时候,加配上HTTP请求和Restful服务操作响应消息中的ContentType,便能实现原生数据的传输。
下面通过一个上传和下载图片文件的项目示例来演示如上的结论。
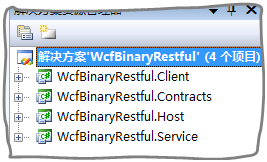
第一步:在VS2008中,创建一个解决方案:WcfBinaryRestful,包括四个项目:如下图所示:

其中各个项目的说明如下表所述:
|
项目名称 |
说明 |
|
WcfBinaryRestful.Contracts |
WCF服务的契约部分 |
|
WcfBinaryRestful.Service |
WCF服务具体实现部分 |
|
WcfBinaryRestful.Host |
WCF服务的Console程序的承载程序 |
|
WcfBinaryRestful.Client |
客户端 |
第二步:在WcfBinaryRestful.Contracts中创建并设计服务契约IService.cs,代码如下:
其中ReadImg方法用于提供jpg图片文件,供客户端下载,而ReceiveImg用于接收客户端上传的jpg图片
第三步:在WcfBinaryRestful.Service项目中创建并设计服务具体实现类:Service.cs
 using System;
 using System.Collections.Generic;
 using System.Linq;
 using System.Text;
 using System.ServiceModel.Web;
 using System.Drawing;
 using System.Diagnostics;
 namespace WcfBinaryRestful.Service
 {
{ public class Service : Contracts.IService
 {
{ [WebInvoke(Method = "*", UriTemplate = "ReadImg")]
 public System.IO.Stream ReadImg()
 {
{ string runDir = System.Environment.CurrentDirectory;
 string imgFilePath = System.IO.Path.Combine(runDir, "jillzhanglogo.jpg");
 System.IO.FileStream fs = new System.IO.FileStream(imgFilePath, System.IO.FileMode.Open);
 System.Threading.Thread.Sleep(2000);
 WebOperationContext.Current.OutgoingResponse.ContentType = "image/jpeg";
 return fs;
 }
} [WebInvoke(Method = "*", UriTemplate = "ReceiveImg")]
 public void ReceiveImg(System.IO.Stream stream)
 {
{ Debug.WriteLine(WebOperationContext.Current.IncomingRequest.ContentType);
 System.Threading.Thread.Sleep(3000);
 string runDir = System.Environment.CurrentDirectory;
 string imgFilePath = System.IO.Path.Combine(runDir, "ReceiveImg.jpg");
 Image bmp = Bitmap.FromStream(stream);
 bmp.Save(imgFilePath);
 }
} }
} }
}
第四步:用配置的方式,创建服务承载项目:WcfBinaryRestful.Host。并使得服务可以用Restful方式访问。
Host.cs
 using System;
 using System.Collections.Generic;
 using System.Linq;
 using System.Text;
 using System.ServiceModel;
 namespace WcfBinaryRestful.Host
 {
{ public class Host
 {
{ static void Main()
 {
{ using (ServiceHost host = new ServiceHost(typeof(Service.Service)))
 {
{ host.Open();
 Console.WriteLine("服务已经启动!");
 Console.Read();
 }
} }
} }
} }
}
App.config
 <?xml version="1.0" encoding="utf-8" ?>
 <configuration>
 <system.serviceModel>
 <services>
 <service name="WcfBinaryRestful.Service.Service">
 <host>
 <baseAddresses>
 <add baseAddress="http://127.0.0.1:9874/"/>
 </baseAddresses>
 </host>
 <endpoint address="" binding="webHttpBinding" contract="WcfBinaryRestful.Contracts.IService" behaviorConfiguration="WcfBinaryRestfulBehavior"></endpoint>
 </service>
 </services>
 <behaviors>
 <endpointBehaviors>
 <behavior name="WcfBinaryRestfulBehavior">
 <webHttp/>
 </behavior>
 </endpointBehaviors>
 </behaviors>
 </system.serviceModel>
 </configuration>
第五步:实现客户端程序
Form1.cs
 using System;
 using System.Collections.Generic;
 using System.ComponentModel;
 using System.Data;
 using System.Drawing;
 using System.Linq;
 using System.Text;
 using System.Windows.Forms;
 namespace WcfBinaryRestful.Client
 {
{ public partial class Form1 : Form
 {
{ public Form1()
 {
{ InitializeComponent();
 }
} System.Net.WebClient wc;
 private void button1_Click(object sender, EventArgs e)
 {
{ wc = new System.Net.WebClient();
 SaveFileDialog op = new SaveFileDialog();
 if (op.ShowDialog() == DialogResult.OK)
 {
{ wc.DownloadFileAsync(new Uri("http://127.0.0.1:9874/ReadImg"), op.FileName);
 wc.DownloadFileCompleted += new AsyncCompletedEventHandler(wc_DownloadFileCompleted);
 button2.Enabled = true;
 button1.Enabled = false;
 }
}
 }
}
 void wc_DownloadFileCompleted(object sender, AsyncCompletedEventArgs e)
 {
{ if (e.Cancelled)
 {
{ button2.Enabled = false;
 button1.Enabled = true;
 MessageBox.Show("用户已经取消下载!");
 return;
 }
} using (System.Net.WebClient wc = e.UserState as System.Net.WebClient)
 {
{ button2.Enabled = false;
 button1.Enabled = true;
 MessageBox.Show("下载完毕!");
 }
} }
}
 private void button2_Click(object sender, EventArgs e)
 {
{ if (wc != null)
 {
{ wc.CancelAsync();
 }
} }
}
 System.Net.WebClient uploadWc = new System.Net.WebClient();
 private void button3_Click(object sender, EventArgs e)
 {
{ OpenFileDialog op = new OpenFileDialog();
 op.Filter = "jpg文件(*.jpg)|*.jpg";
 if (op.ShowDialog() == DialogResult.OK)
 {
{ uploadWc.Headers.Add("Content-Type", "image/jpeg");
 System.IO.FileStream fs = new System.IO.FileStream(op.FileName,System.IO.FileMode.Open);
 byte[] buffer = new byte[(int)fs.Length];
 fs.Read(buffer, 0, (int)fs.Length);
 fs.Close();
 uploadWc.UploadDataCompleted += new System.Net.UploadDataCompletedEventHandler(uploadWc_UploadDataCompleted);
 uploadWc.UploadDataAsync(new Uri("http://127.0.0.1:9874/ReceiveImg"), buffer);
 button3.Enabled = false;
 button4.Enabled = true;
 }
} }
}
 void uploadWc_UploadDataCompleted(object sender, System.Net.UploadDataCompletedEventArgs e)
 {
{ if (e.Cancelled)
 {
{ button3.Enabled = true;
 button4.Enabled = false;
 MessageBox.Show("用户已经取消上传!");
 return;
 }
} MessageBox.Show("完成上传!");
 button3.Enabled = true;
 button4.Enabled = false;
 }
}
 private void button4_Click(object sender, EventArgs e)
 {
{ uploadWc.CancelAsync();
 }
}

 }
} }
}
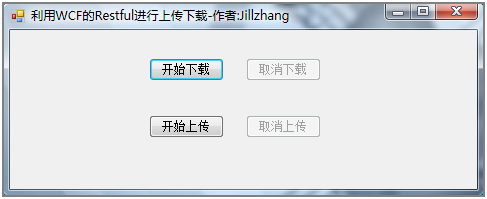
设置好多启动项目调试后,调试,出现如下的运行界面:
1.服务承载程序运行界面图:

2.客户端运行界面图:

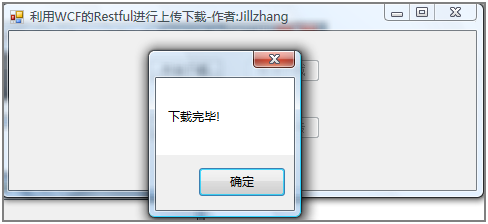
点击开始下载按钮,选择一个下载文件的保存位置,等待一会后,会提示下载成功,如下图所示:

打开刚才选择下载文件的保存位置,便能发现已经成功下载了jpg的图片文件:

当然顺便还可以温习一下如何异步调用Restful的WCF服务,点击取消下载可以停止下载,不再多说
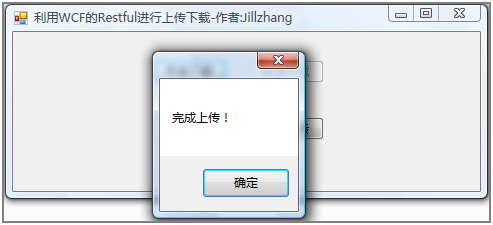
点击开始上传,选择一个要上传的jpg图片,等待几秒钟,便能收到上传成功的对话框,如下图所示:

找到服务承载程序所在目录,便能看到上传的jpg图像文件:

原文引自:http://jillzhang.cnblogs.com/


