一次dropzone体验
对于前端,本人不是太擅长,对于当前的一些网上的样例,也许是习武悟性太差,不是太透,所以只能通过blog的方式记录下一些武功套路,便于以后查询使用
首先,我们需要知道这个武功适应的战场。
什么是dropzone?
DropzoneJS是一个提供文件拖拽上传并且提供图片预览的开源类库,它是轻量级的,不依赖任何其他类库(如JQuery)并且高度可定制.
支持浏览器:
- Chrome 7+
- Firefox 4+
- IE 10+
- Opera 12+ (Version 12 for MacOS is disabled because their API is buggy)
- Safari 6+
对于所有其他浏览器 , dropzone 提供了一个 file input 作为应对策略,对于老旧的浏览器,会出现file input,还是可以文件上传的。
资源
官网:https://www.dropzonejs.com/
GitHub:https://github.com/enyo/dropzone
看demo:
dropzone.html
<!DOCTYPE html>
<html lang="en" xmlns:th="http://www.thymeleaf.org">
<head>
    <meta charset="UTF-8">
    <title>Title</title>
    <!-- css 引用-->
    <link rel="stylesheet" type="text/css" th:href="@{~/static/css/basic.min.css}"/>
    <link rel="stylesheet" type="text/css" th:href="@{~/static/css/dropzone.min.css}"/>

    <!-- js 引用 -->
    <script th:src="@{~/static/js/jquery_3.1.0_jquery.min.js}"></script>
    <script th:src="@{~/static/js/dropzone.min.js}"></script>

</head>
<body>

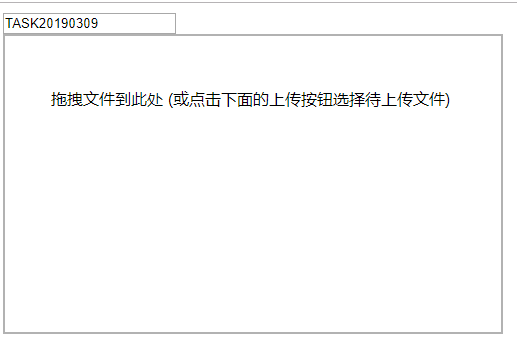
<input type="text" value="TASK20190309" id="taskKey"/>
<div id="dropz" class="dropzone" style="width: 500px; height: 300px;"></div>

<!-- 文件上传缩略图模板 -->
<div id="preview-template" class="hide">
    <div class="dz-preview dz-file-preview">
        <div class="dz-image">
            <img data-dz-thumbnail="" />
        </div>

        <div class="dz-details">
            <div class="dz-size">
                <span data-dz-size=""></span>
            </div>

            <div class="dz-filename">
                <span data-dz-name=""></span>
            </div>
        </div>

        <div class="dz-error-message">
            <span data-dz-errormessage=""></span>
        </div>

        <div class="dz-success-mark">
            <span class="fa-stack fa-lg bigger-150">
                <i class="fa fa-circle fa-stack-2x white"></i>
                <i class="fa fa-check fa-stack-1x fa-inverse green"></i>
            </span>
        </div>

        <div class="dz-error-mark">
            <span class="fa-stack fa-lg bigger-150">
                <i class="fa fa-circle fa-stack-2x white"></i>
                <i class="fa fa-remove fa-stack-1x fa-inverse red"></i>
            </span>
        </div>
    </div>
</div>

<!--<div id="preview-template" style="display: none;">
    <div class="dz-preview dz-file-preview ">
        <div class="dz-image"><img data-dz-thumbnail /></div>
        <div class="dz-details">
            <div class="dz-filename"><span data-dz-name></span></div>
            <div class="dz-size" data-dz-size></div>
        </div>
        <div class="dz-progress"><span class="dz-upload" data-dz-uploadprogress></span></div>
        <div class="dz-success-mark"><span>✔</span></div>
        <div class="dz-error-mark"><span>✘</span></div>
        <div class="dz-error-message"><span data-dz-errormessage></span></div>
    </div>
</div>-->

</body>
<script th:inline="javascript">
    Dropzone.autoDiscover = false;//解决两次实例Dropzone错误,可在控制台看到该错误
    var $taskKey = $("#taskKey");
    try{

        var myDropzone = new Dropzone("#dropz",{
            url: "/uploadFile",//文件提交地址
            method:"post",  //也可用put
            paramName:"file", //默认为file
            maxFiles:2,//一次性上传的文件数量上限
            maxFilesize: 2, //文件大小,单位:MB
            acceptedFiles: ".jpg,.gif,.png,.jpeg", //上传的类型
            addRemoveLinks:true, //默认false。如果设为true,则会给文件添加一个删除链接
            uploadMultiple:true,//如果设为true,则相当于 HTML 表单添加 multiple 属性
            parallelUploads: 2,//一次上传的文件数量
            autoProcessQueue:true, //当设置 false 你必须自己像这样 myDropzone.processQueue()
            previewTemplate: $('#preview-template').html(),//如果去掉该选项就会使用默认的
            dictDefaultMessage :
                '<span class="bigger-150 bolder"><i class="ace-icon fa fa-caret-right red"></i> 拖拽文件到此处</span> \
                <span class="smaller-80 grey">(或点击下面的上传按钮选择待上传文件)</span> <br /> \
                <i class="upload-icon ace-icon fa fa-cloud-upload blue fa-3x"></i>'
            ,
            dictMaxFilesExceeded: "您最多只能上传{{maxFiles}}个文件!",
            dictResponseError: '文件上传失败!',
            dictInvalidFileType: "文件类型只能是*.jpg,*.gif,*.png,*.jpeg",
            dictFallbackMessage:"浏览器不受支持",
            dictFileTooBig:"文件过大({{filesize}}MB). 上传文件最大支持: {{maxFilesize}}MB.",
            dictRemoveLinks: "删除",
            dictCancelUpload: "取消",
            dictRemoveFile: "移除",
            //文件信息预览
            thumbnail: function(file, dataUrl) {
                if (file.previewElement) {
                    $(file.previewElement).removeClass("dz-file-preview");
                    var images = $(file.previewElement).find("[data-dz-thumbnail]").each(function() {
                        var thumbnailElement = this;
                        thumbnailElement.alt = file.name;
                        thumbnailElement.src = dataUrl;
                    });
                    setTimeout(function() { $(file.previewElement).addClass("dz-image-preview"); }, 1);
                }
            },
            accept: function(file, done) {
                //此处可以在上传前添加一些校验
                var taskKey = $taskKey.val();
                if (taskKey === "" || taskKey == null) {
                    done("任务不为空");
                } else {done();}
            },
            init:function(){
                //添加文件触发
                this.on('addedfile',function(file){
                    console.log("addedfile .....");
                });

                this.on('successmultiple',function(files,reponse){
                    console.log("successmultiple .....");
                    $.each(files,function(index,file){
                        if(file.accepted){
                                if(reponse[file.name]!='0'){
                                    //表示后台处理失败
                                    var $div = $(file.previewElement);
                                    $div.removeClass("dz-success").addClass("dz-error");
                                    $div.find(".dz-error-message").find("span").text("上传失败");
                                }
                        }
                    });
                });

                this.on('sending',function(files, xhr, formData){
                    //此处可以添加自定义参数
                    formData.append("taskKey", $taskKey.val());
                });

                this.on('errormultiple',function(files,reponse){
                    console.log("errormultiple .....");
                    $.each(files,function(index,file){
                        if(file.accepted){
                            if(reponse[file.name]=='0'){
                                //表示后台处理成功
                                var $div = $(file.previewElement);
                                $div.removeClass("dz-error").addClass("dz-success");
                            }
                        }
                    });

                });
            }
        });

        //在以ajax模式离开此页面时删除dropzone实例
        $(document).one('ajaxloadstart.page', function(e) {
            try {
                myDropzone.destroy();
            } catch(e) {}
        });

    }catch (e) {
        alert('浏览版本过低,不支持文件上传!');
    }

</script>

</html>
后台:
package com.paic.phssp.springtest.dropzone;

import com.fasterxml.jackson.core.JsonProcessingException;
import com.fasterxml.jackson.databind.ObjectMapper;
import com.mongodb.util.JSON;
import com.paic.phssp.springtest.dto.Student;
import com.rabbitmq.tools.json.JSONUtil;
import org.slf4j.Logger;
import org.slf4j.LoggerFactory;
import org.springframework.boot.autoconfigure.EnableAutoConfiguration;
import org.springframework.boot.json.JsonParser;
import org.springframework.http.HttpStatus;
import org.springframework.http.ResponseEntity;
import org.springframework.stereotype.Controller;
import org.springframework.util.MultiValueMap;
import org.springframework.web.bind.annotation.RequestMapping;
import org.springframework.web.multipart.MultipartFile;
import org.springframework.web.multipart.MultipartHttpServletRequest;

import javax.annotation.Resource;
import javax.servlet.http.HttpServletRequest;
import java.io.File;
import java.io.IOException;
import java.util.HashMap;
import java.util.List;
import java.util.Map;
import java.util.UUID;

/**
 * 文件上传demo
 */
@Controller
@EnableAutoConfiguration
public class DropzoneController {

    private final Logger log = LoggerFactory.getLogger(getClass());

    @Resource
    private Student student;

    @RequestMapping("/dropzone")
    private String toDropzonePage() {
        System.out.println("Hello World.....");
        return "dropzone";
    }

    @RequestMapping("/uploadFile")
    private ResponseEntity<String> uploadFile(MultipartHttpServletRequest request) {
        log.info("start upload file ......");
        HttpStatus httpStatus = HttpStatus.INTERNAL_SERVER_ERROR;//status code 500

        Map<String, Object> loadResultMap = new HashMap<String, Object>();
        MultiValueMap<String, MultipartFile> multiMap = request.getMultiFileMap();

        String taskKey = request.getParameter("taskKey");
        log.info("taskKey = "+taskKey);
        String filePath = "F:\\test";

        //TODO 异常
        //int i = 9/0;

        for (Map.Entry<String, List<MultipartFile>> entry : multiMap.entrySet()) {
            List<MultipartFile> mFList = entry.getValue();

            for (MultipartFile mFile : mFList) {
                int loadResult = loadFile(mFile, filePath);
                String fileName = mFile.getOriginalFilename();
                loadResultMap.put(fileName, loadResult);
            }
        }

        //封装返回
        ObjectMapper objMapper = new ObjectMapper();
        String body = "";
        try {
            body = objMapper.writeValueAsString(loadResultMap);

            httpStatus = HttpStatus.OK;
        } catch (JsonProcessingException e) {
            log.error("load file error", e);
        } catch (Exception e) {
            log.error("load file error", e);
        }

        ResponseEntity responseEntity = new ResponseEntity(body, httpStatus);
        return responseEntity;
    }

    private int loadFile(MultipartFile mfile, String filePath) {
        log.error("load file param=", mfile.toString());

        int result = 1;

        // 获取上传的原始文件名
        String fileName = mfile.getOriginalFilename();

        //TODO 制造有失败上传场景
       /* if(fileName.equals("5a38b9ee3b7fb.jpg")){
            return result;
        }*/

        String fileSuffix = fileName.substring(fileName.lastIndexOf("."), fileName.length());

        // 判断并创建上传用的文件夹
        File file = new File(filePath);
        if (!file.exists()) {
            file.mkdir();
        }
        // 重新设置文件名为 UUID,以确保唯一
        file = new File(filePath, UUID.randomUUID() + fileSuffix);

        result = 0;
        try {
            // 写入文件
            mfile.transferTo(file);
        } catch (IOException e) {
            log.error("load file error", e);
        }
        return result;
    }

}
可能的报错:
org.apache.tomcat.util.http.fileupload.FileUploadBase$FileSizeLimitExceededException: The field file exceeds its maximum permitted size of xxx bytes.
解决方案:
#springBoot自带tomcat,Post请求参数默认限制1024,设置0就不限制大小了
server.tomcat.max-http-post-size=0
1)在配置文件(application.properties)加入如下代码,一般这个方法解决不了问题
multipart.maxFileSize = 10Mb
multipart.maxRequestSize=100Mb
2)把如下代码放在启动类上,并在类上加入@Configuration
@Bean
    public MultipartConfigElement multipartConfigElement() {
        MultipartConfigFactory factory = new MultipartConfigFactory();
        //  单个数据大小
        factory.setMaxFileSize(DataSize.ofMegabytes(2L));

        /// 总上传数据大小
        factory.setMaxRequestSize(DataSize.ofMegabytes(10L));
        return factory.createMultipartConfig();
    }
测试:

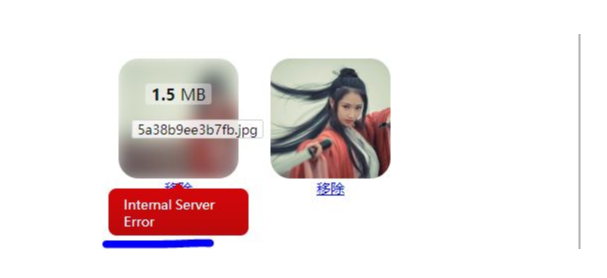
(1) 未写就异常失败了;//TODO 异常,放开

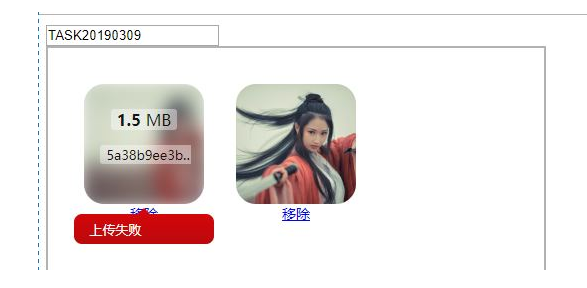
(2)因为uploadMultiple=true(一次请求可{{parallelUploads}}文件),成功与失败都有,//TODO 制造有失败上传场景,放开

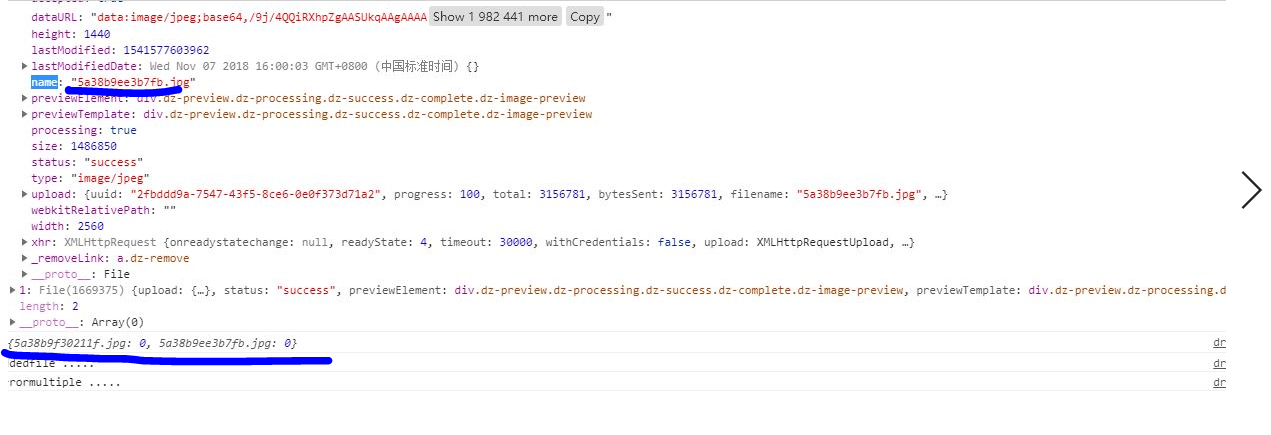
(3)成功,主要看下,前端file打印:

参考:
https://blog.csdn.net/weixin_40119256/article/details/81843361
http://wxb.github.io/dropzonejs.com.zh-CN/
https://blog.csdn.net/qq_25446311/article/details/78600354


