

ELK
ELK适用场景
公司网站的访问量有多大,访问高峰期的时间段是多少,最经常访问的热点数据是什么?这一切的一切,虽然我们可以自己通过shell等手段截取出来,
但是如果网站多了,服务器多了,还是非常不方便,而且阅读性也不好,因此ELK应运而生,不仅可以获取访问高峰期,还可以制作图表,让你的领导一目了然,
ELK已然成为各大互联往公司必部署的项目,因此接下来我们就来部署一套ELK系统
安装环境
192.168.41.142 ES,Kibana
192.168.41.143 logstash
ELK版本:7.5.1
操作系统:CentOS Linux release 7.6.1810 (Core)
注意:
- 请确保你的firewalld和selinux关闭
- 最好确保你的机器是2个cpu以上
- 最好确保你的机器是2G以上内存
- ES和logstash服务器需要java8以上
原理
logstash负责收集客户端的日志信息发送给ES服务器,然后通过Kibana以web形式展现出来
kibana
Kibana是一个为Logstash和ElasticSearch提供的日志分析的Web接口。可使用它对日志进行高效的搜索、可视化、分析等各种操作。是一个开源的分析与可视化平台,设计出来用于和Elasticsearch一起使用的。你可以用kibana搜索、查看存放在Elasticsearch中的数据。Kibana与Elasticsearch的交互方式是各种不同的图表、表格、地图等,直观的展示数据,从而达到高级的数据分析与可视化的目的。
部署kibana
1、上传kibana包到192.168.41.142主机上,并解压到/usr/local目录下
1 | tar -zxvf kibana-7.5.1-linux-x86_64.tar.gz -C /usr/local/ |
2、修改kibana的监听端口,默认为5601,0.0.0.0代表全网监听
1 2 3 | root@bogon ~#vim /usr/local/kibana-7.5.1-linux-x86_64/config/kibana.yml server.port: 5601 server.host: "0.0.0.0 |
3、启动kiabana
1 2 | root@bogon ~#/usr/local/kibana-7.5.1-linux-x86_64/bin/kibanaKibana should not be run as root. Use --allow-root to continue. |
当用root启动kibana时会报错,提示我们不能用root账号运行,需要加--allow-root参数
1 2 | root@bogon ~#nohup /usr/local/kibana/bin/kibana --allow-root &> /var/log/kibana.log & #剥离ssh终端后台运行kibana并把日志输出到/var/log/kibana.log [1] 17854 |
1 2 3 4 5 6 7 8 9 10 11 | root@bogon log#ss -ntl State Recv-Q Send-Q Local Address:Port Peer Address:Port LISTEN 0 128 127.0.0.1:9000 *:* LISTEN 0 128 *:22 *:* LISTEN 0 100 127.0.0.1:25 *:* LISTEN 0 128 *:5601 *:* LISTEN 0 128 *:10050 *:* LISTEN 0 128 :::80 :::* LISTEN 0 128 :::22 :::* LISTEN 0 100 ::1:25 :::* LISTEN 0 128 :::10050 :::* |
ss -ntl 查看kibana的5601端口已经启动
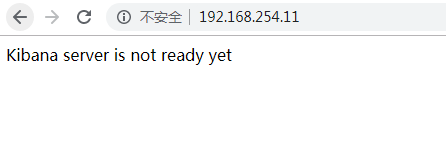
4、浏览器输入Kibana服务器的ip地址加端口号验证,出现以下内容代表kibana部署成功,由于连接不到ES服务器所以才会出现这种界面!

由于是kibana界面是不安全的,因为没有任何的认证,谁都可以登录到kibana界面,为了安全,我们可以部署一个nginx,利用反向代理到后端的kibana
5、部署nginx并配置
1 2 3 4 5 6 | [root@localhost ~]# vim /etc/nginx/nginx.conf location / { proxy_pass http://127.0.0.1:5601; auth_basic "ELK ADMIN PAGE"; auth_basic_user_file /etc/nginx/.htpasswd; } |
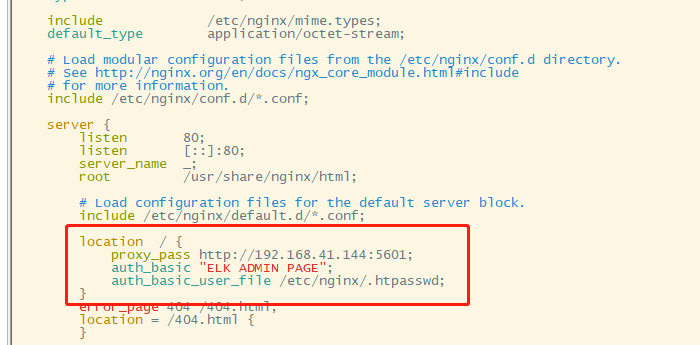
设置nginx认证账户密码
1 2 3 4 | root@bogon log#htpasswd -c -m /etc/nginx/.htpasswd admin1New password: Re-type new password: Adding password for user admin1 |
重启nginx服务
1 | root@bogon log#systemctl restart nginx |
重新登陆验证
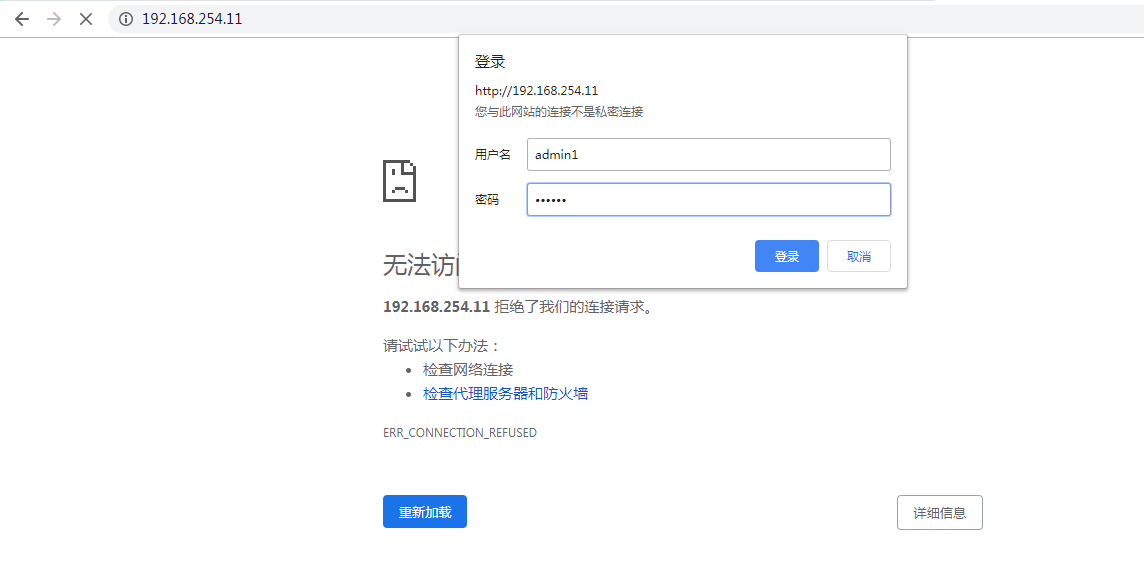
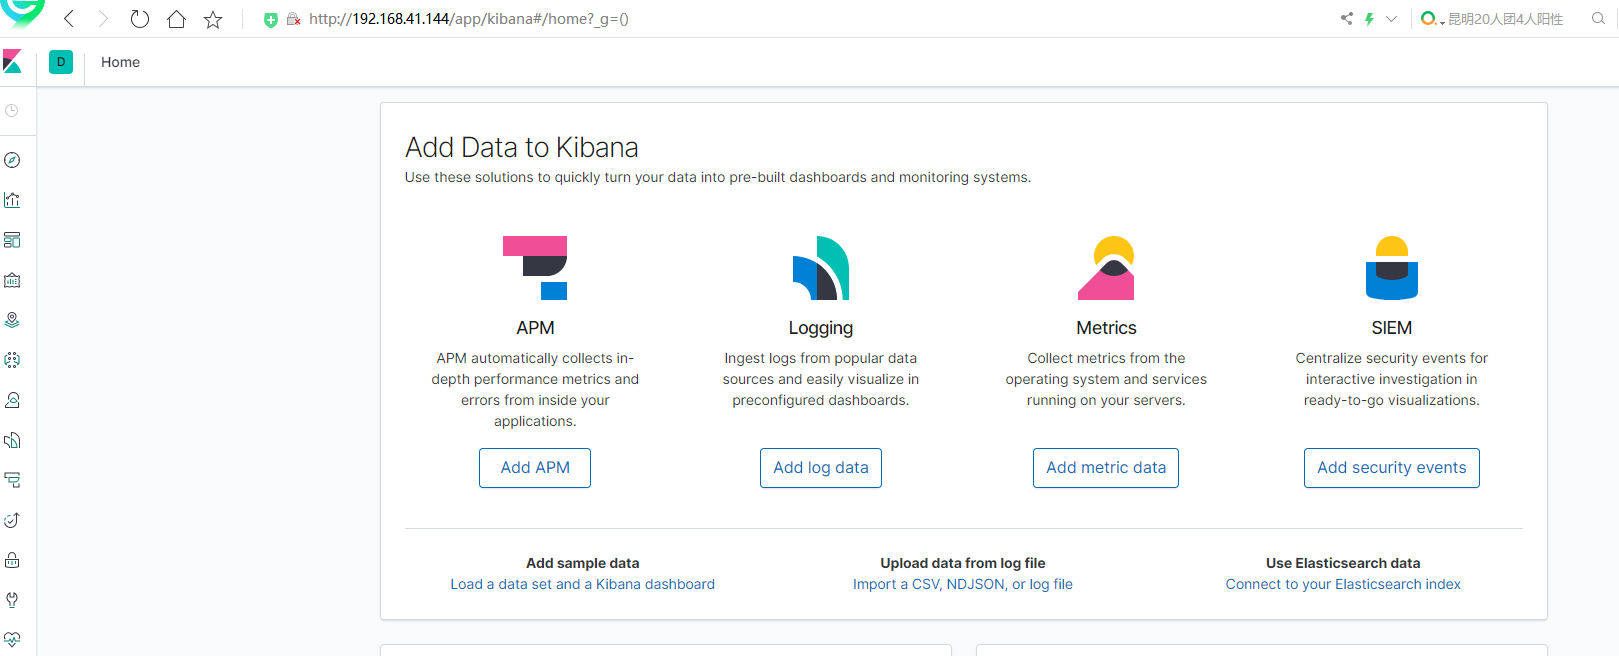
输入用户名密码后得到如下界面
部署ES(elasticsearch)
1、上传elasticsearch包并解压
1 | tar -zxvf elasticsearch-7.5.1-linux-x86_64.tar.gz -C /usr/local/ |
2、编辑配置文件
1 | root@bogon ~#vim /usr/local/elasticsearch-7.5.1/config/elasticsearch.yml |
1 2 3 4 | network.host: 0.0.0.0http.port: 9200path.data: /usr/local/elasticsearch/data/path.logs: /usr/local/elasticsearch/logs/ |
3、因为ES启动文件不允许以root用户执行,因此需要用一个普通用户lizf,并且修改/usr/local/elasticsearch属主和属组为lizf
1 2 3 | root@bogon ~#chown -R lizf.lizf /usr/local/elasticsearch-7.5.1/root@bogon ~#ls -ld /usr/local/elasticsearch-7.5.1/drwxr-xr-x. 10 lizf lizf 166 10月 24 12:22 /usr/local/elasticsearch-7.5.1/ |
4、切换到lizf用户启动
1 2 3 | root@bogon ~#su - lizf上一次登录:日 10月 24 12:47:47 CST 2021pts/0 上15:35:09 lizf@bogon ~$/usr/local/elasticsearch-7.5.1/bin/elasticsearch -d |
可能会遇到的报错
1 2 3 | [1]: max file descriptors [4096] for elasticsearch process is too low, increase to at least [65535][2]: max virtual memory areas vm.max_map_count [65530] is too low, increase to at least [262144][3]: the default discovery settings are unsuitable for production use; at least one of [discovery.seed_hosts, discovery.seed_providers, cluster.initial_master_nodes] must be configured |
解决办法
1 2 3 4 5 6 7 8 9 10 11 | 1]: [root@localhost elasticsearch]# vim /etc/security/limits.conf * soft nofile 65536 * hard nofile 65536 [root@localhost local]# vim /etc/security/limits.d/20-nproc.conf * soft nproc unlimited [2]: [root@localhost elasticsearch]# vim /etc/sysctl.conf vm.max_map_count=262144 [root@localhost elasticsearch]#sysctl -p [3]: [root@localhost elasticsearch]# vim /usr/local/elasticsearch/config/elasticsearch.yml cluster.initial_master_nodes: ["node-1"] node.name: node-1 |
再次启动ES时就不会报错,端口正常启动了
1 2 3 4 5 6 7 8 9 10 11 12 13 14 15 16 | lizf@bogon ~$/usr/local/elasticsearch-7.5.1/bin/elasticsearch -d OpenJDK 64-Bit Server VM warning: Option UseConcMarkSweepGC was deprecated in version 9.0 and will likely be removed in a future release.lizf@bogon ~$ss -ntlState Recv-Q Send-Q Local Address:Port Peer Address:Port LISTEN 0 128 127.0.0.1:9000 *:* LISTEN 0 128 *:80 *:* LISTEN 0 128 *:22 *:* LISTEN 0 100 127.0.0.1:25 *:* LISTEN 0 128 *:5601 *:* LISTEN 0 128 *:10050 *:* LISTEN 0 128 :::80 :::* LISTEN 0 128 :::9200 :::* LISTEN 0 128 :::9300 :::* LISTEN 0 128 :::22 :::* LISTEN 0 100 ::1:25 :::* LISTEN 0 128 :::10050 |
浏览器验证
部署logstash
1、在192.168.41.143主机上上传logstash包并解压到/usr/local/目录下
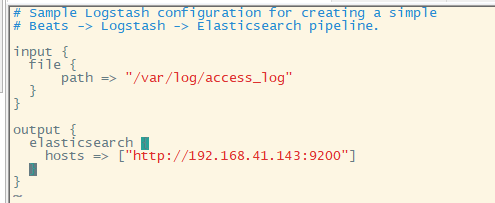
2、编辑logstash配置文件
先将/usr/local/logstash-7.5.1/config/logstash-sample.conf 改成/usr/local/logstash-7.5.1/config/logstash.conf 再去编辑
1 | [root@node2 config]# vim /usr/local/logstash-7.5.1/config/logstash.conf |
3、由于logstash启动非常慢,官方给了一个优化速度的包,咱们也安装一下并启动
1 | [root@localhost config]# yum install epel-release -y && yum install haveged -y && systemctl enable haveged && systemctl start haveged |
4、启动logstash服务
1 2 | [root@node2 config]# nohup /usr/local/logstash-7.5.1/bin/logstash -f /usr/local/logstash-7.5.1/config/logstash.conf &> /var/log/logstash.log & [1] 17916 |


【推荐】国内首个AI IDE,深度理解中文开发场景,立即下载体验Trae
【推荐】编程新体验,更懂你的AI,立即体验豆包MarsCode编程助手
【推荐】抖音旗下AI助手豆包,你的智能百科全书,全免费不限次数
【推荐】轻量又高性能的 SSH 工具 IShell:AI 加持,快人一步
· 从 HTTP 原因短语缺失研究 HTTP/2 和 HTTP/3 的设计差异
· AI与.NET技术实操系列:向量存储与相似性搜索在 .NET 中的实现
· 基于Microsoft.Extensions.AI核心库实现RAG应用
· Linux系列:如何用heaptrack跟踪.NET程序的非托管内存泄露
· 开发者必知的日志记录最佳实践
· winform 绘制太阳,地球,月球 运作规律
· AI与.NET技术实操系列(五):向量存储与相似性搜索在 .NET 中的实现
· 超详细:普通电脑也行Windows部署deepseek R1训练数据并当服务器共享给他人
· 上周热点回顾(3.3-3.9)
· AI 智能体引爆开源社区「GitHub 热点速览」