

Nginx介绍
官方网站为:http://nginx.org/ 。它是一款免费开源的高性能 HTTP 代理服务器及反向代理服务器(Reverse Proxy)产品,同时它还可以提供 IMAP/POP3 邮件代理服务等功能。它高并发性能很好,官方测试能够支撑 5 万的并发量;运行时内存和 CPU 占用率低,配置简单,容易上手,而且运行非常稳定。
Nginx 的常用功能如下
1.反向代理
这是 Nginx 服务器作为 WEB 服务器的主要功能之一,客户端向服务器发送请求时,会首先经过 Nginx 服务器,由服务器将请求分发到相应的 WEB 服务器。正向代理是代理客户端,而反向代理则是代理服务器,Nginx 在提供反向代理服务方面,通过使用正则表达式进行相关配置,采取不同的转发策略,配置相当灵活,而且在配置后端转发请求时,完全不用关心网络环境如何,可以指定任意的IP地址和端口号,或其他类型的连接、请求等。
特别关注:正向代理与反向代理

维基百科:
Unlike a forward proxy,
which is an intermediary for its associated clients to contact any server,
a reverse proxy is an intermediary for its associated servers to be contacted by any client。
翻译:
正向代理是【所要代理的客户端】与【其他所有服务器(重点:所有)】之间的代理者,
而反向代理是【其他所有客户端(重点:所有)】与【所要代理的服务器】之间的代理者。
正向与反向的概念,要从我们作为用户(客户端)的角度来看:
- 一个对客户端(我们自己)负责,为正
- 一个对所代理的服务器(我们的目标)负责,为反。
代理的对象不同,代理哪端便可以隐藏哪端:
- 正向代理是代理我们发出请求的客户端,隐藏真实客户端(我们自己)
- 反向代理是代理我们访问的服务器,隐藏真实服务端(我们的目标)
2.负载均衡
这也是 Nginx 最常用的功能之一,负载均衡,一方面是将单一的重负载分担到多个网络节点上做并行处理,每个节点处理结束后将结果汇总返回给用户,这样可以大幅度提高网络系统的处理能力;另一方面将大量的前端并发请求或数据流量分担到多个后端网络节点分别处理,这样可以有效减少前端用户等待相应的时间。而 Nginx 负载均衡都是属于后一方面,主要是对大量前端访问或流量进行分流,已保证前端用户访问效率,并可以减少后端服务器处理压力。
3.Web 缓存
在很多优秀的网站中,Nginx 可以作为前置缓存服务器,它被用于缓存前端请求,从而提高 Web服务器的性能。Nginx 会对用户已经访问过的内容在服务器本地建立副本,这样在一段时间内再次访问该数据,就不需要通过 Nginx 服务器向后端发出请求。减轻网络拥堵,减小数据传输延时,提高用户访问速度。
Nginx进程模型
Nginx 服务器启动后,产生一个 Master 进程(Master Process),Master 进程执行一系列工作后产生一个或者多个 Worker 进程(Worker Processes)。
- Master进程:负责端口监听、进程管理、请求调度等,用于接收来自外界的信号,并向各 Worker 进程发送信号,同时监控 Worker 进程的工作状态。当 Worker 进程退出后(异常情况下),Master 进程会自动启动新的 Worker 进程。
- Worker进程:负责业务处理,外部请求真正的处理者。多个 Worker 进程之间是对等的,他们同等竞争来自客户端的请求,各进程互相之间是独立的。一个请求,只可能在一个 Worker 进程中处理,一个 Worker 进程不可能处理其它进程的请求。
nginx安装
Nginx常用安装方式有:yum安装、二进制安装。
本文介绍rpm安装方式。
特别关注
本文旨在规范nginx安装,关于nginx的使用如反向代理、负载均衡等,请参考 nginx负载均衡结构示例
组件安装操作步骤参考 组件安装部署手册模板,根据不同组件的安装目标,部分操作可以省略。
本文将按照该参考步骤执行。
一、获取组件可执行程序库,包括主程序,此为组件的基本文件
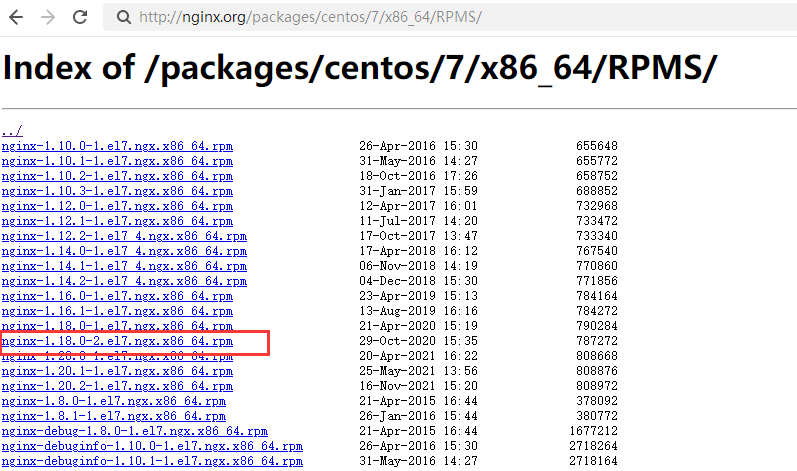
1.官网获取rpm安装包
创建目录 /usr/local/nginx,将rpm包下载到该目录下
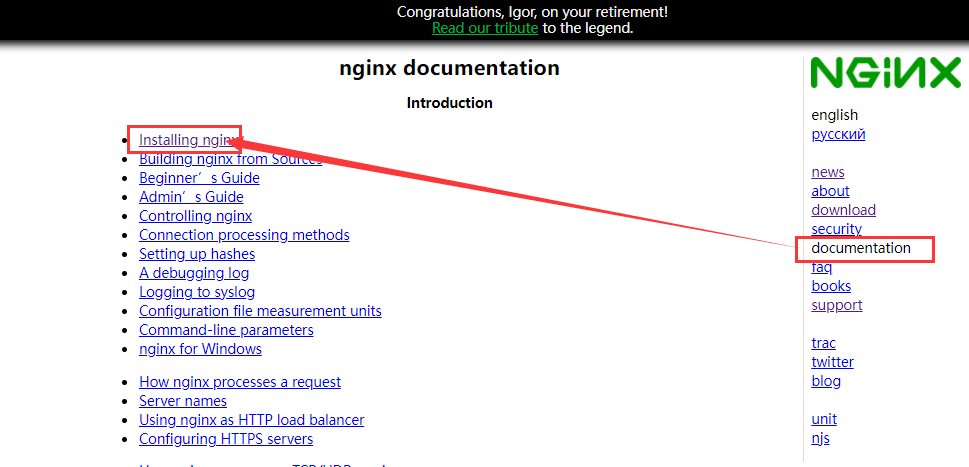
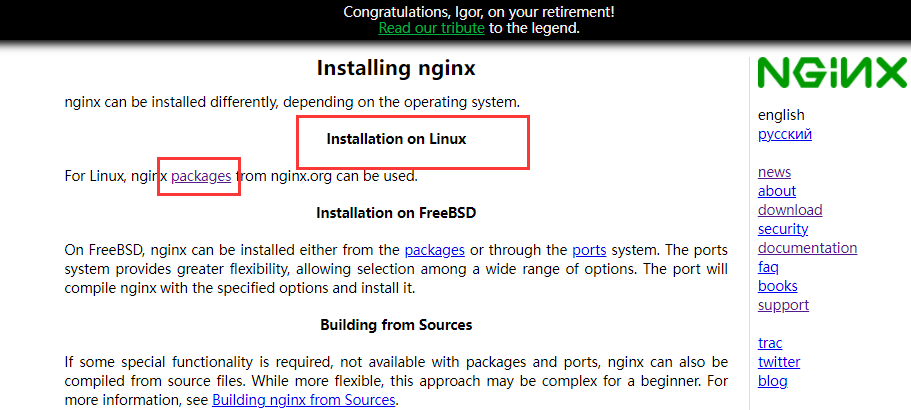
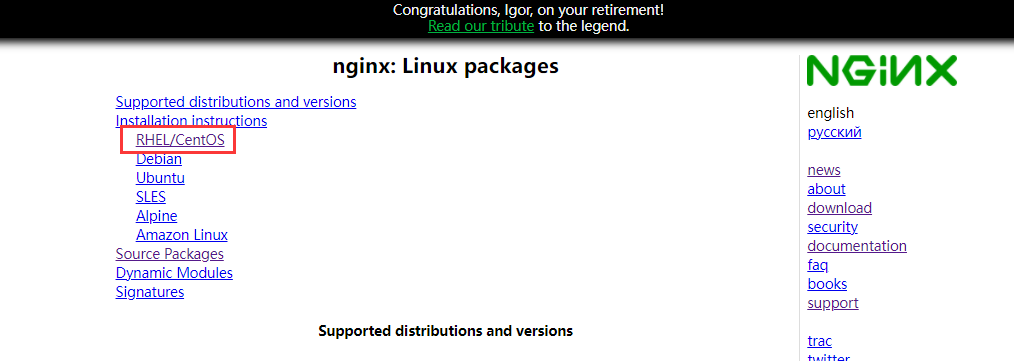
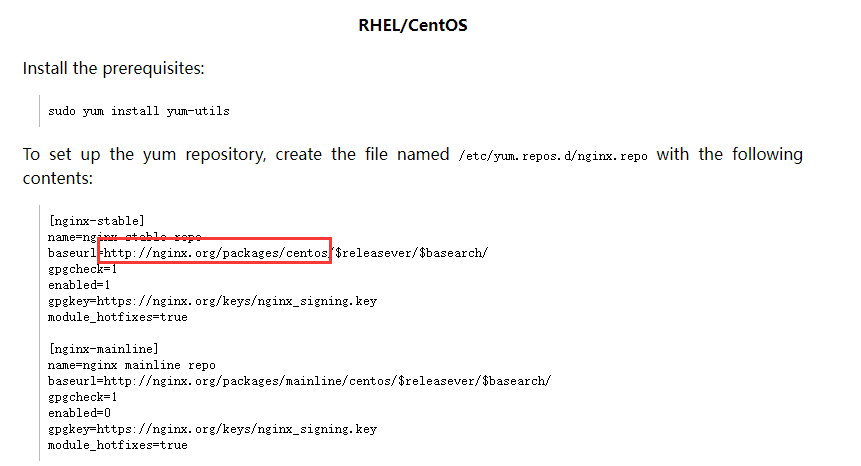
根据 [baseurl] 指定的路径,找到nginx各版本rpm安装包,
[root@localhost nginx]# wget http://nginx.org/packages/centos/7/x86_64/RPMS/nginx-1.20.2-1.el7.ngx.x86_64.rpm
2.安装依赖组件
根据官方安装步骤,需要先安装依赖工具,实测CentOS7.5默认已经加载,无需安装
yum install yum-utils
3.rpm安装
执行rpm包安装
[root@localhost nginx]# rpm -ivh nginx-1.20.2-1.el7.ngx.x86_64.rpm
使用rmp安装,默认启用了所有nginx模块,如下
[root@localhost nginx]# nginx -V
nginx version: nginx/1.20.2
built by gcc 4.8.5 20150623 (Red Hat 4.8.5-44) (GCC)
built with OpenSSL 1.0.2k-fips  26 Jan 2017
TLS SNI support enabled
configure arguments: --prefix=/etc/nginx --sbin-path=/usr/sbin/nginx --modules-path=/usr/lib64/nginx/modules --conf-path=/etc/nginx/nginx.conf --error-log-path=/var/log/nginx/error.log --http-log-path=/var/log/nginx/access.log --pid-path=/var/run/nginx.pid --lock-path=/var/run/nginx.lock --http-client-body-temp-path=/var/cache/nginx/client_temp --http-proxy-temp-path=/var/cache/nginx/proxy_temp --http-fastcgi-temp-path=/var/cache/nginx/fastcgi_temp --http-uwsgi-temp-path=/var/cache/nginx/uwsgi_temp --http-scgi-temp-path=/var/cache/nginx/scgi_temp --user=nginx --group=nginx --with-compat --with-file-aio --with-threads --with-http_addition_module --with-http_auth_request_module --with-http_dav_module --with-http_flv_module --with-http_gunzip_module --with-http_gzip_static_module --with-http_mp4_module --with-http_random_index_module --with-http_realip_module --with-http_secure_link_module --with-http_slice_module --with-http_ssl_module --with-http_stub_status_module --with-http_sub_module --with-http_v2_module --with-mail --with-mail_ssl_module --with-stream --with-stream_realip_module --with-stream_ssl_module --with-stream_ssl_preread_module --with-cc-opt='-O2 -g -pipe -Wall -Wp,-D_FORTIFY_SOURCE=2 -fexceptions -fstack-protector-strong --param=ssp-buffer-size=4 -grecord-gcc-switches -m64 -mtune=generic -fPIC' --with-ld-opt='-Wl,-z,relro -Wl,-z,now -pie'
4.查看nginx安装目录
rpm安装nginx完成后,程序文件默认存放在多个目录
[root@localhost ~]# find / -name nginx
/etc/logrotate.d/nginx
/etc/nginx        #主目录及配置文件
/var/log/nginx    #日志
/var/cache/nginx  #缓存
/usr/sbin/nginx   #主程序
/usr/lib64/nginx  #组件模块
/usr/share/nginx  #html主页
特别关注:以上目录其实在安装程序时指定,可以通过查看nginx版本命令确认安装时指定的参数,包括各项目录以及常用模块,如stream
[root@localhost ~]# nginx -V
nginx version: nginx/1.20.2
built by gcc 4.8.5 20150623 (Red Hat 4.8.5-44) (GCC)
built with OpenSSL 1.0.2k-fips  26 Jan 2017
TLS SNI support enabled
configure arguments: --prefix=/etc/nginx --sbin-path=/usr/sbin/nginx --modules-path=/usr/lib64/nginx/modules --conf-path=/etc/nginx/nginx.conf --error-log-path=/var/log/nginx/error.log --http-log-path=/var/log/nginx/access.log --pid-path=/var/run/nginx.pid --lock-path=/var/run/nginx.lock --http-client-body-temp-path=/var/cache/nginx/client_temp --http-proxy-temp-path=/var/cache/nginx/proxy_temp --http-fastcgi-temp-path=/var/cache/nginx/fastcgi_temp --http-uwsgi-temp-path=/var/cache/nginx/uwsgi_temp --http-scgi-temp-path=/var/cache/nginx/scgi_temp --user=nginx --group=nginx --with-compat --with-file-aio --with-threads --with-http_addition_module --with-http_auth_request_module --with-http_dav_module --with-http_flv_module --with-http_gunzip_module --with-http_gzip_static_module --with-http_mp4_module --with-http_random_index_module --with-http_realip_module --with-http_secure_link_module --with-http_slice_module --with-http_ssl_module --with-http_stub_status_module --with-http_sub_module --with-http_v2_module --with-mail --with-mail_ssl_module --with-stream --with-stream_realip_module --with-stream_ssl_module --with-stream_ssl_preread_module --with-cc-opt='-O2 -g -pipe -Wall -Wp,-D_FORTIFY_SOURCE=2 -fexceptions -fstack-protector-strong --param=ssp-buffer-size=4 -grecord-gcc-switches -m64 -mtune=generic -fPIC' --with-ld-opt='-Wl,-z,relro -Wl,-z,now -pie'
二、安装系统服务(可选)
rpm安装默认生成系统服务文件,可以通过 service 或 systemctl 命令操作
[root@localhost ~]# find / -name nginx.service
/usr/lib/systemd/system/nginx.service
三、主程序加入到环境变量
rpm安装默认已经将主程序添加到系统变量
[root@localhost ~]# ll /usr/sbin/nginx
-rwxr-xr-x. 1 root root 1377720 11月 16 23:03 /usr/sbin/nginx
四、配置文件
配置文件存放在 /etc/nginx/nginx.conf,启动时默认加载该路径,也可以在启动时指定配置文件,配置文件结构如下,分为3个部分:全局块、events块、http块
worker_processes  2;

events {
    use epoll;
    worker_connections  1024;
}

http {
     include       mime.types;
    default_type  application/octet-stream;
    sendfile        on;
    server {
        listen       80;
        server_name  localhost;
        location / {
            root   html;
            index  index.html index.htm;
        }
        error_page   500 502 503 504  /50x.html;
        location = /50x.html {
            root   html;
        }
    }
}
特别关注:配置文件中指定的所有路径,请在启动前确保已存在
配置文件说明
1.全局块
从配置文件开始到 events 块之间的内容,主要会设置一些影响 nginx 服务器整体运行的配置指令,主要包括配置运行 Nginx 服务器的用户(组)、允许生成的 worker process 数,进程 PID 存放路径、日志存放路径和类型以及配置文件的引入等
#定义Nginx运行的用户和用户组
user nginx nginx;

#nginx进程数,建议设置为等于CPU总核心数
worker_processes 8;

#全局错误日志定义类型,[ debug | info | notice | warn | error | crit ]
error_log /var/log/nginx/error.log info;

#进程文件
pid /var/run/nginx.pid;

#nginxworker最大打开文件数,可设置为系统优化后的ulimit -n的结果
worker_rlimit_nofile 65535;
2.events块
events
{
    #epoll模型是Linux 2.6以上内核版本中的高性能网络I/O模型,如果跑在FreeBSD上面,就用kqueue模型
    use epoll;

    #单个worker进程最大连接数(nginx最大连接数=worker连接数*进程数)
    worker_connections 65535;
}
3.http块
这部分应该是 Nginx 服务器配置中最频繁的部分;代理、缓存和日志定义等绝大多数功能和第三方模块的配置都在这里。
http块分为:http全局块、server块。
3.1http全局块配置
http
{
    #nginx支持的媒体类型库文件
    include mime.types;

    #默认媒体文件类型
    default_type application/octet-stream;

    #默认编码
    charset utf-8;

    #服务器名字的hash表大小
    server_names_hash_bucket_size 128;

    #上传文件大小限制
    client_header_buffer_size 32k;

    #开启高效文件传输模式,实现内核零拷贝
    sendfile on;

    #开启目录列表访问,适合下载服务器,默认关闭。
    autoindex off;

    #长连接超时时间,单位是秒
    keepalive_timeout 120;
}
3.2http server块的配置,即虚拟主机的配置
server #网站配置区域
{
    #默认监听80端口
    listen 80;

    #提供服务的域名主机名
    server_name www.sample.com;
    location / {
        #站点根目录(这里html是相对路径,默认网站根目录为:/usr/local/nginx/html)
            root html;

        #默认首页文件,多个用空格分开
            index index.thml index.htm;
    }

    #出现对应http状态码时,使用50x.html回应客户
    error_page 500 502 503 504  /50x.html;

    location = /50x.thml {
        #指定对应目录
        root    html;
    }
}
五、运行用户
默认使用root运行即可。
六、开机启动
请参考教程 Linux开机启动方案
七、服务启动运行
通过nginx主程序启动服务,以服务器192.168.11.14为例

nginx -c /etc/nginx/nginx.conf
nginx默认配置将作为web服务器运行,启动后在浏览器访问 http://192.168.11.14即可打开页面,默认首页为 /usr/local/nginx/html/index.html,可以修改内容,显示当前服务器IP

附录:关于nginx高并发配置优化
并发测试可以使用工具:Apache自带的ab压力测试工具
与nginx并发控制相关的参数包括 ulimit -n(Linux操作系统最大打开的文件描述符限制)、worker_processes、worker_rlimit_nofile、worker_connections、epoll(Linux IO模型)。
- ulimit -n,操作系统最大打开的文件描述符限制,Linux系统每一个TCP连接都是一个文件描述符
- worker_processes,worker进程个数,全局模块配置,直接关系nginx并发处理能力,建议配置为CPU核心数,或者配置为 auto,自动根据CPU核心数创建worker进程个数
- worker_rlimit_nofile,每个worker进程打开的最多文件描述符个数,全局模块配置,理论值应该是最多打开文件数(ulimit -n)与nginx进程数相除,但因为nginx分配请求未必很均匀,所以最好与ulimit -n的值保持一致;文件描述符包括TCP连接、打开本地文件等
- worker_connections,每个worker进程的最大连接数,event模块配置,与worker_processes共同决定nginx最大连接数,worker_processes * worker_connections,配置为 >= (ulimit -n)即可发挥操作系统最大性能
- epoll,event模块配置,具体为 use epoll
特别关注:查看CPU核心数(非CPU个数,一块CPU可以有多个核心)
[root@localhost ~]# cat /proc/cpuinfo | grep 'processor' | wc -l
4
[root@localhost ~]# lscpu | grep "CPU(s):"
CPU(s):                4
特别关注:关于Linux操作系统最大打开的文件描述符限制
使用 ulimit -n 可即时修改,但重启后就无效了,要设置 /etc/security/limits.conf 配置文件,重启系统后才可以永久生效。
limits.conf的格式如下
<domain>   <type>   <item>    <value>
domain: 限制作用的用户范围,通配符*表示是针对所有用户的限制,也可以指定用户,例如:root
type: 限制类型
    soft 指的是当前系统生效的最大值(超过后仅警告)
    hard 表明系统中所能设定的最大值(超过后系统错误)
    soft 的限制不能比hard限制高
    - 表明同时设置了 soft 和 hard 的值
item: 限制的具体内容
    nofile - 打开的文件描述符的最大数目
    nproc - 进程最大数量
value: 具体限制值

示例:以下限制所有用户打开的文件描述符最大数目为 65535
*    -  nofile  65535
配置ulimit合并脚本,方便执行
ulimit -n 65535 && echo -e "*\t-\tnproc\t65535\n*\t-\tnofile\t65535" >> /etc/security/limits.conf
特别关注:ulimit -n 与 limits.conf配置对nginx服务有时不生效
因为ulimit和limits.conf的配置只针对登录用户启动的应用服务(nginx -c nginx.conf),而对systemd管理的服务不起作用(service nginx start),服务的limit要在相应的service文件中单独指定,具体可以参考 centos8平台nginx服务配置打开文件限制max open files limits
附录:location配置规范与经验
location是nginx使用最多的块级指令,建议了解学习 nginx location配置规则与经验
特别关注
nginx日志管理比较特殊,请参考 Linux日志管理经验总结(crontab+logrotate)


【推荐】国内首个AI IDE,深度理解中文开发场景,立即下载体验Trae
【推荐】编程新体验,更懂你的AI,立即体验豆包MarsCode编程助手
【推荐】抖音旗下AI助手豆包,你的智能百科全书,全免费不限次数
【推荐】轻量又高性能的 SSH 工具 IShell:AI 加持,快人一步
· 被坑几百块钱后,我竟然真的恢复了删除的微信聊天记录!
· 没有Manus邀请码?试试免邀请码的MGX或者开源的OpenManus吧
· 【自荐】一款简洁、开源的在线白板工具 Drawnix
· 园子的第一款AI主题卫衣上架——"HELLO! HOW CAN I ASSIST YOU TODAY
· 无需6万激活码!GitHub神秘组织3小时极速复刻Manus,手把手教你使用OpenManus搭建本