LSTM是RNN的一种算法, 在序列分类中比较有用。常用于语音识别,文字处理(NLP)等领域。
等同于VGG等CNN模型在在图像识别领域的位置。 本篇文章是叙述LSTM 在MNIST 手写图中的使用。
用来给初步学习RNN的一个范例,便于学习和理解LSTM .
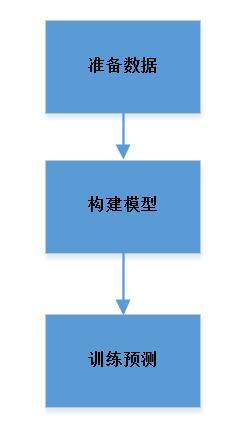
先把工作流程图贴一下:

代码片段 :
数据准备
def makedata():
    img_rows, img_cols = 28, 28

    mnist = fetch_mldata("MNIST original")
    # rescale the data, use the traditional train/test split
    X_1D, y_int = mnist.data / 255., mnist.target
    y = np_utils.to_categorical(y_int, num_classes=10)

    X = X_1D.reshape(X_1D.shape[0], img_rows, img_cols )

    input_shape = (img_rows, img_cols, 1)
    x_train, x_test = X[:60000], X[60000:]
    y_train, y_test = y[:60000], y[60000:]

    return X, y
    pass
下载 MNIST数据, 进行归一化 mnist.data / 255, 把数据[7000,784 ] 转成[ 70000,28,28]
构建模型:
def buildlstm():

    import numpy as np

    data_dim = 28
    timesteps = 28
    num_classes = 10

    # expected input data shape: (batch_size, timesteps, data_dim)
    model = Sequential()
    model.add(LSTM(32, return_sequences=True,   input_shape=(timesteps, data_dim+14)))
    model.add(LSTM(32, return_sequences=True))
    model.add(LSTM(32))
    model.add(Dense(10, activation='softmax'))

    model.compile(loss='categorical_crossentropy',
                  optimizer='rmsprop',
                  metrics=['accuracy'])
    print model.summary()
    return  model
    pass
基础参数: data_dim, timesteps, num_classes 分别为 28,28, 10
网络层级 : LSTM ----》LSTM ----》LSTM ----》Dense
注意点: input_shape=(timesteps, data_dim+14)) 此处 应该为 data_dim , data_dim+14是我做第二个试验使用。
网络理解: RNN是用前一部分数据对当前数据的影响,并共同作用于最后结果。 用基础的深度神经网络(只有Dense层),是把MNIST一个图形,
提取成784个像素数据,把784个数据扔给神经网络,784个数据是同等的概念。 训练出权重来确定最终的分类值。
RNN 之于MNIST, 是把MNIST 分成 28x28 数据。可以理解为用一个激光扫描一个图片,扫成28个(行)数据, 每行为28个像素。 站在时间序列
的角度,其实图片没有序列概念。但是我们可以这样理解, 每一行于下一行是有位置关系的,不能进行顺序变化。 比如一个手写 “7”字, 如果把28行
的上下行顺序打乱, 那么7 上面的一横就可能在中间位置,也可能在下面的位置。 这样,最终的结果就不应该是 7 .
所以MNIST 的 28x28可以理解为 有时序关系的数据。
训练预测:
def runTrain(model, x_train, x_test, y_train, y_test):
    model.fit(x_train, y_train,  batch_size= nbatch_size, epochs= nEpoches)
    score = model.evaluate(x_test, y_test, batch_size=nbatch_size)
    print 'evaluate score:', score
    pass
这部分应该没什么好说的
主程序:
def test():

    X,y = makedata2()
    x_train, x_test = X[:60000], X[60000:]
    y_train, y_test = y[:60000], y[60000:]
    model = buildlstm()
    runTrain(model, x_train, x_test, y_train, y_test )
    pass
运行结果:
结构:
Layer (type)                 Output Shape              Param #
=================================================================
lstm_1 (LSTM)                (None, 28, 32)            7808
_________________________________________________________________
lstm_2 (LSTM)                (None, 28, 32)            8320
_________________________________________________________________
lstm_3 (LSTM)                (None, 32)                8320
_________________________________________________________________
dense_1 (Dense)              (None, 10)                330
=================================================================
Total params: 24,778
Trainable params: 24,778
Non-trainable params: 0
_________________________________________________________________


结果:
base    lstm for mnist
acc : 98.56%

结果2:
把数据最后增加 50%  的 0 , (dim X 0.5)
acc : 98.39%
结果基本上 与原数据一致
该实验证明两个结论:
1. LSTM可用于图形识别
2. 在数据中 每行28个基础像素后面 + 14 个空白(0)的元素,不影分类识别。
写在最后: 本实验的目的是为了理解RNN(LSTM), 只有理解了才能很好的使用。 本文章的目的是为记录和分享。
再说下 RNN在其它领域的应用。 比如在语音识别领域,一个音谱,识别成一个单词(词语),可以理解成一个
竖向扫描的MNIST , 一个股票的K线图,也可以理解一个竖向扫描的MNIST。 还有其它领域,可以归纳递推。
入门之后, 如何在自己的领域,再深入(构建复杂模型,优化数据的处理),提高网络模型的识别准确,那需要
见仁见智的。
代码文件链接:
有对 金融程序化 和 深度学习结合有兴趣的可以加群 , 个人群: 杭州程序化交易群 375129936

