

以下内容为学习下图这本书做的笔记,非原创。做笔记主要是为了实践一下看看结果加深记忆。
目录:
1.保存和恢复状态 2. 清除画布 3. 移动坐标 4. 旋转坐标 5. 缩放图形 6.变换图形
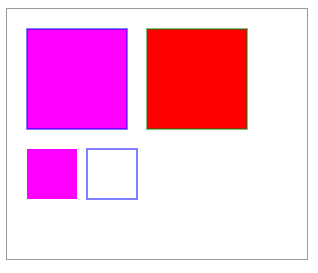
① 绘制一个矩形,填充颜色为 #ff00ff, 轮廓颜色为蓝色,然后保存这个状态,再绘制另一个矩形,填充颜色为 #ff0000, 轮廓颜色为绿色,最后恢复为第一个矩形的状态,并绘制两个小的矩形,此时已经恢复了原来保存的状态,所以会沿用最先设定的属性值。
语句:
 1 <canvas id="canvas" width="300" height="250" style="border:solid 1px #999;"></canvas>
 2 <script>
 3     draw();
 4     function draw(){
 5         //使用document.getElementById() 方法, 根据 canvas 元素的 id 获取对 canvas 的引用
 6         var ctx = document.getElementById('canvas').getContext('2d');
 7         //开始绘制矩形
 8         ctx.fillStyle = "#ff00ff";
 9         ctx.strokeStyle = "blue";
10         ctx.fillRect(20, 20, 100, 100);
11         ctx.strokeRect(20, 20, 100, 100);
12         ctx.fill();
13         ctx.stroke();
14         //保存当前 canvas 状态
15         ctx.save();       //save() : 将当前的状态推送到栈中保存
16         //绘制另一个矩形
17         ctx.fillStyle = "#ff0000";
18         ctx.strokeStyle = "green";
19         ctx.fillRect(140,20,100,100);
20         ctx.strokeRect(140,20,100,100);
21         ctx.fill();
22         ctx.stroke();
23         //恢复第一个矩形的状态
24         ctx.restore();  //restore() : 将上一个保存的状态从栈中弹出,恢复上一次所有的设置
25         //绘制两个矩形
26         ctx.fillRect(20,140,50,50);
27         ctx.strokeRect(80,140,50,50);
28     }
29 </script>
页面表现:
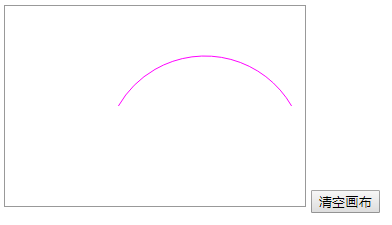
① 使用 clearRect() 方法擦除画布中的绘图
用法 : clearRect( x, y, width, height ) ,参数说明:
x : 要清除的矩形的左上角的 x 坐标 y : 要清除的矩形左上角的 y 坐标
width : 要清除的矩形的宽度,以像素计 height : 要清除的矩形的高度,以像素计
语句:
 1 <canvas id="canvas" width="300" height="200" style="border:solid 1px #999;"></canvas>
 2 <input name="" type="button" value="清空画布" onclick="clearMap();" >
 3 <script>
 4     //使用document.getElementById() 方法, 根据 canvas 元素的 id 获取对 canvas 的引用
 5     var ctx = document.getElementById('canvas').getContext('2d');
 6     ctx.strokeStyle = "#ff00ff";
 7     ctx.beginPath();
 8     ctx.arc(200,150,100,-Math.PI*1/6,-Math.PI*5/6,true);
 9     ctx.stroke();
10     function clearMap(){
11         ctx.clearRect(0,0,300,200); //使用 clearRect() 方法来清空画布
12     }
13 </script>
页面表现:
点击按钮之后:

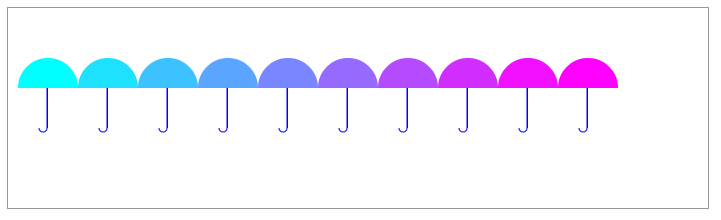
① 综合运用 save()、restore()、translate() 方法来绘制一个伞状图形。
在默认情况下,以画布左上角(0,0)为绘图原点,使用translate()方法可以移动坐标原点,绘图时以新的坐标为绘图原点。
语句:
 1 <canvas id="canvas" width="700" height="200" style="border:solid 1px #999;"></canvas>
 2 <script>
 3     draw();
 4     function draw(){
 5         //使用document.getElementById() 方法, 根据 canvas 元素的 id 获取对 canvas 的引用
 6         var ctx = document.getElementById('canvas').getContext('2d');
 7         //注意:所有的移动都是基于这一上下文
 8         ctx.translate(40,80);
 9         for( var i=0; i<10; i++ ){
10             ctx.save();  //使用 save() 方法保存画布的原始状态
11             ctx.translate(60*i, 0);
12             drawTop(ctx, "rgb("+(30*i)+","+(255-30*i)+",255)");
13             drawGrip(ctx);
14             ctx.restore();  //使用 restore() 方法恢复原始状态
15         }
16     }
17     //绘制伞形顶部半圆
18     function drawTop(ctx, fillStyle){
19         ctx.fillStyle = fillStyle;
20         ctx.beginPath();
21         ctx.arc(0, 0, 30, 0, Math.PI, true);
22         ctx.closePath();
23         ctx.fill();
24     }
25     //绘制伞形底部手柄
26     function drawGrip(ctx){
27         ctx.save();
28         ctx.fillStyle = "blue";
29         ctx.fillRect(-1.5, 0, 1.5, 40);
30         ctx.beginPath();
31         ctx.strokeStyle = "blue";
32         ctx.arc(-5, 40, 4, Math.PI, Math.PI*2, true);
33         ctx.stroke();
34         ctx.closePath();
35         ctx.restore();
36     }
37
38 </script>
页面表现:
效果说明:

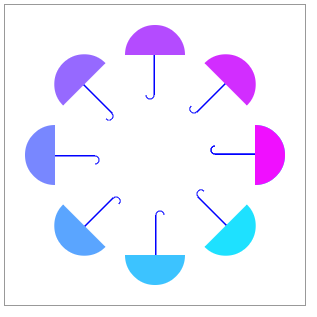
① 在每次开始绘制图形之前,先把坐标控件旋转 PI*( 2/4 + i/4 ),再将坐标空间沿y轴负方向移动100,然后开始绘制图形,从而实现使图形沿一中心点平均旋转分布。
用法:context.rotate( angle ) ,参数说明:angle为旋转角度,旋转角度为顺时针
将角度转换为弧度公式 : degress * Math.PI / 180
语句:
 1 <canvas id="canvas" width="300" height="300" style="border:solid 1px #999;"></canvas>
 2 <script>
 3     draw();
 4     function draw(){
 5         //使用document.getElementById() 方法, 根据 canvas 元素的 id 获取对 canvas 的引用
 6         var ctx = document.getElementById('canvas').getContext('2d');
 7         //注意:所有的移动都是基于这一上下文
 8         ctx.translate(150,150);
 9         for( var i=0; i<9; i++ ){
10             ctx.save();     //使用 save() 方法保存画布的原始状态
11             ctx.rotate(Math.PI*(2/4+i/4));  //使用 rotate()方法 可以以原点为中心旋转 canvas 上下文对象的坐标空间
12             ctx.translate(0, -100);
13             drawTop(ctx, "rgb("+(30*i)+","+(255-30*i)+",255)");
14             drawGrip(ctx);
15             ctx.restore();  //使用 restore() 方法恢复原始状态
16         }
17     }
18     //绘制伞形顶部半圆
19     function drawTop(ctx, fillStyle){
20         ctx.fillStyle = fillStyle;
21         ctx.beginPath();
22         ctx.arc(0, 0, 30, 0, Math.PI, true);
23         ctx.closePath();
24         ctx.fill();
25     }
26     //绘制伞形底部手柄
27     function drawGrip(ctx){
28         ctx.save();
29         ctx.fillStyle = "blue";
30         ctx.fillRect(-1.5, 0, 1.5, 40);
31         ctx.beginPath();
32         ctx.strokeStyle = "blue";
33         ctx.arc(-5, 40, 4, Math.PI, Math.PI*2, true);
34         ctx.stroke();
35         ctx.closePath();
36         ctx.restore();
37     }
38
39 </script>
页面表现:
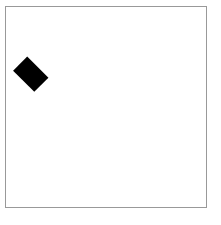
② 简单的例子
语句:
 1 <canvas id="canvas" width="200" height="200" style="border:solid 1px #999;"></canvas>
 2 <script>
 3 draw();
 4 function draw(){
 5     //使用document.getElementById() 方法, 根据 canvas 元素的 id 获取对 canvas 的引用
 6     var canvas = document.getElementById('canvas');
 7     //通过 canvas 元素的 getContext() 方法获取画布上下文(context),创建 context 对象,以获取允许进行绘制的 2D 环境
 8     if(canvas.getContext){
 9         var ctx = canvas.getContext('2d');
10         ctx.rotate(Math.PI*45/180);
11         ctx.fillRect(50,20,30,20);
12     }
13 }
14 </script>
页面表现:
效果说明:

scale (x, y) ,参数说明:
x:横轴的缩放因子 y: 纵轴的缩放因子
x 跟 y 必须为正值,需要放大图形参数大于1,需要缩小图形参数小于1
①
语句:
 1 <canvas id="canvas" width="400" height="350" style="border:solid 1px #999;"></canvas>
 2 <script>
 3     draw();
 4     function draw(){
 5         //使用document.getElementById() 方法, 根据 canvas 元素的 id 获取对 canvas 的引用
 6         var ctx = document.getElementById('canvas').getContext('2d');
 7         //注意:所有的移动都是基于这一上下文
 8         ctx.translate(200, 20);
 9         for( var i=0; i<80; i++ ){
10             ctx.save();
11             ctx.translate(30, 30);
12             ctx.scale(0.95, 0.95);  //缩小图形到上次的 0.95 倍
13             ctx.rotate(Math.PI/12); //旋转 15 度
14             ctx.beginPath();
15             ctx.fillStyle = "red";
16             ctx.globalAlpha = "0.4";    //设置透明度
17             ctx.arc(0,0,50,0,Math.PI*2,true);
18             ctx.closePath();
19             ctx.fill();
20         }
21     }
22 </script>
页面表现:

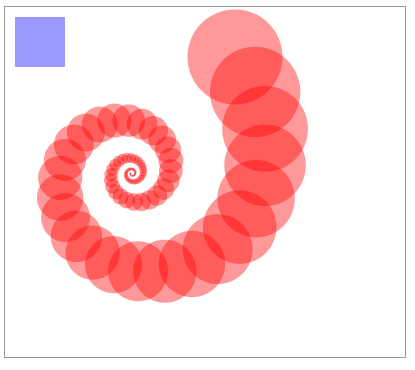
①
语句:
 1 <canvas id="canvas" width="400" height="350" style="border:solid 1px #999;"></canvas>
 2 <script>
 3     draw();
 4     function draw(){
 5         //使用document.getElementById() 方法, 根据 canvas 元素的 id 获取对 canvas 的引用
 6         var ctx = document.getElementById('canvas').getContext('2d');
 7         //注意:所有的移动都是基于这一上下文
 8         ctx.translate(200, 20);
 9         for( var i=1; i<90; i++ ){
10             ctx.save();
11             ctx.transform(0.95, 0, 0, 0.95, 30, 30);
12             ctx.rotate(Math.PI/12);
13             ctx.beginPath();
14             ctx.fillStyle = "red";
15             ctx.globalAlpha = "0.4";
16             ctx.arc(0, 0, 50, 0, Math.PI*2, true);
17             ctx.closePath();
18             ctx.fill();
19         }
20         //恢复最初的原点,然后讲原点改为(10,10)
21         ctx.setTransform(1, 0, 0, 1, 10, 10);
22         ctx.fillStyle = "blue";
23         ctx.fillRect(0, 0, 50, 50);
24         ctx.fill();
25     }
26 </script>
页面表现:
② transform 方法可替代 tranlate
代码第 8 行跟第 9 行效果相同。
语句:
 1 <canvas id="canvas" width="100" height="100" style="border:solid 1px #999;"></canvas>
 2 <script>
 3     draw();
 4     function draw(){
 5         //使用document.getElementById() 方法, 根据 canvas 元素的 id 获取对 canvas 的引用
 6         var ctx = document.getElementById('canvas').getContext('2d');
 7         //注意:所有的移动都是基于这一上下文
 8         //ctx.translate(10, 10);
 9         ctx.transform( 0, 1, 1, 0, 10, 10);
10         ctx.fillStyle = "blue";
11         ctx.fillRect(0, 0, 20, 20);
12     }
13 </script>
页面表现:

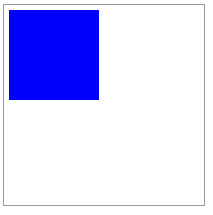
③ transform方法可替代 scale
语句:
 1 <canvas id="canvas" width="200" height="200" style="border:solid 1px #999;"></canvas>
 2 <script>
 3     draw();
 4     function draw(){
 5         //使用document.getElementById() 方法, 根据 canvas 元素的 id 获取对 canvas 的引用
 6         var ctx = document.getElementById('canvas').getContext('2d');
 7         ctx.fillStyle = "blue";
 8         //ctx.scale(0.5, 0.5);
 9         ctx.transform(0.5, 0, 0, 0.5, 0, 0);
10         ctx.fillRect(10, 10, 180, 180);
11     }
12 </script>
页面表现:
④ transform 方法可替代 rotate 方法(替代之后发现效果有点差别)
用法:context.transform(cosθ, sinθ, -sinθ, cosθ, 0, 0 ) , 参数说明:
θ为旋转角度的弧度值
语句:
 1 <canvas id="canvas" width="200" height="200" style="border:solid 1px #999;"></canvas>
 2 <script>
 3     draw();
 4     function draw(){
 5         //使用document.getElementById() 方法, 根据 canvas 元素的 id 获取对 canvas 的引用
 6         var ctx = document.getElementById('canvas').getContext('2d');
 7         ctx.fillStyle = "blue";
 8         //ctx.rotate(45*Math.PI/180);
 9         ctx.transform(Math.PI/2, Math.PI/2, -Math.PI/2, Math.PI/2, 0, 0);
10         ctx.fillRect(0, 0, 100, 0.3);
11     }
12 </script>
页面表现:
使用 transform 方法:
使用 rotate 方法:


 浙公网安备 33010602011771号