聊聊 SpringBoot 中的两种占位符:@*@ 和 ${*}
前言
在 SpringBoot 项目中,我们经常会使用两种占位符(有时候还会混用),它们分别是:
-
@*@
-
${*}
如果我们上网搜索「SpringBoot 的占位符 @」,大部分答案会告诉你,SpringBoot 的默认占位符由 ${*}变成 @*@了,更好一点的答案会引用 SpringBoot官网 中的描述:
On the last point: since the default config files accept Spring style placeholders (
${…}) the Maven filtering is changed to use@..@placeholders (you can override that with a Maven propertyresource.delimiter).
于是我们得到了答案,并心安理得地开始使用 @*@占位符。但如果有探索欲比较强的同学问起:Spring 中的占位符本来是 ${*},为啥 SpringBoot 中的占位符就变成 @*@了呢?有时候这两种占位符还能混用,这又是为什么呢?
今天,我们就来一探究竟,这两种占位符到底是如何实现的。
场景
首先要说明两种场景:
-
使用 @Value 注解注入属性时,只能使用 ${*} 占位符解析。
-
处理资源文件中的属性时,这两种占位符就有点意思了:它们既有可能都有效,还有可能都不生效,甚至你可以扩展自己的占位符!当然这一切都要看你是怎么配置的。下文会进行详细描述。
我们先简单看下第一种场景,@Value 注解的处理属于 Spring 核心框架逻辑,可以参见 PropertySourcesPlaceholderConfigurer 这个类,最终会执行 ${*} 占位符的解析。其中的冒号后面可以写默认值。
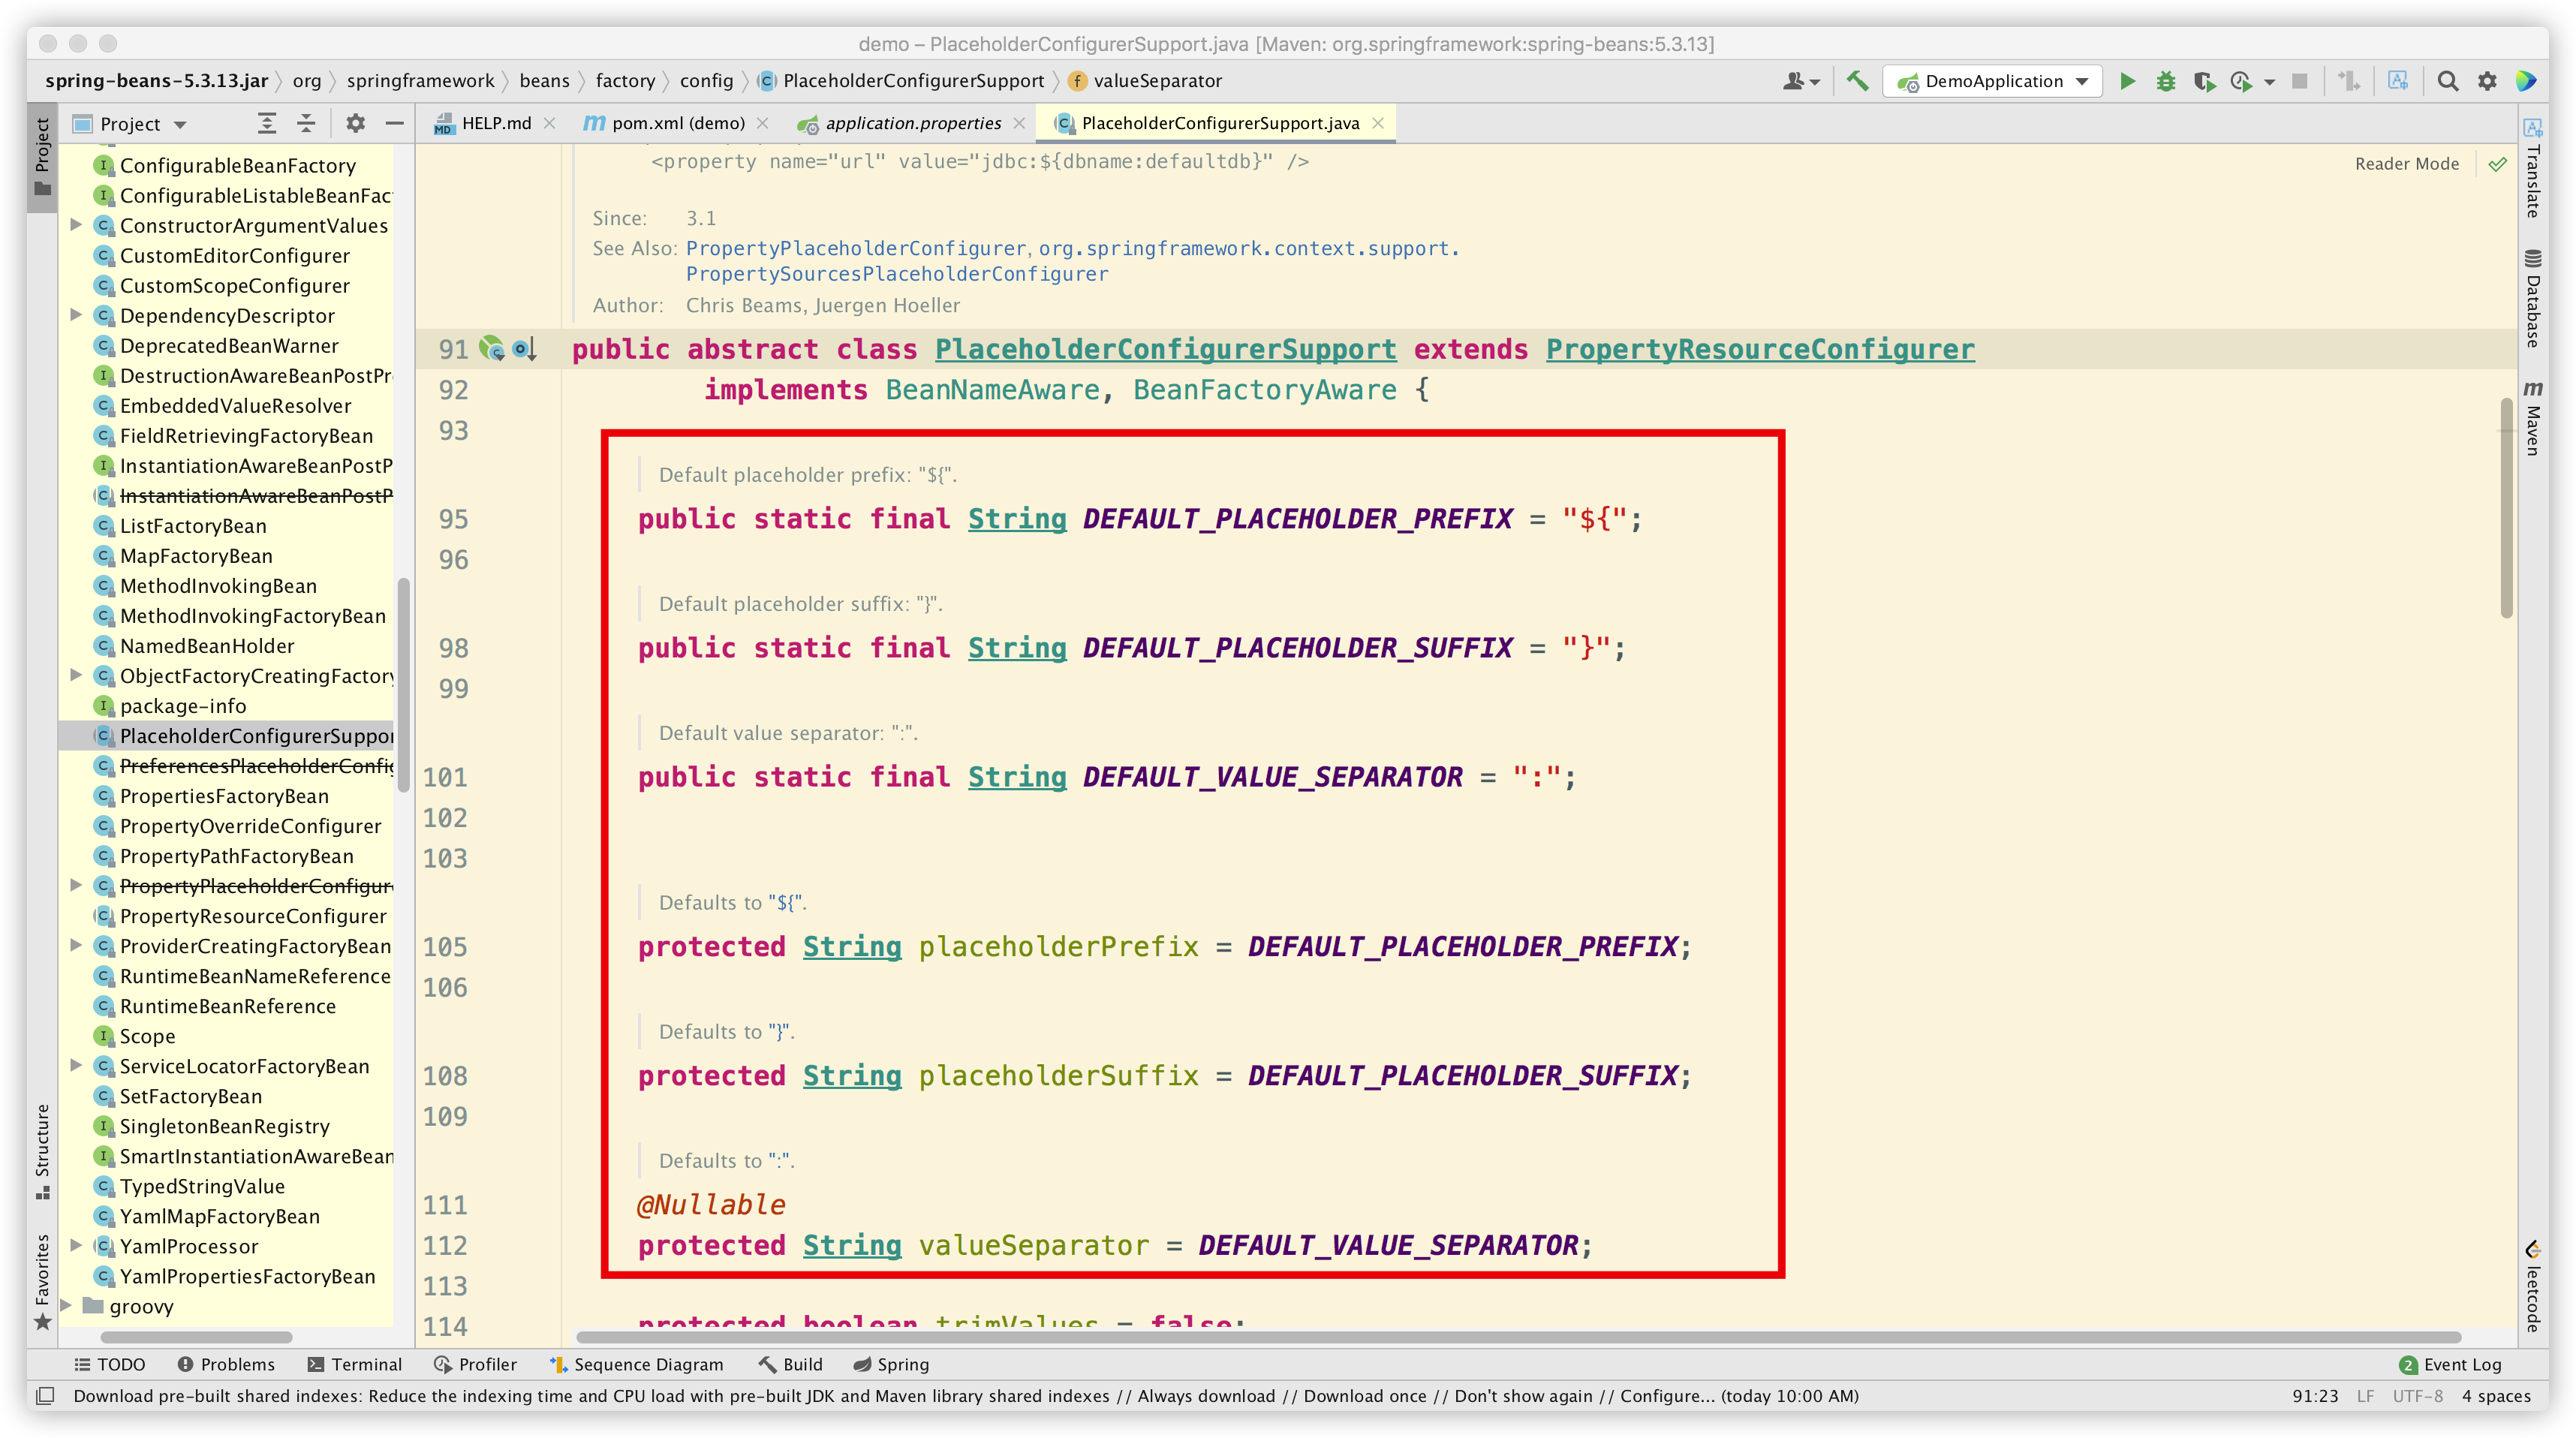
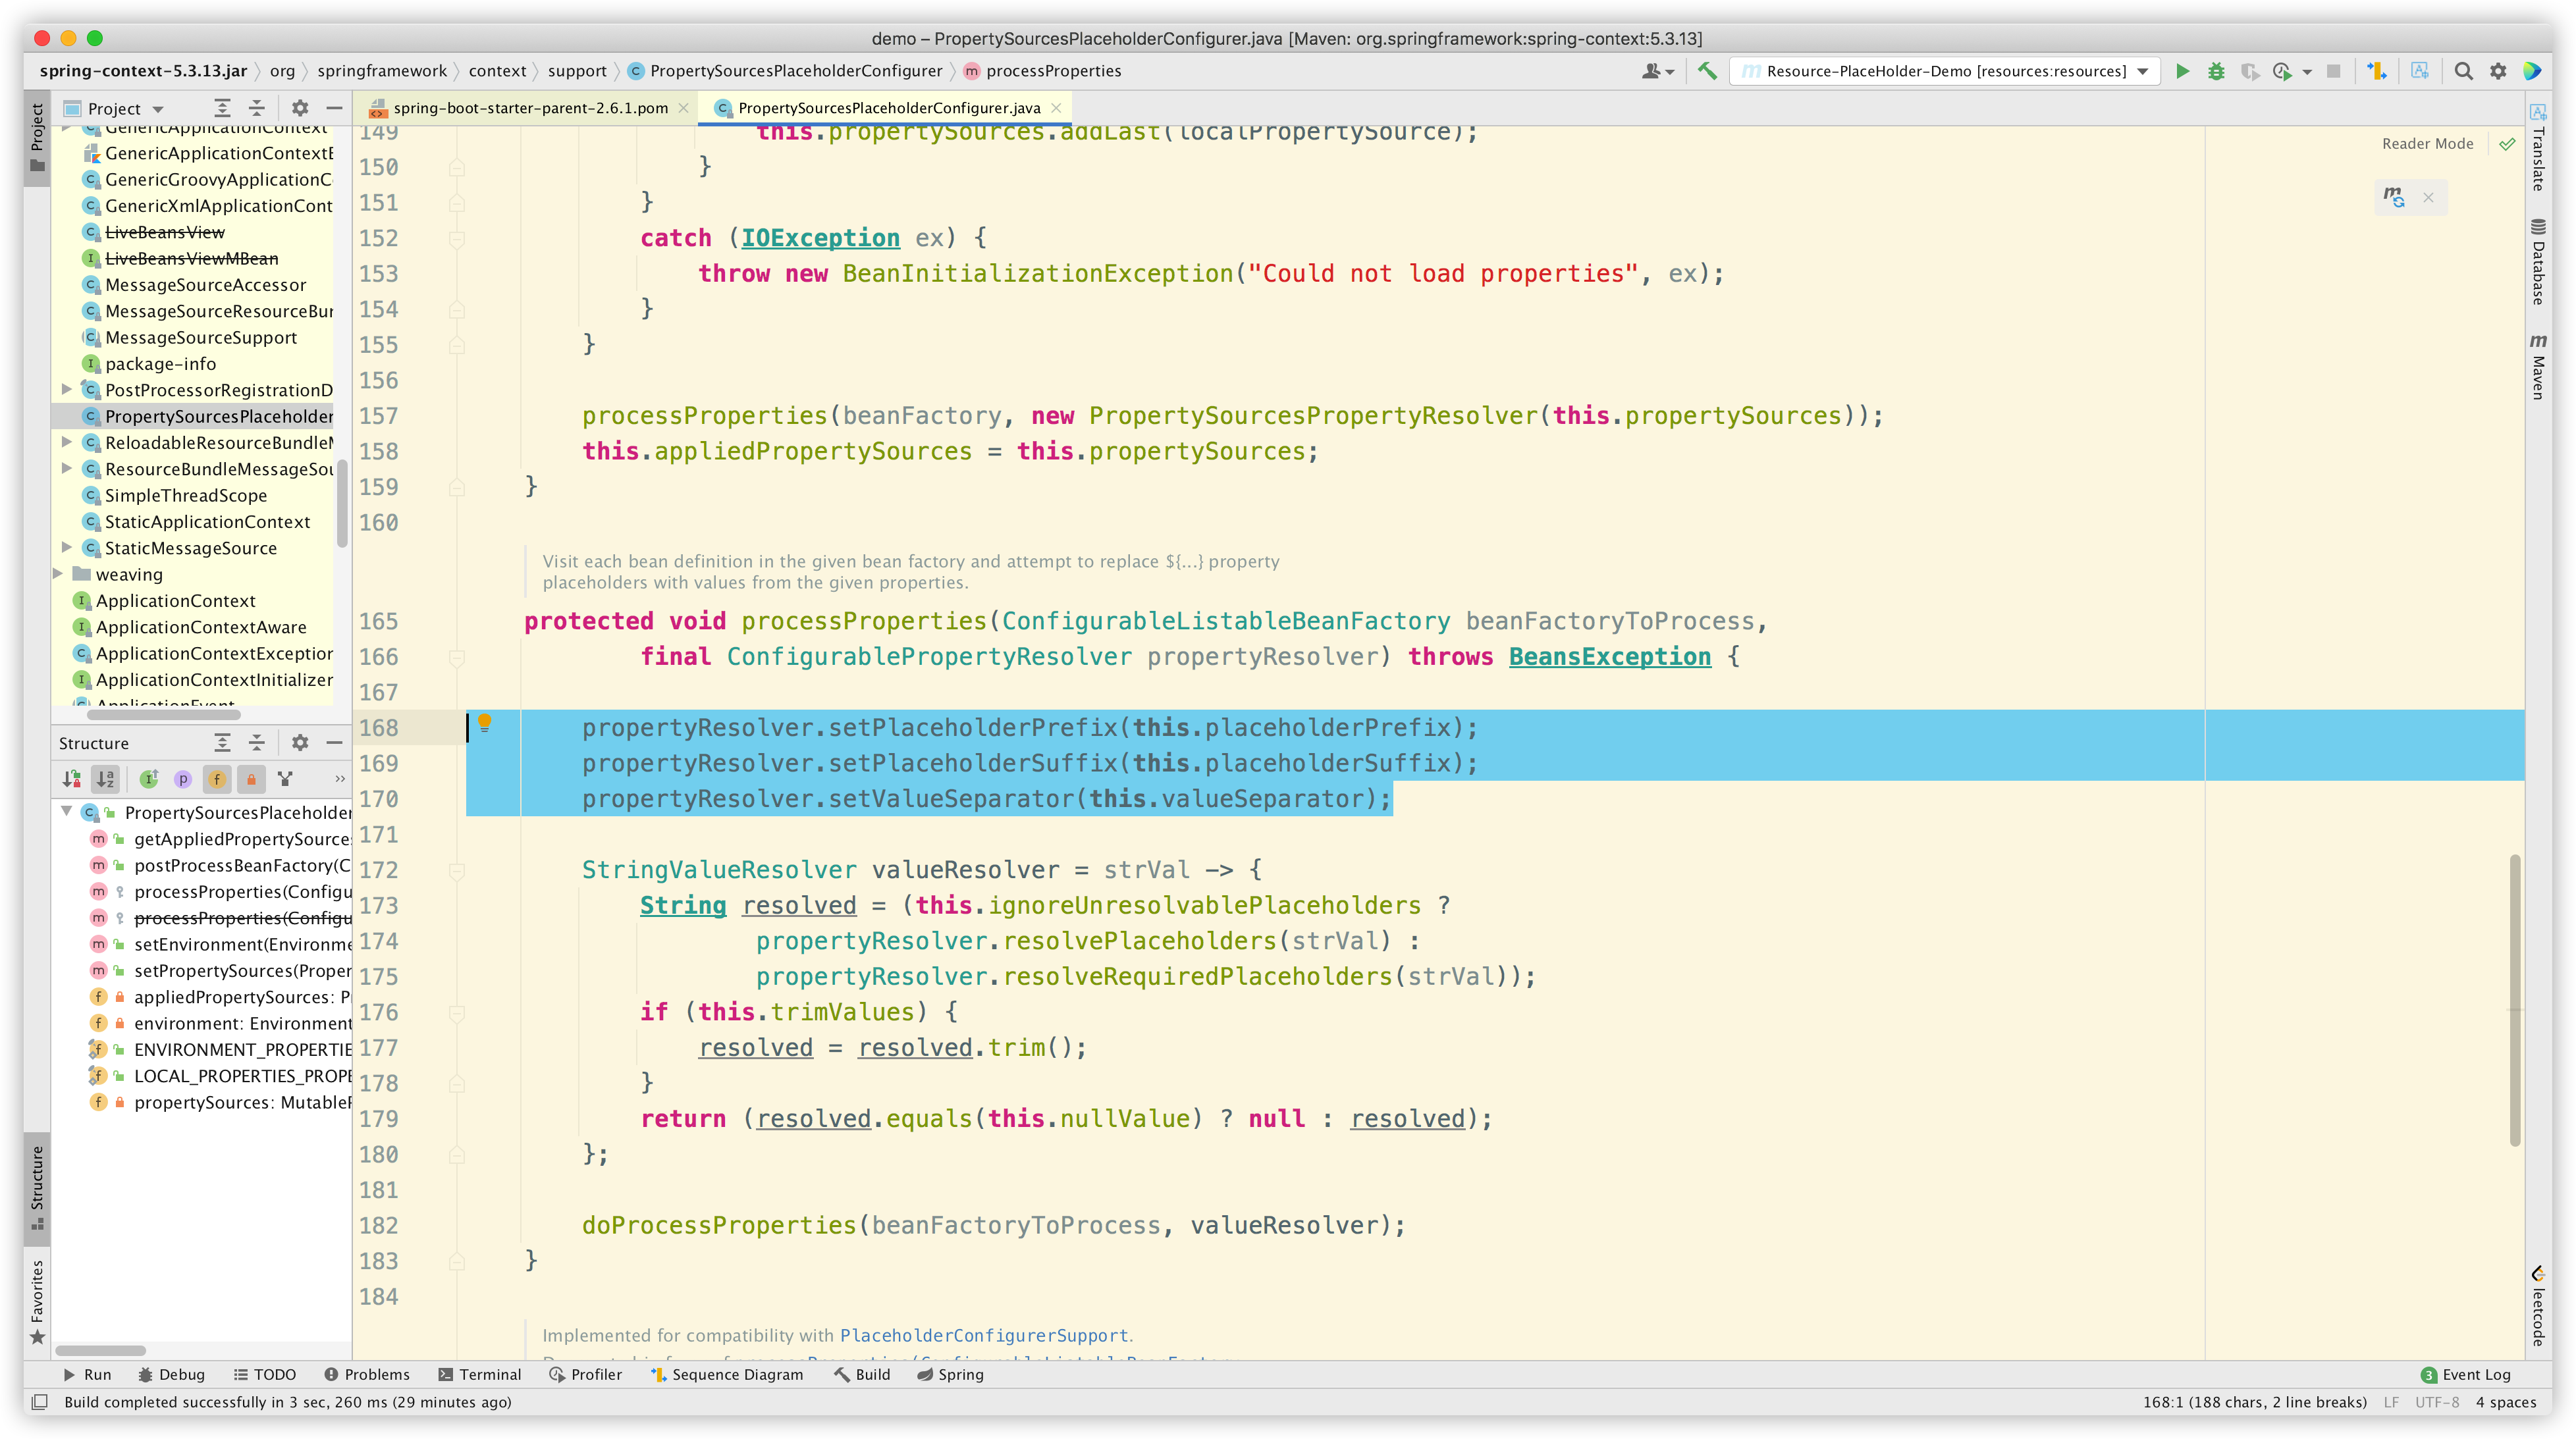
由于这种场景不是本文重点,因此不再展开。有兴趣的同学可自行探索详细解析流程。可以参考文章SpringBoot 中 @Value 源码解析。
下面我们重点看看第二种场景:处理资源文件中的属性占位符。为方便说明,我们搭建一个 Demo 项目。
前置知识
用过 Maven 的同学应该都知道,插件 maven-resources-plugin 就是用来处理资源文件的。结合前文中提到的 resource.delimite,我们在 spring-boot-starter-parent 中可以找到对应的配置:
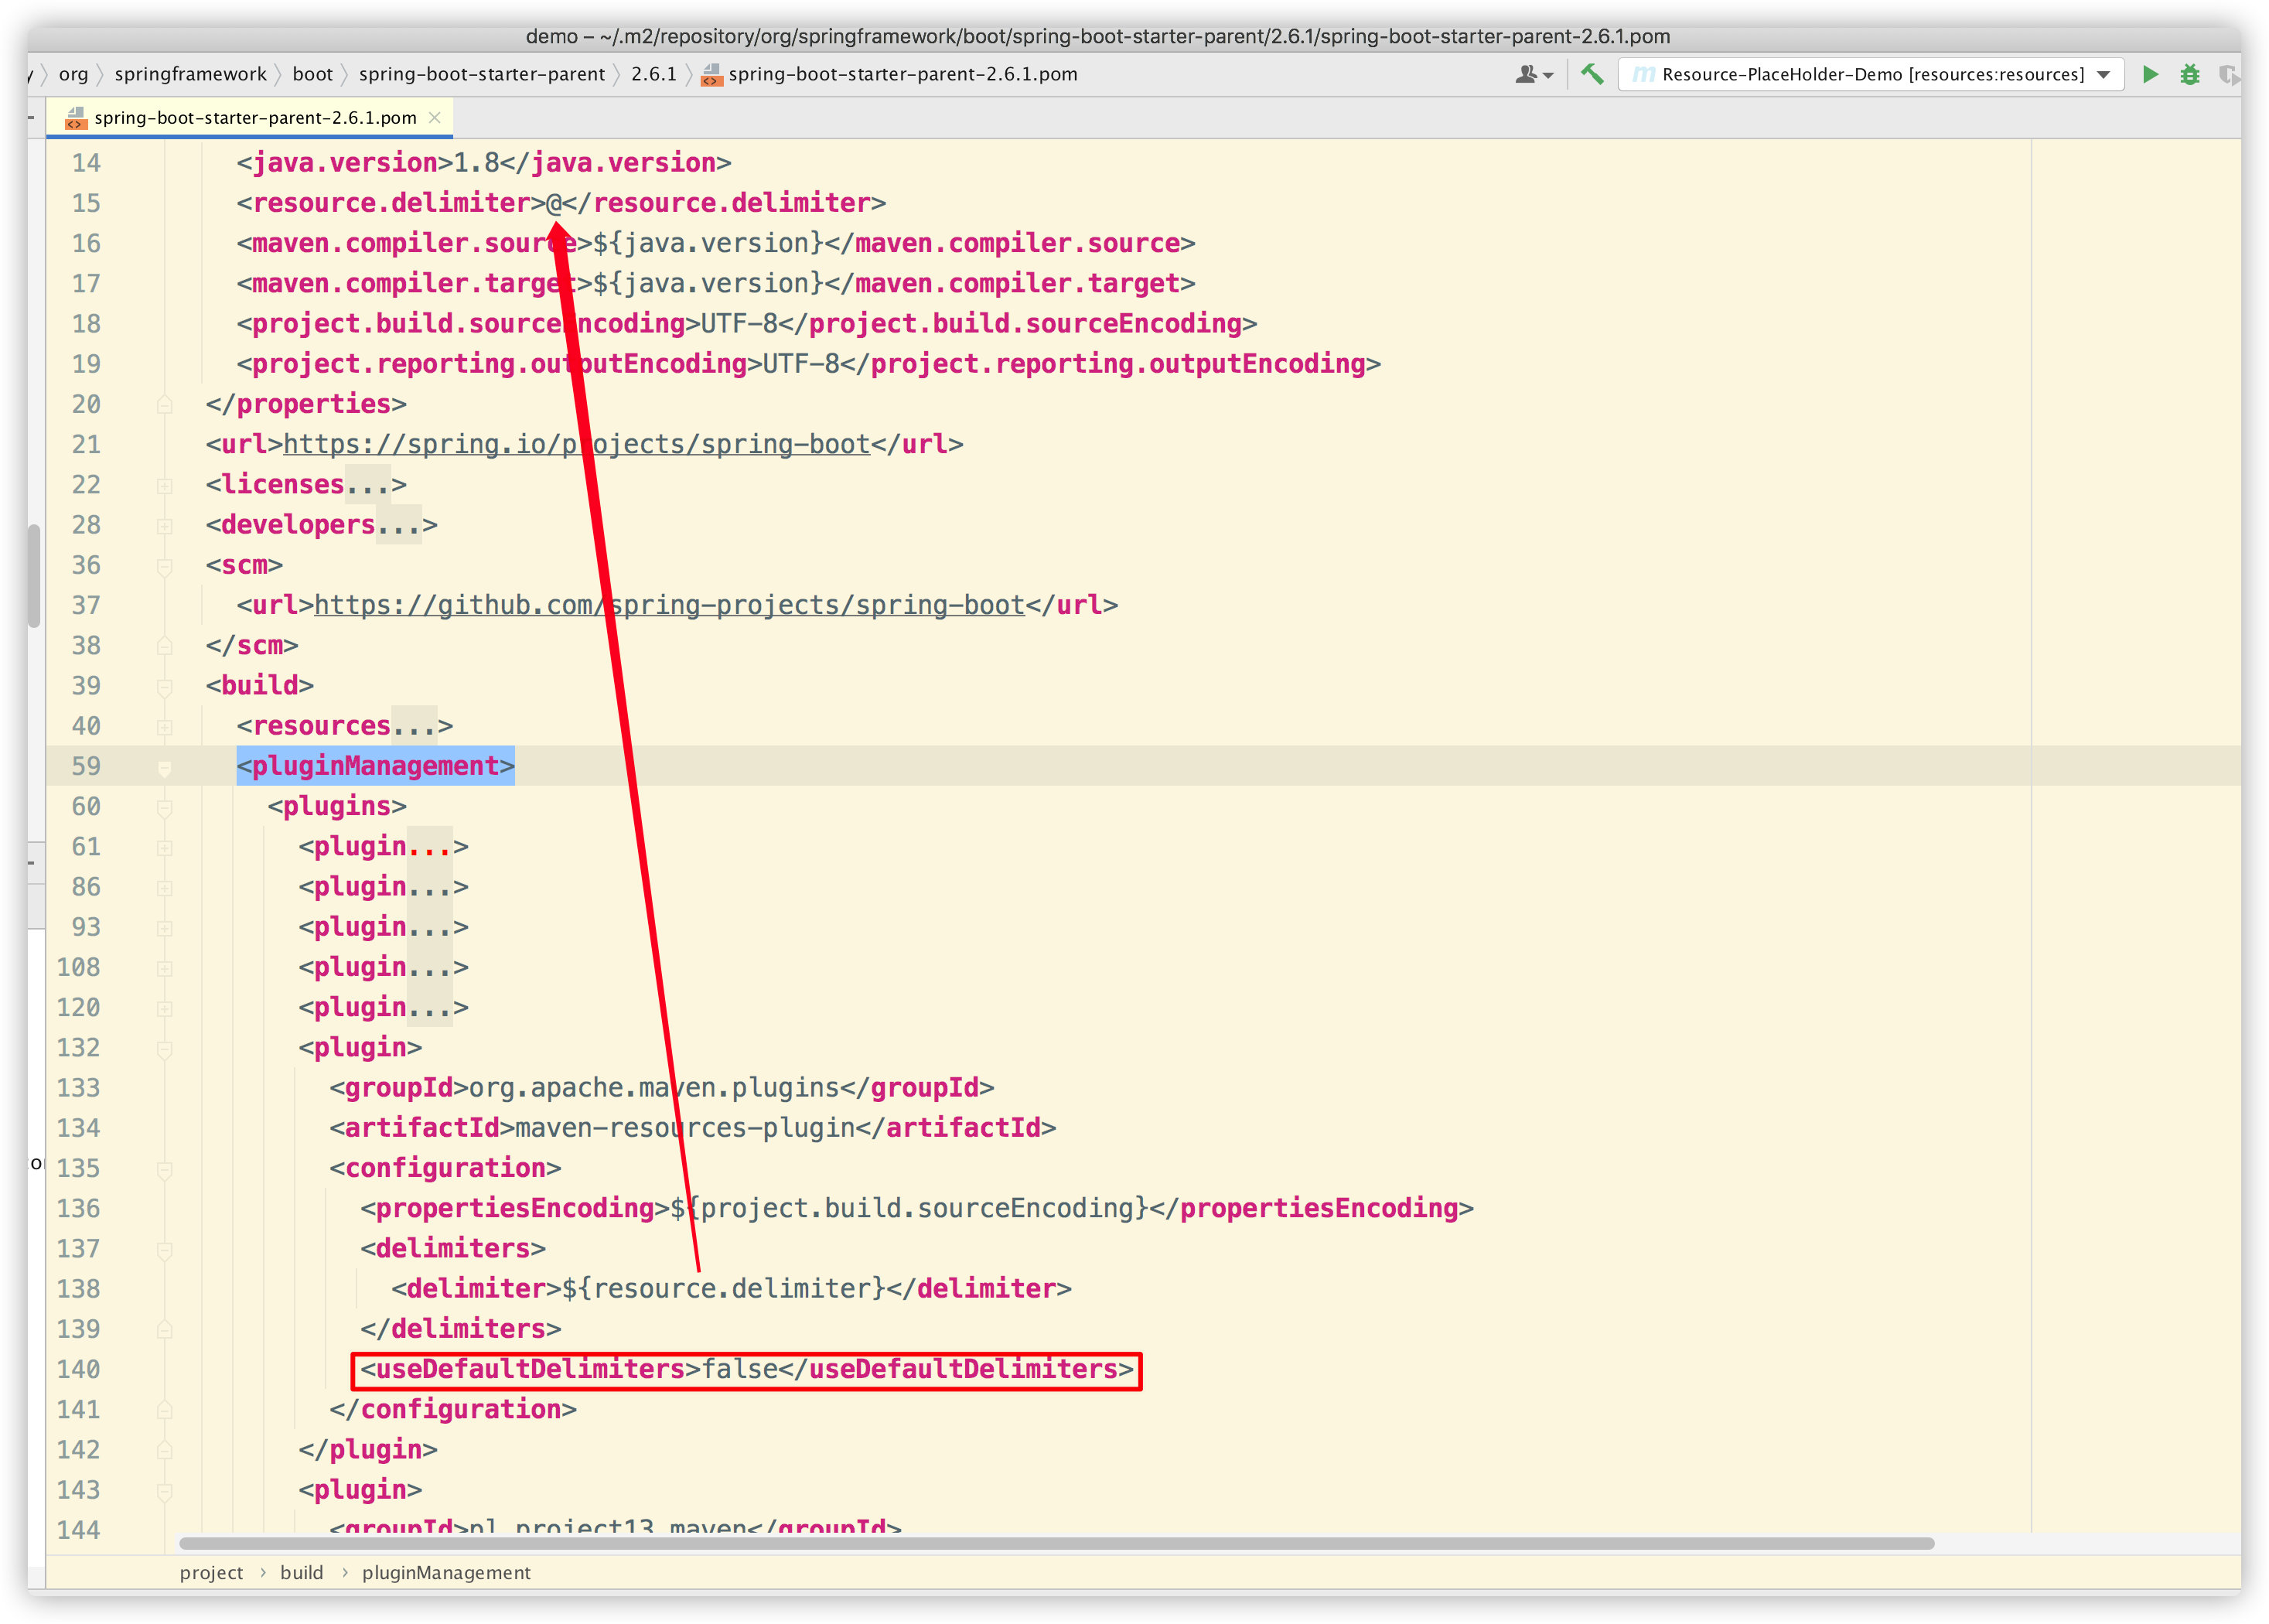
可以看到 delimiter 是 maven-resources-plugin 插件中的一个配置项,用于控制占位符的类型。稍后我们会更改其中的一些配置项进行实验。
项目搭建
我们创建一个 SpringBoot Demo 项目,环境信息如下:
-
spring-boot 2.6.1
-
maven-resources-plugin 3.2.0
我们需要准备一些配置数据,如下所示:
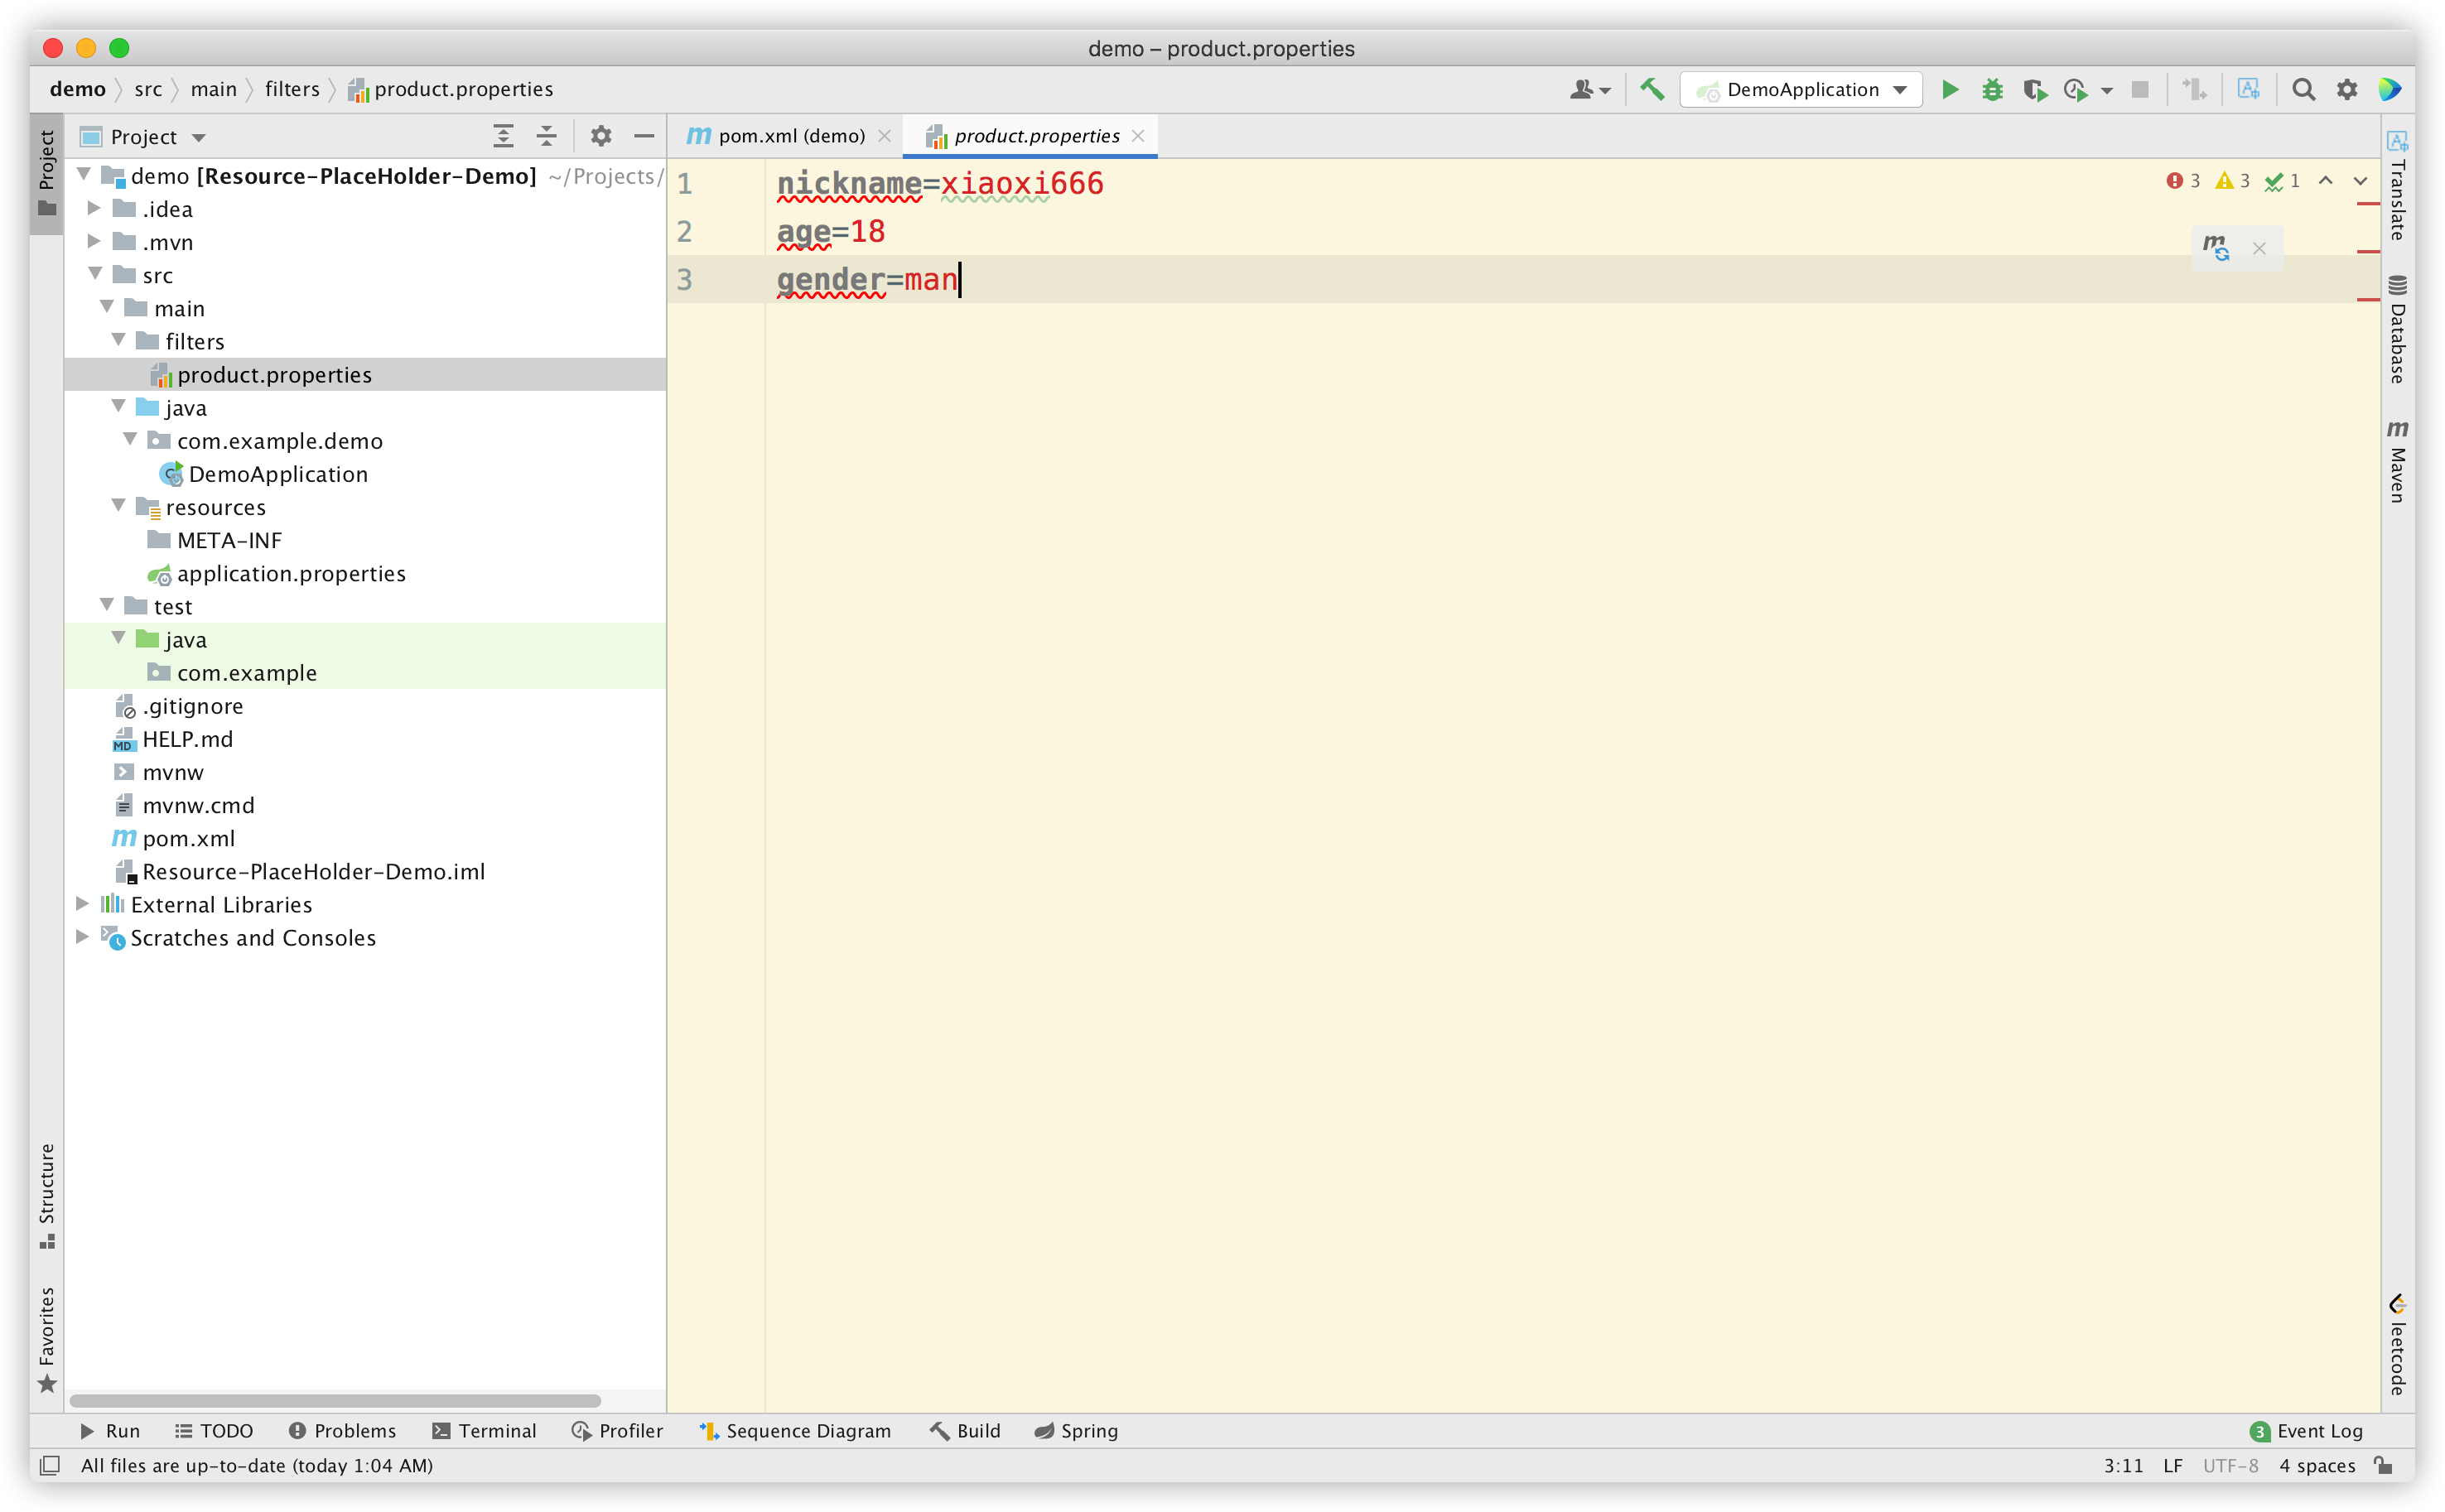
它们会被 application.properties 引用:

为进行对比,这里我们使用了三种占位符,分别是 Spring 的默认占位符 ${*}、SpringBoot 的默认占位符 @*@,以及我随便写的一种占位符 #*#。可以预知的是,默认情况下 #*# 这种占位符一定不会被解析。
然后我们还需要在 pom.xml 进行配置,确保资源被正确解析:
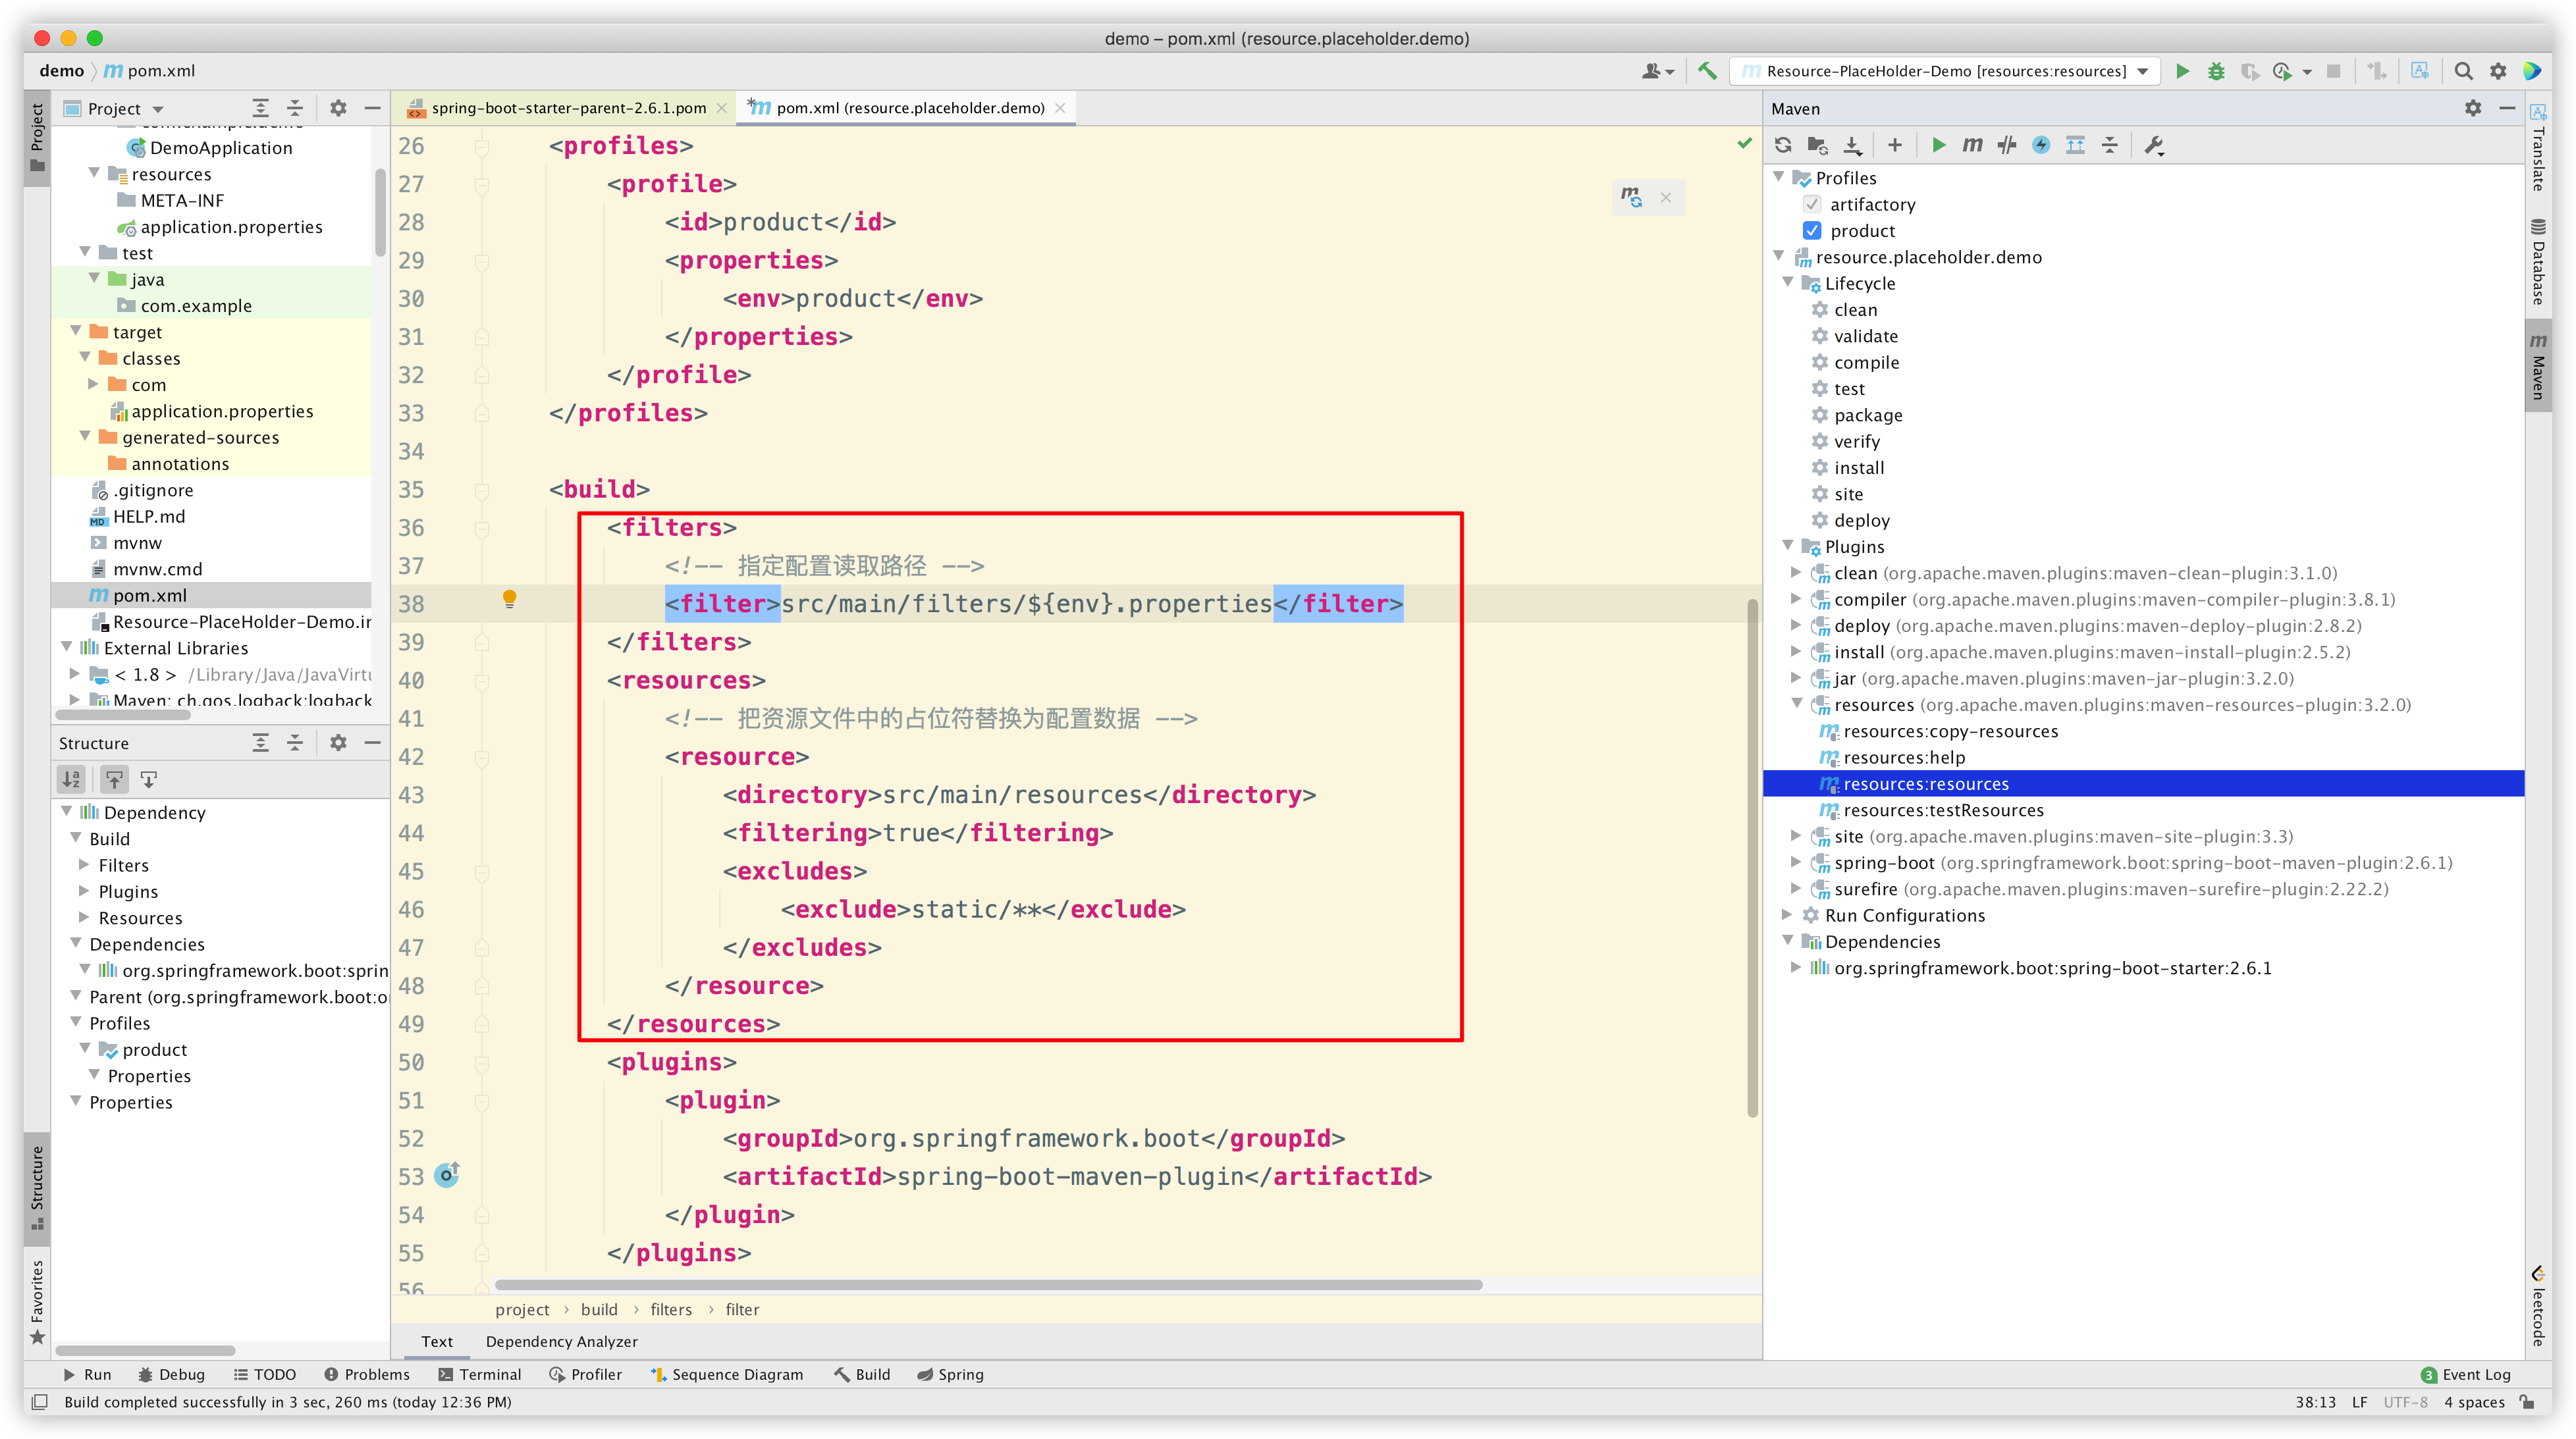
此时 pom.xml 的完整内容如下:
<?xml version="1.0" encoding="UTF-8"?>
<project xmlns="http://maven.apache.org/POM/4.0.0" xmlns:xsi="http://www.w3.org/2001/XMLSchema-instance"
         xsi:schemaLocation="http://maven.apache.org/POM/4.0.0 https://maven.apache.org/xsd/maven-4.0.0.xsd">
    <modelVersion>4.0.0</modelVersion>
    <parent>
        <groupId>org.springframework.boot</groupId>
        <artifactId>spring-boot-starter-parent</artifactId>
        <version>2.6.1</version>
        <relativePath/> <!-- lookup parent from repository -->
    </parent>
    <groupId>com.example</groupId>
    <artifactId>resource.placeholder.demo</artifactId>
    <version>0.0.1-SNAPSHOT</version>
    <name>resource.placeholder.demo</name>
    <description>Demo project for Spring Boot</description>
    <properties>
        <java.version>1.8</java.version>
    </properties>
    <dependencies>
        <dependency>
            <groupId>org.springframework.boot</groupId>
            <artifactId>spring-boot-starter</artifactId>
        </dependency>
    </dependencies>

    <profiles>
        <profile>
            <id>product</id>
            <properties>
                <env>product</env>
            </properties>
        </profile>
    </profiles>

    <build>
        <filters>
            <!-- 指定配置读取路径 -->
            <filter>src/main/filters/${env}.properties</filter>
        </filters>
        <resources>
            <!-- 把资源文件中的占位符替换为配置数据 -->
            <resource>
                <directory>src/main/resources</directory>
                <filtering>true</filtering>
                <excludes>
                    <exclude>static/**</exclude>
                </excludes>
            </resource>
        </resources>
        <plugins>
            <plugin>
                <groupId>org.springframework.boot</groupId>
                <artifactId>spring-boot-maven-plugin</artifactId>
            </plugin>
        </plugins>
    </build>

</project>
注:上面我们准备了一个非常简单的配置文件 product.properties 用于演示。在实际项目中,一般会为不同的 Profile 配置不同的数据,比如除了 product.properties 配置文件外,还可能会有 dev.properties 等等配置文件。
现在,我们 build 一下项目,看看 class 中的资源文件内容:
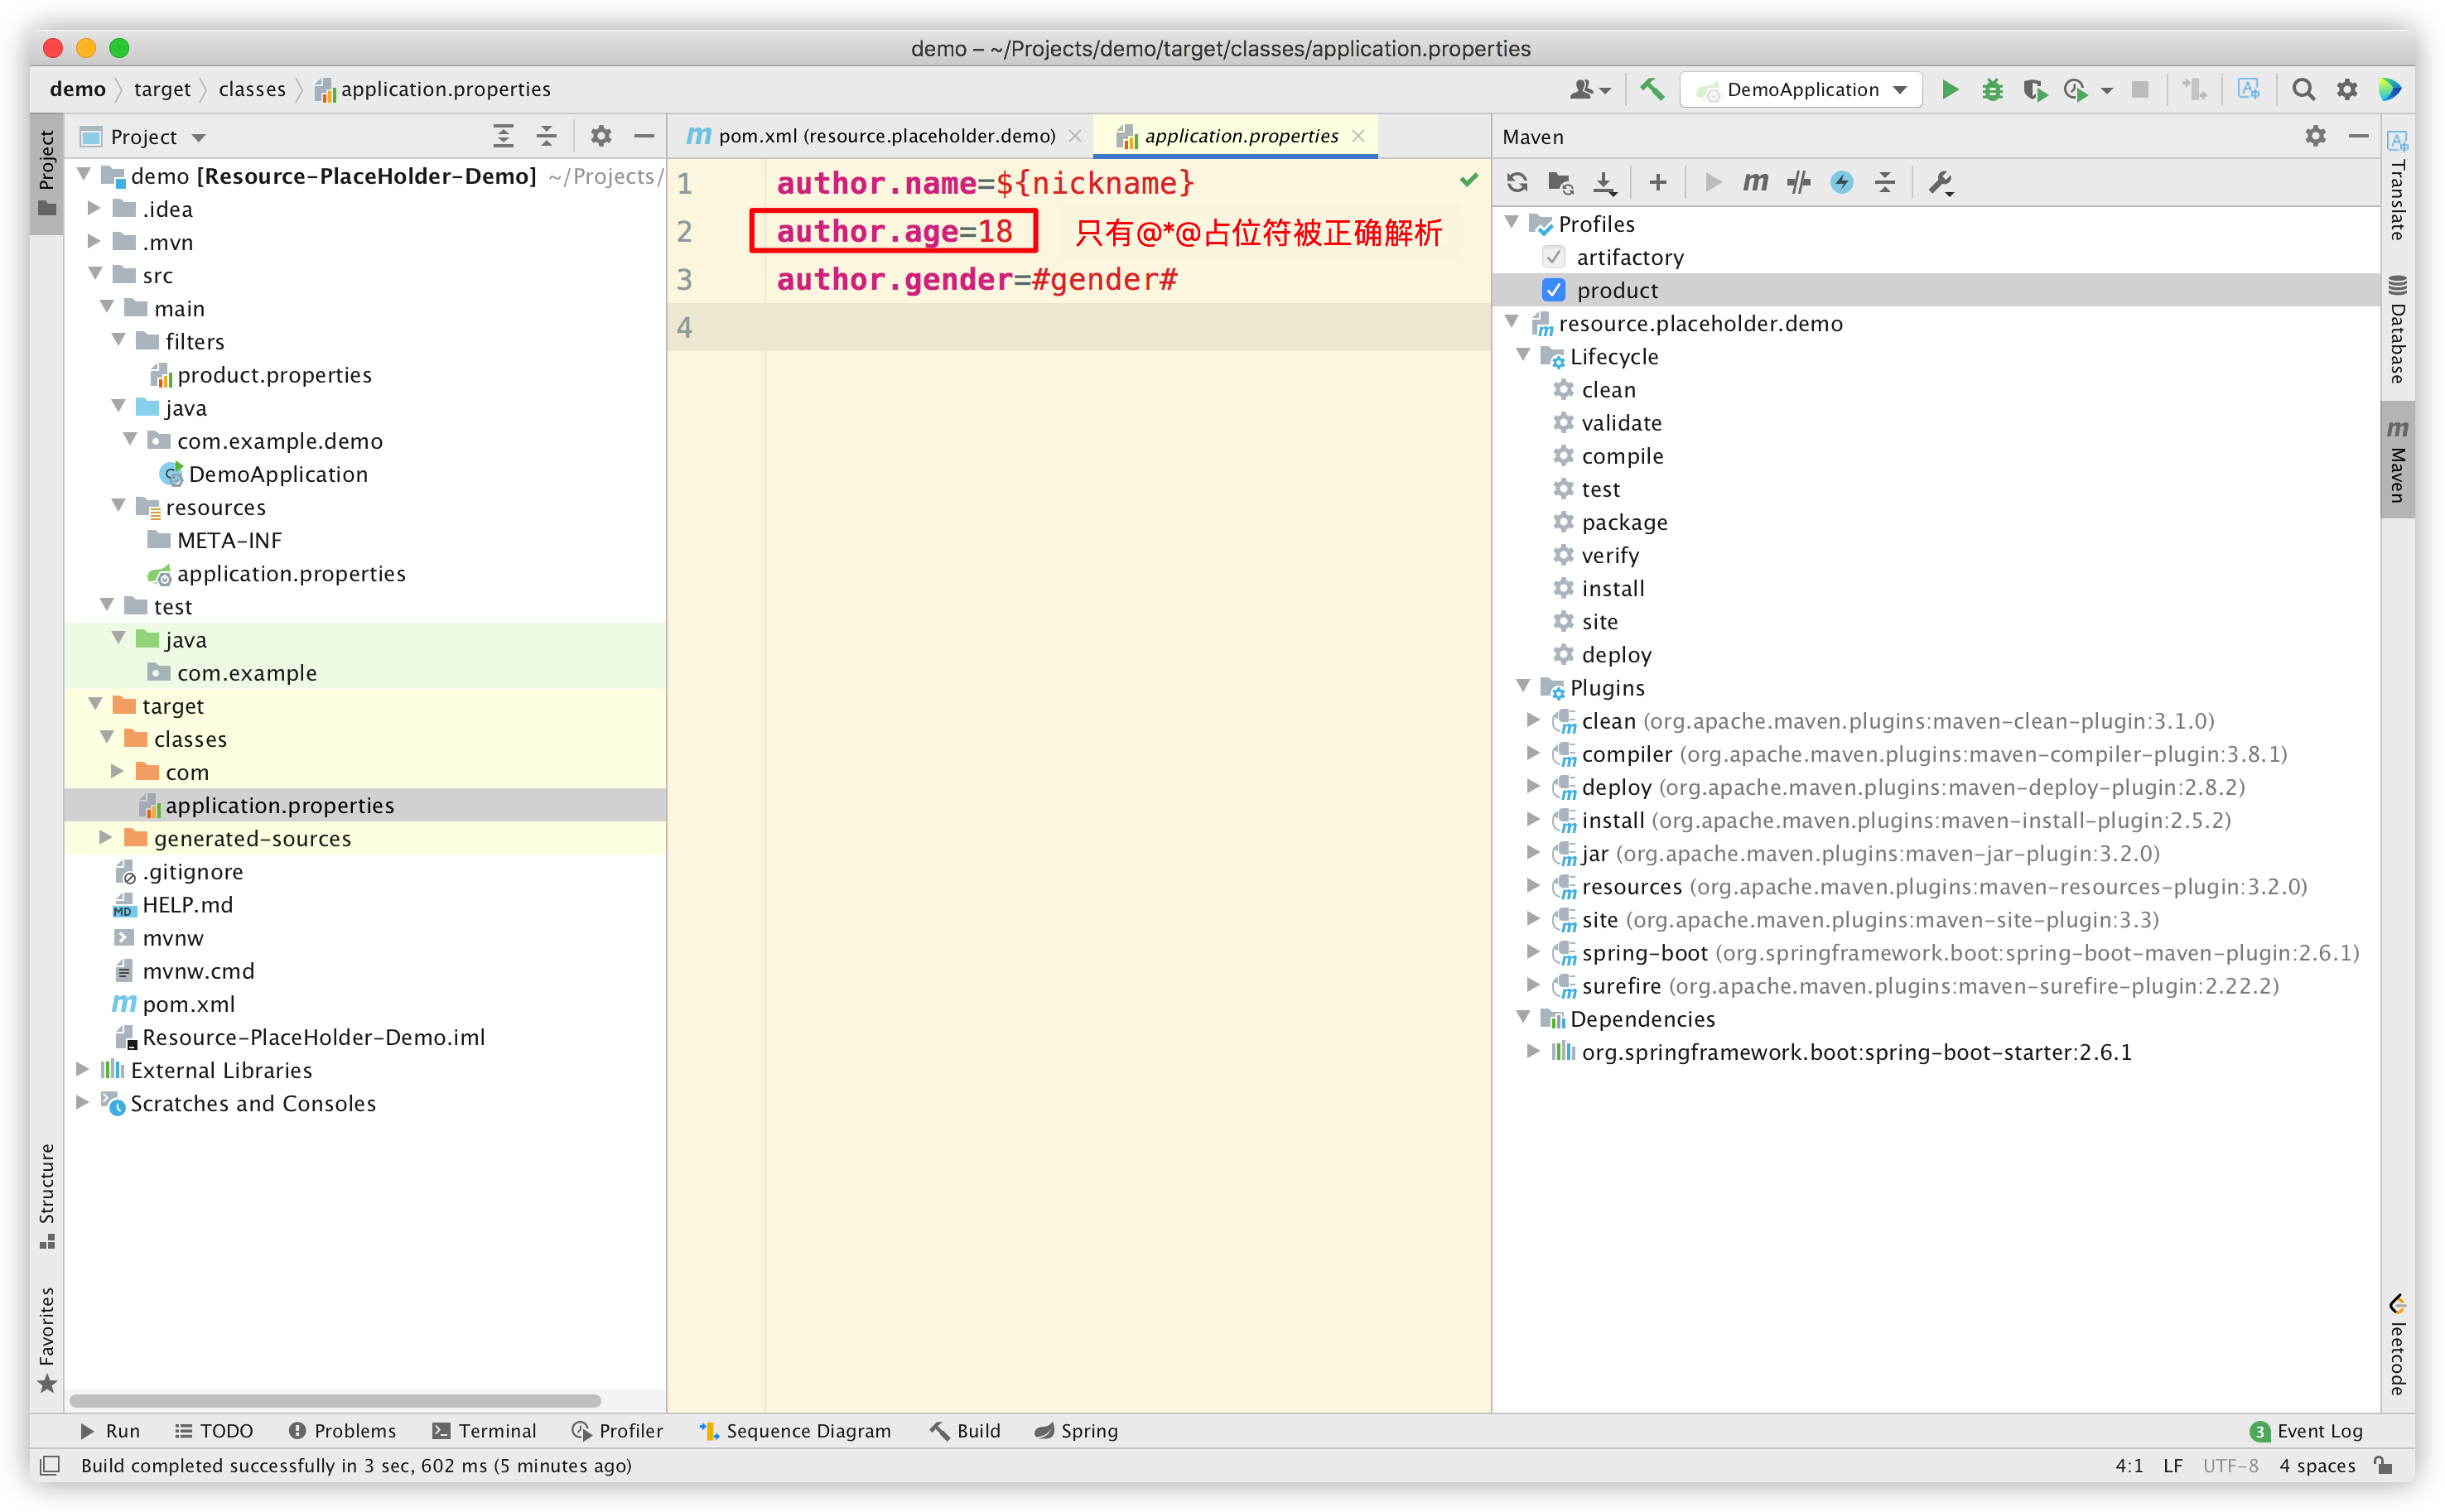
很明显,只有 @*@ 这种占位符被解析了,而 ${*} 和 #*# 都没有被解析。
那我们修改一下配置(手动引入 maven-resources-plugin,覆盖 parent 中的配置),看看会发生什么:
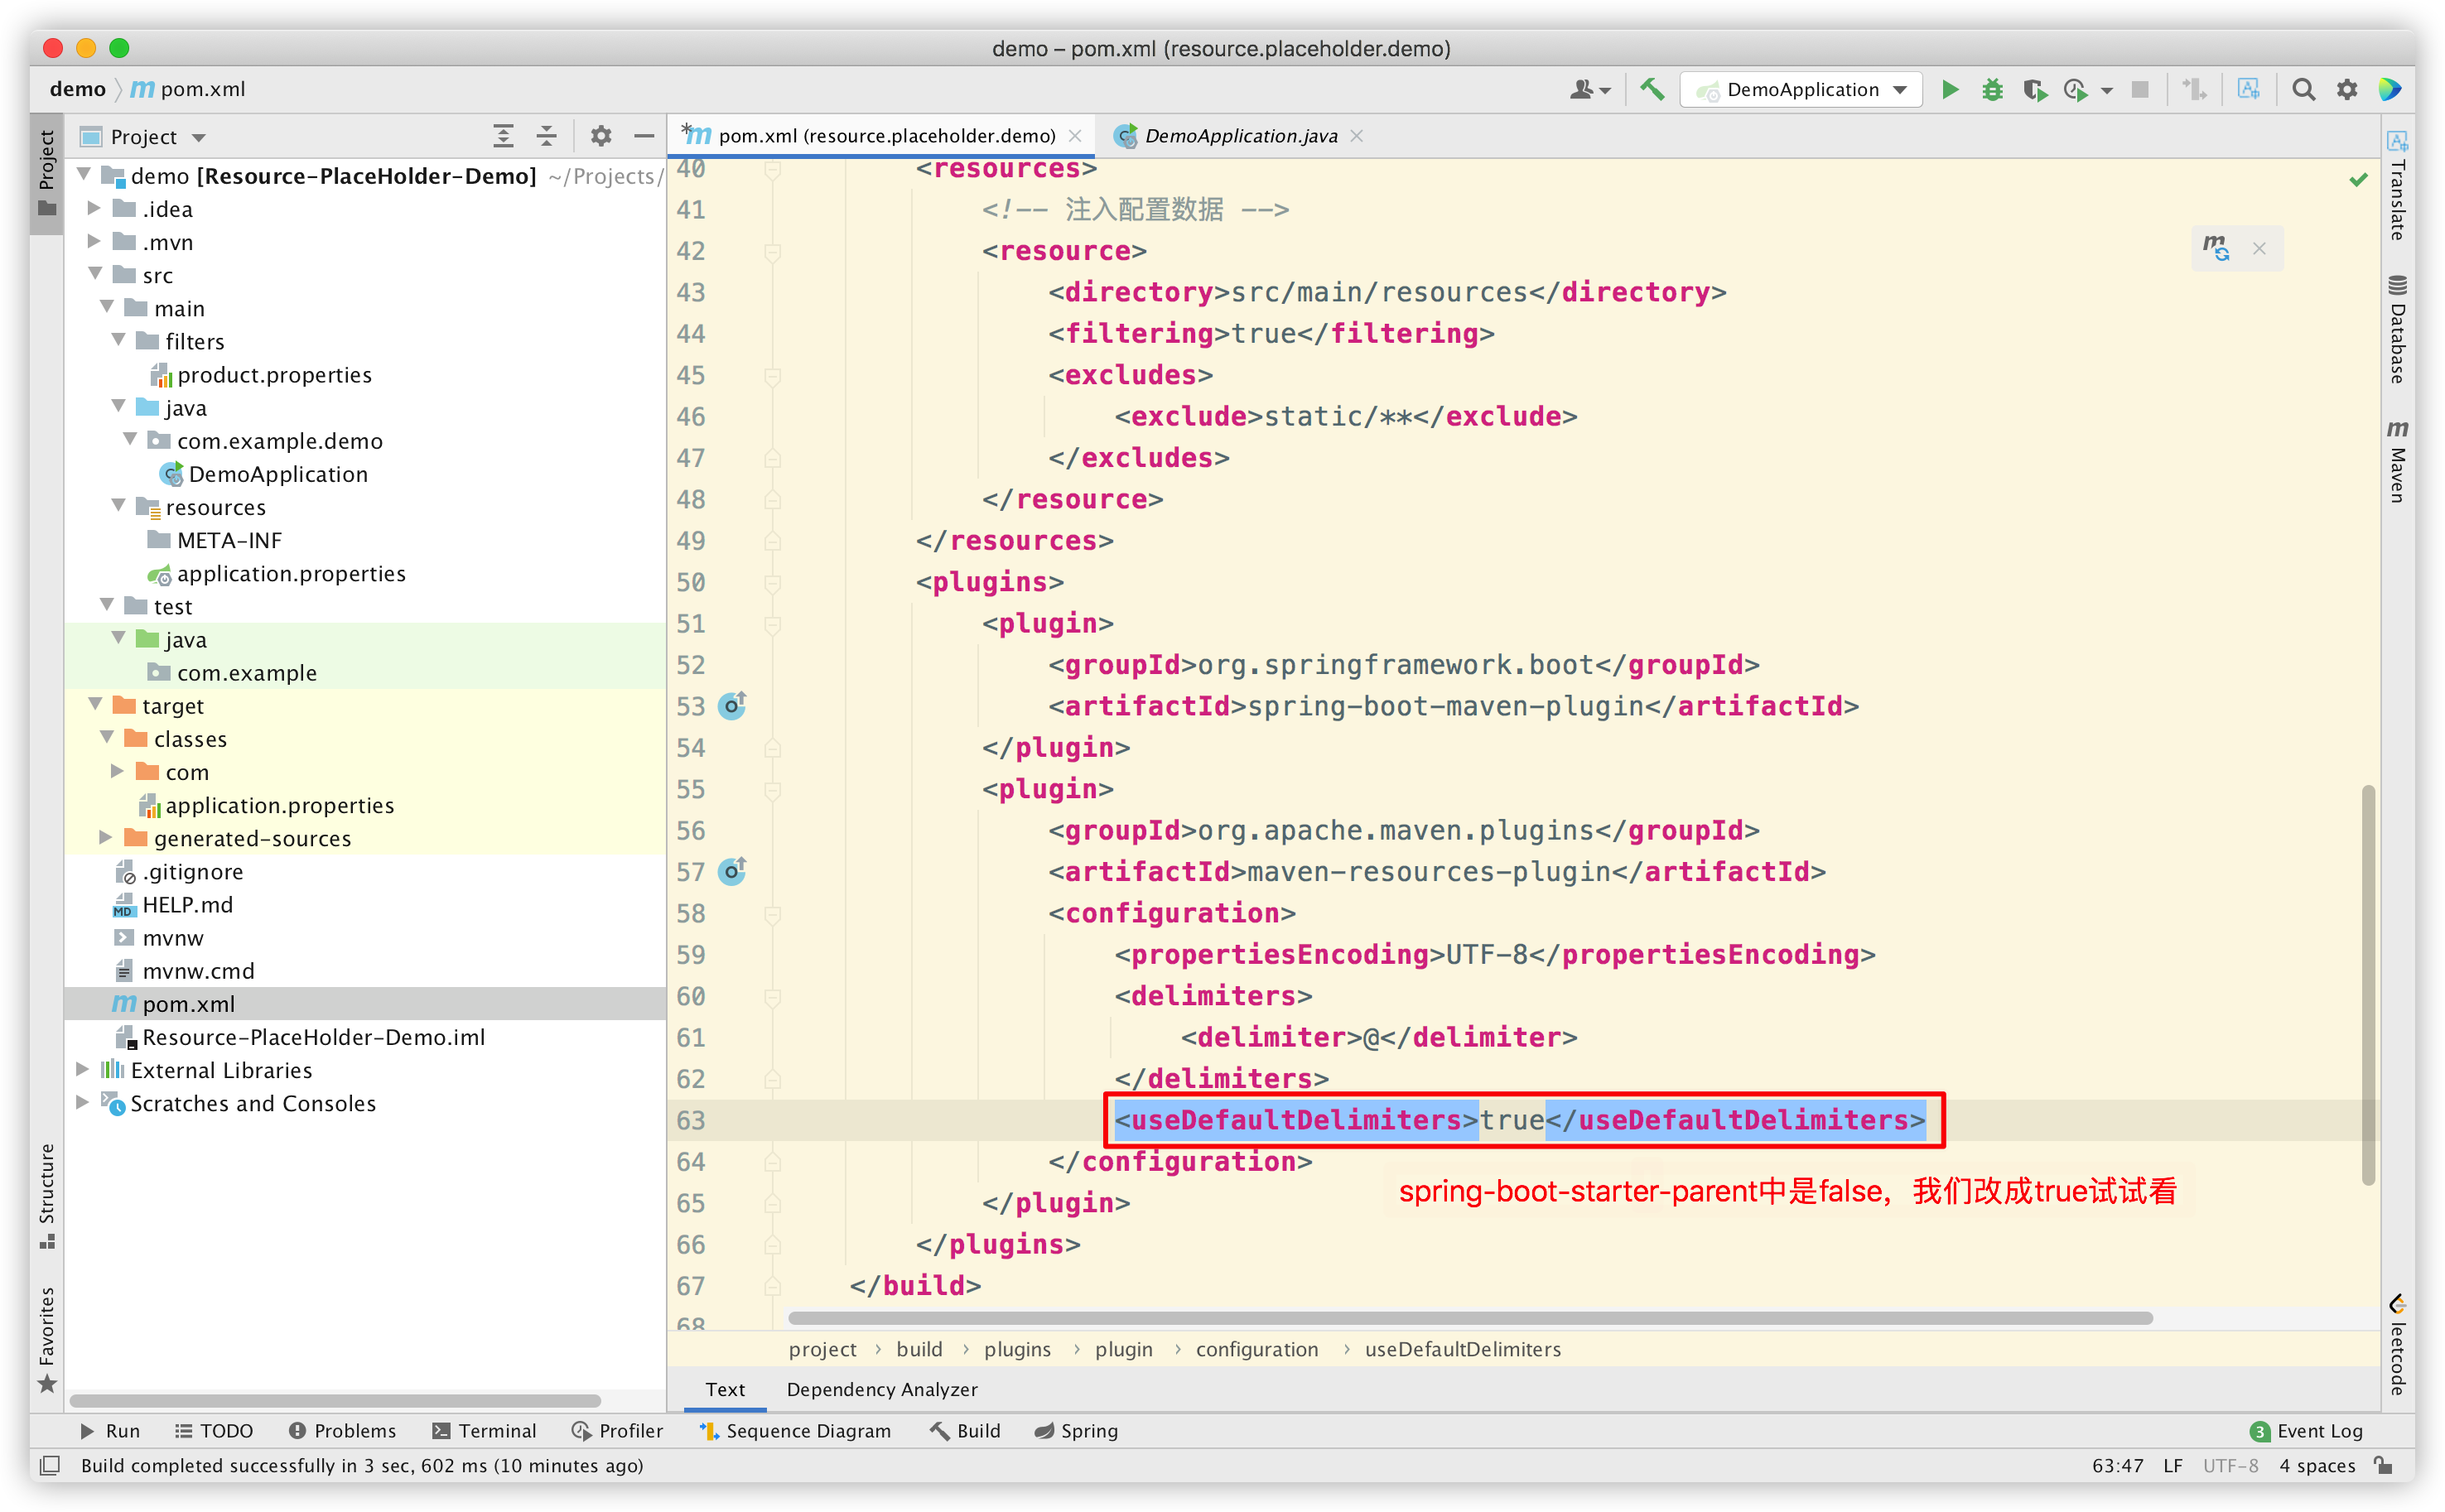
Reimport Maven 后,再次 build,看看效果:
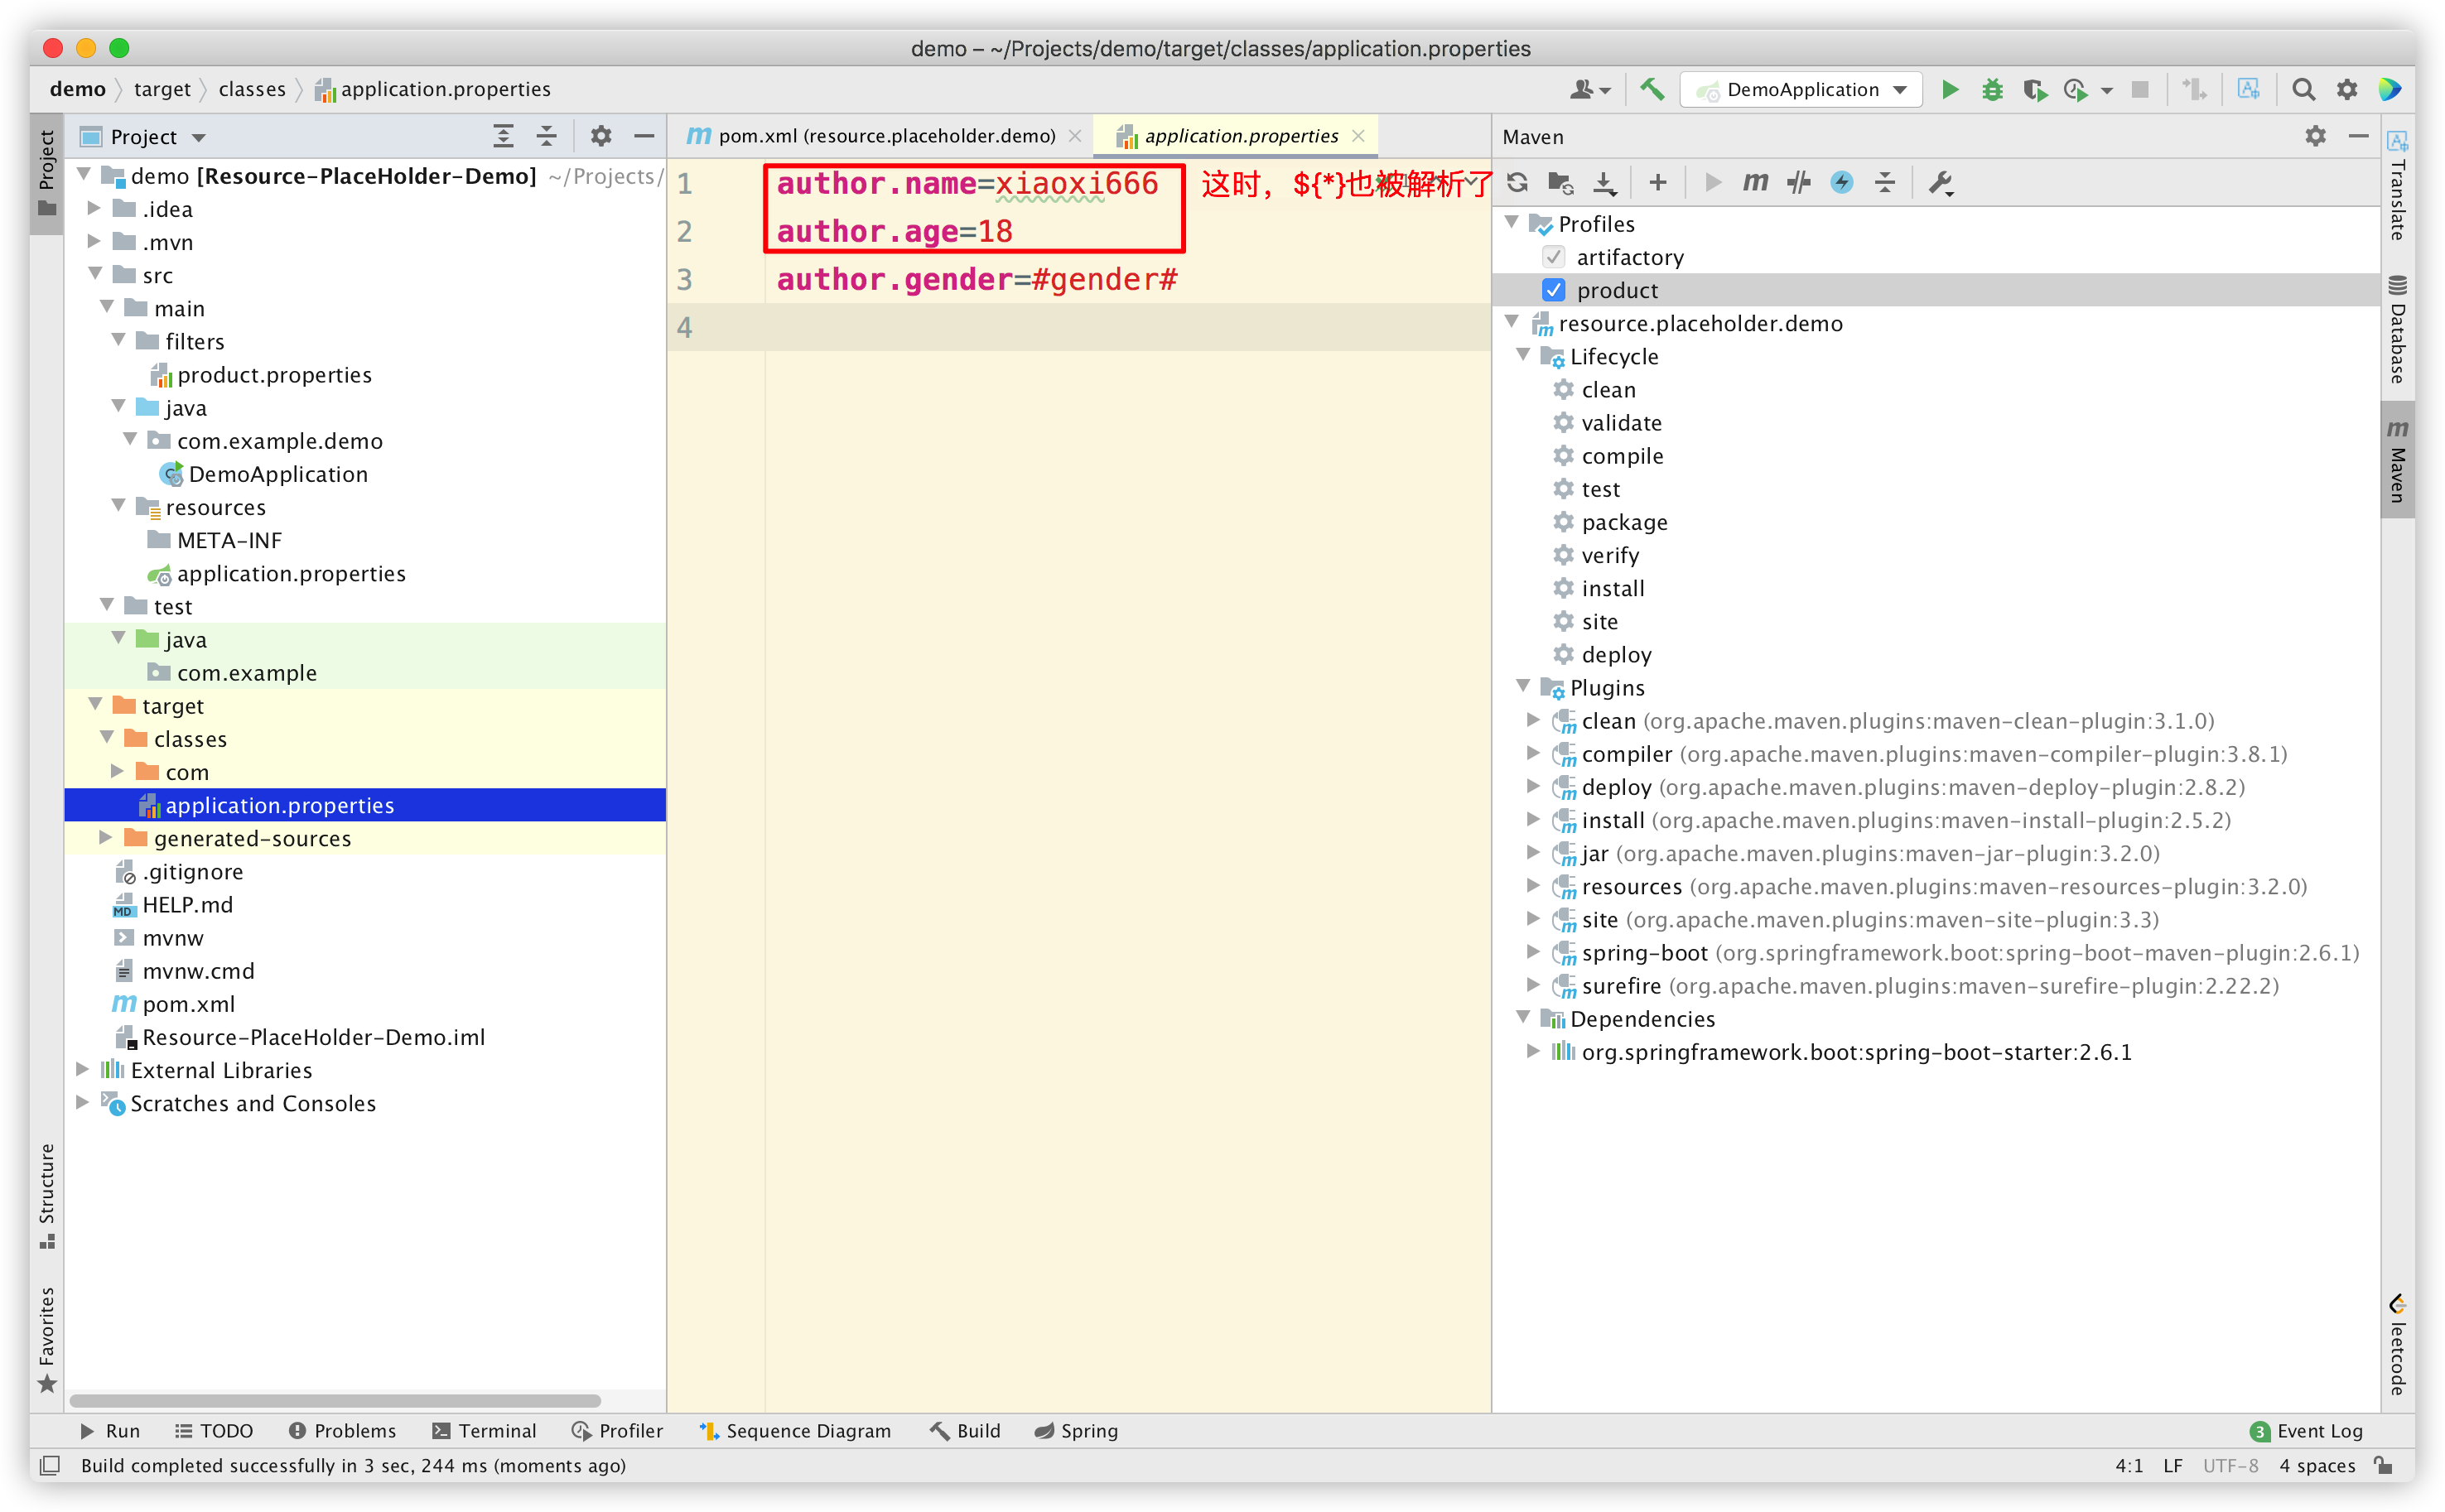
可以发现把 useDefaultDelimiters 改为 true 后, ${*} 占位符也可以解析了。
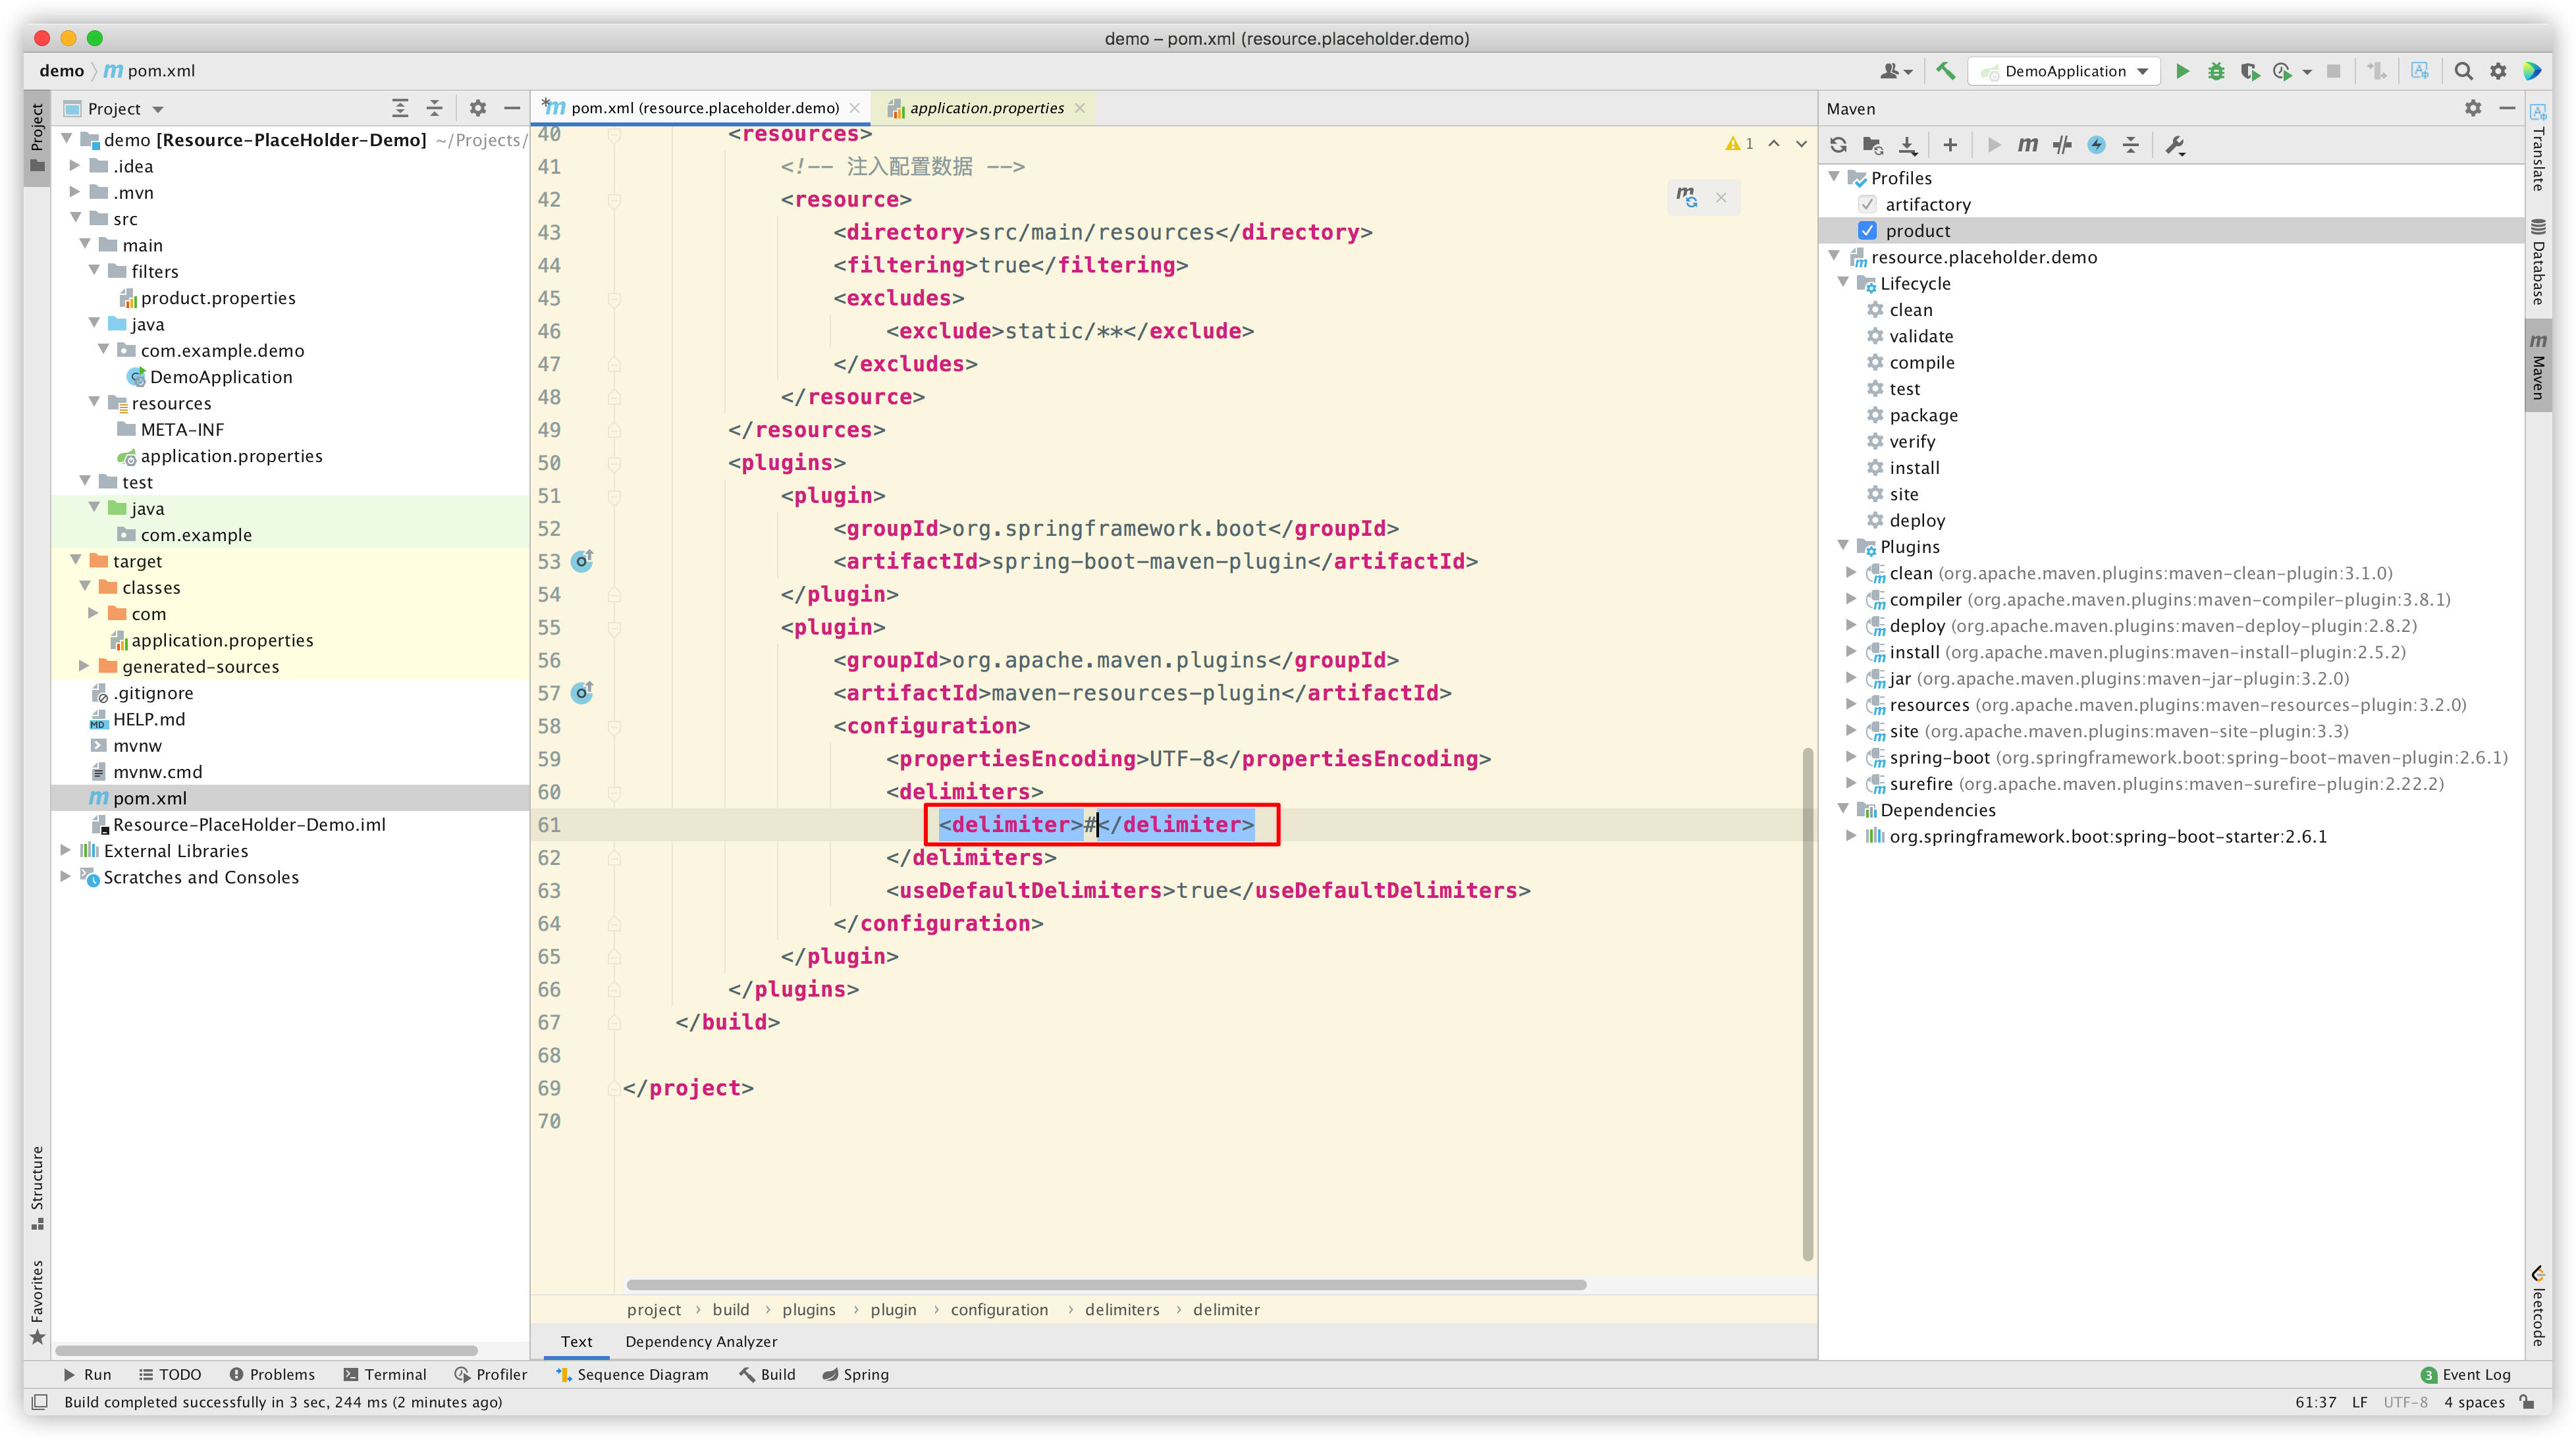
那我们继续改,把 delimite 改成 #,看看 #*# 这种占位符能否被解析:
Reimport Maven 后,再次 build,看看效果:
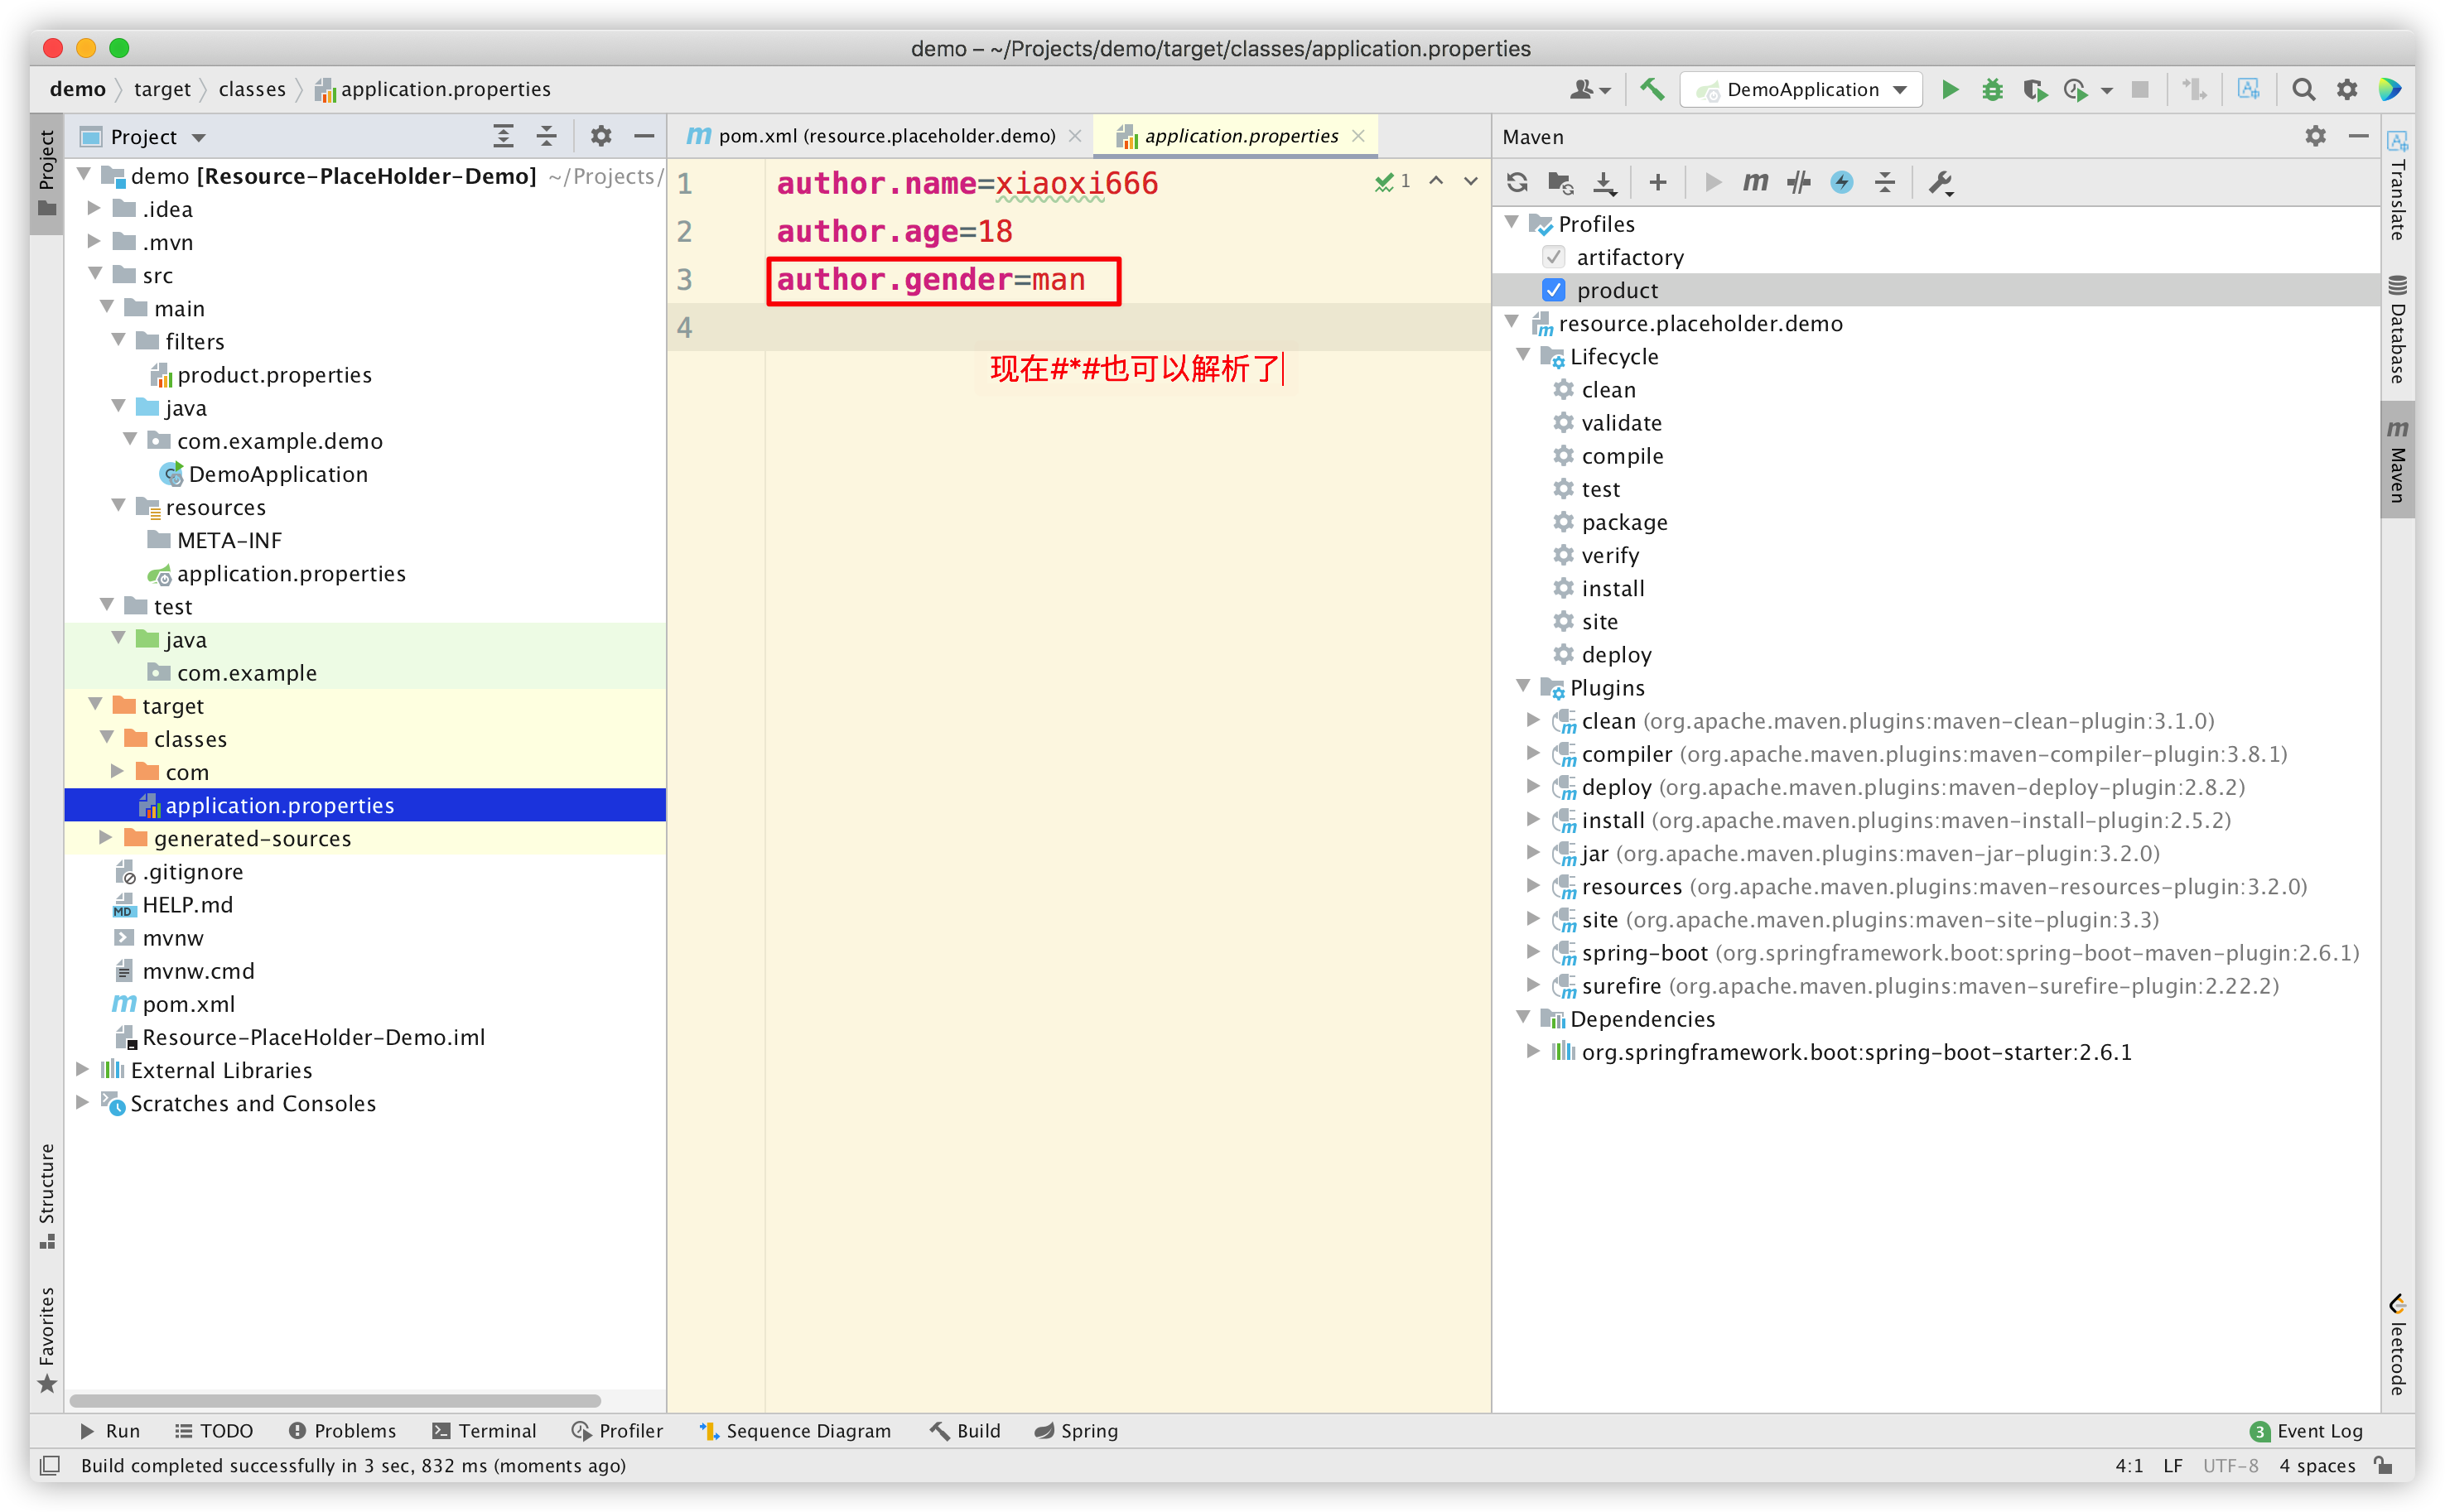
可以看到,我们自定义的占位符也可以解析了。
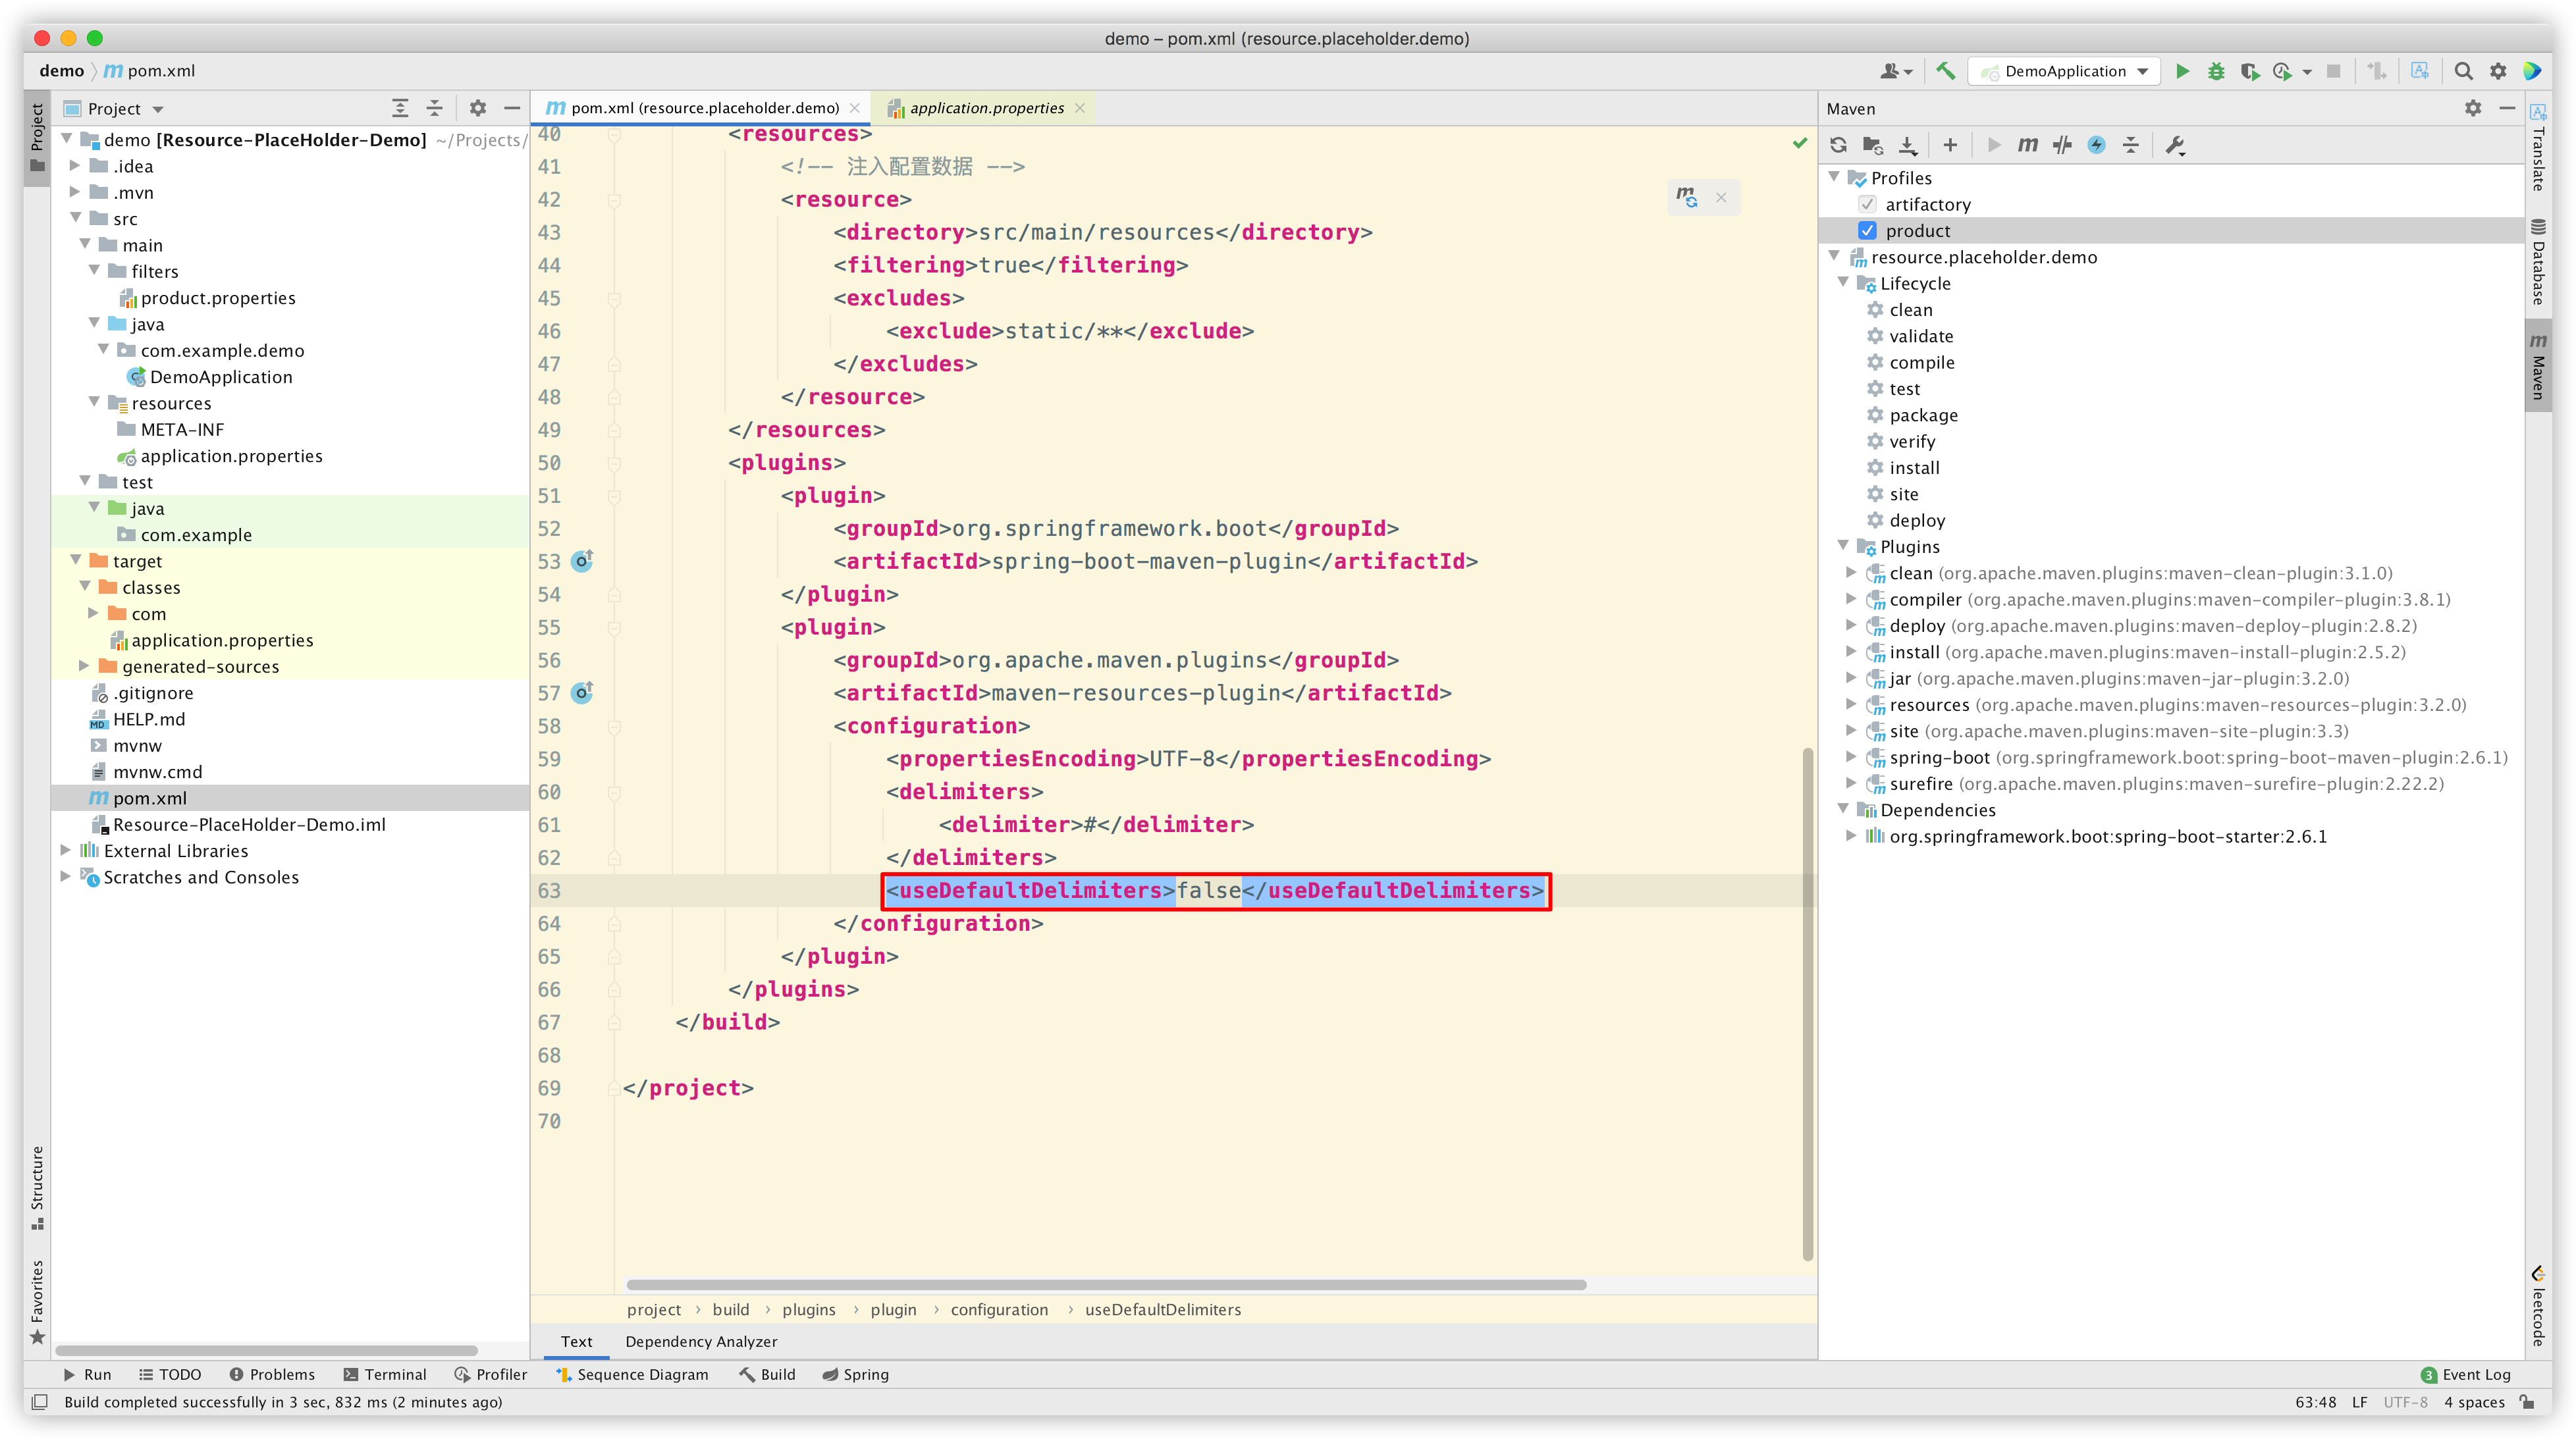
继续实验,把 useDefaultDelimiters 改回 false:
Reimport Maven 后,再次 build,看看效果:
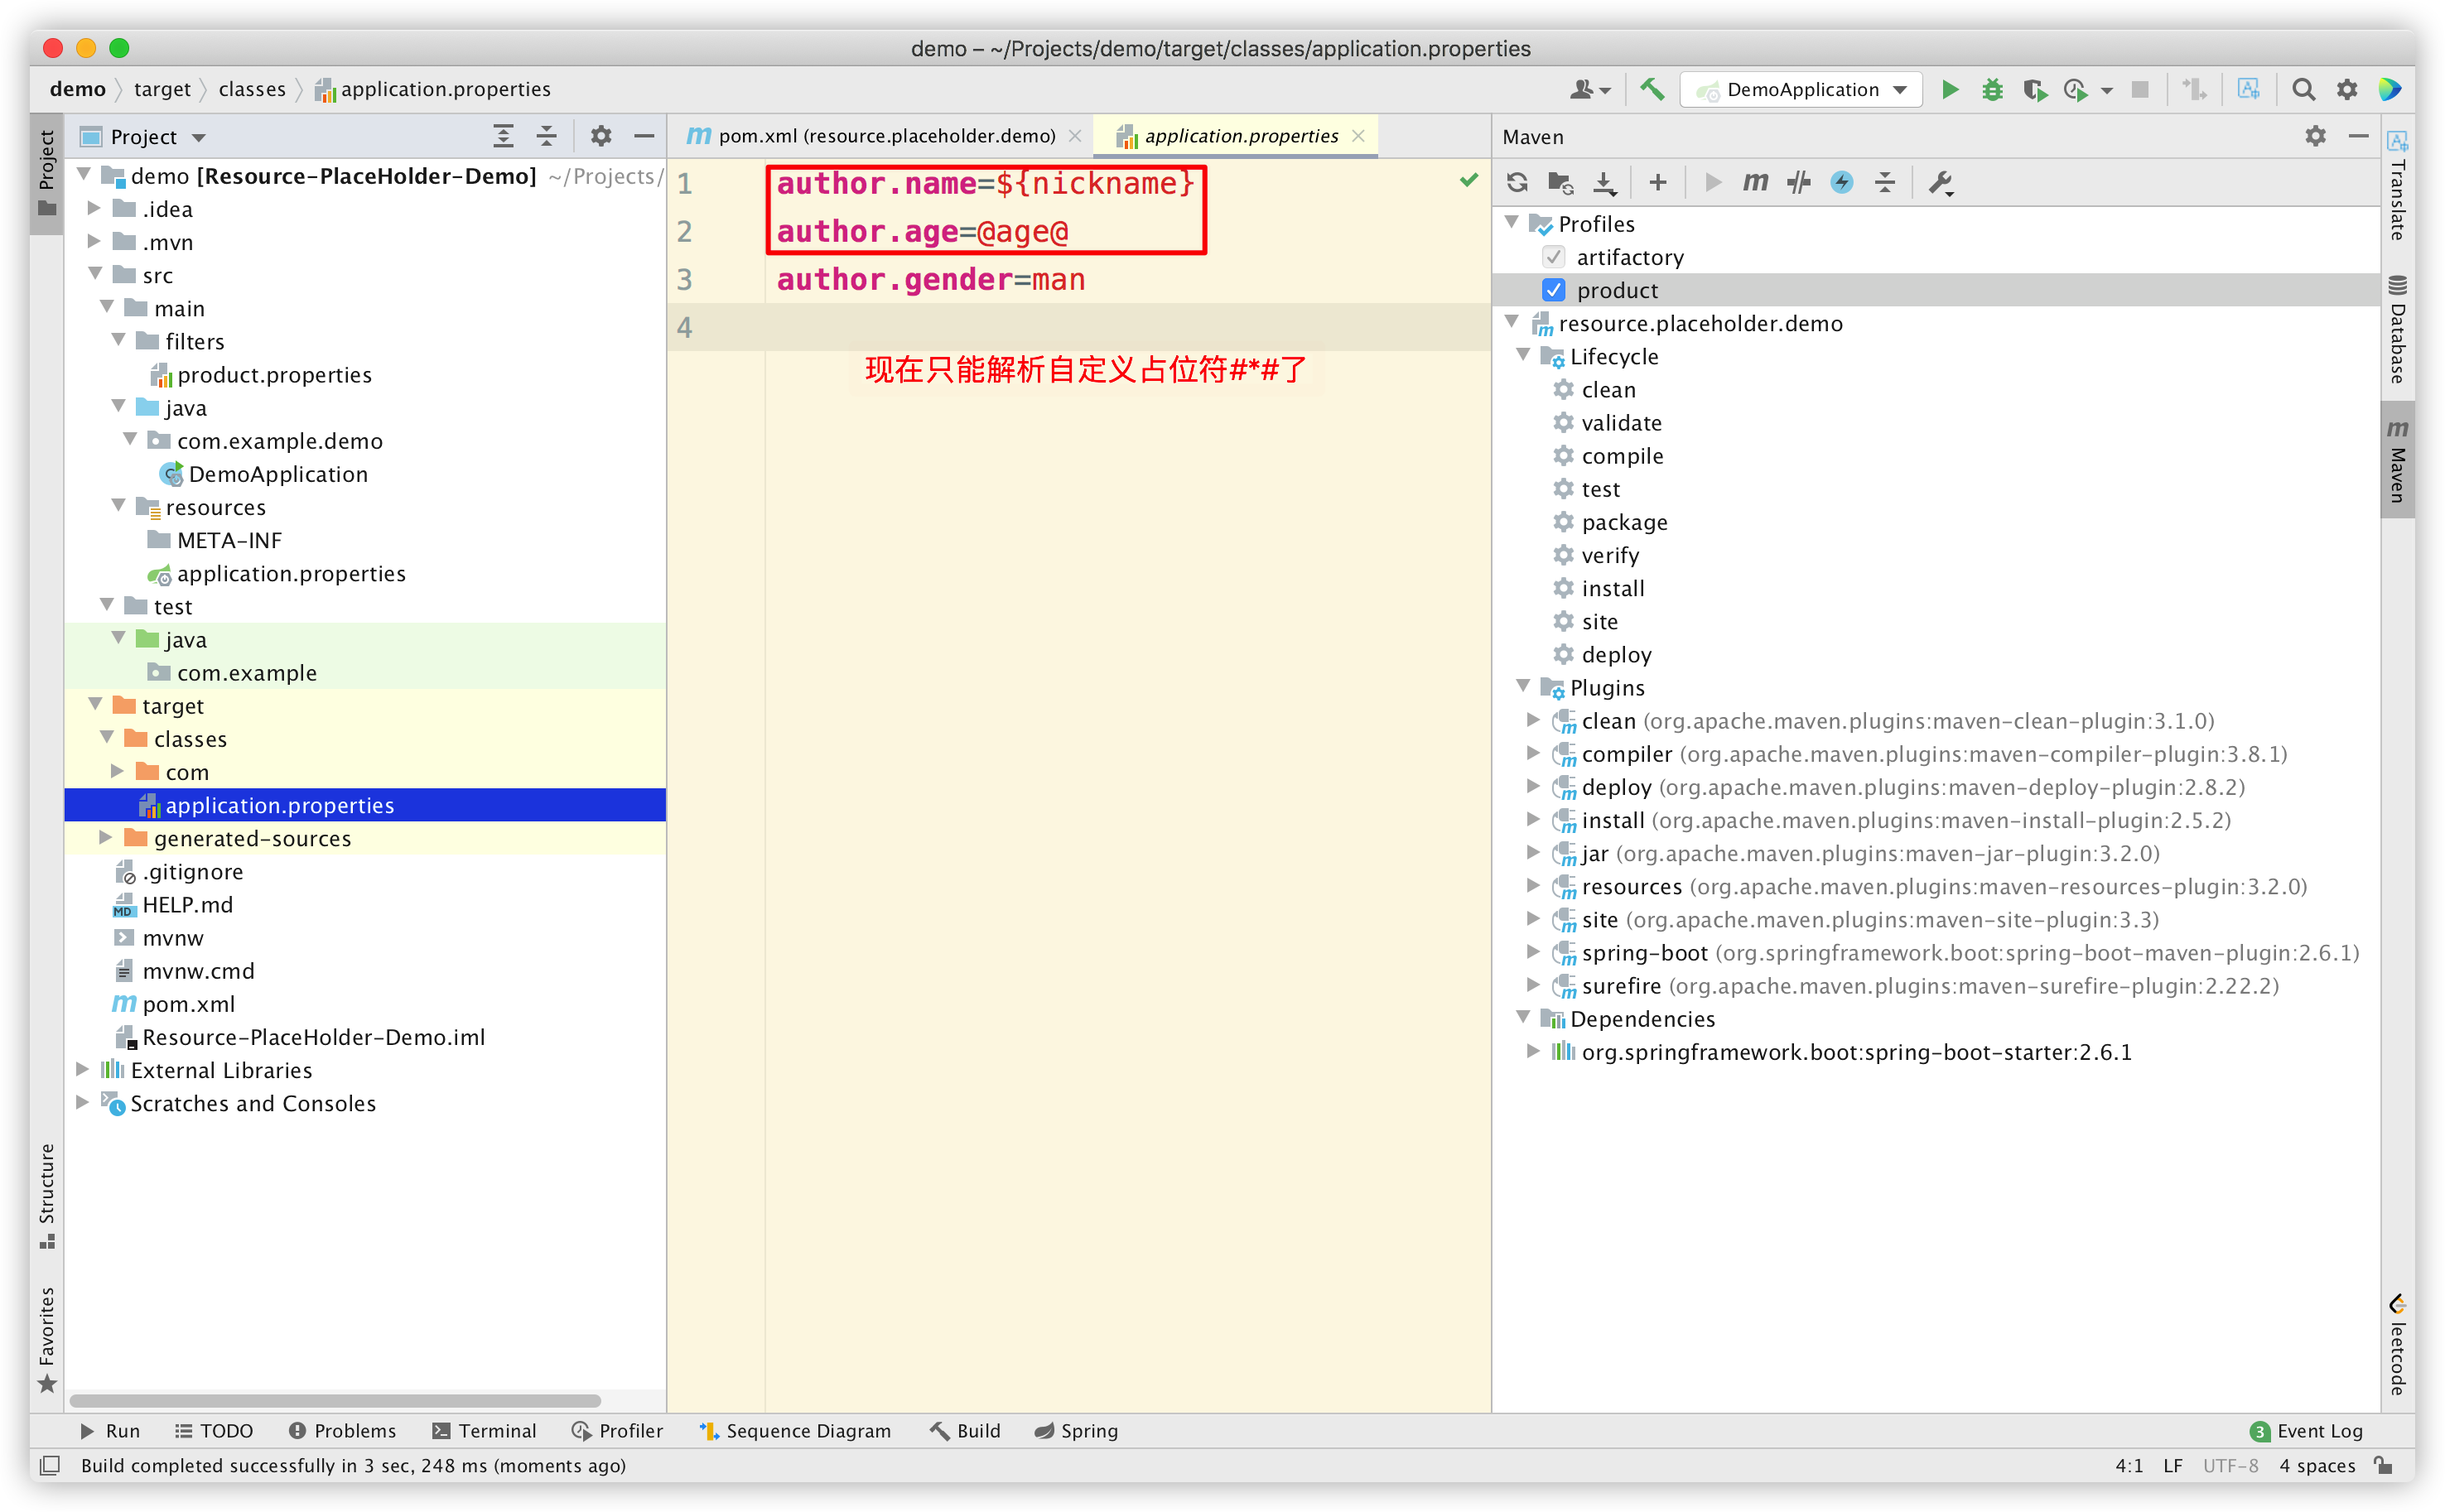
我们发现,现在只能解析自定义占位符 #*# 了,而 ${*} 和 @*@ 没有被解析。
基于上面几项实验的结果,我们可以大胆推测,maven-resources-plugin 插件的:
-
默认占位符有两种,分别是 ${*} 和 @*@
-
配置项 useDefaultDelimiters,可以控制是否使用默认占位符
-
配置项 delimiter,既可以写默认占位符,也可以自定义占位符
好了,现在我们需要到 maven-resources-plugin 插件中找一下对应的源码,验证上述猜测是否正确。
源码解析
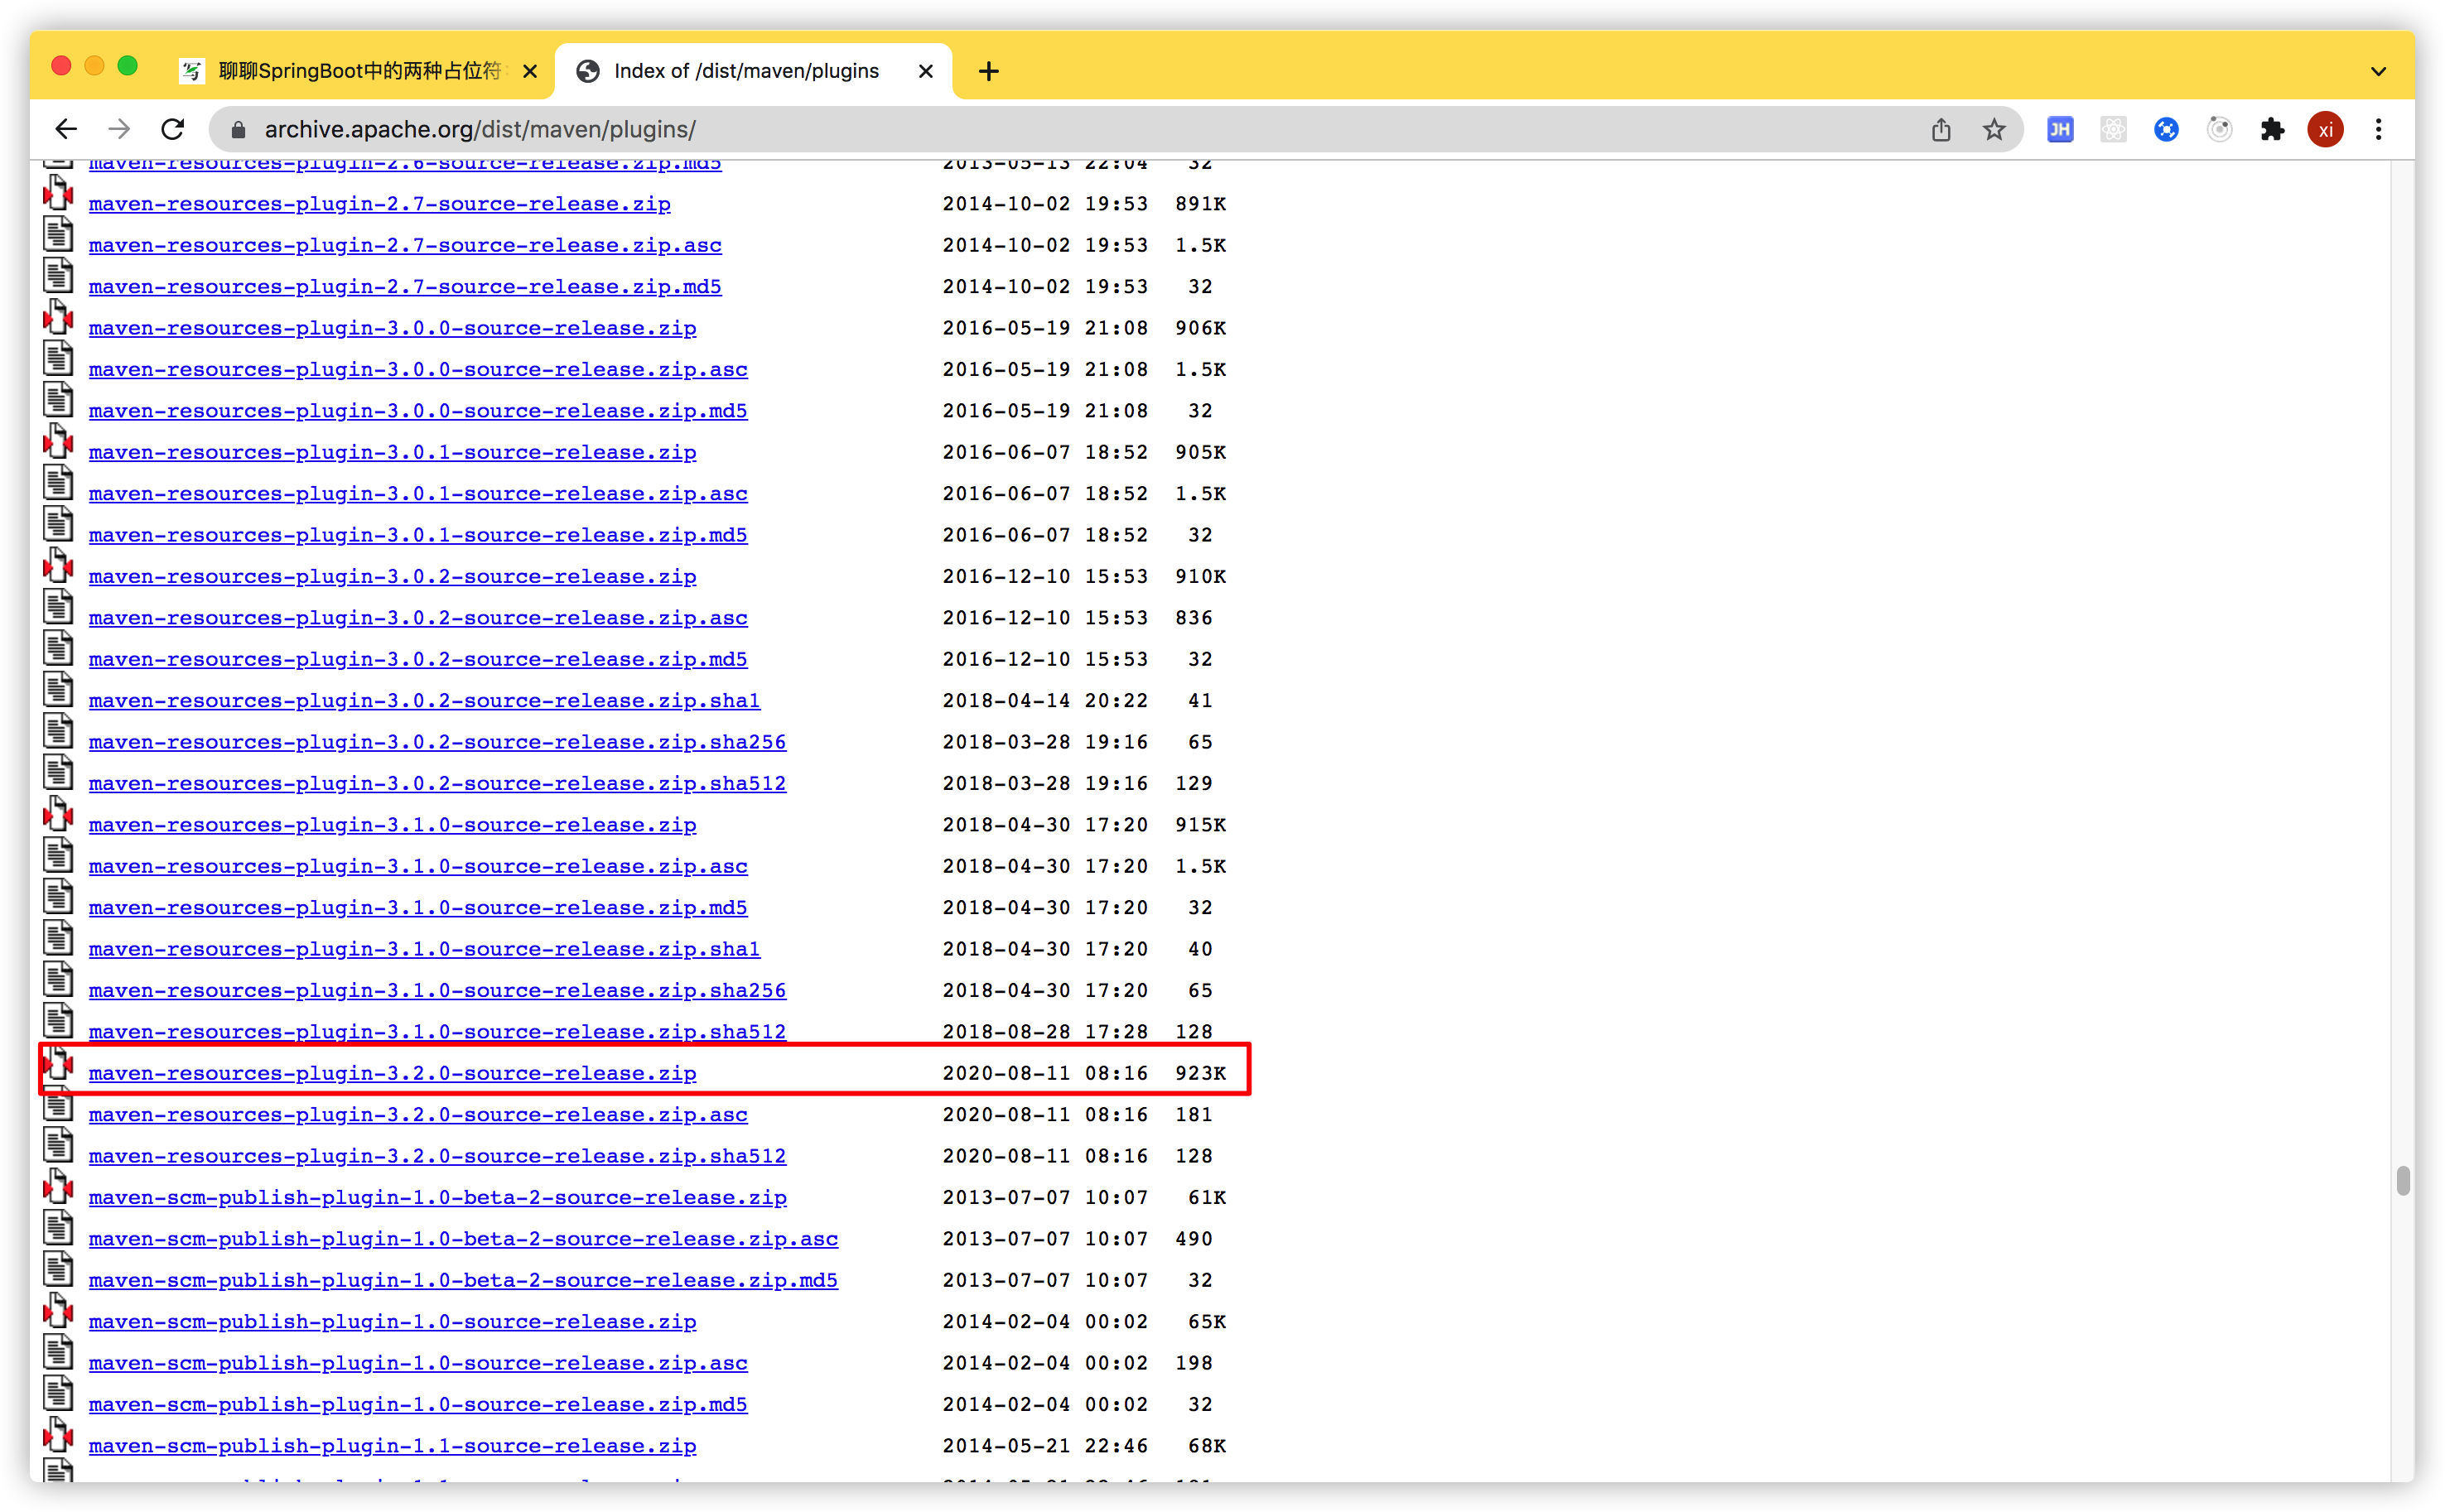
首先我们要下载 maven-resources-plugin 的源码。URL 为https://archive.apache.org/dist/maven/plugins/
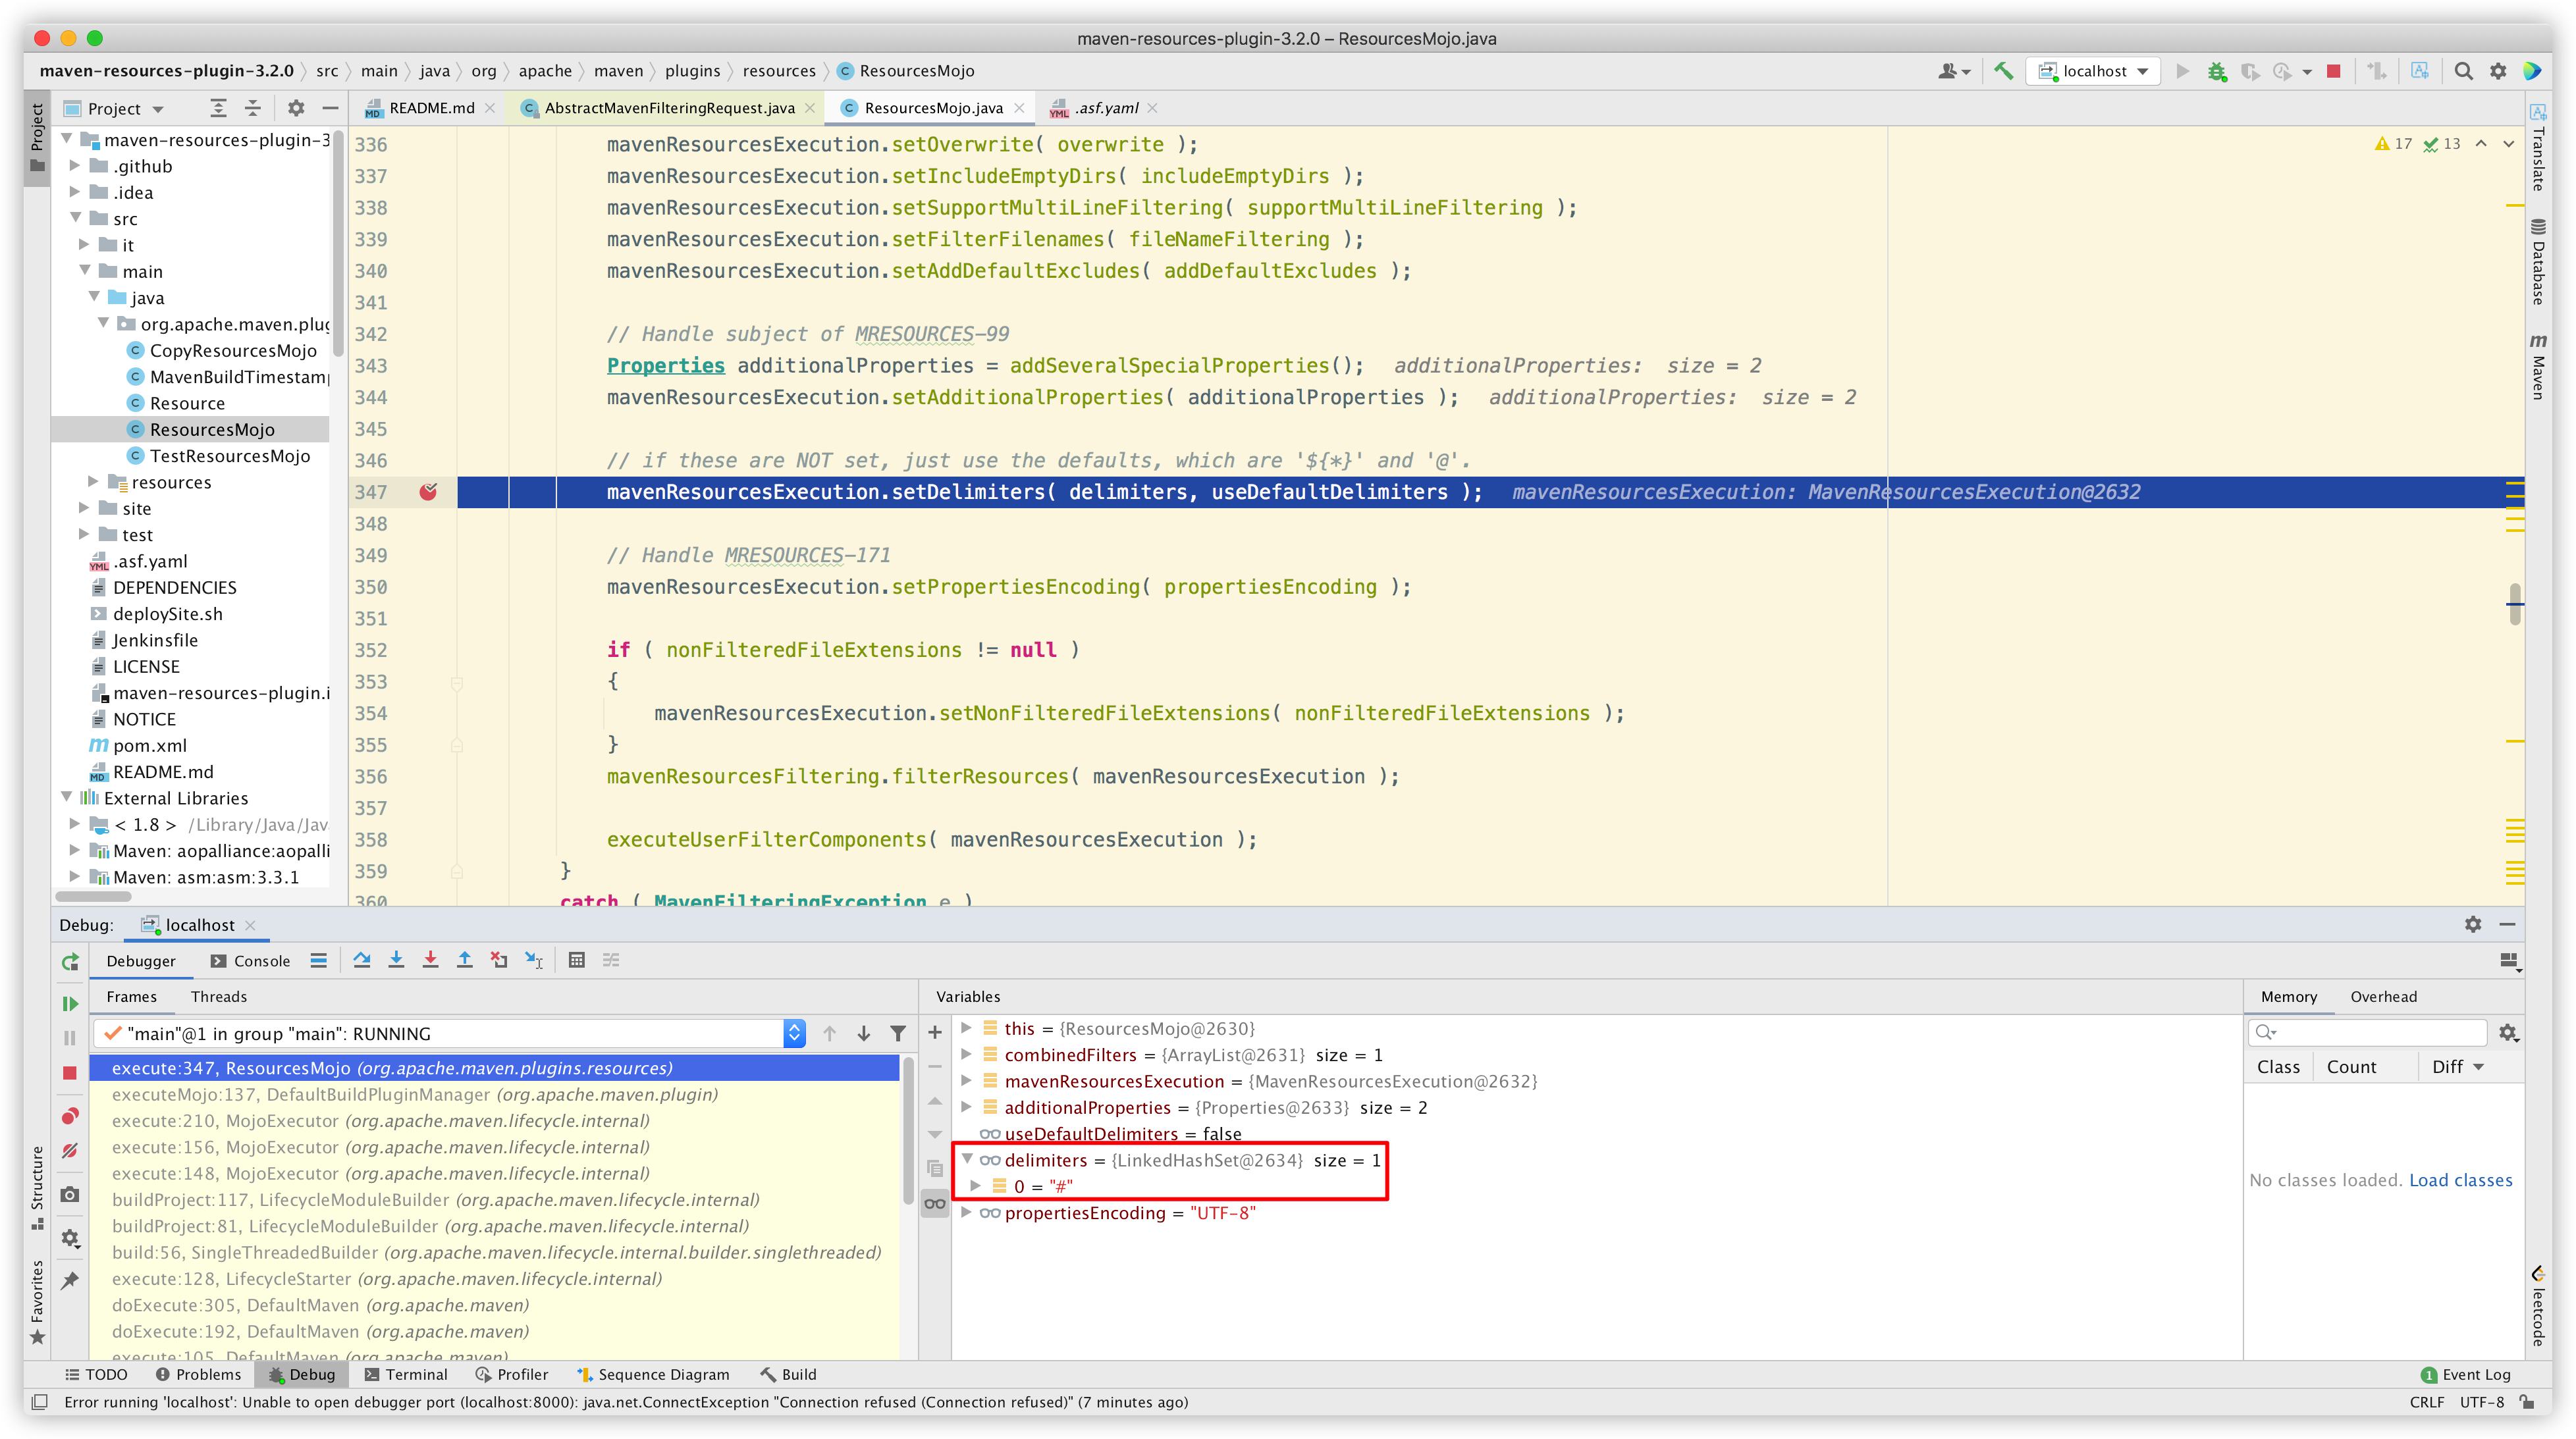
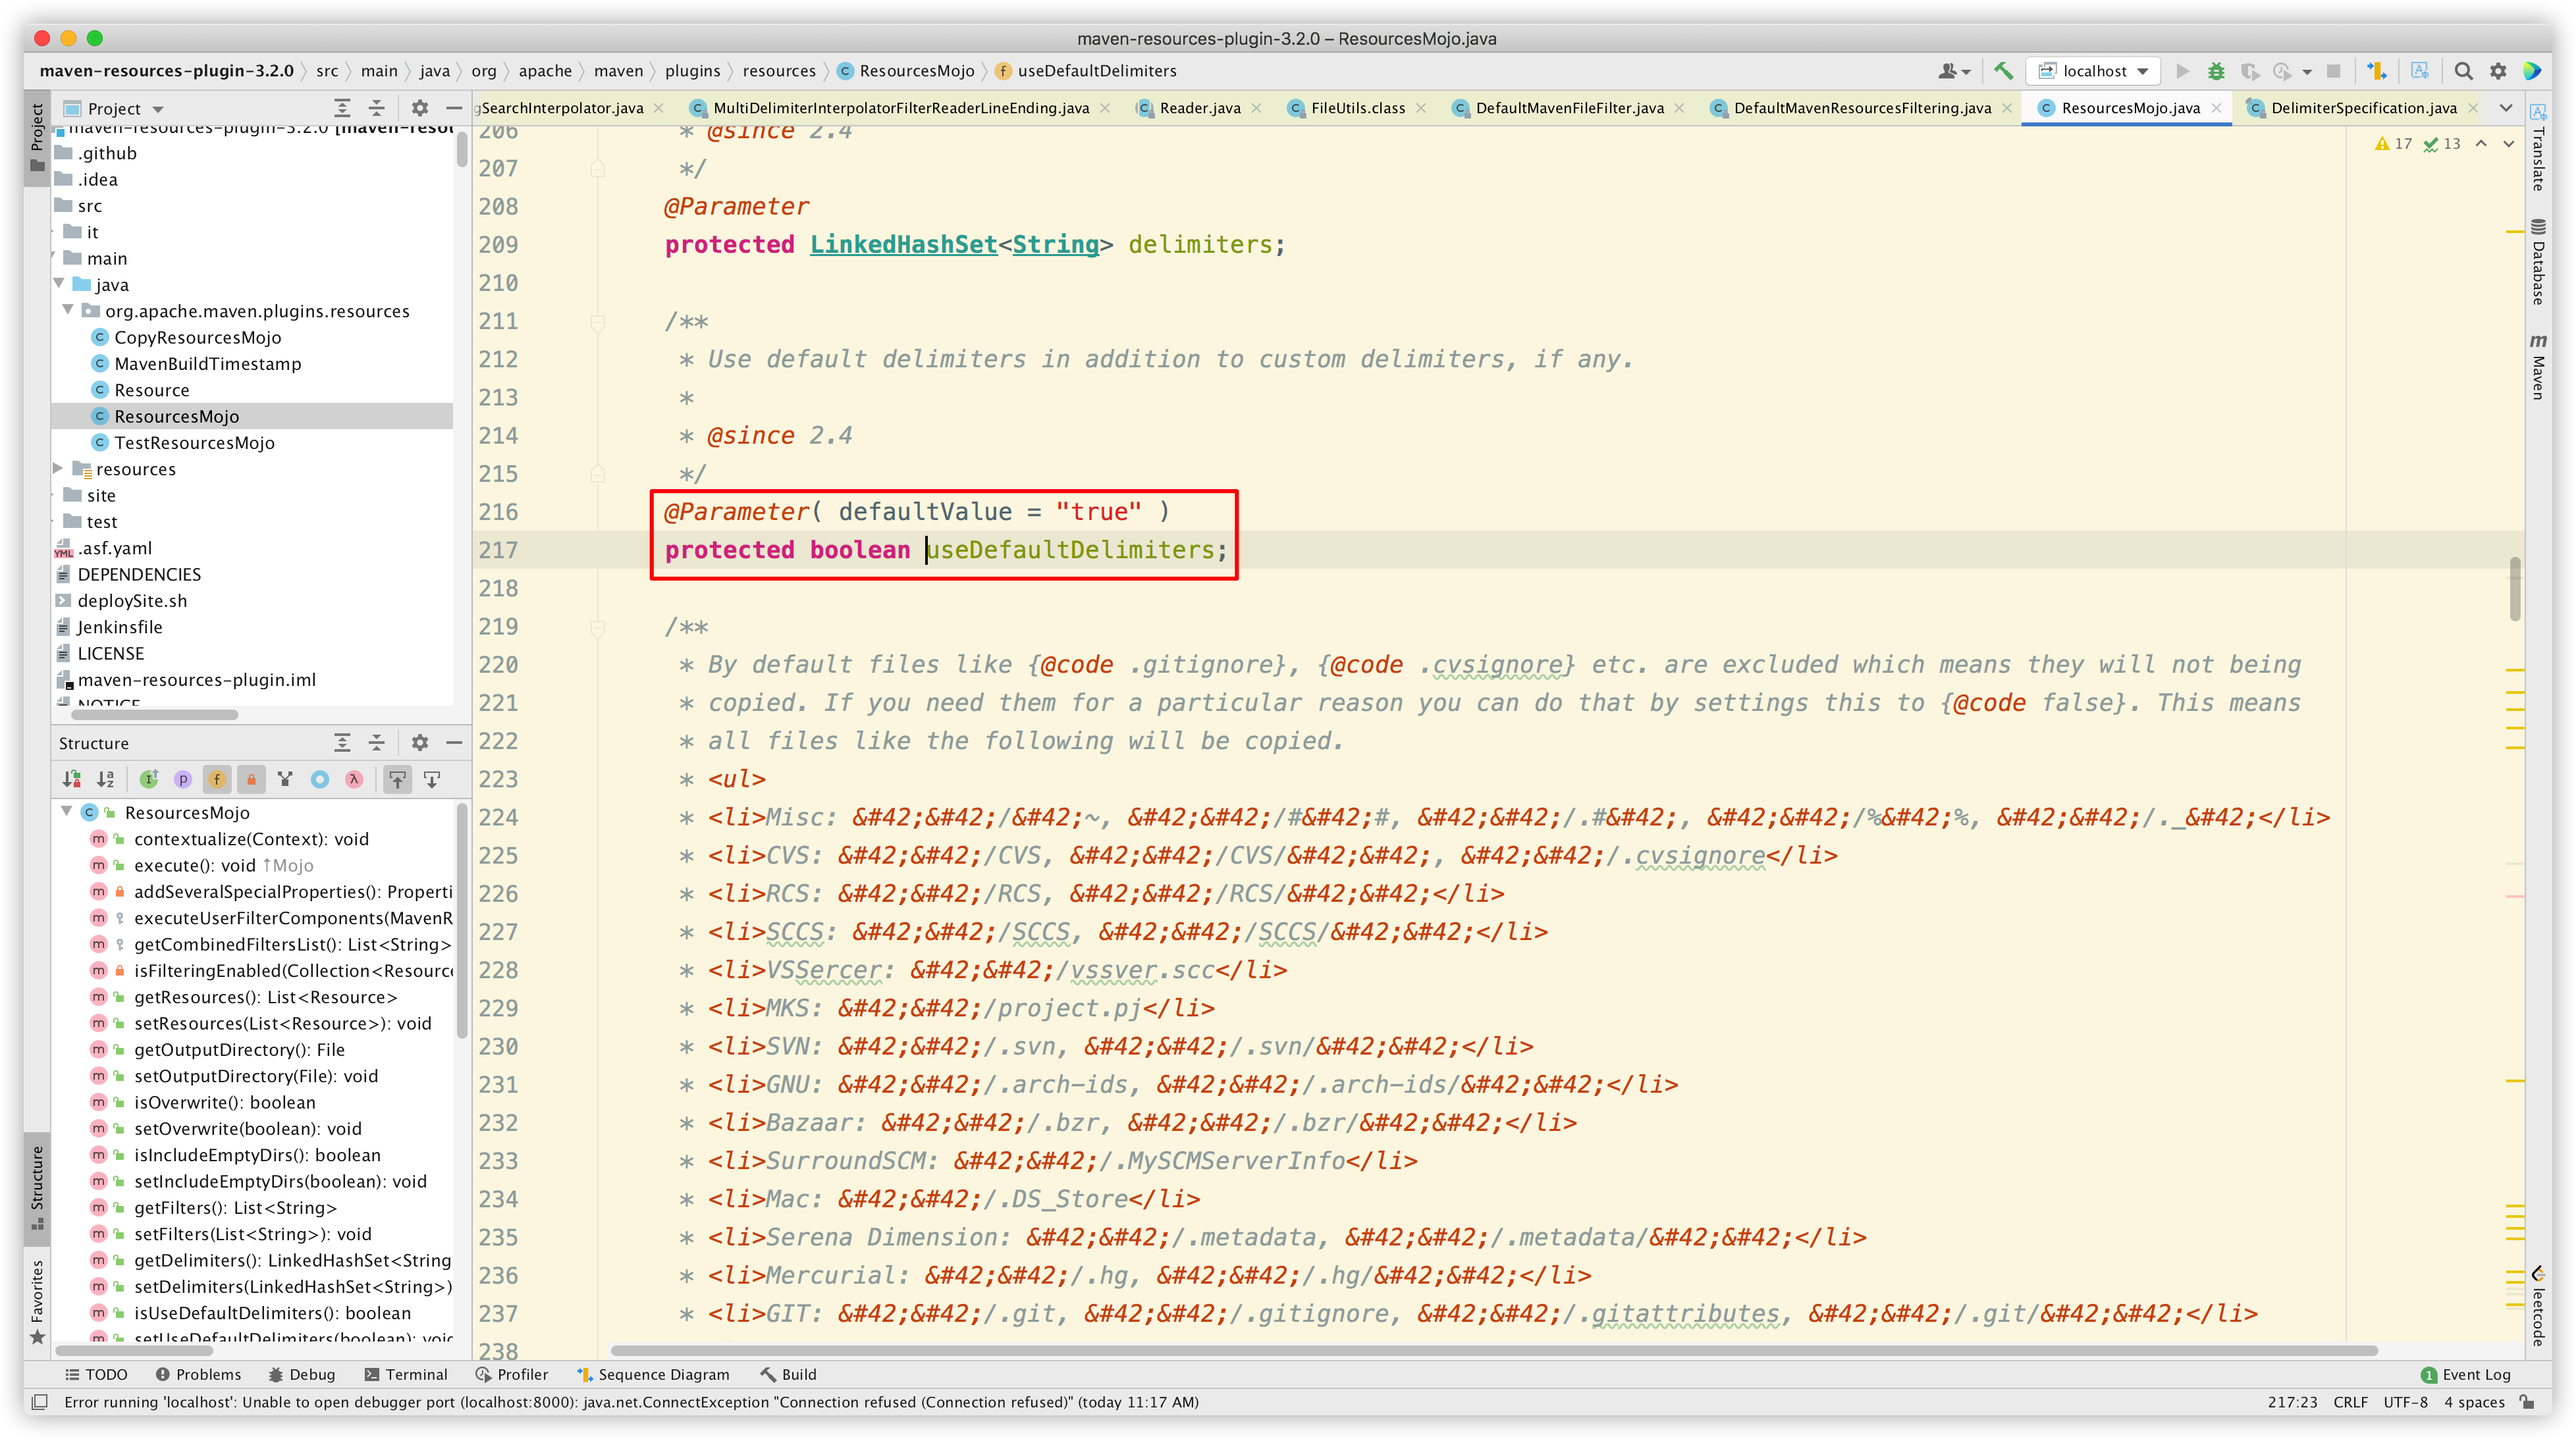
在不熟悉源码的情况下,我们直接通过关键词 useDefaultDelimiters,定位到关键代码 org.apache.maven.shared.filtering.AbstractMavenFilteringRequest#setDelimiters,打上断点进行调试。
PS:可以参考文章 如何调试 Maven 源码和插件源码 学习 Maven 插件的调试方法。具体到本项目,我们可以执行命令 mvnDebug -Pproduct resources:resources 以启动调试。其中的 -P 是为了指定 profile,从而能够找到 ${env}.properties 文件进行配置数据的读取。
我们的第一个断点位于解析 delimiter 的地方:
进到方法内部看看:
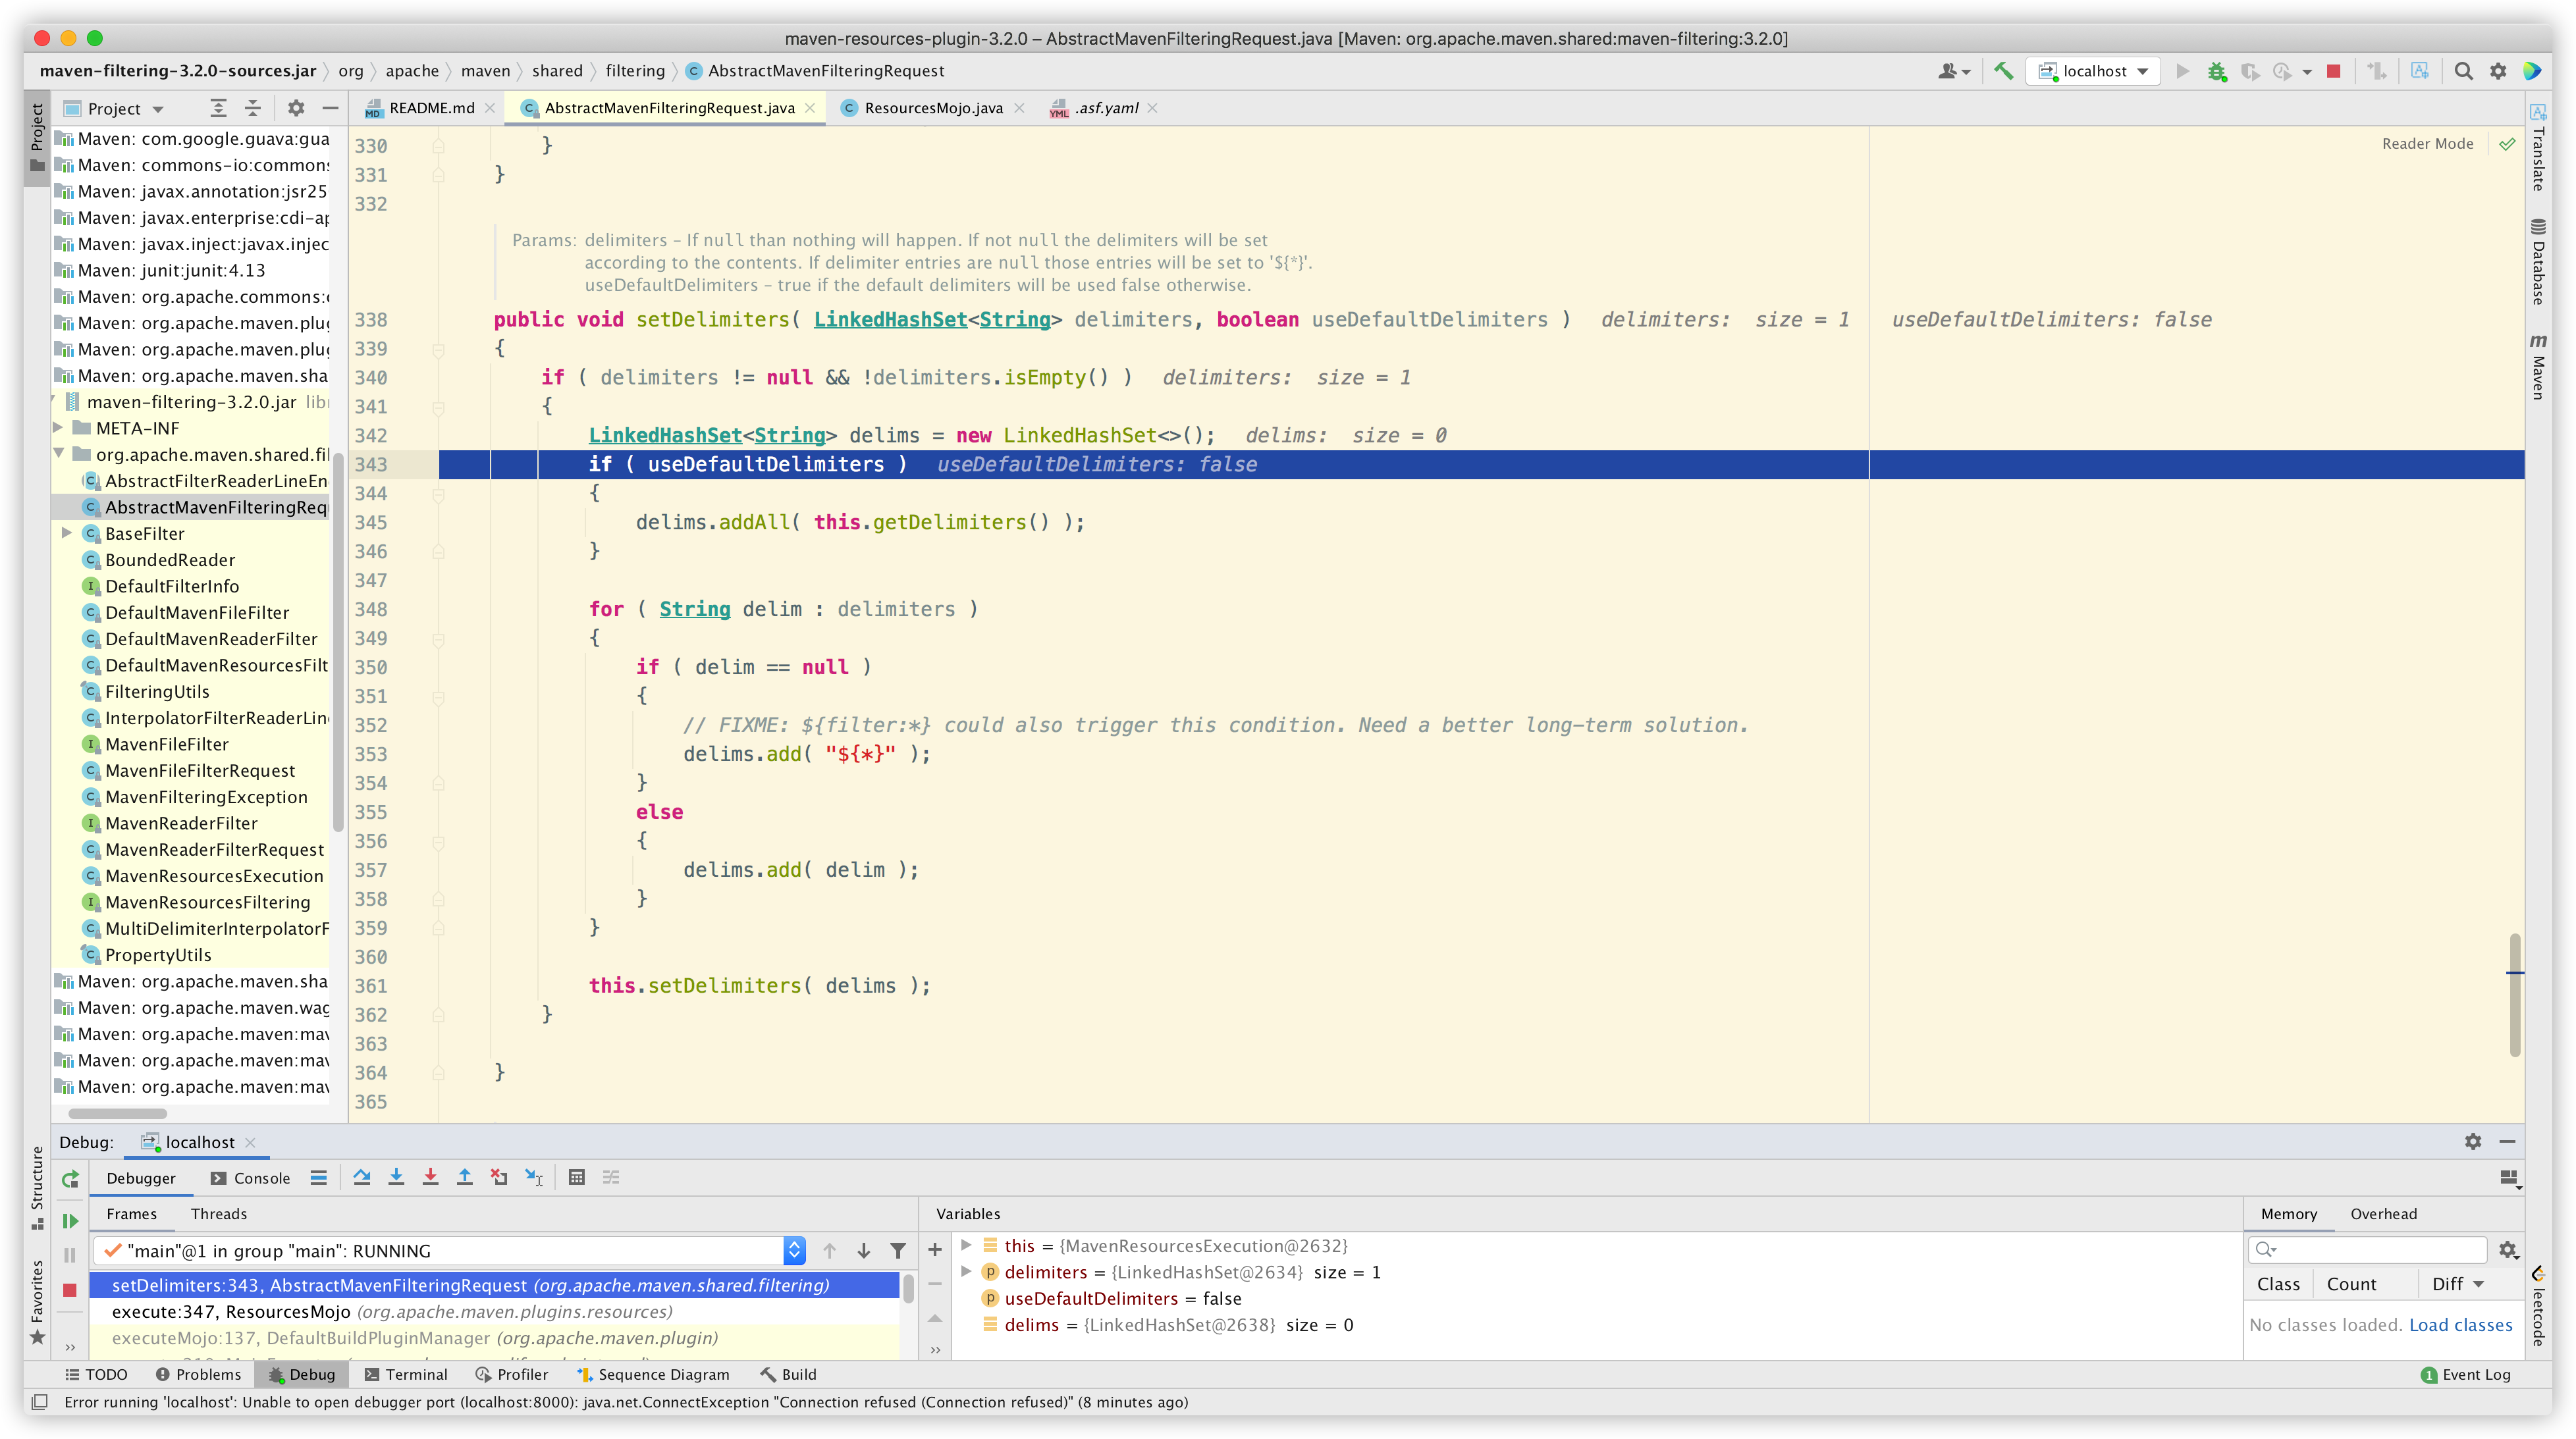
可以看到逻辑非常简单:
检查是否传入了自定义 delimiters:
-
如果没有,setDelimiters 执行将没有任何效果;也就是说,一定还有默认的值,稍后我们去验证。
-
如果有,那么进行解析(如果为 null,默认使用 ${*} )。同时会判断 useDefaultDelimiters 是否为 true,若为 true,就把默认 delimiters 加到结果集中。
那么我们顺着找一下默认 delimiters:

发现是在初始化时设置的。
继续追踪,可以看到 delimiters 被解析为占位符:
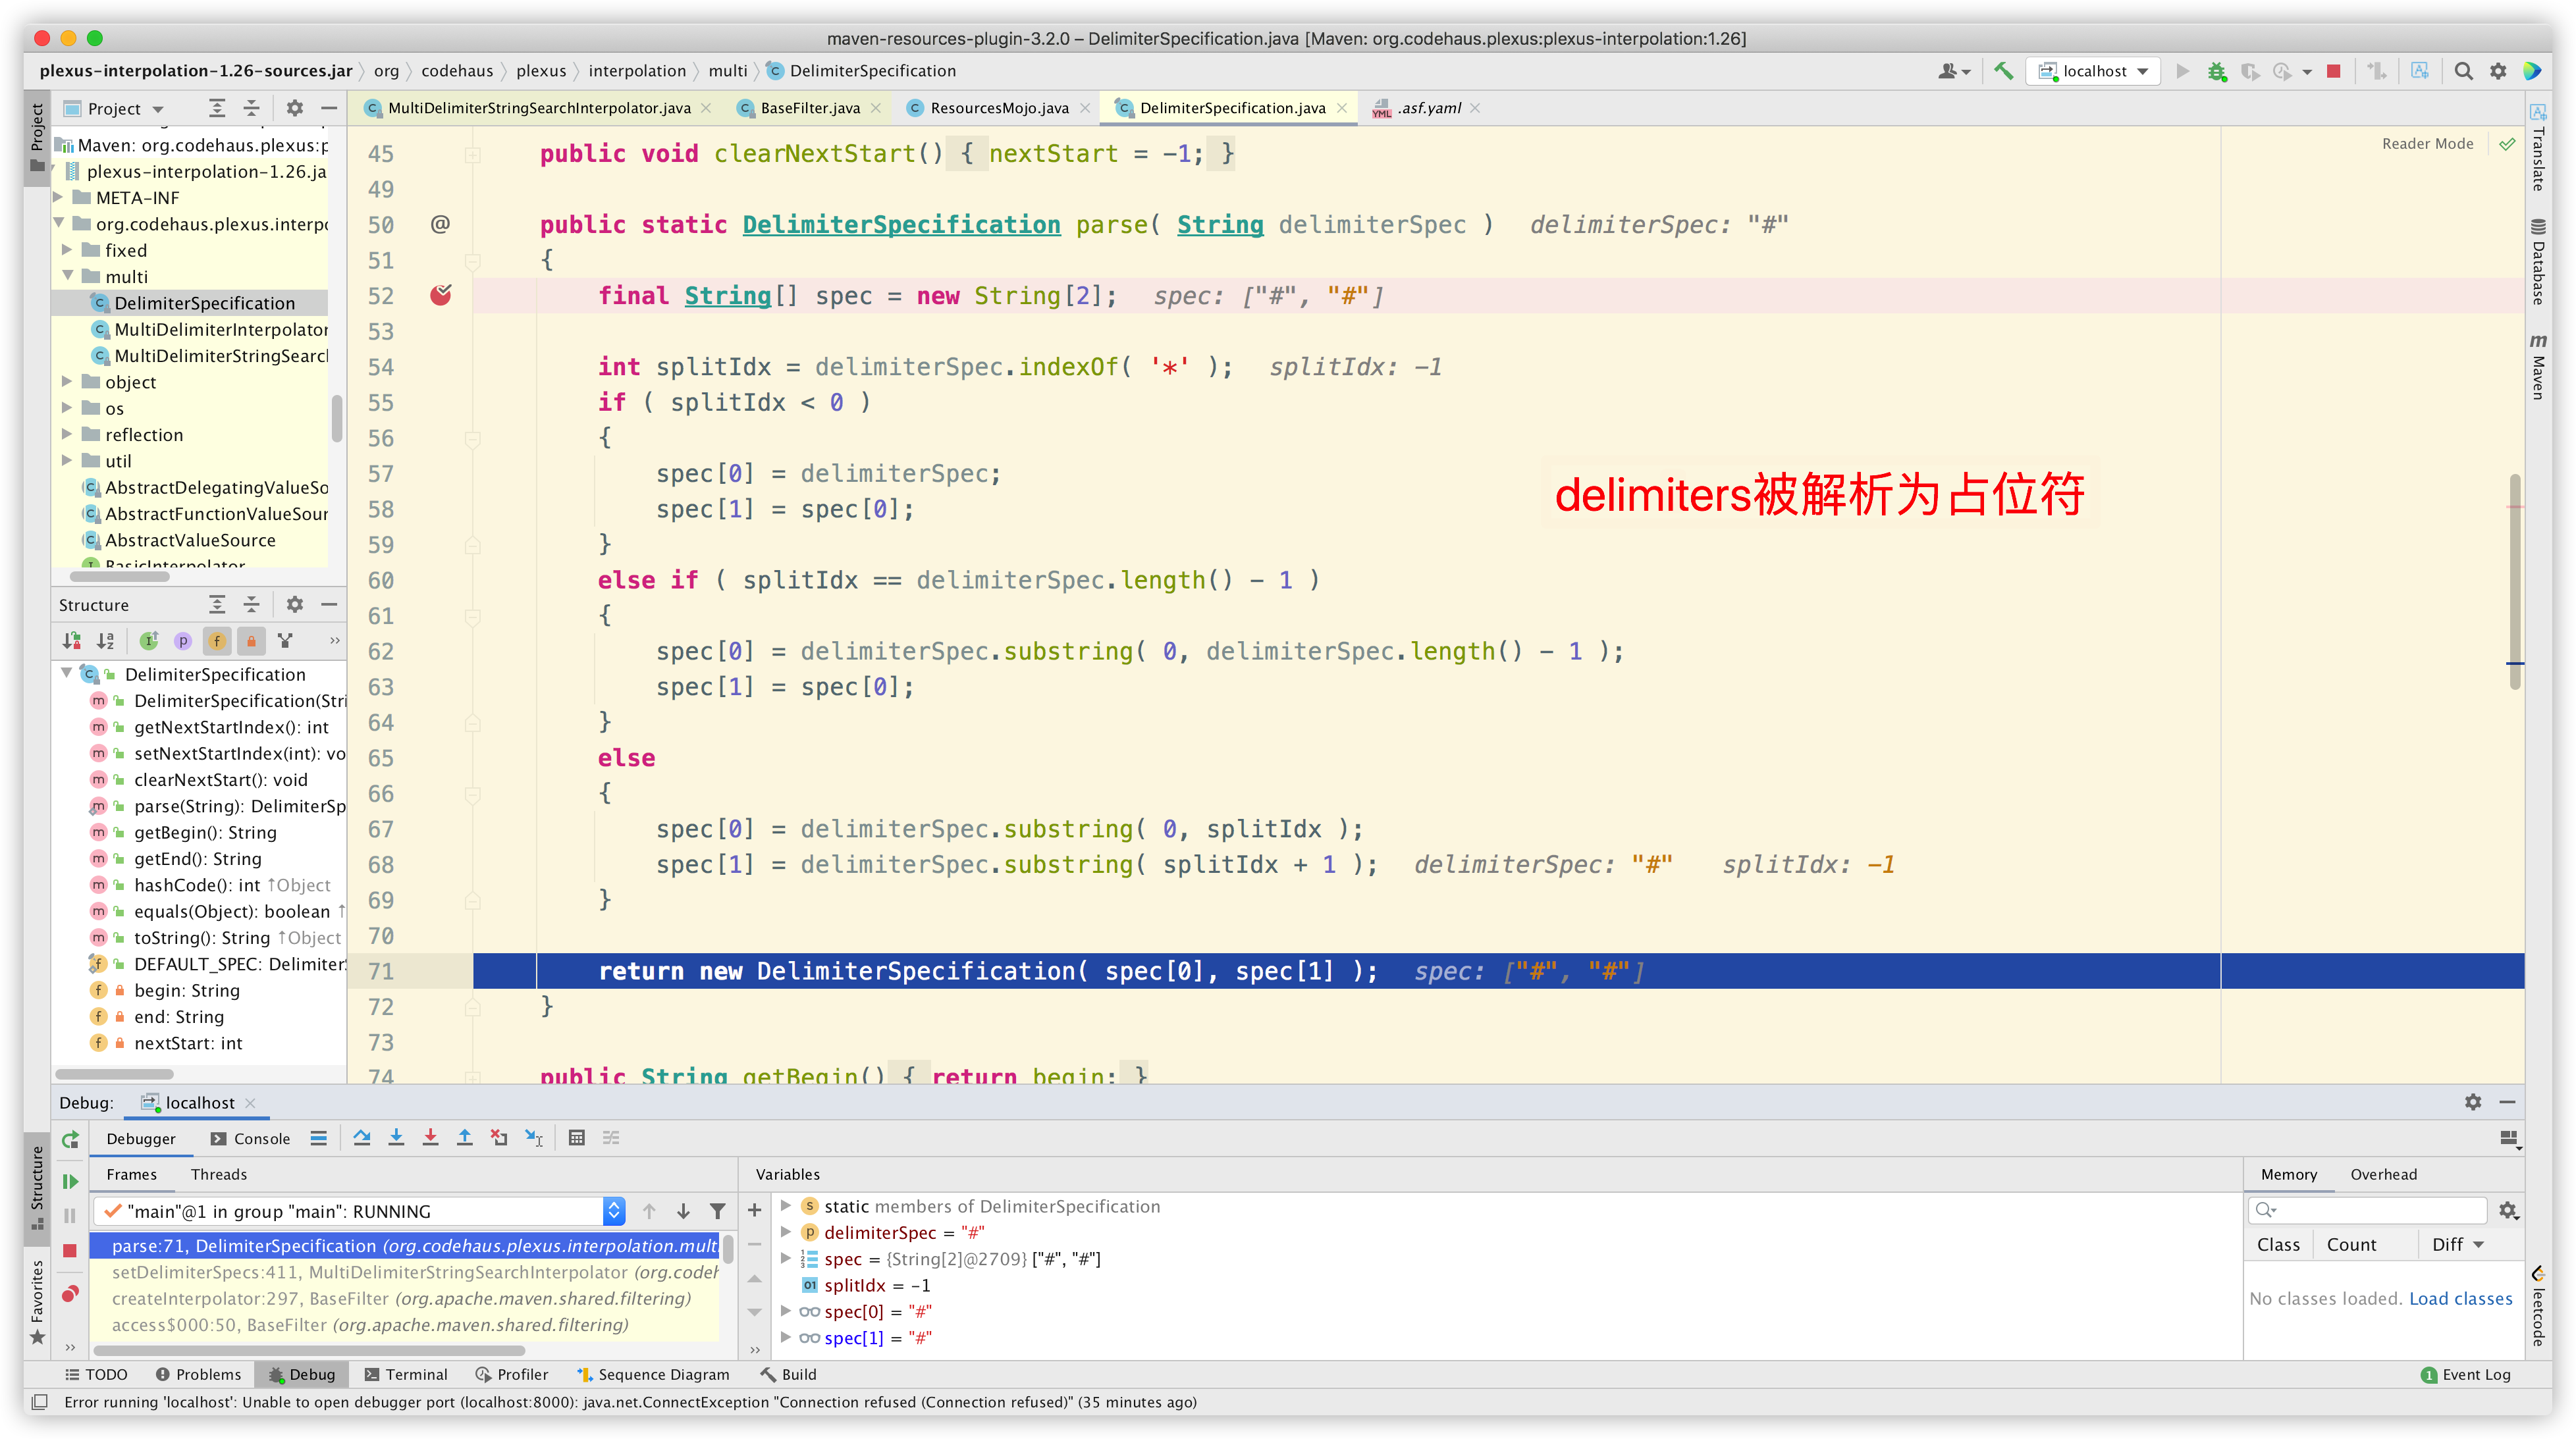
PS:maven-resources-plugin 插件注释中有相关说明:
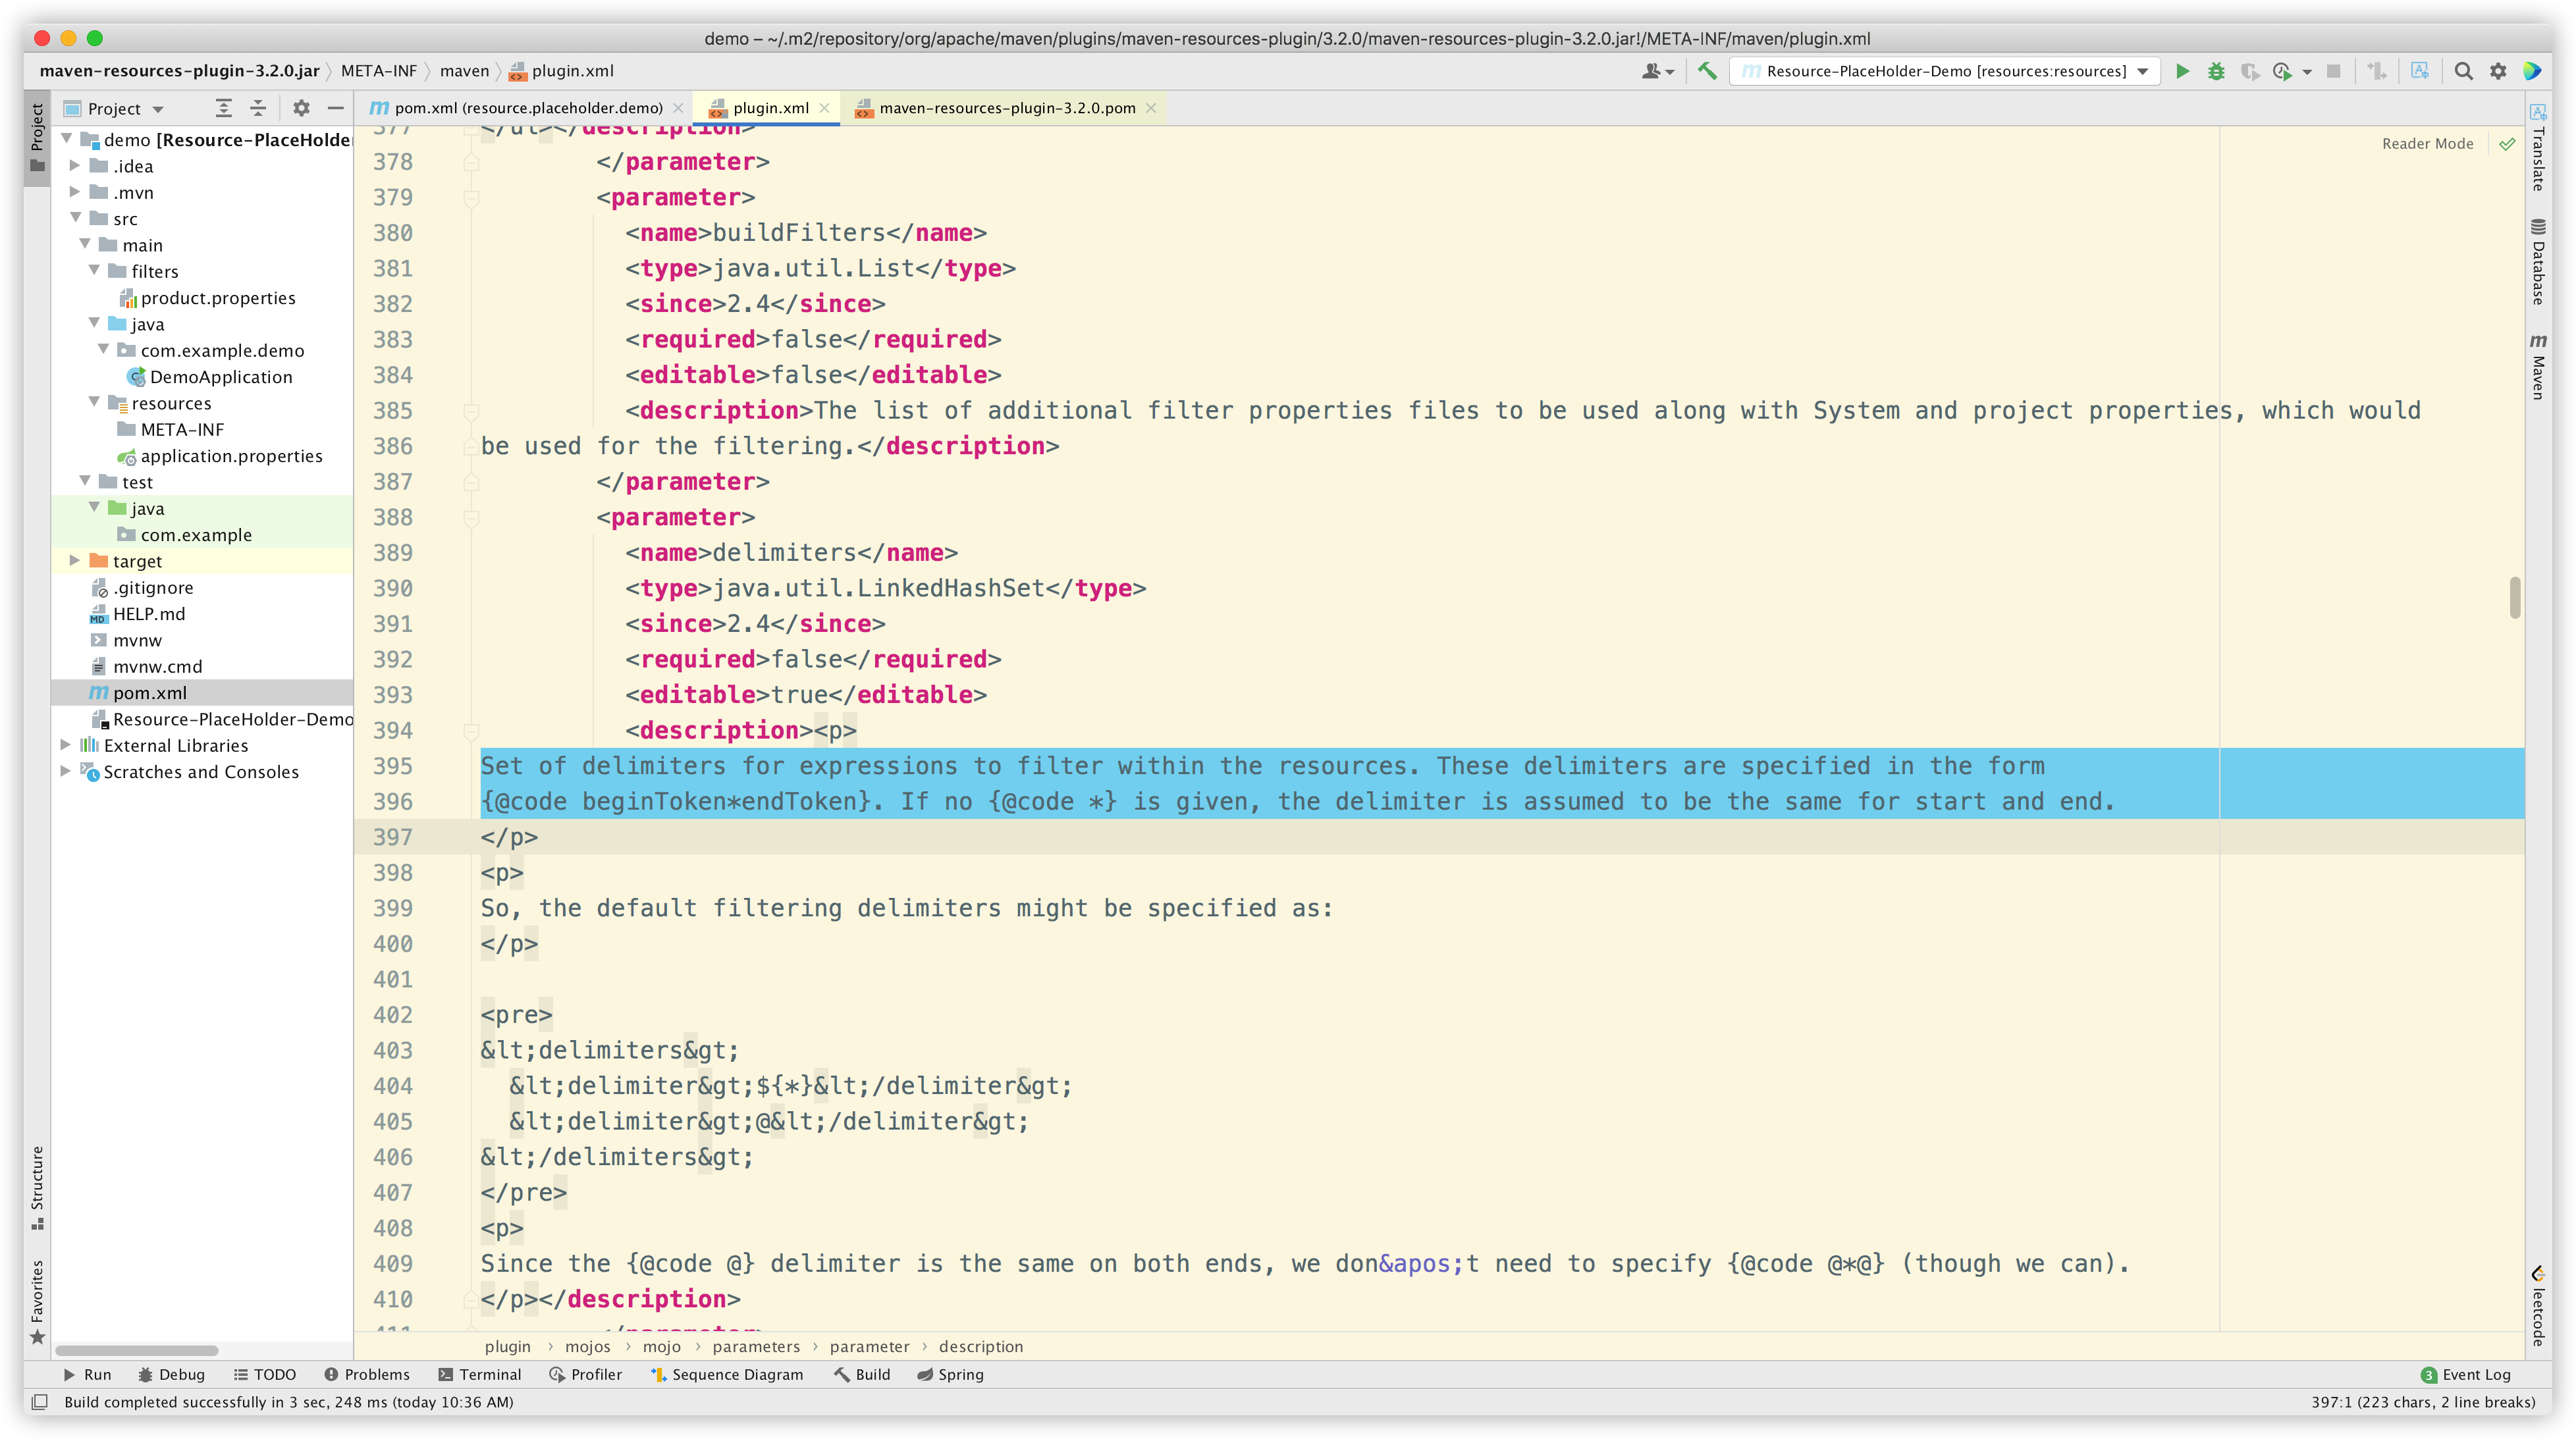
然后开始逐字符读取文件 application.properties,只有发现字符匹配占位符时才处理:
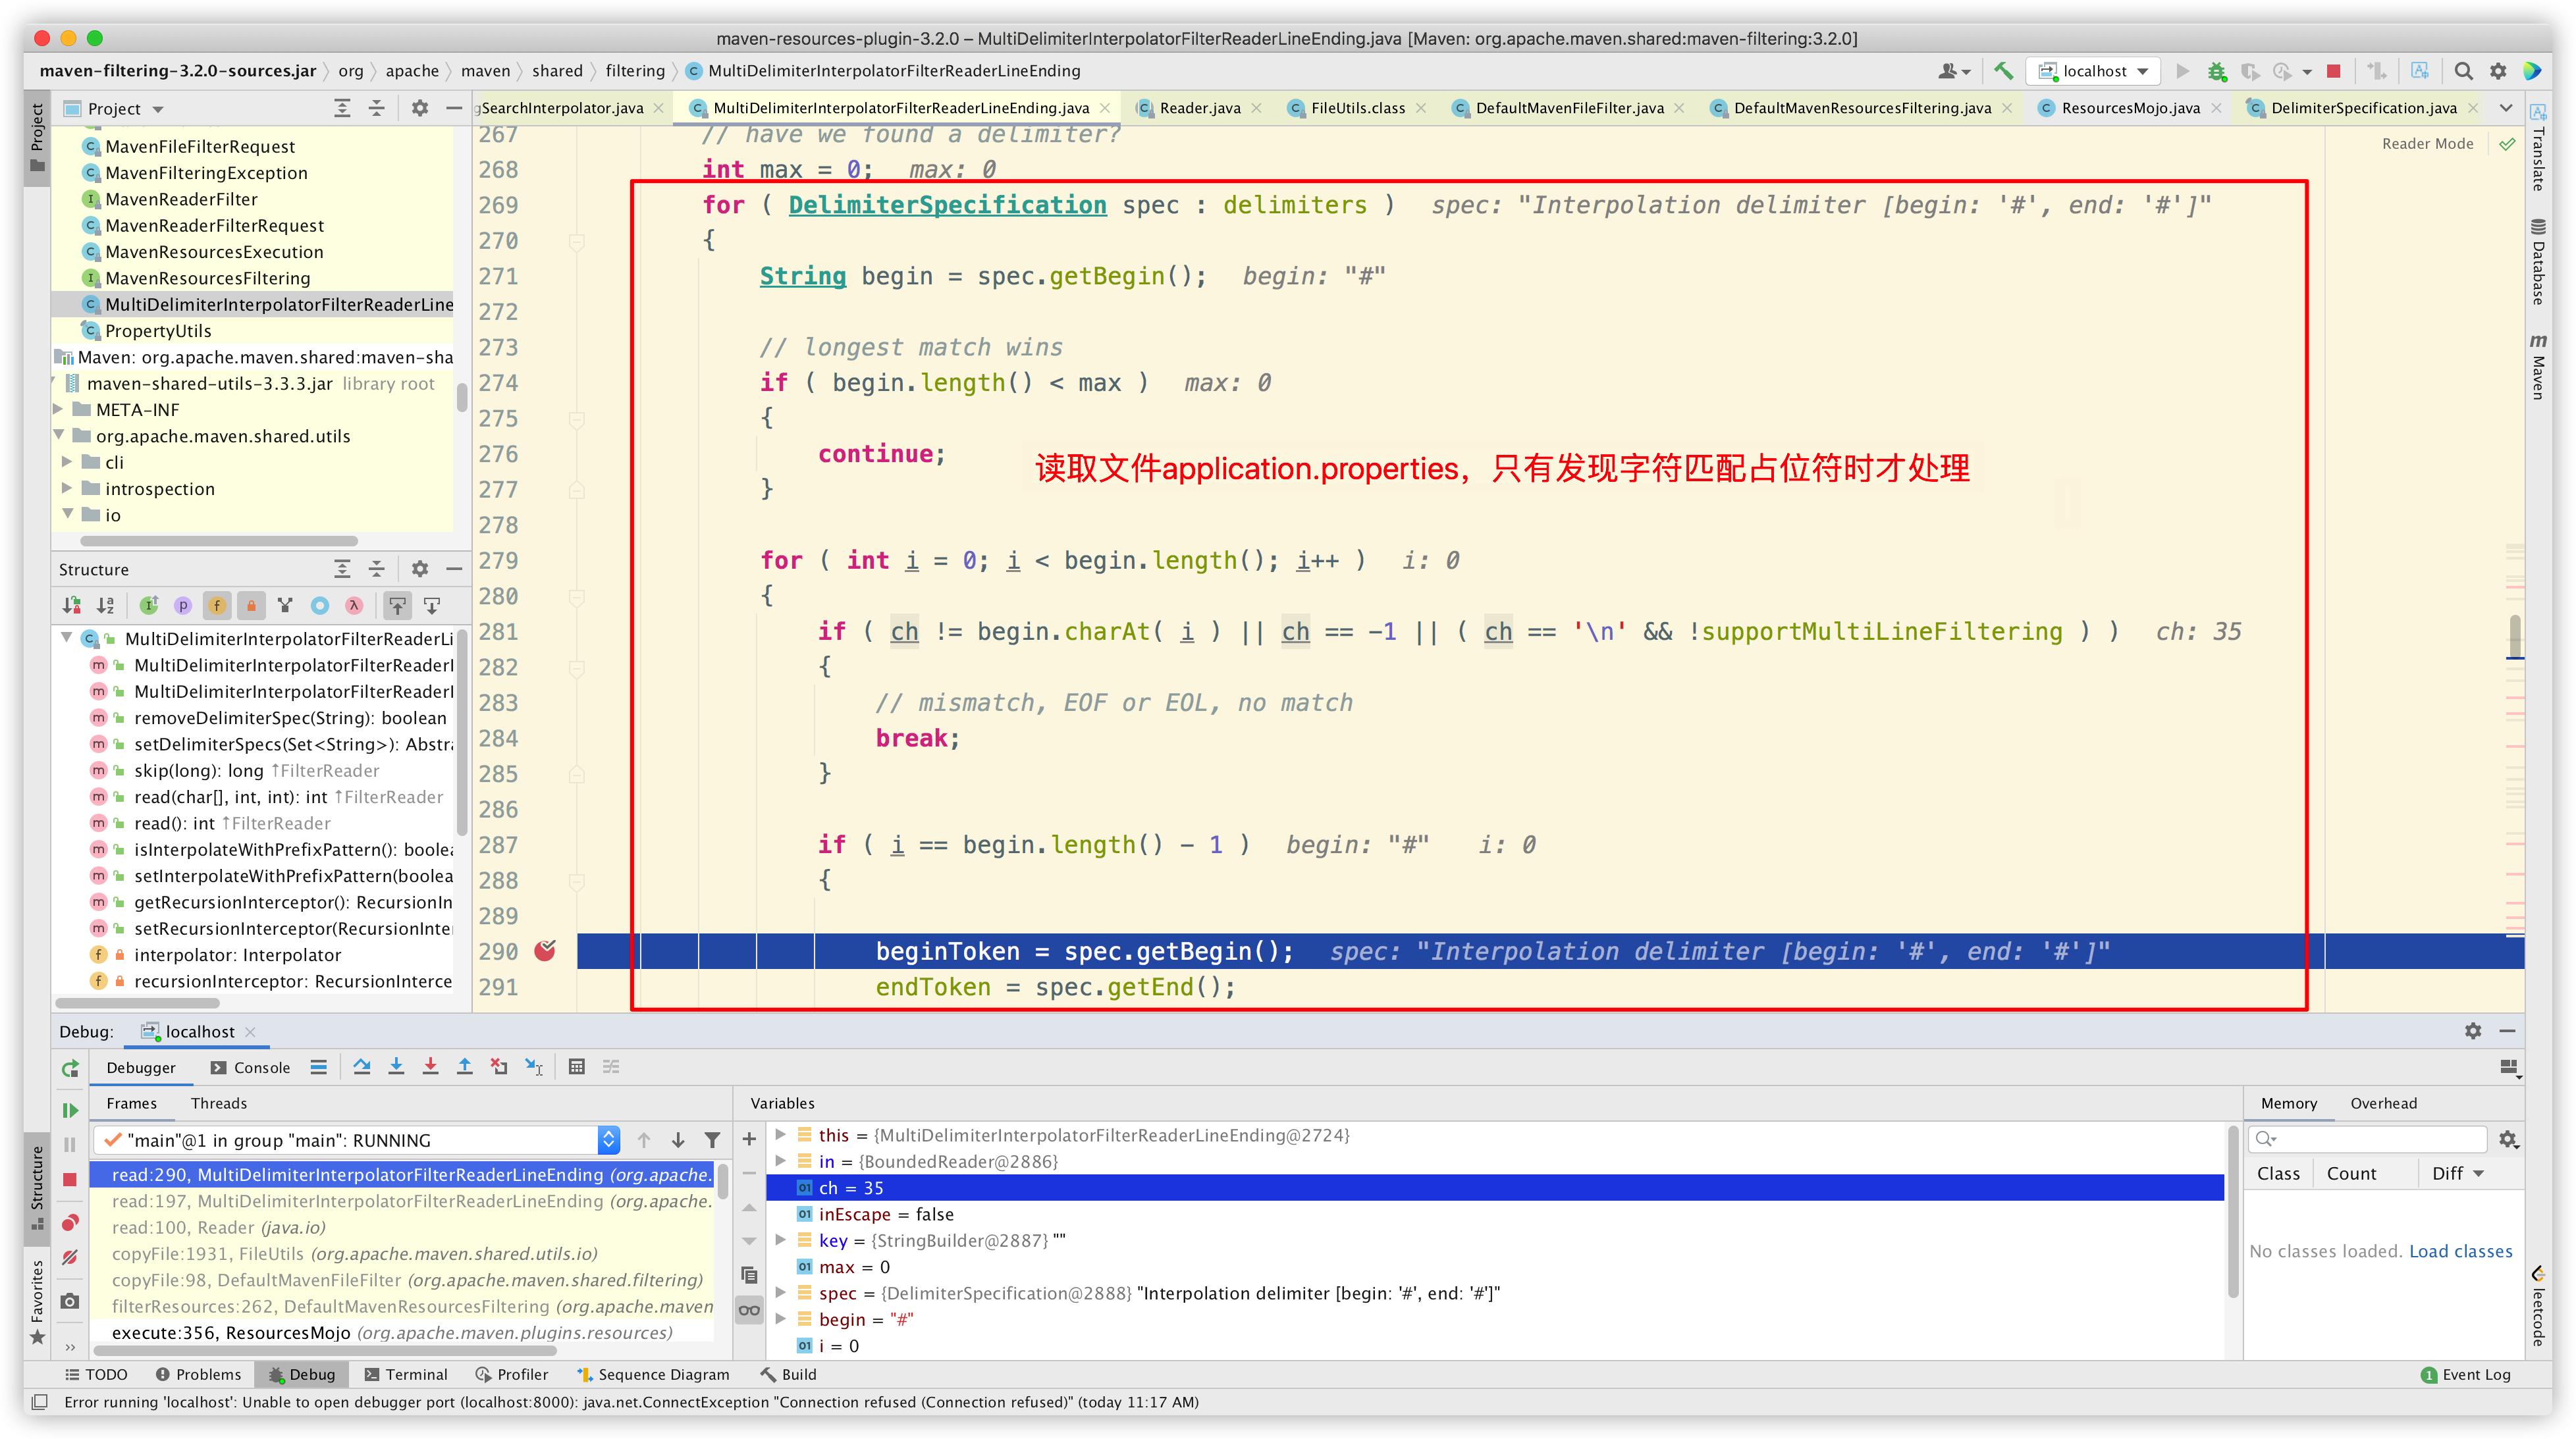
由于我们自定义了 delimiter 为 #,并且把 useDefaultDelimiters 置为 false,因此 delimiters 中只有 #*# 这一种占位符,因此只有 # 这个字符才会被解析。而 ${ 、} 和 @ 都会被无视。
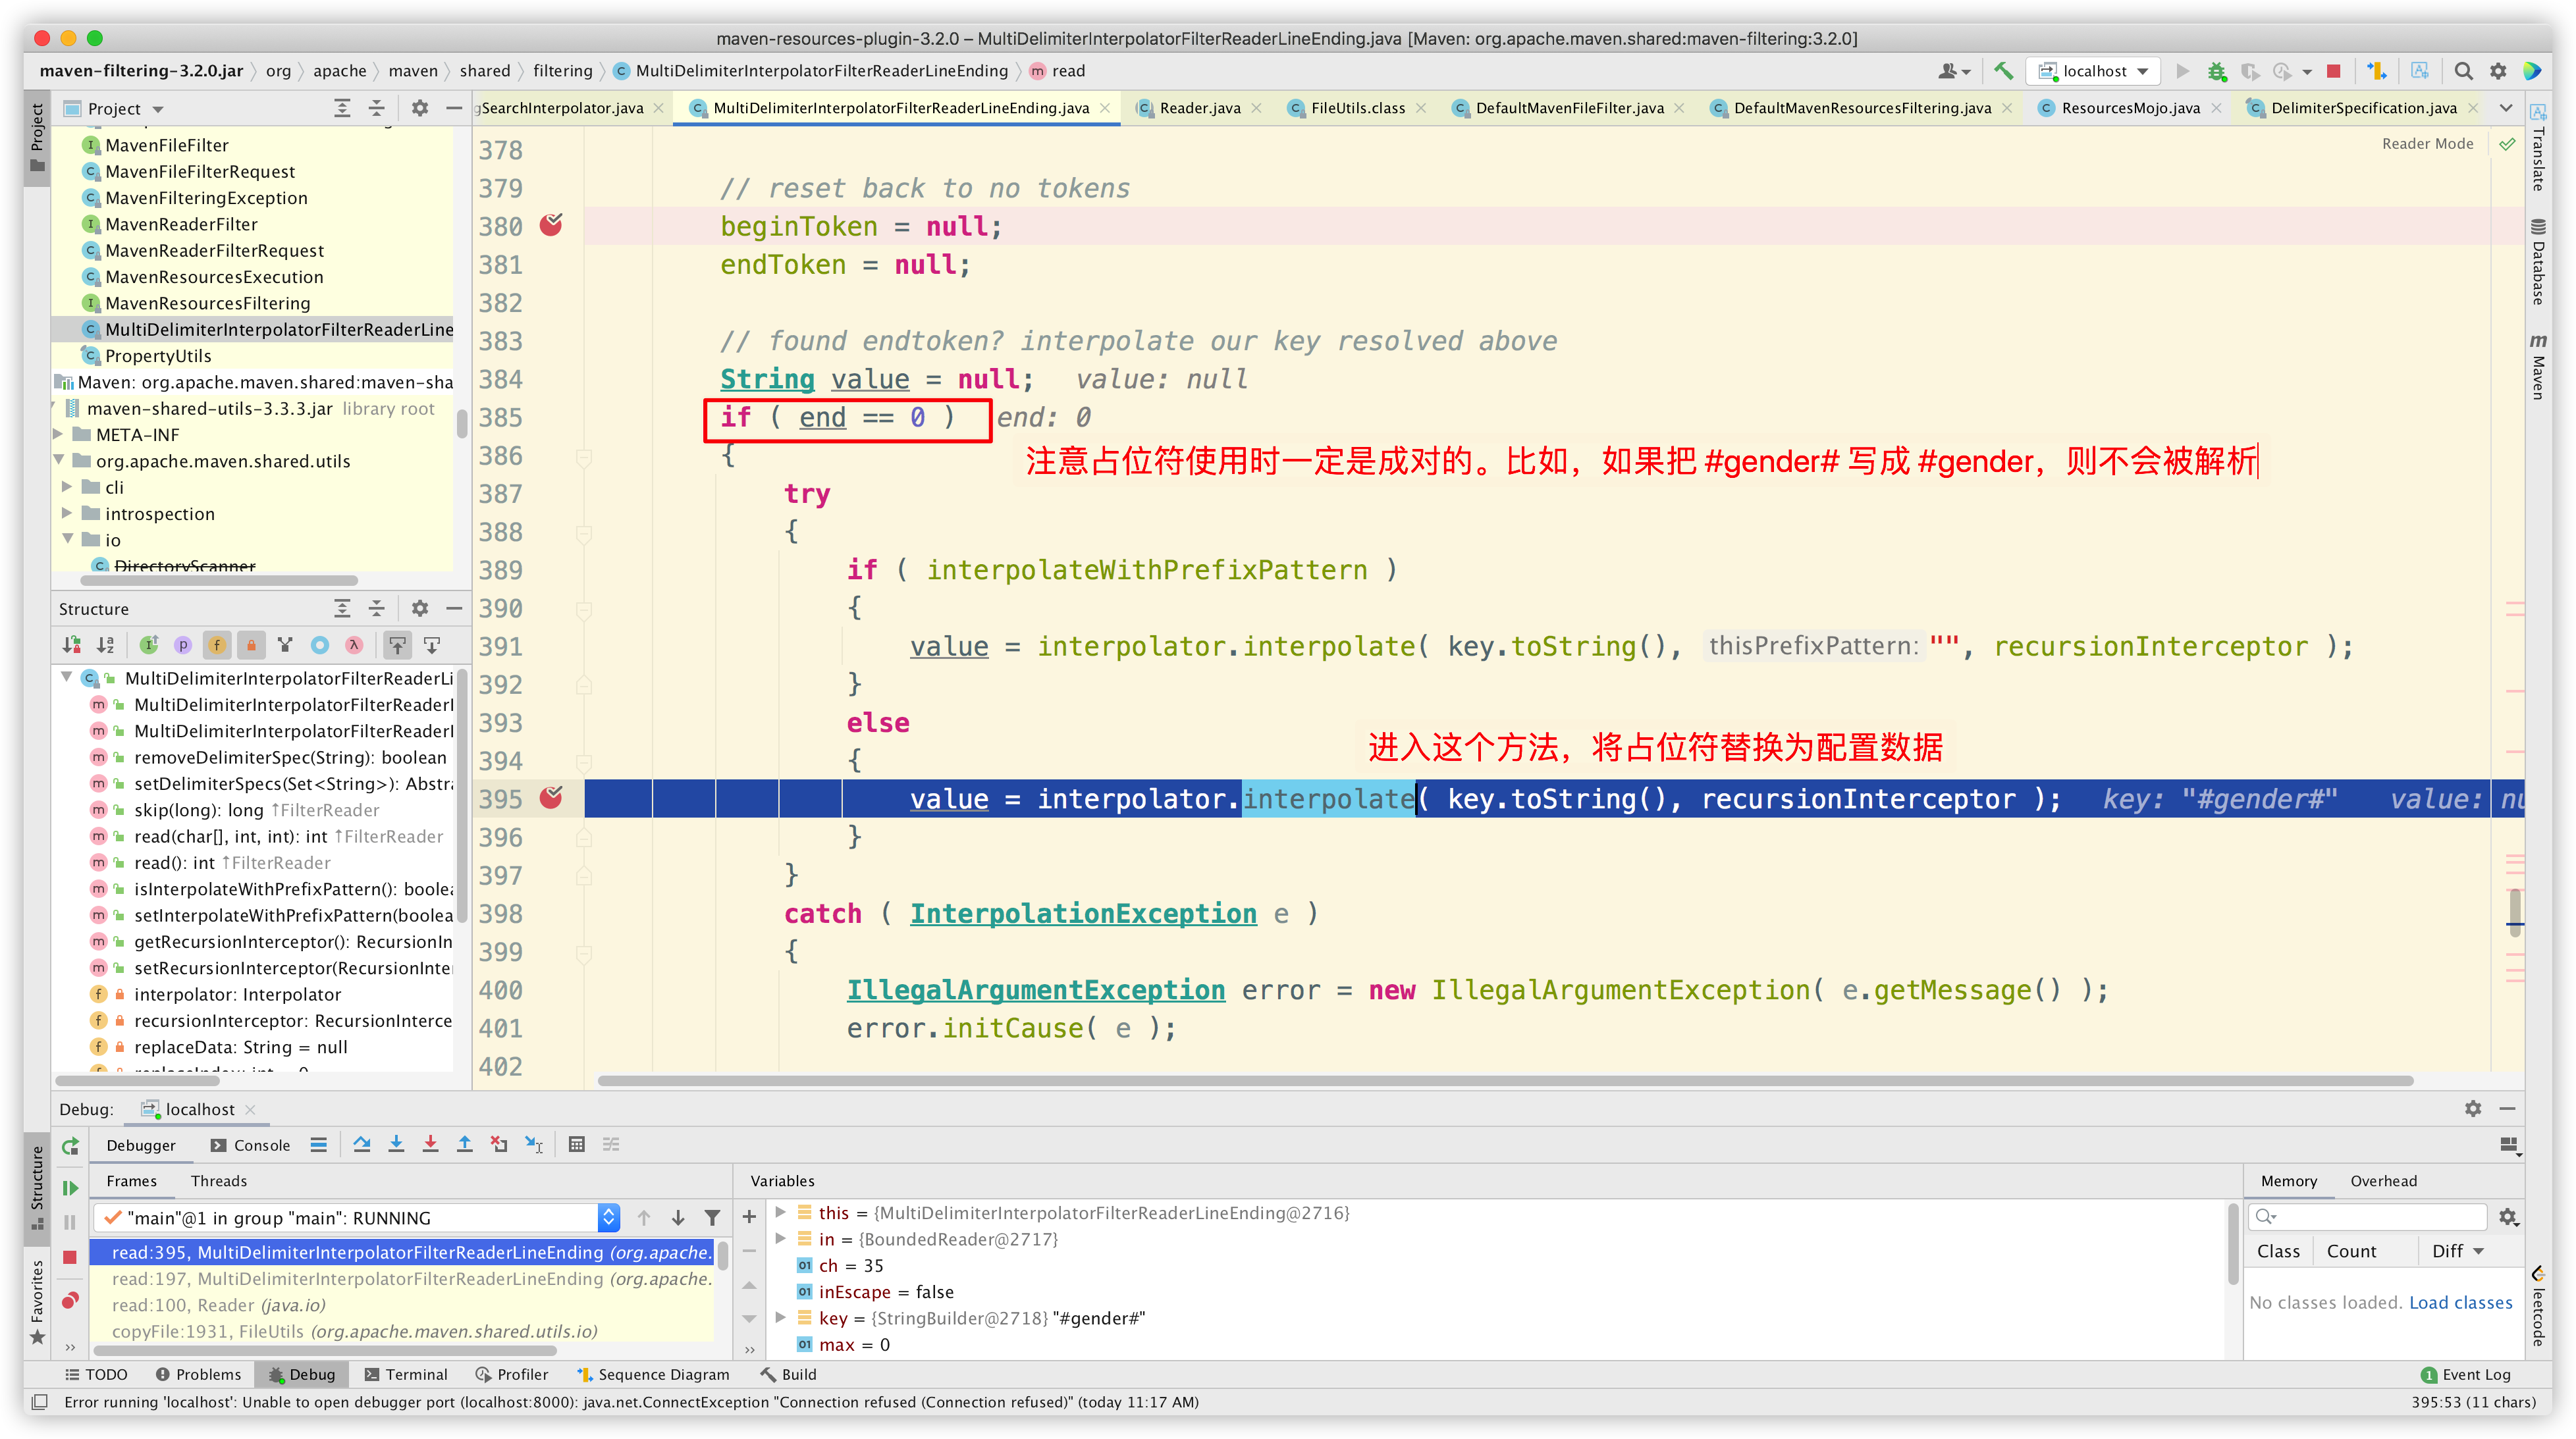
接下来进入 org.codehaus.plexus.interpolation.multi.MultiDelimiterStringSearchInterpolator#interpolate 中,将占位符替换为配置数据:
首先获取即将被解析的占位符表达式:
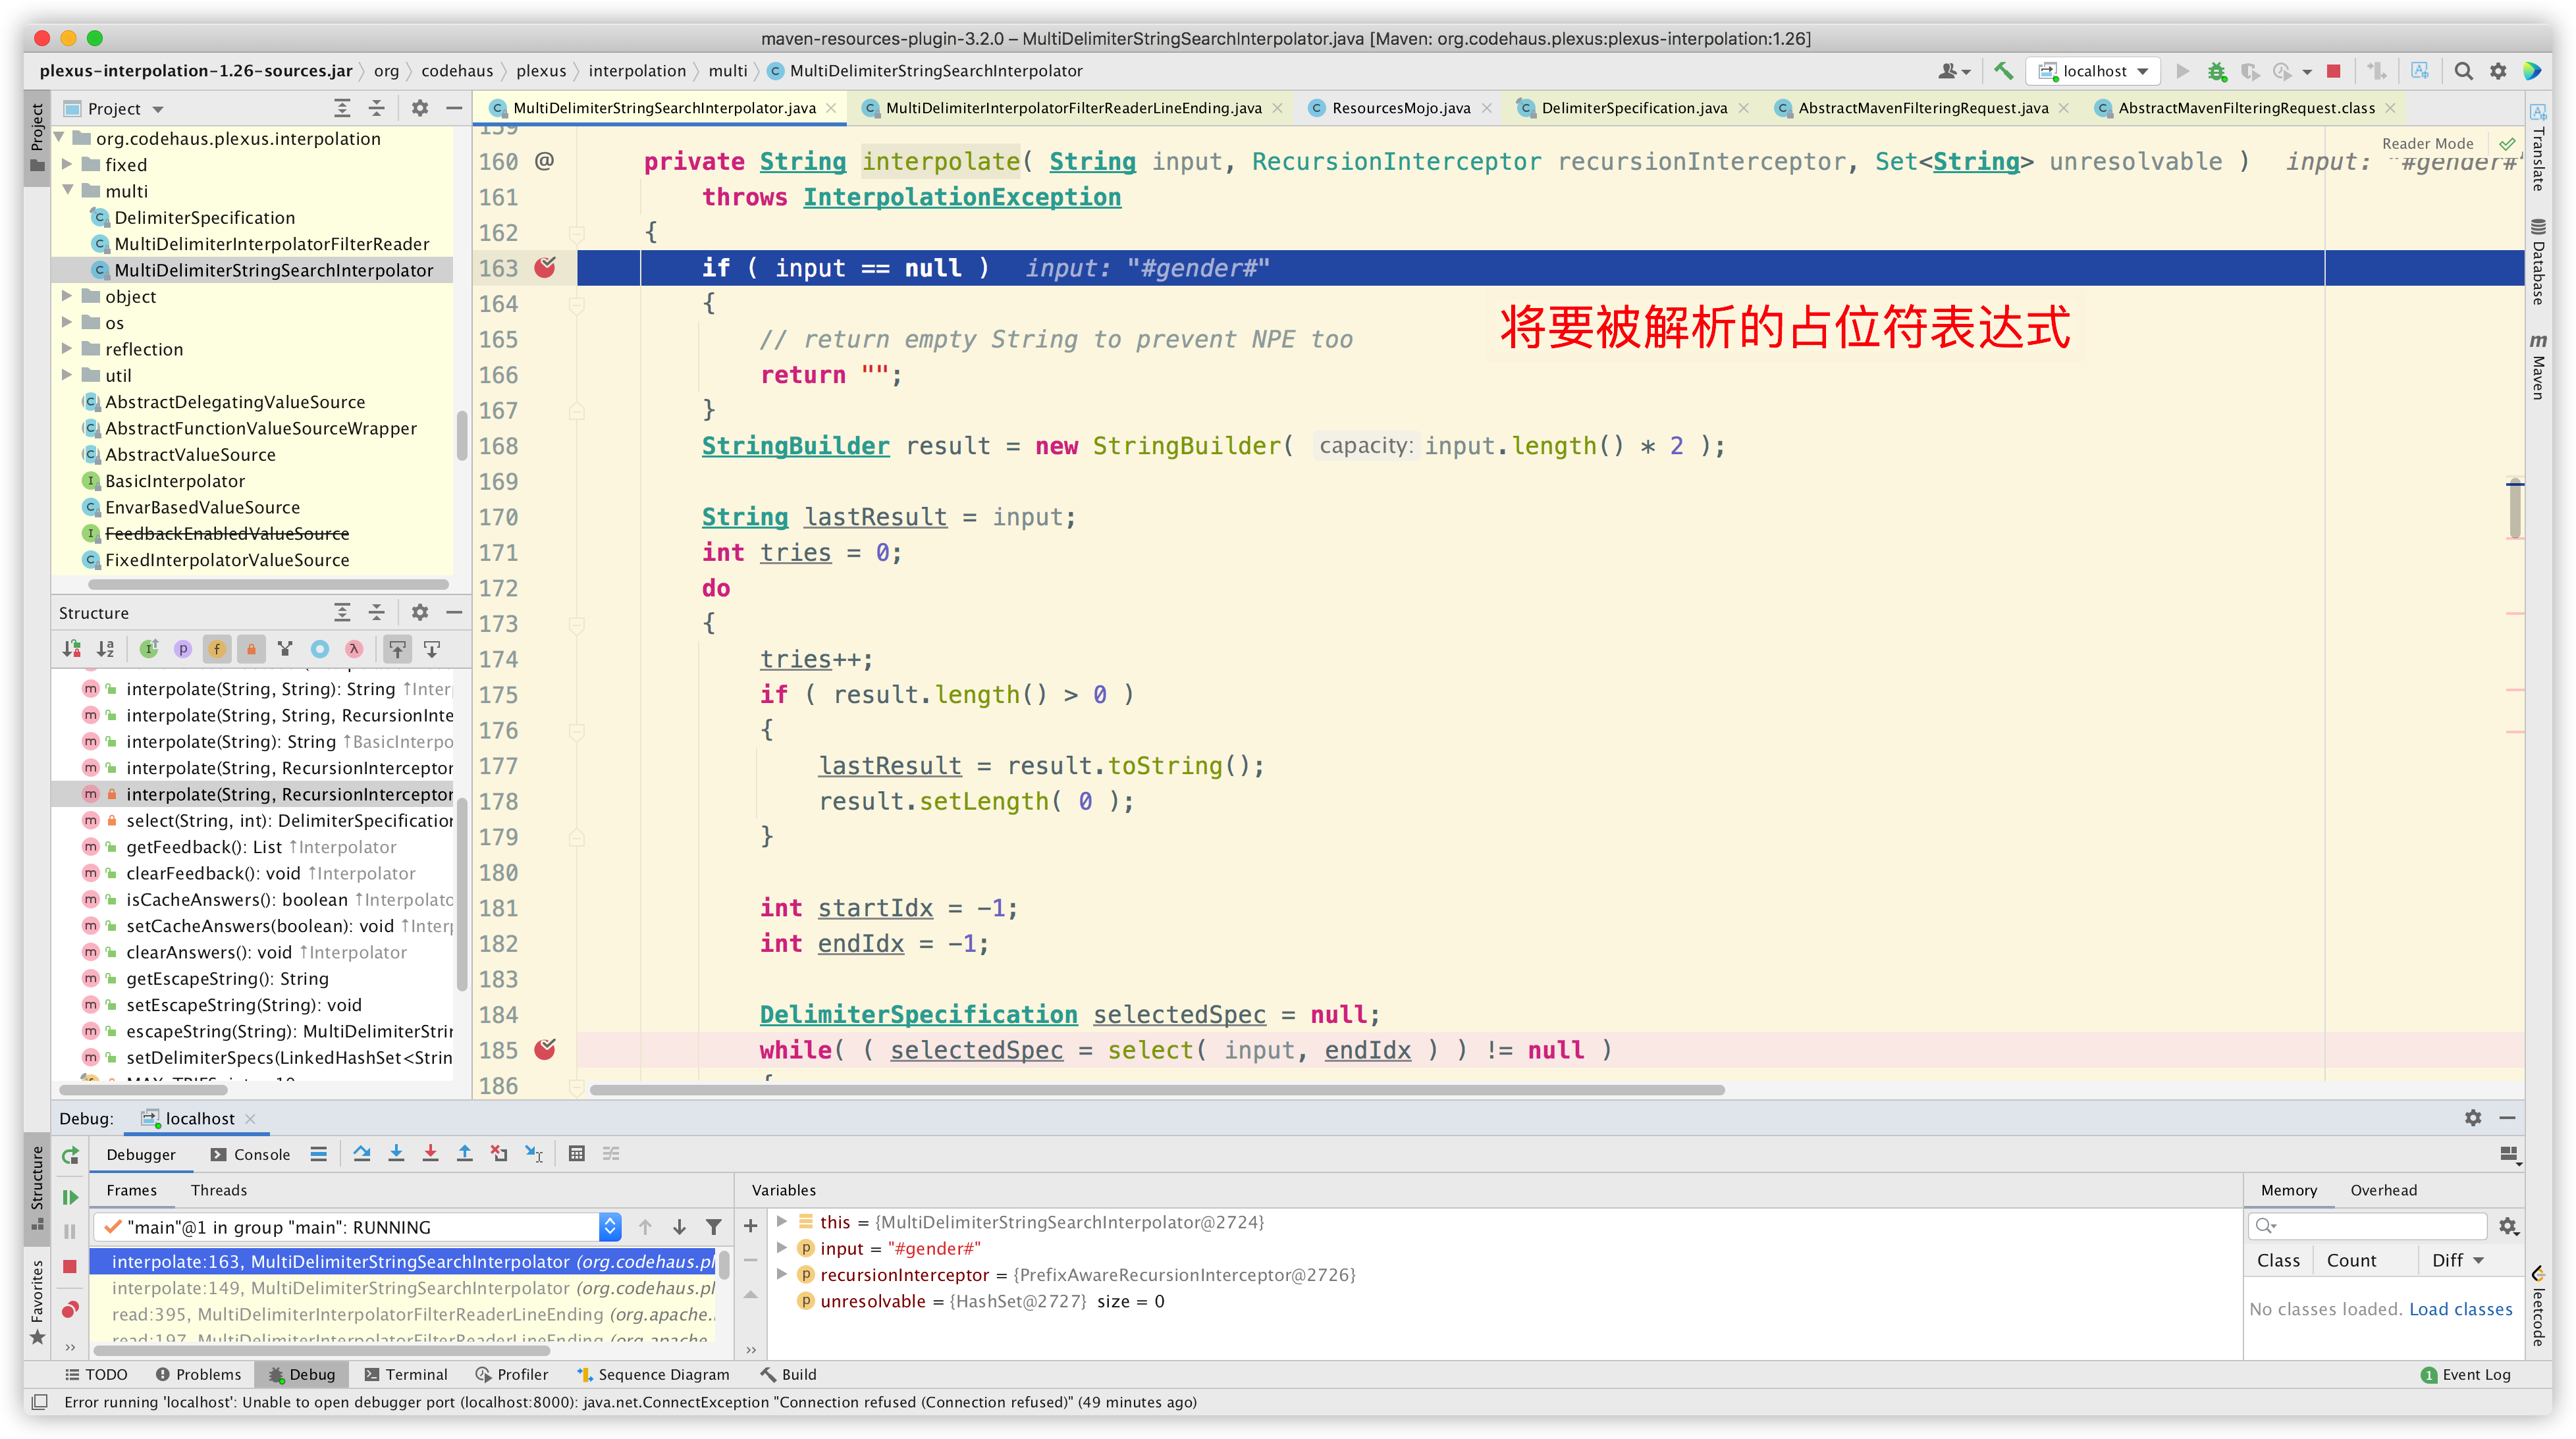
接着获取可用的占位符:
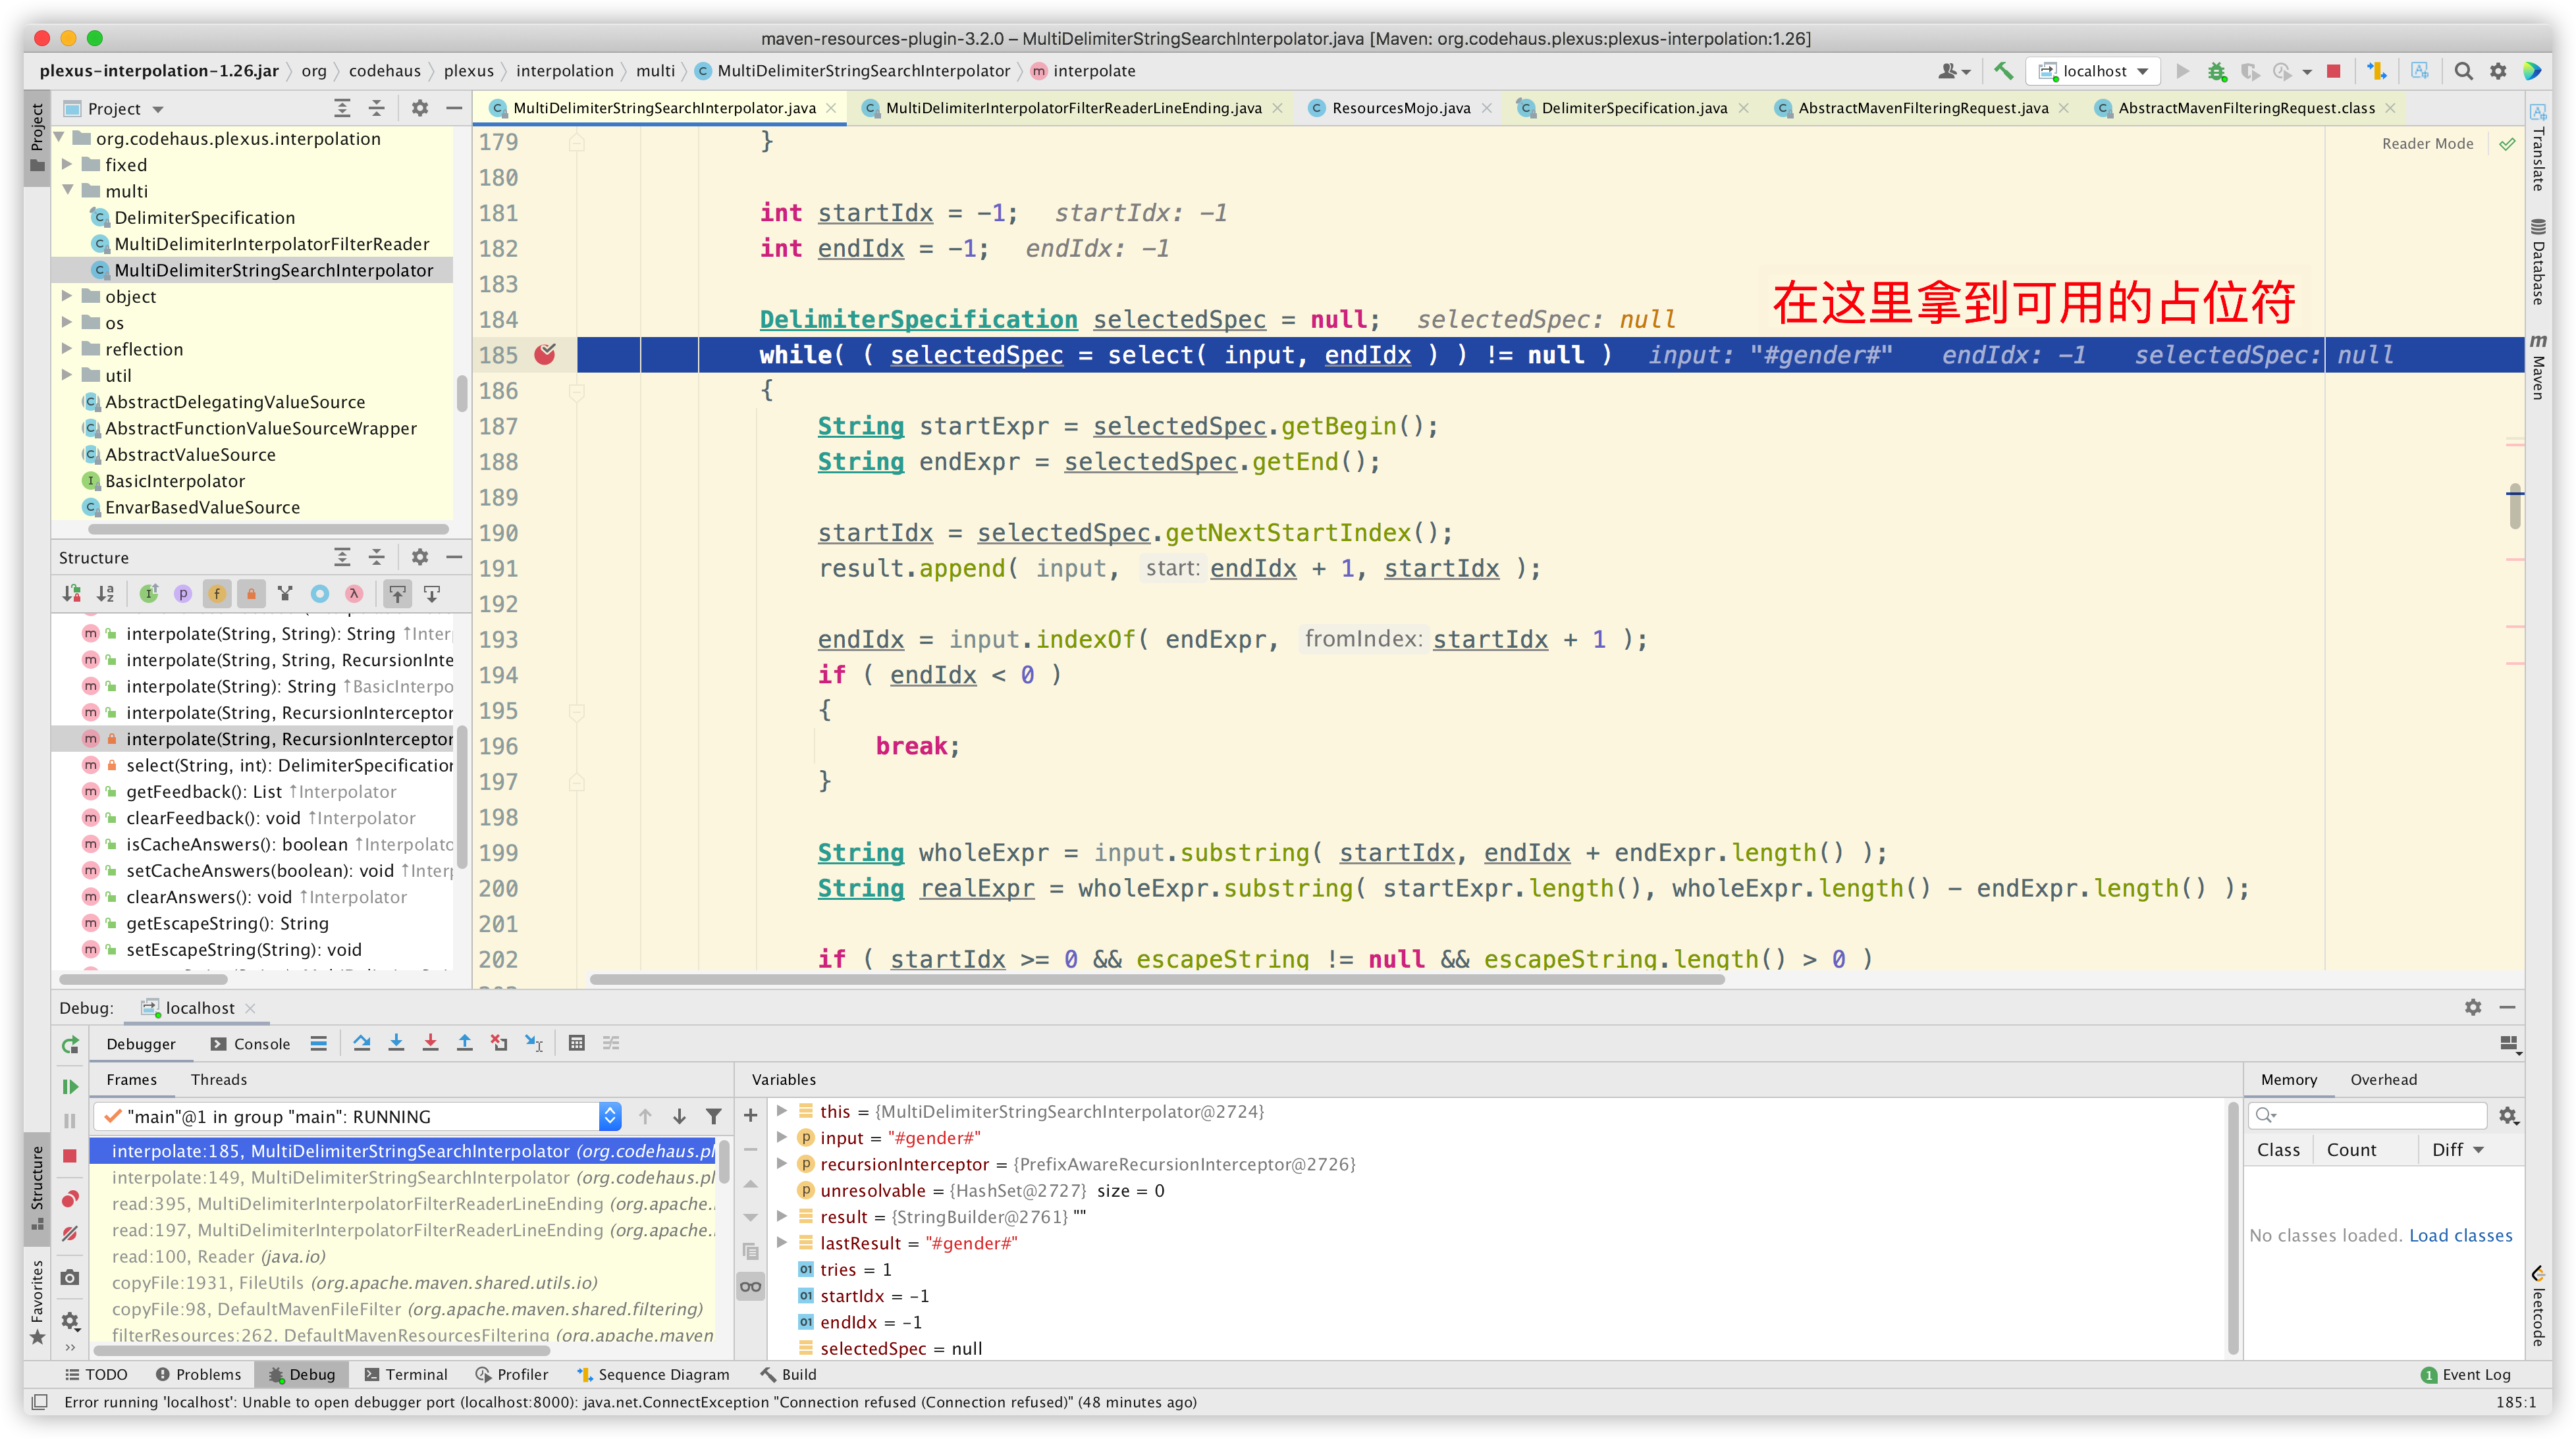
进入方法内部:
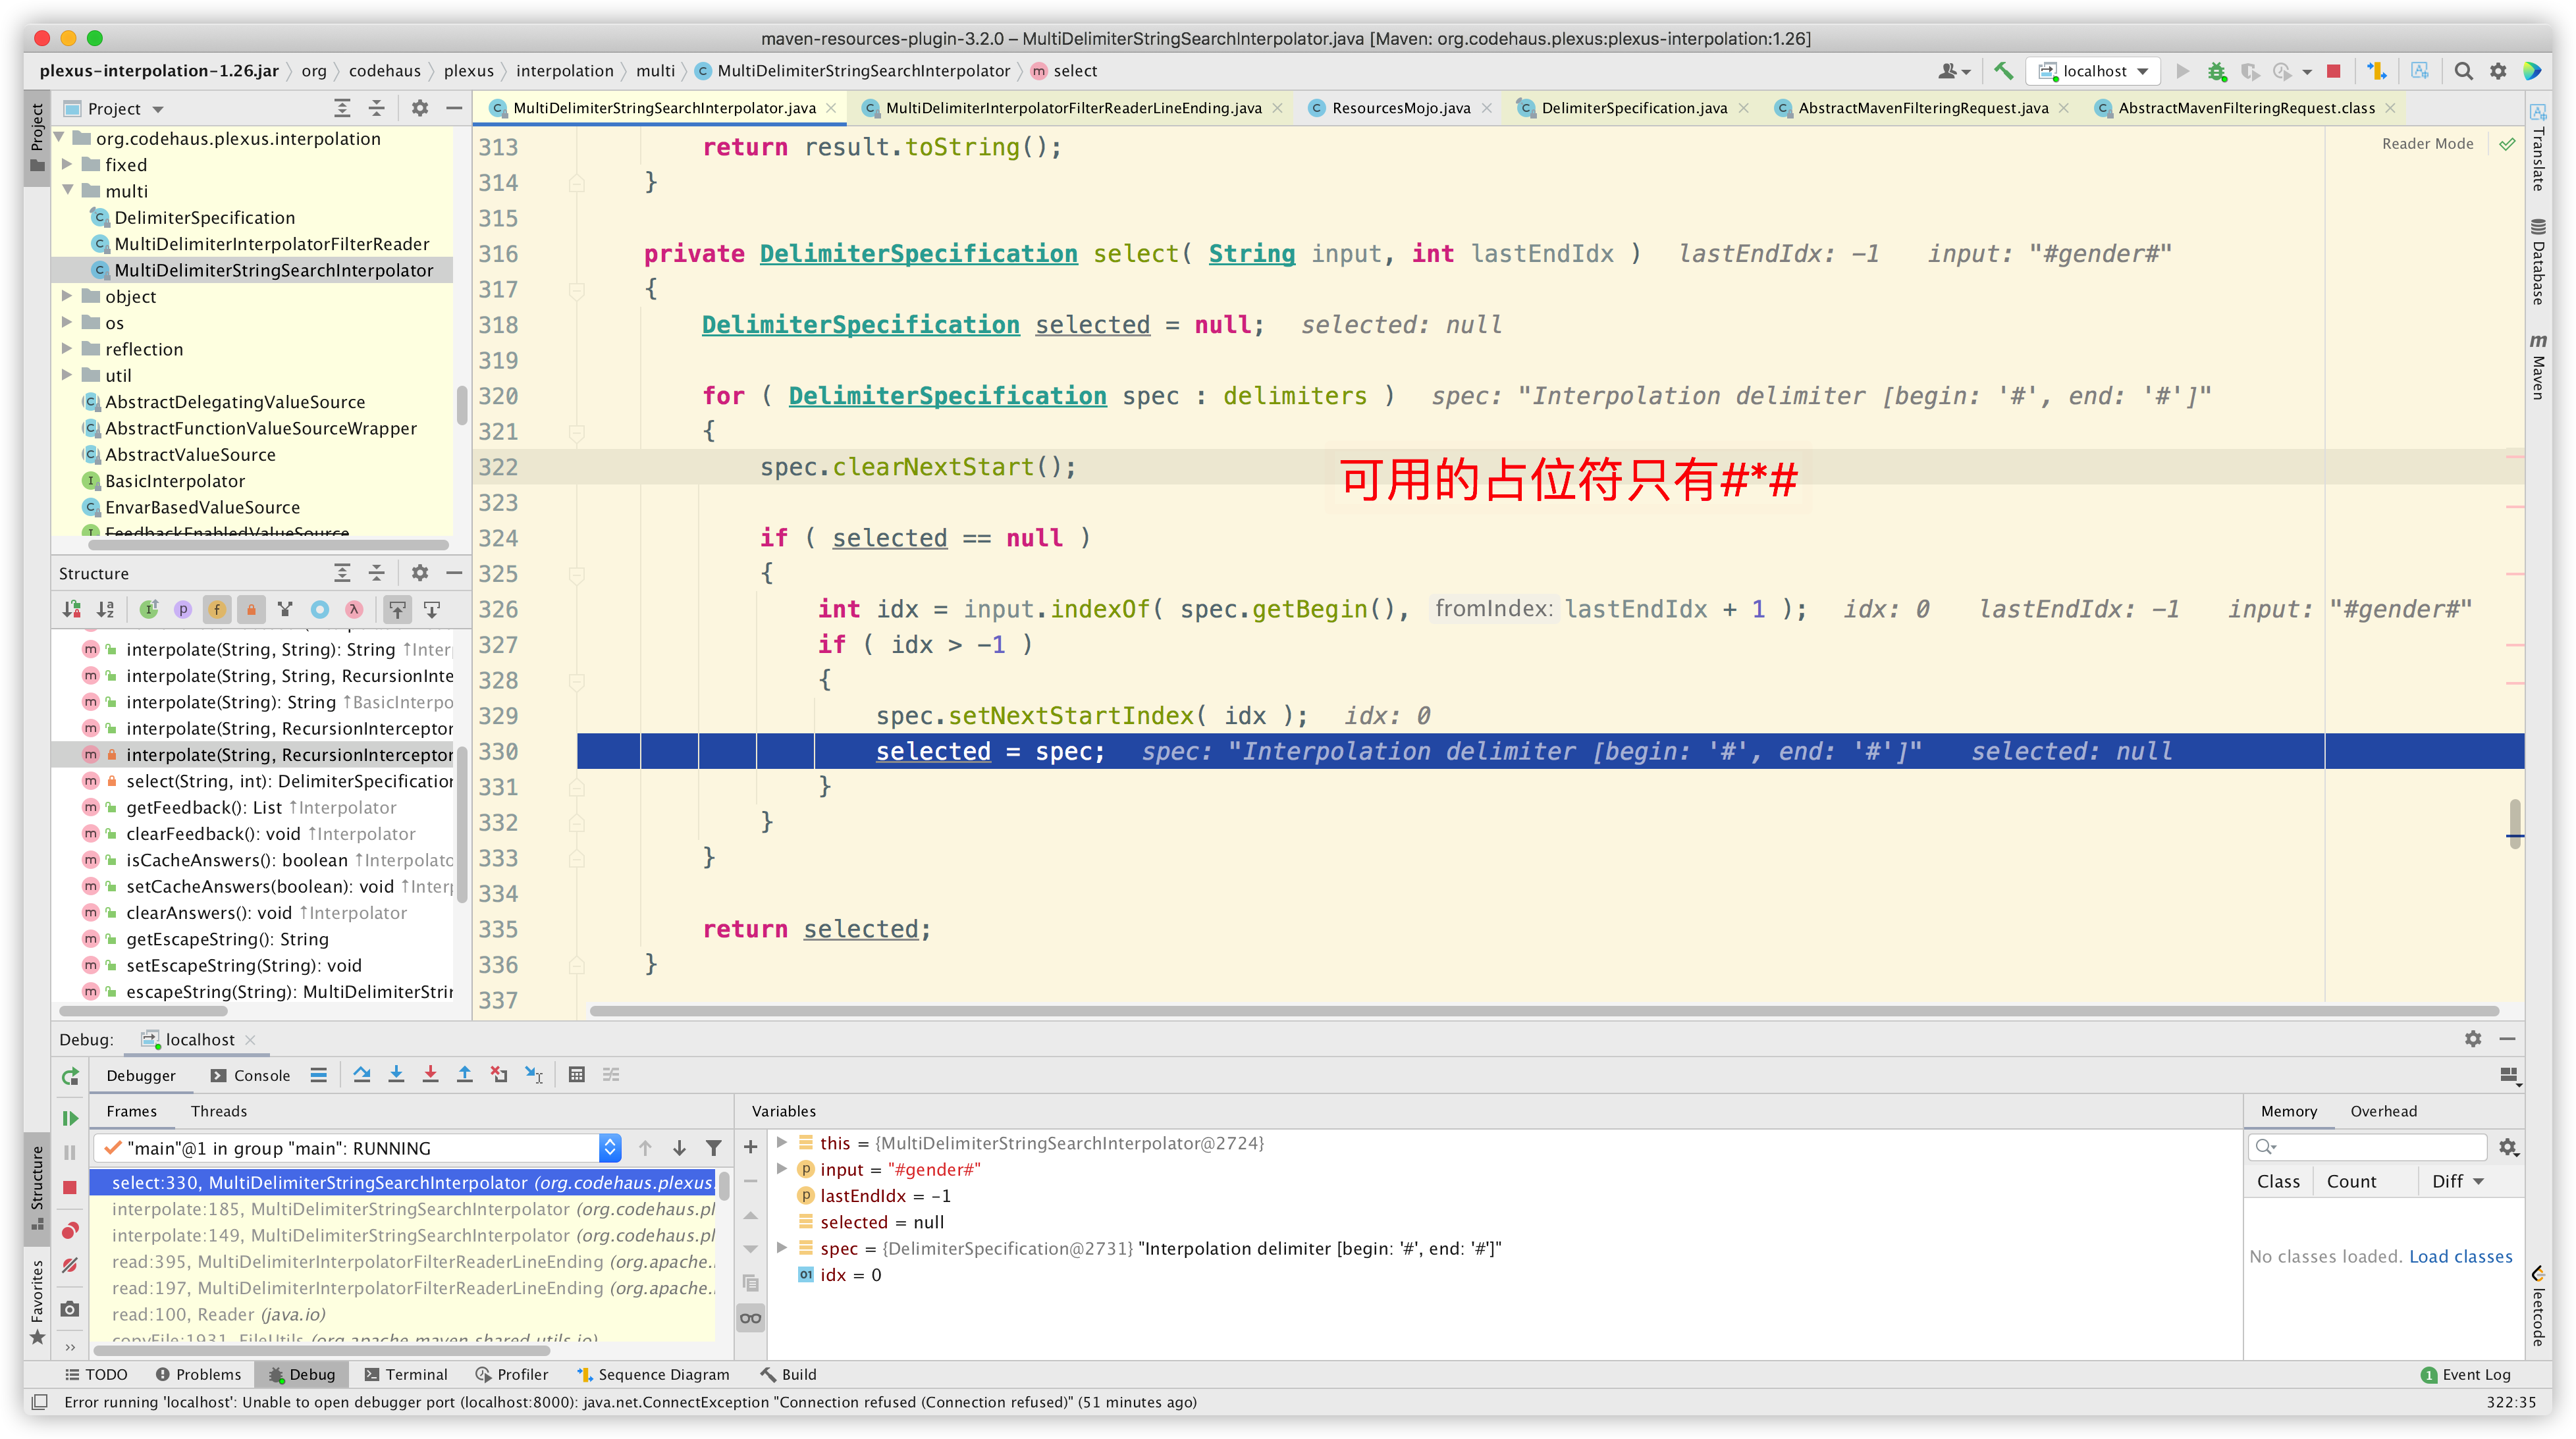
最后解析出配置数据:
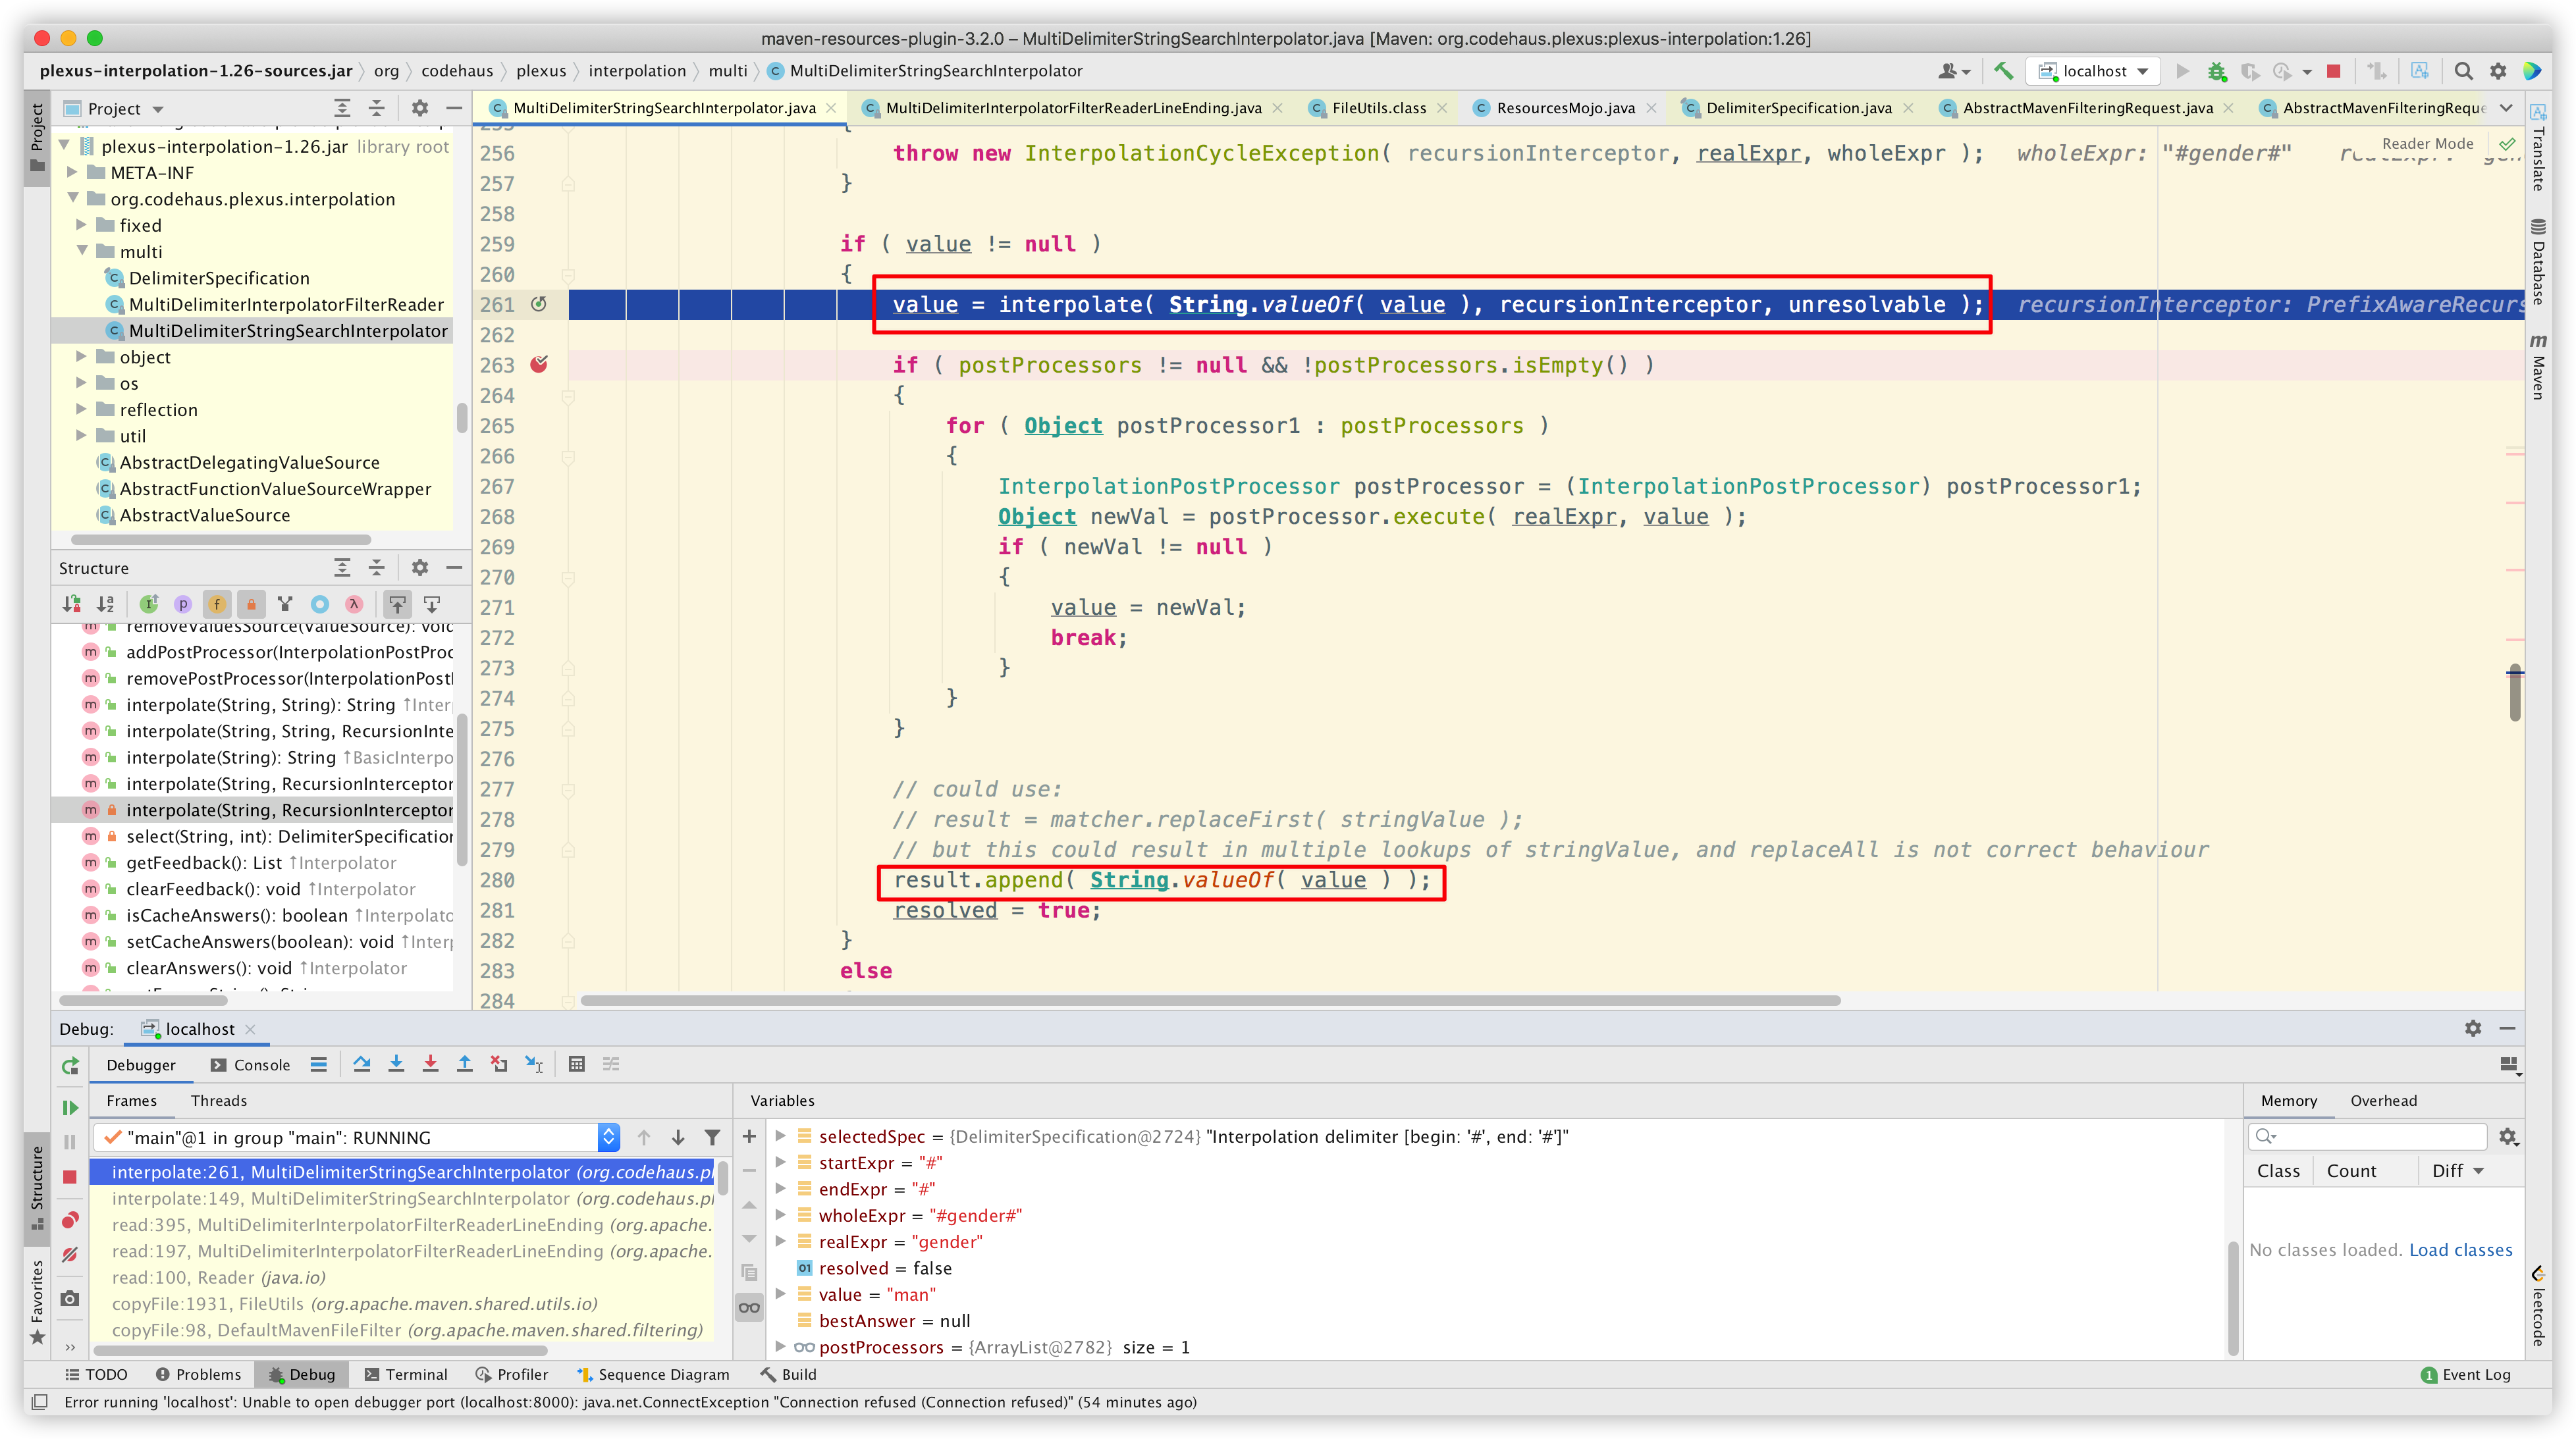
然后回到上层,将占位符替换为配置数据:
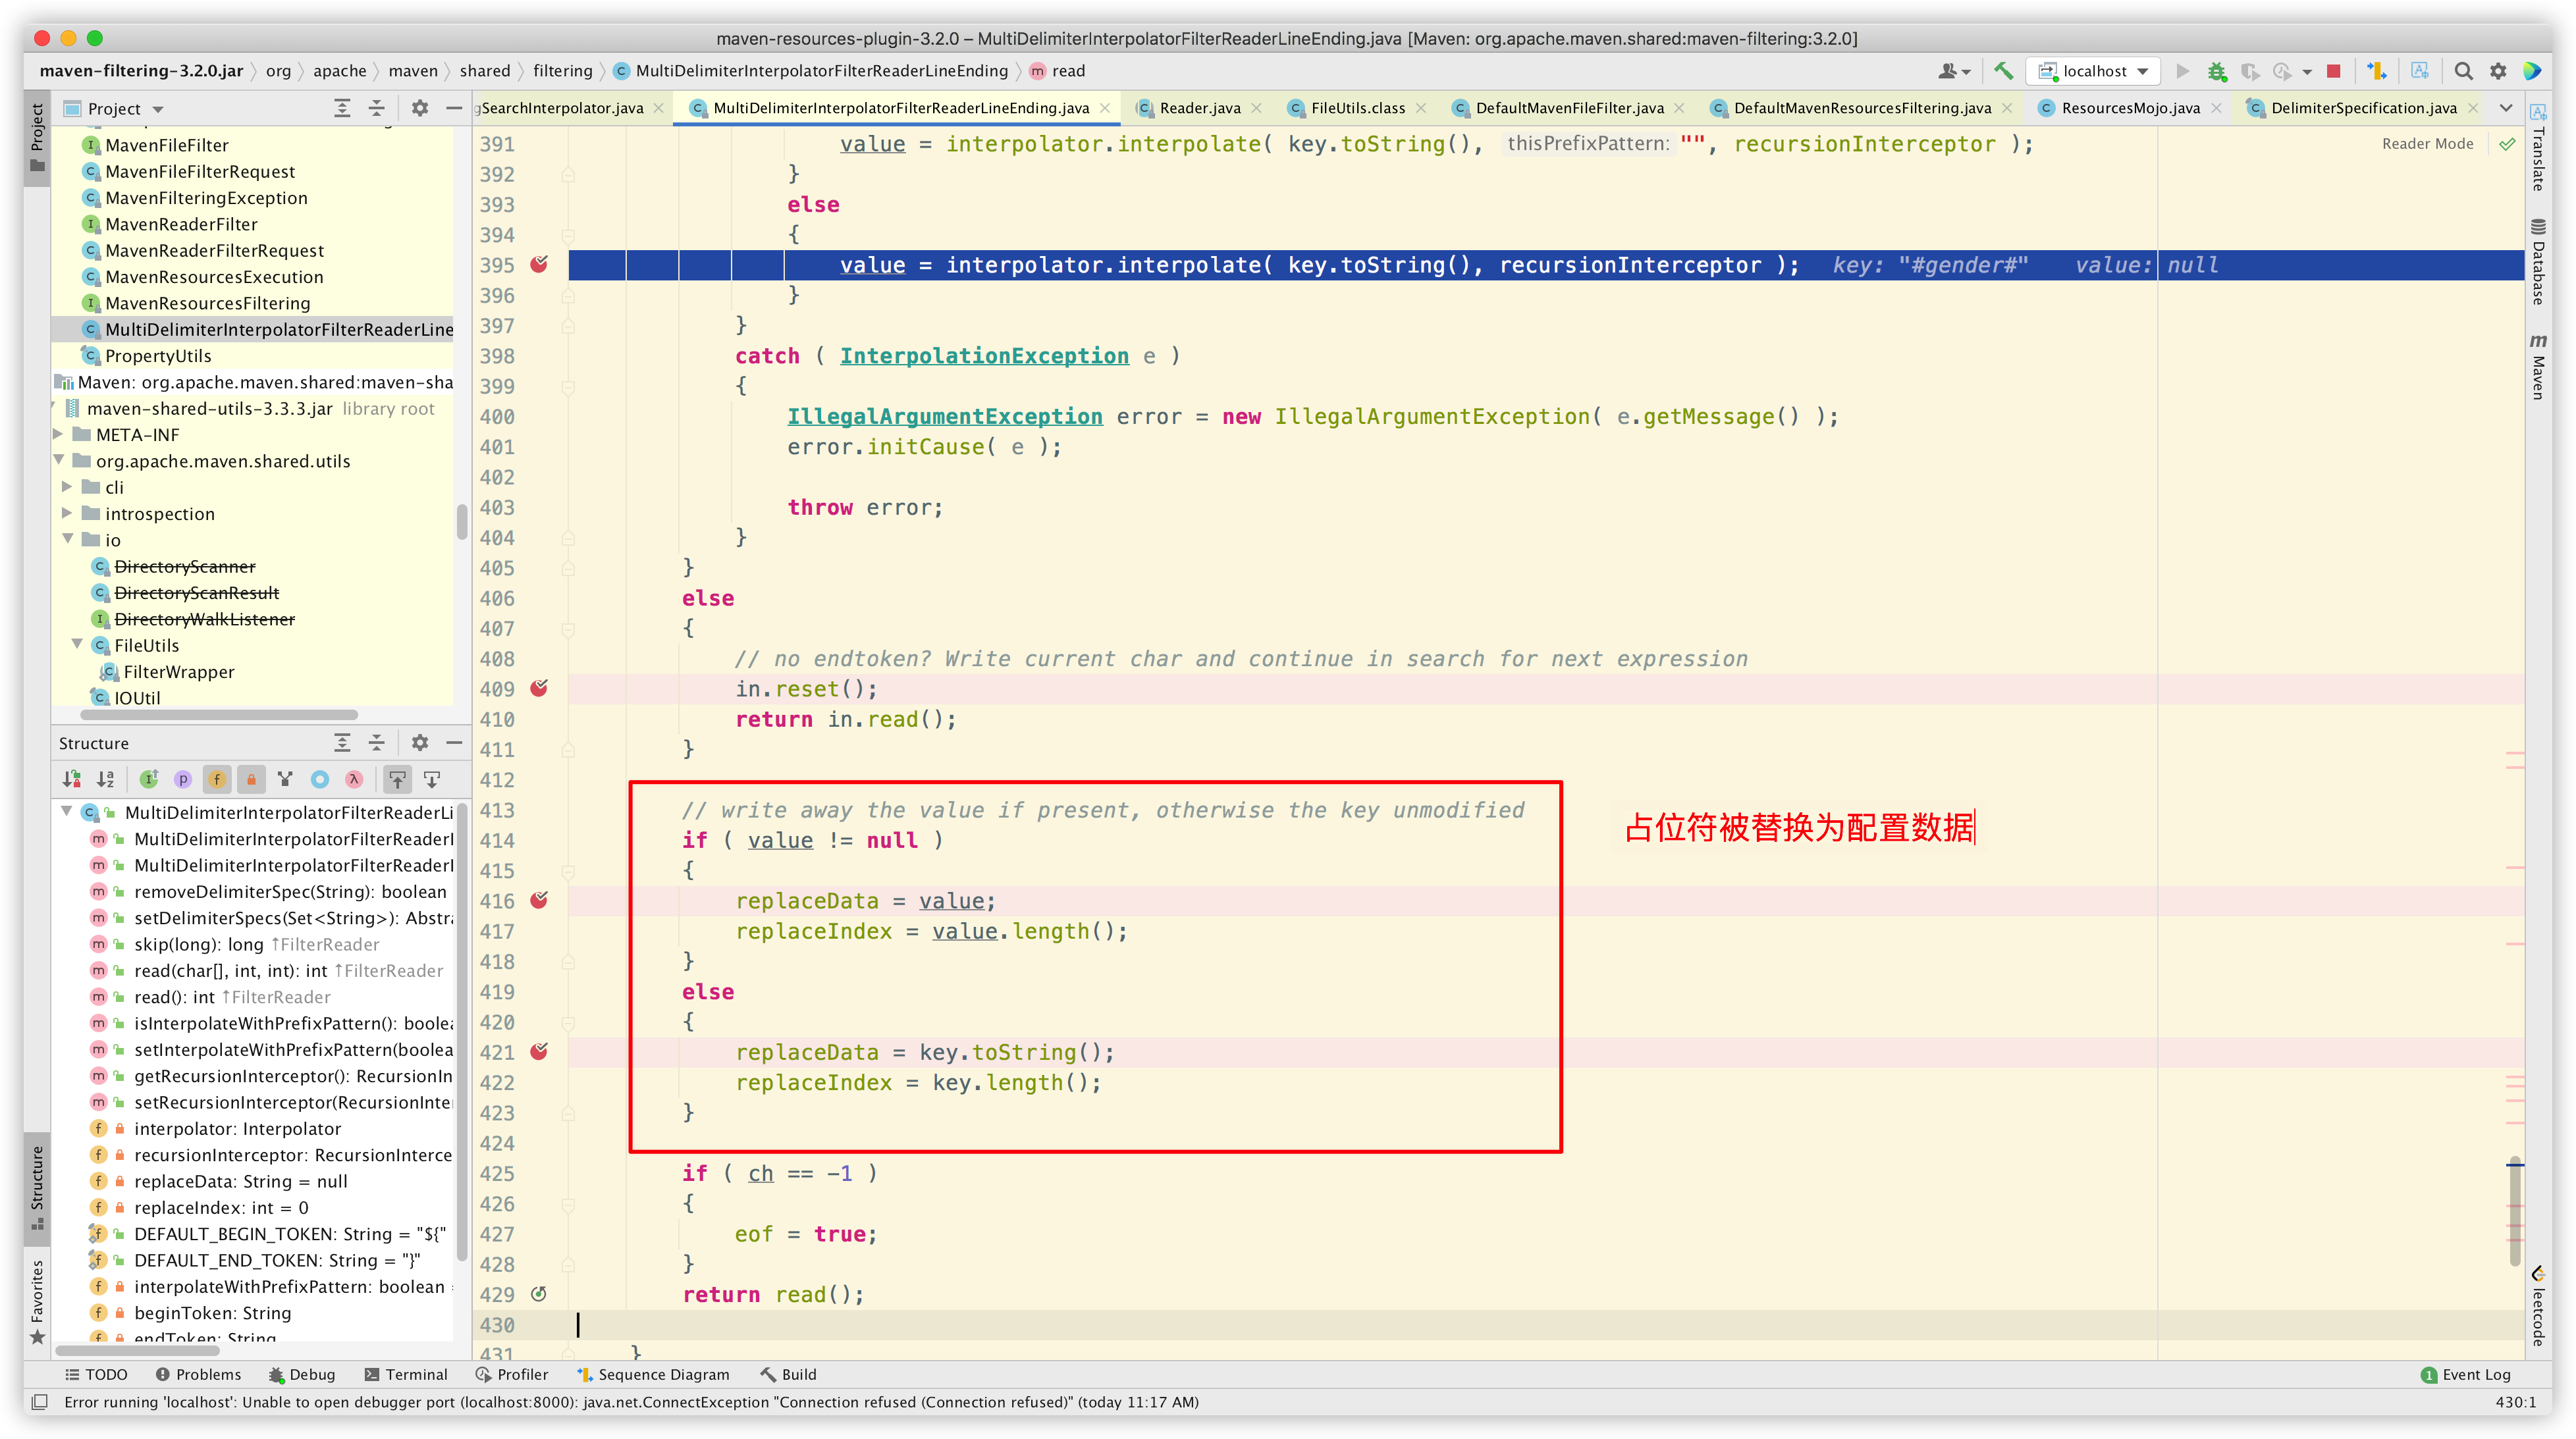
到这里,占位符的解析过程就结束了。
至此,我们知道:maven-resources-plugin 插件根据我们传入的配置数据,首先解析出可用的 delimiters,并将其转换为占位符,最终用真实的配置数据进行替换。
总结
本文讨论了 SpringBoot 项目中的占位符机制,结合实验和源码进行了验证。可以得出结论,对于 SpringBoot 使用的 maven-resources-plugin 3.2.0 (更低的版本可自行探索)来说:
-
默认占位符有两种,分别是 ${*} 和 @*@
-
配置项 useDefaultDelimiters,可以控制是否使用默认占位符。如果为 true,则 ${*} 和 @*@ 这两种占位符始终有效,可以同时使用
-
配置项 delimiter,既可以写默认占位符,也可以自定义占位符,比如上文中的 #
注意事项:
-
占位符必须成对使用,如果忘记写右边的,则不会被解析。
-
本文搭建的 Demo 项目,使用了 spring-boot-starter-parent 作为 parent,但有时我们可能不会使用它。此时,maven-resources-plugin 插件需要我们手动引入,道理是一样的。
常见情况:
-
如果项目直接或间接引入 spring-boot-starter-parent 作为 parent,且没有手动配置 maven-resources-plugin 插件。则只能使用 @*@ 这一种占位符,这是在 spring-boot-starter-parent 指定的。
-
如果项目没有引入 spring-boot-starter-parent 作为 parent,手动引入 maven-resources-plugin 插件,但没有指定任何 delimiter,也没有显式配置 useDefaultDelimiters 为 false,那么可以使用默认占位符 @*@ 或 ${*},因为不配置 useDefaultDelimiters 的话,默认为 true。

 浙公网安备 33010602011771号