python爬虫-使用cookie登录
前言:
什么是cookie?
Cookie,指某些网站为了辨别用户身份、进行session跟踪而储存在用户本地终端上的数据(通常经过加密)。
比如说有些网站需要登录后才能访问某个页面,在登录之前,你想抓取某个页面内容是不允许的。那么我们可以利用Urllib库保存我们登录的Cookie,然后再抓取其他页面,这样就达到了我们的目的。
一、Urllib库简介
Urllib是python内置的HTTP请求库,官方地址:https://docs.python.org/3/library/urllib.html
包括以下模块:
>>>urllib.request 请求模块

>>>urllib.error 异常处理模块

>>>urllib.parse url解析模块

>>>urllib.robotparser robots.txt解析模块
二、urllib.request.urlopen介绍
uurlopen一般常用的有三个参数,它的参数如下:
urllib.requeset.urlopen(url,data,timeout)
简单的例子:
1、url参数的使用(请求的URL)
response = urllib.request.urlopen('http://www.baidu.com')
2、data参数的使用(以post请求方式请求)
data= bytes(urllib.parse.urlencode({'word':'hello'}), encoding='utf8')

response= urllib.request.urlopen('http://www.baidu.com/post', data=data)
3、timeout参数的使用(请求设置一个超时时间,而不是让程序一直在等待结果)
response= urllib.request.urlopen('http://www.baidu.com/get', timeout=4)
三、构造Requset
1、数据传送POST和GET(举例说明:此处列举登录的请求,定义一个字典为values,参数为:email和password,然后利用urllib.parse.urlencode方法将字典编码,命名为data,构建request时传入两个参数:url、data。运行程序,即可实现登陆。)
GET方式:直接以链接形式访问,链接中包含了所有的参数。
LOGIN_URL= "http://*******/postLogin/" values={'email':'*******@***com','password':'****'} data=urllib.parse.urlencode(values).encode() geturl = LOGIN_URL+ "?"+data request = urllib.request.Request(geturl)
POST方式:上面说的data参数就是用在这里的,我们传送的数据就是这个参数data。
LOGIN_URL='http://******/postLogin/'

values={'email':'*******@***.com','password':'*****'}

data=urllib.parse.urlencode(values).encode()

request=urllib.request.Request(URL,data)
2、设置Headers(有些网站不会同意程序直接用上面的方式进行访问,如果识别有问题,那么站点根本不会响应,所以为了完全模拟浏览器的工作,我们需要设置一些Headers 的属性)

举例:(这个例子只是说明了怎样设置headers)
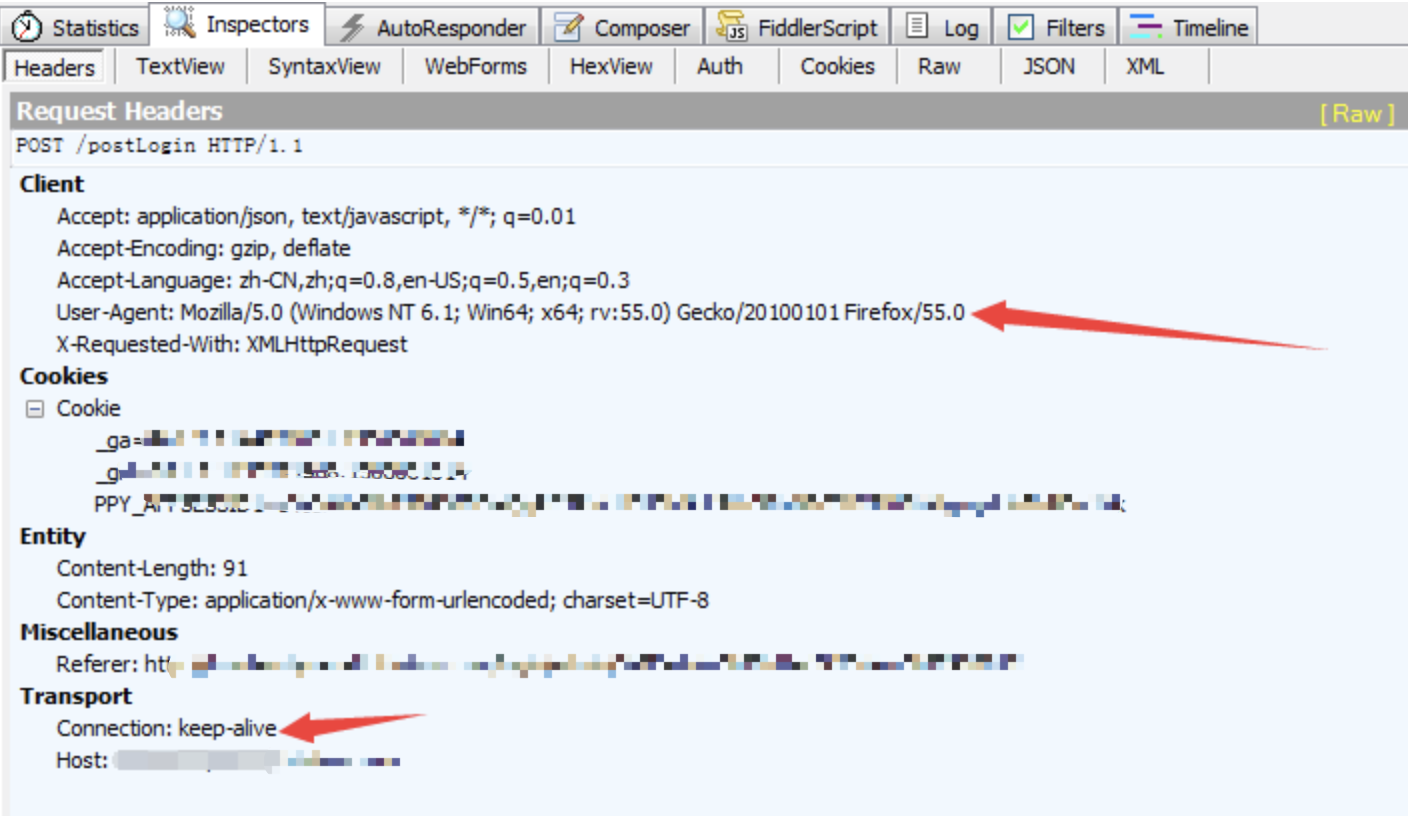
user_agent = r'Mozilla/5.0 (Windows NT 6.1; Win64; x64; rv:55.0) Gecko/20100101 Firefox/55.0'

headers={'User-Agent':user_agent,'Connection':'keep-alive'}

request=urllib.request.Request(URL,data,headers)
四、使用cookie登录
1、获取登录网址
浏览器输入需要登录的网址:'http://*****/login'(注意:这个并非其真实站点登录网址),使用抓包工具fiddler抓包(其他工具也可)找到登录后看到的request。
此处确定需要登录的网址为:'http://*****/postLogin/'

2、查看要传送的post数据
找到登录后的request中有webforms的信息,会列出登录要用的post数据,包括Email,password,auth。
找到登录后看到的request的headers信息,找出User-Agent设置、connection设置等
4、开始编码,使用cookie登录该网站
import urllib.error, urllib.request, urllib.parse
import http.cookiejar

LOGIN_URL = 'http://******/postLogin'
#get_url为使用cookie所登陆的网址,该网址必须先登录才可
get_url = 'https://*****/pending'
values = {'email':'*****','password':'******','auth':'admin'}
postdata = urllib.parse.urlencode(values).encode()
user_agent = r'Mozilla/5.0 (Macintosh; Intel Mac OS X 10_13_3) AppleWebKit/537.36' \
             r' (KHTML, like Gecko) Chrome/61.0.3163.79 Safari/537.36'
headers = {'User-Agent':user_agent, 'Connection':'keep-alive'}
#将cookie保存在本地,并命名为cookie.txt
cookie_filename = 'cookie.txt'
cookie_aff = http.cookiejar.MozillaCookieJar(cookie_filename)
handler = urllib.request.HTTPCookieProcessor(cookie_aff)
opener = urllib.request.build_opener(handler)

request = urllib.request.Request(LOGIN_URL, postdata, headers)
try:
    response = opener.open(request)
except urllib.error.URLError as e:
    print(e.reason)

cookie_aff.save(ignore_discard=True, ignore_expires=True)

for item in cookie_aff:
    print('Name ='+ item.name)
    print('Value ='+ item.value)
#使用cookie登陆get_url
get_request = urllib.request.Request(get_url,headers=headers)
get_response = opener.open(get_request)
print(get_response.read().decode())
5、反复使用cookie登录
(上面代码中我们保存cookie到本地了,以下代码我们能够直接从文件导入cookie进行登录,不用再构建request了)
import urllib.request, urllib.parse
import http.cookiejar

get_url = 'https://******/pending'
cookie_filename = 'cookie.txt'
cookie_aff = http.cookiejar.MozillaCookieJar(cookie_filename)
cookie_aff.load(cookie_filename,ignore_discard=True,ignore_expires=True)

handler = urllib.request.HTTPCookieProcessor(cookie_aff)
opener = urllib.request.build_opener(handler)
#使用cookie登陆get_url
get_request = urllib.request.Request(get_url)
get_response = opener.open(get_request)
print(get_response.read().decode())
以上
作者:小喜
出处: http://www.cnblogs.com/xiaoxi-3-/
如果对您有帮助,请关注我的同名简书:https://www.jianshu.com/u/da1677475c27
本文版权归作者和博客园共有,欢迎转载,但未经作者同意必须保留此段声明,且在文章页面明显位置给出原文连接,否则保留追究法律责任的权利。


