Python进阶11---异常及模块化
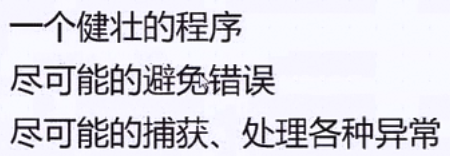
异常处理
异常Exception
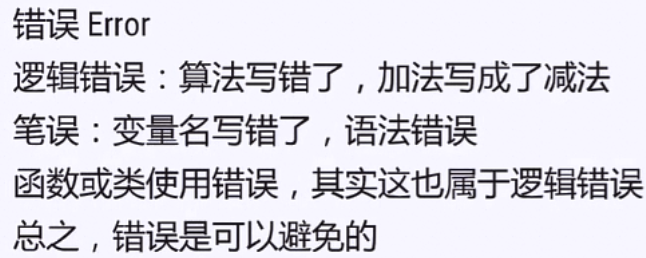
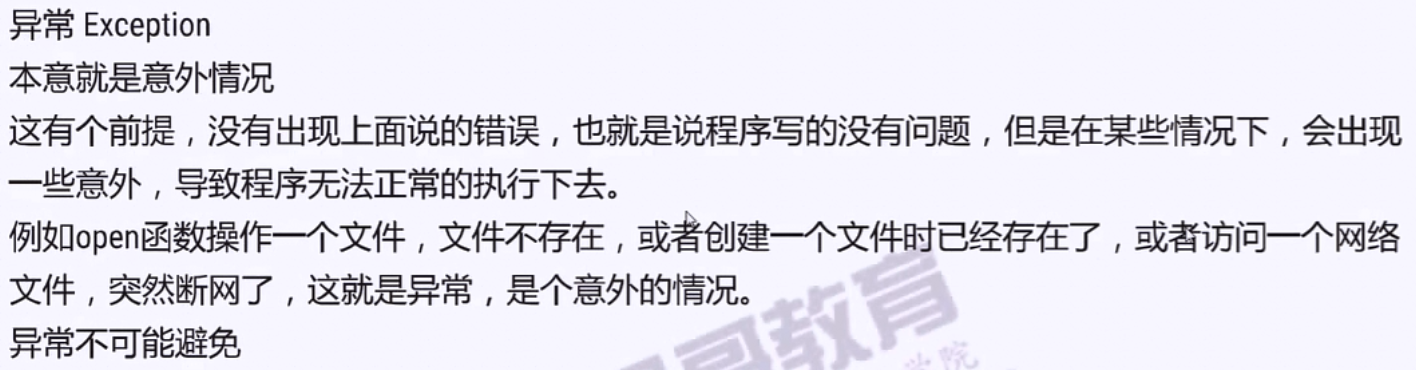


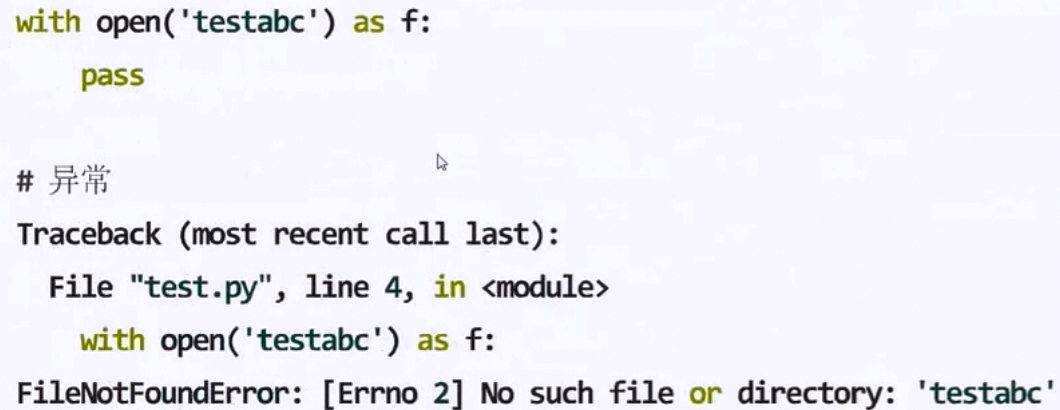
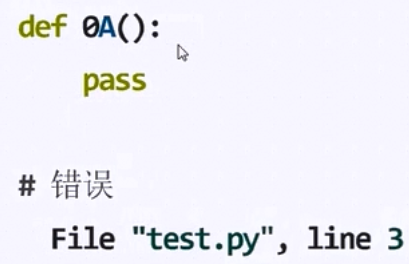

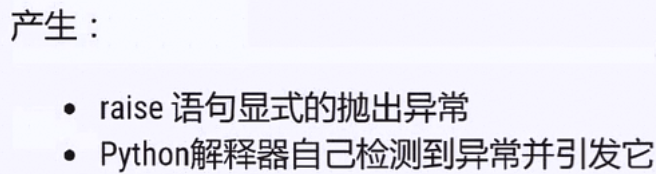
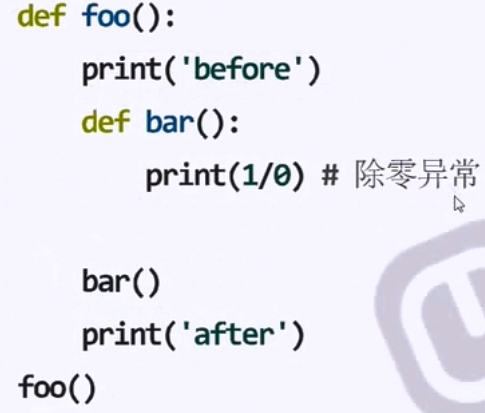
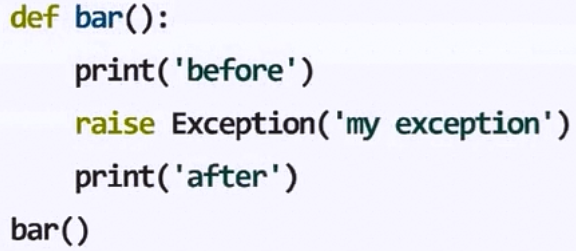
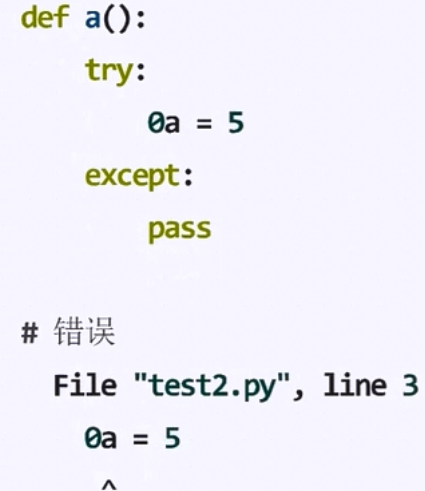
产生异常
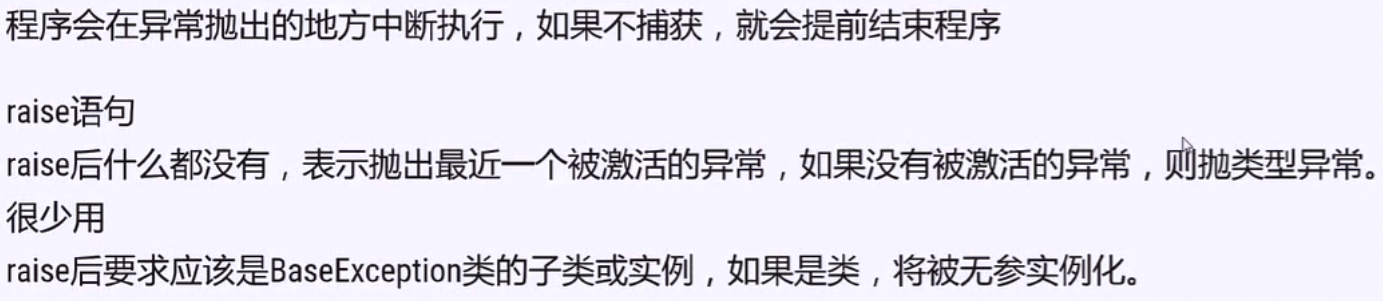
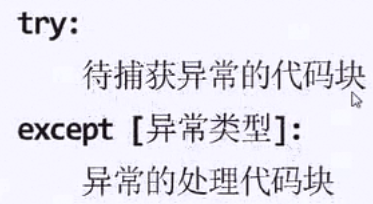
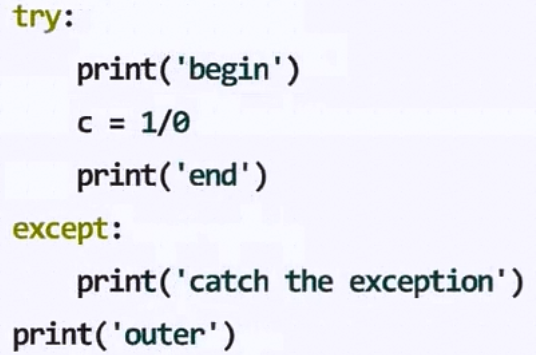
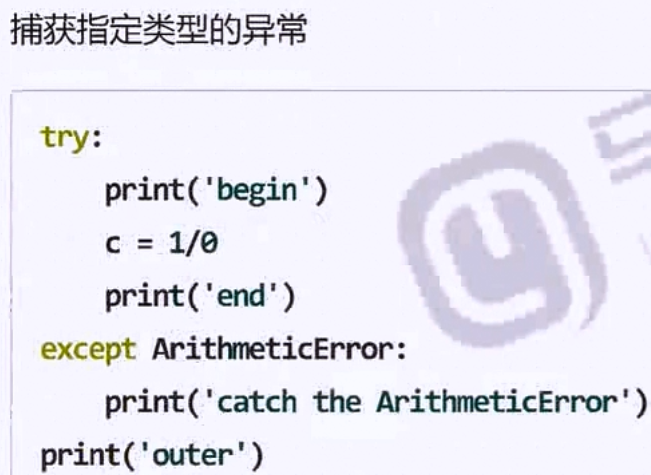
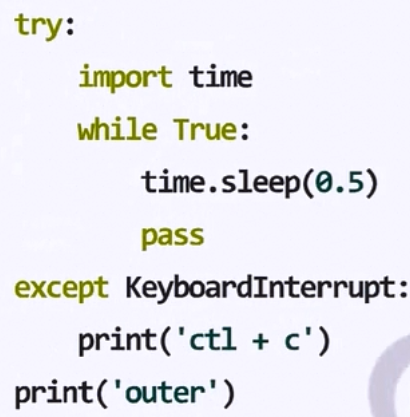
异常的捕获

异常类及继承层次
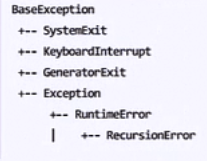

BaseException及子类

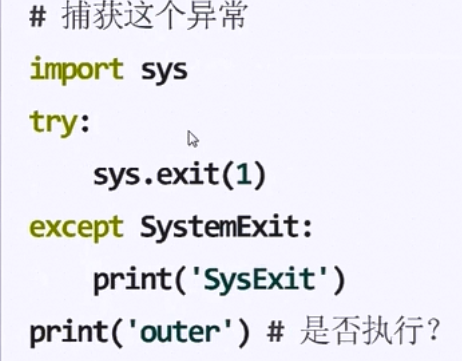
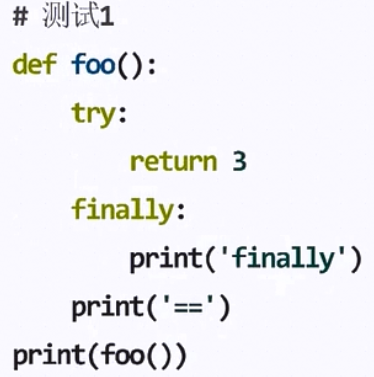
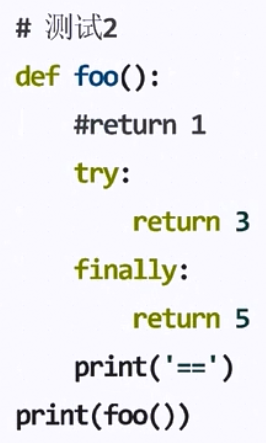
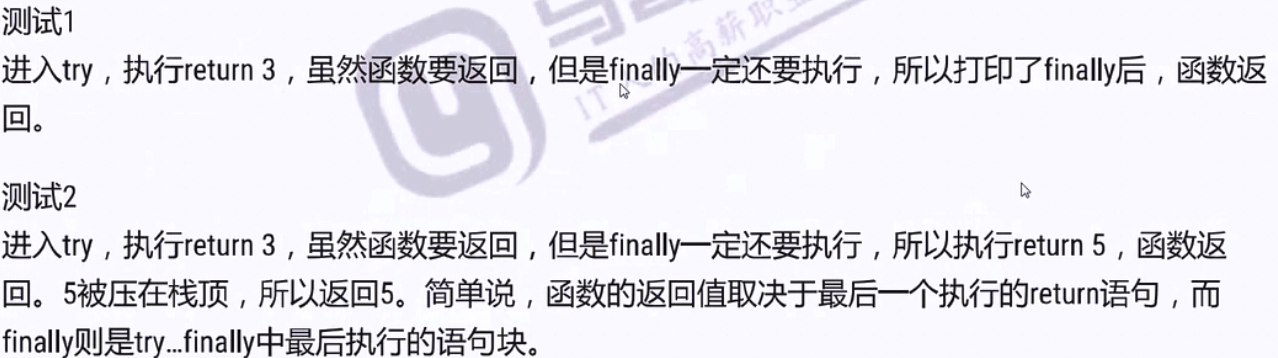
执行!

Exception及子类

 --
--
![]()

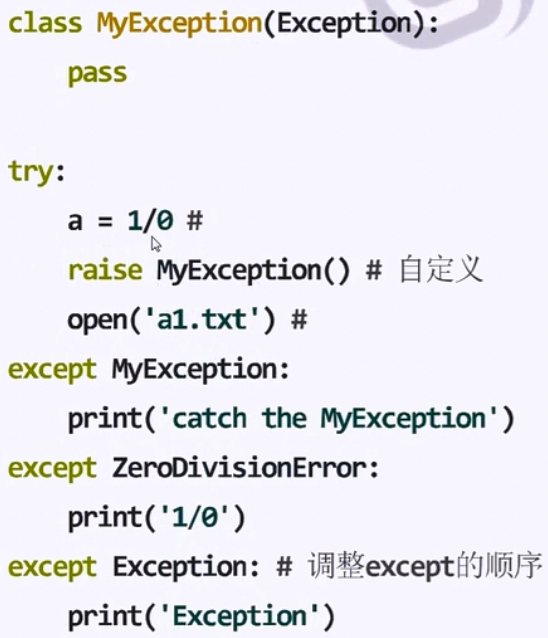
自定义异常

异常的捕获
![]()
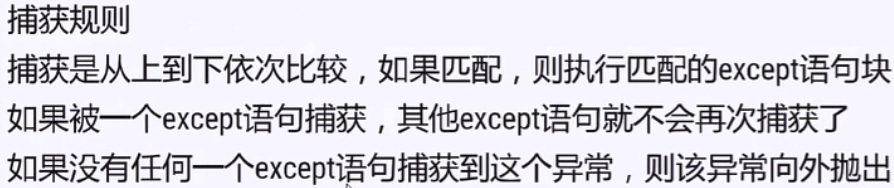

as子句
![]()


![]()
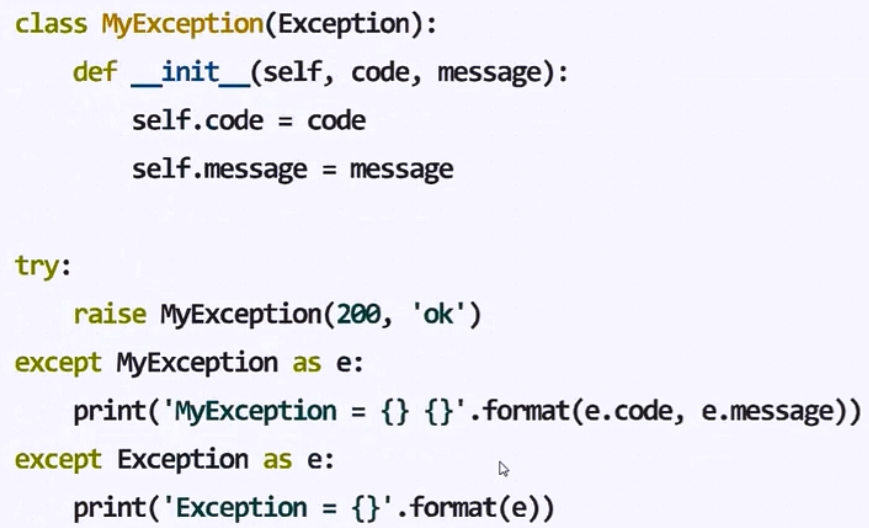
finally子句


![]()
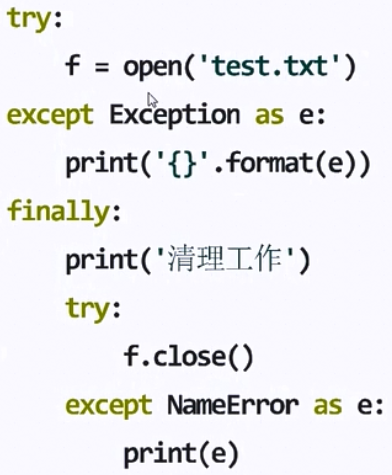
finally执行时机
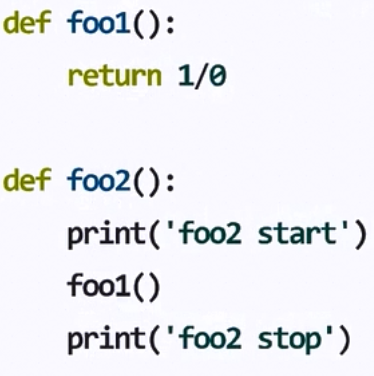
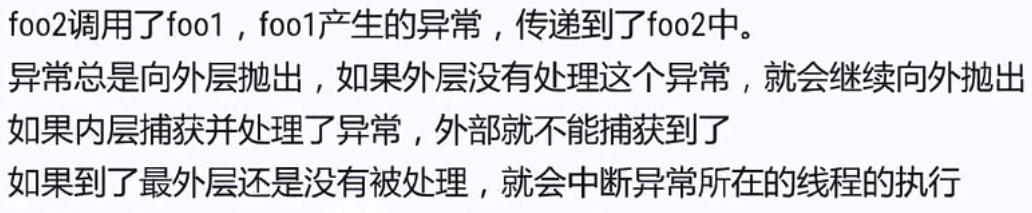
异常的传递
![]()
# Author: Baozi
#-*- codeing:utf-8 -*-

#线程中测试异常
import threading
import time

def foo1():
    return 1/0

def foo2():
    time.sleep(3)#3秒后抛出异常
    print('foo2 start')
    foo1()
    print('foo2 stop')

t = threading.Thread(target=foo2)
t.start()
print('t-->starting')

while True:
    time.sleep(1)
    print('Everything OK')
    if t.is_alive():
        print('alive')
    else:
        print('dead')
try嵌套
try:
    try:
        ret = 1/0
    except KeyError as e:
        print(e)
    else:
        print('OK')
    finally:
        print('inner fin')
except:
    print('outer catch')
finally:
    print('outer fin')

#输出如下:
inner fin
outer catch
outer fin
内部捕获不到异常,会向外层传递异常
但是如果内层有finally且其中有return、break语句,则异常不会继续向外抛出!
def foo():
    try:
        ret = 1/0
    except KeyError as e:
        print(e)
    finally:
        print('inner fin')
        return # 异常被丢弃

try:
    foo()
except:
    print('outer catch')
finally:
    print('outer fin')

#输出如下:
inner fin
outer fin
异常的捕获机制
1.立即捕获
![]()
def parse_int(s):
    try:
        return int(s)
    except:
        return 0

print(parse_int('sss'))
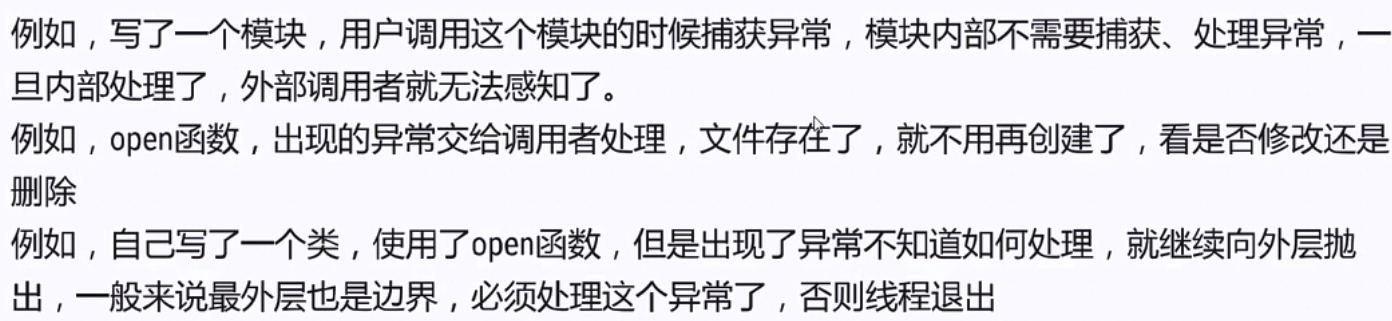
2边界捕获
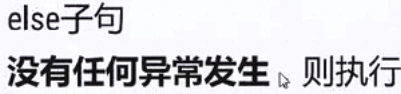
else子句
try:
    ret = 1*0
except ArithmeticError as e:
    print(e)
else:
    print('ok')
finally:
    print('fin')
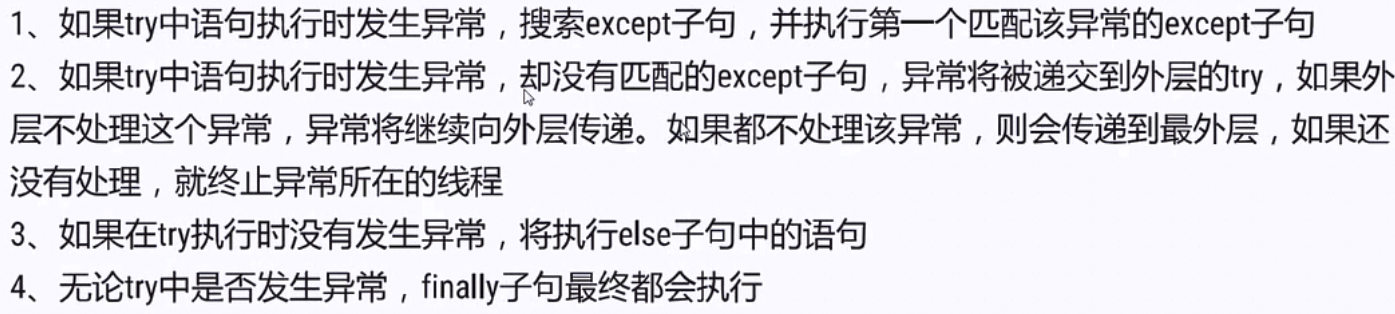
总结


try的工作原理
模块化

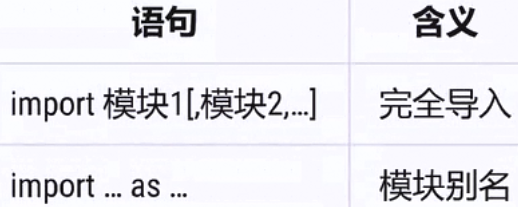
导入语句
单独运行下面例子,体会区别


总结
![]()


from语句


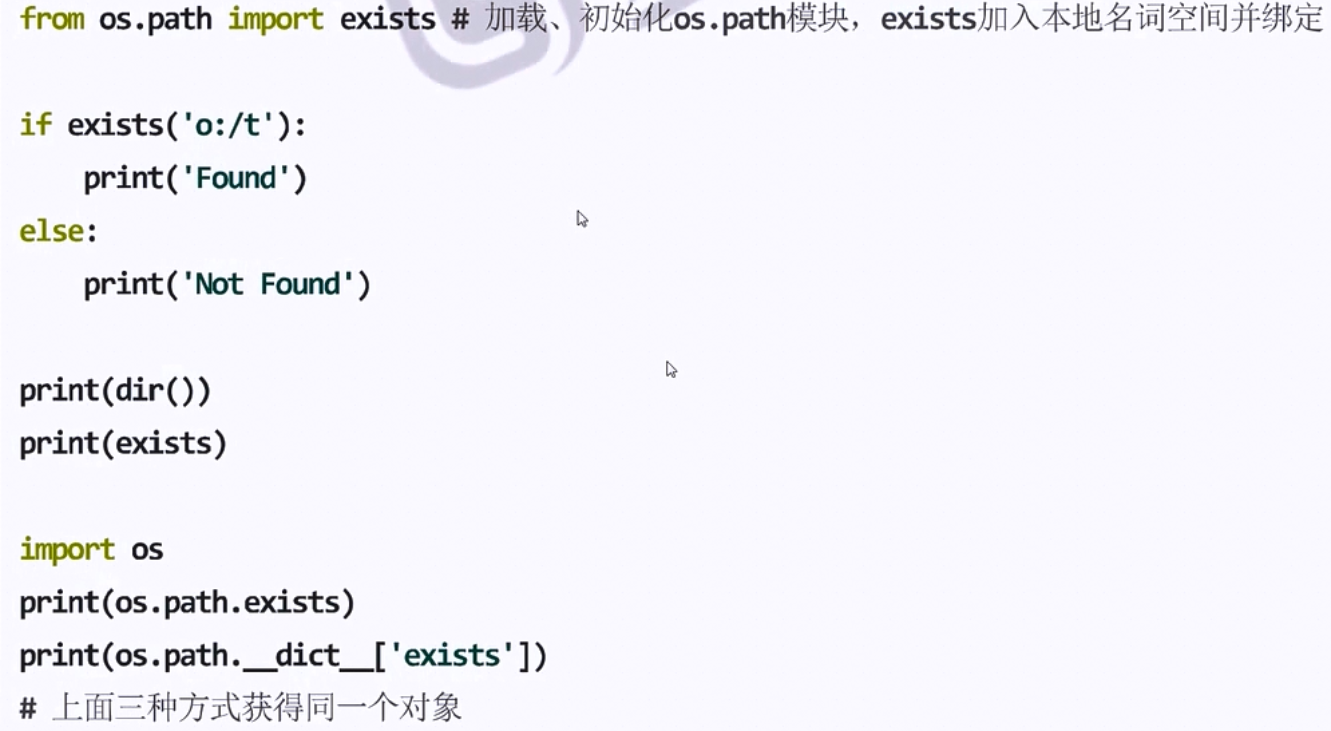
总结


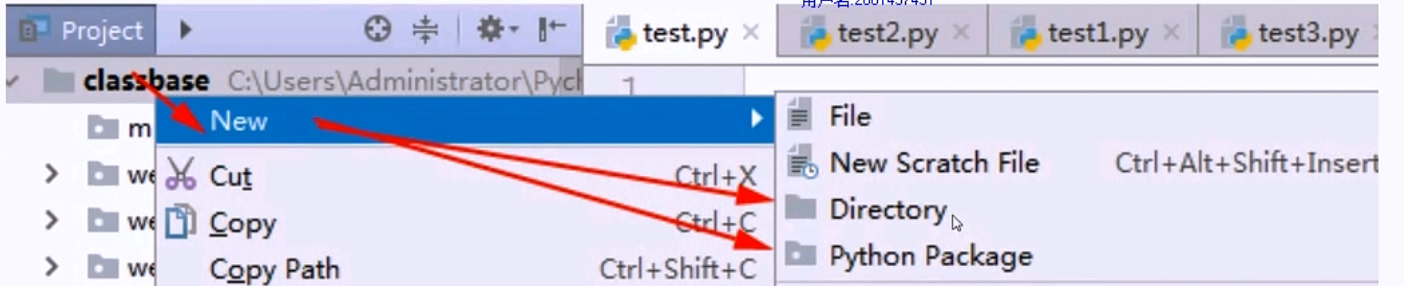
自定义模块
![]()
#test1.py文件
print("This is test1 module")

class A:
    def showmodule(self):
        print("{}.a = {}".format(self.__module__,self))
        print(self.__class__.__name__)

a = A()
a.showmodule()
#输出如下:
This is test1 module
__main__.a = <__main__.A object at 0x00000000028E5630>
A

#test2.py文件
import test1

a = test1.A()
a.showmodule()

#test3.py文件
from test1 import A as cls
a = cls()
a.showmodule()

#test2.py和test3.py文件输出如下:
This is test1 module
test1.a = <test1.A object at 0x00000000029C2F98>
A
test1.a = <test1.A object at 0x0000000001DC5518>
A
自定义模块命名规范

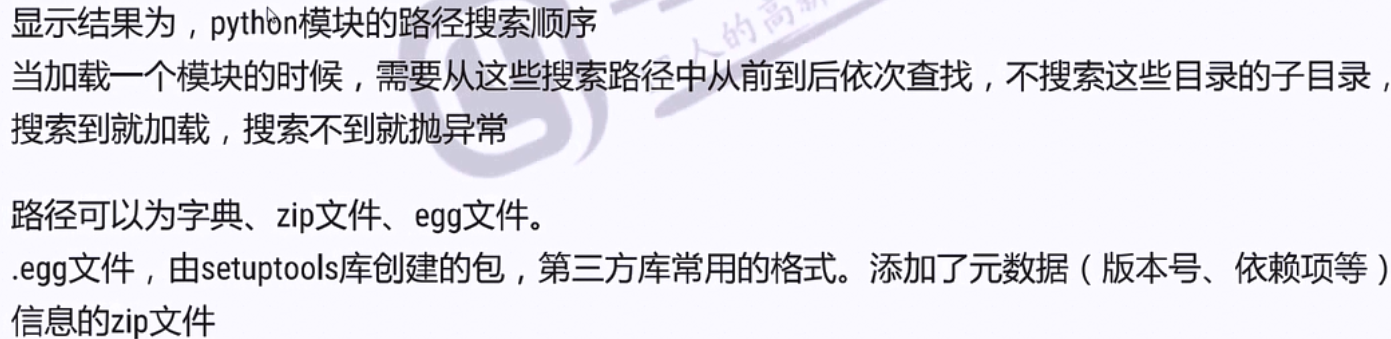
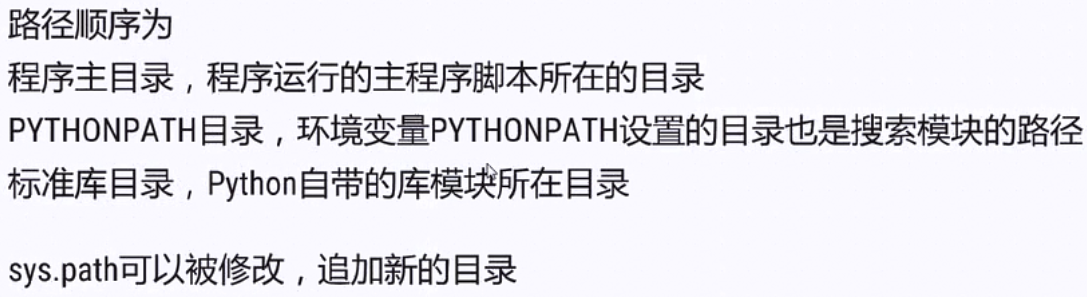
模块搜索顺序
![]()
import sys
for i in sys.path:
    print(i)

#输出如下:
F:\code_python_urllib_demo\Python全栈开发--异常及模块
F:\code_python_urllib_demo
D:\Anaconda3\python36.zip
D:\Anaconda3\DLLs
D:\Anaconda3\lib
D:\Anaconda3
D:\Anaconda3\lib\site-packages
D:\Anaconda3\lib\site-packages\Sphinx-1.5.6-py3.6.egg
D:\Anaconda3\lib\site-packages\pip-9.0.1-py3.6.egg
D:\Anaconda3\lib\site-packages\win32
D:\Anaconda3\lib\site-packages\win32\lib
D:\Anaconda3\lib\site-packages\Pythonwin
D:\Anaconda3\lib\site-packages\setuptools-27.2.0-py3.6.egg
D:\pycharm\PyCharm 2017.3.4\helpers\pycharm_matplotlib_backend
模块的重复导入
#test1.py文件
print("This is test1 module")

class A:
    def showmodule(self):
        print("{}.a = {}".format(self.__module__,self))
        print(self.__class__.__name__)

a = A()
a.showmodule()

#test2.py文件
import test1

print('local module')
import test1

模块的运行

#test1.py文件
import test2

#test2.py文件
#判断模块是否以程序的方式运行
if __name__ == '__main__':
    print('in __main__')#程序的方式运行
else:
    print('in import module')#模块导入的方式运行
if __name__ == '__main__':用途

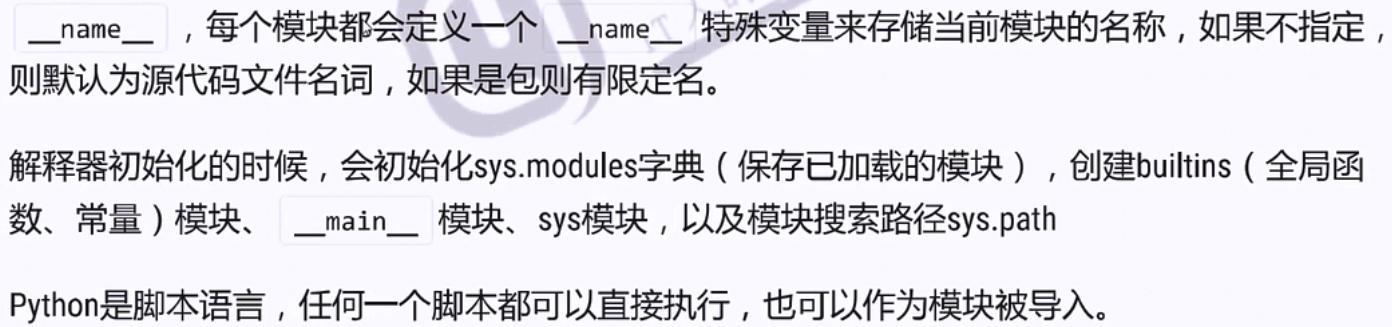
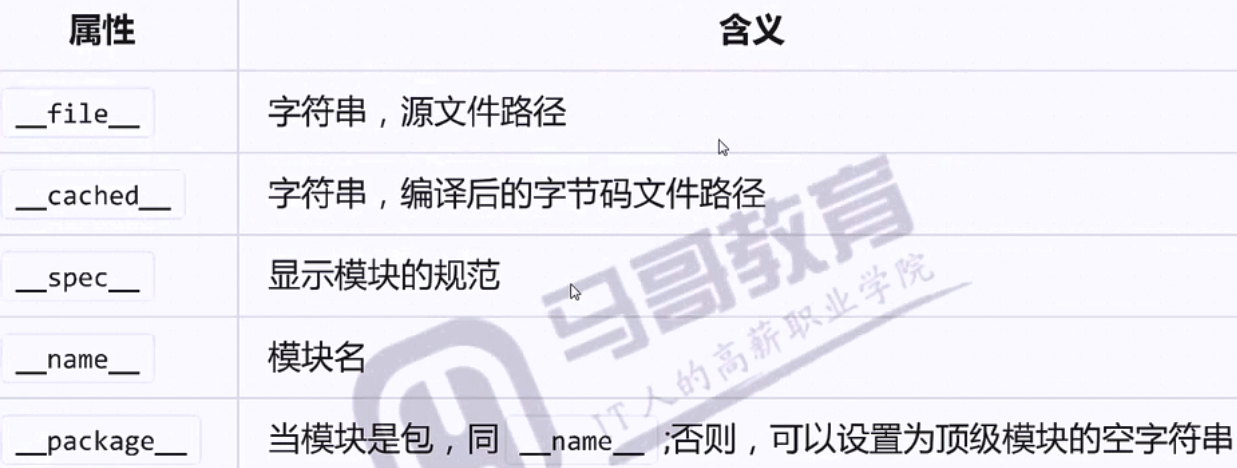
模块的属性
包

import m
print(m)
print(type(m))
print(dir(m))#没有__file__
#输出如下:
<module 'm' (namespace)>
<class 'module'>
['__doc__', '__loader__', '__name__', '__package__', '__path__', '__spec__']
![]()
![]()

子模块
![]()
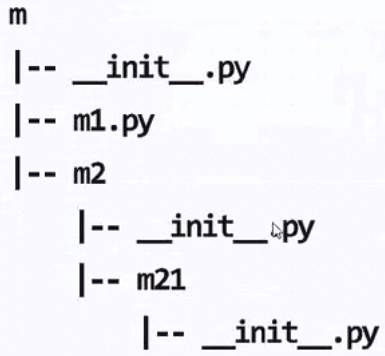
![]()
#注意查看模块的加载,当前名词空间
import m
# import m.m1
# from m import m1
# from m.m2 import m21
# import m.m2.m21

print(dir())
import sys
print(sorted(sys.modules.keys()))

模块和包的总结
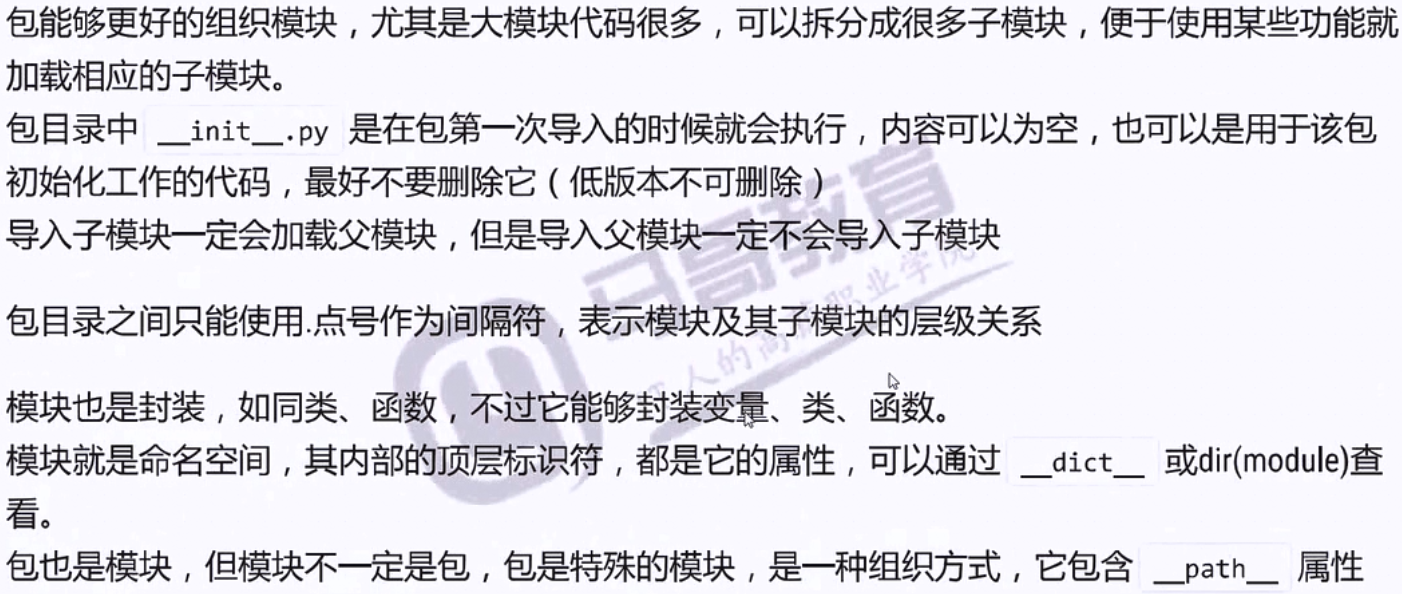


绝对导入、相对导入
绝对导入

相对导入
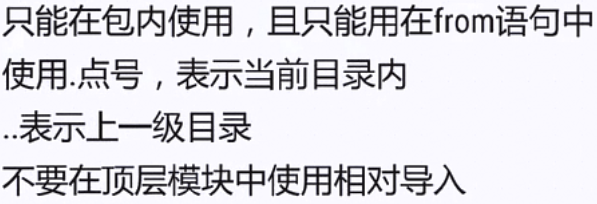
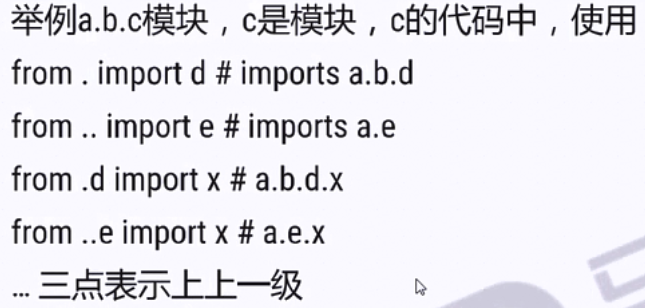
![]()

访问控制
下划线开头的模块名

模块内的标识符
#xyz.py文件
print(__name__)
A = 5
_B = 6
__C = 7
__my__ = 8

#test.py文件
import xyz
import sys

print(dir())#['__annotations__',..., 'sys', 'xyz']
print(xyz.A,xyz._B,xyz.__C,xyz.__my__)#5 6 7 8

from语句
#修改test.py文件
from xyz import A,_B as B,__my__,__C as C

import sys#xyz

print(dir())#['A', 'B', 'C', '__annotations__', ...,'__my__',..., '__spec__', 'sys']
print(A,B,__my__,C)#5 6 8 7
![]()
from ... import * 和 __all__
使用from ... import * 导入
#修改test.py文件
from xyz import *

import sys
print(dir())#['A', ... , 'sys']
print(locals()['A'])
print(sorted(locals().keys()))#['A', ... , 'sys']

A  = 55
print(locals()['A'])
![]()
使用 __all__
![]()
#修改xyz.py文件
__all__ = ["X","Y"]

print(__name__)
A = 5
_B = 6
__C = 7

__my__ = 8

X = 10
Y = 20

#修改test.py文件
from xyz import *

import sys
# print(sorted(sys.modules.keys()))
print(dir())#['A', ... , 'sys']
print(locals()['X'])#10
print(locals()['Y'])#20
![]()
#修改xyz.py文件
__all__ = ["X","Y","_B","__C"]

print(__name__)
A = 5
_B = 6
__C = 7

__my__ = 8

X = 10
Y = 20

#修改test.py文件
from xyz import *

import sys
# print(sorted(sys.modules.keys()))
print(dir())#['A', ... , 'sys']
print(locals()['X'])#10
print(locals()['Y'])#20
print(locals()['_B'])#6
print(locals()['__C'])#7
![]()
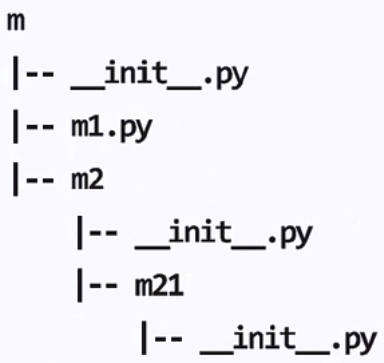
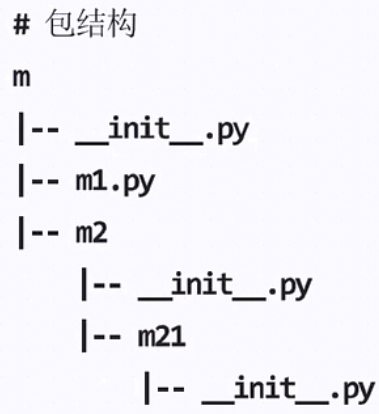
包和子模块
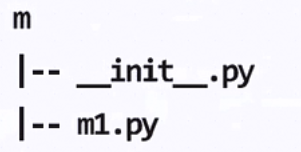
#__init.py文件中
print(__name__)
x = 1

#m1.py文件中
print(__name__)
y = 5

#test.py文件中
#如何访问到m1.py中的变量m1
#访问到m.m1的变量y的几种实现
#方法1,直接导入m1模块
import m.m1
print(dir())#['__annotations__', ... , 'm']
print(m.m1.y)

#方法2,直接导入m.m1的属性y
from m.m1 import y
print(dir())#['__annotations__', ... , 'y']
print(y)

#方法3,from m import *
#该方法导入后,无法看到子模块m1,无法访问y
#在__init__.py增加__all__ = ['x','m1'],使用__all__提供导出的名称
from m import *
print(dir())#['__annotations__' ,... , 'm1', 'x']
print(m1.y)

#方法4,不使用__all__
#在__init.py增加from . import m1
from m import *
print(dir())#['__annotations__', ... , 'm1', 'x']
print(m1.y)
![]()
#__init.py文件
print(__name__)
x = 1

from .m1 import y as _z
print(dir())
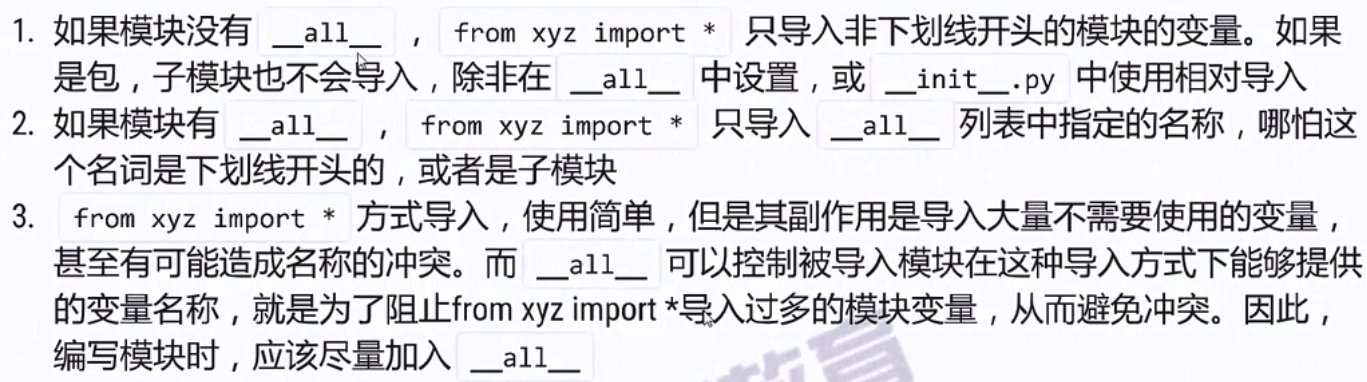
总结
![]()
![]()

模块变量的修改
#xyz.py文件
print(__name__)
X = 10

#test2.py文件
import xyz
print(xyz.X)

#test.py文件
import xyz
print(xyz.X)
xyz.X = 50
import test2

#运行test.py文件输出如下:
xyz
10
50

模块化高级内容
包管理

主要工具
distutils
![]()
setuptools

![]()
pip

wheel

使用setup.py打包
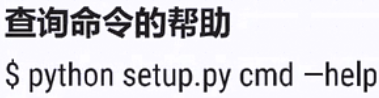
![]()
https://docs.python.org/3.5/distutils/setupscript.html

from distutils.core import setup

#导入setup函数并传参
setup(
    name = 'm',
    description = 'Python test m',
    author = 'chengyu',
    author_email = '867920363@qq.com',
    packages = ['m']
    # packages = ['m','m.m1','m.m2','m.m2.m21']
)
#name 名字
#version 版本
#packages=[] 打包列表
#packages=['m'] 指定m,就会把m所有的非目录子模块打包
#['m','m.m1.m2.m3'] 逐级建立目录,但是只把m的所有非目录子模块打包,把m.m1.m2.m3打包
#description 描述信息
#author 作者
#author_email 作者邮件
#url 包的主页,可以不写
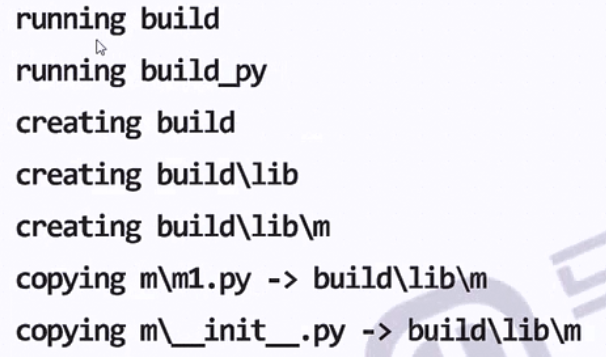
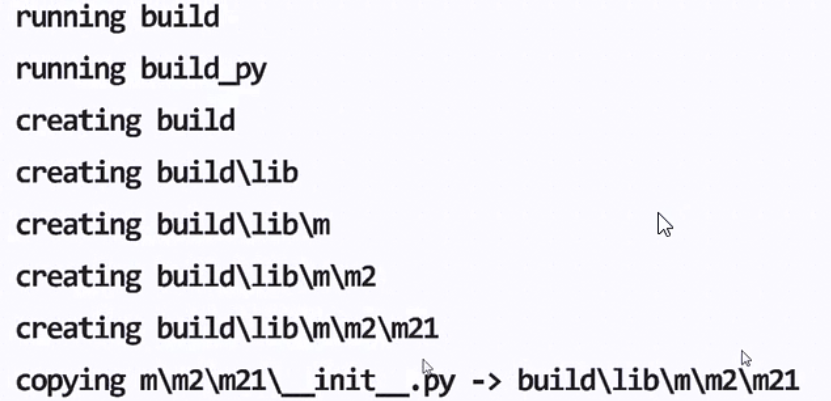
build命令,编译
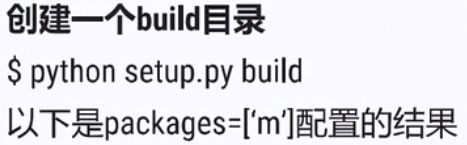


![]()

![]()
install命令,安装
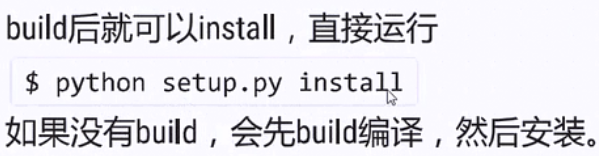
install会安装到site-packages路径下。
sdist命令,分发


插件化开发
动态导入
![]()
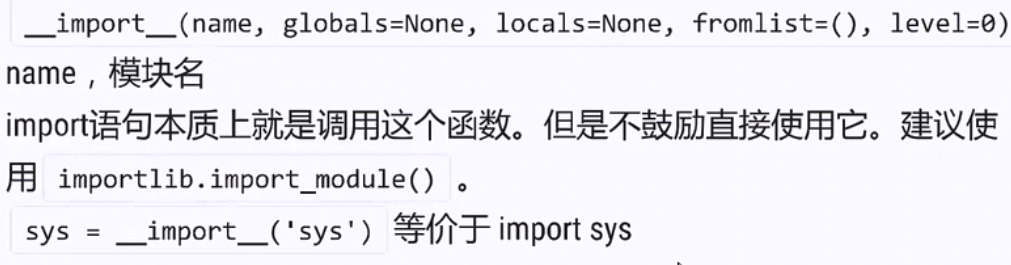
1.内建函数__import__()
#主程序模块test.py文件
if __name__ == '__main__':
    mod = __import__('test2')
    cls = getattr(mod,'A')
    cls().showme()

#test2.py文件
class A:
    def showme(self):
        print('I am A')
importlib.import_module()

#test2.py文件
class A:
    def showme(self):
        print('I am A')

#主程序模块test.py
import importlib
def plugin_load(plugin_name:str,seq=":"):
    m,_,c = plugin_name.partition(seq)
    mod = importlib.import_module(m)
    cls = getattr(mod,c)
    return cls()

if __name__ == '__main__':
    #装载插件
    a = plugin_load('test2:A')
    a.showme()
![]()
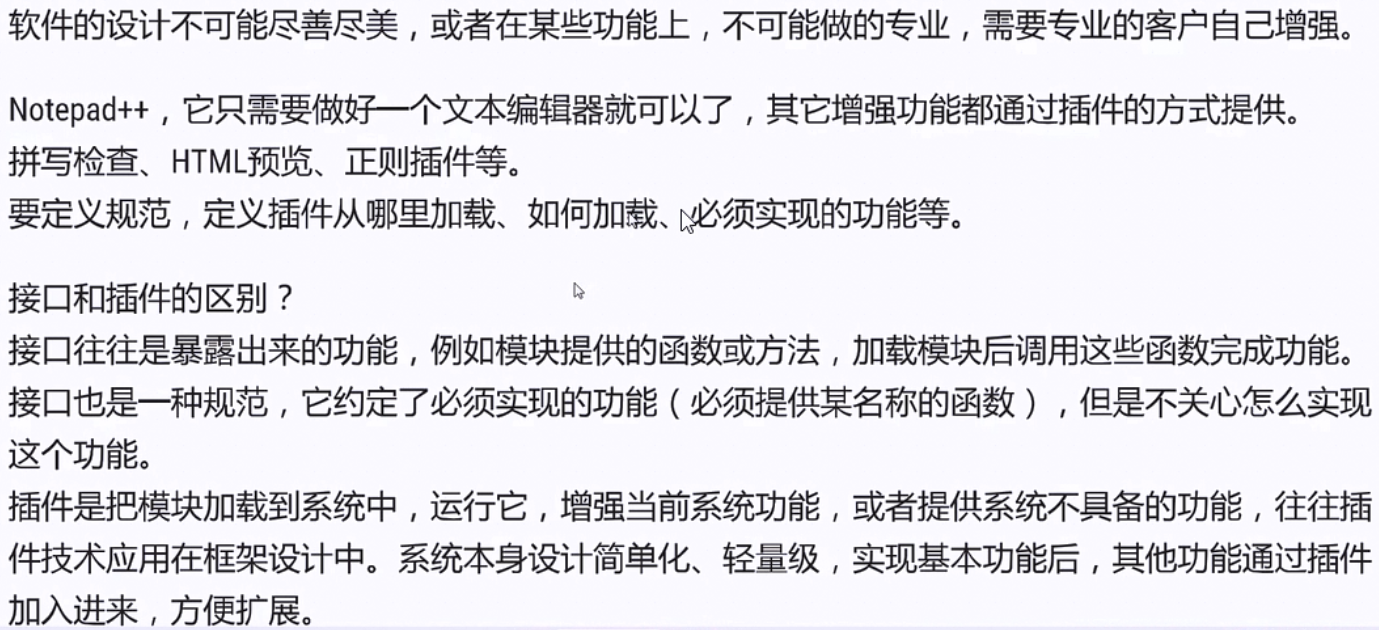
插件化编程技术
依赖的技术

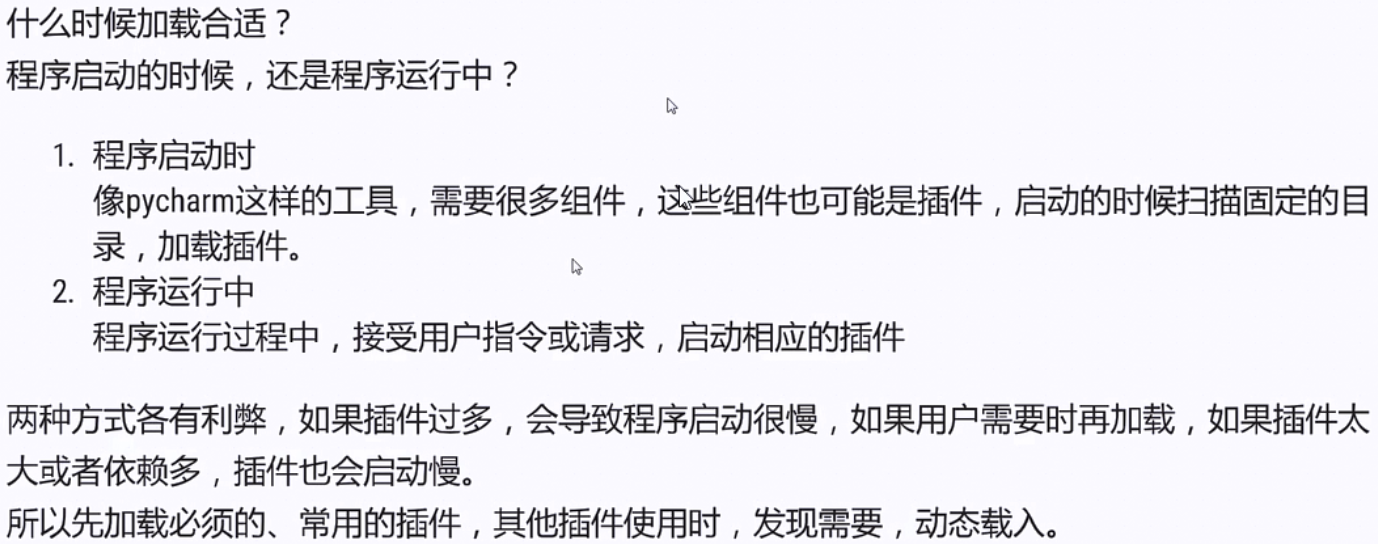
加载的时机
应用
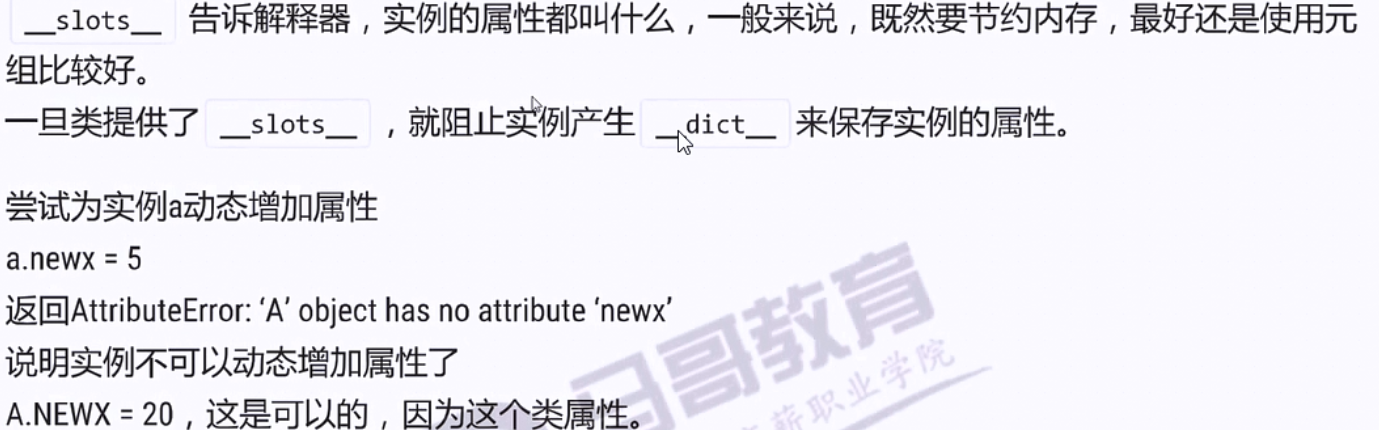
一、__slots__
问题的引出

class A:
    X = 1
    def __init__(self):
        self.y = 5
        self.z = 6

    def show(self):
        print(self.X,self.y,self.z)

a = A()
print(A.__dict__)
print(a.__dict__)

class A:
    X = 1

    # __slots__ = ('y','z')#元组
    # __slots__ = ['y','z']#可以
    # __slots__ = 'y','z'#可以
    __slots__ = 'y'#可以
    def __init__(self):
        self.y = 5
        # self.z = 6

    def show(self):
        # print(self.X,self.y,self.z)
        print(self.X,self.y)

a = A()
print(A.__dict__)
# print(a.__dict__)
print(a.__slots__)
继承
class A:
    X = 1
    __slots__ = ('y','z')#元组

    def __init__(self):
        self.y = 5

    def show(self):
        print(self.X,self.y)

a = A()
a.show()
print(A.__dict__)
print(a.__slots__)

class B(A):
    pass

print('B',B().__dict__)#B {}
![]()
应用场景
![]()
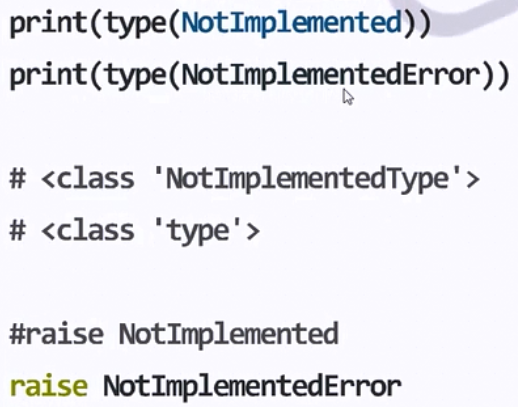
二、未实现和未实现的异常

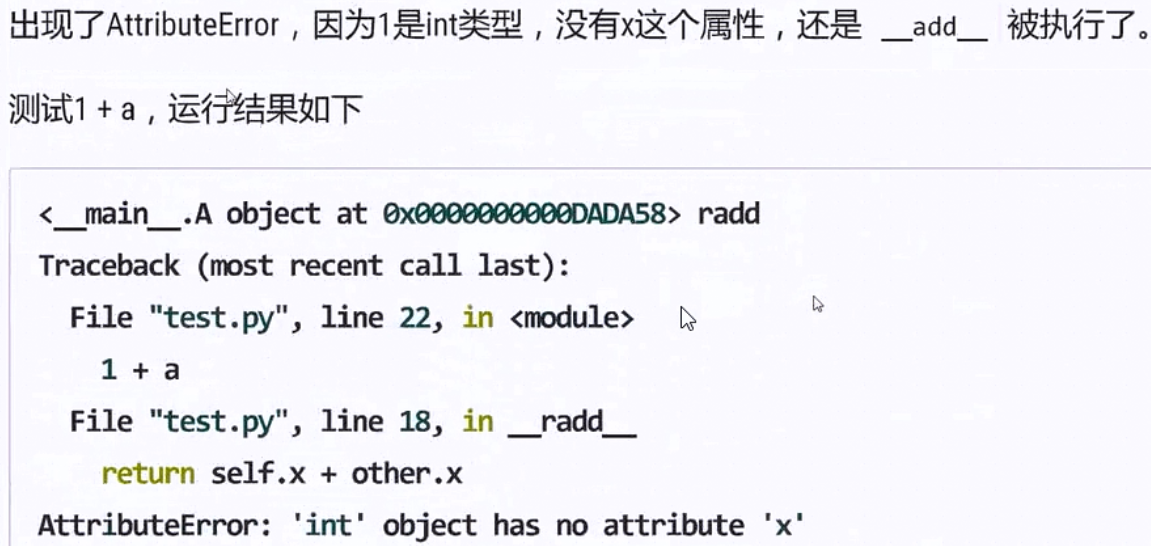
三、运算符重载中的反向方法
![]()
class A:
    def __init__(self,x):
        self.x = x

    def __add__(self, other):
        print(self,'add')
        return self.x + other.x

    def __iadd__(self, other):
        print(self,'iadd')
        return A(self.x + other.x)

    def __radd__(self, other):
        print(self,'radd')
        return self.x + other.x

a = A(4)
b = A(5)
print(a,b)
print(a+b)
print(b+a)
b+=a
a+=b
#运行结果:
<__main__.A object at 0x0000000002965080> <__main__.A object at 0x00000000029650B8>
<__main__.A object at 0x0000000002965080> add
9
<__main__.A object at 0x00000000029650B8> add
9
<__main__.A object at 0x00000000029650B8> iadd
<__main__.A object at 0x0000000002965080> iadd
![]()

class A:
    def __init__(self,x):
        self.x = x

    def __add__(self, other):
        print(self,'add')
        return self.x + other.x

    def __iadd__(self, other):
        print(self,'iadd')
        return A(self.x + other.x)

    def __radd__(self, other):
        print(self,'radd')
        return self.x + other.x

a = A(4)
a+1
#运行结果:
<__main__.A object at 0x00000000029356D8> add
Traceback (most recent call last):
File "F:/code_python_urllib_demo/Python全栈开发--异常及模块/test.py", line 18, in <module>
a+1
File "F:/code_python_urllib_demo/Python全栈开发--异常及模块/test.py", line 7, in __add__
return self.x + other.x
AttributeError: 'int' object has no attribute 'x'

class A:
    def __init__(self,x):
        self.x = x

    def __add__(self, other):
        print(self,'add')
        return self.x + other.x

    def __iadd__(self, other):
        print(self,'iadd')
        return A(self.x + other.x)

    def __radd__(self, other):
        print(self,'radd')
        return self.x + other.x

class B:
    def __init__(self,x):
        self.x = x

a = A(4)
b = B(10)
print(a+b)
print(b+a)
#运行结果
<__main__.A object at 0x00000000029A5080> add
14
<__main__.A object at 0x00000000029A5080> radd
14

![]()
class A:
    def __init__(self,x):
        self.x = x

    def __add__(self, other):
        print(self,'add')
        try:
            return self.x + other.x
        except AttributeError:
            try:
                x = int(other)
            except:
                x = 0
            return self.x + x

    def __iadd__(self, other):
        print(self,'iadd')
        return A(self.x + other.x)

    def __radd__(self, other):
        print(self,'radd')
        return self + other

class B:
    def __init__(self,x):
        self.x = x

a = A(4)
b = B(10)
print(a+b)
print(b+a)
print(a+2)
print(2+a)
print(a+'abc')
print('abc'+a)
#运行结果:
<__main__.A object at 0x0000000002965048> add
14
<__main__.A object at 0x0000000002965048> radd
<__main__.A object at 0x0000000002965048> add
14
<__main__.A object at 0x0000000002965048> add
6
<__main__.A object at 0x0000000002965048> radd
<__main__.A object at 0x0000000002965048> add
6
<__main__.A object at 0x0000000002965048> add
4
<__main__.A object at 0x0000000002965048> radd
<__main__.A object at 0x0000000002965048> add
4

做一枚奔跑的老少年!

 浙公网安备 33010602011771号