

Spring Boot【全解】3
三、SpringBoot原理分析
第1章
1.1 起步依赖原理分析
1.1.1 分析spring-boot-starter-parent
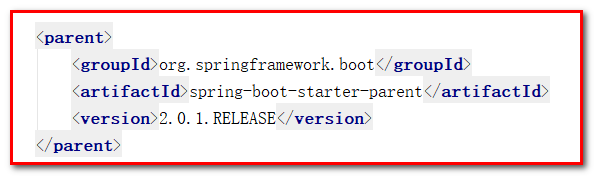
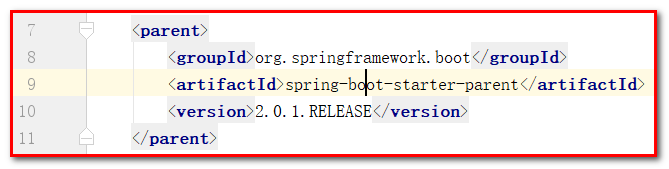
按住Ctrl点击pom.xml中的spring-boot-starter-parent,跳转到了spring-boot-starter-parent的pom.xml,xml配置如下(只摘抄了部分重点配置):
<parent>

    <groupId>org.springframework.boot</groupId>

    <artifactId>spring-boot-dependencies</artifactId>

    <version>2.0.1.RELEASE</version>

    <relativePath>../../spring-boot-dependencies</relativePath>

</parent>
按住Ctrl点击pom.xml中的spring-boot-starter-dependencies,跳转到了spring-boot-starter-dependencies的pom.xml,xml配置如下(只摘抄了部分重点配置):
<properties>

    <activemq.version>5.15.3</activemq.version>

    <antlr2.version>2.7.7</antlr2.version>

    <appengine-sdk.version>1.9.63</appengine-sdk.version>

    <artemis.version>2.4.0</artemis.version>

    <aspectj.version>1.8.13</aspectj.version>

    <assertj.version>3.9.1</assertj.version>

    <atomikos.version>4.0.6</atomikos.version>

    <bitronix.version>2.1.4</bitronix.version>

    <build-helper-maven-plugin.version>3.0.0</build-helper-maven-plugin.version>

    <byte-buddy.version>1.7.11</byte-buddy.version>

    ... ...
<hibernate.version>5.2.16.Final</hibernate.version>

    <hibernate-validator.version>6.0.9.Final</hibernate-validator.version>

    ... ...

    <jstl.version>1.2</jstl.version>

    <jtds.version>1.3.1</jtds.version>

    <junit.version>4.12</junit.version>

    <junit-jupiter.version>5.1.0</junit-jupiter.version>

    <junit-platform.version>1.1.0</junit-platform.version>
... ...

</properties>

<dependencyManagement>

    <dependencies>

        <dependency>

            <groupId>org.springframework.boot</groupId>

            <artifactId>spring-boot</artifactId>

            <version>2.0.1.RELEASE</version>

        </dependency>

        <dependency>

            <groupId>org.springframework.boot</groupId>

            <artifactId>spring-boot-test</artifactId>

            <version>2.0.1.RELEASE</version>

        </dependency>
... ...

        <dependency>

            <groupId>org.springframework.boot</groupId>

            <artifactId>spring-boot-starter-activemq</artifactId>

            <version>2.0.1.RELEASE</version>

        </dependency>

        <dependency>

            <groupId>org.springframework.boot</groupId>

            <artifactId>spring-boot-starter-actuator</artifactId>

            <version>2.0.1.RELEASE</version>

        </dependency>

        <dependency>

            <groupId>org.springframework.boot</groupId>

            <artifactId>spring-boot-starter-amqp</artifactId>

            <version>2.0.1.RELEASE</version>

        </dependency>

        <dependency>

            <groupId>org.springframework.boot</groupId>

            <artifactId>spring-boot-starter-aop</artifactId>

            <version>2.0.1.RELEASE</version>

        </dependency>
... ...

    </dependencies>

</dependencyManagement>

<build>

    <pluginManagement>

        <plugins>

            <plugin>

                <groupId>org.jetbrains.kotlin</groupId>

                <artifactId>kotlin-maven-plugin</artifactId>

                <version>${kotlin.version}</version>

            </plugin>

            <plugin>

                <groupId>org.jooq</groupId>

                <artifactId>jooq-codegen-maven</artifactId>

                <version>${jooq.version}</version>

            </plugin>

            <plugin>

                <groupId>org.springframework.boot</groupId>

                <artifactId>spring-boot-maven-plugin</artifactId>

                <version>2.0.1.RELEASE</version>

            </plugin>
... ...

        </plugins>

    </pluginManagement>

</build>
总结:从上面的spring-boot-starter-dependencies的pom.xml中我们可以发现,一部分坐标的版本、依赖管理、插件管理已经定义好,所以我们的SpringBoot工程继承spring-boot-starter-parent后已经具备版本锁定等配置了(不会出现版本冲突的问题)。所以起步依赖的作用就是进行依赖的传递。
1.1.1 分析spring-boot-starter-web
不是所有的jar都传递,需要指定,用到哪个jar包,导入哪个jar包。
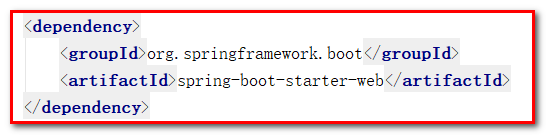
按住Ctrl点击pom.xml中的spring-boot-starter-web,跳转到了spring-boot-starter-web的pom.xml,xml配置如下(只摘抄了部分重点配置):
<?xml version="1.0" encoding="UTF-8"?>

<project xsi:schemaLocation="http://maven.apache.org/POM/4.0.0 http://maven.apache.org/xsd/maven-4.0.0.xsd" xmlns="http://maven.apache.org/POM/4.0.0"

    xmlns:xsi="http://www.w3.org/2001/XMLSchema-instance">

  <modelVersion>4.0.0</modelVersion>

  <parent>

    <groupId>org.springframework.boot</groupId>

    <artifactId>spring-boot-starters</artifactId>

    <version>2.0.1.RELEASE</version>

  </parent>

  <groupId>org.springframework.boot</groupId>

  <artifactId>spring-boot-starter-web</artifactId>

  <version>2.0.1.RELEASE</version>

  <name>Spring Boot Web Starter</name>

  <description>Starter for building web, including RESTful, applications using Spring

      MVC. Uses Tomcat as the default embedded container</description>

  <dependencies>

    <dependency>

      <groupId>org.springframework.boot</groupId>

      <artifactId>spring-boot-starter</artifactId>

      <version>2.0.1.RELEASE</version>

      <scope>compile</scope>

    </dependency>

    <dependency>

      <groupId>org.springframework.boot</groupId>

      <artifactId>spring-boot-starter-json</artifactId>

      <version>2.0.1.RELEASE</version>

      <scope>compile</scope>

    </dependency>

    <dependency>

      <groupId>org.springframework.boot</groupId>

      <artifactId>spring-boot-starter-tomcat</artifactId>

      <version>2.0.1.RELEASE</version>

      <scope>compile</scope>

    </dependency>

    <dependency>

      <groupId>org.hibernate.validator</groupId>

      <artifactId>hibernate-validator</artifactId>

      <version>6.0.9.Final</version>

      <scope>compile</scope>

    </dependency>

    <dependency>

      <groupId>org.springframework</groupId>

      <artifactId>spring-web</artifactId>

      <version>5.0.5.RELEASE</version>

      <scope>compile</scope>

    </dependency>

    <dependency>

      <groupId>org.springframework</groupId>

      <artifactId>spring-webmvc</artifactId>

      <version>5.0.5.RELEASE</version>

      <scope>compile</scope>

    </dependency>

  </dependencies>

</project>
总结:从上面的spring-boot-starter-web的pom.xml中我们可以发现,spring-boot-starter-web就是将web开发要使用的spring-web、spring-webmvc等坐标进行了“打包”,这样我们的工程只要引入spring-boot-starter-web起步依赖的坐标就可以进行web开发了,同样体现了依赖传递的作用,同时加载tomcat,只要启动main方法,就相当于起到tomcat进行开发;同时加载json,支持springmvc的数据请求和响应。
2.1 自动配置原理解析
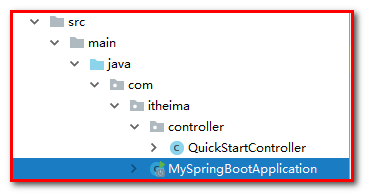
按住Ctrl点击查看启动类MySpringBootApplication上的注解@SpringBootApplication
@SpringBootApplication

public class MySpringBootApplication {


    public static void main(String[] args) {

        SpringApplication.run(MySpringBootApplication.class);

    }

}
注解@SpringBootApplication的源码
@Target({ElementType.TYPE})

@Retention(RetentionPolicy.RUNTIME)

@Documented

@Inherited

@SpringBootConfiguration

@EnableAutoConfiguration

@ComponentScan(

    excludeFilters = {@Filter(

    type = FilterType.CUSTOM,

    classes = {TypeExcludeFilter.class}

), @Filter(

    type = FilterType.CUSTOM,

    classes = {AutoConfigurationExcludeFilter.class}

)}

)

public @interface SpringBootApplication {

    @AliasFor(

        annotation = EnableAutoConfiguration.class

    )

    Class<?>[] exclude() default {};


    @AliasFor(

        annotation = EnableAutoConfiguration.class

    )

    String[] excludeName() default {};


    @AliasFor(

        annotation = ComponentScan.class,

        attribute = "basePackages"

    )

    String[] scanBasePackages() default {};


    @AliasFor(

        annotation = ComponentScan.class,

        attribute = "basePackageClasses"

    )

    Class<?>[] scanBasePackageClasses() default {};

}
1:其中:@ComponentScan包表示组件扫描,我们使用@Controller可以被扫描到,因为MySpringBootApplication.java放置到com.itheima下,说明它表示扫描com.itheima包极其子包都可以使用spring的组件
2:其中:@SpringBootConfiguration:等同与@Configuration,既标注该类是Spring的一个配置类(用于省略applicationContext.xml文件)
@Target({ElementType.TYPE})

@Retention(RetentionPolicy.RUNTIME)

@Documented

@Configuration

public @interface SpringBootConfiguration {

}
3:其中:@EnableAutoConfiguration:SpringBoot自动配置功能开启
按住Ctrl点击查看注解@EnableAutoConfiguration
@Target({ElementType.TYPE})

@Retention(RetentionPolicy.RUNTIME)

@Documented

@Inherited

@AutoConfigurationPackage

@Import({AutoConfigurationImportSelector.class})

public @interface EnableAutoConfiguration {

    String ENABLED_OVERRIDE_PROPERTY = "spring.boot.enableautoconfiguration";


    Class<?>[] exclude() default {};


    String[] excludeName() default {};

}
其中:@Import(AutoConfigurationImportSelector.class) 导入了AutoConfigurationImportSelector类
按住Ctrl点击查看AutoConfigurationImportSelector源码
package org.springframework.boot.autoconfigure;
public class AutoConfigurationImportSelector implements DeferredImportSelector, BeanClassLoaderAware, ResourceLoaderAware, BeanFactoryAware, EnvironmentAware, Ordered {

    private static final String[] NO_IMPORTS = new String[0];

    private static final Log logger = LogFactory.getLog(AutoConfigurationImportSelector.class);

    private static final String PROPERTY_NAME_AUTOCONFIGURE_EXCLUDE = "spring.autoconfigure.exclude";

    private ConfigurableListableBeanFactory beanFactory;

    private Environment environment;

    private ClassLoader beanClassLoader;

    private ResourceLoader resourceLoader;


    public AutoConfigurationImportSelector() {

    }


    public String[] selectImports(AnnotationMetadata annotationMetadata) {

        if (!this.isEnabled(annotationMetadata)) {

            return NO_IMPORTS;

        } else {

            AutoConfigurationMetadata autoConfigurationMetadata = AutoConfigurationMetadataLoader.loadMetadata(this.beanClassLoader);

            AnnotationAttributes attributes = this.getAttributes(annotationMetadata);

            List<String> configurations = this.getCandidateConfigurations(annotationMetadata, attributes);

            configurations = this.removeDuplicates(configurations);

            Set<String> exclusions = this.getExclusions(annotationMetadata, attributes);

            this.checkExcludedClasses(configurations, exclusions);

            configurations.removeAll(exclusions);

            configurations = this.filter(configurations, autoConfigurationMetadata);

            this.fireAutoConfigurationImportEvents(configurations, exclusions);

            return StringUtils.toStringArray(configurations);

        }

    }


    protected List<String> getCandidateConfigurations(AnnotationMetadata metadata, AnnotationAttributes attributes) {

        List<String> configurations = SpringFactoriesLoader.loadFactoryNames(this.getSpringFactoriesLoaderFactoryClass(), this.getBeanClassLoader());

        Assert.notEmpty(configurations, "No auto configuration classes found in META-INF/spring.factories. If you are using a custom packaging, make sure that file is correct.");

        return configurations;

    }
}
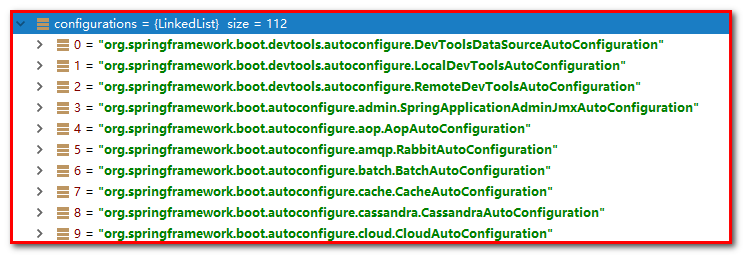
其中,SpringFactoriesLoader.loadFactoryNames 方法的作用就是从META-INF/spring.factories文件中读取指定类对应的类名称列表
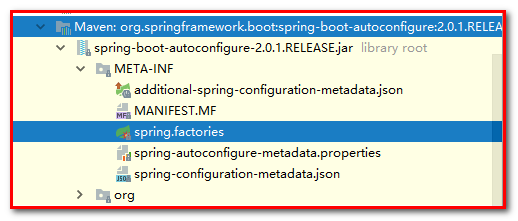
spring.factories 文件中有关自动配置的配置信息如下:
spring.factories
... ... ...

org.springframework.boot.autoconfigure.solr.SolrAutoConfiguration,\

org.springframework.boot.autoconfigure.thymeleaf.ThymeleafAutoConfiguration,\

org.springframework.boot.autoconfigure.transaction.TransactionAutoConfiguration,\

org.springframework.boot.autoconfigure.transaction.jta.JtaAutoConfiguration,\

org.springframework.boot.autoconfigure.validation.ValidationAutoConfiguration,\

org.springframework.boot.autoconfigure.web.client.RestTemplateAutoConfiguration,\

org.springframework.boot.autoconfigure.web.embedded.EmbeddedWebServerFactoryCustomizerAutoConfiguration,\

org.springframework.boot.autoconfigure.web.reactive.HttpHandlerAutoConfiguration,\

org.springframework.boot.autoconfigure.web.reactive.ReactiveWebServerFactoryAutoConfiguration,\

org.springframework.boot.autoconfigure.web.reactive.WebFluxAutoConfiguration,\

org.springframework.boot.autoconfigure.web.reactive.error.ErrorWebFluxAutoConfiguration,\

org.springframework.boot.autoconfigure.web.reactive.function.client.WebClientAutoConfiguration,\

org.springframework.boot.autoconfigure.web.servlet.DispatcherServletAutoConfiguration,\

org.springframework.boot.autoconfigure.web.servlet.ServletWebServerFactoryAutoConfiguration,\

org.springframework.boot.autoconfigure.web.servlet.error.ErrorMvcAutoConfiguration,\

org.springframework.boot.autoconfigure.web.servlet.HttpEncodingAutoConfiguration,\

org.springframework.boot.autoconfigure.web.servlet.MultipartAutoConfiguration,\

org.springframework.boot.autoconfigure.web.servlet.WebMvcAutoConfiguration,\

org.springframework.boot.autoconfigure.websocket.reactive.WebSocketReactiveAutoConfiguration,\

... ... ...
上面配置文件存在大量的以AutoConfiguration为结尾的类名称,这些类就是存有自动配置信息的类,而SpringApplication在获取这些类名后再加载
我们以ServletWebServerFactoryAutoConfiguration为例,搜索spring.factories文件,来分析源码:
@Configuration

@AutoConfigureOrder(-2147483648)

@ConditionalOnClass({ServletRequest.class})

@ConditionalOnWebApplication(

    type = Type.SERVLET

)

@EnableConfigurationProperties({ServerProperties.class})

@Import({ServletWebServerFactoryAutoConfiguration.BeanPostProcessorsRegistrar.class, EmbeddedTomcat.class, EmbeddedJetty.class, EmbeddedUndertow.class})

public class ServletWebServerFactoryAutoConfiguration {

    public ServletWebServerFactoryAutoConfiguration() {

    }


    @Bean

    public ServletWebServerFactoryCustomizer servletWebServerFactoryCustomizer(ServerProperties serverProperties) {

        return new ServletWebServerFactoryCustomizer(serverProperties);

    }
... ...
}
其中:
@Bean
表示SpringBoot启动后,通过传递性依赖的坐标,获取当前坐标需要在applicationContext.xml中需要的配置,只不过SpringBoot使用@Bean自动完成的创建,简化了很多的Xml文件的代码量,省略了applicationContext.xml的配置 。
@EnableConfigurationProperties(ServerProperties.class) 代表加载ServerProperties服务器配置属性类
进入ServerProperties.class源码如下:
@ConfigurationProperties(prefix = "server", ignoreUnknownFields = true)

public class ServerProperties {


   /**

    * Server HTTP port.

    */

   private Integer port;


   /**

    * Network address to which the server should bind.

    */

   private InetAddress address;
}
其中,
prefix = "server" 表示SpringBoot配置文件中的前缀,SpringBoot会将配置文件中以server开始的属性映射到该类的字段中。
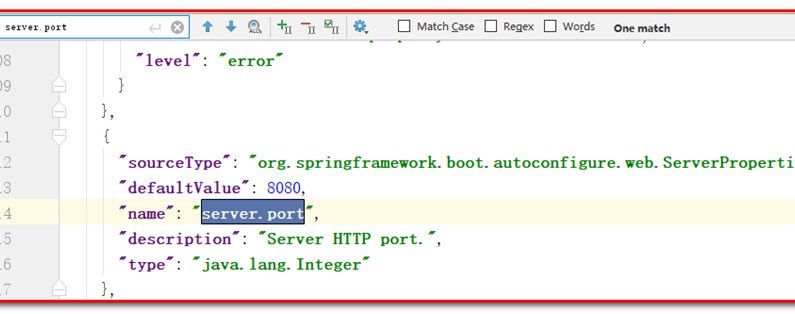
同级目录下打开:spring-configuration-metadata.json

搜素:server.port
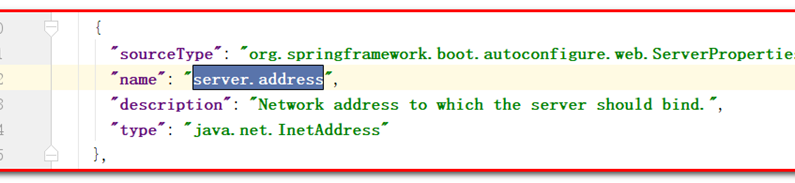
搜素:server.address
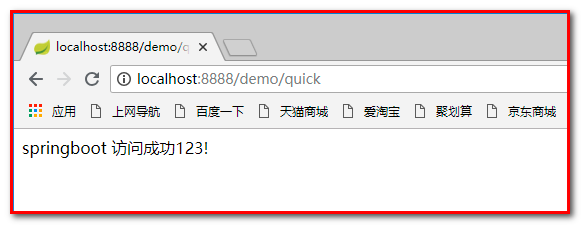
也可以在resources下创建application.properties文件,覆盖底层配置
映射关系如下:
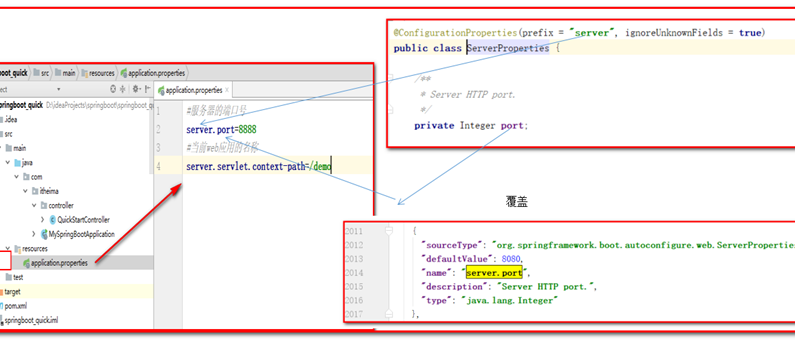
重新启动,我们发现端口变成8888,web访问路径也变成了demo
为什么可以在resources下创建application.properties文件呢?我们查看springboot的启动依赖:
点击spring-boot-starter-parent
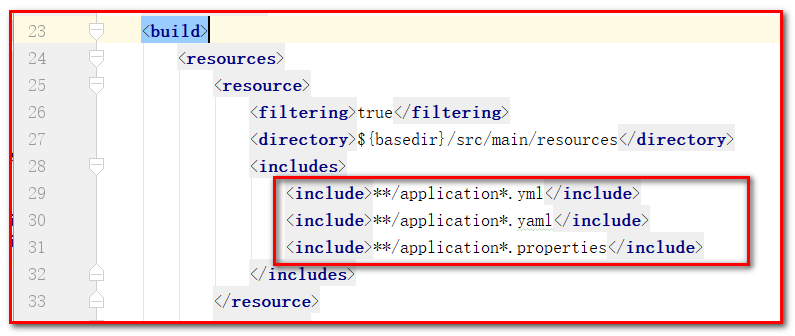
发现除了可以使用application.propertes文件,也可以使用application.yml或者application.yaml文件。


【推荐】国内首个AI IDE,深度理解中文开发场景,立即下载体验Trae
【推荐】编程新体验,更懂你的AI,立即体验豆包MarsCode编程助手
【推荐】抖音旗下AI助手豆包,你的智能百科全书,全免费不限次数
【推荐】轻量又高性能的 SSH 工具 IShell:AI 加持,快人一步
· Linux系列:如何用heaptrack跟踪.NET程序的非托管内存泄露
· 开发者必知的日志记录最佳实践
· SQL Server 2025 AI相关能力初探
· Linux系列:如何用 C#调用 C方法造成内存泄露
· AI与.NET技术实操系列(二):开始使用ML.NET
· 被坑几百块钱后,我竟然真的恢复了删除的微信聊天记录!
· 没有Manus邀请码?试试免邀请码的MGX或者开源的OpenManus吧
· 【自荐】一款简洁、开源的在线白板工具 Drawnix
· 园子的第一款AI主题卫衣上架——"HELLO! HOW CAN I ASSIST YOU TODAY
· Docker 太简单,K8s 太复杂?w7panel 让容器管理更轻松!