
MediaPipe
MediaPipe
github:https://github.com/google/mediapipe
MediaPipe 的主要概念
数据包(Packet)
数据流(Stream)
计算单元(Calculator)
图(Graph)
子图(Subgraph)
bazel build -c opt --define MEDIAPIPE_DISABLE_GPU=1 --action_env PYTHON_BIN_PATH="C://Python//Python36//python.exe" mediapipe/examples/desktop/hand_tracking:hand_tracking_cpu --verbose_failures
注意:
Building C++ command-line example apps
To build, for example, MediaPipe Hands, run:
bazel build -c opt --define MEDIAPIPE_DISABLE_GPU=1 mediapipe/examples/desktop/hand_tracking:hand_tracking_cpu
如遇到python错误,命令中指定python路径 --action_env PYTHON_BIN_PATH="C://Python//Python36//python.exe"
例:
bazel build -c opt --define MEDIAPIPE_DISABLE_GPU=1 --action_env PYTHON_BIN_PATH="C://Python//Python36//python.exe" mediapipe/examples/desktop/hand_tracking:hand_tracking_cpu --verbose_failures
Bazel
中文笔记推荐:https://blog.gmem.cc/bazel-study-note
使用Bazel编译项目
在https://github.com/bazelbuild/examples/,可以clone到本地试一下
1 编译你的第一个Bazel项目
首先进入到cpp-tutorial/stage1目录下,然后运行以下指令:
bazel build //main:hello-world注意target中的//main:是BUILD文件相对于WORKSPACE文件的位置,hello-world则是我们在BUILD文件中命名好的target的名字。
现在你可以测试你刚刚生成的二进制文件了:
bazel-bin/main/hello-world查看依赖图
生成依赖图的一段文字描述(即在工作区根目录下运行下述指令):
bazel query --nohost_deps --noimplicit_deps 'deps(//main:hello-world)' --output graph
这个指令告诉Bazel查找target //main:hello-world的所有依赖项(不包括host和隐式依赖),然后输出图的文字描述。再把文字描述贴到GraphViz里,可以看到依赖图。
2 多个target的编译
cpp-tutorial/stage2/main
3 多个package的编译
cpp-tutorial/stage3
bazel使用windows.h
https://github.com/bazelbuild/bazel/tree/master/examples/windows/dll
bazel build //examples/windows/dll:hello_world-link-to-dll-via-lib
例:bazel-windows-demo

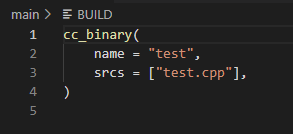


bazel build //main:test


