
【quick start】nexus快速搭建、配置教程
搭建
使用k8s编排文件快速部署
---
apiVersion: apps/v1
kind: Deployment
metadata:
  annotations: {}
  labels:
    k8s-app: nexus3
    k8s.kuboard.cn/name: nexus3
  name: nexus3
  namespace: aap-global
spec:
  progressDeadlineSeconds: 600
  replicas: 1
  revisionHistoryLimit: 10
  selector:
    matchLabels:
      k8s-app: nexus3
  strategy:
    rollingUpdate:
      maxSurge: 25%
      maxUnavailable: 25%
    type: RollingUpdate
  template:
    metadata:
      creationTimestamp: null
      labels:
        k8s-app: nexus3
      name: nexus3
      namespace: aap-global
    spec:
      containers:
        - image: 'nexus3:3.41.1'
          imagePullPolicy: Always
          name: nexus3
          ports:
            - containerPort: 8081
              name: web
              protocol: TCP
          resources:
            limits:
              cpu: '1'
              memory: 2Gi
            requests:
              cpu: 500m
              memory: 512Mi
          terminationMessagePath: /dev/termination-log
          terminationMessagePolicy: File
          volumeMounts:
            - mountPath: /nexus-data
              name: nexus-data
      dnsPolicy: ClusterFirst
      initContainers:
        - args:
            - 'echo "授权文件夹防止拒绝访问"; whoami && chown 200:200 /nexus-data'
          command:
            - /bin/sh
            - '-c'
          image: 'nexus3:3.41.1'
          imagePullPolicy: IfNotPresent
          name: chmod-access
          resources: {}
          securityContext:
            runAsUser: 0
          terminationMessagePath: /dev/termination-log
          terminationMessagePolicy: File
          volumeMounts:
            - mountPath: /nexus-data
              name: nexus-data
      nodeName: {{ 如果使用localPathPVC,这里必须固定节点启动 }}
      restartPolicy: Always
      schedulerName: default-scheduler
      securityContext: {}
      terminationGracePeriodSeconds: 30
      volumes:
        - name: nexus-data
          persistentVolumeClaim:
            claimName: nexus-data-pvc

---
apiVersion: v1
kind: Service
metadata:
  annotations: {}
  labels:
    k8s-app: nexus3
    k8s.kuboard.cn/name: nexus3
  name: nexus3
  namespace: aap-global
spec:
  ports:
    - name: zt2tme
      nodePort: 10081
      port: 8081
      protocol: TCP
      targetPort: 8081
  selector:
    k8s-app: nexus3
  sessionAffinity: None
  type: NodePort
测试
curl ${youIp}:10081
配置
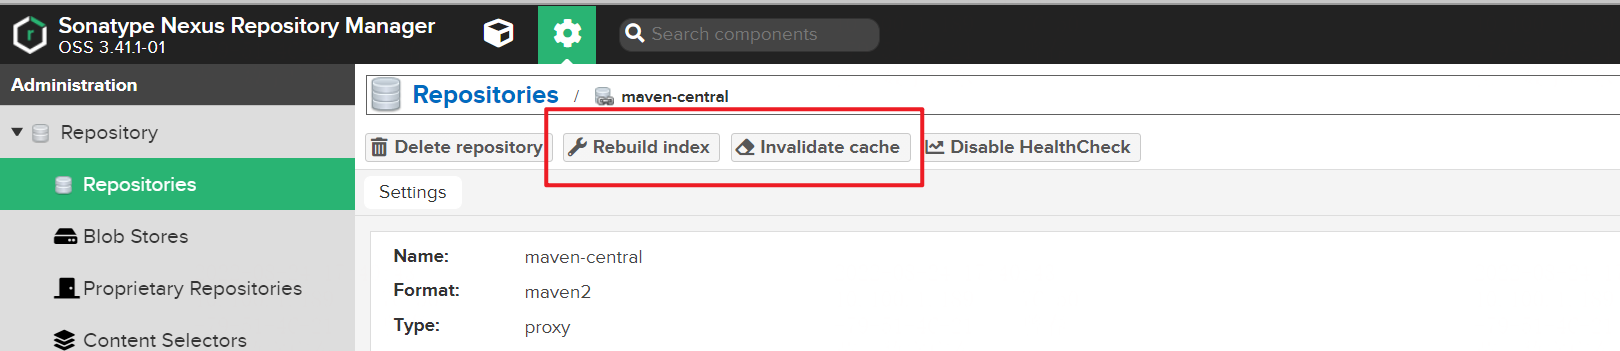
- 创建repository,repository分为三种,hosted(存储库)/proxy(代理别的库)/group(集成前两者为同一个仓库)
默认会有maven-central(proxy)
配置镜像源账号密码(需要认证时)
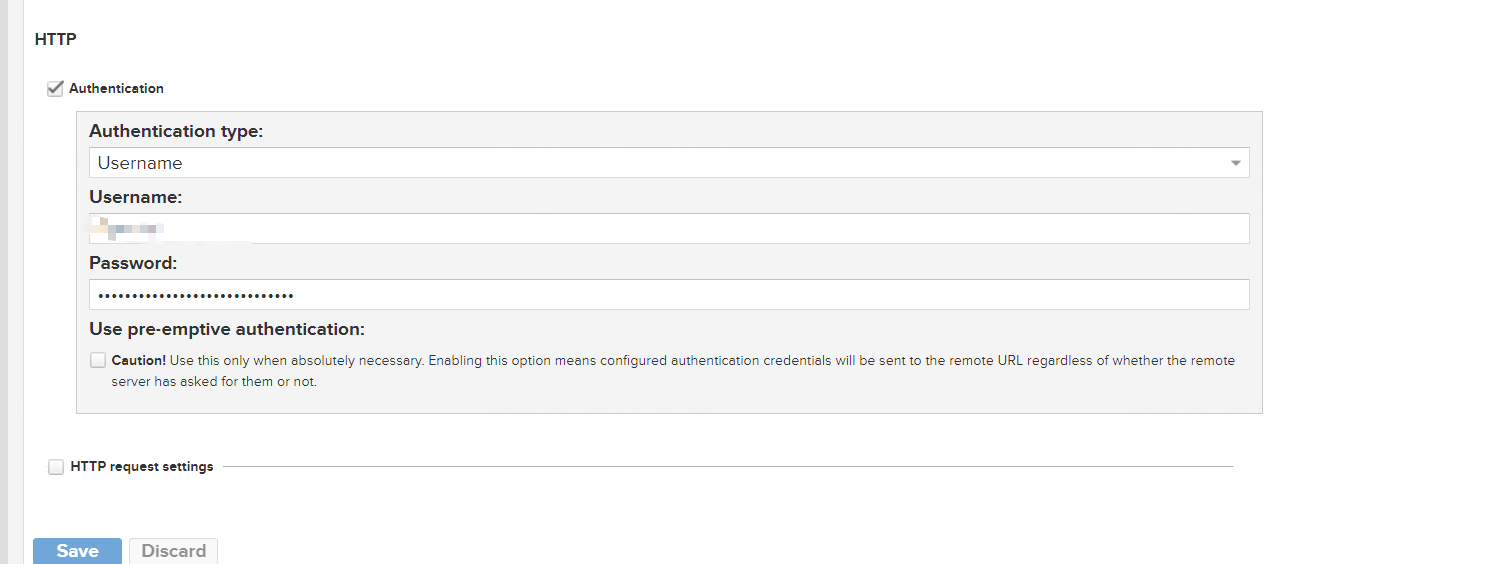
配置完成后,清一下缓存
- 配置代理仓库时,如果使用私有镜像源,并且使用了https,需要添加证书信任
信任私有证书
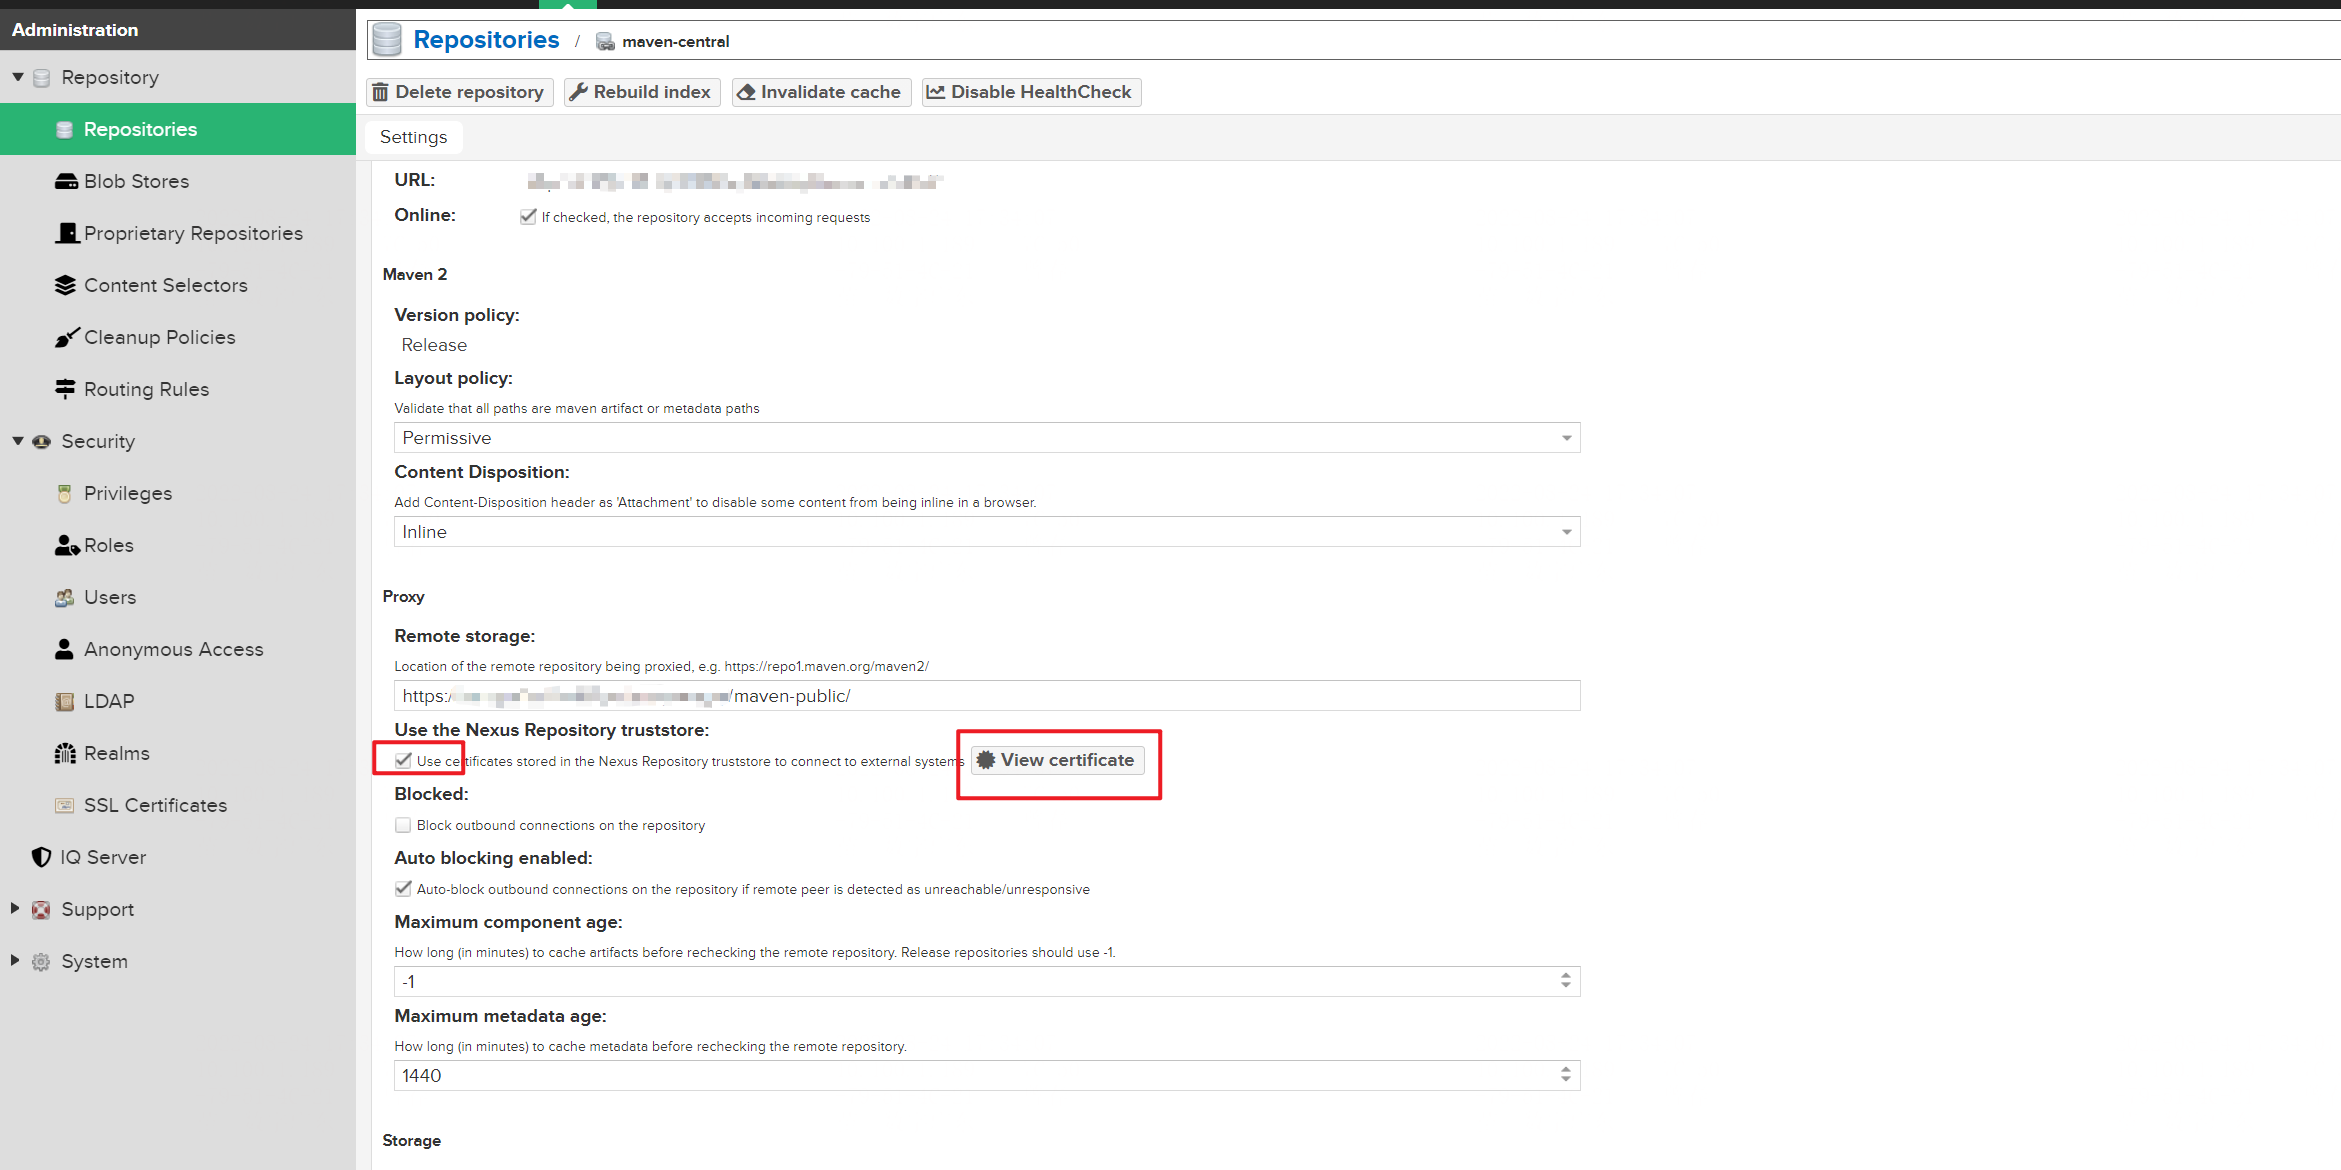
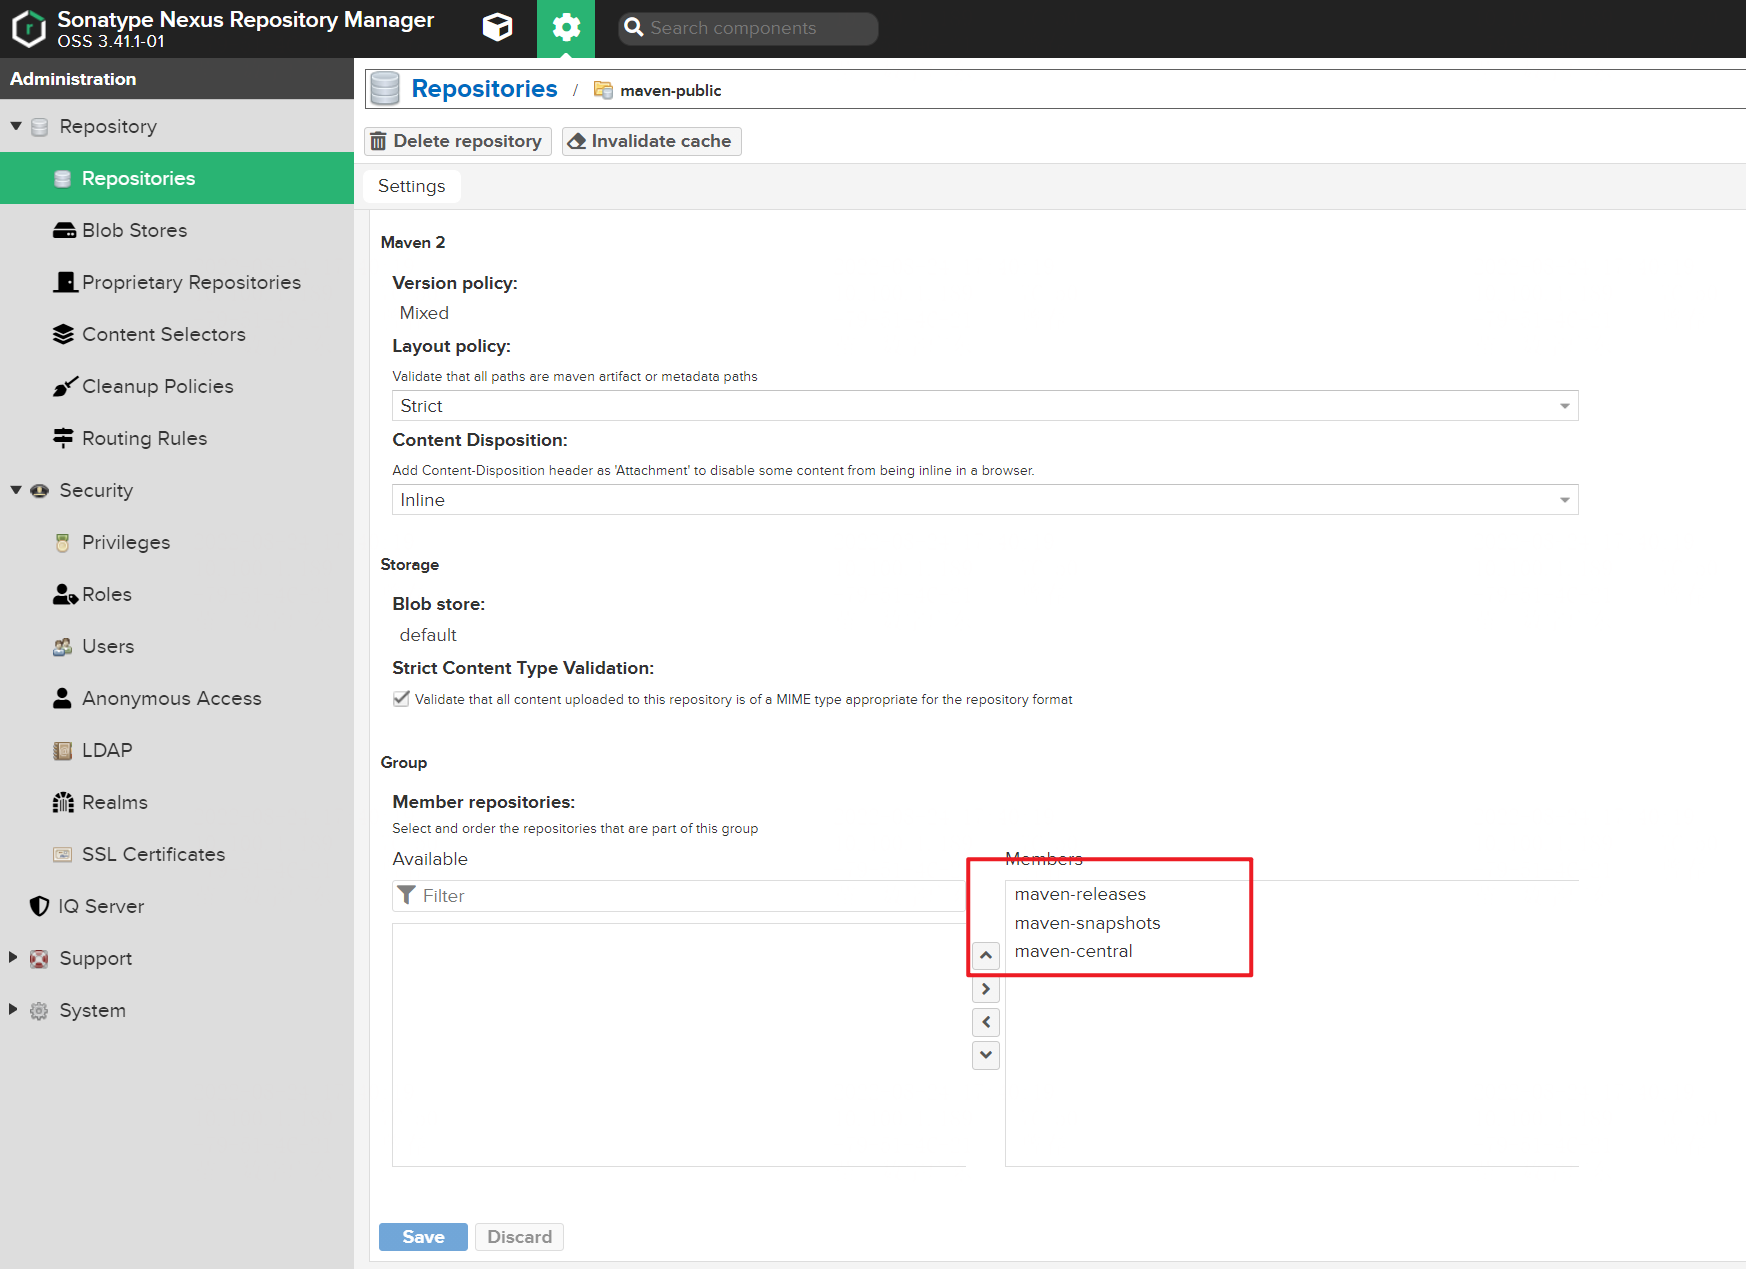
可以代理到公网中央仓库或国内其它镜像源;maven-releases(hosted),可以上传私有依赖到这里;
maven-public(group),这个可以默认包含前面两个仓库,下载依赖时,直接指向这个库,即可同时下载maven-central和maven-releases的依赖
- 创建role角色,每一个角色可以分配的权限细化到每一个仓库,搜索时可以根据仓库名搜索。还有一个重要权限(nx-component-upload)用于控制用户上传依赖的权限
- 创建用户,并分配角色

 浙公网安备 33010602011771号