最近学习Linux系统,文章转载,方便查阅!
开机会加载的其他几个重要的文件
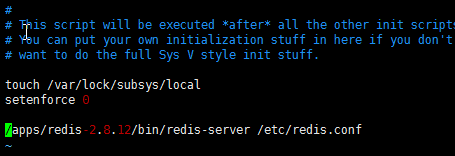
1、/etc/rc.d/rc.local 用于开机自启动程序

2、/etc/fstab 用于加载文件系统的,可以配置自动加载iso文件
比如挂在光驱上的iso: (fstab不重启生效命令:sudo mount -a)
/dev/cdrom /mnt/centos6.7/ iso9660 defaults 0 0
挂载磁盘上的iso文件
/var/www/html/isoimage/CentOS-6.7-x86_64-bin-DVD1.iso /mnt/centos6.7-iso -t,iso9660 -o,loop 0 0
如果不成功,只能够在/etc/rc.d/rc.local下追加
mount /var/www/html/isoimage/CentOS-6.7-x86_64-bin-DVD1.iso /var/www/html/centos6.7-iso/ -t iso9660 -o loop
3、用于限制打开文件的数量的文件
vim /etc/security/limits.conf
在文件末尾添加行:
*       -        nofile          500000
*       soft    nofile          500000
4、配置进程数限制文件(ES必须要2048以上)
vim /etc/security/limits.d/90-nproc.conf
在文件末尾添加行:
*       soft    nproc          2048
root  soft    nproc          unlimited
5、/etc/sysctl.conf配置虚拟机内存
vim /etc/sysctl.conf 在最后加上 vm.max_map_count = 262144
保存之后,使设置生效 sysctl -p
查看sysctl -a | grep 'vm.max_map_count'
6、关闭selinux
修改文件的方式关闭
vim /etc/selinux/config
# This file controls the state of SELinux on the system.
# SELINUX= can take one of these three values:
#     enforcing - SELinux security policy is enforced.
#     permissive - SELinux prints warnings instead of enforcing.
#     disabled - No SELinux policy is loaded.
SELINUX=disabled
# SELINUXTYPE= can take one of these two values:
#     targeted - Targeted processes are protected,
#     mls - Multi Level Security protection.
SELINUXTYPE=targeted
命令行方式关闭
sed -i 's/SELINUX=enforcing/SELINUX=permissive/' /etc/selinux/config
setenforce 0
7、关闭iptables开机启动
service iptables stop
chkconfig --list | grep iptables
chkconfig iptables on
chkconfig iptables off
8、crontab 使用
crontab -l 查看已经定义了多少个定时任务
crontab -e 编辑任务定义文件 * * * * * 分别代表 : 分 、时 、日 、月 、周
也可以直接vim /var/spool/cron/root 文件,因为crontab -e 打开的就是他
9、关于网络
/etc/udev/rules.d/70-persistent-net.rules
此文件记录着机器的网卡信息,操作系统启动的时候 "动态" 生成/修改这个文件,有多少个网卡,就对于多少行信息,所以ifcfg-eth0 这些网卡的配置信息一定要和这里对于上。可以直接删除,因为系统启动会自动生成
注意:如果是虚拟机clone,那么在70-persistent-net.rules 中有两条网卡记录,eth0是之前那个模本机器的,而eth1才是现在这个clone之后的网卡,但是默认ifcfg-eth0绑定的是eth0网卡信息,导致没法获取到网络。
有如下两种解决方案:
- 1、直接删除70-persistent-net.rules ,然后重启(一定要重启),会自动重新生成这个文件,这时候里面就只有一个网卡信息,而且编号会对应为eth0
- 2、修改70-persistent-net.rules ,删除eth0哪行信息,然后把eth1改为eth0,同样要重启机器,一定要重启。
/etc/sysconfig/network-scripts/ifcfg-eth0
这些文件记录着每一个网卡的配置信息,要和上面的文件信息匹配上,网卡名称等等要对于上才行,否则没法使用,主要是给上面网卡绑定信息:ip、dns、gateway等等


