JavaScript-PC网页特效
PC网页特效
1、元素偏移量offset系列

<!DOCTYPE html>
<html lang="en">
<head>
    <meta charset="UTF-8">
    <title>Title</title>
    <style>
        *{
            margin: 0;
            padding: 0;
        }
        .father{
            /*position: relative;*/
            width: 200px;
            height: 200px;
            margin: 100px;
            background-color: purple;
        }
        .son{
            width: 100px;
            height: 100px;
            background-color: beige;
            margin-left: 45px;
            margin-top: 45px;
        }
        .aa{
            position: relative;
            padding: 10px;
            border: 15px green solid;
            width: 100px;
            height: 200px;
            background-color: red;
            margin-top: 200px;
            margin-left: 200px;
        }
    </style>
</head>
<body>
<div class="father">
    <div class="son"></div>
    <div class="aa"></div>
</div>
<script>
    // offset 系列
    let father = document.querySelector('.father');
    let son = document.querySelector('.son');
    let aa = document.querySelector('.aa');
    // 1、可以得到元素的偏移 位置 返回的不带单位的数值
    console.log(father.offsetTop);  //100
    console.log(father.offsetLeft); //100
    // 它以带有定位的父亲为准 如果没有父亲或者父亲没有定位 则以body为准
    console.log(son.offsetTop);     //100
    console.log(son.offsetLeft);    //145
    // 2、可以得到元素的大小 宽度和长度 包含padding + border + width
    console.log(aa.offsetWidth);    //150
    console.log(aa.offsetHeight);   //250
    // 3、返回带有定位的父亲 否则返回的是body
    console.log(son.offsetParent);  //body
    console.log(son.parentNode);    //<div vlass='father'></div>
    //返回父亲,最近一级的亲爸,不管父亲有没有定位
</script>
</body>
</html>
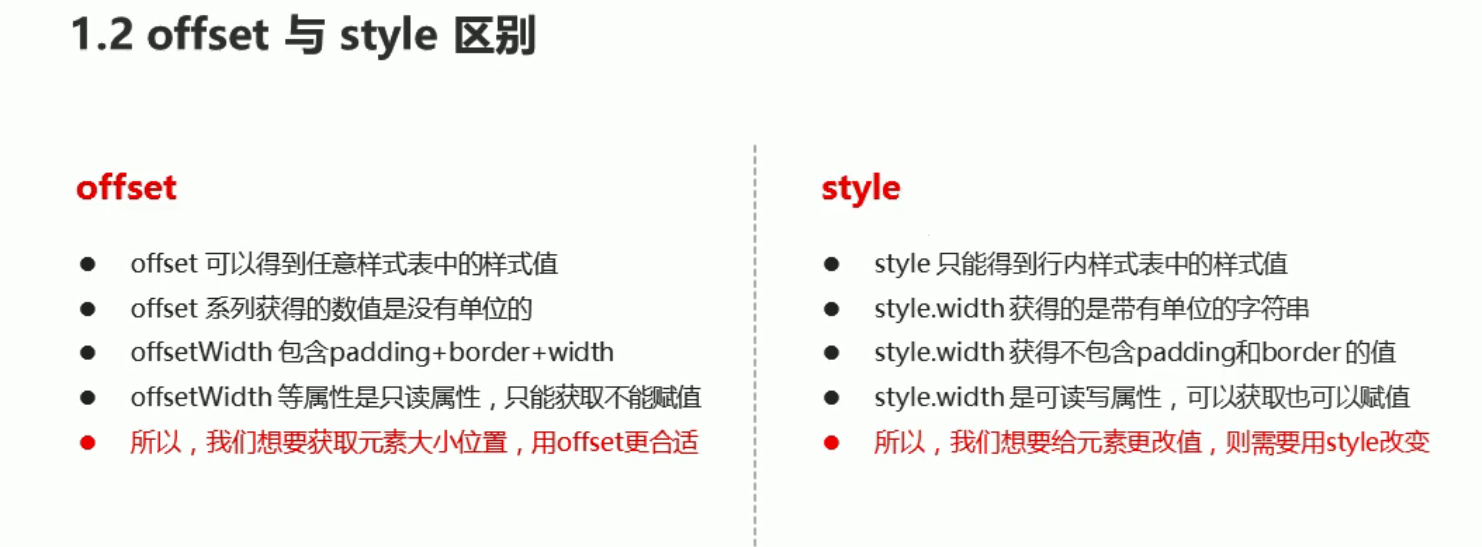
2、offset与style的区别
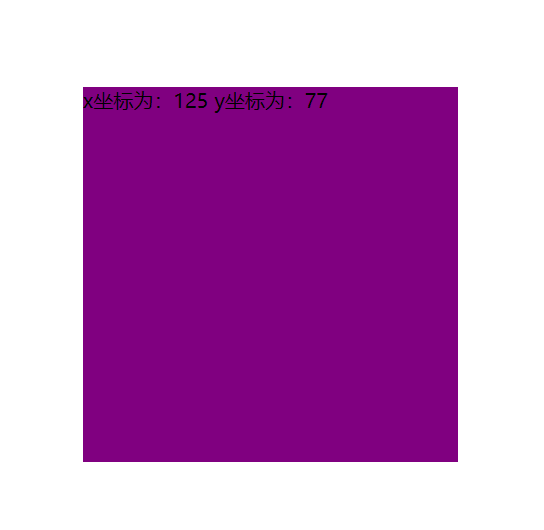
3、获取鼠标在盒子里的坐标
<!DOCTYPE html>
<html lang="en">
<head>
    <meta charset="UTF-8">
    <title>Title</title>
    <style>
        div{
            width: 300px;
            height: 300px;
            background-color: purple;
            margin: 200px 200px;
        }
    </style>
</head>
<body>
<div></div>
<script>
    let div = document.querySelector('div');
    div.addEventListener('mousemove',function (e) {
        let x =  e.pageX - div.offsetLeft;
        let y =  e.pageY - div.offsetTop;
        this.innerHTML = 'x坐标为:'+x+' y坐标为:'+y;
    })
</script>
</body>
</html>
4、模态框的拖动
<!DOCTYPE html>
<html>
<head lang="en">
<meta charset="UTF-8">
<title></title>
<style>
.login-header {
width: 100%;
text-align: center;
height: 30px;
font-size: 24px;
line-height: 30px;
}
ul,
li,
ol,
dl,
dt,
dd,
div,
p,
span,
h1,
h2,
h3,
h4,
h5,
h6,
a {
padding: 0px;
margin: 0px;
}
.login {
display: none;
width: 512px;
height: 280px;
position: fixed;
border: #ebebeb solid 1px;
left: 50%;
top: 50%;
background: #ffffff;
box-shadow: 0px 0px 20px #ddd;
z-index: 9999;
transform: translate(-50%, -50%);
}
.login-title {
width: 100%;
margin: 10px 0px 0px 0px;
text-align: center;
line-height: 40px;
height: 40px;
font-size: 18px;
position: relative;
cursor: move;
}
.login-input-content {
margin-top: 20px;
}
.login-button {
width: 50%;
margin: 30px auto 0px auto;
line-height: 40px;
font-size: 14px;
border: #ebebeb 1px solid;
text-align: center;
}
.login-bg {
display: none;
width: 100%;
height: 100%;
position: fixed;
top: 0px;
left: 0px;
background: rgba(0, 0, 0, .3);
}
a {
text-decoration: none;
color: #000000;
}