
百度人脸识别
1.申请百度人脸识别应用
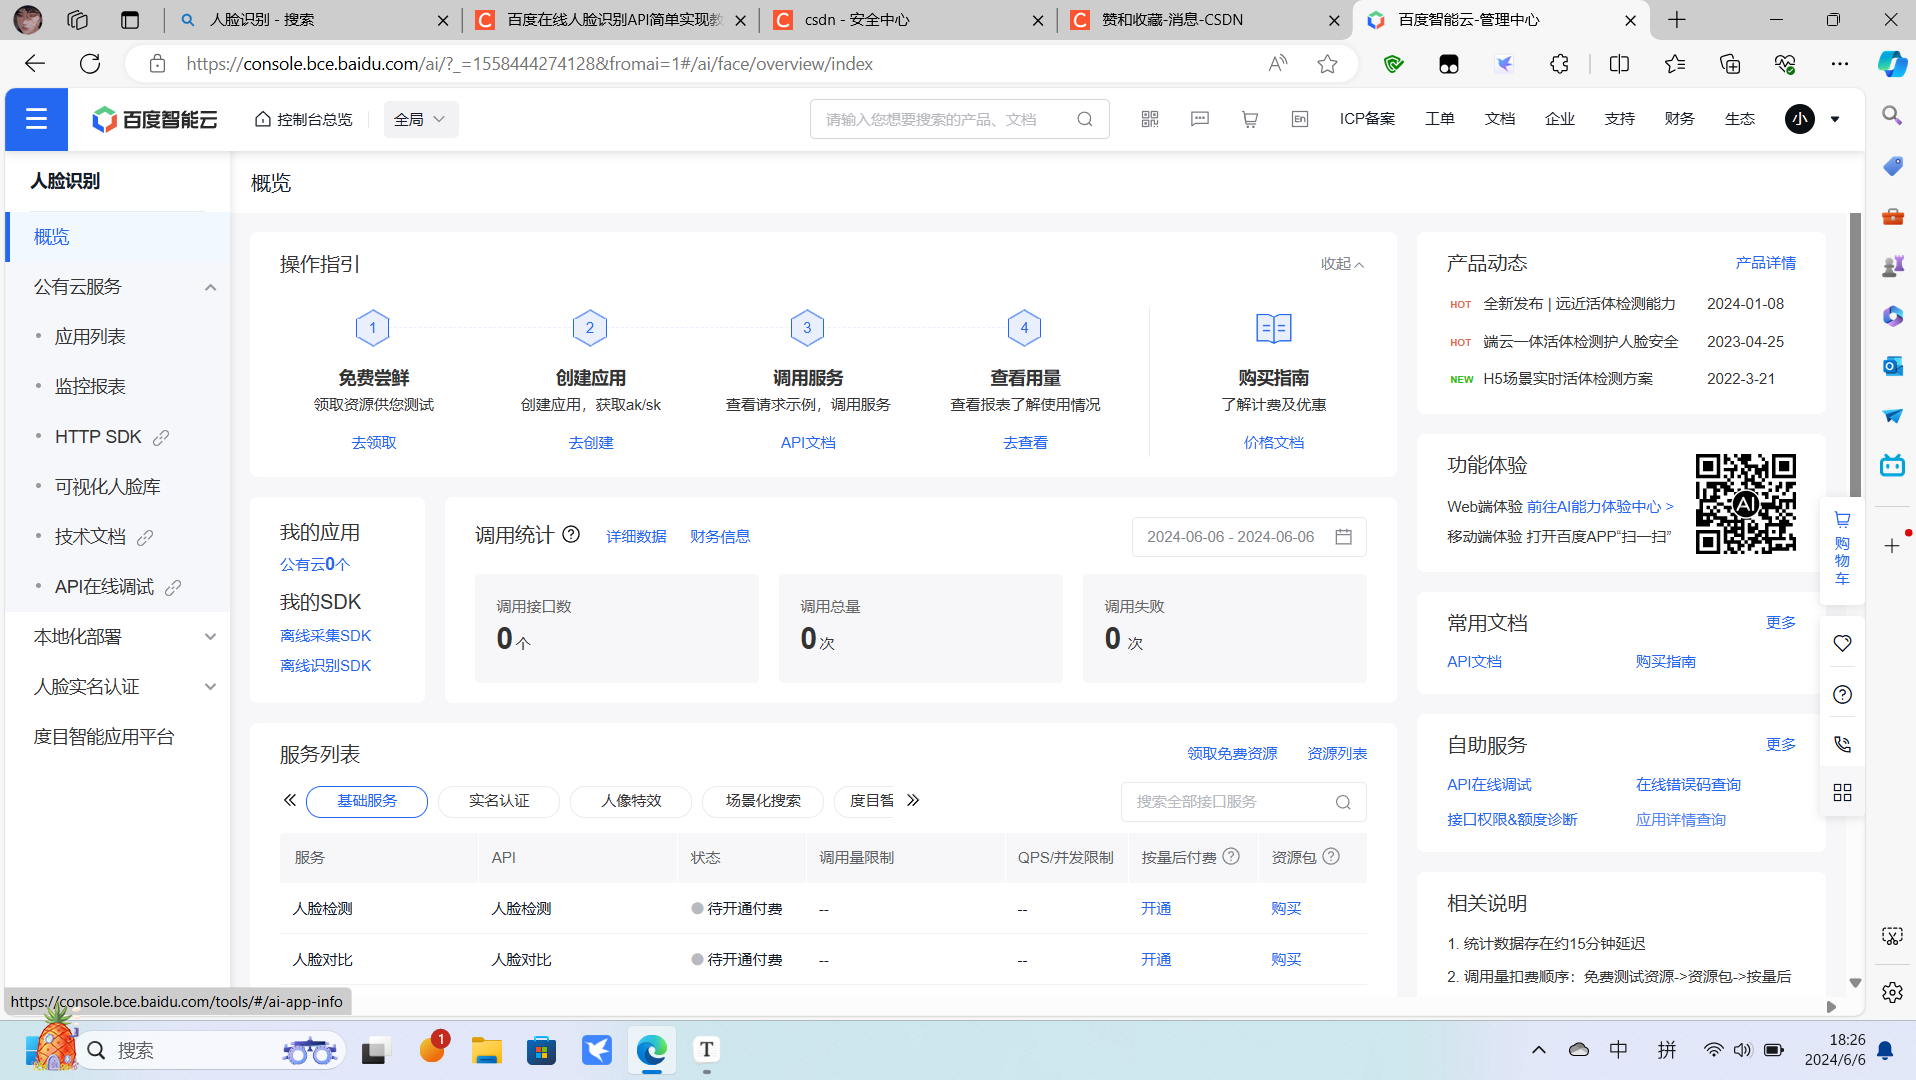
首先需要在百度智能云平台登录
https://console.bce.baidu.com/ai/?_=1558444274128&fromai=1#/ai/face/overview/index
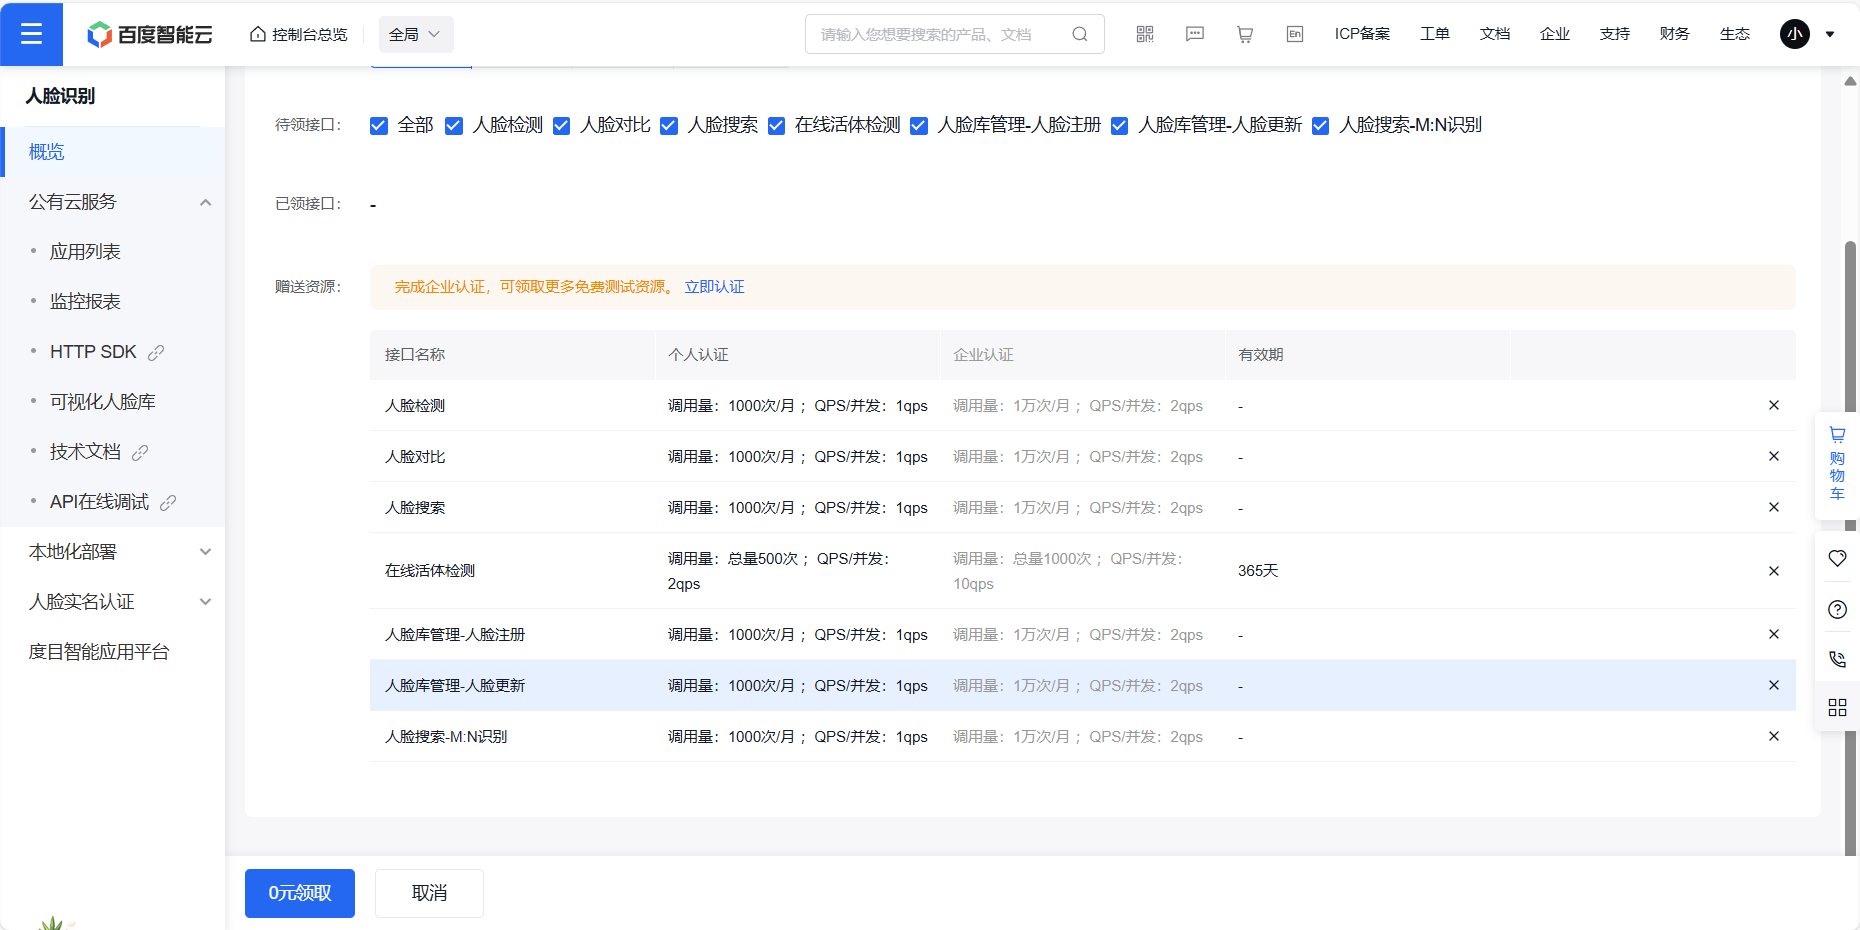
登陆后创建应用,创建的应用是人脸识别的,默认已帮你勾选上了相关功能。
创建应用后,点击管理应用,你就可以获取API Key和Secret Key
2.获取token
现在就可以编写代码调用在线的人脸检测API了
首先是获取token,用于校验,代码如下,注意换成自己申请的API Key和Secret Key
def getToken():


    global token


    # client_id 为官网获取的AK, client_secret 为官网获取的SK


    host = 'https://aip.baidubce.com/oauth/2.0/token?grant_type=client_credentials&client_id=你的API Key&client_secret=你的Secret Key'


    request = urllib2.Request(host)


    request.add_header('Content-Type', 'application/json; charset=UTF-8')


    response = urllib2.urlopen(request)


    content = response.read()


    if (content):


        token=json.loads(content)['access_token']
3.图片的base64编码
上传的用于检测的图片需经过Base64编码。需要注意的是,图片的base64编码是不包含图片头的,代码如下:
def imgToBase64(imgPath):


    with open(imgPath, "rb") as f:  # 转为二进制格式


        base64_data = base64.b64encode(f.read())  # 使用base64进行加密


        return base64_data
4.人脸识别
最后就是调用接口进行人脸识别了
def faceDetect(imgBase64):


    '''


    人脸检测与属性分析


    '''


    request_url = "https://aip.baidubce.com/rest/2.0/face/v3/detect"


    request_url = request_url + "?access_token=" + token


    request = urllib2.Request(request_url)


    request.add_header('Content-Type', 'application/json')


    data = {"image": imgBase64, "image_type": "BASE64","face_field":"age,beauty,expression,face_shape,gender"}


    response = urllib2.urlopen(request, urllib.urlencode(data))


    content = response.read()


    if content:


        return content
这个函数中输入的是图片的base64编码,请求的参数中比较重要的是那个face_field,默认只返回人脸框的位置、概率和旋转角度,age(年龄预测),beauty(颜值打分),expression(表情)等更多属性,需要在这个参数中添加,具体的请参考官方说明文档:http://ai.baidu.com/docs#/Face-Detect-V3/top
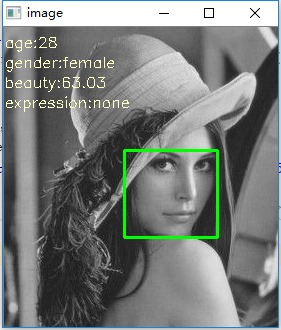
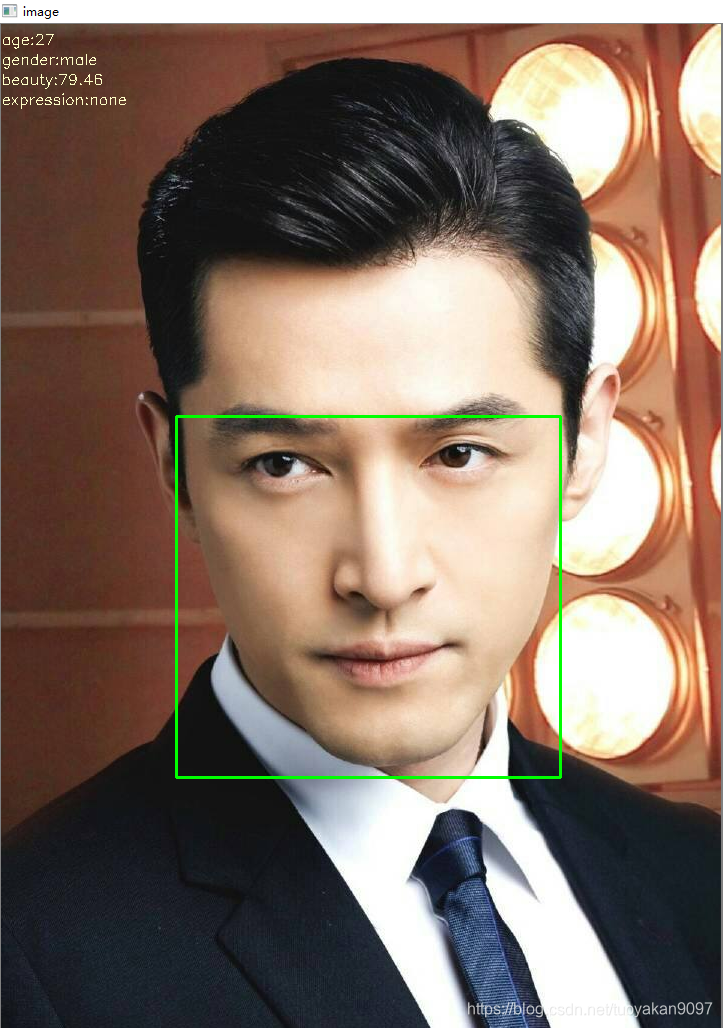
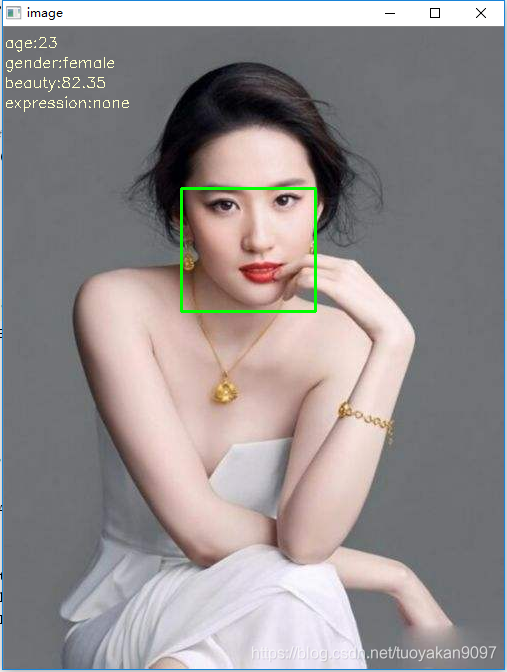
5.结果绘制与可视化
人脸识别最后返回的是json数据,但我们往往需要画个框框,把人脸框出来,同时把一些预测的属性也标注上,这个代码我已经附在最后面了。
最终实现的效果如下:
6.实现的完整源代码
下面我附上实现这些功能的完整代码:
#coding:utf-8


import urllib,urllib2, sys


import ssl


import json


import base64


import cv2


global token


def getToken():


    global token


    # client_id 为官网获取的AK, client_secret 为官网获取的SK


    host = 'https://aip.baidubce.com/oauth/2.0/token?grant_type=client_credentials&client_id=你的API Key&client_secret=你的Secret Key'


    request = urllib2.Request(host)


    request.add_header('Content-Type', 'application/json; charset=UTF-8')


    response = urllib2.urlopen(request)


    content = response.read()


    if (content):


        token=json.loads(content)['access_token']


def faceDetect(imgBase64):


    '''


    人脸检测与属性分析


    '''


    request_url = "https://aip.baidubce.com/rest/2.0/face/v3/detect"


    request_url = request_url + "?access_token=" + token


    request = urllib2.Request(request_url)


    request.add_header('Content-Type', 'application/json')


    data = {"image": imgBase64, "image_type": "BASE64","face_field":"age,beauty,expression,face_shape,gender"}


    response = urllib2.urlopen(request, urllib.urlencode(data))


    content = response.read()


    if content:


        return content


def imgToBase64(imgPath):


    with open(imgPath, "rb") as f:  # 转为二进制格式


        base64_data = base64.b64encode(f.read())  # 使用base64进行加密


        return base64_data


if __name__=="__main__":


    getToken()


    imgPath=r"C:\Users\lee\Pictures\lena.jpg"


    result=json.loads(faceDetect(imgToBase64(imgPath)))['result']


    face_list=result['face_list'][0]


    location=face_list['location']


    age=face_list['age']


    beauty=face_list['beauty']


    expression=face_list['expression']['type']


    gender=face_list['gender']['type']


    img = cv2.imread(imgPath, cv2.IMREAD_COLOR)


    leftTopX=int(location['left'])


    leftTopY=int(location['top'])


    rightBottomX=int(leftTopX+int(location['width']))


    rightBottomY = int(leftTopY + int(location['height']))


    cv2.rectangle(img, (leftTopX, leftTopY), (rightBottomX, rightBottomY), (0, 255, 0), 2)


    font = cv2.FONT_HERSHEY_SIMPLEX


    # 第一个坐标表示起始位置


    cv2.putText(img,"age:"+str(age),(0, 20),font, 0.5, (200, 255, 255), 1)


    cv2.putText(img, "gender:" + gender.encode("utf-8"), (0, 40), font, 0.5, (200, 255, 255), 1)


    cv2.putText(img, "beauty:" + str(beauty), (0, 60), font, 0.5, (200, 255, 255), 1)


    cv2.putText(img, "expression:" + str(expression), (0, 80), font, 0.5, (200, 255, 255), 1)


    cv2.imshow('image', img)


    cv2.waitKey(0)


    print("end")

 浙公网安备 33010602011771号