

app简单控件了解——视图——设置视图的宽和高


=====================================================================================
手机屏幕是长方形区域:短的叫宽,长的叫高。
控件宽度通过--------android:layout_width-----------设置
控件高度通过--------android:layout_height-----------设置
宽和高的取值,主要有3种:
(1)、match_parent:表示与上级视图保持一致。上级视图的尺寸有多大,当前视图的尺寸就有多大。
(2)、wrap_content:表示与内容自适应。对于文本视图来说,内部文字需要多大的显示空间,当前视图就要占据多大的尺寸。
但最宽不能超过上级视图的宽度,一旦超过,就会换行;最高不能超过上级视图的高度,一旦超过就会隐藏。
(3)、以dp为单位的具体尺寸,比如300dp,表示宽度和高度就这么大。
====================================================================================================
MainActivity:

package com.example.myapplication;

import android.support.v7.app.AppCompatActivity;
import android.os.Bundle;
import android.view.View;
import android.widget.TextView;

public class MainActivity extends AppCompatActivity
{

    @Override
    protected void onCreate(Bundle savedInstanceState)
    {
        super.onCreate(savedInstanceState);
        setContentView(R.layout.activity_main);

    }


    public void doClick(View view)
    {
        TextView tx = findViewById(R.id.textView);

        tx.setText("初始化成功-------------");
    }

}

xml配置:
1 2 3 4 5 6 7 8 9 10 11 12 13 14 15 16 17 18 19 20 21 22 23 24 25 26 27 28 29 30 31 32 33 34 35 36 37 38 39 40 41 42 43 44 45 46 47 48 49 | <?xml version="1.0" encoding="utf-8"?><android.support.constraint.ConstraintLayout xmlns:android="http://schemas.android.com/apk/res/android" xmlns:app="http://schemas.android.com/apk/res-auto" xmlns:tools="http://schemas.android.com/tools" android:layout_width="match_parent" android:layout_height="match_parent" android:clickable="true" tools:context=".MainActivity"> <LinearLayout android:layout_width="match_parent" android:layout_height="wrap_content" android:background="#F32152" android:baselineAligned="false" android:orientation="horizontal" tools:ignore="MissingConstraints"> <TextView android:id="@+id/textView" android:layout_width="80dp" android:layout_height="80dp" android:background="#2196F3" android:text="文字展示" android:textAlignment="center" android:translationX="0dp" android:translationY="0dp" /> <TextView android:id="@+id/textView2" android:layout_width="80dp" android:layout_height="80dp" android:background="#FFEB3B" android:text="国家展示" android:textStyle="bold" /> <Button android:id="@+id/button" android:layout_width="80dp" android:layout_height="80dp" android:background="#03A9F4" android:onClick="doClick" android:text="确定" /> </LinearLayout></android.support.constraint.ConstraintLayout> |

------------------------------------------------------------------------------------------------------------------------
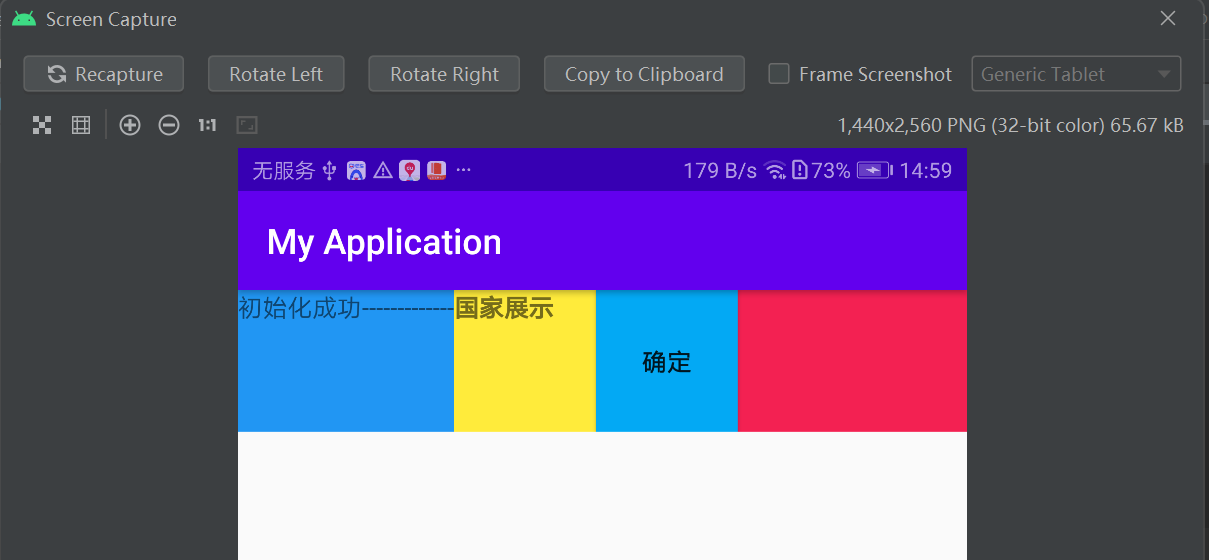
第一个text,宽度为80dp时,点击按钮,修改文字长度,
点击前:

点击后:

------------------------------------------------------------------------------------------------------------------------
第一个text,宽度为 android:layout_width="wrap_content" 时,点击按钮,修改文字长度,
点击前:
点击后:
==============================================================================
书本示例:
xml设置如下:
1 2 3 4 5 6 7 8 9 10 11 12 13 14 15 16 17 18 19 20 21 22 23 24 25 26 27 28 29 30 31 32 33 34 35 36 37 38 39 40 41 42 | <LinearLayout xmlns:android="http://schemas.android.com/apk/res/android" android:layout_width="match_parent" android:layout_height="match_parent" android:orientation="vertical"> <TextView android:layout_width="wrap_content" android:layout_height="wrap_content" android:layout_marginTop="5dp" android:background="#00ffff" android:text="视图宽度采用wrap_content定义" android:textColor="#000000" android:textSize="17sp" /> <TextView android:layout_width="match_parent" android:layout_height="wrap_content" android:layout_marginTop="5dp" android:background="#00ffff" android:text="视图宽度采用match_parent定义" android:textColor="#000000" android:textSize="17sp" /> <TextView android:layout_width="300dp" android:layout_height="wrap_content" android:layout_marginTop="5dp" android:background="#00ffff" android:text="视图宽度采用固定大小" android:textColor="#000000" android:textSize="17sp" /> <TextView android:id="@+id/tv_code" android:layout_width="wrap_content" android:layout_height="wrap_content" android:layout_marginTop="5dp" android:background="#00ffff" android:text="通过代码指定视图宽度" android:textColor="#000000" android:textSize="17sp" /></LinearLayout> |
执行结果如下:


【推荐】国内首个AI IDE,深度理解中文开发场景,立即下载体验Trae
【推荐】编程新体验,更懂你的AI,立即体验豆包MarsCode编程助手
【推荐】抖音旗下AI助手豆包,你的智能百科全书,全免费不限次数
【推荐】轻量又高性能的 SSH 工具 IShell:AI 加持,快人一步
· winform 绘制太阳,地球,月球 运作规律
· AI与.NET技术实操系列(五):向量存储与相似性搜索在 .NET 中的实现
· 超详细:普通电脑也行Windows部署deepseek R1训练数据并当服务器共享给他人
· 【硬核科普】Trae如何「偷看」你的代码?零基础破解AI编程运行原理
· 上周热点回顾(3.3-3.9)
2021-06-26 性能测试——LoadRunner——Recording Options——recording设置
2021-06-26 性能测试——LoadRunner——协议选择
2020-06-26 APP——自动化——java——程序安装好,直接调用
2020-06-26 APP——自动化——java——初始化安装程序
2020-06-26 APP——自动化——python——driver其他常用的方法
2020-06-26 APP——自动化——python——swipe从坐标点滑动到坐标点以及其它滑动
2020-06-26 APP——自动化——python——设置网络模式