tinymce图片上传
一、概述
对于上传图片功能,tinymce提供了很多相关配置http://tinymce.ax-z.cn/configure/file-image-upload.php
这里我们对其中的自定义上传图片进行简单的讲解,需要用到images_upload_url属性。
二、更改配置
在上一篇文章中,链接如下:https://www.cnblogs.com/xiao987334176/p/14596776.html
已经实现了tinymce的安装和使用,打开页面,点击图片上传。
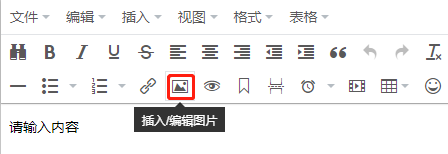
弹出框
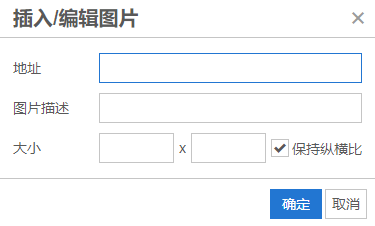
注意:默认只能插入一个浏览器能访问到图片地址。
如果我需要上传本地文件,怎么办呢?修改初始化配置
以上一篇文章中的tinymce_demo项目为例,修改文件src/components/Tinymce/index.vue
增加images_upload_url属性
...
window.tinymce.init({
    images_upload_url: 'http://127.0.0.1:8000/file/excel_upload/',
    language: this.language,
...
注意:images_upload_url就是指后端api图片上传地址。
关于这个api接口,我采用的是django项目开发的,参考链接:https://www.cnblogs.com/xiao987334176/p/14361854.html
注意:需要修改一下视图函数才能使用。
修改api/views.py,完整内容如下:

from rest_framework.views import APIView
from upload_demo import settings
from django.shortcuts import render, redirect, HttpResponse
from django.http import JsonResponse
from rest_framework import status
import os
import uuid


class File(APIView):
    def post(self, request):
        print(request.FILES)
        # 接收文件
        file_obj = request.FILES.get('file', None)
        print("file_obj", file_obj.name)

        # 判断是否存在文件夹
        head_path = os.path.join(settings.BASE_DIR,'static')
        print("head_path", head_path)
        # 如果没有就创建文件路径
        if not os.path.exists(head_path):
            os.makedirs(head_path)

        # 判断文件大小不能超过5M
        if file_obj.size > 5242880:
            return JsonResponse({'status': status.HTTP_403_FORBIDDEN, 'msg': '文件过大'},
                                status=status.HTTP_403_FORBIDDEN)

        # 文件后缀
        suffix = file_obj.name.split(".").pop()
        print("文件后缀", suffix)  # 图片后缀 png

        # 判断文件后缀
        # suffix_list = ["xlsx","xls"]
        # if suffix not in suffix_list:
        #     return JsonResponse({'status': status.HTTP_403_FORBIDDEN, 'msg': '只能选择excel文件'},
        #                         status=status.HTTP_403_FORBIDDEN)

        # 重命名文件名
        file_name = '%s.%s'%(uuid.uuid4(),suffix)
        print("file_name",file_name)
        # 储存路径
        file_path = os.path.join(head_path,file_name)
        print("储存路径", file_path)

        # 写入文件到指定路径
        with open(file_path, 'wb') as f:
            for chunk in file_obj.chunks():
                f.write(chunk)

        data = {}
        data['status'] = status.HTTP_200_OK
        data['name'] = file_name
        data['location'] = "http://127.0.0.1:8000/static/{}".format(file_name)
        return JsonResponse(data, status=status.HTTP_200_OK)
注意:api返回的json中,必须包含location字段,比如:{ "location": "folder/sub-folder/new-location.png" }
我返回的api信息如下:
{'status': 200, 'name': '448c0db3-4162-4330-9981-eae1960606eb.jpg', 'location': 'http://127.0.0.1:8000/static/039f4e72-097e-4a2c-b0dc-2539f78eb325.jpg'}
多几个字段无所谓,只要有location就行。
三、上传文件
再次点击图片上传,会发现多了一个上传选项
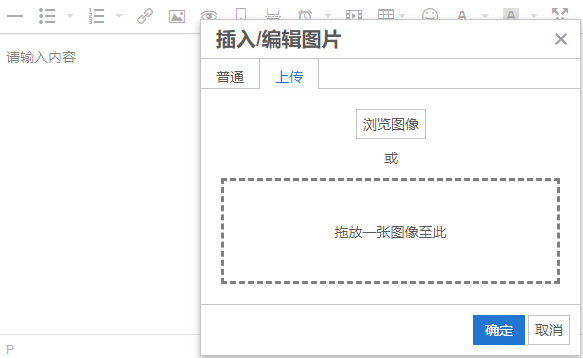
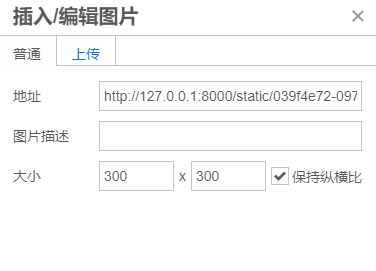
选择一张图片,注意:上传成功后,会显示图片像素大小。如下图:
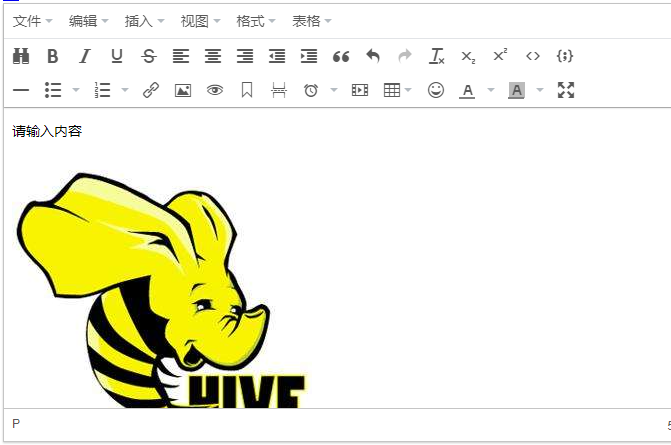
点击确定,效果如下:


【推荐】国内首个AI IDE,深度理解中文开发场景,立即下载体验Trae
【推荐】编程新体验,更懂你的AI,立即体验豆包MarsCode编程助手
【推荐】抖音旗下AI助手豆包,你的智能百科全书,全免费不限次数
【推荐】轻量又高性能的 SSH 工具 IShell:AI 加持,快人一步
· 开发者必知的日志记录最佳实践
· SQL Server 2025 AI相关能力初探
· Linux系列:如何用 C#调用 C方法造成内存泄露
· AI与.NET技术实操系列(二):开始使用ML.NET
· 记一次.NET内存居高不下排查解决与启示
· Manus重磅发布:全球首款通用AI代理技术深度解析与实战指南
· 被坑几百块钱后,我竟然真的恢复了删除的微信聊天记录!
· 没有Manus邀请码?试试免邀请码的MGX或者开源的OpenManus吧
· 园子的第一款AI主题卫衣上架——"HELLO! HOW CAN I ASSIST YOU TODAY
· 【自荐】一款简洁、开源的在线白板工具 Drawnix
2018-04-09 python 全栈开发,Day16(函数第一次考试)