受 LabelImg 启发的基于 web 的图像标注工具,基于 Vue 框架
受 LabelImg 启发的基于 web 的图像标注工具,基于 Vue 框架
哟,网友们好,年更鸽子终于想起了他的博客园密码。如标题所述,今天给大家带来的是一个基于 vue2 的图像标注工具。至于它诞生的契机呢,应该是我导 pass 掉了我的提议(让甲方使用 LabelImg 进行数据标注),说是要把功能集成起来。截止到写这篇文章时完成度应该有90%,至于剩下的10%嘛,问就是相信网友的智慧(其实就是不包括数据持久化),想必一定难不倒看文章的各位。那么废话不多说,下面进入正文。
项目地址:https://github.com/xiao-qi-w/LabelVue.git
视频演示:敬请期待...
首先我们对 LabelImg 进行一个简单的介绍,这样屏幕前的你会对我的设计思路有更准确地认知。
LabelImg 是一个开源的图像标注工具,主要用于创建机器学习模型所需的训练数据。它支持标注图像中的对象,通过提供界面来创建矩形框(bounding boxes)并对其进行分类。主要特点包括:
- 图形用户界面:允许用户通过拖拽来标注图像中的目标。
- 支持多种格式:可以导出为 Pascal VOC XML、YOLO TXT 和 COCO JSON 格式。
- 支持图像和视频:可用于标注单张图像或视频帧。
- 易于使用:界面简洁直观,适合快速标注和管理数据集。
适合用于物体检测任务的数据准备阶段。
其工作界面及基本功能介绍如下:
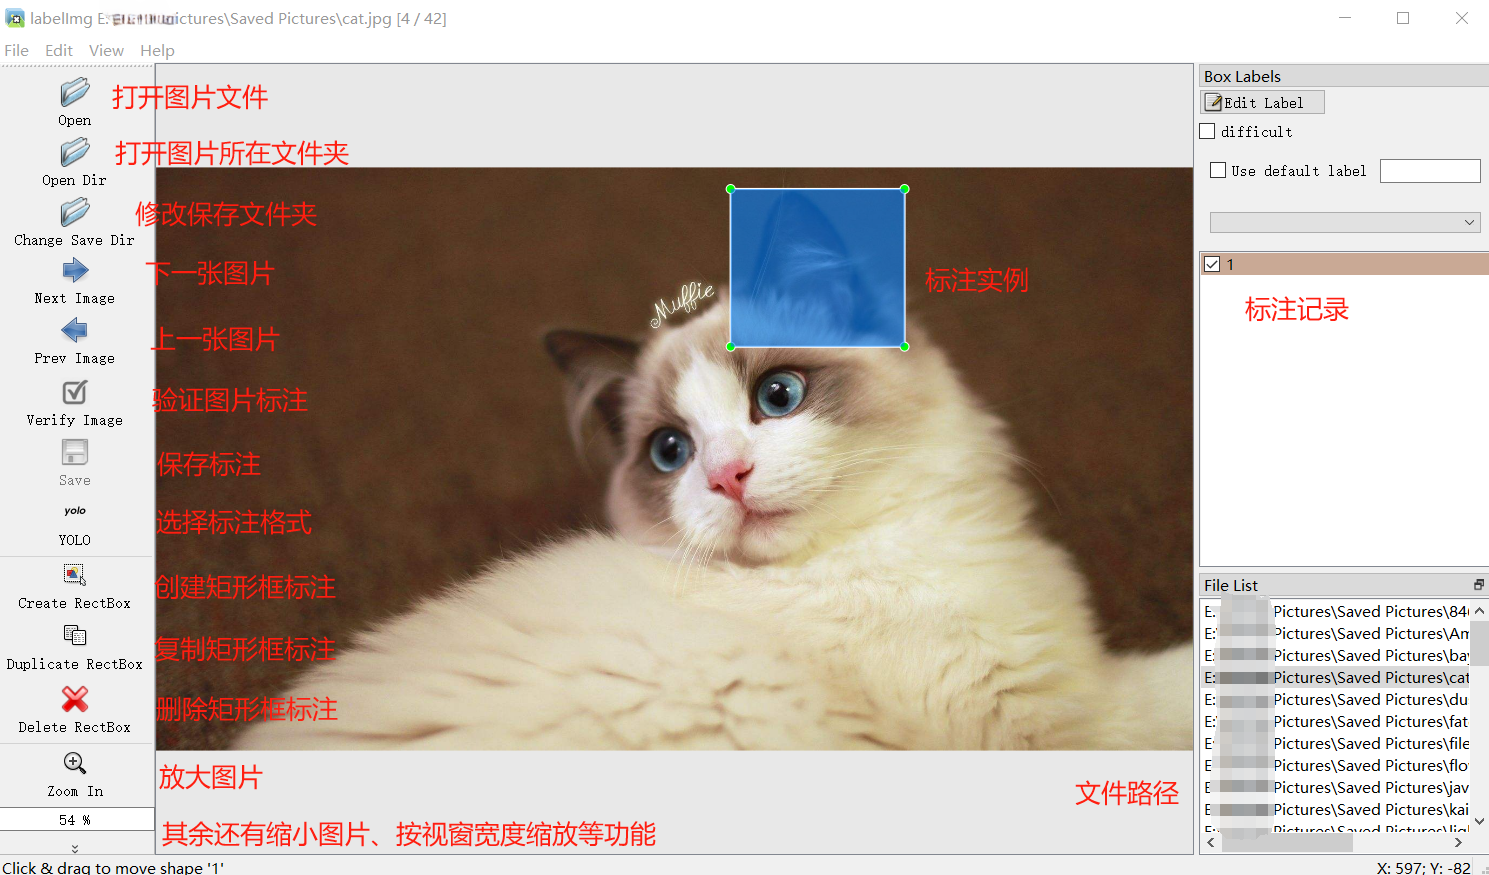
从图中不难看出其实要实现的功能并不多,重点在于矩形框标注的绘制、拖动与缩放上面。而前端想要实现这些操作,当然是推荐使用 canvas。
canvas 是 HTML5 提供的一个元素,用于在网页上绘制图形和动画。它允许在网页中直接绘制和操作图像、形状和文本,主要通过 JavaScript 进行控制。主要特点包括:
- 绘图 API:通过 CanvasRenderingContext2D 接口提供丰富的绘图功能,如绘制线条、矩形、圆形和图像。
- 动画:可以用来创建平滑的动画效果。
- 图像处理:支持图像数据的操作和处理。
- 交互:可以与用户交互,实现例如图形编辑和游戏等应用。
使用 <canvas> 元素可以创建动态、交互式的图形和视觉效果。
在这里鸣谢B站 up 主 渡一教育-提薪课 和 尚硅谷,我的 vue 和 canvas 功底全靠二位的视频撑着。
介绍完了前置内容,下面来看看核心代码。
首先是页面布局,我是按照下面的方式进行划分的,代码结构和 css如下:
代码结构: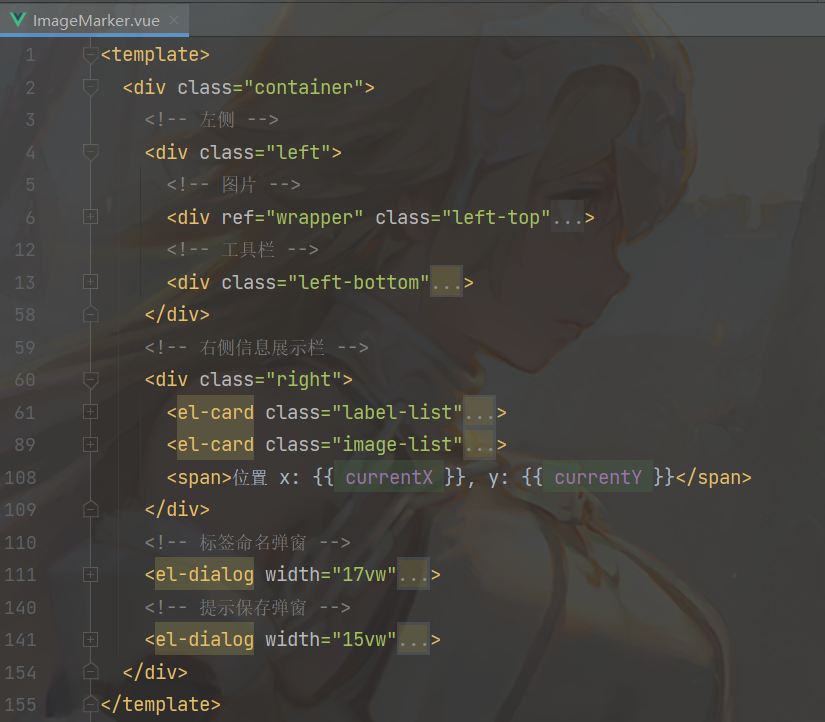
css:
布局样式
<style scoped>
.container {
  display: flex;
  height: 95vh;
}

.left,
.right {
  height: 100%;
  flex: 20%;
  padding: 1vw;
  overflow-y: auto;
  display: flex;
  flex-direction: column;
}

.left {
  flex: 80%;
}

.left-top {
  flex: 90%;
  height: 94vh;
  margin-top: 3vh;
  display: flex;
  flex-direction: column;
  overflow: auto;
  box-shadow: 0 2px 4px rgba(0, 0, 0, .12), 0 0 6px rgba(0, 0, 0, .04);
}

.left-bottom {
  margin-top: 1vh;
  padding: 1vh;
  display: flex;
  justify-content: center;
  justify-items: center;
  box-shadow: 0 2px 4px rgba(0, 0, 0, .12), 0 0 6px rgba(0, 0, 0, .04);
}

.right > .label-list,
.right > .image-list {
  flex: 50%; /* 平分高度 */
  overflow-y: auto; /* 内容溢出时显示滚动条 */
  margin-bottom: 10px;
}

/deep/ .cell-clicked {
  background: #fdf5e6 !important;
}
</style>
介绍完布局后,我们再来看看需要用到的各种响应式变量:
响应式状态
data() {
    return {
        /* 图片相关 */
        images: [ // 每个图像可以是更复杂的对象结构,但要保证具备可访问到的相对路径(url)
            {
                id: 1,
                url: require('@/assets/cat.jpg'),
            },
            {
                id: 2,
                url: require('@/assets/bay.jpg'),
            },
        ],
        /* 状态变量 */
        creating: false, // 是否正在创建
        canvasChanged: false, // 画布状态是否改变
        showNameInput: false, // 是否显示标注命名弹窗
        showSaveAlert: false, // 是否显示保存提示弹窗
        /* 缩放相关 */
        dpr: 1, // 设备像素比
        scale: 0, // 缩放倍率
        maxScale: 3.0, // 最大缩放倍率
        minScale: 0.1, // 最小缩放倍率
        adaptiveScale: 0, // 自适应缩放倍率
        scaleStep: 0.1, // 缩放变化幅度
        /* 鼠标上一刻所在位置 */
        prevX: 0,
        prevY: 0,
        /* 鼠标实时位置 */
        currentX: 0,
        currentY: 0,
        /* 缓存 */
        currentImage: null, // 当前图像
        currentImageIndex: 0, // 当前图像在图像列表中的下标
        targetImageIndex: -1, // 目标图像在图像列表中的下标,切换图片时使用
        wrapper: null, // canvas 父级元素 DOM
        canvas: null, // 当前 canvas
        bufferCanvas: null, // 离屏 canvas,缓存用
        currentRect: null, // 当前矩形
        selectedRect: null, // 选中矩形
        selectedRectIndex: -1, // 选中矩形在矩形列表中的下标
        labelName: "", // 矩形标签
        rects: [], // 保存当前图片的矩形
    };
},
然后是图像部分,使用 canvas 绘制并展示,主要体现在以下方法中:
加载当前图片
loadImage() {
    this.currentImage = new Image();
    this.currentImage.src = this.imagePath;
    this.currentImage.onload = () => {
        this.currentImage.width *= this.dpr;
        this.currentImage.height *= this.dpr;
        this.setSize();
        this.drawCanvas();
    };
}
设置画布大小
setSize() {
    // 未设置缩放倍率
    if (this.scale === 0) {
        // 获取所在容器宽高
        const width = this.wrapper.clientWidth * this.dpr;
        const height = this.wrapper.clientHeight * this.dpr;
        // 计算缩放比例
        const scaleX = width / this.currentImage.width;
        const scaleY = height / this.currentImage.height;
        this.scale = Math.min(scaleX, scaleY);
        this.adaptiveScale = this.scale;
    }
    // 计算缩放后的图片尺寸
    const scaledWidth = this.currentImage.width * this.scale;
    const scaledHeight = this.currentImage.height * this.scale;
    // 设置画布宽高
    this.canvas.width = scaledWidth;
    this.canvas.height = scaledHeight;
    this.canvas.style.width = `${scaledWidth / this.dpr}px`;
    this.canvas.style.height = `${scaledHeight / this.dpr}px`;
    // 设置离屏画布宽高
    this.bufferCanvas.width = scaledWidth;
    this.bufferCanvas.height = scaledHeight;
    this.bufferCanvas.style.width = `${scaledWidth / this.dpr}px`;
    this.bufferCanvas.style.height = `${scaledHeight / this.dpr}px`;
    // 设置居中
    this.$nextTick(() => {
        // 设置垂直居中
        if (this.wrapper.clientHeight <= scaledHeight / this.dpr) {
            // 画布高度超过父元素视窗高度时,取消居中设置
            this.wrapper.style.justifyContent = '';
        } else {
            // 画布高度未超过父元素视窗高度时,重新居中设置
            this.wrapper.style.justifyContent = 'center';
        }
        // 设置水平居中
        if (this.wrapper.clientWidth <= scaledWidth / this.dpr) {
            // 画布宽度超过父元素视窗宽度时,取消居中设置
            this.wrapper.style.alignItems = '';
        } else {
            // 画布宽度未超过父元素视窗宽度时,重新居中设置
            this.wrapper.style.alignItems = 'center';
        }
    });
}
绘制画布
drawCanvas() {
const ctx = this.canvas.getContext('2d');
const bufferCtx = this.bufferCanvas.getContext('2d');
const width = this.canvas.width;
const height = this.canvas.height;
// 绘制缩放后的图片到离屏画布
bufferCtx.clearRect(0, 0, width, height);
bufferCtx.drawImage(this.currentImage, 0, 0, width, height);
// 绘制已创建矩形
if (this.currentRect) {
this.currentRect.draw(this.scale);
}
for (const rect of this.rects) {
if (rect === this.selectedRect) {
rect.color = 'rgba(255, 0, 0, 0.3)';
} else {
rect.color = 'rgba(0, 0, 255, 0.3)';
}
rect.draw(this.scale);
}
// 将缩放后的图片绘制到主画布
ctx.drawImage(this.bufferCanvas, 0, 0, width, height);
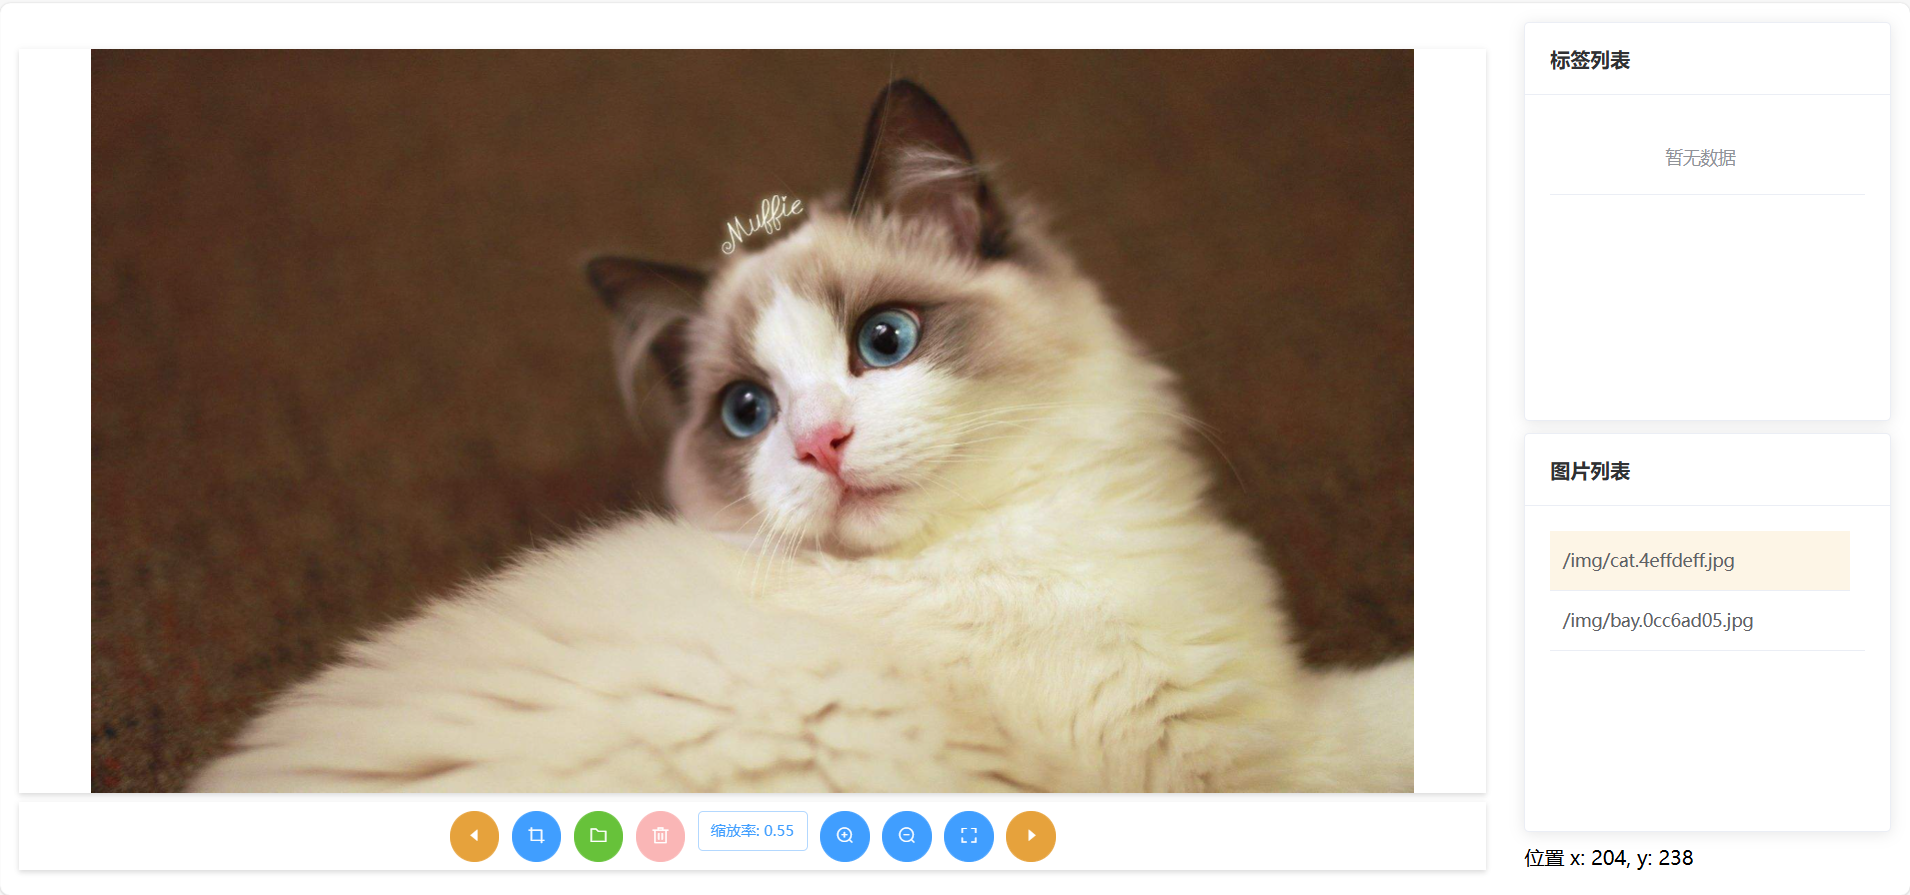
}绘制方法中使用到了 bufferCanvas,一个隐藏的 canvas 元素作为缓存,主要是为了避免绘制矩形框标注时因重绘频率过高产生的画面闪烁现象。绘制效果如下:
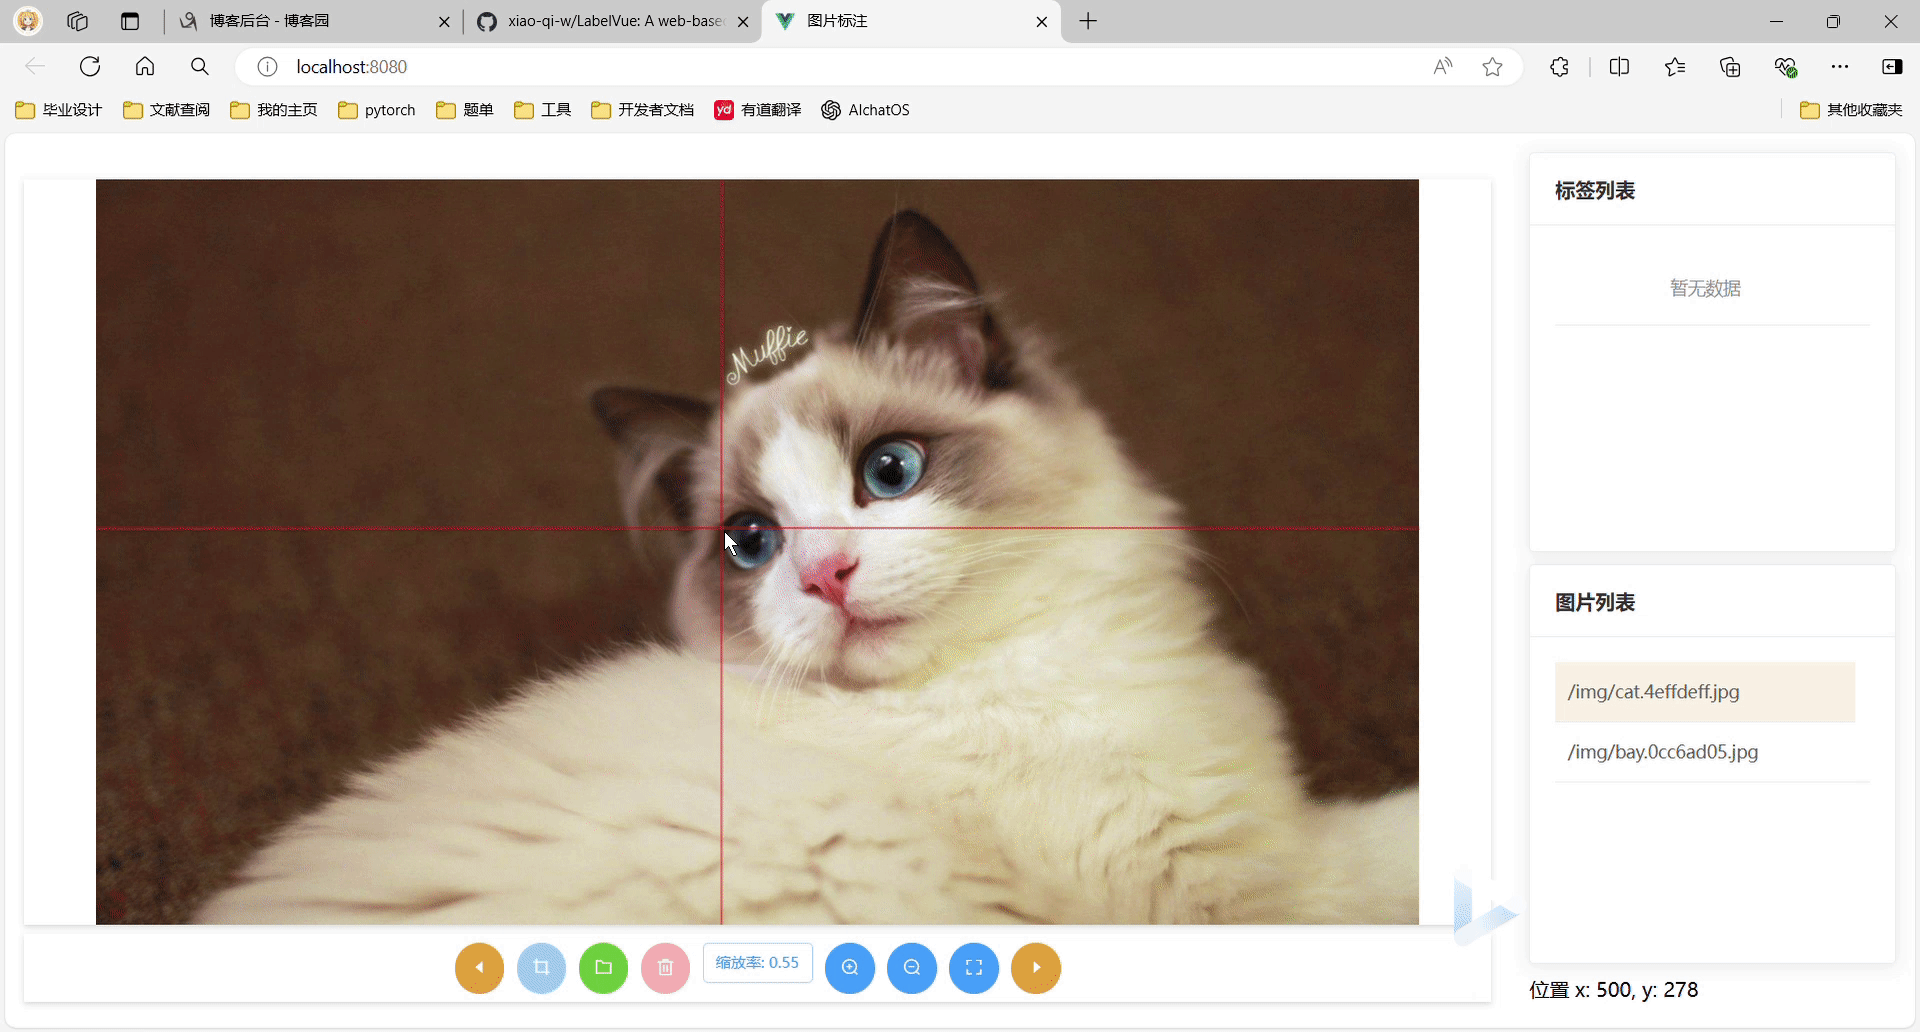
有了图片,接下来就是考虑如何绘制矩形框标注了,主要是鼠标按下事件,鼠标移动事件和鼠标抬起事件。代码如下:
鼠标按下
handleMouseDown(e) {
    const mouseX = e.offsetX;
    const mouseY = e.offsetY;
    this.prevX = mouseX;
    this.prevY = mouseY;
    // 找出被选中的矩形
    this.selectedRect = null;
    this.selectedRectIndex = -1;
    for (let i = this.rects.length - 1; i > -1; i--) {
        const rect = this.rects[i];
        if (rect.isSelected(mouseX, mouseY)) {
            this.selectedRect = rect;
            this.selectedRectIndex = i;
            break;
        }
    }
    if (this.creating) {
        // 新建
        const bufferCtx = this.bufferCanvas.getContext('2d');
        this.currentRect = new Rect(bufferCtx, this.dpr, mouseX, mouseY, this.scale);
    } else if (this.selectedRect) {
        // 拖动或缩放
        this.selectedRect.mouseDown(mouseX, mouseY);
    }
}
鼠标移动
handleMouseMove(e) {
    // 获取鼠标在Canvas中的坐标
    const mouseX = e.offsetX;
    const mouseY = e.offsetY;
    this.currentX = mouseX;
    this.currentY = mouseY;
    const ctx = this.canvas.getContext('2d');
    if (this.creating) {
        // 新建
        ctx.clearRect(0, 0, this.canvas.width, this.canvas.height);
        ctx.drawImage(this.bufferCanvas, 0, 0);
        // 绘制交叉辅助线
        ctx.beginPath();
        ctx.moveTo(mouseX * this.dpr, 0);
        ctx.lineTo(mouseX * this.dpr, this.canvas.height);
        ctx.moveTo(0, mouseY * this.dpr);
        ctx.lineTo(this.canvas.width, mouseY * this.dpr);
        ctx.strokeStyle = 'red'; // 设置线条颜色
        ctx.stroke();
        if (!this.currentRect) return;
        this.currentRect.maxX = mouseX;
        this.currentRect.maxY = mouseY;
    } else if (this.selectedRect) {
        // 拖动或缩放
        this.selectedRect.mouseMove(e, this);
    }
    // 画布状态发生变化重新渲染
    if (this.creating || this.selectedRect) {
        this.drawCanvas(); // 绘制背景和已有矩形
    }
}
鼠标抬起
handleMouseUp(e) {
    if (this.creating) {
        // 新建
        this.currentRect.maxX = e.offsetX;
        this.currentRect.maxY = e.offsetY;
        this.creating = false;
        // 矩形形状合法,加入到矩形集合
        if (this.currentRect.minX !== this.currentRect.maxX
            && this.currentRect.minY !== this.currentRect.maxY) {
            this.showNameInput = true;
        }
    } else if (this.selectedRect) {
        // 拖动或缩放
        this.selectedRect.mouseUp(this.currentImage.width, this.currentImage.height);
    }
    this.drawCanvas();
}
这三种鼠标事件与实际矩形框标注的绘制离不开自定义矩形类提供的方法,矩形类定义如下:
自定义矩形类
export default class Rect {
  constructor(ctx, dpr, startX, startY, scale) {
    this.name = 'undefined';
    this.timestamp = Date.now();
    /* 绘制相关 */
    this.ctx = ctx;
    this.dpr = dpr;
    this.color = 'rgba(0, 0, 255, 0.3)';
    this.minX = startX;
    this.minY = startY;
    this.maxX = startX;
    this.maxY = startY;
    this.vertexSize = 8 * dpr;
    /* 缩放相关 */
    this.scale = scale;
    this.realScale = scale;
    /* 状态相关 */
    this.dragging = false;
    this.resizing = false;
    this.changed = true;
    this.vertexIndex = -1;
  }

  /**
   * 调整起止坐标
   */
  adjustCoordinate() {
    let temp = 0;
    if (this.minX > this.maxX) {
      temp = this.minX;
      this.minX = this.maxX;
      this.maxX = temp;
    }
    if (this.minY > this.maxY) {
      temp = this.minY;
      this.minY = this.maxY;
      this.maxY = temp;
    }
  }

  /**
   * 绘制矩形
   * @param scale 缩放倍率
   */
  draw(scale) {
    if (this.minX === this.maxX || this.minY === this.maxY) {
      return;
    }
    this.realScale = 1 / this.scale * scale;
    const factor = this.realScale * this.dpr;
    const minX = this.minX * factor;
    const minY = this.minY * factor;
    const maxX = this.maxX * factor;
    const maxY = this.maxY * factor;
    this.ctx.beginPath();
    this.ctx.moveTo(minX, minY);
    this.ctx.lineTo(maxX, minY);
    this.ctx.lineTo(maxX, maxY);
    this.ctx.lineTo(minX, maxY);
    this.ctx.lineTo(minX, minY);
    this.ctx.fillStyle = this.color;
    this.ctx.strokeStyle = "#fff";
    this.ctx.lineWidth = 1;
    this.ctx.lineCap = 'square';
    this.ctx.fill();
    this.ctx.stroke();
    // 绘制四个顶点
    this.drawVertex(minX, maxX, minY, maxY);
  }

  /**
   * 绘制矩形四个顶点
   * @param minX 缩放后的最小横坐标
   * @param maxX 缩放后的最大横坐标
   * @param minY 缩放后的最小纵坐标
   * @param maxY 缩放后的最大纵坐标
   */
  drawVertex(minX, maxX, minY, maxY) {
    if (this.dragging || this.resizing) {
      this.ctx.fillStyle = '#FF4500'; // 拖动或缩放状态,红色顶点
    } else {
      this.ctx.fillStyle = '#A7FC00'; // 正常状态,青色顶点
    }
    const size = this.vertexSize;
    this.ctx.fillRect(minX - size / 2, minY - size / 2, size, size);
    this.ctx.fillRect(maxX - size / 2, minY - size / 2, size, size);
    this.ctx.fillRect(maxX - size / 2, maxY - size / 2, size, size);
    this.ctx.fillRect(minX - size / 2, maxY - size / 2, size, size);
  }

  /**
   * 根据坐标(x, y)判断矩形是否被选中
   * @param x 横坐标
   * @param y 纵坐标
   */
  isSelected(x, y) {
    return this.isPointInside(x, y) || this.isPointInsideVertex(x, y) !== -1;
  }

  /**
   * 判断坐标(x, y)是否在矩形内部
   * @param x 横坐标
   * @param y 纵坐标
   */
  isPointInside(x, y) {
    x = x / this.realScale;
    y = y / this.realScale;
    return x >= this.minX && x <= this.maxX && y >= this.minY && y <= this.maxY;
  }

  /**
   * 判断坐标(x, y)是否在矩形顶点内部
   * @param x
   * @param y
   */
  isPointInsideVertex(x, y) {
    x = x / this.realScale;
    y = y / this.realScale;
    const vertices = [
      {x: this.minX, y: this.minY},
      {x: this.maxX, y: this.minY},
      {x: this.maxX, y: this.maxY},
      {x: this.minX, y: this.maxY}
    ];
    const size = this.vertexSize / 2;
    let index = -1;
    for (let i = 0; i < vertices.length; i++) {
      const vx = vertices[i].x;
      const vy = vertices[i].y;
      if (x >= vx - size && x <= vx + size && y >= vy - size && y <= vy + size) {
        // return i;
        index = i; break;
      }
    }
    return index;
  }

  /**
   * 归一化为 yolo 格式
   * @param width 所在图片宽度
   * @param height 所在图片高度
   */
  normalize(width, height) {
    const scaledWidth = width * this.scale / this.dpr;
    const scaledHeight = height * this.scale / this.dpr;
    const rectWidth = (this.maxX - this.minX) / scaledWidth;
    const rectHeight = (this.maxY - this.minY) / scaledHeight;
    const centerX = (this.maxX + this.minX) / 2 / scaledWidth;
    const centerY = (this.maxY + this.minY) / 2 / scaledHeight;
    return {
      x: centerX,
      y: centerY,
      w: rectWidth,
      h: rectHeight,
    }
  }

  /**
   * 鼠标按下事件,按下坐标(x, y)
   * @param x
   * @param y
   */
  mouseDown(x, y) {
    this.vertexIndex = this.isPointInsideVertex(x, y);
    if (this.vertexIndex !== -1) {
      this.resizing = true;
    } else if (this.isPointInside(x, y)) {
      this.dragging = true;
    }
  }

  /**
   * 鼠标移动事件
   * @param e 鼠标事件
   * @param that vue组件
   */
  mouseMove(e, that) {
    const mouseX = e.offsetX;
    const mouseY = e.offsetY;
    if (this.dragging) {
      this.changed = true;
      // 拖动矩形
      const deltaX = mouseX - that.prevX;
      const deltaY = mouseY - that.prevY;
      const scaledDeltaX = (mouseX - that.prevX) / this.realScale;
      const scaledDeltaY = (mouseY - that.prevY) / this.realScale;
      this.minX += scaledDeltaX;
      this.minY += scaledDeltaY;
      this.maxX += scaledDeltaX;
      this.maxY += scaledDeltaY;
      that.prevX += deltaX;
      that.prevY += deltaY;
    }
    if (this.resizing) {
      this.changed = true;
      // 缩放矩形
      const scaledX = mouseX / this.realScale;
      const scaledY = mouseY / this.realScale;
      switch (this.vertexIndex) {
        case 0: // 左上角顶点
          this.minX = scaledX;
          this.minY = scaledY;
          break;
        case 1: // 右上角顶点
          this.maxX = scaledX;
          this.minY = scaledY;
          break;
        case 2: // 右下角顶点
          this.maxX = scaledX;
          this.maxY = scaledY;
          break;
        case 3: // 左下角顶点
          this.minX = scaledX;
          this.maxY = scaledY;
          break;
      }
    }
    this.draw();
  }

  /**
   * 鼠标抬起事件
   * @param width 所在图片宽度
   * @param height 所在图片高度
   */
  mouseUp(width, height) {
    this.dragging = false;
    this.resizing = false;
    this.adjustCoordinate();
    // 避免缩放过程中把矩形缩成看不见的一点
    if (this.minX === this.maxX) {
      this.maxX += 1;
    }
    if(this.minY === this.maxY) {
      this.maxY += 1;
    }
  }
}
至此,核心功能基本实现,至于对矩形框的命名、保存与删除等操作,都比较简单,演示视频中已经提到了,这里不做过多介绍。最终效果如下(完整功能演示请看文章开头的视频):
——————————————我———是———分———割———线—————————————
长大后的日子是一天快过一天,一年的时间就这么一声不吭地溜走了,对比去年这个时候的我,貌似还是没有太大的长进,我这进步速度就算是按年算也过于迟缓了,望各位引以为戒。我们有缘明年再见ヾ(•ω•`)o
