

springboot(七):整合MyBatis
springbooy集成myBatis分别介绍两种开发模式
无配置文件注解版
一切使用注解搞定。
1 添加相关maven文件
<dependency>
	<groupId>org.mybatis.spring.boot</groupId>
	<artifactId>mybatis-spring-boot-starter</artifactId>
	<version>1.1.1</version>
</dependency>2、application.properties 添加相关配置
spring.datasource.url=jdbc:mysql://localhost:3306/dbweb1
spring.datasource.username=root
spring.datasource.password=123qwe
spring.datasource.driver-class-name=com.mysql.jdbc.Driverspringboot会自动加载spring.datasource.*相关配置,数据源就会自动注入到sqlSessionFactory中,sqlSessionFactory会自动注入到Mapper中,一切都不用管了,直接拿起来使用就行了。、
在启动类中添加对mapper包扫描@MapperScan或者在每个接口中添加

或者直接在Mapper类上面添加注解@Mapper,以上这种实现比较方便,不然每个mapper加个注解也挺麻烦的
3、开发Mapper
第三步是最关键的一块,sql生产都在这里
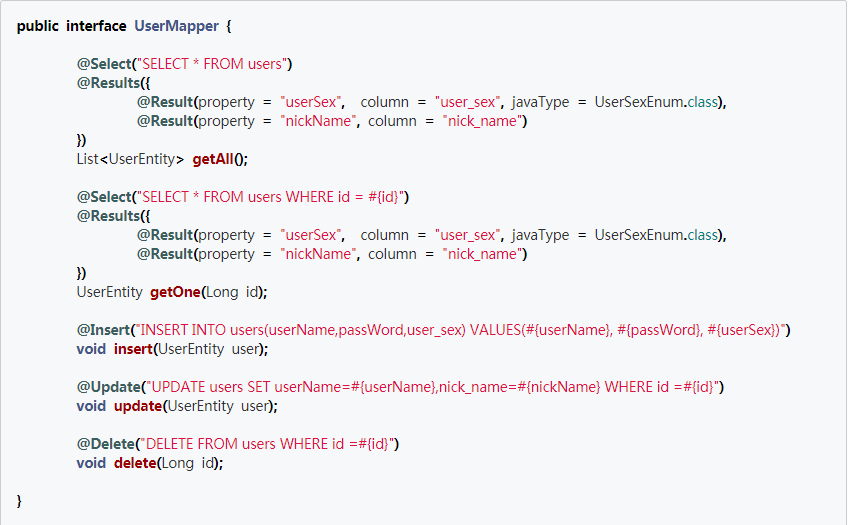
- @Select 是查询类的注解,所有的查询均使用这个
- @Result 修饰返回的结果集,关联实体类属性和数据库字段一一对应,如果实体类属性和数据库属性名保持一致,就不需要这个属性来修饰。
- @Insert 插入数据库使用,直接传入实体类会自动解析属性到对应的值
- @Update 负责修改,也可以直接传入对象
- @delete 负责删除
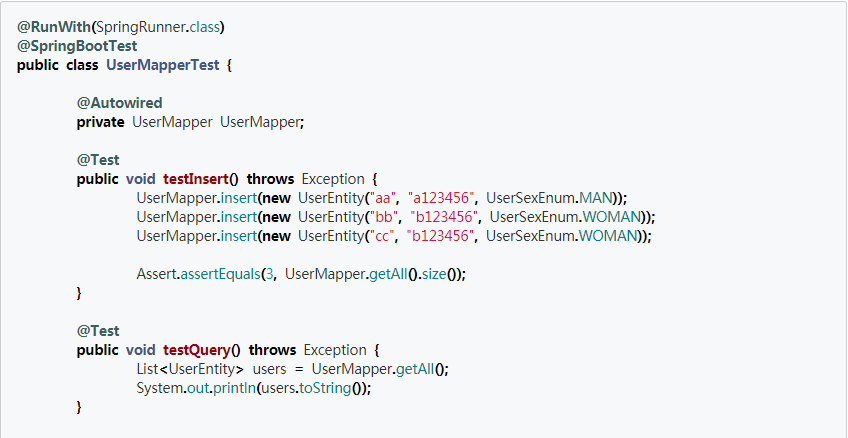
4、使用
上面三步就基本完成了相关dao层开发,使用的时候当作普通的类注入进入就可以了
xml版本
极简xml版本保持映射文件的老传统,优化主要体现在不需要实现dao的是实现层,系统会自动根据方法名在映射文件中找对应的sql.
1、配置
pom文件和上个版本一样,只是application.properties新增以下配置
mybatis.config-locations=classpath:mybatis/mybatis-config.xml
mybatis.mapper-locations=classpath:mybatis/mapper/*.xml
指定了mybatis基础配置文件和实体类映射文件的地址
mybatis-config.xml 配置

2、添加User的映射文件
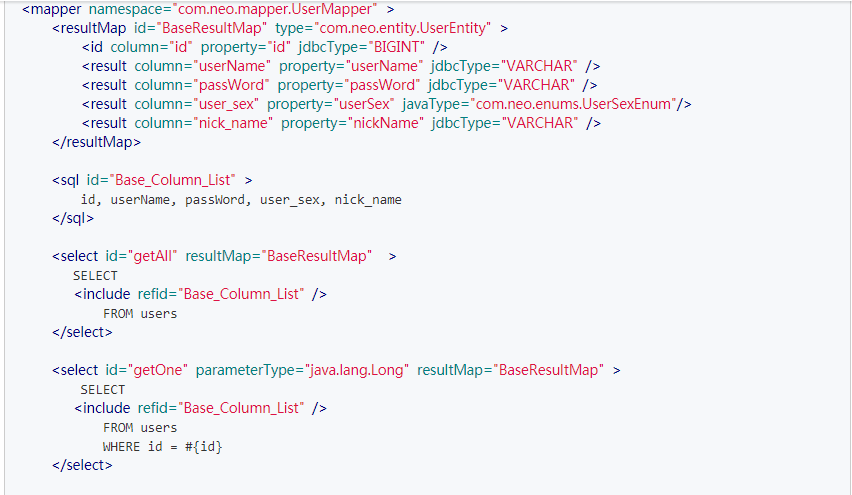
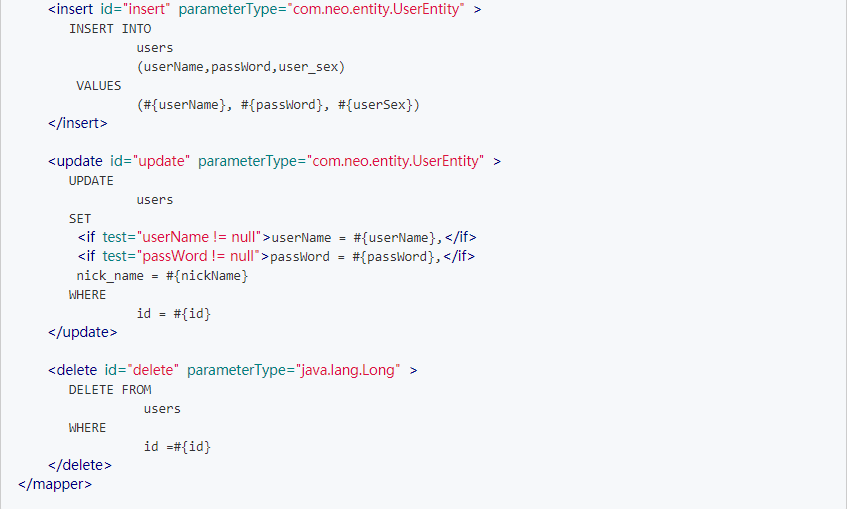
其实就是把上个版本中mapper的sql搬到了这里的xm中了
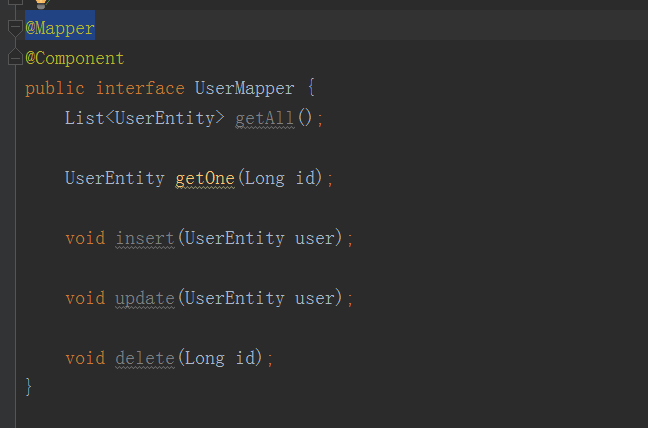
3、编写Dao层的代码
相关信息:http://www.mybatis.org/mybatis-3/zh/getting-started.html#
博客:http://blog.720ui.com/2016/springboot_02_data_mybatis/
- (官方文档,推荐)http://www.mybatis.org/spring-boot-starter/mybatis-spring-boot-autoconfigure/
- )http://blog.csdn.net/isea533/article/details/50359390?locationNum=3&fps=1
本文转载:http://www.ityouknow.com/
