zabbix是linux运维工作中经常用到的开源工具,话不多说,直接开始正式的安装配置环境。
1、安装环境
centos7
服务端:192.168.200.100
客户端:192.168.200.200
mysql5.6
2、检查工作
2.1关闭selinux和firewall
2.1.1检测selinux是否关闭
[root@localhost ~]# getenforce
Disabled #Disabled 为关闭
2.1.2临时关闭
[root@localhost ~]# setenforce 0 #设置SELinux 成为enforcing模式
2.1.3永久关闭
[root@localhost ~]# vi /etc/selinux/config:
将SELINUX=enforcing改为SELINUX=disabled
设置后需要重启才能生效
2.2查看默认防火墙状态
[root@localhost ~]# firewall-cmd --state
not running #关闭后显示not running,开启后显示running
2.2.1停止firewall
[root@localhost ~]# systemctl stop firewalld.service
2.2.2禁止firewall开机启动
[root@localhost ~]# systemctl disable firewalld.service
3、zabbix3.4的安装步骤
服务端配置
3.1.1配置zabbix的yum源
[root@localhost ~]# rpm -ivh http://repo.zabbix.com/zabbix/3.4/rhel/7/x86_64/zabbix-release-3.4-2.el7.noarch.rpm
3.1.2安装zabbix程序包,安装mysql、zabbxi-agent、数据库
[root@localhost ~]# yum install -y zabbix-server-mysql zabbix-web-mysql zabbix-agent mariadb-server 【如果已装有mysql则不用再安装mariadb数据库,我的机器是已经安装了mysql我就不再安装mariadb-server了】
3.1.3进入mysql创建数据库实例,授权 【如果安装了mariadb的就需要先启动Mariadb。我是已装有mysql就进入mysql授权】
[root@localhost ~]# systemctl start mariadb #启动mariadb
[root@localhost ~]# systemctl enable mariadb #设置开机启动
[root@localhost ~]# mysql #登入数据库
MySQL> create database zabbix character set utf8 collate utf8_bin; #创建数据库实例
Query OK, 1 row affected (0.00 sec)
MySQL> grant all privileges on zabbix.* to zabbix@'%' identified by 'zabbix'; #授权所有主机访问数据库实例zabbix,用户名/密码:zabbix/zabbix
Query OK, 0 rows affected (0.00 sec)
MySQL> grant all privileges on zabbix.* to zabbix@localhost identified by 'zabbix'; #授权localhost主机名访问数据库实例zabbix,用户名/密码:zabbix/zabbix
Query OK, 0 rows affected (0.00 sec)
MySQL> grant all privileges on zabbix.* to zabbix@localhost.localdomain identified by 'zabbix'; #授权localhost.localdomain主机访问数据库实例zabbix,用户名/密码:zabbix/zabbix
Query OK, 0 rows affected (0.00 sec)
3.1.4导入初始模式和数据
[root@localhost ~]# cd /usr/share/doc/zabbix-server-mysql-3.4.4/ #进入create.sql.gz所在目录
[root@localhost zabbix-server-mysql-3.4.4]# zcat create.sql.gz |mysql -uroot zabbix #导入数据库中对应的zabbix库,数据库有密码的需要加上-p输入密码(初始数据库默认密码为空值)
该处注意事宜【如果 /usr/share/doc路径下没有zabbix-server-mysql-3.4.4这个文件目录,则需要执行以下命令】
yum -y install zabbix-server-mysql zabbix-web-mysql #安装这两个服务后,就可以在/usr/share/doc/路径下找到对应的文件了
导入还有一种方法,通过数据库管理工具导入,我是使用的数据库管理工具,讲解一下我的方法。
3.1.4.1将create.sql.gz取到本地(自己使用ftp工具或者什么顺手的技术拿取下来)
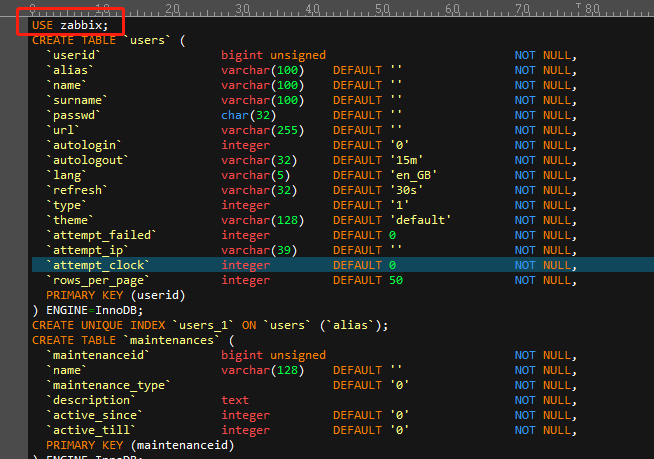
3.1.4.2解压create.sql.gz,在create.sql文件的首部添加一行USE zabbix并保存。
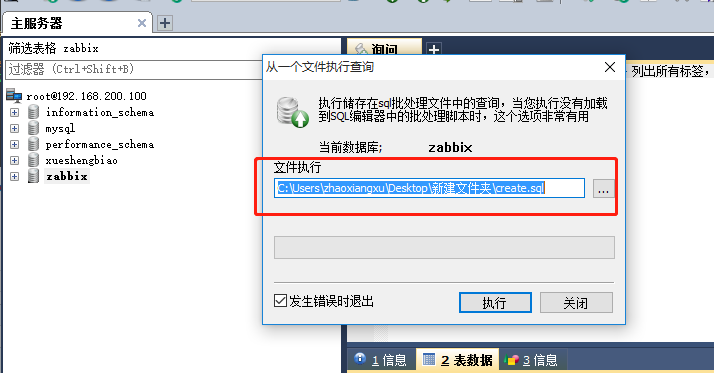
3.1.4.3接下来就使用mysql管理软件,选择zabbix库,执行create.sql导入工作,导入完成即可。
3.1.5配置zabbix-server的配置文件zabbix_server.conf(检查配置文件中,这几项参数是否配置好)
[root@localhost zabbix-server-mysql-3.4.4]# vi /etc/zabbix/zabbix_server.conf
DBHost=localhost # 数据主机名
DBName=zabbix # 数据库实例
DBUser=zabbix # 用户名
DBPassword=zabbix # 密码
3.1.6启动zabbix-server服务
[root@localhost zabbix-server-mysql-3.4.4]# systemctl start zabbix-server #启动zabbix-server服务
[root@localhost zabbix-server-mysql-3.4.4]# systemctl enable zabbix-server #设置zabbix-server服务开机自启动
3.1.7编辑Apache的配置文件,消注释设置正确的时区
[root@localhost zabbix-server-mysql-3.4.4]# vi /etc/httpd/conf.d/zabbix.conf
php_value max_execution_time 300
php_value memory_limit 128M
php_value post_max_size 16M
php_value upload_max_filesize 2M
php_value max_input_time 300
php_value always_populate_raw_post_data -1
php_value date.timezone Asia/Shanghai
启动httpd服务 ,设置开机启动httpd服务
[root@localhost ~]# systemctl start httpd #启动httpd服务
[root@localhost ~]# systemctl enable httpd #设置开机启动httpd服务
4.Zabbix Web网页安装
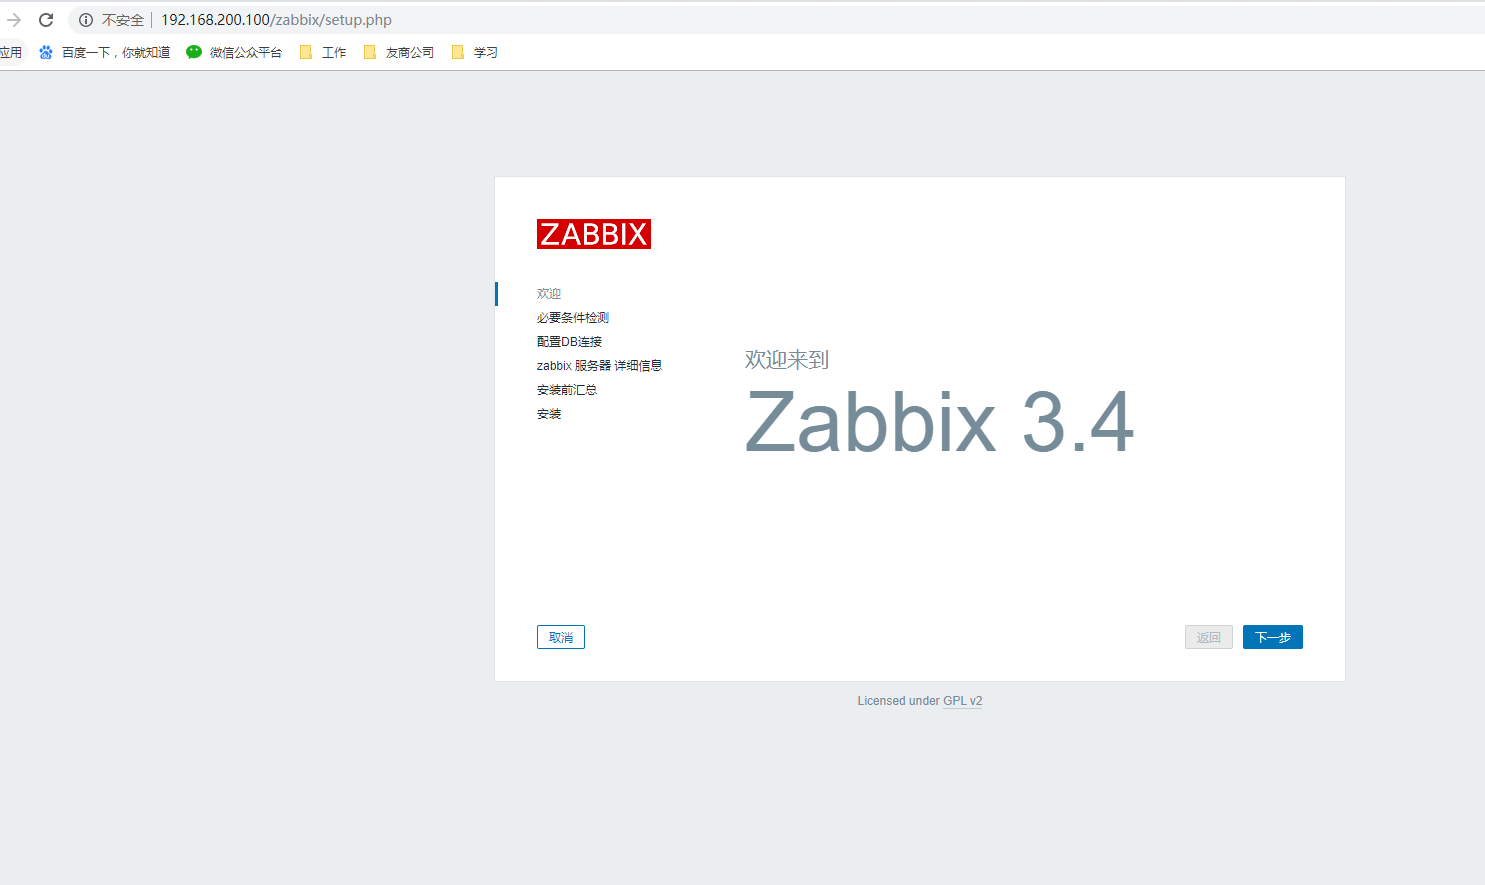
4.1.在浏览器输入地址http://服务器ip/zabbix/setup.php,出现欢迎界面,点击下一步;
4.2检查PHP的必要条件是否都OK

4.3输入mysql配置账号密码端口号等

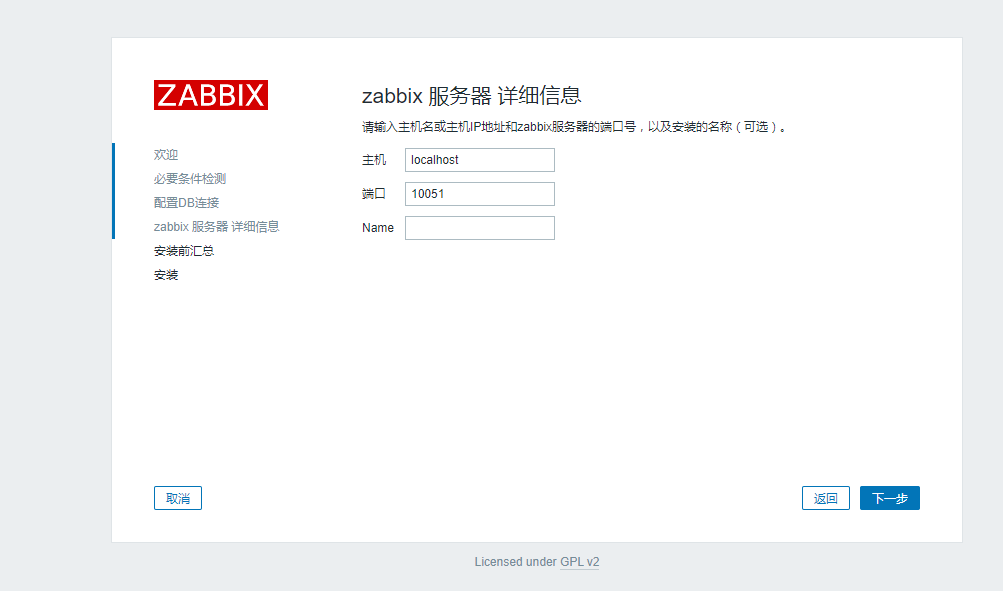
4.4服务器详细信息
4.5核对信息,如无误,点击下一步即可安装完成
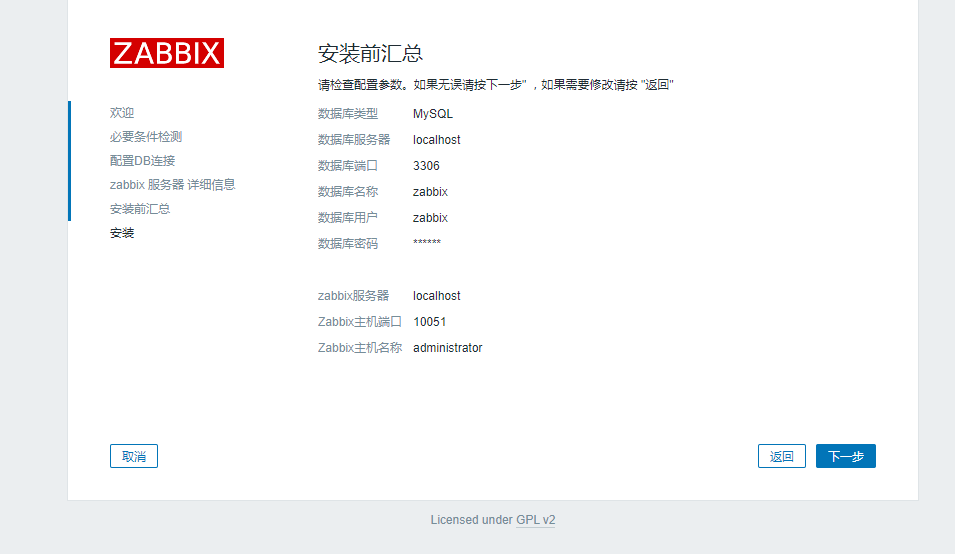

到这里zabbix的服务端就已经装载完成了,下一遍文章更新配置客户端的配置以及监控项的配置。


