(一)日志系统ELK简介与安装
一、ELK概念和功能
官网地址:https://www.elastic.co/cn/downloads?elektra=products&storm=main
1.1 概念
- elk是Elasticsearch、Logstash、Kibana三个开源软件组合
- 具备数据收集(Logstash)、数据存储(Elasticsearch)、分析(Kibana)功能
- 实时数据检索和分析场合
1.2 功能
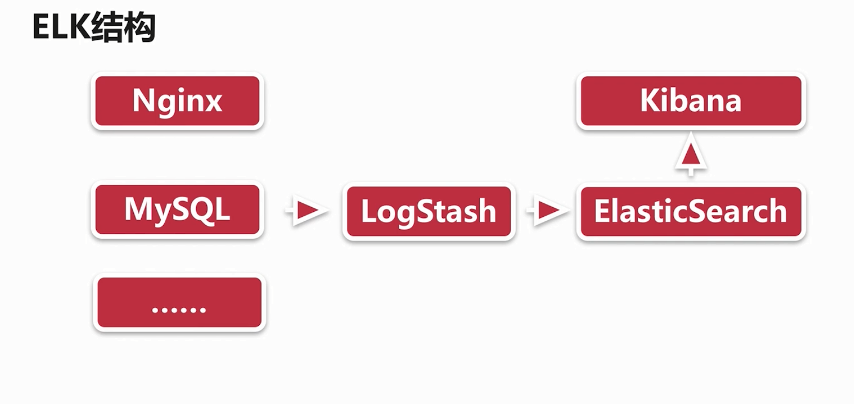
- Logstash负责文本数据的收集、处理
- Elasticsearch负责数据存储和索引
- Kibana负责数据的可视化和统计分析
1.3 ELK结构
二、ELK安装和搭建
2.1 下载安装包
#Elasticsearch
wget   https://artifacts.elastic.co/downloads/elasticsearch/elasticsearch-6.6.1.tar.gz

#Logstash
wget   https://artifacts.elastic.co/downloads/logstash/logstash-6.6.1.tar.gz

#Kibana
wget https://artifacts.elastic.co/downloads/kibana/kibana-6.6.1-linux-x86_64.tar.gz
2.2 搭建Elasticsearch
安装注意
默认需要4G内存
以普通用户运行
修改Elasticsearch配置
1)安装准备
#安装JDK
yum install java-1.8.0-openjdk.x86_64 -y
#创建普通用户elk
useradd elk
#解压安装包
tar -zxvf elasticsearch-6.6.1.tar.gz  -C   /opt/
tar -zxvf logstash-6.6.1.tar.gz         -C   /opt/
tar -zxvf kibana-6.6.1.tar.gz           -C   /opt/
#创建日志和数据存放目录
mkdir  /opt/elasticsearch-6.6.1/data
mkdir  /opt/elasticsearch-6.6.1/logs
#修改授权
chown -R elk:elk  /opt/
chmod 775 -R  /opt/
注:需要普通用户运行elk项目
2)修改elasticsearch配置文件
vim /opt/elasticsearch-6.6.1/config/elasticsearch.yml
network.host: 0.0.0.0
path.data: /opt/elasticsearch-6.6.1/data
path.logs: /opt/elasticsearch-6.6.1/logs
#为了连接上elasticsearch
http.cors.enabled: true
http.cors.allow-origin: "*"
3) 修改系统参数
[root@junesu elasticsearch]# vim /etc/security/limits.conf
* soft nofile 65536
* hard nofile 131072
* soft nproc 2048
* hard nproc 4096
[root@junesu elasticsearch]# vim /etc/security/limits.d/20-nproc.conf
* soft nproc 4096
[root@junesu elasticsearch]# vim /etc/sysctl.conf
#虚拟内存的大小
vm.max_map_count=655360
#文件打开的最大数目
fs.file-max=655360
使内容生效
[root@junesu elasticsearch]# sysctl -p
4)启动
#启动限制最大内存数 普通用户启用
su elk
ES_JAVA_OPTS="-Xms512m -Xmx512m" ./bin/elasticsearch -d
2.3 搭建Kibana
Kibana 启动即可
#切换到elk用户
su elk
#后台运行
nohup  /opt/kibana-6.6.1/bin/kibana -H 0.0.0.0 >/opt/kibana-6.6.1/run.log  2>&1 &
访问 http://IP地址:5601
2.4 搭建Logstash
1)编辑文件,通过TCP写入日志
vim /opt/logstash-6.5.3/config/test.conf
input {
    tcp {
        host => "0.0.0.0"
        port => 5044
        mode => "server"
        tags => ["tags"]
        codec => json_lines
                type => "log"
    }
}
output {
        elasticsearch {
            hosts => "localhost:9200"
            index => "%{[appname]}"
        }
}
2)启动logstash
cd /opt/logstash-6.6.1 &&nohup ./bin/logstash -f ./config/test.conf>/dev/null 2>&1 &
本文仅简单介绍elk的功能和安装方法

 浙公网安备 33010602011771号