
Mongo数据库
一、MongoDB在Ubuntu上安装
1.下载MongoDB
百度网盘下载链接:https://pan.baidu.com/s/1pcK97NI7YeTga9MRpkfWnw
提取码:0u66
2.上传与解压
下载后将压缩包放至自定义路径(/home/xhj/hadoop/这是我的路径)
cd /home/xhj/hadoop
tar -zxvf mongodb-linux-x86_64-4.0.13.tgz #文件名根据自己的压缩包文件名来
3.创建MongoDB数据存储和日志文件
cd /home/xhj/hadoop/mongodb-linux-x86_64-4.0.13
mkdir data
mkdir logs
cd ./logs
touch mongodb.log
cd ../
mkdir etc
touch mongodb.conf
mongodb.conf配置文件
#数据库路径
dbpath=/home/xhj/hadoop/mongodb-linux-x86_64-4.0.13/data
#日志输出文件路径
logpath=/home/xhj/hadoop/mongodb-linux-x86_64-4.0.13/logs/mongodb.log
#错误日志采用追加模式
logappend=true
#启用日志文件,默认启用
journal=true
#这个选项可以过滤掉一些无用的日志信息,若需要调试使用请设置为false
quiet=true
#端口号 默认为27017
port=27017
#允许远程访问
bind_ip=0.0.0.0
#开启子进程
fork=true
#开启认证,必选先添加用户,先不开启(不用验证账号密码)
#auth=true
3.将mongodb服务加入环境变量
sudo gedit /etc/profile
在最后一行添加:
export PATH=$PATH:/home/xhj/hadoop/mongodb-linux-x86_64-4.0.13/bin
使配置文件生效:
source /etc/profile
二、启动MongoDB服务
1.在mongodb安装目录bin目录下启动服务
cd /home/xhj/hadoop/mongodb-linux-x86_64-4.0.13/bin
./mongod --config /home/xhj/hadoop/mongodb-linux-x86_64-4.0.13/etc/mongodb.conf

2.查看mongodb是否启动成功
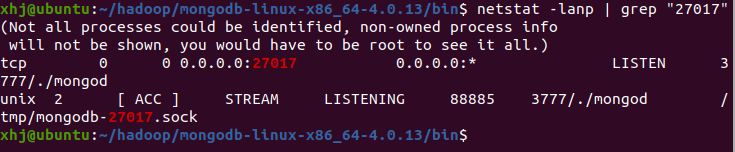
netstat -lanp | grep "27017"
显示如下进程,说明启动成功。
3.操作mongo数据库
输入mongo命令进入数据库,默认进入的是test数据库,show dbs查看当前所有数据库。

注意:如果一个数据库是没有安全认证的,不使用用户名密码即可登陆,这样是不安全的,所以我们应当授予权限才能操作数据库,这样在企业中才能保证数据安全性。
三、添加用户、安全认证
使用admin数据库,进行新用户授权。
MongoDB副本集默认会创建local、admin数据库,local数据库主要存储副本集的元数据,admin数据库则主要存储MongoDB的用户、角色等信息。

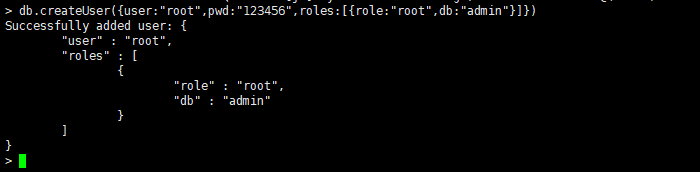
输入如下命令:
db.createUser({user:"root",pwd:"123456",roles:[{role:"root",db:"admin"}]})
授权成功后,关闭mongo服务:
db.shutdownServer()
修改mongodb.conf配置文件
sudo gedit /home/xhj/hadoop/mongodb-linux-x86_64-4.0.13/etc/mongodb.conf
#开启认证,必选先添加用户
auth=true
开启mongo服务,进入数据库测试
cd /home/xhj/hadoop/mongodb-linux-x86_64-4.0.13/bin
./mongod --config /home/xhj/hadoop/mongodb-linux-x86_64-4.0.13/etc/mongodb.conf
mango
show dbs此时看不到任何数据库,说明安全认证用户配置生效。

使用use admin通过db.auth('root','密码')输出1就是验证成功
use admin
db.auth('root','123465')

四、mongodb命令行使用
Student文档如下:
|
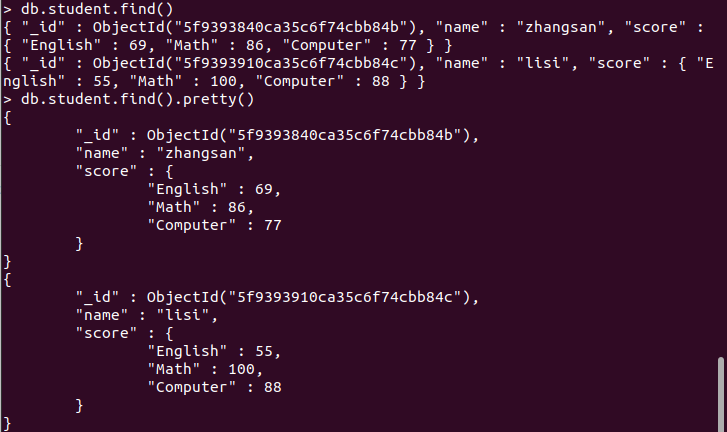
{ “name”: “zhangsan”, “score”: { “English”: 69, “Math”: 86, “Computer”: 77 } } { “name”: “lisi”, “score”: { “English”: 55, “Math”: 100, “Computer”: 88 } } |
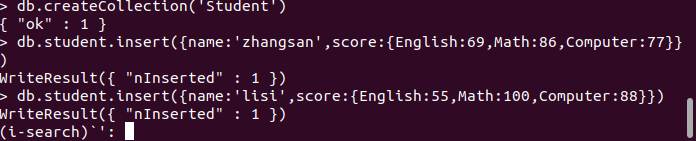
(1)用MongoDB Shell设计出student集合;
db.createCollection('student')
db.student.insert({name:'zhangsan',score:{English:69,Math:86,Computer:77}})
db.student.insert({name:'lisi',score:{English:55,Math:100,Computer:88}})
(2)用find()方法输出两个学生的信息;
(3)用find()方法查询zhangsan的所有成绩(只显示score列);

(4)修改lisi的Math成绩,改为95。

