RPi.GPIO API All In One
RPi.GPIO API All In One
Python & Raspberry Pi
# RPi.GPIO 0.7.1 / Released: Feb 6, 2022
$ pip install RPi.GPIO
$ pip3 install RPi.GPIO
https://pypi.org/project/RPi.GPIO/
https://sourceforge.net/projects/raspberry-gpio-python/
API docs
import RPi.GPIO as GPIO

GPIO.setmode
GPIO.BCM

GPIO.setup
GPIO.OUT

GPIO.PWM
https://sourceforge.net/p/raspberry-gpio-python/wiki/Examples/
import RPi.GPIO as GPIO
GPIO.setmode(GPIO.BOARD)

func = GPIO.gpio_function(pin)
# will return a value from:
GPIO.IN, GPIO.OUT, GPIO.SPI, GPIO.I2C, GPIO.HARD_PWM, GPIO.SERIAL, GPIO.UNKNOWN

P17_value = GPIO.gpio_function(17)
P27_value = GPIO.gpio_function(27)
P22_value = GPIO.gpio_function(22)
print('GPIO.gpio_function(17) =', P17_value)
print('GPIO.gpio_function(27) =', P27_value)
print('GPIO.gpio_function(22) =', P22_value)

https://sourceforge.net/p/raspberry-gpio-python/wiki/Checking function of GPIO channels/
https://sourceforge.net/p/raspberry-gpio-python/wiki/Inputs/
import RPi.GPIO as GPIO
GPIO.setmode(GPIO.BOARD)
GPIO.setup(12, GPIO.OUT)

# To set an output high:
GPIO.output(12, GPIO.HIGH)
 # or
GPIO.output(12, 1)
 # or
GPIO.output(12, True)

# To set an output low:
GPIO.output(12, GPIO.LOW)
 # or
GPIO.output(12, 0)
 # or
GPIO.output(12, False)
https://sourceforge.net/p/raspberry-gpio-python/wiki/Outputs/
# To discover information about your RPi:
GPIO.RPI_INFO

# To discover the Raspberry Pi board revision:
GPIO.RPI_INFO['P1_REVISION']
# GPIO.RPI_REVISION    (deprecated)

# To discover the version of RPi.GPIO:
GPIO.VERSION

print('GPIO.RPI_INFO =', GPIO.RPI_INFO)
print('GPIO.VERSION =', GPIO.VERSION)

"""

GPIO.RPI_INFO = {'P1_REVISION': 3, 'REVISION': 'a22082', 'TYPE': 'Pi 3 Model B', 'MANUFACTURER': 'Embest', 'PROCESSOR': 'BCM2837', 'RAM': '1G'}
GPIO.VERSION = 0.7.1


"""

cleanup
GPIO.cleanup()
# It is possible that don't want to clean up every channel leaving some set up when your program exits.
# You can clean up individual channels, a list or a tuple of channels:

GPIO.cleanup(channel)
GPIO.cleanup( (channel1, channel2) )
GPIO.cleanup( [channel1, channel2] )
import RPi.GPIO as GPIO
# choose BCM numbering scheme.
GPIO.setmode(GPIO.BCM)

# red / green / blue
# GPIO.setup(17, GPIO.OUT)
# GPIO.setup(27, GPIO.OUT)
# GPIO.setup(22, GPIO.OUT)

# GPIO.setup list
LEDs = [17, 27, 22]
GPIO.setup(LEDs, GPIO.OUT)
GPIO.setup(LEDs, GPIO.OUT)
GPIO.setup(LEDs, GPIO.OUT)
https://sourceforge.net/p/raspberry-gpio-python/wiki/BasicUsage/
import time
import RPi.GPIO as GPIO
GPIO.setmode(GPIO.BOARD)
GPIO.setup(12, GPIO.OUT)

p = GPIO.PWM(12, 50)  # channel=12 frequency=50Hz
p.start(0)
try:
    while 1:
        for dc in range(0, 101, 5):
            p.ChangeDutyCycle(dc)
            time.sleep(0.1)
        for dc in range(100, -1, -5):
            p.ChangeDutyCycle(dc)
            time.sleep(0.1)
except KeyboardInterrupt:
    pass
p.stop()
GPIO.cleanup()
https://sourceforge.net/p/raspberry-gpio-python/wiki/PWM/
demos
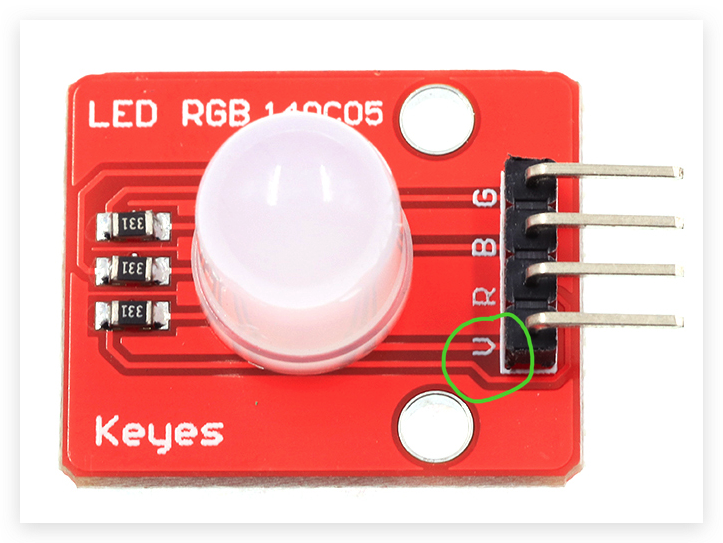
Keyes
RGB LED140C05
V 针脚需要接共阳极的 5V


#!/usr/bin/env python3
# coding: utf8
import RPi.GPIO as GPIO
# choose BCM numbering scheme.
GPIO.setmode(GPIO.BCM)
# red / green / blue
GPIO.setup(17, GPIO.OUT)
GPIO.setup(27, GPIO.OUT)
GPIO.setup(22, GPIO.OUT)

# hz = input('Please define the frequency in Herz(recommended:75): ')
# reddc = input('Please define the red LED Duty Cycle: ')
# greendc = input('Please define the green LED Duty Cycle: ')
# bluedc = input('Please define the blue LED Duty Cycle: ')

# hz = 1000
# hz = 800000
hz = 75
red = GPIO.PWM(17, hz)
green = GPIO.PWM(27, hz)
blue = GPIO.PWM(22, hz)

print('开始闪烁⏳')

try:
  while True:
    # red.start((reddc/2.55))
    # green.start((greendc/2.55))
    # blue.start((bluedc/2.55))
    red.start((0/2.55))
    green.start((255/2.55))
    blue.start((0/2.55))
# ❌ ValueError: dutycycle must have a value from 0.0 to 100.0

except KeyboardInterrupt:
  red.stop()
  green.stop()
  blue.stop()
  # clean up GPIO on CTRL+C exit
  GPIO.cleanup()

print('结束闪烁 👌🏻')
#!/usr/bin/env python3
# coding: utf8
import RPi.GPIO as GPIO
# choose BCM numbering scheme.
GPIO.setmode(GPIO.BCM)
# red / green / blue
# GPIO.setup(17, GPIO.OUT)
# GPIO.setup(27, GPIO.OUT)
# GPIO.setup(22, GPIO.OUT)

# GPIO.setup list
LEDs = [17, 27, 22]
GPIO.setup(LEDs, GPIO.OUT)
GPIO.setup(LEDs, GPIO.OUT)
GPIO.setup(LEDs, GPIO.OUT)

# hz = input('Please define the frequency in Herz(recommended:75): ')
# reddc = input('Please define the red LED Duty Cycle: ')
# greendc = input('Please define the green LED Duty Cycle: ')
# bluedc = input('Please define the blue LED Duty Cycle: ')

# hz = 1000
# hz = 800000
hz = 75
red = GPIO.PWM(17, hz)
green = GPIO.PWM(27, hz)
blue = GPIO.PWM(22, hz)

print('开始闪烁⏳')

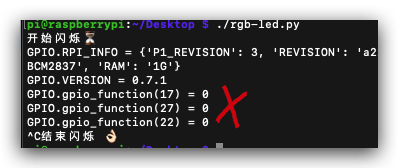
print('GPIO.RPI_INFO =', GPIO.RPI_INFO)
print('GPIO.VERSION =', GPIO.VERSION)


P17_value = GPIO.gpio_function(17)
P27_value = GPIO.gpio_function(27)
P22_value = GPIO.gpio_function(22)
print('GPIO.gpio_function(17) =', P17_value)
print('GPIO.gpio_function(27) =', P27_value)
print('GPIO.gpio_function(22) =', P22_value)

try:
  # while True:
  #   # red.start((reddc/2.55))
  #   # green.start((greendc/2.55))
  #   # blue.start((bluedc/2.55))
  #   red.start((0/2.55))
  #   green.start((255/2.55))
  #   blue.start((0/2.55))
  #   # ❌ ValueError: dutycycle must have a value from 0.0 to 100.0
  for r in range(255):
    for g in range(255):
      for b in range(255):
        red.start((r/2.55))
        green.start((g/2.55))
        blue.start((b/2.55))

except KeyboardInterrupt:
  red.stop()
  green.stop()
  blue.stop()
  # clean up GPIO on CTRL+C exit
  GPIO.cleanup()

print('结束闪烁 👌🏻')
solution
#!/usr/bin/env python3
# coding: utf8

import RPi.GPIO as GPIO
from time import sleep

# choose BCM numbering scheme.
GPIO.setmode(GPIO.BCM)
# red / green / blue
# GPIO.setup(17, GPIO.OUT)
# GPIO.setup(27, GPIO.OUT)
# GPIO.setup(22, GPIO.OUT)

# GPIO.setup list
LEDs = [17, 22, 27]
GPIO.setup(LEDs, GPIO.OUT)

# LED Duty Cycle / LED 占空比
# hz = input('Please define the frequency in Herz(recommended:75): ')
# reddc = input('Please define the red LED Duty Cycle: ')
# greendc = input('Please define the green LED Duty Cycle: ')
# bluedc = input('Please define the blue LED Duty Cycle: ')

# hz = 1000
# hz = 800000
# hz = 75
hz = 60

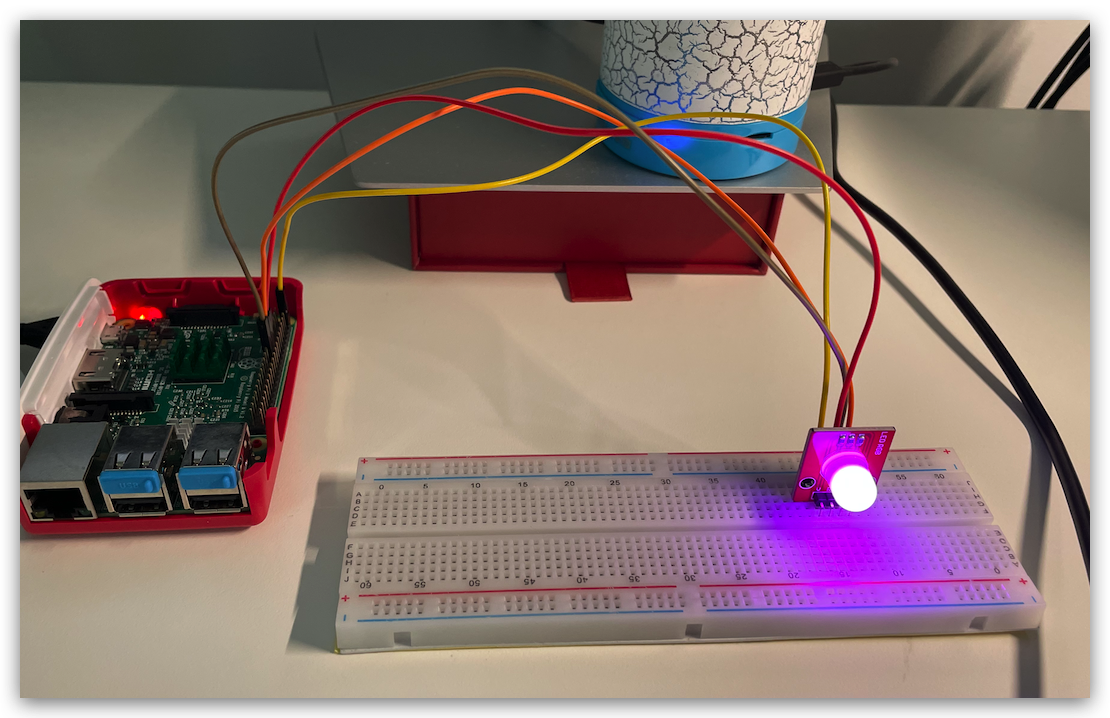
# RBG => GPIO 17, 27, 22 真实引脚接线对应关系
# rgb => 输出颜色顺序 `绿红蓝` ❌
# red = GPIO.PWM(17, hz)
# blue = GPIO.PWM(27, hz)
# green = GPIO.PWM(22, hz)

# BGR => 蓝绿红 ✅, 但是与 RBG 逻辑上完全不符合呀 💩
blue = GPIO.PWM(17, hz)
green = GPIO.PWM(27, hz)
red = GPIO.PWM(22, hz)

print('开始闪烁⏳')
print('GPIO.RPI_INFO =', GPIO.RPI_INFO)
print('GPIO.VERSION =', GPIO.VERSION)
print('clean up GPIO on CTRL+C exit 🎉')

def init():
  for color in ["r", "g", "b"]:
    if(color == "r"):
      red.start((100.0))
      green.start((0.0))
      blue.start((0.0))
    elif(color == "g"):
      red.start((0.0))
      green.start((100.0))
      blue.start((0.0))
    else:
      red.start((0.0))
      green.start((0.0))
      blue.start((100.0))
    sleep(3)
    # sleep(1)

init()

def clear():
  red.stop()
  green.stop()
  blue.stop()
  GPIO.cleanup()


try:
  while True:
    for r in range(11):
      for g in range(11):
        for b in range(11):
          red.start((r * 10.0))
          green.start((g * 10.0))
          blue.start((b * 10.0))
          # print('✅ RGB =', r*10.0, g* 10.0, b*10.0)
          # ValueError: dutycycle must have a value from 0.0 to 100.0
          sleep(0.01)
except KeyboardInterrupt:
  # clear()
  print('结束闪烁 ❌')
finally:
  clear()
  print('结束闪烁 👌🏻')
(🐞 反爬虫测试!打击盗版⚠️)如果你看到这个信息, 说明这是一篇剽窃的文章,请访问 https://www.cnblogs.com/xgqfrms/ 查看原创文章!
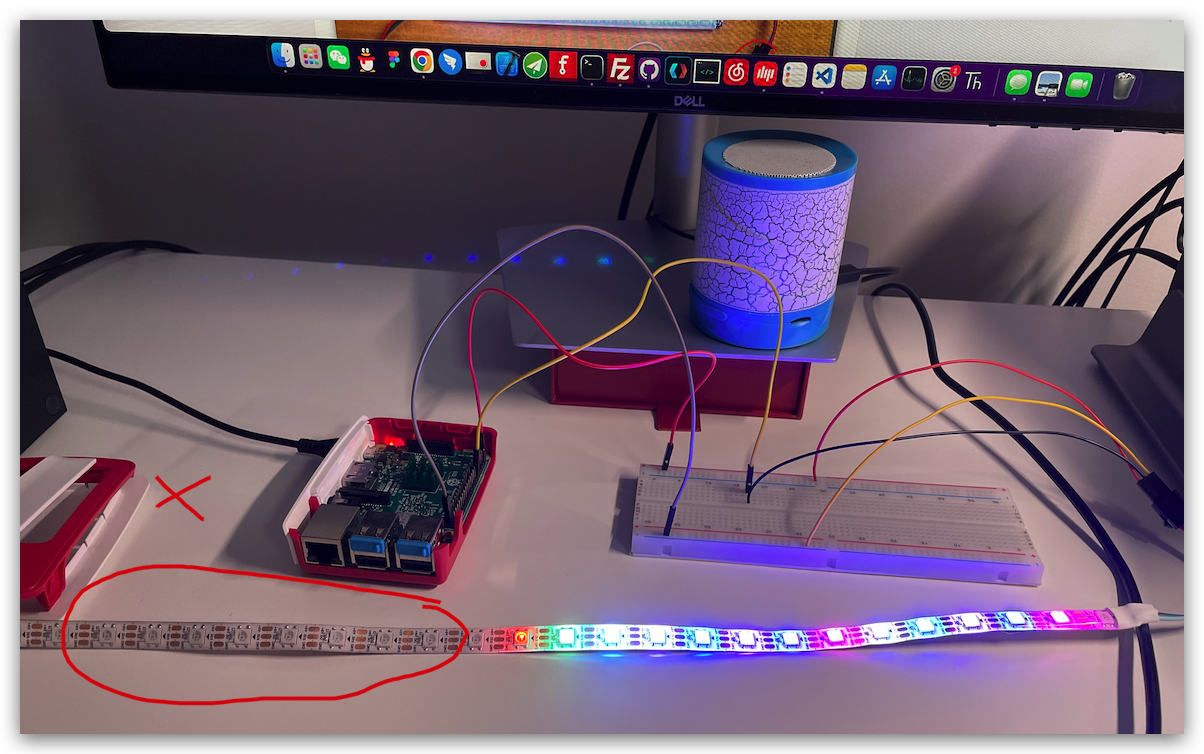
Raspberry Pi 3B
fix low voltage error

$ sudo vim /boot/config.txt

# disable audio (snd_bcm2835)
# dtparam=audio=on

$ sudo reboot
https://tutorials-raspberrypi.com/connect-control-raspberry-pi-ws2812-rgb-led-strips/
https://github.com/adafruit/Adafruit_CircuitPython_NeoPixel/issues/151
https://github.com/xgqfrms/Raspberry-Pi
https://github.com/xgqfrms/Raspberry-Pi/commit/e6cdaf1f9b7394e7dc37d6022fe1cdf6aac23472
refs
https://www.cnblogs.com/xgqfrms/p/17397022.html#5176673
https://www.cnblogs.com/xgqfrms/p/17397440.html
https://ozeki.hu/p_3047-how-to-setup-a-rgb-led-on-raspberry-pi.html
https://s761111.gitbook.io/raspi-sensor/ba-wan-san-se-ledpwm-hu-xi
©xgqfrms 2012-2021
www.cnblogs.com/xgqfrms 发布文章使用:只允许注册用户才可以访问!
原创文章,版权所有©️xgqfrms, 禁止转载 🈲️,侵权必究⚠️!
本文首发于博客园,作者:xgqfrms,原文链接:https://www.cnblogs.com/xgqfrms/p/17397440.html
未经授权禁止转载,违者必究!


