
linux
1. 下载tesseract-ocr源码
git clone -b master https://github.com/tesseract-ocr/tesseract.git tesseract-ocr
2. 安装g++
yum install gcc gcc-c++ make
3. 安装autoconf automake libtool libjpeg-devellibpng-devel libtiff-devel zlib-devel
yum installautoconf automake libtool
yum installlibjpeg-devel libpng-devel libtiff-devel zlib-devel
4. 安装leptonica
wget http://www.leptonica.org/source/leptonica-1.76.0.tar.gz
解压后 进入目录后依次执行:
./configure
make
make install
编译完成后使用vim增加如下三个变量:
vim /etc/profile
exportLD_LIBRARY_PATH=$LD_LIBRARY_PAYT:/usr/local/lib
export LIBLEPT_HEADERSDIR=/usr/local/include
export PKG_CONFIG_PATH=/usr/local/lib/pkgconfig
保存后执行: source /etc/profile
5. 进入第1步下载的tesseract-ocr目录依次执行如下命令:
./autogen.sh
./configure
make
make install
6. 安装pytesseract
pip3 installpytesseract
7.配置语言环境变量
cp /usr/share/tesseract/tessdata/* /usr/local/share/tessdata/
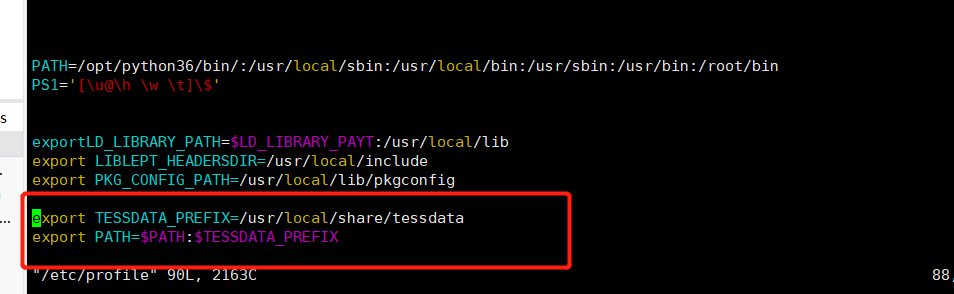
vim /etc/profile
添加
export TESSDATA_PREFIX=/usr/local/share/tessdata/
export PATH=$PATH:$TESSDATA_PREFIX
win
参考:https://blog.csdn.net/showgea/article/details/82656515
1. 安装tesseract
OCR,即Optical Character Recognition,光学字符识别,是指通过扫描字符,然后通过其形状将其翻译成电子文本的过程。对于图形验证码来说,它们都是一些不规则的字符,这些字符确实是由字符稍加扭曲变换得到的内容。
tesseract下载地址:https://digi.bib.uni-mannheim.de/tesseract/
进入下载页面,可以看到有各种.exe文件的下载列表,这里可以选择下载3.0版本。
其中文件名中带有dev的为开发版本,不带dev的为稳定版本,可以选择下载不带dev的版本,例如可以选择下载tesseract-ocr-setup-3.05.02.exe。
下载完成后双击,此时会出现如下图所示的页面。
此时可以勾选Additional language data(download)选项来安装OCR识别支持的语言包,这样OCR便可以识别多国语言。然后一路点击Next按钮即可。
接下来,为了在python代码中使用tesseract功能,使用pip安装pytesseract:
pip install pytesseract
2、配置环境变量
为了在全局使用方便,比如安装路径为D:\Program Files (x86)\Tesseract-OCR,将该路径添加到环境变量的path中
配置完成后在命令行输入tesseract -v,如果出现如下图所示,说明环境变量配置成功
3、验证安装
接下来,我们可以使用tesseract和pytesseract来分别进行测试。
我们以如下图所示的图片为样例进行测试。
该图片的链接为https://raw.githubusercontent.com/Python3WebSpider/TestTess/master/image.png,可以直接保存或下载。
首先用命令行进行测试,将图片下载到D盘chromeDownload文件夹,保存为image.png,然后在该文件夹中打开命令行,用tesseract命令测试:
tesseract image.png result
运行结果如下:
D:\chromeDownload>tesseract image.png result
Tesseract Open Source OCR Engine v3.05.02 with Leptonica
这里我们调用了tesseract命令,其中第一个参数为图片名称,第二个参数result 为结果保存的目标文件名称。
运行结果便是图片的识别结果:Python3WebSpider。可以在chromeDownload文件夹中看到result.txt,这时已经成功将图片文字转为电子文本了。
然后还可以利用Python代码来测试,这里就需要借助于pytesseract库了,测试代码如下:
from PIL import Image
import pytesseract
text = pytesseract.image_to_string(Image.open(r'D:\chromeDownload\image.png'))
print(text)
我们首先利用Image读取了图片文件,然后调用了pytesseract的image_to_string()方法,再将其识别结果输出。
运行结果如下:
Python3WebSpider
如果成功输出结果,则证明tesseract和pytesseract都已经安装成功。
4、使用时遇到的坑
在使用tesseract命令行进行测试时,会议开始报以下的错误
Error opening data file \Program Files (x86)\Tesseract-OCR\tessdata/eng.traineddata
Please make sure the TESSDATA_PREFIX environment variable is set to the parent directory of your "tessdata" directory.
Failed loading language 'eng'
Tesseract couldn't load any languages!
Could not initialize tesseract.
报错是意思是缺少环境变量TESSDATA_PREFIX,导致无法加载任何语言,就不能初始化tesseract。
解决的方法也很简单,在环境变量中添加TESSDATA_PREFIX,如下图
注意:变量值中的路径为“D:/Program Files (x86)/Tesseract-OCR”,使用正斜杠“/”。windows中复制过来的路径默认是反斜杠“\”
配置完成后,重新打开命令行,即可正常使用。
第二个坑是使用pytesseract时,出现以下错误
Traceback (most recent call last):
File "D:\Python36\lib\site-packages\pytesseract\pytesseract.py", line 170, in run_tesseract
proc = subprocess.Popen(cmd_args, **subprocess_args())
File "D:\Python36\lib\subprocess.py", line 709, in __init__
restore_signals, start_new_session)
File "D:\Python36\lib\subprocess.py", line 997, in _execute_child
startupinfo)
FileNotFoundError: [WinError 2] 系统找不到指定的文件。
During handling of the above exception, another exception occurred:
Traceback (most recent call last):
File "D:/python/20180911.py", line 4, in <module>
text = pytesseract.image_to_string(Image.open(r'D:\chromeDownload\image.png'))
File "D:\Python36\lib\site-packages\pytesseract\pytesseract.py", line 294, in image_to_string
return run_and_get_output(*args)
File "D:\Python36\lib\site-packages\pytesseract\pytesseract.py", line 202, in run_and_get_output
run_tesseract(**kwargs)
File "D:\Python36\lib\site-packages\pytesseract\pytesseract.py", line 172, in run_tesseract
raise TesseractNotFoundError()
pytesseract.pytesseract.TesseractNotFoundError: tesseract is not installed or it's not in your path
这就很坑,添加了全局变量,还是提示tesseract没有安装或者不在PATH中。
百度了一下,解决方案如下。
pytesseract安装后,在python的Lib目录下site-packges下会生成一个pytesseract文件夹,文件夹中找到pytesseract.py,路径为:D:\Python36\Lib\site-packages\pytesseract,使用notepad之类软件打开pytesseract.py,找到如下两行:
# CHANGE THIS IF TESSERACT IS NOT IN YOUR PATH, OR IS NAMED DIFFERENTLY
tesseract_cmd = 'tesseract'
将tesseract_cmd = 'tesseract'修改为:tesseract_cmd = 'D:/Program Files (x86)/Tesseract-OCR/tesseract.exe'
表示tesseract_cmd配置的是你安装tesseract的绝对路径,这样就能找到tesseract了。修改后保存,再去运行python代码,就可以成功了。

