一种更优雅的Flutter Dialog解决方案
为了应对复杂的业务场景,同时降低侵入性,在保持api稳定基础上,全面重构了SmartDialog底层
我现在可以自信的说:它现在是一个简洁,强大,侵入性极低的Pub包
请使用Flutter 2.0及其以上的小伙伴们移步:这一次,解决Flutter Dialog的各种痛点!
前言
系统自带的Dialog实际上就是Push了一个新页面,这样存在很多好处,但是也存在一些很难解决的问题
- 必须传BuildContext
- loading弹窗一般都封装在网络框架中,多传个context参数就很头疼;用fish_redux还好,effect层直接能拿到context,要是用bloc还得在view层把context传到bloc或者cubit里面。。。
- 无法穿透暗色背景,点击dialog后面的页面
- 这个是真头痛,想了很多办法,都没能在自带的dialog上面解决这个问题
- 系统自带Dialog写成的Loading弹窗,在网络请求和跳转页面的情况,会存在路由混乱的情况
- 情景复盘:loading库一般封装在网络层,某个页面提交完表单,要跳转页面,提交操作完成,进行页面跳转,loading关闭是在异步回调中进行(onError或者onSuccess),会出现执行了跳转操作时,弹窗还未关闭,延时一小会关闭,因为用的都是pop页面方法,会把跳转的页面pop掉
- 上面是一种很常见的场景,涉及到复杂场景更加难以预测,解决方法也有:定位页面栈的栈顶是否是Loading弹窗,选择性Pop,实现麻烦
上面这些痛点,简直个个致命,当然,还存在一些其它的解决方案,例如:
- 页面顶级使用Stack
- 使用Overlay
很明显,使用Overlay可移植性最好,目前很多toast和dialog三方库便是使用该方案,使用了一些loading库,看了其中源码,穿透背景解决方案,和预期想要的效果大相径庭、一些dialog库自带toast显示,但是toast显示却又不能和dialog共存(toast属于特殊的信息展示,理应能独立存在),导致我需要多依赖一个Toast库
SmartDialog
基于上面那些难以解决的问题,只能自己去实现,花了一些时间,实现了一个Pub包,基本该解决的痛点都已解决了,用于实际业务没什么问题
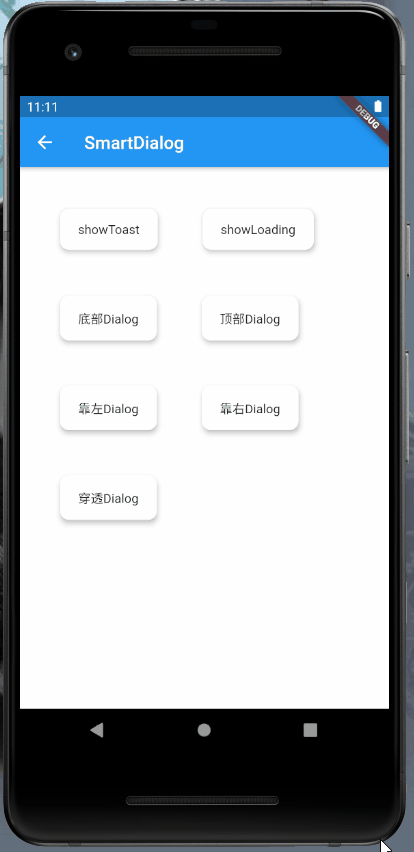
效果
引入
- Pub:查看flutter_smart_dialog插件版本
- 自2.0版本开始,本库已适配空安全
dependencies:
  flutter_smart_dialog: any
- 注意:该库已迁移空安全,注意版本区分
# 非空安全前最后一个稳定版本
dependencies:
  flutter_smart_dialog: ^1.3.1
使用
- 主入口配置
- 在主入口这地方需要配置下,这样就可以不传BuildContext使用Dialog了
- 只需要在MaterialApp的builder参数处配置下即可
void main() {
  runApp(MyApp());
}

///flutter 2.0
class MyApp extends StatelessWidget {
  @override
  Widget build(BuildContext context) {
    return MaterialApp(
      home: Container(),
      builder: (BuildContext context, Widget? child) {
        return FlutterSmartDialog(child: child);
      },
    );
  }
}

///flutter 1.x
class MyApp extends StatelessWidget {
  @override
  Widget build(BuildContext context) {
    return MaterialApp(
      home: Container(),
      builder: (BuildContext context, Widget child) {
        return FlutterSmartDialog(child: child);
      },
    );
  }
}
使用FlutterSmartDialog包裹下child即可,下面就可以愉快的使用SmartDialog了
- 使用Toast:因为toast特殊性,此处单独对toast做了一些优化
- msg:必传参数
- time:可选,Duration类型,默认2000ms
- widget:可选,可以自定义toast
- alignment:可选,控制toast位置
- 如果想使用花里胡哨的Toast效果,请使用showToast方法定制就行了,炒鸡简单喔,懒得自己写的,抄下我的ToastWidget,改下属性就行了哈
SmartDialog.showToast('test toast');
- 使用Loading:loading拥有诸多设置属性,参照下方的
SmartDialog配置参数说明即可- msg:可选,loading动画下面的文字信息(默认:加载中...)
//open loading
SmartDialog.showLoading();

//delay off
await Future.delayed(Duration(seconds: 2));
SmartDialog.dismiss();
- 自定义dialog
- 使用SmartDialog.show()方法即可,里面含有众多
Temp为后缀的参数,和下述无Temp为后缀的参数功能一致 - 特殊属性
isUseExtraWidget:是否使用额外覆盖浮层,可与主浮层独立开;可与loading,dialog之类独立开,自带的showToast便是开启了该配置,可与loading共存
- 使用SmartDialog.show()方法即可,里面含有众多
SmartDialog.show(
    alignmentTemp: Alignment.bottomCenter,
    clickBgDismissTemp: true,
    widget: Container(
      color: Colors.blue,
      height: 300,
    ),
);
- SmartDialog配置参数说明
- 为了避免
instance里面暴露过多属性,导致使用不便,此处诸多参数使用instance中的config属性管理 - 使用config设置的属性都是全局的,将这些属性单独使用Config管理,是为了方便修改和管理这些属性,也是为了使SmartDialog类更易维护
- 为了避免
| 参数 | 功能说明 |
|---|---|
| alignment | 控制自定义控件位于屏幕的位置 Alignment.center: 自定义控件位于屏幕中间,且是动画默认为:渐隐和缩放,可使用isLoading选择动画 Alignment.bottomCenter、Alignment.bottomLeft、Alignment.bottomRight:自定义控件位于屏幕底部,动画默认为位移动画,自下而上,可使用animationDuration设置动画时间 Alignment.topCenter、Alignment.topLeft、Alignment.topRight:自定义控件位于屏幕顶部,动画默认为位移动画,自上而下,可使用animationDuration设置动画时间 Alignment.centerLeft:自定义控件位于屏幕左边,动画默认为位移动画,自左而右,可使用animationDuration设置动画时间 Alignment.centerRight:自定义控件位于屏幕左边,动画默认为位移动画,自右而左,可使用animationDuration设置动画时间 |
| isPenetrate | 默认:false;是否穿透遮罩背景,交互遮罩之后控件,true:点击能穿透背景,false:不能穿透;穿透遮罩设置为true,背景遮罩会自动变成透明(必须) |
| clickBgDismiss | 默认:true;点击遮罩,是否关闭dialog---true:点击遮罩关闭dialog,false:不关闭 |
| maskColor | 遮罩颜色(isPenetrate为true,该参数失效) |
| maskWidget | 可高度自定义遮罩样式,使用该参数,maskColor失效(isPenetrate为true,该参数失效) |
| animationDuration | 动画时间 |
| isUseAnimation | 默认:true;是否使用动画 |
| isLoading | 默认:true;是否使用Loading动画;true:内容体使用渐隐动画 false:内容体使用缩放动画,仅仅针对中间位置的dialog |
| isExist | 状态标定:loading和自定义dialog 是否存在在界面上 |
| isExistMain | 状态标定:自定义dialog 是否存在在界面上(show) |
| isExistLoading | 状态标定:loading是否存在界面上(showLoading) |
| isExistToast | 状态标定:toast是否存在在界面上(showToast) |
- Config属性使用,举个栗子
- 内部已初始化相关属性;如果需要定制,可在主入口处,初始化自己想要的属性
SmartDialog.instance.config
    ..clickBgDismiss = true
    ..isLoading = true
    ..isUseAnimation = true
    ..animationDuration = Duration(milliseconds: 270)
    ..isPenetrate = false
    ..maskColor = Colors.black.withOpacity(0.1)
    ..alignment = Alignment.center;
- 返回事件,关闭弹窗解决方案
使用Overlay的依赖库,基本都存在一个问题,难以对返回事件的监听,导致触犯返回事件难以关闭弹窗布局之类,想了很多办法,没办法在依赖库中解决该问题,此处提供一个BaseScaffold,在每个页面使用BaseScaffold,便能解决返回事件关闭Dialog问题
- Flutter 2.0
typedef ScaffoldParamVoidCallback = void Function();

class BaseScaffold extends StatefulWidget {
  const BaseScaffold({
    Key? key,
    this.appBar,
    this.body,
    this.floatingActionButton,
    this.floatingActionButtonLocation,
    this.floatingActionButtonAnimator,
    this.persistentFooterButtons,
    this.drawer,
    this.endDrawer,
    this.bottomNavigationBar,
    this.bottomSheet,
    this.backgroundColor,
    this.resizeToAvoidBottomInset,
    this.primary = true,
    this.drawerDragStartBehavior = DragStartBehavior.start,
    this.extendBody = false,
    this.extendBodyBehindAppBar = false,
    this.drawerScrimColor,
    this.drawerEdgeDragWidth,
    this.drawerEnableOpenDragGesture = true,
    this.endDrawerEnableOpenDragGesture = true,
    this.isTwiceBack = false,
    this.isCanBack = true,
    this.onBack,
  }) : super(key: key);

  final bool extendBody;
  final bool extendBodyBehindAppBar;
  final PreferredSizeWidget? appBar;
  final Widget? body;
  final Widget? floatingActionButton;
  final FloatingActionButtonLocation? floatingActionButtonLocation;
  final FloatingActionButtonAnimator? floatingActionButtonAnimator;
  final List<Widget>? persistentFooterButtons;
  final Widget? drawer;
  final Widget? endDrawer;
  final Color? drawerScrimColor;
  final Color? backgroundColor;
  final Widget? bottomNavigationBar;
  final Widget? bottomSheet;
  final bool? resizeToAvoidBottomInset;
  final bool primary;
  final DragStartBehavior drawerDragStartBehavior;
  final double? drawerEdgeDragWidth;
  final bool drawerEnableOpenDragGesture;
  final bool endDrawerEnableOpenDragGesture;

  //custom param
  final bool isTwiceBack;
  final bool isCanBack;
  final ScaffoldParamVoidCallback? onBack;

  @override
  _BaseScaffoldState createState() => _BaseScaffoldState();
}

class _BaseScaffoldState extends State<BaseScaffold> {
  DateTime? _lastTime;

  @override
  Widget build(BuildContext context) {
    return WillPopScope(
      child: Scaffold(
        appBar: widget.appBar,
        body: widget.body,
        floatingActionButton: widget.floatingActionButton,
        floatingActionButtonLocation: widget.floatingActionButtonLocation,
        floatingActionButtonAnimator: widget.floatingActionButtonAnimator,
        persistentFooterButtons: widget.persistentFooterButtons,
        drawer: widget.drawer,
        endDrawer: widget.endDrawer,
        bottomNavigationBar: widget.bottomNavigationBar,
        bottomSheet: widget.bottomSheet,
        backgroundColor: widget.backgroundColor,
        resizeToAvoidBottomInset: widget.resizeToAvoidBottomInset,
        primary: widget.primary,
        drawerDragStartBehavior: widget.drawerDragStartBehavior,
        extendBody: widget.extendBody,
        extendBodyBehindAppBar: widget.extendBodyBehindAppBar,
        drawerScrimColor: widget.drawerScrimColor,
        drawerEdgeDragWidth: widget.drawerEdgeDragWidth,
        drawerEnableOpenDragGesture: widget.drawerEnableOpenDragGesture,
        endDrawerEnableOpenDragGesture: widget.endDrawerEnableOpenDragGesture,
      ),
      onWillPop: _dealWillPop,
    );
  }

  Future<bool> _dealWillPop() async {
    widget.onBack?.call();

    if (SmartDialog.instance.config.isExist) {
      SmartDialog.dismiss();
      return false;
    }

    if (!widget.isCanBack) {
      return false;
    }

    var now = DateTime.now();
    var condition =
        _lastTime == null || now.difference(_lastTime!) > Duration(seconds: 1);
    if (widget.isTwiceBack && condition) {
      _lastTime = now;
      SmartDialog.showToast("再点一次退出");
      return false;
    }
    return true;
  }
}
- Flutter 1.x
typedef ScaffoldParamVoidCallback = void Function();

class BaseScaffold extends StatefulWidget {
  const BaseScaffold({
    Key key,
    this.appBar,
    this.body,
    this.floatingActionButton,
    this.floatingActionButtonLocation,
    this.floatingActionButtonAnimator,
    this.persistentFooterButtons,
    this.drawer,
    this.endDrawer,
    this.bottomNavigationBar,
    this.bottomSheet,
    this.backgroundColor,
    this.resizeToAvoidBottomInset,
    this.primary = true,
    this.drawerDragStartBehavior = DragStartBehavior.start,
    this.extendBody = false,
    this.extendBodyBehindAppBar = false,
    this.drawerScrimColor,
    this.drawerEdgeDragWidth,
    this.drawerEnableOpenDragGesture = true,
    this.endDrawerEnableOpenDragGesture = true,
    this.isTwiceBack = false,
    this.isCanBack = true,
    this.onBack,
  })  : assert(primary != null),
        assert(extendBody != null),
        assert(extendBodyBehindAppBar != null),
        assert(drawerDragStartBehavior != null),
        super(key: key);

  ///系统Scaffold的属性
  final bool extendBody;
  final bool extendBodyBehindAppBar;
  final PreferredSizeWidget appBar;
  final Widget body;
  final Widget floatingActionButton;
  final FloatingActionButtonLocation floatingActionButtonLocation;
  final FloatingActionButtonAnimator floatingActionButtonAnimator;
  final List<Widget> persistentFooterButtons;
  final Widget drawer;
  final Widget endDrawer;
  final Color drawerScrimColor;
  final Color backgroundColor;
  final Widget bottomNavigationBar;
  final Widget bottomSheet;
  final bool resizeToAvoidBottomInset;
  final bool primary;
  final DragStartBehavior drawerDragStartBehavior;
  final double drawerEdgeDragWidth;
  final bool drawerEnableOpenDragGesture;
  final bool endDrawerEnableOpenDragGesture;

  ///增加的属性
  ///点击返回按钮提示是否退出页面,快速点击俩次才会退出页面
  final bool isTwiceBack;

  ///是否可以返回
  final bool isCanBack;

  ///监听返回事件
  final ScaffoldParamVoidCallback onBack;

  @override
  _BaseScaffoldState createState() => _BaseScaffoldState();
}

class _BaseScaffoldState extends State<BaseScaffold> {
  DateTime _lastPressedAt; //上次点击时间

  @override
  Widget build(BuildContext context) {
    return WillPopScope(
      child: Scaffold(
        appBar: widget.appBar,
        body: widget.body,
        floatingActionButton: widget.floatingActionButton,
        floatingActionButtonLocation: widget.floatingActionButtonLocation,
        floatingActionButtonAnimator: widget.floatingActionButtonAnimator,
        persistentFooterButtons: widget.persistentFooterButtons,
        drawer: widget.drawer,
        endDrawer: widget.endDrawer,
        bottomNavigationBar: widget.bottomNavigationBar,
        bottomSheet: widget.bottomSheet,
        backgroundColor: widget.backgroundColor,
        resizeToAvoidBottomInset: widget.resizeToAvoidBottomInset,
        primary: widget.primary,
        drawerDragStartBehavior: widget.drawerDragStartBehavior,
        extendBody: widget.extendBody,
        extendBodyBehindAppBar: widget.extendBodyBehindAppBar,
        drawerScrimColor: widget.drawerScrimColor,
        drawerEdgeDragWidth: widget.drawerEdgeDragWidth,
        drawerEnableOpenDragGesture: widget.drawerEnableOpenDragGesture,
        endDrawerEnableOpenDragGesture: widget.endDrawerEnableOpenDragGesture,
      ),
      onWillPop: dealWillPop,
    );
  }

  ///控件返回按钮
  Future<bool> dealWillPop() async {
    if (widget.onBack != null) {
      widget.onBack();
    }

    //处理弹窗问题
    if (SmartDialog.instance.config.isExist) {
      SmartDialog.dismiss();
      return false;
    }

    //如果不能返回,后面的逻辑就不走了
    if (!widget.isCanBack) {
      return false;
    }

    if (widget.isTwiceBack) {
      if (_lastPressedAt == null ||
          DateTime.now().difference(_lastPressedAt) > Duration(seconds: 1)) {
        //两次点击间隔超过1秒则重新计时
        _lastPressedAt = DateTime.now();

        //弹窗提示
        SmartDialog.showToast("再点一次退出");
        return false;
      }
      return true;
    } else {
      return true;
    }
  }
}
几个问题解决方案
穿透背景
- 穿透背景有俩个解决方案,这里都说明下
AbsorbPointer、IgnorePointer
当时想解决穿透暗色背景,和背景后面的控件互动的时候,我几乎立马想到这俩个控件,先了解下这俩个控件吧
- AbsorbPointer
-
阻止子树接收指针事件,
AbsorbPointer本身可以响应事件,消耗掉事件 -
absorbing属性(默认true)- true:拦截向子Widget传递的事件 false:不拦截
-
AbsorbPointer(
    absorbing: true,
    child: Listener(
        onPointerDown: (event){
            print('+++++++++++++++++++++++++++++++++');
        },
    )
)
- IgnorePointer
- 阻止子树接收指针事件,
IgnorePointer本身无法响应事件,其下的控件可以接收到点击事件(父控件) ignoring属性(默认true)- true:拦截向子Widget传递的事件 false:不拦截
- 阻止子树接收指针事件,
IgnorePointer(
    ignoring: true,
    child: Listener(
        onPointerDown: (event){
            print('----------------------------------');
        },
    )
)
分析
- 这里来分析下,首先
AbsorbPointer这个控件是不合适的,因为AbsorbPointer本身会消费触摸事件,事件被AbsorbPointer消费掉,会导致背景后的页面无法获取到触摸事件;IgnorePointer本身无法消费触摸事件,又由于IgnorePointer和AbsorbPointer都具有屏蔽子Widget获取触摸事件的作用,这个貌似靠谱,这里试了,可以和背景后面的页面互动!但是又存在一个十分坑的问题 - 因为使用
IgnorePointer屏蔽子控件的触摸事件,而IgnorePointer本身又不消耗触摸事件,会导致无法获取到背景的点击事件!这样点击背景会无法关闭dialog弹窗,只能手动关闭dialog;各种尝试,实在没办法获取到背景的触摸事件,此种穿透背景的方案只能放弃
Listener、behavior
这种方案,成功实现想要的穿透效果,这里了解下behavior的几种属性
- deferToChild:仅当一个孩子被命中测试击中时,屈服于其孩子的目标才会在其范围内接收事件
- opaque:不透明目标可能会受到命中测试的打击,导致它们既在其范围内接收事件,又在视觉上阻止位于其后方的目标也接收事件
- translucent:半透明目标既可以接收其范围内的事件,也可以在视觉上允许目标后面的目标也接收事件
有戏了!很明显translucent是有希望的,尝试了几次,然后成功实现了想要的效果
注意,这边有几个坑点,提一下
-
务必使用
Listener控件来使用behavior属性,使用GestureDetector中behavior属性会存在一个问题,一般来说:都是Stack控件里面的Children,里面有俩个控件,分上下层,在此处,GestureDetector设置behavior属性,俩个GestureDetector控件上下叠加,会导致下层GestureDetector获取不到触摸事件,很奇怪;使用Listener不会产生此问题 -
我们的背景使用
Container控件,我这里设置了Colors.transparent,直接会导致下层接受不到触摸事件,color为空才能使下层控件接受到触摸事件,此处不要设置color即可
下面是写的一个验证小示例
class TestLayoutPage extends StatelessWidget {
  @override
  Widget build(BuildContext context) {
    return _buildBg(children: [
      //下层
      Listener(
        onPointerDown: (event) {
          print('下层蓝色区域++++++++');
        },
        child: Container(
          height: 300,
          width: 300,
          color: Colors.blue,
        ),
      ),

      //上层 事件穿透
      Listener(
        behavior: HitTestBehavior.translucent,
        onPointerDown: (event) {
          print('上层区域---------');
        },
        child: Container(
          height: 200,
          width: 200,
        ),
      ),
    ]);
  }

  Widget _buildBg({List<Widget> children}) {
    return Scaffold(
      appBar: AppBar(title: Text('测试布局')),
      body: Center(
        child: Stack(
          alignment: Alignment.center,
          children: children,
        ),
      ),
    );
  }
}
Toast和Loading冲突
-
这个问题,从理论上肯定会存在的,因为一般Overlay库只会使用一个OverlayEntry控件,这会导致,全局只能存在一个浮窗布局,Toast本质是一个全局弹窗,Loading也是一个全局弹窗,使用其中一个都会导致另一个消失
-
Toast明显是应该独立于其他弹窗的一个消息提示,封装在网络库中的关闭弹窗的dismiss方法,也会将Toast消息在不适宜的时候关闭,在实际开发中就碰到此问题,只能多引用一个Toast三方库来解决,在规划这个dialog库的时候,就想到必须解决此问题
- 此处内部多使用了一个OverlayEntry来解决该问题,提供了相关参数来分别控制,完美使Toast独立于其它的dialog弹窗
- 多增加一个OverlayEntry都会让内部逻辑和方法使用急剧复杂,维护也会变得不可预期,故额外只多提供一个OverlayEntry;如果需要更多,可copy本库,自行定义,实现该库相关源码,都力求能让人看明白,相信大家copy使用时不会感到晦涩难懂
-
FlutterSmartDialog提供
OverlayEntry和OverlayEntryExtra可以高度自定义,相关实现,可查看内部实现 -
FlutterSmartDialog内部已进行相关实现,使用
show()方法中的isUseExtraWidget区分
最后
这个库花了一些时间去构思和实现,算是解决几个很大的痛点
- 如果大家对
返回事件有什么好的处理思路,麻烦在评论里告知,谢谢!
项目地址
FlutterSmartDialog一些信息
-
Github:flutter_smart_dialog
-
使用效果体验:点击体验一下
系列文章
状态管理

 浙公网安备 33010602011771号