

springboot项目实现图片上传和下载,通过自定义Servlet实现图片回显以及文件下载
介绍:本次案例使用springboot项目实现了文件的上传及下载,并且在windows环境和Linux环境下都适用。
本次案例是在https://www.cnblogs.com/xct5622/p/14137813.html的基础上进行改进,通过自定义servlet实现对上传的图片回显到页面和文件的下载。
一、功能预览:
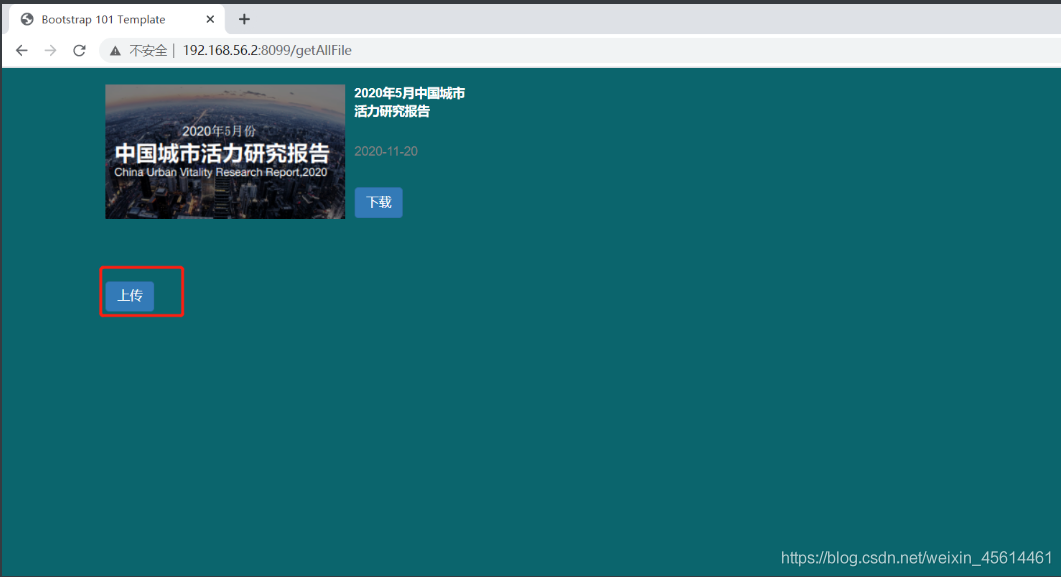

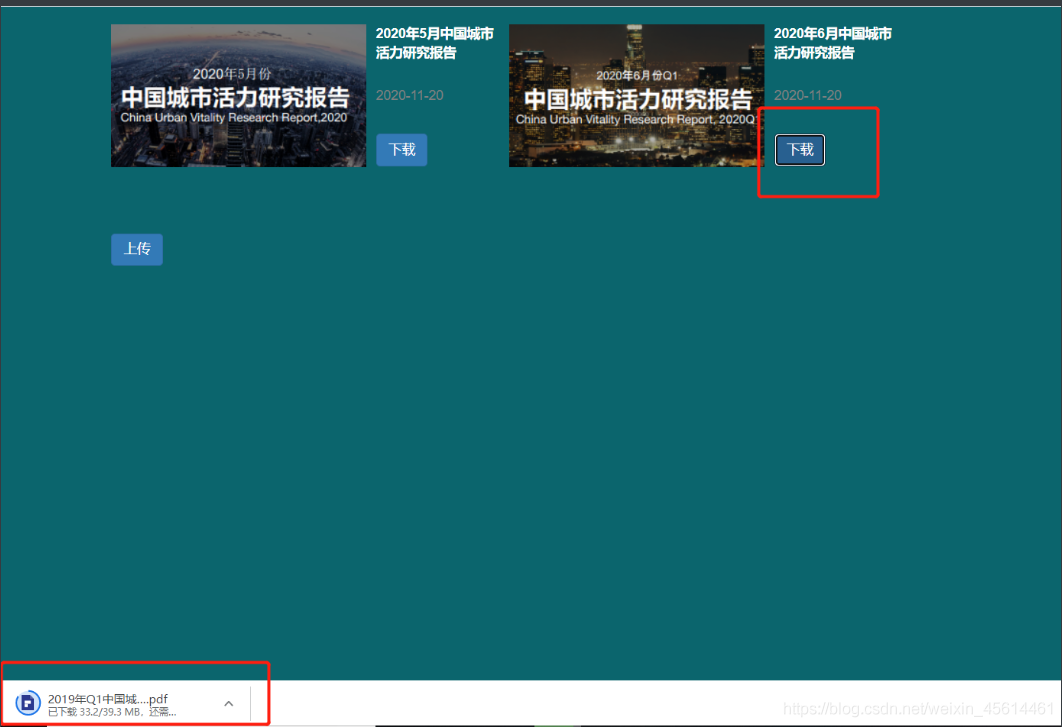
二、功能实现:
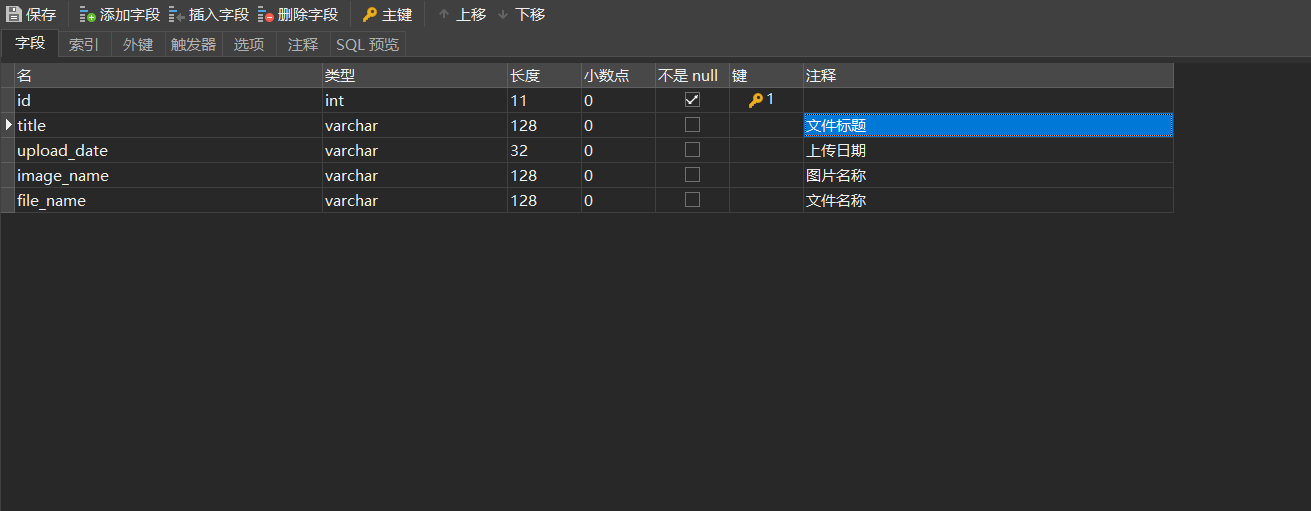
2.1、先创建一个表,用来存储上传文件的一些基本信息。
2.2、创建一个springboot项目,并且导入下列依赖:
<dependencies>
    <dependency>
        <groupId>org.springframework.boot</groupId>
        <artifactId>spring-boot-starter-web</artifactId>
    </dependency>
    <dependency>
        <groupId>org.springframework.boot</groupId>
        <artifactId>spring-boot-starter-thymeleaf</artifactId>
    </dependency>
    <dependency>
        <groupId>org.projectlombok</groupId>
        <artifactId>lombok</artifactId>
        <optional>true</optional>
    </dependency>
    <dependency>
        <groupId>mysql</groupId>
        <artifactId>mysql-connector-java</artifactId>
    </dependency>
    <dependency>
        <groupId>org.mybatis.spring.boot</groupId>
        <artifactId>mybatis-spring-boot-starter</artifactId>
        <version>2.1.1</version>
    </dependency>
    <dependency>
        <groupId>org.springframework.boot</groupId>
        <artifactId>spring-boot-starter-test</artifactId>
        <scope>test</scope>
        <exclusions>
            <exclusion>
                <groupId>org.junit.vintage</groupId>
                <artifactId>junit-vintage-engine</artifactId>
            </exclusion>
        </exclusions>
    </dependency>
</dependencies>
2.3、修改yml文件:
创建三个yml文件:
application-dev.yml:该配置文件是在windows环境下使用的
spring:
  application:
    name: file_upload_download
  servlet:
    multipart:
      max-file-size: 100MB
      max-request-size: 100MB
  mvc:
    static-path-pattern: /**
  datasource:
    url: jdbc:mysql://localhost:3306/test?useUnicode=true&characterEncoding=utf8&allowMultiQueries=true&serverTimezone=GMT%2B8
    username: root
    password: 123456
    driver-class-name: com.mysql.cj.jdbc.Driver
server:
  port: 8099
#上传文件的存储地址
file:
  doc-dir: D:/myFile
application-prod.yml:该配置文件是在Linux环境下使用的
spring:
  application:
    name: file_upload_download
  servlet:
    multipart:
      max-file-size: 100MB
      max-request-size: 100MB
  mvc:
    static-path-pattern: /**
  datasource:
    url: jdbc:mysql://192.168.56.2:3306/test?useUnicode=true&characterEncoding=utf8&allowMultiQueries=true&serverTimezone=GMT%2B8
    username: root
    password: 123456
    driver-class-name: com.mysql.cj.jdbc.Driver
server:
  port: 8099

file:
  doc-dir: /usr/local/myFile  #上传文件地址
使用哪个配置文件直接在application.yml中进行切换即可:
spring:
  profiles:
    active: prod #dev
2.4、实体类:
package com.xct.file_upload_uownload.entity;

import lombok.Data;

/**
 * @author Xct1194542884
 * @title: xct
 * @projectName file_upload_uownload
 * @description: TODO
 * @date 2020-11-19 11:39
 */
@Data
public class FileInformation {

    private Integer id;

    private String title;

    private String uploadDate;

    private String imageName;

    private String fileName;
}
2.5、dao层:mapper
创建一个FileMapper,提供将文件信息添加到数据库,以及查询数据库中所有文件信息方法。
package com.xct.file_upload_uownload.dao;

import com.xct.file_upload_uownload.entity.FileInformation;
import org.apache.ibatis.annotations.Insert;
import org.apache.ibatis.annotations.Mapper;
import org.apache.ibatis.annotations.Param;
import org.apache.ibatis.annotations.Select;

import java.util.List;

/**
 * @author Xct1194542884
 * @title: xct
 * @projectName file_upload_uownload
 * @description: TODO
 * @date 2020-11-19 11:42
 */
@Mapper
public interface FileMapper {

    /**
     * 添加
     * @author xct
     * @date 2020-11-20 16:17
     * @param title
     * @param uploadDate
     * @param imageName
     * @param fileName
     * @return int
     */
    @Insert("INSERT INTO file_information (title,upload_date,image_name,file_name) VALUES(#{title},#{upload_date},#{image_name},#{file_name})")
    public int insert(@Param("title")String title,@Param("upload_date")String uploadDate,@Param("image_name")String imageName,@Param("file_name")String fileName);

    //查询
    @Select("SELECT id,title,upload_date uploadDate,image_name imageName,file_name fileName from file_information")
    public List<FileInformation> findAllFile();
}
2.6、自定义servlet
创建一个类,用于获取配置文件中的上传文件路径
package com.xct.entity;

import org.springframework.beans.factory.annotation.Value;
import org.springframework.stereotype.Component;

@Component
public class Global {

    //文件上传根路径
    private static String dir;

    public static String getDir() {
        return dir;
    }

    @Value("${file.doc-dir}")
    public static void setDir(String dir) {
        Global.dir = dir;
    }
}
自定义一个servlet,用于上传图片的回显以及文件下载,使用注解方式注册servlet
package com.xct.servlet;

import com.xct.entity.Global;
import org.slf4j.Logger;
import org.slf4j.LoggerFactory;
import org.springframework.util.FileCopyUtils;
import org.springframework.web.util.UriUtils;

import javax.servlet.ServletException;
import javax.servlet.http.HttpServlet;
import javax.servlet.http.HttpServletRequest;
import javax.servlet.http.HttpServletResponse;
import java.io.File;
import java.io.FileInputStream;
import java.io.FileNotFoundException;
import java.io.IOException;

/**
 * @description: 自定义servlet,当用户访问指定路径时会进入这个servlet获取对应数据,然后返回一个文件流
 * @date 2021-05-31 10:52
 */
@WebServlet(name = "fileDownloadServlet",urlPatterns = FileDownloadServlet.FILEBASEURL + "*")
public class FileDownloadServlet extends HttpServlet {

    //上传文件和图片存放的文件夹,也就是该servlet的请求路径
    public final static String FILEBASEURL = "/files/";

    private Logger logger = LoggerFactory.getLogger(getClass());

    //将指定文件转为流响应到客户端
    public void fileOutputStream(HttpServletRequest req, HttpServletResponse resp) throws IOException, ServletException {
        String filepath = req.getRequestURI();
        int index = filepath.indexOf(FILEBASEURL);
        if (index >= 0) {
            filepath = filepath.substring(index + FILEBASEURL.length());
        }
        try {
            filepath = UriUtils.decode(filepath, "UTF-8");
        } catch (Exception e1) {
            logger.error(String.format("解释文件路径失败,URL地址为%s", filepath), e1);
        }
        File file = new File(getFilesBaseDir() + FILEBASEURL + filepath);
        try {
            FileCopyUtils.copy(new FileInputStream(file), resp.getOutputStream());  //输出流
            resp.setHeader("Content-Type", "application/octet-stream");
            return;
        } catch (FileNotFoundException e) {
            req.setAttribute("exception", new FileNotFoundException("请求的文件不存在"));
            req.getRequestDispatcher("/error/404.jsp").forward(req, resp);
        }
    }

    @Override
    protected void doGet(HttpServletRequest req, HttpServletResponse resp) throws ServletException, IOException {
        fileOutputStream(req, resp);
    }

    @Override
    protected void doPost(HttpServletRequest req, HttpServletResponse resp) throws ServletException, IOException {
        fileOutputStream(req, resp);
    }

    /**
     * 获取上传文件的根目录
     *
     * @return
     */
    public static String getFilesBaseDir() {
        String DIR = Global.getDir();
        if (!DIR.endsWith("/")) {
            DIR += "/";
        }
        return DIR;
    }

}
扫描servlet,在启动类上加上@ServletComponentScan注解
package com.xct;

import com.xct.servlet.FileDownloadServlet;
import org.springframework.boot.SpringApplication;
import org.springframework.boot.autoconfigure.SpringBootApplication;
import org.springframework.boot.web.servlet.ServletComponentScan;

@SpringBootApplication
@ServletComponentScan(basePackageClasses = {FileDownloadServlet.class})
public class FileDownloadApplication {

    public static void main(String[] args) {
        SpringApplication.run(FileDownloadApplication.class, args);
    }

}
2.7、服务层:上传实现
创建一个FileService接口,FileServiceImpl实现FileService接口,提供文件上传实现和查询所有文件方法。
package com.xct.file_upload_uownload.service.impl;

import com.xct.file_upload_uownload.dao.FileMapper;
import com.xct.file_upload_uownload.entity.FileInformation;
import com.xct.file_upload_uownload.service.FileService;
import org.slf4j.Logger;
import org.slf4j.LoggerFactory;
import org.springframework.beans.factory.annotation.Autowired;
import org.springframework.stereotype.Service;
import org.springframework.util.ResourceUtils;
import org.springframework.web.multipart.MultipartFile;

import java.io.File;
import java.text.SimpleDateFormat;
import java.util.Date;
import java.util.List;

/**
 * @author Xct1194542884
 * @title: xct
 * @projectName file_upload_uownload
 * @description: TODO
 * @date 2020-10-30 11:30
 */
@Service
public class FileServiceImpl implements FileService {

    private static final Logger LOGGER= LoggerFactory.getLogger(FileService.class);

    @Autowired
    FileMapper fileMapper;


    /**
     * 文件上传的实现方法
     * @author xct
     * @date 2020-11-20 16:41
     * @param file
     * @param image
     * @param title
     * @return java.lang.String
     */
    @Override
    public String uploadFile(MultipartFile file, MultipartFile image,String title) throws Exception {
        String os = System.getProperty("os.name");
        File imagePath;  //封面图片存放地址
        File fileRealPath;   //文件存放地址
        if (os.toLowerCase().startsWith("win")) {  //windows系统
            String path = System.getProperty("user.dir");  //获取项目相对路径
            fileRealPath = new File(path+"/src//main/resources/file");
            imagePath = new File(path+"/src//main/resources/static/images");
        }else{//linux系统
            //获取根目录
            //如果是在本地windows环境下,目录为项目的target\classes下
            //如果是linux环境下,目录为jar包同级目录
            File rootPath = new File(ResourceUtils.getURL("classpath:").getPath());
            if(!rootPath.exists()){
                rootPath = new File("");
            }
            fileRealPath = new File(rootPath.getAbsolutePath()+"/file/");
            imagePath = new File(rootPath.getAbsolutePath()+"/images");
        }
        //判断文件夹是否存在
        if(!fileRealPath.exists()){
            //不存在,创建
            fileRealPath.mkdirs();
        }
        if(!imagePath.exists()){
            //不存在,创建
            imagePath.mkdirs();
        }
        //获取文件名称
        String fileName = file.getOriginalFilename();
        String imageName = image.getOriginalFilename();
        //创建文件存放地址
        File resultPath = new File(fileRealPath+"/"+fileName);
        if (resultPath.exists()){
            LOGGER.warn("文件已经存在!");
            return "false!";
        }
        //创建图片存放地址
        File imageResultPath = new File(imagePath+"/"+imageName);
        if(imageResultPath.exists()){
            LOGGER.warn("图片已经存在!");
            return "false!";
        }
        SimpleDateFormat sdf = new SimpleDateFormat("yyyy-MM-dd");
        file.transferTo(resultPath);
        image.transferTo(imageResultPath);
        fileMapper.insert(title, sdf.format(new Date()), imageName, fileName);
        System.out.println("absolutePath:"+fileRealPath.getCanonicalPath());
        System.out.println("resultPath:"+resultPath.getCanonicalPath());
        System.out.println("imageResultPath:"+imageResultPath.getCanonicalPath());
        return "true!";
    }

    /**
     * 查询数据库中所有文件信息的方法
     * @author xct
     * @date 2020-11-20 16:42
     * @param
     * @return java.util.List<com.xct.file_upload_uownload.entity.FileInformation>
     */
    @Override
    public List<FileInformation> getAllFile() {
        return fileMapper.findAllFile();
    }
}
2.8、控制器:
创建一个FileController,提供文件上传的控制器和一个查询所有文件后跳转前端页面的控制器。
package com.xct.controller;

import com.xct.entity.FileInformation;
import com.xct.service.FileService;
import org.slf4j.Logger;
import org.slf4j.LoggerFactory;
import org.springframework.beans.factory.annotation.Autowired;
import org.springframework.stereotype.Controller;
import org.springframework.web.bind.annotation.PostMapping;
import org.springframework.web.bind.annotation.RequestMapping;
import org.springframework.web.bind.annotation.RequestParam;
import org.springframework.web.multipart.MultipartFile;

import javax.servlet.http.HttpServletRequest;
import java.util.List;

/**
 * @author Xct1194542884
 * @title: xct
 * @projectName file_download
 * @description: TODO
 * @date 2021-05-31 11:11
 */
@Controller
public class FileController {
    @Autowired
    FileService fileService;

    private static final Logger LOGGER= LoggerFactory.getLogger(FileController.class);

    @RequestMapping("/")
    public String index(HttpServletRequest request){
        List<FileInformation> allFile = fileService.getAll();
        request.setAttribute("fileList", allFile);
        return "fileDownload";
    }

    /**
     * 文件上传
     * @author xct
     * @date 2020-11-20 16:50
     * @param file    文件
     * @param fileImage  用于做封面的图片
     * @param title   标题
     * @return java.lang.String
     */
    @PostMapping("/uploadFile")
    public String uploadFile(@RequestParam("file") MultipartFile file, @RequestParam("fileImage")MultipartFile fileImage, @RequestParam("title")String title){
        if(file.isEmpty()){
            LOGGER.error("上传失败,请选择文件!");
            return "redirect:/";
        }
        try {
            boolean result = fileService.uploadFile(file,fileImage,title);
//            LOGGER.info(result);
            return "redirect:/getAllFile";
        } catch (Exception e) {
            e.printStackTrace();
            LOGGER.error("文件上传失败!");
            return "redirect:/";
        }
    }
}
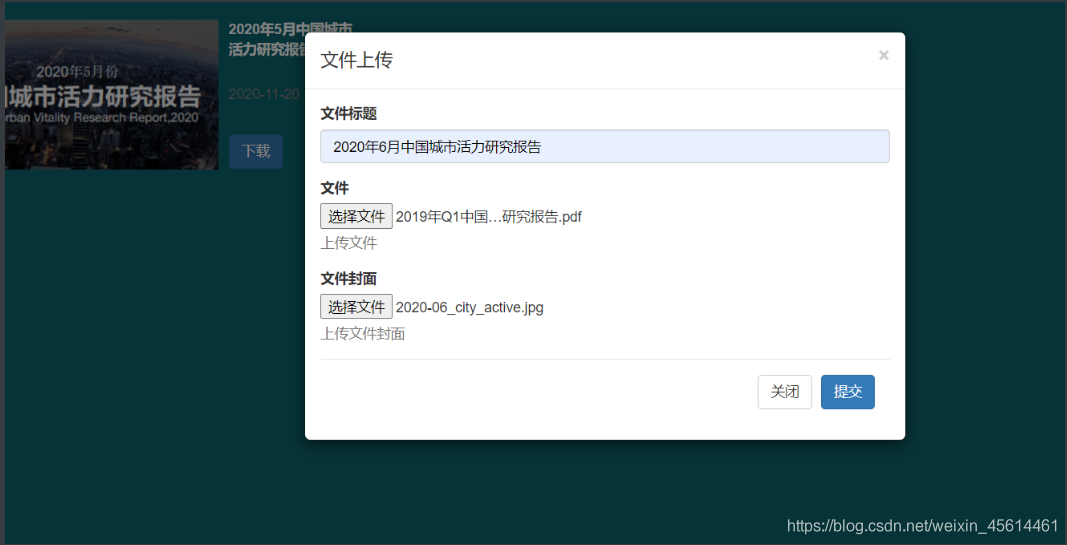
3.0、前端页面:
创建一个前端页面,使用表单将用户输入的文件信息传输到controller。
<!DOCTYPE html>
<html lang="en" xmlns:th="https://www.thymeleaf.org">
<head>
<meta charset="utf-8">
<meta http-equiv="X-UA-Compatible" content="IE=edge">
<meta name="viewport" content="width=device-width, initial-scale=1">
<!-- 上述3个meta标签*必须*放在最前面,任何其他内容都*必须*跟随其后! -->
<title>Bootstrap 101 Template</title>
<!-- Bootstrap -->
<link href="https://cdn.jsdelivr.net/npm/bootstrap@3.3.7/dist/css/bootstrap.min.css" rel="stylesheet">
<style>
html,body{
height: 100%;
width: 100%;
margin: 0 auto;
}
.titleClass{
margin-top:8px;
color: white;
font-weight: bolder;
}
.timeClass{
margin-top: 25px;
margin-bottom: 10px;
color: grey;
font-size: 14px;
}
.contentTd{
padding-left: 10px;
padding-right: 10px;
width: 150px!important;
height: 150px;
}
tr{
margin-top: 10px;
margin-bottom: 60px;
display: block;
}
.buttonP{
padding-top: 20px;
}
.imageTd{
width: 267px!important;
height: 150px;
}
.imageTd img{
width: 100%;
height: 100%;
}
</style>
</head>
<body>
<!-- jQuery (Bootstrap 的所有 JavaScript 插件都依赖 jQuery,所以必须放在前边) -->
<script src="https://cdn.jsdelivr.net/npm/jquery@1.12.4/dist/jquery.min.js"></script>
<!-- 加载 Bootstrap 的所有 JavaScript 插件。你也可以根据需要只加载单个插件。 -->
<script src="https://cdn.jsdelivr.net/npm/bootstrap@3.3.7/dist/js/bootstrap.min.js"></script>
<div style="width: 100%;height: 100%;background-color: #0B656D">
<table align="center" style="width: 85%;">
<th:block th:each="usr,status:${fileList}">
<p th:remove="tag" th:utext="${(status.index+1)%3==1 ? '<tr>':''}"/>
<td class="imageTd">
<img th:src="@{/images/{imageName}(imageName=${usr.imageName})}">
</td>
<td class="contentTd">
<p class="titleClass"><span th:text="${usr.title}"></span></p>
<p class="timeClass"><span th:text="${usr.uploadDate}"></span></p>
<p class="buttonP">
<!--<a href="/download/2018年度中国城市活力研究报告.pdf" download>-->
<a th:href="@{/download/{fileName}(fileName=${usr.fileName})}" download>
<button type="button" class="btn btn-primary">下载</button>
</a>
</p>
</td>
<p th:remove="tag" th:utext="${(status.index+1)%5==0 ? '</tr>':''}"/>
</th:block>
<tr>
<td>
<button type="button" class="btn btn-primary" data-toggle="modal" data-target="#myModal">
上传
</button>
</td>
</tr>
</table>
<div class="modal fade" id="myModal" tabindex="-1" role="dialog" aria-labelledby="myModalLabel">
<div class="modal-dialog" role="document">
<div class="modal-content">
<div class="modal-header">
<button type="button" class="close" data-dismiss="modal" aria-label="Close"><span aria-hidden="true">×</span></button>
<h4 class="modal-title" id="myModalLabel">文件上传</h4>
</div>
<div class="modal-body">
<form enctype="multipart/form-data" method="post" action="/uploadFile">
<div class="form-group">
<label for="exampleInputEmail1">文件标题</label>
<input type="text" class="form-control" id="exampleInputEmail1" placeholder="文件标题" name="title">
</div>
<div class="form-group">
<label for="exampleInputFile">文件</label>
<input type="file" id="exampleInputFile" name="file">
<p class="help-block">上传文件</p>
</div>
<div class="form-group">
<label for="exampleInputFile">文件封面</label>
<input type="file" id="fileImage" name="fileImage">
<p class="help-block">上传文件封面</p>
</div>
<div class="modal-footer">
<button type="button" class="btn btn-default" data-dismiss="modal">关闭</button>
<button type="submit" class="btn btn-primary">提交</button>
</div>
</form>
</div>
</div>
</div>
</div>
</div>
</body>
</html>
3.1、测试:上传成功之后,yml里的文件存放路径可以看到刚才上传的文件

