SpringBoot数据访问之整合Mybatis配置文件
SpringBoot数据访问之整合Mybatis的方式
环境搭建以及前置知识回顾
SpringBoot中有两种start的形式:
- 官方:spring-boot-starter-*
- 第三方:*-spring-boot-starter
Mybatis属于第三方,所以我们需要找他的官网、配置文档等。
贴心链接:Github
进入后记得切换tags
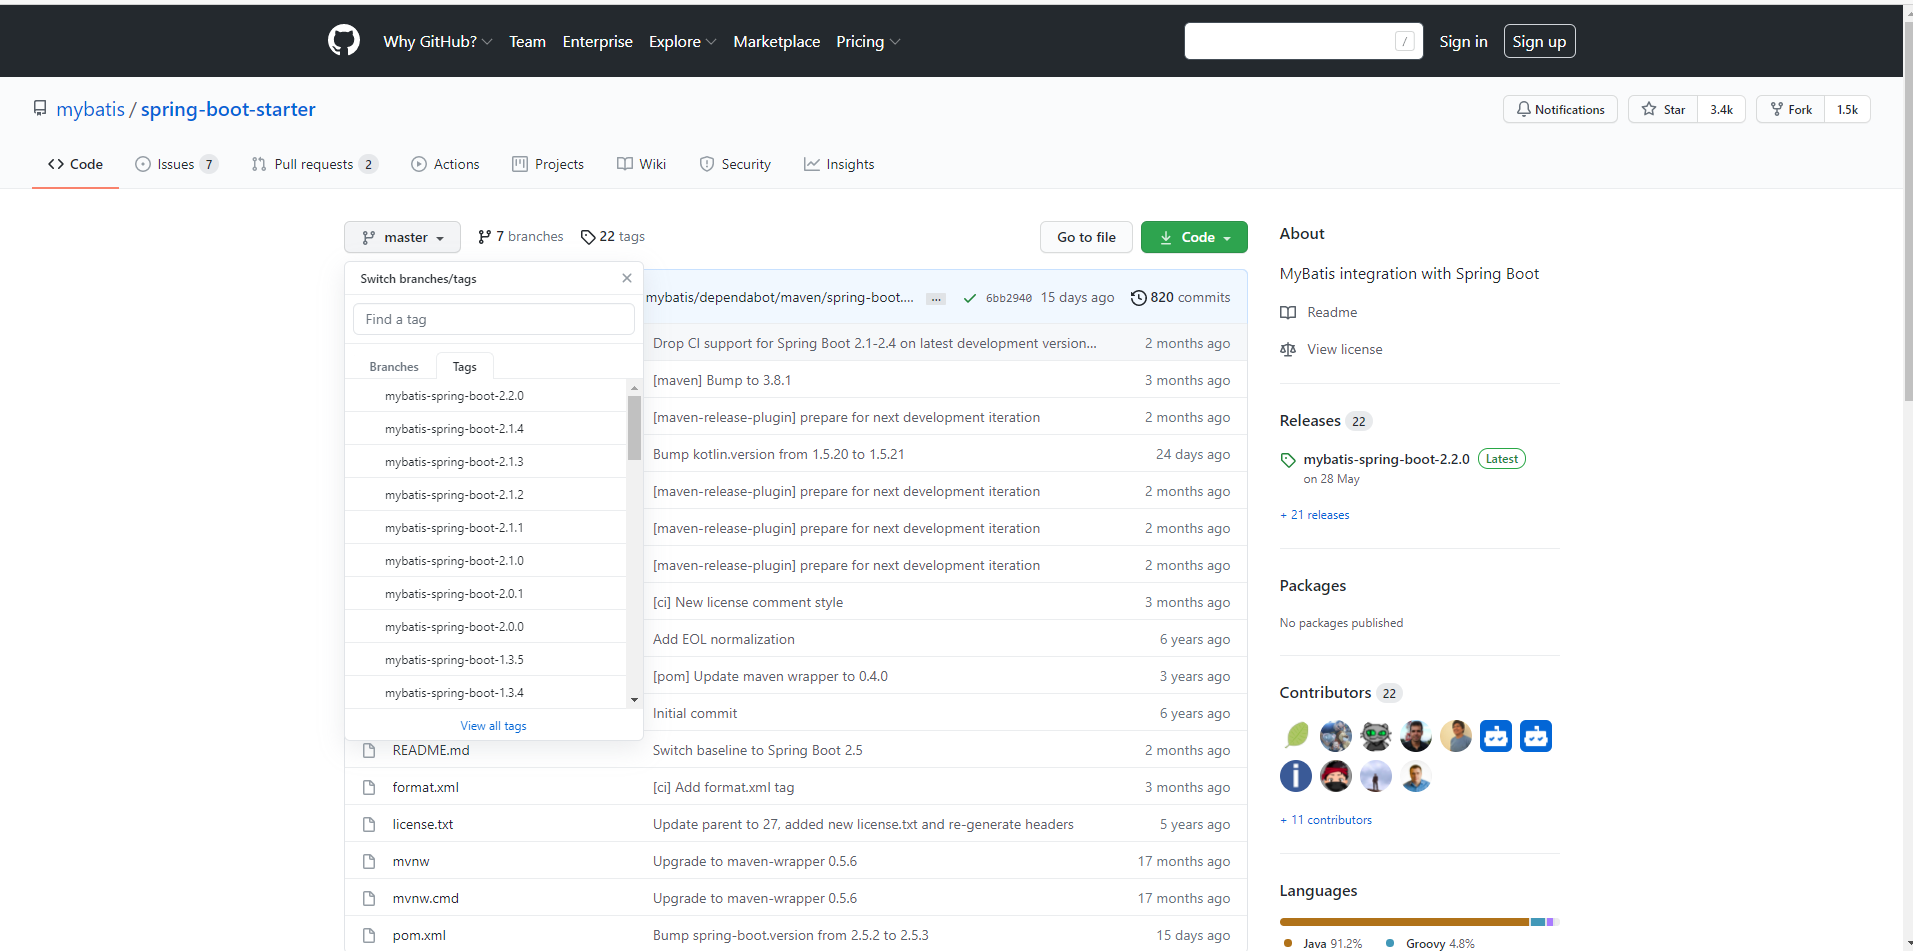
作者使用的版本是最新的2.2.0;
找到它下面的pom.xml,可以得到:
<dependency>
    <groupId>org.mybatis.spring.boot</groupId>
    <artifactId>mybatis-spring-boot-starter</artifactId>
    <version>2.2.0</version>
</dependency>
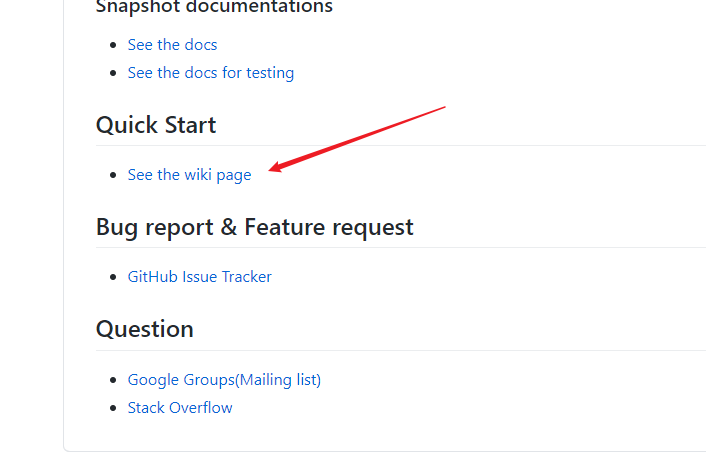
在网页下方,找到快速开始文档:
回顾前面mybatis的使用过程:
- 导入mybatis依赖和数据库驱动
- 连接数据库
- 增加全局配置文件,一般是(mybatis-config.xml)
- 编写工具类:SqlSessionFactory
- 使用sqlSession
- 编写Mapper
- .......
Druid的配置:Druid
分析Mybatis启动器自动配置
找到MybatisAutoConfiguration,
@ConditionalOnSingleCandidate(DataSource.class)
只允许一个数据源在容器中。
@EnableConfigurationProperties(MybatisProperties.class)
@EnableConfigurationProperties(类.class)
- 开启类配置绑定功能
- 把这个类这个组件自动注册到容器中
我们进入MybatisProperties.class中查看:
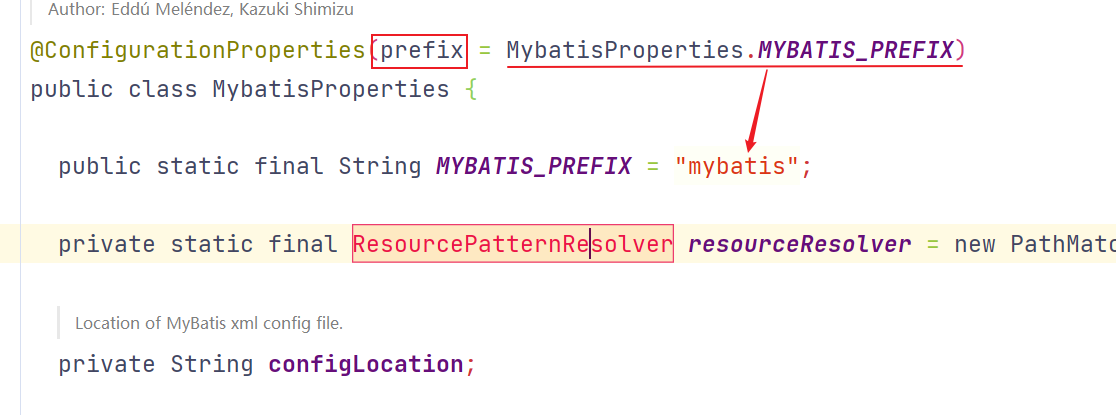
由上图可知,我们只需要在配置文件中使用mybatis为前置,就可以使用了。
使用配置搞清楚后,我们来看下启动器给我们自动装配了什么功能:
-
@Bean
@ConditionalOnMissingBean
public SqlSessionFactory sqlSessionFactory(DataSource dataSource)
对应的是之前的使用过程第4步,现在自动配置好了
-
@Bean
@ConditionalOnMissingBean
public SqlSessionTemplate sqlSessionTemplate(SqlSessionFactory sqlSessionFactory)
对应之前的使用过程第5步,可以进入**SqlSessionTemplate **看下,SqlSessionTemplate组合了SqlSession。
-
@Import(AutoConfiguredMapperScannerRegistrar.class),只要我们写的操作MyBatis的接口,标注了 @Mapper 就会被自动扫描进来,对应之前的使用过程第6步。
整合Mybatis
目录结构:
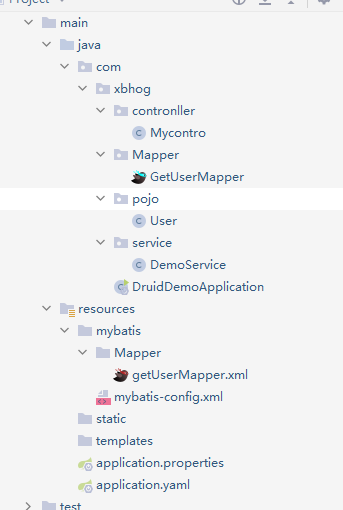
首先创建一个全局配置文件(mybatis-config.xml):
<?xml version="1.0" encoding="UTF-8" ?>
<!DOCTYPE configuration
        PUBLIC "-//mybatis.org//DTD Config 3.0//EN"
        "http://mybatis.org/dtd/mybatis-3-config.dtd">
<configuration>

</configuration>
Configuration中包含:包括获取数据库连接实例的数据源(DataSource)以及决定事务作用域和控制方式的事务管理器(TransactionManager)。因为我们的数据源已经通过Druid配置好了,所以这里直接清空就好。
实体类
创建实体类,尽可能与数据库字段名保持一致。
import lombok.Data;

@Data
public class User {
    private int id;
    private String username;
    private String password;
}
Mapper层(对照Dao)
创建GetUserMapper接口;
import com.xbhog.pojo.User;
import org.apache.ibatis.annotations.Mapper;
import org.apache.ibatis.annotations.Param;

@Mapper
public interface GetUserMapper {
    public User getUserid(int id);
}
实现接口:
创建getUserMapper.xml,实现接口或者叫绑定接口,编写增删改查的。
<?xml version="1.0" encoding="UTF-8" ?>
<!DOCTYPE mapper
        PUBLIC "-//mybatis.org//DTD Mapper 3.0//EN"
        "http://mybatis.org/dtd/mybatis-3-mapper.dtd">
<mapper namespace="com.xbhog.Mapper.GetUserMapper">

    <select id="getUserid" resultType="com.xbhog.pojo.User">
        select * from user where id = #{id}
    </select>
</mapper>
其中id对应的是GetUserMapper接口中抽象方法getUserid,结果集类型对应的返回值类型User。
其实我们现在可以创建controller来实现访问了,为了方便后序功能的扩展,我们可以创建一个service层,有一句话说的好,出现问题,没有加一层解决不了的,有的话那就再加一层。
Service层:DemoService
import com.xbhog.Mapper.GetUserMapper;
import com.xbhog.pojo.User;
import org.springframework.beans.factory.annotation.Autowired;
import org.springframework.stereotype.Service;


@Service
public class DemoService {
    @Autowired
    GetUserMapper getUserMapper;

    public User getUser(int id){
        return getUserMapper.getUserid(id);
    }
}
从容器中取出GetUserMapper,在service层进行调用。如果只是测试,可以直接省略创建Controller.
创建Controller:
@Controller
public class Mycontro {
    @Autowired
    DemoService demoService;

    @ResponseBody
    @GetMapping("/user")
    public User getById(@RequestParam("id") int id){
        return demoService.getUser(id);
    }

}
上述步骤完成后需要在mybatis中注册,在Springboot中需要在配置文件中:
mybatis:
  config-location: classpath:mybatis/mybatis-config.xml   #全局配置文件位置
  mapper-locations: classpath:mybatis/Mapper/*.xml #sql映射文件位置
完整配置:
spring:
  datasource:
    url: jdbc:mysql://localhost:3306/vuesite
    username: root
    password: 123456
    driver-class-name: com.mysql.jdbc.Driver
    druid:
      aop-patterns: com.xbhog.*
      filters: stat,wall
      stat-view-servlet:
        enabled: true
        login-password: admin
        login-username: admin
        reset-enable: false


      web-stat-filter:
        enabled: true
        url-pattern: /*
        exclusions: '*.js,*.gif,*.jpg,*.png,*.css,*.ico,/druid/*'

      filter:
        stat:
          slow-sql-millis: 1000
          log-slow-sql: true
          enabled: true
        wall:
          enabled: true
          config:
            drop-table-allow: false


mybatis:
  config-location: classpath:mybatis/mybatis-config.xml
  mapper-locations: classpath:mybatis/Mapper/*.xml
测试:
输入:localhost:8080/user?id=2 查询id为2的用户
结果:
{"id":2,"username":"demo","password":"123456"}
如果之前也配置了Druid,可以查看http://localhost:8080/druid/

注意点
驼峰命名:
如果数据库中的字段是驼峰命名(Camel-Case),那么我们需要在mybatis中开启驼峰命名,不开启的话,是无法查找到对应的数据。
在全局配置文件中:
<?xml version="1.0" encoding="UTF-8" ?>
<!DOCTYPE configuration
        PUBLIC "-//mybatis.org//DTD Config 3.0//EN"
        "http://mybatis.org/dtd/mybatis-3-config.dtd">
<configuration>

    <settings>
        <setting name="mapUnderscoreToCamelCase" value="true"/>
    </settings>
</configuration>
全局配置设置:
其实在springBoot中的mybatis-start中已经有全局配置属性了。
找到MybatisProperties配置属性类。

进入Configuration,发现我们需要的配置已经在里面设置好了,以后只需要在配置文件中设置属性即可:
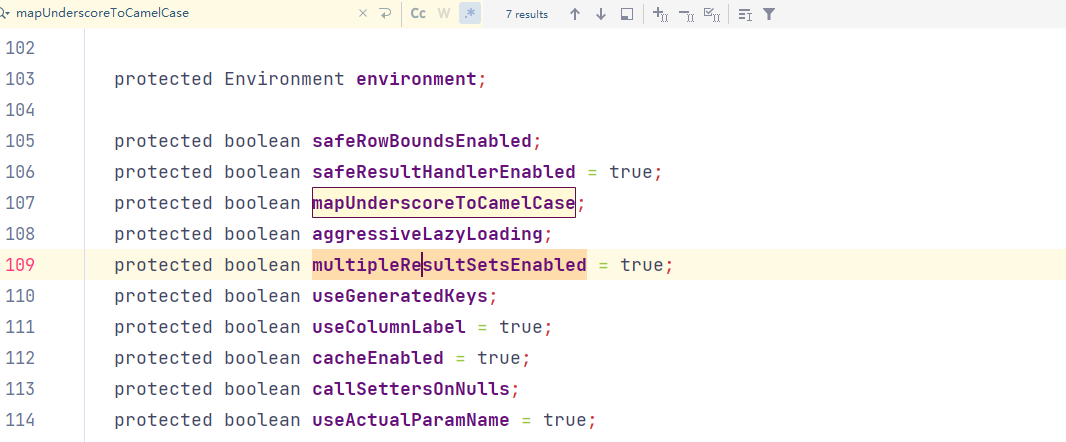
所以我们可以删除全局配置文件。在yaml或者properties中配置:
mybatis:
#  config-location: classpath:mybatis/mybatis-config.xml
  mapper-locations: classpath:mybatis/Mapper/*.xml
  configuration:  #全局配置文件
    map-underscore-to-camel-case: true
总结mybatis整合过程:
-
导入mybatis官方starter
-
编写mapper接口。标准@Mapper注解
-
编写sql映射文件并绑定mapper接口
-
在application.yaml中指定Mapper配置文件的位置,以及指定全局配置文件的信息 (建议;配置在mybatis.configuration)
结束:
如果你看到这里或者正好对你有所帮助,希望能点赞、点关注,点收藏,感谢;
有错误的地方,欢迎在评论指出,作者看到会进行修改。


【推荐】国内首个AI IDE,深度理解中文开发场景,立即下载体验Trae
【推荐】编程新体验,更懂你的AI,立即体验豆包MarsCode编程助手
【推荐】抖音旗下AI助手豆包,你的智能百科全书,全免费不限次数
【推荐】轻量又高性能的 SSH 工具 IShell:AI 加持,快人一步
· 基于Microsoft.Extensions.AI核心库实现RAG应用
· Linux系列:如何用heaptrack跟踪.NET程序的非托管内存泄露
· 开发者必知的日志记录最佳实践
· SQL Server 2025 AI相关能力初探
· Linux系列:如何用 C#调用 C方法造成内存泄露
· 震惊!C++程序真的从main开始吗?99%的程序员都答错了
· 【硬核科普】Trae如何「偷看」你的代码?零基础破解AI编程运行原理
· 单元测试从入门到精通
· 上周热点回顾(3.3-3.9)
· Vue3状态管理终极指南:Pinia保姆级教程