Spring系列之(八)Spring中的AOP
Spring中的AOP
通过配置(XML/注解)实现AOP
1. AOP相关术语
1.1 连接点
方法,Service接口中的所有方法
1.2 切入点
方法,Service接口中被增强过的方法
Tip:所有的切入点都是连接点
1.3 通知
方法,通常,具有增强功能的方法会放到一个类中,该类中所有用于增强的方法就被称为通知
分类:
- 前置通知
- 后置通知
- 异常通知
- 最终通知
- 环绕通知

1.4 目标对象
被代理对象
1.5 织入
过程,把增强方法应用到被代理对象来创建新的代理对象的过程
1.6 代理
代理对象
1.7 切面
描述通知是在切入点执行的具体什么时间点执行的,如切入点之前执行,切入点之后执行,切入点发生异常时执行....标红的部分就是切面
2. Spring AOP在实际项目开发中要做的事
开发阶段:
- 编写核心业务代码,实现业务功能,大部分开发人员都可做
- 抽取公共代码,制作成通知(开发最后阶段做),高级开发可做
- 在配置文件中,配置切面,高级开发可做
运行阶段:
Spring框架监控切入点的执行,一旦监控到切入点被运行,使用代理机制,动态创建目标对象的代理对象,根据通知类别,在代理对象的对应位置,将通知对应的功能织入,完成完整的代码逻辑运行。
3. Spring基于XML的AOP配置步骤
-
导入aop约束

参考网址:Spring Framework 中文文档 -
创建业务层接口实现类的Bean对象

-
创建通知类的Bean对象

-
使用<aop:config>标签表明开始AOP的配置
-
使用<aop:aspect>标签表明配置切面
id属性:切面的唯一标识
ref属性:指定通知类Bean的id -
<aop:aspect>标签内部配置通知的类型
<aop:before>:前置通知,在切入点之前执行
method属性:指定通知类中哪个方法用于前置通知
pointcut属性:指定切入点表达式,用于指定对业务层中的哪些方法进行增强,也就是设置的通知是用在哪个方法上的
<aop:after-returning>:后置通知,在切入点正常执行之后执行,后置通知和异常通知只能执行一个
method属性:指定通知类中哪个方法用于后置通知
pointcut属性:指定切入点表达式,用于指定对业务层中的哪些方法进行增强,也就是设置的通知是用在哪个方法上的
<aop:after-throwing>:异常通知,在切入点执行产生异常之后执行
method属性:指定通知类中哪个方法用于异常通知
pointcut属性:指定切入点表达式,用于指定对业务层中的哪些方法进行增强,也就是设置的通知是用在哪个方法上的
<aop:after>:最终通知,无论切入点是否正常执行都会在切入点之后执行
method属性:指定通知类中哪个方法用于最终通知
pointcut属性:指定切入点表达式,用于指定对业务层中的哪些方法进行增强,也就是设置的通知是用在哪个方法上的
<aop:around>:环绕通知
method属性:指定通知类中哪个方法用于环绕通知
pointcut属性:指定切入点表达式,用于指定对业务层中的哪些方法进行增强,也就是设置的通知是用在哪个方法上的
【环绕通知好像是完全自己来写各种通知】
切入点表达式
1. 关键字:execution(表达式)
2. 构成:访问修饰符 返回值 包名.包名....类名.方法名(参数列表)
3. 标准的表达式举例:

public void com.itheima.service.impl.AccountServiceImpl.saveAccount(int)
访问修饰符可以省略
void com.itheima.service.impl.AccountServiceImpl.saveAccount(int)
返回值可以使用通配符,表示任意返回值
* com.itheima.service.impl.AccountServiceImpl.saveAccount(int)
包名可以使用通配符,表示任意包,但是有几级包,就需要写几组 \*.
\* \*.\*.\*.\*.AccountServiceImpl.saveAccount(int)
包名可以使用. .表示当前包及其子包
\* \*. .AccountServiceImpl.saveAccount(int)
类名和方法名都可以使用\*来实现通配
\* \*. .\*.\*(int)
参数列表:可以直接写数据类型,基本类型写名称,引用类型写`包名.类名`的方式,可以使用通配符表示任意类型,但是必须有参数;可以使用. .表示有无参数均可,有参数可以是任意类型
\* \*. .\*.\*(\*)
\* \*. .\*.\*(. .)

4. 全通配写法
   \*  *. . * . *(. .)
5. 实际开发中切入表达式的通常写法

\* com.itheima.service.impl.\*.\*(. .)
- 通用化切入点表达式(抽取出切入点表达式,使用时通过id调用)
<aop:pointcut>标签:用于定义切入点表达式,可供调用
id属性:表达式的唯一标识
expression属性:表达式
<aop:pointcut>标签的位置:位于<aop:aspect>标签内部,只能用于当前切面;位于<aop:config>标签内部,可以用于所有切面

Tip:<aop:pointcut>标签放在<aop:config>标签内部,必须放在<aop:aspect>标签之前
4. Spring基于XML的AOP实例
4.1 pom中导入坐标

4.2 业务层接口和实现类
IAccountService
package com.itheima.service;

/**
 * @author 商务小本本
 */
public interface IAccountService {

    void selectAccount();

    void saveAccount(int account);

    int updateAccount();

    int deleteAccount(int account);
}
AccountServiceImpl实现类
package com.itheima.service.impl;

import com.itheima.service.IAccountService;

/**
 * @author 商务小本本
 */
public class AccountServiceImpl implements IAccountService {
    public void selectAccount() {
        System.out.println("selectAccount方法");
    }

    public void saveAccount(int account) {
        System.out.println("saveAccount方法");
    }

    public int updateAccount() {
        System.out.println("updateAccount方法");
        return 0;
    }

    public int deleteAccount(int account) {
        System.out.println("deleteAccount方法");
        return 0;
    }
}
4.3 通知所在的类
package com.itheima.logger;

/**
 * @author 商务小本本
 */
public class Logger {

    void beforeAdvice(){
        System.out.println("前置通知");
    }

    void afterReturnAdvice(){
        System.out.println("后置通知");
    }

    void afterThrowAdvice(){
        System.out.println("异常通知");
    }

    void afterAdvice(){
        System.out.println("最终通知");
    }
}
4.4 配置文件
- 引入AOP约束
<?xml version="1.0" encoding="UTF-8"?>
<beans xmlns="http://www.springframework.org/schema/beans"
       xmlns:xsi="http://www.w3.org/2001/XMLSchema-instance"
       xmlns:aop="http://www.springframework.org/schema/aop"
       xsi:schemaLocation="http://www.springframework.org/schema/beans
        http://www.springframework.org/schema/beans/spring-beans.xsd
        http://www.springframework.org/schema/aop
        http://www.springframework.org/schema/aop/spring-aop.xsd">
</beans>
- 创建Service对象
<bean id="accountService" class="com.itheima.service.impl.AccountServiceImpl"></bean>
- 创建通知类对象
<bean id="logger" class="com.itheima.logger.Logger"></bean>
- 配置切面
<aop:config>
        <aop:pointcut id="pt1" expression="execution(void com.itheima.service.impl.AccountServiceImpl.saveAccount(..))"/>
        <aop:aspect id="loggerAdvice" ref="logger">
            <aop:before method="beforeAdvice" pointcut-ref="pt1"></aop:before>
            <aop:after-returning method="afterReturnAdvice" pointcut-ref="pt1"></aop:after-returning>
            <aop:after-throwing method="afterThrowAdvice" pointcut-ref="pt1"></aop:after-throwing>
            <aop:after method="afterAdvice" pointcut-ref="pt1"></aop:after>
        </aop:aspect>
    </aop:config>
4.5 测试
import com.itheima.service.IAccountService;
import org.springframework.context.ApplicationContext;
import org.springframework.context.support.ClassPathXmlApplicationContext;

public class AopTest {

    public static void main(String[] args) {
        ApplicationContext applicationContext = new ClassPathXmlApplicationContext("bean.xml");
        IAccountService as = applicationContext.getBean("accountService", IAccountService.class);

        as.saveAccount(1);
    }
}

5. 环绕通知
Spring框架提供的一种可以在代码中手动控制增强方法何时执行的方式
Spring框架提供了一个接口,ProceedingJoinPoint,该接口的proceed方法相当于明确调用切入点方法,该接口可以作为环绕通知的方法参数,程序执行时,Spring框架会提供该接口的实现类供我们使用。
继续补充Spring基于XML的AOP实例的环绕通知部分
- 通知类中增加环绕通知,环绕通知的返回值要与切入点的返回值保持一致
Object arroundAdvice(ProceedingJoinPoint proceedingJoinPoint){
    Object result = null;
    try {
        Object[] args = proceedingJoinPoint.getArgs();
        System.out.println("前置通知");
        result = proceedingJoinPoint.proceed(args);
        System.out.println("后置通知");

        return result;
    }catch (Throwable t){
        System.out.println("异常通知");
        throw new RuntimeException(t);
    }finally {
        System.out.println("最终通知");
    }
}
- bean.xml中配置环绕通知

- 测试类
import com.itheima.service.IAccountService;
import org.springframework.context.ApplicationContext;
import org.springframework.context.support.ClassPathXmlApplicationContext;

public class AopTest {

    public static void main(String[] args) {
        ApplicationContext applicationContext = new ClassPathXmlApplicationContext("bean.xml");
        IAccountService as = applicationContext.getBean("accountService", IAccountService.class);

        as.updateAccount();
    }
}
- 测试结果

6. Spring基于注解的AOP实例
将上面基于XML的实例改为基于注解的实例
-
bean.xml中引入注解相关的名称空间和约束

-
bean.xml中配置包扫描(扫描注解)和注解AOP支持

-
使用注解配置Service创建和通知了创建

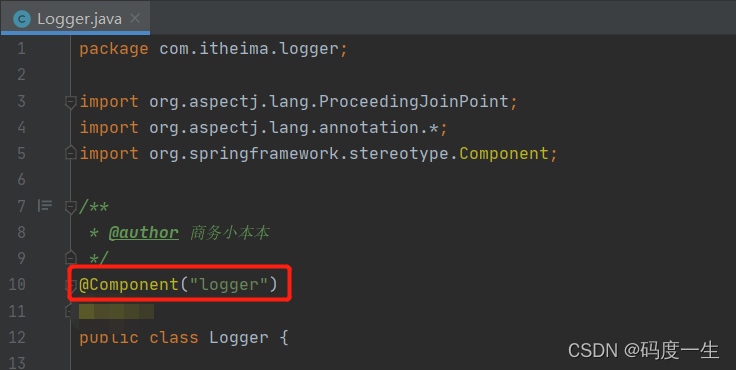
Tip:Logger类不属于Web三层架构的任意一层,所以使用注解@Component
作用等同于

-
通用化切入点表达式的注解配置

作用等同于

-
切面的注解配置

作用等同于

-
测试类不变,测试结果如下

-
接下来是配置环绕通知

作用等同于

Tip:注解AOP中尽量使用环绕通知,其他通知类型的执行顺序可能会出问题
7. Spring纯注解(不存在bean.xml)的AOP
配置类中使用注解@EnableAspectJAutoProxy
作用等同于


 浙公网安备 33010602011771号