

SpringBoot监控
SpringBoot监控(了解)
Actuator监控
SpringBoot自带监控功能Actuator,可以帮助实现对程序内部运行情况监控,比如监控状况、Bean加载情况、配置属性、日志信息等。
在第一天的springboot-demo项目中演示
①导入依赖坐标
<dependency>
  <groupId>org.springframework.boot</groupId>
  <artifactId>spring-boot-starter-actuator</artifactId>
</dependency>
②访问http://localhost/actuator springboot-demo当时设置的端口号是80,80端口号可以省略的
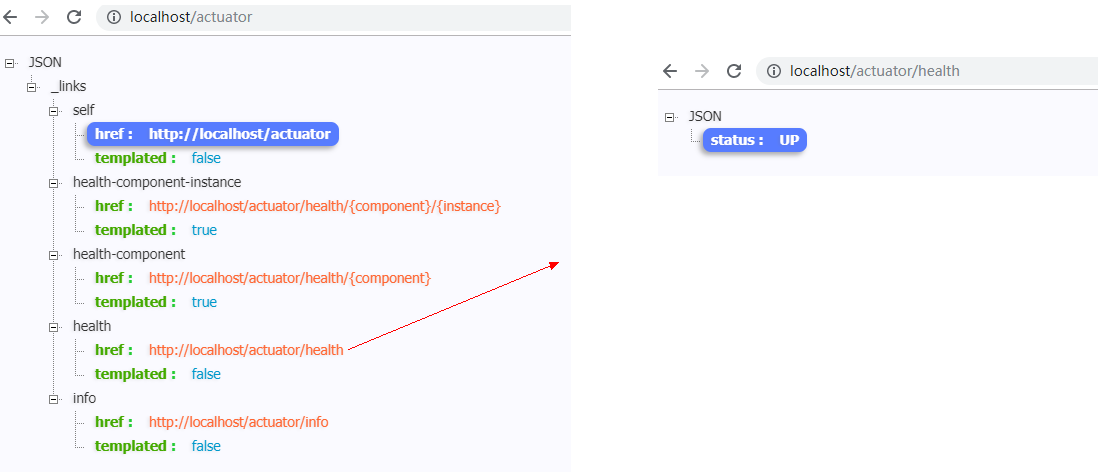
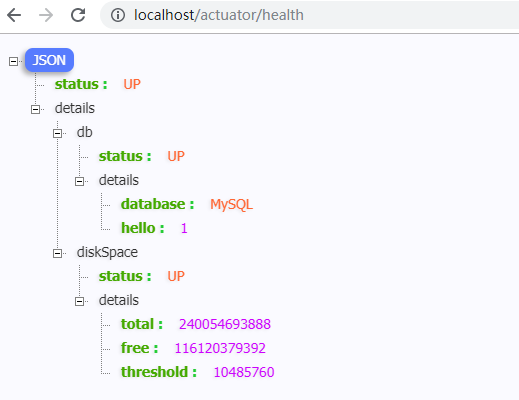
如果想看更详细的health信息信息,在配置文件中添加以下代码
management:  # 注意这里要顶格写(前面不需要空格)
  endpoint:
    health:
      show-details: always
重启项目后再访问
④ 如果想看更多的信息,在配置文件中添加以下代码
management:
  endpoint:
    health:
      show-details: always
  endpoints:
    web:
      exposure:
        include: "*"
重启在访问 http://localhost/actuator ,发现多了很多东西
重点关注3个
http://localhost/actuator/beans
http://localhost/actuator/mappings
具体详细的解释:
| 路径 | 描述 |
|---|---|
| /beans | 描述应用程序上下文里全部的Bean,以及它们的关系 |
| /env | 获取全部环境属性 |
| /env/ | 根据名称获取特定的环境属性值 |
| /health | 报告应用程序的健康指标,这些值由HealthIndicator的实现类提供 |
| /info | 获取应用程序的定制信息,这些信息由info打头的属性提供 |
| /mappings | 描述全部的URI路径,以及它们和控制器(包含Actuator端点)的映射关系 |
| /metrics | 报告各种应用程序度量信息,比如内存用量和HTTP请求计数 |
| /metrics/ | 报告指定名称的应用程序度量值 |
| /trace | 提供基本的HTTP请求跟踪信息(时间戳、HTTP头等) |
Spring Boot Admin(第三方提供的)
actuator的监控内容够详细,但是阅读性比较差,所以可以使用Spring Boot Admin提供一个可视化的界面查阅信息,Spring Boot Admin是一个开源社区项目,用于管理和监控SpringBoot应用程序。
Spring Boot Admin 有两个角色,客户端(Client)和服务端(Server)。
应用程序作为Spring Boot Admin Client向为Spring Boot Admin Server注册
Spring Boot Admin Server 的界面将Boot Admin ClientActuatorEndpoint
开发步骤如下:
admin-server:
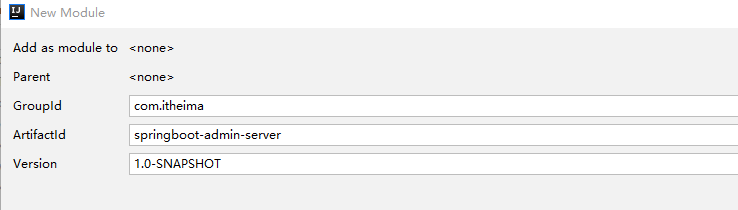
①创建 admin-server 模块
②导入依赖坐标 admin-starter-server
③在引导类上启用监控功能@EnableAdminServer
admin-client: 自己创建的项目就是所谓的client端
①创建 admin-client 模块
②导入依赖坐标 admin-starter-client
③配置相关信息:server地址等
④启动server和client服务,访问server
功能演示:
第一步:创建admin-server端
1、创建项目
2、导入依赖
<parent>
    <groupId>org.springframework.boot</groupId>
    <artifactId>spring-boot-starter-parent</artifactId>
    <version>2.1.3.RELEASE</version>
</parent>

<dependencies>
    <dependency>
        <groupId>org.springframework.boot</groupId>
        <artifactId>spring-boot-starter-web</artifactId>
        <version>2.1.3.RELEASE</version>
    </dependency>
    <dependency>
        <groupId>de.codecentric</groupId>
        <artifactId>spring-boot-admin-starter-server</artifactId>
        <version>2.1.3</version>
    </dependency>
</dependencies>
3、创建引导类
package com.itheima;

import de.codecentric.boot.admin.server.config.EnableAdminServer;
import org.springframework.boot.SpringApplication;
import org.springframework.boot.autoconfigure.SpringBootApplication;

@SpringBootApplication
@EnableAdminServer //注意这里需要开启注解
public class SpringbootAdminServerApplication {
    public static void main(String[] args) {
        SpringApplication.run(SpringbootAdminServerApplication.class,args);
    }
}
第二步:把springboot-demo项目作为client端
1、在springboot-demo项目中添加依赖
<dependency>
    <groupId>de.codecentric</groupId>
    <artifactId>spring-boot-admin-starter-client</artifactId>
    <version>2.1.3</version>
</dependency>
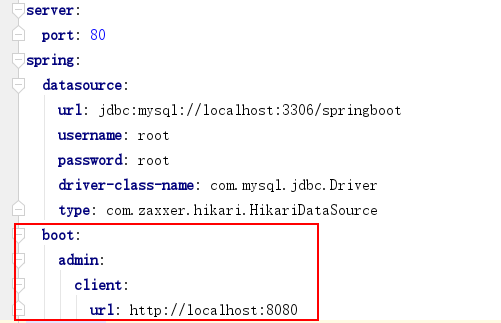
2、发布到server端,在application.yml中添加
spring.boot.admin.client.url=http://localhost:8080
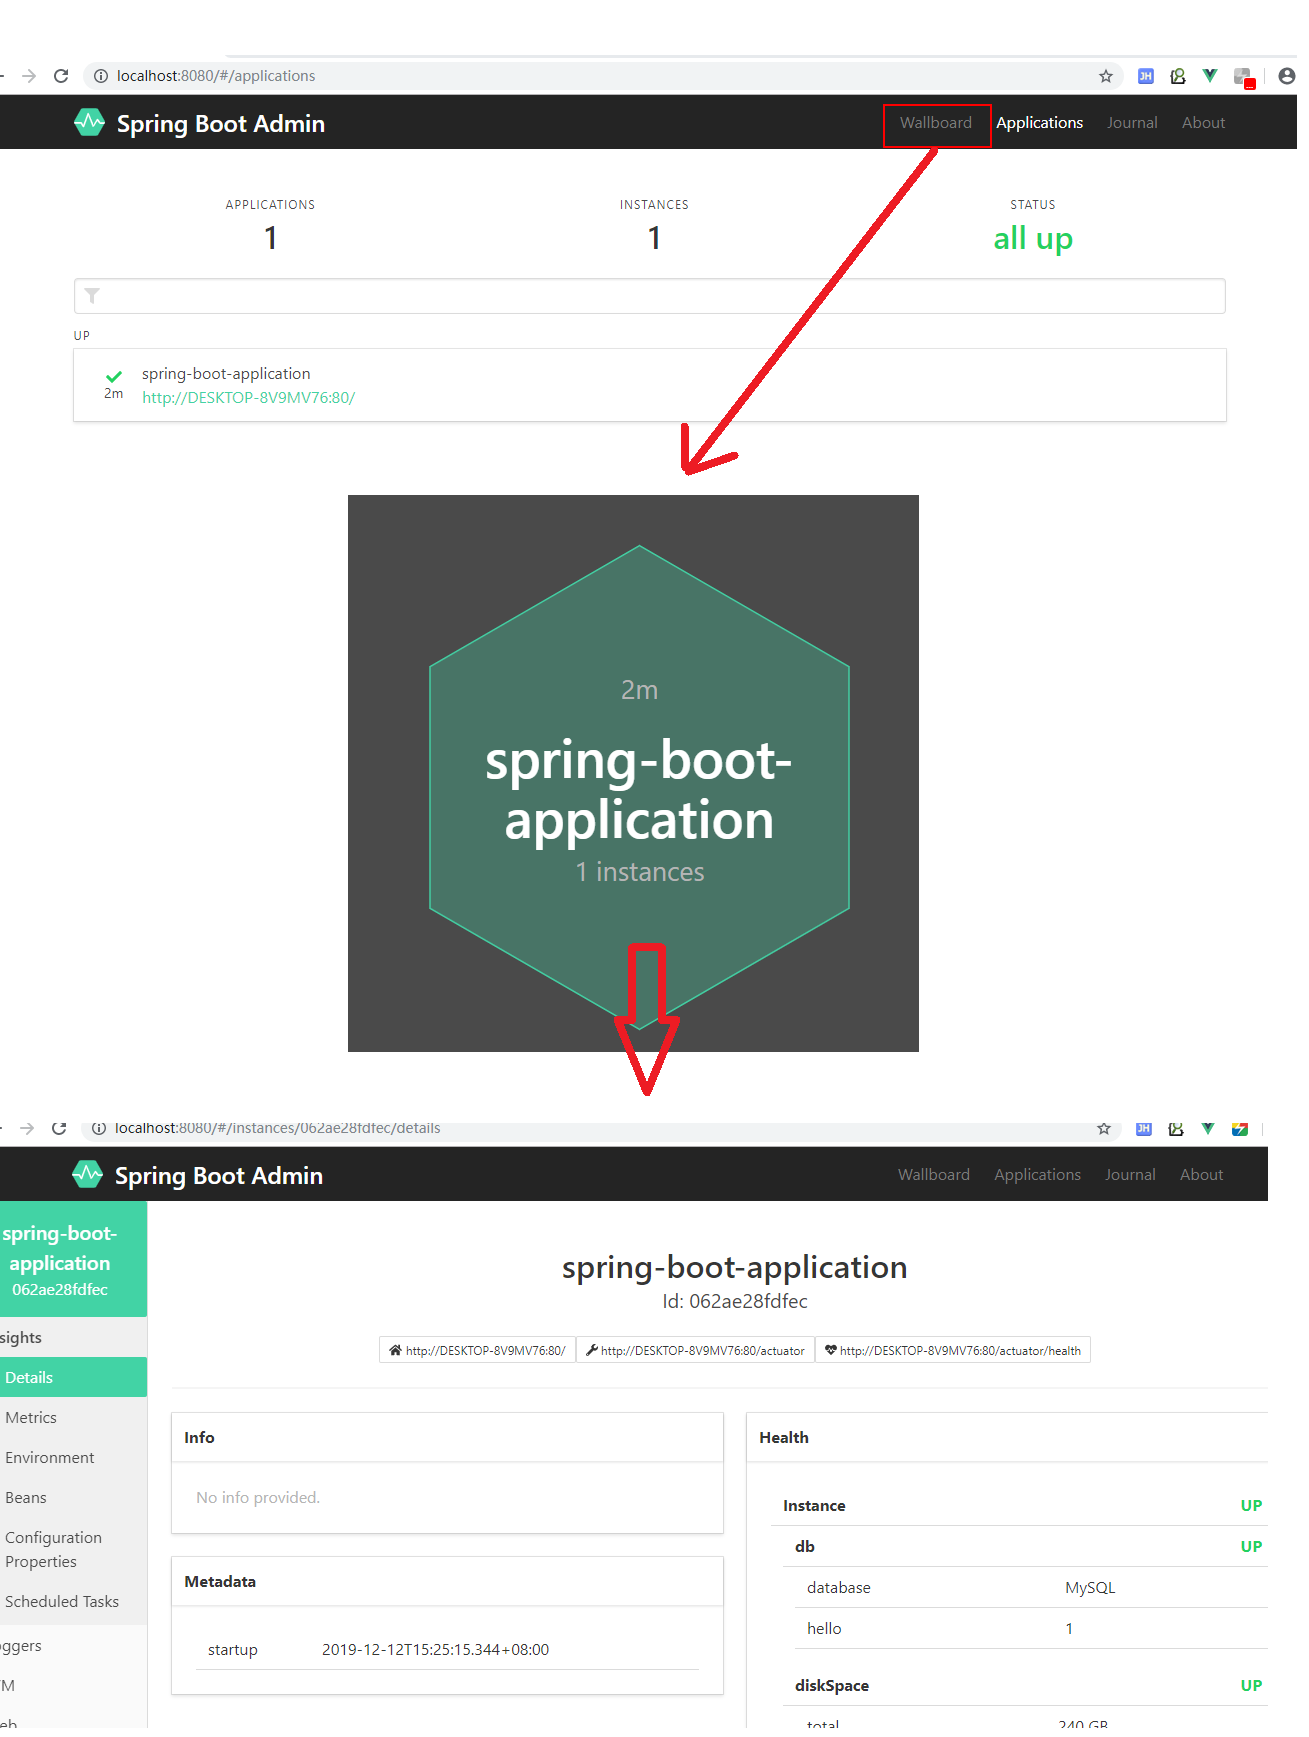
第三步:两个项目启动 (先启动server)
访问项目 http://localhost:8080/#/applications 查阅信息即可


【推荐】国内首个AI IDE,深度理解中文开发场景,立即下载体验Trae
【推荐】编程新体验,更懂你的AI,立即体验豆包MarsCode编程助手
【推荐】抖音旗下AI助手豆包,你的智能百科全书,全免费不限次数
【推荐】轻量又高性能的 SSH 工具 IShell:AI 加持,快人一步
· winform 绘制太阳,地球,月球 运作规律
· TypeScript + Deepseek 打造卜卦网站:技术与玄学的结合
· AI 智能体引爆开源社区「GitHub 热点速览」
· Manus的开源复刻OpenManus初探
· 写一个简单的SQL生成工具