

RabbitMQ入门学习
由于传统的RabbitMQ使用起来较为麻烦,这里便直接使用SpringAMQP这套模板。
先创建一个名为mq-study的SpringCloud项目,该项目下有两个子模块,consumer和publisher。分别对应消息的消费者和消息的生产者。
在mq-study的pom文件中引入SpringAMQP的依赖
点击查看代码
<!--AMQP依赖,包含RabbitMQ-->
        <dependency>
            <groupId>org.springframework.boot</groupId>
            <artifactId>spring-boot-starter-amqp</artifactId>
        </dependency>
在consumer和publisher的application.yml文件中添加配置信息
点击查看代码
spring:
  rabbitmq:
    host: 192.168.136.50 # 主机名
    port: 5672 # 端口
    virtual-host: / # 虚拟主机
    username: wzh# 用户名
    password: 1234 # 密码
简单队列模型---Basic Queue
在publisher服务中编写测试类
点击查看代码
@SpringBootTest
@RunWith(SpringRunner.class)
public class SimpleQueue {
    @Autowired
    private RabbitTemplate rabbitTemplate;

    @Test
    public void SimpleQueue(){
        //队列名称
        String queueName="simple.queue";
        //消息
        String msg="Hello,wzh!";
        //发送消息
        rabbitTemplate.convertAndSend(queueName,msg);
    }
}
点击查看代码
@Configuration
public class SimpleConfig {
    //声明交换机
    @Bean
    public FanoutExchange simpleExchange(){
        return new FanoutExchange("wzh.simple");
    }
    //声明队列
    @Bean
    public Queue simpleQueue(){
        return new Queue("simple.queue");
    }
    //绑定交换机和队列
    @Bean
    public Binding bindingSimple(FanoutExchange simpleExchange,Queue simpleQueue){
        return BindingBuilder.bind(simpleQueue).to(simpleExchange);
    }
}
在consumer服务中编写监听消息的类
点击查看代码
@Component
public class SimpleListener {
    @RabbitListener(queues = "simple.queue")
    public void listenSimpleQueueMessage(String msg) throws InterruptedException {
        System.out.println("spring 消费者接收到消息:【" + msg + "】");
    }
}
最终先启动consumer服务的启动类,之后启动测试方法,可收到对应信息。

任务模型---WorkQueues
WorkQueues又称为TaskQueues,简单来说就是让多个消费者绑定到同一个队列,共同消费队列中的信息。当生产消息的速度大于消费速度是可以使用该模型。
在consumer服务中声明交换机和队列,并绑定。
点击查看代码
@Configuration
public class WorkConfig {
    //声明交换机
    @Bean
    public FanoutExchange workExchange(){
        return new FanoutExchange("wzh.work");
    }
    //声明队列
    @Bean
    public Queue workQueue(){
        return new Queue("work.queue");
    }
    //绑定交换机和队列
    @Bean
    public Binding bindingWork(FanoutExchange workExchange,Queue workQueue){
        return BindingBuilder.bind(workQueue).to(workExchange);
    }
}
在consumer服务中编写监听消息的类
点击查看代码
@Component
public class WorkListener {
    @RabbitListener(queues = "work.queue")
    public void workListener1(String msg) throws Exception{
        System.out.println("消费者1接收到消息:【" + msg + "】" + LocalTime.now());
        Thread.sleep(20);
    }

    @RabbitListener(queues = "work.queue")
    public void workListener2(String msg) throws Exception{
        System.err.println("消费者2接收到消息:【" + msg + "】" + LocalTime.now());
        Thread.sleep(200);
    }
}
点击查看代码
@SpringBootTest
@RunWith(SpringRunner.class)
public class WorkQueue {
    @Autowired
    private RabbitTemplate rabbitTemplate;
    @Test
    public void workQueue() throws Exception{
        //队列名称
        String queueName="work.queue";
        //消息
        String msg="Hello,RabbitMQ---";
        //发送消息
        for (int i = 1; i <= 50; i++) {
            rabbitTemplate.convertAndSend(queueName,msg+i);
            Thread.sleep(20);
        }
    }
}
启动项目,查看效果。

从图中可以发现这两个消费者消费完消息耗时约5秒。消费者2明显拖慢了消息消费的速度。因为WorkQueues是平均分配消息的,如果想让消费者1多消费就要配置一下文件了。
点击查看代码
spring:
  rabbitmq:
    listener:
      simple:
        prefetch: 1 # 每次只能获取一条消息,处理完成才能获取下一个消息
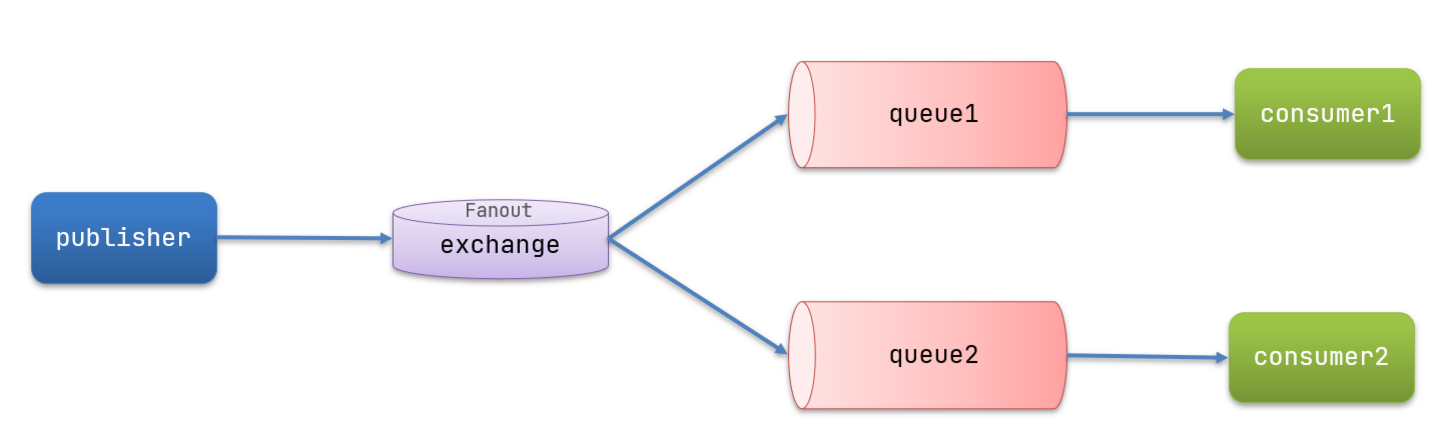
广播模型---Fanout
在生产者与队列之间配置一个交换机,生产者将产生的消息发送到交换机,交换机在根据规则将消息发送到不同的队列中。
在consumer服务中声明交换机和队列,并绑定。
点击查看代码
@Configuration
public class FanoutConfig {
    //声明一个FanoutExchange
    @Bean
    public FanoutExchange fanoutExchange(){
        return new FanoutExchange("wzh.fanout");
    }
    //声明两个队列
    @Bean
    public Queue queue1(){
        return new Queue("fanout.queue1");
    }
    @Bean
    public Queue queue2(){
        return new Queue("fanout.queue2");
    }
    //将两个队列绑定到FanoutExchange
    @Bean
    public Binding bindingQ1(FanoutExchange fanoutExchange,Queue queue1){
        return BindingBuilder.bind(queue1).to(fanoutExchange);
    }
    @Bean
    public Binding bindingQ2(FanoutExchange fanoutExchange,Queue queue2){
        return BindingBuilder.bind(queue2).to(fanoutExchange);
    }
}
点击查看代码
@SpringBootTest
@RunWith(SpringRunner.class)
public class FanoutQueue {
    @Autowired
    private RabbitTemplate rabbitTemplate;
    @Test
    public void fanoutQueue(){
        //队列名称
        String exchangeName="wzh.fanout";
        //消息
        String message = "Hello, RabbitMQ!";
        //发送消息
        rabbitTemplate.convertAndSend(exchangeName,"",message);
    }
}
点击查看代码
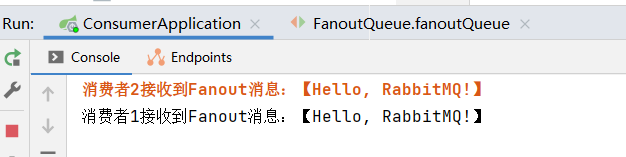
@Component
public class FanoutListener {
    @RabbitListener(queues = "fanout.queue1")
    public void fanoutQ1(String msg){
        System.out.println("消费者1接收到Fanout消息:【" + msg + "】");
    }

    @RabbitListener(queues = "fanout.queue2")
    public void fanoutQ2(String msg){
        System.err.println("消费者2接收到Fanout消息:【" + msg + "】");
    }
}
Direct模型
如果我们希望不同的消息被不同的队列消费。这时就要用到Direct类型的Exchange。
通过注解的方式声明交换机并绑定队列
点击查看代码
@Component
public class DirectListener {
@RabbitListener(bindings = @QueueBinding(
value = @Queue(name = "direct.queue1"),
exchange = @Exchange(name = "wzh.direct",type = ExchangeTypes.DIRECT),
key = {"miku","luka"}
))
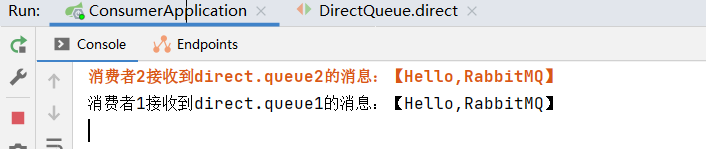
public void direct1(String msg){
System.out.println("消费者1接收到direct.queue1的消息:【" + msg + "】");
}
@RabbitListener(bindings = @QueueBinding(
value = @Queue(name = "direct.queue2"),
exchange = @Exchange(name = "wzh.direct",type = ExchangeTypes.DIRECT),
key = {"miku","luka"}
))
public void direct2(String msg){
System.err.println("消费者2接收到direct.queue2的消息:【" + msg + "】");
}
}
点击查看代码
@SpringBootTest
@RunWith(SpringRunner.class)
public class DirectQueue {
    @Autowired
    private RabbitTemplate rabbitTemplate;

    @Test
    public void direct(){
        //队列名称
        String exhangeName="wzh.direct";
        //消息
        String msg="Hello,RabbitMQ";
        //发送消息
        rabbitTemplate.convertAndSend(exhangeName,"luka",msg);
    }
}
启动项目
Topic模型
该模型和Direct模型使用起来差不多,但是新加了RoutingKey的通配符共功能。
通配符规则:
“#”:匹配一个或多个词
“* ”:匹配一个词
举例:
item.#:可以匹配item.sup.insert或item.sup
item.*:只可以匹配item.sup
在publisher服务中编写测试方法
点击查看代码
@SpringBootTest
@RunWith(SpringRunner.class)
public class TopicQueue {
@Autowired
private RabbitTemplate rabbitTemplate;
@Test
public void topicQueue(){
// 交换机名称
String exchangeName = "wzh.topic";
// 消息
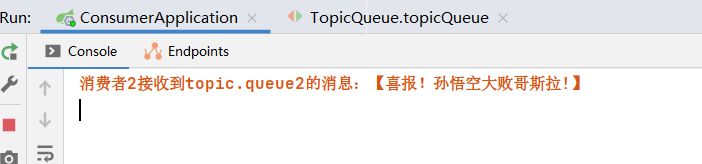
String message = "喜报!孙悟空大败哥斯拉!";
// 发送消息
rabbitTemplate.convertAndSend(exchangeName, "news", message);
}
}
点击查看代码
@Component
public class TopicListener {
    @RabbitListener(bindings = @QueueBinding(
            value = @Queue(name = "topic.queue1"),
            exchange = @Exchange(name = "wzh.topic",type = ExchangeTypes.TOPIC),
            key = "china.#"
    ))
    public void topic1(String msg){
        System.out.println("消费者1接收到topic.queue1的消息:【" + msg + "】");
    }

    @RabbitListener(bindings = @QueueBinding(
            value = @Queue(name = "topic.queue2"),
            exchange = @Exchange(name = "wzh.topic",type = ExchangeTypes.TOPIC),
            key = "#.news"
    ))
    public void topic2(String msg){
        System.err.println("消费者2接收到topic.queue2的消息:【" + msg + "】");
    }
}
消息转换器
当我们发送消息的时候,Spring辉将消息进行序列化发送给MQ,接收时又会将信息反序列化成Java对象。但是默认情况下Spring采用默认的JDK序列化方式序列化。但是JDK序列化存在数据体积大,不够安全和可读性性差的问题。所以一般使用Json字符串的方式进行序列化。
使用方法:
引入依赖
点击查看代码
<dependency>
    <groupId>com.fasterxml.jackson.dataformat</groupId>
    <artifactId>jackson-dataformat-xml</artifactId>
    <version>2.9.10</version>
</dependency>
点击查看代码
@Bean
    public MessageConverter jsonMessageConverter(){
        return new Jackson2JsonMessageConverter();
    }
最后测试一下
consumer
点击查看代码
@Component
public class ObjectListener {
@RabbitListener(bindings = @QueueBinding(
value = @Queue(name = "object.queue"),
exchange = @Exchange(name = "wzh.object",type = ExchangeTypes.DIRECT),
key = "wife"
))
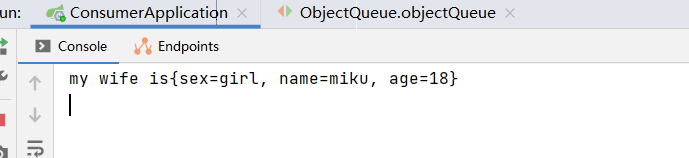
public void object(Map<String, Object> wife){
System.out.println("my wife is"+wife);
}
}
publisher
点击查看代码
@SpringBootTest
@RunWith(SpringRunner.class)
public class ObjectQueue {
    @Autowired
    private RabbitTemplate rabbitTemplate;
    @Test
    public void objectQueue(){
        //创建一个map类型的对象,该对象作为消息传递
        Map<String, Object> wife = new HashMap<>();
        wife.put("name","miku");
        wife.put("age",18);
        wife.put("sex","girl");
        //声明队列
        String exchangeName="wzh.object";
        //发送消息
        rabbitTemplate.convertAndSend(exchangeName,"wife",wife);
    }
}


【推荐】国内首个AI IDE,深度理解中文开发场景,立即下载体验Trae
【推荐】编程新体验,更懂你的AI,立即体验豆包MarsCode编程助手
【推荐】抖音旗下AI助手豆包,你的智能百科全书,全免费不限次数
【推荐】轻量又高性能的 SSH 工具 IShell:AI 加持,快人一步
· 无需6万激活码!GitHub神秘组织3小时极速复刻Manus,手把手教你使用OpenManus搭建本
· C#/.NET/.NET Core优秀项目和框架2025年2月简报
· Manus爆火,是硬核还是营销?
· 终于写完轮子一部分:tcp代理 了,记录一下
· 【杭电多校比赛记录】2025“钉耙编程”中国大学生算法设计春季联赛(1)