【EF6学习笔记】(七)读取关联数据
本篇参考原文链接:Reading Related Data
本章主要讲述加载显示关联数据;
数据加载分为以下三种
Lazy loading
这种加载方式在于需要用到这个导航属性数据的时候,才会去数据库取数据,如下图,循环中,每一次都去数据库取一次数据:

Eager loading
这种加载方式则是先定义好哪个导航属性数据需要一起加载(通过是.Inclue),然后在加载主数据的时候,一并把导航数据全部加载,如下图:

Explicit loading
这种加载就是需要明确用代码来定义去数据库取数据(通过Collection.Load()或者Reference.Load()),一般是用在Lazy Loading 被关闭的情况下;如:

性能考虑
显而易见,Lazy Loading和Eager Loading 各有优势劣势;
Lazy Loading可以在需要的时候才取数据,那么不需要的时候就节约了资源;但需要的时候也对数据库产生了很大压力;
Eager Loading可以在需要的时候一次性取到全部数据,对于数据库压力来说会好很多;
所以,根据自己需要选择哪一种咯。。。
序列化之前关闭Lazy Loading
如果要序列化一个实体,会出现导航属性一层一层展下去,出现循环等等问题,所以在WEB API或者特定应用场景下需要序列化实例的时候,需要做些特殊处理;
准备深入学习此部分;计划后续再补充这部分;
新建Course页面来显示包含Department
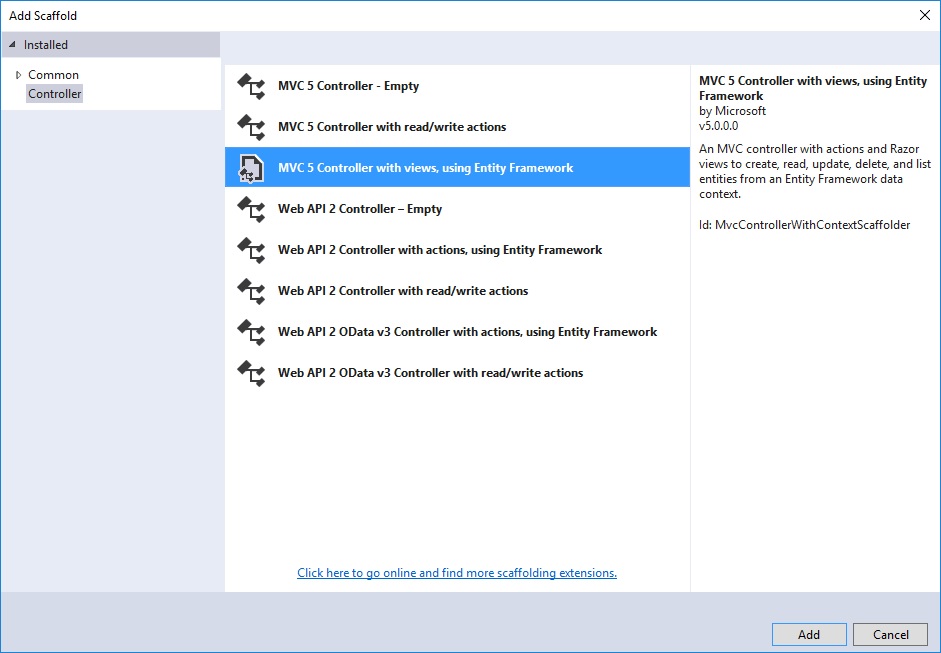
这次偷偷懒,直接用带View 使用EF的控制器模板来创建Course控制器:
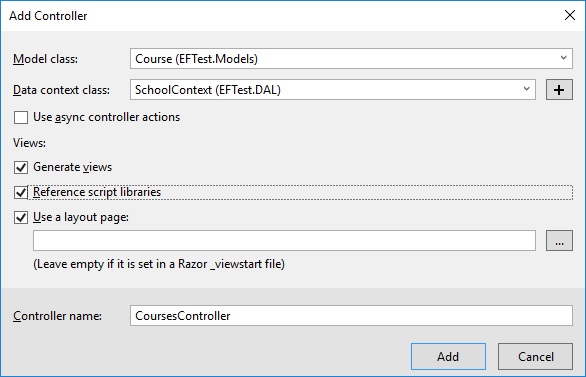
在控制器里,Index Action 已经直接把Department导航属性加载了:
        // GET: Courses
        public ActionResult Index()
        {
            var courses = db.Courses.Include(c => c.Department);
            return View(courses.ToList());
        }
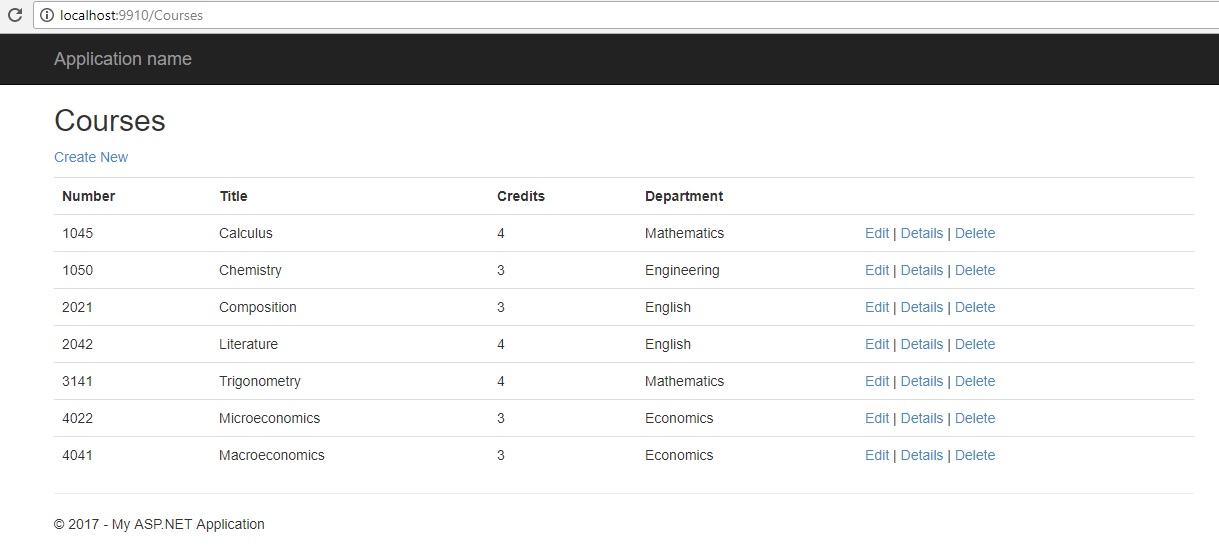
然后把Courses/Index 试图改为:
(注意:个人偷懒,创建控制器的时候,Course控制器被自动创建为CoursesController, 所以要手动改下Home/Index里对应Course的Action Link参数)
(另外:要Department标题显示Department 而不是Name ,则需要到Department模型里把Name这个属性加上 [Display(Name ="Department")]
@model IEnumerable<EFTest.Models.Course>

@{
    ViewBag.Title = "Courses";
}

<h2>Courses</h2>

<p>
    @Html.ActionLink("Create New", "Create")
</p>
<table class="table">
    <tr>
        <th>
            @Html.DisplayNameFor(model => model.CourseID)
        </th>
        <th>
            @Html.DisplayNameFor(model => model.Title)
        </th>
        <th>
            @Html.DisplayNameFor(model => model.Credits)
        </th>
        <th>
            @Html.DisplayNameFor(model => model.Department.Name)
        </th>
        <th></th>
    </tr>

@foreach (var item in Model) {
    <tr>
        <td>
            @Html.DisplayFor(modelItem => item.CourseID)
        </td>
        <td>
            @Html.DisplayFor(modelItem => item.Title)
        </td>
        <td>
            @Html.DisplayFor(modelItem => item.Credits)
        </td>
        <td>
            @Html.DisplayFor(modelItem => item.Department.Name)
        </td>
        <td>
            @Html.ActionLink("Edit", "Edit", new { id=item.CourseID }) |
            @Html.ActionLink("Details", "Details", new { id=item.CourseID }) |
            @Html.ActionLink("Delete", "Delete", new { id=item.CourseID })
        </td>
    </tr>
}

</table>
新建Instructors列表显示页面
准备建一个可以分多级显示的页面,上部显示Instructor列表,点击选择后,中部显示对应的Enrollment列表,再点击选择后,显示Enrollment对应的学生和成绩列表;
先准备一个显示用的模型:InstructorIndexData
在项目下新建ViewModels文件夹,然后增加一个显示模型:
using EFTest.Models;
using System.Collections.Generic;

namespace EFTest.ViewModels
{
    public class InstructorIndexData
    {
        public IEnumerable<Instructor> Instructors { get; set; }
        public IEnumerable<Course> Courses { get; set; }
        public IEnumerable<Enrollment> Enrollments { get; set; }

    }
}
然后新增 Instructor 控制器:
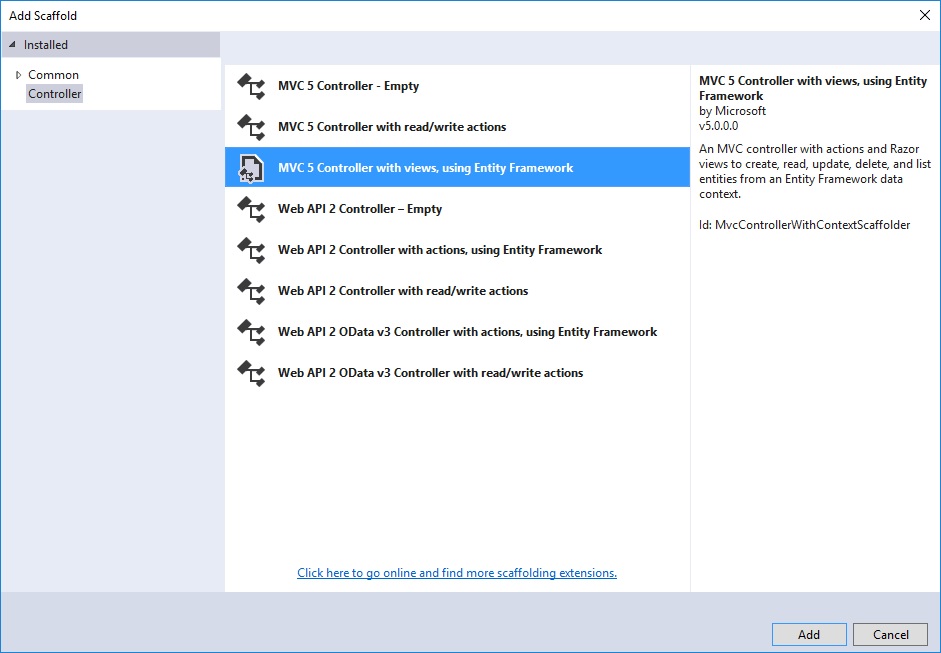
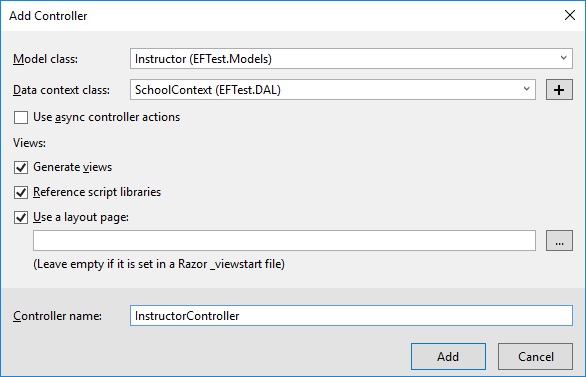
(注意把控制器名字改为 InstructorController)
在控制器里增加显示用模型文件夹的申明:
using EFTest.ViewModels;
把原先的Index Action 改为如下:
        public ActionResult Index(int? id, int? courseID)
        {
            var viewModel = new InstructorIndexData();
            viewModel.Instructors = db.Instructors
                .Include(i => i.OfficeAssignment)
                .Include(i => i.Courses.Select(c => c.Department))
                .OrderBy(i => i.LastName);

            if (id != null)
            {
                ViewBag.InstructorID = id.Value;
                viewModel.Courses = viewModel.Instructors.Where(
                    i => i.ID == id.Value).Single().Courses;
            }

            if (courseID != null)
            {
                ViewBag.CourseID = courseID.Value;
                viewModel.Enrollments = viewModel.Courses.Where(
                    x => x.CourseID == courseID).Single().Enrollments;
                //var selectedCourse = viewModel.Courses.Where(x => x.CourseID == courseID).Single();
                //db.Entry(selectedCourse).Collection(x => x.Enrollments).Load();
                //foreach (Enrollment enrollment in selectedCourse.Enrollments)
                //{
                //    db.Entry(enrollment).Reference(x => x.Student).Load();
                //}
                //viewModel.Enrollments = selectedCourse.Enrollments;
            }
            return View(viewModel);
        }
VIEW修改为:
(分为3部分显示,上部列表显示Instructors ,并增加一个Select的Link指向Index并带回ID值;中间部分显示选中的Instructor的Course列表,并也增加一个Select的LINK,
指向Index 并带回Instructors ID以及CourseID, 最下部分则为选中的Course的Enrollments列表;)
@model EFTest.ViewModels.InstructorIndexData

@{
    ViewBag.Title = "Instructors";
}

<h2>Instructors</h2>

<p>
    @Html.ActionLink("Create New", "Create")
</p>
<table class="table">
    <tr>
        <th>Last Name</th>
        <th>First Name</th>
        <th>Hire Date</th>
        <th>Office</th>
        <th></th>
    </tr>

@foreach (var item in Model.Instructors)
{
    string selectedRow = "";
    if (item.ID == ViewBag.InstructorID)
    {
        selectedRow = "success";
    }
    <tr class="@selectedRow">
        <td>
            @Html.DisplayFor(modelItem => item.LastName)
        </td>
        <td>
            @Html.DisplayFor(modelItem => item.FirstMidName)
        </td>
        <td>
            @Html.DisplayFor(modelItem => item.HireDate)
        </td>
        <td>
            @if (item.OfficeAssignment != null)
                {
                @item.OfficeAssignment.Location
            }
        </td>
        <td>
            @Html.ActionLink("Select", "Index", new { id = item.ID }) |
            @Html.ActionLink("Edit", "Edit", new { id = item.ID }) |
            @Html.ActionLink("Details", "Details", new { id = item.ID }) |
            @Html.ActionLink("Delete", "Delete", new { id = item.ID })
        </td>
    </tr>
}

</table>
@if (Model.Courses != null)
{
    <h3>Courses Taught by Selected Instructor</h3>
    <table class="table">
        <tr>
            <th></th>
            <th>Number</th>
            <th>Title</th>
            <th>Department</th>
        </tr>

        @foreach (var item in Model.Courses)
        {
            string selectedRow = "";
            if (item.CourseID == ViewBag.CourseID)
            {
                selectedRow = "success";
            }
            <tr class="@selectedRow">
                <td>
                    @Html.ActionLink("Select", "Index", new { courseID = item.CourseID })
                </td>
                <td>
                    @item.CourseID
                </td>
                <td>
                    @item.Title
                </td>
                <td>
                    @item.Department.Name
                </td>
            </tr>
        }

    </table>
}

@if (Model.Enrollments != null)
{
    <h3>
        Students Enrolled in Selected Course
    </h3>
    <table class="table">
        <tr>
            <th>Name</th>
            <th>Grade</th>
        </tr>
        @foreach (var item in Model.Enrollments)
        {
            <tr>
                <td>
                    @item.Student.FullName
                </td>
                <td>
                    @Html.DisplayFor(modelItem => item.Grade)
                </td>
            </tr>
        }
    </table>
}
扩展学习
原文中是采用直接刷新全部页面来显示,至于在实际项目中,有时候为了好的操作体验,采用Ajax来显示;
下面自己学习使用Ajax来进行点选Instructor后显示Course部分视图;
先做些准备工作:
通过NuGet 把项目中原 jQuery升级到最新;然后安装 Microsoft.jQuery.Unobtrusive.Ajax
(Microsoft.jQuery.Unobtrusive.Ajax是包含了 jQuery.Unobtrusive.Ajax 的微软包)
再把Home/Index对应的View加一行:
@{
    ViewBag.Title = "Hello EF6";
}
<h2>Hello EF6</h2>
<div>
    <ul>
        <li>@Html.ActionLink("Home", "Index", "Home")</li>
        <li>@Html.ActionLink("About", "About", "Home")</li>
        <li>@Html.ActionLink("Students", "Index", "Student")</li>
        <li>@Html.ActionLink("Courses", "Index", "Courses")</li>
        <li>@Html.ActionLink("Instructors", "Index", "Instructor")</li>
        <li>@Html.ActionLink("Ajax_Instructors", "Index", "Instructors")</li>
        <li>@Html.ActionLink("Departments", "Index", "Department")</li>
    </ul>
</div>
在Shared/_Layout.cshtml 这个模板View中加入应用:(这个办法是笨办法,还有一种是高级压缩的js引用办法,先用笨办法)
<head>
    <meta charset="utf-8" />
    <meta name="viewport" content="width=device-width, initial-scale=1.0">
    <title>@ViewBag.Title - My ASP.NET Application</title>
    <link href="~/Content/Site.css" rel="stylesheet" type="text/css" />
    <link href="~/Content/bootstrap.min.css" rel="stylesheet" type="text/css" />
    <script src="~/Scripts/modernizr-2.6.2.js"></script>
    <script src="~/Scripts/jquery-3.1.1.min.js"></script>
    <script src="~/Scripts/jquery.unobtrusive-ajax.min.js"></script>
</head>
新建一个InstructorsContorller :
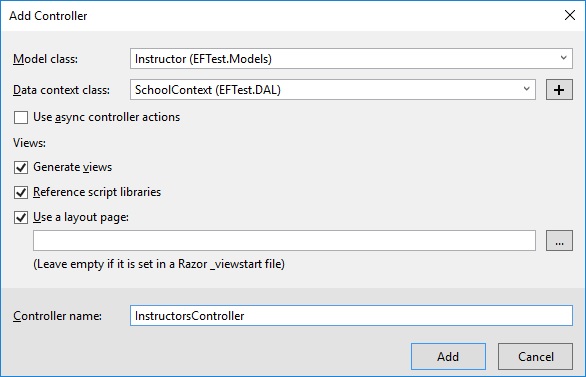
这个控制器里的Index可以不用改,主要是改Instructors/Index对应的View: (增加一个Ajax的ActionLink) (以及一个准备放Course的结果的Div)
@model IEnumerable<EFTest.Models.Instructor>
@{
    var ajaxOption = new AjaxOptions()
    {
        HttpMethod = "Get",UpdateTargetId = "CourseList"
    };
}

@{
    ViewBag.Title = "Index";
}

<h2>Index</h2>

<p>
    @Html.ActionLink("Create New", "Create")
</p>
<table class="table">
    <tr>
        <th>
            @Html.DisplayNameFor(model => model.LastName)
        </th>
        <th>
            @Html.DisplayNameFor(model => model.FirstMidName)
        </th>
        <th>
            @Html.DisplayNameFor(model => model.HireDate)
        </th>
        <th>
            @Html.DisplayNameFor(model => model.OfficeAssignment.Location)
        </th>
        <th></th>
    </tr>

@foreach (var item in Model) {
    <tr>
        <td>
            @Html.DisplayFor(modelItem => item.LastName)
        </td>
        <td>
            @Html.DisplayFor(modelItem => item.FirstMidName)
        </td>
        <td>
            @Html.DisplayFor(modelItem => item.HireDate)
        </td>
        <td>
            @Html.DisplayFor(modelItem => item.OfficeAssignment.Location)
        </td>
        <td>
            @Ajax.ActionLink("Select","GetList","Courses", new { id = item.ID },ajaxOption)
            @Html.ActionLink("Edit", "Edit", new { id=item.ID }) |
            @Html.ActionLink("Details", "Details", new { id=item.ID }) |
            @Html.ActionLink("Delete", "Delete", new { id=item.ID })
        </td>
    </tr>
}
</table>
<div id="CourseList"></div>
最后为Courses控制器加一个GetList 这个Action: (返回的是一个GetList的部分视图)
        public ActionResult GetList(int? id)
        {
            var courses = db.Instructors.Where(i => i.ID == id.Value).Single().Courses;

            return PartialView(courses.ToList());
        }
为这个Action 新建视图: (勾选 Create as a partial view)
最后把这个View调整一下:
@model IEnumerable<EFTest.Models.Course>

<h3>Courses Taught by Selected Instructor</h3>
<table class="table">
    <tr>
        <th>Number</th>
        <th>
            @Html.DisplayNameFor(model => model.Department.Name)
        </th>
        <th>
            @Html.DisplayNameFor(model => model.Title)
        </th>
        <th>
            @Html.DisplayNameFor(model => model.Credits)
        </th>
    </tr>

@foreach (var item in Model) {
    <tr>
        <td>
            @Html.DisplayFor(modelItem => item.CourseID)
        </td>
        <td>
            @Html.DisplayFor(modelItem => item.Department.Name)
        </td>
        <td>
            @Html.DisplayFor(modelItem => item.Title)
        </td>
        <td>
            @Html.DisplayFor(modelItem => item.Credits)
        </td>
    </tr>
}

</table>
最后效果:
主页面没有刷新,点击Instructor行的右侧Select的时候会在下面显示其关联的Course (没有设置加载时的动画,所以第一次点击查询,操作会显得有些生硬)

-------------------------------------------
个性签名:独学而无友,则孤陋而寡闻。做一个灵魂有趣的人!
如果觉得这篇文章对你有小小的帮助的话,记得在右下角点个“推荐”哦,博主在此感谢!
万水千山总是情,打赏一分行不行,所以如果你心情还比较高兴,也是可以扫码打赏博主,哈哈哈(っ•̀ω•́)っ✎⁾⁾!


【推荐】国内首个AI IDE,深度理解中文开发场景,立即下载体验Trae
【推荐】编程新体验,更懂你的AI,立即体验豆包MarsCode编程助手
【推荐】抖音旗下AI助手豆包,你的智能百科全书,全免费不限次数
【推荐】轻量又高性能的 SSH 工具 IShell:AI 加持,快人一步
· .NET Core 中如何实现缓存的预热?
· 从 HTTP 原因短语缺失研究 HTTP/2 和 HTTP/3 的设计差异
· AI与.NET技术实操系列:向量存储与相似性搜索在 .NET 中的实现
· 基于Microsoft.Extensions.AI核心库实现RAG应用
· Linux系列:如何用heaptrack跟踪.NET程序的非托管内存泄露
· TypeScript + Deepseek 打造卜卦网站:技术与玄学的结合
· 阿里巴巴 QwQ-32B真的超越了 DeepSeek R-1吗?
· 【译】Visual Studio 中新的强大生产力特性
· 10年+ .NET Coder 心语 ── 封装的思维:从隐藏、稳定开始理解其本质意义
· 【设计模式】告别冗长if-else语句:使用策略模式优化代码结构