【ASP.NET Core分布式项目实战】(三)整理IdentityServer4 MVC授权、Consent功能实现
前言
由于之前的博客都是基于其他的博客进行开发,现在重新整理一下方便以后后期使用与学习
新建IdentityServer4服务端
服务端也就是提供服务,如QQ Weibo等。
新建项目解决方案AuthSample.
新建一个ASP.NET Core Web Application 项目MvcCookieAuthSample,选择模板Web 应用程序 不进行身份验证。
给网站设置默认地址 http://localhost:5000
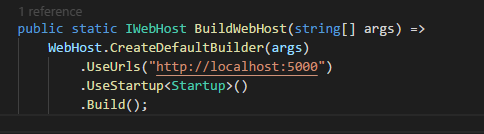
第一步:添加Nuget包:IdentityServer4
添加IdentityServer4 引用:
Install-Package IdentityServer4
第二步:添加Config.cs配置类
然后添加配置类Config.cs:


using System;
using System.Collections.Generic;
using System.Linq;
using System.Threading.Tasks;
using IdentityServer4;
using IdentityServer4.Models;
using IdentityServer4.Test;

namespace MvcCookieAuthSample
{
    public class Config
    {
        //所有可以访问的Resource
        public static IEnumerable<ApiResource> GetApiResources()
        {
            return new List<ApiResource>()
            {
                new ApiResource("api1","API Application")
            };
        }

        //客户端
        public static IEnumerable<Client> GetClients()
        {
            return new List<Client>
            {
                new Client{
                    ClientId="mvc",
                    AllowedGrantTypes=GrantTypes.Implicit,//模式:隐式模式
                    ClientSecrets={//私钥
                        new Secret("secret".Sha256())
                    },
                    AllowedScopes={//运行访问的资源
                        IdentityServerConstants.StandardScopes.Profile,
                        IdentityServerConstants.StandardScopes.OpenId,
                    },
                    RedirectUris={"http://localhost:5001/signin-oidc"},//跳转登录到的客户端的地址
                    PostLogoutRedirectUris={"http://localhost:5001/signout-callback-oidc"},//跳转登出到的客户端的地址
                    RequireConsent=false//是否需要用户点击确认进行跳转
                }
            };
        }

        //测试用户
        public static List<TestUser> GetTestUsers()
        {
            return new List<TestUser>
            {
                new TestUser{
                    SubjectId="10000",
                    Username="wyt",
                    Password="password"
                }
            };
        }

        //定义系统中的资源
        public static IEnumerable<IdentityResource> GetIdentityResources()
        {
            return new List<IdentityResource>
            {
                //这里实际是claims的返回资源
                new IdentityResources.OpenId(),
                new IdentityResources.Profile(),
                new IdentityResources.Email()
            };
        }

    }
}
第三步:添加Startup配置
引用命名空间:
using IdentityServer4;
然后打开Startup.cs 加入如下:
services.AddIdentityServer()
                .AddDeveloperSigningCredential()//添加开发人员签名凭据
                .AddInMemoryApiResources(Config.GetApiResources())//添加内存apiresource
                .AddInMemoryClients(Config.GetClients())//添加内存client
                .AddInMemoryIdentityResources(Config.GetIdentityResources())//添加系统中的资源
                .AddTestUsers(Config.GetTestUsers());//添加测试用户
public void Configure(IApplicationBuilder app, IHostingEnvironment env)
{
    ...
    app.UseIdentityServer();
    ...
}
注册登录实现
我们还需要新建一个ViewModels,在ViewModels中新建RegisterViewModel.cs和LoginViewModel.cs来接收表单提交的值以及来进行强类型视图
using System.ComponentModel.DataAnnotations;

namespace MvcCookieAuthSample.ViewModels
{
    public class RegisterViewModel
    {
        [Required]//必须的
        [DataType(DataType.EmailAddress)]//内容检查是否为邮箱
        public string Email { get; set; }

        [Required]//必须的
        [DataType(DataType.Password)]//内容检查是否为密码
        public string Password { get; set; }

        [Required]//必须的
        [DataType(DataType.Password)]//内容检查是否为密码
        public string ConfirmedPassword { get; set; }
    }
}
using System;
using System.Collections.Generic;
using System.ComponentModel.DataAnnotations;
using System.Linq;
using System.Threading.Tasks;

namespace MvcCookieAuthSample.ViewModels
{
    public class LoginViewModel
    {

        [Required]
        public string UserName { get; set; }

        [Required]//必须的
        [DataType(DataType.Password)]//内容检查是否为密码
        public string Password { get; set; }
    }
}
在Controllers文件夹下新建AdminController.cs
using System;
using System.Collections.Generic;
using System.Linq;
using System.Threading.Tasks;
using Microsoft.AspNetCore.Mvc;

namespace MvcCookieAuthSample.Controllers
{
    public class AdminController : Controller
    {
        public IActionResult Index()
        {
            return View();
        }
    }
}
在Views文件夹下新建Admin文件夹,并在Admin文件夹下新建Index.cshtml
@{
    ViewData["Title"] = "Admin";
}
<h2>@ViewData["Title"]</h2>

<p>Admin Page</p>
在Controllers文件夹下新建AccountController.cs
using System;
using System.Collections.Generic;
using System.Linq;
using System.Threading.Tasks;
using Microsoft.AspNetCore.Mvc;
using IdentityServer4.Test;
using Microsoft.AspNetCore.Identity;
using MvcCookieAuthSample.ViewModels;
using Microsoft.AspNetCore.Authentication;

namespace MvcCookieAuthSample.Controllers
{
    public class AccountController : Controller
    {
        private readonly TestUserStore _users;
        public AccountController(TestUserStore users)
        {
            _users = users;
        }

        //内部跳转
        private IActionResult RedirectToLocal(string returnUrl)
        {
            if (Url.IsLocalUrl(returnUrl))
            {//如果是本地
                return Redirect(returnUrl);
            }

            return RedirectToAction(nameof(HomeController.Index), "Home");
        }

        //添加验证错误
        private void AddError(IdentityResult result)
        {
            //遍历所有的验证错误
            foreach (var error in result.Errors)
            {
                //返回error到model
                ModelState.AddModelError(string.Empty, error.Description);
            }
        }

        public IActionResult Register(string returnUrl = null)
        {
            ViewData["returnUrl"] = returnUrl;
            return View();
        }

        [HttpPost]
        public async Task<IActionResult> Register(RegisterViewModel registerViewModel, string returnUrl = null)
        {
            return View();
        }

        public IActionResult Login(string returnUrl = null)
        {
            ViewData["returnUrl"] = returnUrl;
            return View();
        }

        [HttpPost]
        public async Task<IActionResult> Login(LoginViewModel loginViewModel, string returnUrl = null)
        {
            if (ModelState.IsValid)
            {
                ViewData["returnUrl"] = returnUrl;
                var user = _users.FindByUsername(loginViewModel.UserName);

                if (user==null)
                {
                    ModelState.AddModelError(nameof(loginViewModel.UserName), "UserName not exists");
                }
                else
                {
                    if (_users.ValidateCredentials(loginViewModel.UserName,loginViewModel.Password))
                    {
                        //是否记住
                        var prop = new AuthenticationProperties
                        {
                            IsPersistent = true,
                            ExpiresUtc = DateTimeOffset.UtcNow.Add(TimeSpan.FromMinutes(30))
                        };

                        await Microsoft.AspNetCore.Http.AuthenticationManagerExtensions.SignInAsync(HttpContext, user.SubjectId, user.Username, prop);
                    }
                }

                return RedirectToLocal(returnUrl);
            }

            return View();
        }

        public async Task<IActionResult> Logout()
        {
            await HttpContext.SignOutAsync();
            return RedirectToAction("Index", "Home");
        }
    }
}
然后在Views文件夹下新增Account文件夹并新增Register.cshtml与Login.cshtml视图
@{
    ViewData["Title"] = "Register";
}

@using MvcCookieAuthSample.ViewModels;
@model RegisterViewModel;

<h2>@ViewData["Title"]</h2>
<h3>@ViewData["Message"]</h3>

<div class="row">
    <div class="col-md-4">
        @* 这里将asp-route-returnUrl="@ViewData["returnUrl"],就可以在进行register的post请求的时候接收到returnUrl *@
        <form method="post" asp-route-returnUrl="@ViewData["returnUrl"]">
            <h4>Create a new account.</h4>
            <hr />

           @*统一显示错误信息*@
            <div class="text-danger" asp-validation-summary="All"></div>

            <div class="form-group">
                <label asp-for="Email"></label>
                <input asp-for="Email" class="form-control" />
                <span asp-validation-for="Email" class="text-danger"></span>
            </div>
            <div class="form-group">
                <label asp-for="Password"></label>
                <input asp-for="Password" class="form-control" />
                <span asp-validation-for="Password" class="text-danger"></span>
            </div>
            <div class="form-group">
                <label asp-for="ConfirmedPassword"></label>
                <input asp-for="ConfirmedPassword" class="form-control" />
                <span asp-validation-for="ConfirmedPassword" class="text-danger"></span>
            </div>
            <button type="submit" class="btn btn-default">Register</button>
        </form>
    </div>
</div>
@{
    ViewData["Title"] = "Login";
}

@using MvcCookieAuthSample.ViewModels;
@model LoginViewModel;

<div class="row">
    <div class="col-md-4">
        <section>
            <form method="post" asp-controller="Account" asp-action="Login"  asp-route-returnUrl="@ViewData["returnUrl"]">
                <h4>Use a local account to log in.</h4>
                <hr />

                 @*统一显示错误信息*@
                <div class="text-danger" asp-validation-summary="All"></div>

                <div class="form-group">
                    <label asp-for="UserName"></label>
                    <input asp-for="UserName" class="form-control" />
                    <span asp-validation-for="UserName" class="text-danger"></span>
                </div>

                <div class="form-group">
                    <label asp-for="Password"></label>
                    <input asp-for="Password" type="password" class="form-control" />
                    <span asp-validation-for="Password" class="text-danger"></span>
                </div>

                <div class="form-group">
                    <button type="submit" class="btn btn-default">Log in</button>
                </div>

            </form>
        </section>
    </div>
</div>

@section Scripts
    {
    @await Html.PartialAsync("_ValidationScriptsPartial")
}
我们接下来要修改_Layout.cshtml视图页面判断注册/登陆按钮是否应该隐藏

完整的_Layout.cshtml代码:
<!DOCTYPE html>
<html>
<head>
<meta charset="utf-8" />
<meta name="viewport" content="width=device-width, initial-scale=1.0" />
<title>@ViewData["Title"] - MvcCookieAuthSample</title>
<environment include="Development">
<link rel="stylesheet" href="~/lib/bootstrap/dist/css/bootstrap.css" />
<link rel="stylesheet" href="~/css/site.css" />
</environment>
<environment exclude="Development">
<link rel="stylesheet" href="https://ajax.aspnetcdn.com/ajax/bootstrap/3.3.7/css/bootstrap.min.css"
asp-fallback-href="~/lib/bootstrap/dist/css/bootstrap.min.css"
asp-fallback-test-class="sr-only" asp-fallback-test-property="position" asp-fallback-test-value="absolute" />
<link rel="stylesheet" href="~/css/site.min.css" asp-append-version="true" />
</environment>
</head>
<body>
<nav class="navbar navbar-inverse navbar-fixed-top">
<div class="container">
<div class="navbar-header">
<button type="button" class="navbar-toggle" data-toggle="collapse" data-target=".navbar-collapse">
<span class="sr-only">Toggle navigation</span>
<span class="icon-bar"></span>
<span class="icon-bar"></span>
<span class="icon-bar"></span>
</button>
<a asp-area="" asp-controller="Home" asp-action="Index" class="navbar-brand">MvcCookieAuthSample</a>
</div>
<div class="navbar-collapse collapse">
<ul class="nav navbar-nav">
<li><a asp-area="" asp-controller="Home" asp-action="Index">Home</a></li>
<li><a asp-area="" asp-controller="Home" asp-action="About">About</a></li>
<li><a asp-area="" asp-controller="Home" asp-action="Contact">Contact</a></li>
</ul>
@if (User.Identity.IsAuthenticated)
{
<form asp-action="Logout" asp-controller="Account" method="post">
<ul class="nav navbar-nav navbar-right">
<li>
<a title="Welcome" asp-controller="Admin" asp-action="Index">@User.Identity.Name</a>
</li>
<li>
<button type="submit" class="btn btn-link navbar-btn navbar-link">Log out</button>
</li>
</ul>
</form>
}
else
{
<ul class="nav navbar-nav navbar-right">
<li><a asp-area="" asp-controller="Account" asp-action="Register">Register</a></li>
<li><a asp-area="" asp-controller="Account" asp-action="Login">Log in</a></li>
</ul>
}
</div>
</div>
</nav>
<div class="container body-content">
@RenderBody()
<hr />
<footer>
<p>© 2018 - MvcCookieAuthSample</p>
</footer>
</div>
<environment include="Development">
<script src="~/lib/jquery/dist/jquery.js"></script>
<script src="~/lib/bootstrap/dist/js/bootstrap.js"></script>
<script src="~/js/site.js" asp-append-version="true"></script>
</environment>
<environment exclude="Development">
<script src="https://ajax.aspnetcdn.com/ajax/jquery/jquery-2.2.0.min.js"
asp-fallback-src="~/lib/jquery/dist/jquery.min.js"
asp-fallback-test="window.jQuery"
crossorigin="anonymous"
integrity="sha384-K+ctZQ+LL8q6tP7I94W+qzQsfRV2a+AfHIi9k8z8l9ggpc8X+Ytst4yBo/hH+8Fk">
</script>
<script src="https://ajax.aspnetcdn.com/ajax/bootstrap/3.3.7/bootstrap.min.js"
asp-fallback-src="~/lib/bootstrap/dist/js/bootstrap.min.js"
asp-fallback-test="window.jQuery && window.jQuery.fn && window.jQuery.fn.modal"
crossorigin="anonymous"
integrity="sha384-Tc5IQib027qvyjSMfHjOMaLkfuWVxZxUPnCJA7l2mCWNIpG9mGCD8wGNIcPD7Txa">
</script>
<script src="~/js/site.min.js" asp-append-version="true"></script>
</environment>
@RenderSection("Scripts", required: false)
</body>
</html>
最后给AdminController加上 [Authorize] 特性标签即可
然后我们就可以运行网站,输入用户名和密码进行登录了
新建客户端
新建一个MVC网站MvcClient
dotnet new mvc --name MvcClient
给网站设置默认地址 http://localhost:5001

MVC的网站已经内置帮我们实现了Identity,所以我们不需要再额外添加Identity引用
添加认证
services.AddAuthentication(options =>
{
    options.DefaultScheme = "Cookies";//使用Cookies认证
    options.DefaultChallengeScheme = "oidc";//使用oidc
})
.AddCookie("Cookies")//配置Cookies认证
.AddOpenIdConnect("oidc",options=> {//配置oidc
    options.SignInScheme = "Cookies";
    options.Authority = "http://localhost:5000";
    options.RequireHttpsMetadata = false;

    options.ClientId = "mvc";
    options.ClientSecret = "secret";
    options.SaveTokens = true;
});
在管道中使用Authentication
app.UseAuthentication();
接下来我们在HomeController上打上 [Authorize] 标签,然后启动运行
我们这个时候访问首页http://localhost:5001会自动跳转到ocalhost:5000/account/login登录

登录之后会自动跳转回来

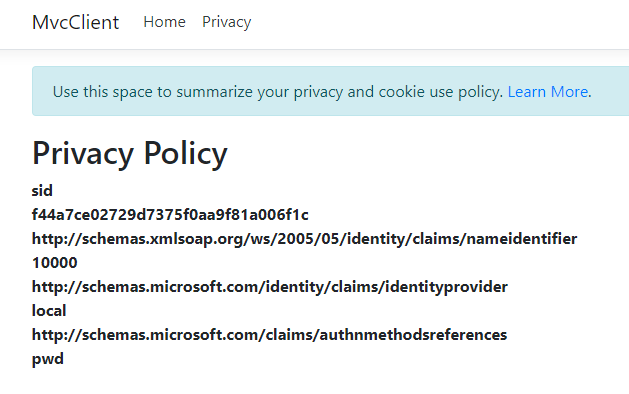
我们可以在Home/About页面将claim的信息显示出来
@{
    ViewData["Title"] = "About";
}
<h2>@ViewData["Title"]</h2>
<h3>@ViewData["Message"]</h3>

<dl>
    @foreach (var claim in User.Claims)
    {
        <dt>@claim.Type</dt>
        <dt>@claim.Value</dt>
    }
</dl>
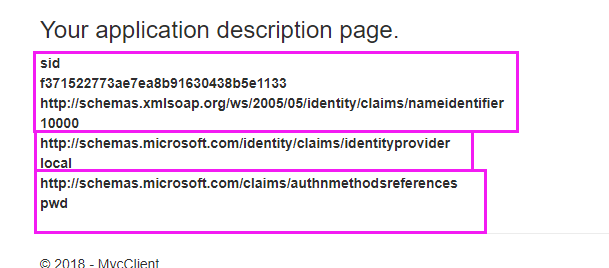
这边的内容是根据我们在IdentityServer服务中定义的返回资源决定的

Consent功能实现
首先在ViewModels文件夹下创建两个视图模型
ScopeViewModel.cs
using System;
using System.Collections.Generic;
using System.Linq;
using System.Threading.Tasks;

namespace MvcCookieAuthSample.ViewModels
{
    //领域
    public class ScopeViewModel
    {
        public string Name { get; set; }
        public string DisplayName { get; set; }
        public string Description { get; set; }
        public bool Emphasize { get; set; }
        public bool Required { get; set; }
        public bool Checked { get; set; }
    }
}
ConsentViewModel.cs
using System;
using System.Collections.Generic;
using System.Linq;
using System.Threading.Tasks;

namespace MvcCookieAuthSample.ViewModels
{
    public class ConsentViewModel
    {
        public string ClientId { get; set; }
        public string ClientName { get; set; }
        public string ClientUrl { get; set; }
        public string ClientLogoUrl { get; set; }
        public bool AllowRememberConsent { get; set; }

        public IEnumerable<ScopeViewModel> IdentityScopes { get; set; }
        public IEnumerable<ScopeViewModel> ResourceScopes { get; set; }
    }
}
我们在MvcCookieAuthSample项目中添加新控制器ConsentController
using System;
using System.Collections.Generic;
using System.Linq;
using System.Threading.Tasks;
using Microsoft.AspNetCore.Mvc;
using MvcCookieAuthSample.ViewModels;
using IdentityServer4.Models;
using IdentityServer4.Services;
using IdentityServer4.Stores;

namespace MvcCookieAuthSample.Controllers
{
    public class ConsentController : Controller
    {
        private readonly IClientStore _clientStore;
        private readonly IResourceStore _resourceStore;
        private readonly IIdentityServerInteractionService _identityServerInteractionService;

        public ConsentController(IClientStore clientStore, IResourceStore resourceStore, IIdentityServerInteractionService identityServerInteractionService)
        {
            _clientStore = clientStore;
            _resourceStore = resourceStore;
            _identityServerInteractionService = identityServerInteractionService;
        }

        private async Task<ConsentViewModel> BuildConsentViewModel(string returnUrl)
        {
            var request =await _identityServerInteractionService.GetAuthorizationContextAsync(returnUrl);
            if (request == null)
                return null;

            var client =await  _clientStore.FindEnabledClientByIdAsync(request.ClientId);
            var resources =await _resourceStore.FindEnabledResourcesByScopeAsync(request.ScopesRequested);

            return CreateConsentViewModel(request, client, resources);
        }

        private ConsentViewModel CreateConsentViewModel(AuthorizationRequest request,Client client,Resources resources)
        {
            var vm = new ConsentViewModel();
            vm.ClientName = client.ClientName;
            vm.ClientLogoUrl = client.LogoUri;
            vm.ClientUrl = client.ClientUri;
            vm.AllowRememberConsent = client.AllowRememberConsent;

            vm.IdentityScopes = resources.IdentityResources.Select(i => CreateScopeViewModel(i));
            vm.ResourceScopes = resources.ApiResources.SelectMany(i =>i.Scopes).Select(i=>CreateScopeViewModel(i));

            return vm;
        }

        private ScopeViewModel CreateScopeViewModel(IdentityResource identityResource)
        {
            return new ScopeViewModel
            {
                Name = identityResource.Name,
                DisplayName = identityResource.DisplayName,
                Description = identityResource.Description,
                Required = identityResource.Required,
                Checked = identityResource.Required,
                Emphasize = identityResource.Emphasize
            };
        }

        private ScopeViewModel CreateScopeViewModel(Scope scope)
        {
            return new ScopeViewModel
            {
                Name = scope.Name,
                DisplayName = scope.DisplayName,
                Description = scope.Description,
                Required = scope.Required,
                Checked = scope.Required,
                Emphasize = scope.Emphasize
            };
        }

       [HttpGet]
        public async Task<IActionResult> Index(string returnUrl)
        {
            var model =await BuildConsentViewModel(returnUrl);
            if (model==null)
            {

            }
            return View(model);
        }
    }
}
然后新建Idenx.cshtml视图和_ScopeListitem.cshtml分部视图
_ScopeListitem.cshtml
@using MvcCookieAuthSample.ViewModels;
@model ScopeViewModel

<li>
    <label>
        <input type="checkbox" name="ScopesConsented" id="scopes_@Model.Name" value="@Model.Name" checked="@Model.Checked" disabled="@Model.Required"/>

        <strong>@Model.Name</strong>
        @if (Model.Emphasize)
        {
            <span class="glyphicon glyphicon-exclamation-sign"></span>
        }
    </label>
    @if (string.IsNullOrWhiteSpace(Model.Description))
    {
        <div>
            <label for="scopes_@Model.Name">@Model.Description</label>
        </div>
    }
</li>
Idenx.cshtml
@using MvcCookieAuthSample.ViewModels;
@model ConsentViewModel
<p>Consent Page</p>
<!--Client Info-->
<div class="row page-header">
    <div class="col-sm-10">
        @if (!string.IsNullOrWhiteSpace(Model.ClientLogoUrl))
        {
            <div><img src="@Model.ClientLogoUrl" /></div>
        }

        <h1>
            @Model.ClientName
            <small>希望使用你的账户</small>
        </h1>
    </div>
</div>

<!--Scope Info-->
<div class="row">
    <div class="col-sm-8">
        <form asp-action="Index">
            @if (Model.IdentityScopes.Any())
            {
                <div>
                    <div class="panel-heading">
                        <span class="glyphicon glyphicon-user"></span>
                        用户信息
                    </div>
                    <ul class="list-group">
                        @foreach (var scope in Model.IdentityScopes)
                        {
                            @Html.Partial("_ScopeListitem",scope)
                        }
                    </ul>
                </div>
            }
            @if (Model.ResourceScopes.Any())
            {
                <div>
                    <div class="panel-heading">
                        <span class="glyphicon glyphicon-tasks"></span>
                        应用权限
                    </div>
                    <ul class="list-group">
                        @foreach (var scope in Model.ResourceScopes)
                        {
                            @Html.Partial("_ScopeListitem",scope)
                        }
                    </ul>
                </div>
            }
        </form>
    </div>
</div>
最后我们修改Config.cs,增加一些信息
using System;
using System.Collections.Generic;
using System.Linq;
using System.Threading.Tasks;
using IdentityServer4;
using IdentityServer4.Models;
using IdentityServer4.Test;

namespace MvcCookieAuthSample
{
    public class Config
    {
        //所有可以访问的Resource
        public static IEnumerable<ApiResource> GetApiResources()
        {
            return new List<ApiResource>()
            {
                new ApiResource("api1","API Application")
            };
        }

        //客户端
        public static IEnumerable<Client> GetClients()
        {
            return new List<Client>
            {
                new Client{
                    ClientId="mvc",
                    AllowedGrantTypes=GrantTypes.Implicit,//模式:隐式模式
                    ClientSecrets={//私钥
                        new Secret("secret".Sha256())
                    },
                    AllowedScopes={//运行访问的资源
                        IdentityServerConstants.StandardScopes.Profile,
                        IdentityServerConstants.StandardScopes.OpenId,
                        IdentityServerConstants.StandardScopes.Email,
                    },
                    RedirectUris={"http://localhost:5001/signin-oidc"},//跳转登录到的客户端的地址
                    PostLogoutRedirectUris={"http://localhost:5001/signout-callback-oidc"},//跳转登出到的客户端的地址
                    RequireConsent=true,//是否需要用户点击确认进行跳转,改为点击确认后进行跳转

                    ClientName="MVC Clent",
                    ClientUri="http://localhost:5001",
                    LogoUri="https://chocolatey.org/content/packageimages/aspnetcore-runtimepackagestore.2.0.0.png",
                    AllowRememberConsent=true,
                }
            };
        }

        //测试用户
        public static List<TestUser> GetTestUsers()
        {
            return new List<TestUser>
            {
                new TestUser{
                    SubjectId="10000",
                    Username="wyt",
                    Password="password",

                }
            };
        }

        //定义系统中的资源
        public static IEnumerable<IdentityResource> GetIdentityResources()
        {
            return new List<IdentityResource>
            {
                //这里实际是claims的返回资源
                new IdentityResources.OpenId(),
                new IdentityResources.Profile(),
                new IdentityResources.Email()
            };
        }

    }
}
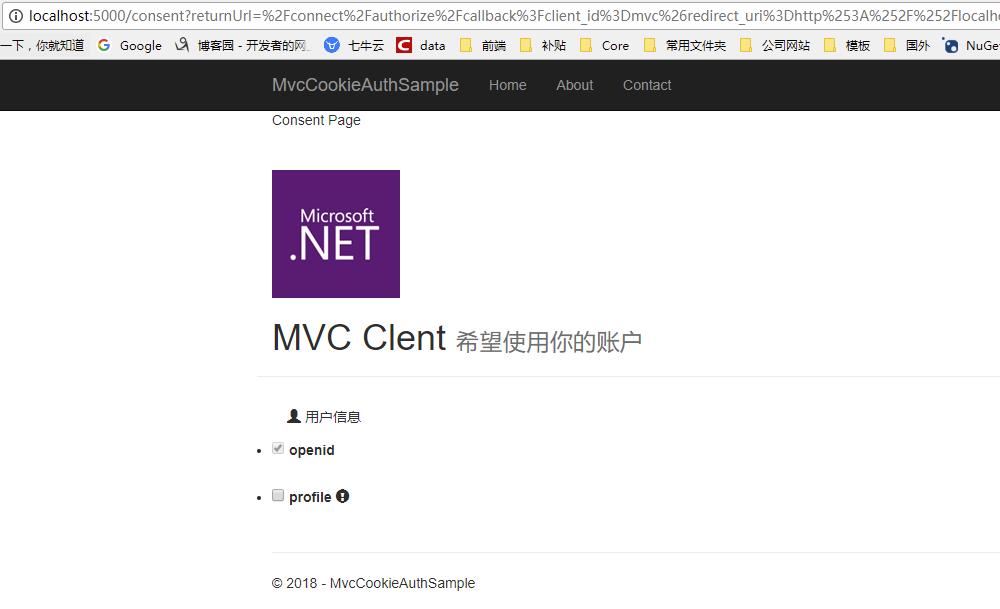
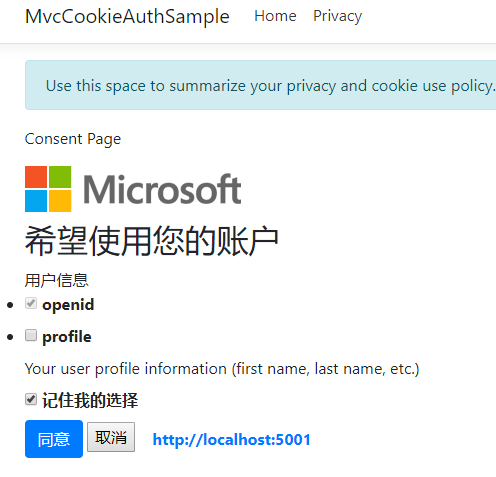
我们这个时候访问首页http://localhost:5001会自动跳转到ocalhost:5000/account/login登录
登录之后会自动跳转到登录确认页面
Consent 确认逻辑实现
首先我们在 ViewModels 文件夹中增加一个类 InputConsentViewModel.cs 用于接收 Consent/Index.cshtml 提交的表单信息
public class InputConsentViewModel
{
    /// <summary>
    /// 按钮
    /// </summary>
    public string Button { get; set; }
    /// <summary>
    /// 接收到的勾选的Scope
    /// </summary>
    public IEnumerable<string> ScopesConsented { get; set; }
    /// <summary>
    /// 是否选择记住
    /// </summary>
    public bool RememberConsent { get; set; }
    /// <summary>
    /// 跳转地址
    /// </summary>
    public string ReturnUrl { get; set; }
}
然后修改 ConsentViewModel.cs ,加入ReturnUrl
public class ConsentViewModel
{
    public string ClientId { get; set; }
    public string ClientName { get; set; }
    public string ClientUrl { get; set; }
    public string ClientLogoUrl { get; set; }
    public bool AllowRememberConsent { get; set; }

    public IEnumerable<ScopeViewModel> IdentityScopes { get; set; }
    public IEnumerable<ScopeViewModel> ResourceScopes { get; set; }

    public string ReturnUrl { get; set; }
}
然后修改 Consent\Index.cshtml ,加入ReturnUrl
然后修改 Controllers\ConsentController.cs 中的 BuildConsentViewModel 方法
private async Task<ConsentViewModel> BuildConsentViewModel(string returnUrl)
{
    AuthorizationRequest request = await _identityServerInteractionService.GetAuthorizationContextAsync(returnUrl);
    if (request == null)
    {
        return null;
    }

    Client client = await _clientStore.FindEnabledClientByIdAsync(request.ClientId);
    Resources resources = await _resourceStore.FindEnabledResourcesByScopeAsync(request.ScopesRequested);

    var vm= CreateConsentViewModel(request, client, resources);
    vm.ReturnUrl = returnUrl;
    return vm;
}
然后在 Controllers\ConsentController.cs 中添加action
[HttpPost]
public async Task<IActionResult> Index(InputConsentViewModel viewModel)
{
    ConsentResponse consentResponse=null;
    if (viewModel.Button == "no")
    {
        consentResponse= ConsentResponse.Denied;
    }
    else if (viewModel.Button == "yes")
    {
        if (viewModel.ScopesConsented!=null&&viewModel.ScopesConsented.Any())
        {
            consentResponse = new ConsentResponse()
            {
                RememberConsent = viewModel.RememberConsent,
                ScopesConsented = viewModel.ScopesConsented
            };
        }
    }

    if ( consentResponse!=null)
    {
        var request =await _identityServerInteractionService.GetAuthorizationContextAsync(viewModel.ReturnUrl);
        await _identityServerInteractionService.GrantConsentAsync(request, consentResponse);
        return Redirect(viewModel.ReturnUrl);
    }

    var model = await BuildConsentViewModel(viewModel.ReturnUrl);
    if (model == null)
    {

    }

    return View(model);
}
然后将 ViewModels\ConsentViewModel.cs 中 ConsentViewModel 的 AllowRememberConsent 改为 RememberConsent ,这样才能与 ViewModels\InputConsentViewModel.cs 保持一致
public class ConsentViewModel:InputConsentViewModel
{
    public string ClientId { get; set; }
    public string ClientName { get; set; }
    public string ClientUrl { get; set; }
    public string ClientLogoUrl { get; set; }
    //public bool RememberConsent { get; set; }
    public IEnumerable<ScopeViewModel> IdentityScopes { get; set; }
    public IEnumerable<ScopeViewModel> ResourceScopes { get; set; }
    //public string ReturnUrl { get; set; }
}
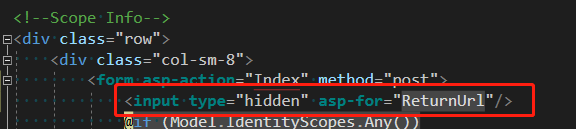
最后修改视图 Consent\Index.cshtml ,加入记住选项和确认按钮
@using MvcCookieAuthSample.ViewModels;
@model ConsentViewModel
<p>Consent Page</p>
<!--Client Info-->
<div class="row page-header">
    <div class="col-sm-10">
        @if (!string.IsNullOrWhiteSpace(Model.ClientLogoUrl))
        {
            <div><img src="@Model.ClientLogoUrl" /></div>
        }

        <h1>
            @Model.ClientId
            <small>希望使用您的账户</small>
        </h1>
    </div>
</div>

<!--Scope Info-->
<div class="row">
    <div class="col-sm-8">
        <form asp-action="Index" method="post">
            <input type="hidden" asp-for="ReturnUrl"/>
            @if (Model.IdentityScopes.Any())
            {
                <div>
                    <div class="panel-heading">
                        <span class="glyphicon glyphicon-user"></span>
                        用户信息
                    </div>
                    <ul class="list-group">
                        @foreach (var scope in Model.IdentityScopes)
                        {
                            @Html.Partial("_ScopeListitem", scope)
                        }
                    </ul>
                </div>
            }
            @if (Model.ResourceScopes.Any())
            {
                <div>
                    <div class="panel-heading">
                        <span class="glyphicon glyphicon-tasks"></span>
                        应用权限
                    </div>
                    <ul class="list-group">
                        @foreach (var scope in Model.ResourceScopes)
                        {
                            @Html.Partial("_ScopeListitem", scope)
                        }
                    </ul>
                </div>
            }

            <div>
                <label>
                    <input type="checkbox" asp-for="RememberConsent"/>
                    <strong>记住我的选择</strong>
                </label>
            </div>

            <div>
                <button name="button" value="yes" class="btn btn-primary" autofocus>同意</button>
                <button name="button" value="no" >取消</button>
                @if (!string.IsNullOrEmpty(Model.ClientUrl))
                {
                    <a href="@Model.ClientUrl" class="pull-right btn btn-default">
                        <span class="glyphicon glyphicon-info-sign"></span>
                        <strong>@Model.ClientUrl</strong>
                    </a>
                }
            </div>
        </form>
    </div>
</div>
修改视图 Views\Consent\_ScopeListitem.cshtml
@using MvcCookieAuthSample.ViewModels;
@model ScopeViewModel

<li>
    <label>
        <input type="checkbox" name="ScopesConsented" id="scopes_@Model.Name" value="@Model.Name" checked="@Model.Checked" disabled="@Model.Required"/>
        @if (Model.Required)
        {
            <input type="hidden" name="ScopesConsented" value="@Model.Name"/>
        }

        <strong>@Model.Name</strong>
        @if (Model.Emphasize)
        {
            <span class="glyphicon glyphicon-exclamation-sign"></span>
        }
    </label>

    @if (!string.IsNullOrWhiteSpace(Model.Description))
    {
        <div>
            <label for="scopes_@Model.Name">@Model.Description</label>
        </div>
    }

</li>
运行效果
Asp.Net Core2.2源码:链接: https://pan.baidu.com/s/1pndxJwqpTsHmNmfQsQ0_2w 提取码: jxwd
Consent 代码重构
新建 Services 文件夹,添加 ConsentService.cs 用于业务封装
public class ConsentService
    {
        private readonly IClientStore _clientStore;
        private readonly IResourceStore _resourceStore;
        private readonly IIdentityServerInteractionService _identityServerInteractionService;

        public ConsentService(IClientStore clientStore
            , IResourceStore resourceStore
            , IIdentityServerInteractionService identityServerInteractionService)
        {
            _clientStore = clientStore;
            _resourceStore = resourceStore;
            _identityServerInteractionService = identityServerInteractionService;
        }

        public async Task<ConsentViewModel> BuildConsentViewModel(string returnUrl,InputConsentViewModel model=null)
        {
            AuthorizationRequest request = await _identityServerInteractionService.GetAuthorizationContextAsync(returnUrl);
            if (request == null)
            {
                return null;
            }

            Client client = await _clientStore.FindEnabledClientByIdAsync(request.ClientId);
            Resources resources = await _resourceStore.FindEnabledResourcesByScopeAsync(request.ScopesRequested);

            var vm = CreateConsentViewModel(request, client, resources,model);
            vm.ReturnUrl = returnUrl;
            return vm;
        }

        public async Task<ProcessConsentResult> ProcessConsent(InputConsentViewModel model)
        {
            ConsentResponse consentResponse = null;
            var result=new ProcessConsentResult();
            if (model.Button == "no")
            {
                consentResponse = ConsentResponse.Denied;
            }
            else if (model.Button == "yes")
            {
                if (model.ScopesConsented != null && model.ScopesConsented.Any())
                {
                    consentResponse = new ConsentResponse()
                    {
                        RememberConsent = model.RememberConsent,
                        ScopesConsented = model.ScopesConsented
                    };
                }
                else
                {
                    result.ValidationError = "请至少选择一个权限";
                }
            }

            if (consentResponse != null)
            {
                var request = await _identityServerInteractionService.GetAuthorizationContextAsync(model.ReturnUrl);
                await _identityServerInteractionService.GrantConsentAsync(request, consentResponse);
                result.RedirectUrl = model.ReturnUrl;
            }
            else
            {
                ConsentViewModel consentViewModel = await BuildConsentViewModel(model.ReturnUrl,model);
                result.ViewModel = consentViewModel;
            }

            return result;
        }

        #region Private Methods

        private ConsentViewModel CreateConsentViewModel(AuthorizationRequest request, Client client,
            Resources resources,InputConsentViewModel model)
        {
            var rememberConsent = model?.RememberConsent ?? true;
            var selectedScopes = model?.ScopesConsented ?? Enumerable.Empty<string>();

            var vm = new ConsentViewModel();
            vm.ClientName = client.ClientName;
            vm.ClientLogoUrl = client.LogoUri;
            vm.ClientUrl = client.ClientUri;
            vm.RememberConsent = rememberConsent;

            vm.IdentityScopes = resources.IdentityResources.Select(i => CreateScopeViewModel(i,selectedScopes.Contains(i.Name)||model==null));
            vm.ResourceScopes = resources.ApiResources.SelectMany(i => i.Scopes).Select(i => CreateScopeViewModel(i, selectedScopes.Contains(i.Name)||model==null));

            return vm;
        }

        private ScopeViewModel CreateScopeViewModel(IdentityResource identityResource,bool check)
        {
            return new ScopeViewModel()
            {
                Name = identityResource.Name,
                DisplayName = identityResource.DisplayName,
                Description = identityResource.Description,
                Required = identityResource.Required,
                Checked = check|| identityResource.Required,
                Emphasize = identityResource.Emphasize
            };
        }

        private ScopeViewModel CreateScopeViewModel(Scope scope, bool check)
        {
            return new ScopeViewModel()
            {
                Name = scope.Name,
                DisplayName = scope.DisplayName,
                Description = scope.Description,
                Required = scope.Required,
                Checked = check||scope.Required,
                Emphasize = scope.Emphasize
            };
        }
        #endregion
    }
Asp.Net Core2.2源码(重构):链接: https://pan.baidu.com/s/1mVdPDfDiDVToLSV9quC5KQ 提取码: 3dsq
集成ASP.NETCore Identity
EF实现
首先我们添加一个Data文件夹
我们首先在Models文件夹下面新建ApplicationUser.cs与ApplicationUserRole.cs
ApplicationUser.cs代码:
using Microsoft.AspNetCore.Identity;

namespace MvcCookieAuthSample.Models
{
    public class ApplicationUser:IdentityUser<int>//不加int的话是默认主键为guid
    {
    }
}
ApplicationUserRole.cs代码:
using Microsoft.AspNetCore.Identity;

namespace MvcCookieAuthSample.Models
{
    public class ApplicationUserRole: IdentityRole<int>//不加int的话是默认主键为guid
    {
    }
}
然后在Data文件夹下新建一个ApplicationDbContext.cs类,使它继承IdentityDbContext
using Microsoft.AspNetCore.Identity.EntityFrameworkCore;
using Microsoft.EntityFrameworkCore;
using MvcCookieAuthSample.Models;

namespace MvcCookieAuthSample.Data
{
    public class ApplicationDbContext:IdentityDbContext<ApplicationUser, ApplicationUserRole,int>
    {
        public ApplicationDbContext(DbContextOptions<ApplicationDbContext> options):base(options)
        {

        }
    }
}
然后我们需要在Startup.cs添加EF的注册进来
//使用配置ApplicationDbContext使用sqlserver数据库,并配置数据库连接字符串
services.AddDbContext<ApplicationDbContext>(options=> {
    options.UseSqlServer(Configuration.GetConnectionString("DefaultConnection"));
});
然后我们需要在appsettings.json中配置数据库连接字符串
"ConnectionStrings": {
  "DefaultConnection": "Server=127.0.0.1;Database=aspnet-IdentitySample;Trusted_Connection=True;MultipleActiveResultSets=true;uid=sa;pwd=123456"
}
EF实现结束
Identity实现
我们需要在Startup.cs添加Identity的注册进来
//配置Identity
services.AddIdentity<ApplicationUser, ApplicationUserRole>()
    .AddEntityFrameworkStores<ApplicationDbContext>()
    .AddDefaultTokenProviders();
由于默认的Identity在密码上限制比较严格,我们把它改的宽松简单一点(不设置也行)
//修改Identity密码强度设置配置
services.Configure<IdentityOptions>(options =>
{
    options.Password.RequireLowercase = false; //需要小写
    options.Password.RequireNonAlphanumeric = false; //需要字母
    options.Password.RequireUppercase = false; //需要大写
});
然后我们要修改 IdentityServer 的配置,首先要添加Nuget包
IdentityServer4.AspNetIdentity
services.AddIdentityServer()
    .AddDeveloperSigningCredential()//添加开发人员签名凭据
    .AddInMemoryApiResources(Config.GetApiResources())//添加内存apiresource
    .AddInMemoryClients(Config.GetClients())//添加内存client
    .AddInMemoryIdentityResources(Config.GetIdentityResources())//添加系统中的资源
    //.AddTestUsers(Config.GetTestUsers())//添加测试用户(这里不需要测试用户了)
    .AddAspNetIdentity<ApplicationUser>();
然后我们修改AccountController,修改代码,替换掉TestUsers的功能
private readonly UserManager<ApplicationUser> _userManager;//创建用户的
private readonly SignInManager<ApplicationUser> _signInManager;//用来登录的
private readonly IIdentityServerInteractionService _interaction;
//依赖注入
public AccountController(UserManager<ApplicationUser> userManager
    , SignInManager<ApplicationUser> signInManager
    , IIdentityServerInteractionService interaction)
{
    _userManager = userManager;
    _signInManager = signInManager;
    _interaction = interaction;
}
完整的AccountController
using System;
using System.Collections.Generic;
using System.Linq;
using System.Threading.Tasks;
using IdentityServer4.Services;
using IdentityServer4.Test;
using Microsoft.AspNetCore.Authentication;
using Microsoft.AspNetCore.Identity;
using Microsoft.AspNetCore.Mvc;
using MvcCookieAuthSample.Models;
using MvcCookieAuthSample.ViewModels;

namespace MvcCookieAuthSample.Controllers
{
    public class AccountController : Controller
    {
        //private TestUserStore _users;

        //public AccountController(TestUserStore users)
        //{
        //    _users = users;
        //}

        private readonly UserManager<ApplicationUser> _userManager;//创建用户的
        private readonly SignInManager<ApplicationUser> _signInManager;//用来登录的
        private readonly IIdentityServerInteractionService _interaction;
        //依赖注入
        public AccountController(UserManager<ApplicationUser> userManager
            , SignInManager<ApplicationUser> signInManager
            , IIdentityServerInteractionService interaction)
        {
            _userManager = userManager;
            _signInManager = signInManager;
            _interaction = interaction;
        }

        public IActionResult Register(string returnUrl = null)
        {
            ViewData["returnUrl"] = returnUrl;
            return View();
        }

        [HttpPost]
        public async Task<IActionResult> Register(RegisterViewModel registerViewModel, string returnUrl = null)
        {
            var identityUser = new ApplicationUser
            {
                Email = registerViewModel.Email,
                UserName = registerViewModel.Email,
                NormalizedUserName = registerViewModel.Email
            };
            var identityResult = await _userManager.CreateAsync(identityUser, registerViewModel.Password);
            if (identityResult.Succeeded)
            {
                return RedirectToAction("Index", "Home");
            }
            return View();
        }

        public IActionResult Login(string returnUrl = null)
        {
            ViewData["returnUrl"] = returnUrl;
            return View();
        }

        [HttpPost]
        public async Task<IActionResult> Login(LoginViewModel loginViewModel, string returnUrl = null)
        {
            if (ModelState.IsValid)
            {
                ViewData["returnUrl"] = returnUrl;
                var user =await _userManager.FindByEmailAsync(loginViewModel.Email);
                if (user==null)
                {
                    ModelState.AddModelError(nameof(loginViewModel.Email),"UserName not exist");
                }
                else
                {
                    if (await _userManager.CheckPasswordAsync(user,loginViewModel.Password))
                    {
                        AuthenticationProperties prop = null;
                        if (loginViewModel.RememberMe)
                        {
                            prop = new AuthenticationProperties()
                            {
                                IsPersistent = true,
                                ExpiresUtc = DateTimeOffset.UtcNow.Add(TimeSpan.FromMinutes(30))
                            };
                        }

                        //await Microsoft.AspNetCore.Http.AuthenticationManagerExtensions.SignInAsync(HttpContext,
                        //    user.SubjectId, user.Username,prop);
                        //return RedirectToLocal(returnUrl);

                        await _signInManager.SignInAsync(user, prop);
                        if (_interaction.IsValidReturnUrl(returnUrl))
                        {
                            return Redirect(returnUrl);
                        }

                        return Redirect("~/");
                    }
                    ModelState.AddModelError(nameof(loginViewModel.Password),"Wrong Password");
                }

            }
            return View(loginViewModel);
        }

        public async Task<IActionResult> LogOut()
        {
            await _signInManager.SignOutAsync();
            //await HttpContext.SignOutAsync();
            return RedirectToAction("Index", "Home");
        }

        //内部跳转
        private IActionResult RedirectToLocal(string returnUrl)
        {
            if (Url.IsLocalUrl(returnUrl))
            {
                return Redirect(returnUrl);
            }

            return RedirectToAction("Index", "Home");
        }

        //添加验证错误
        private void AddError(IdentityResult result)
        {
            //遍历所有的验证错误
            foreach (var error in result.Errors)
            {
                //返回error到model
                ModelState.AddModelError(string.Empty, error.Description);
            }
        }
    }
}
接下来我们重新生成一下,我们需要执行shell命令生成一下数据库
dotnet ef migrations add VSInit
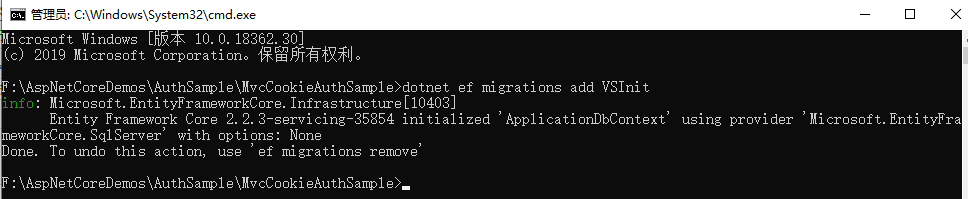
这时候Migrations文件夹下已经有新增的数据库更新配置文件了
DbContextSeed初始化
由于我们现在每次EF实体模型变化的时候每次都是手动更改,我们想通过代码的方式让他自动更新,或者程序启动的时候添加一些数据进去
首先,在Data文件夹下添加一个ApplicationDbContextSeed.cs初始化类
public class ApplicationDbContextSeed
{
    private UserManager<ApplicationUser> _userManager;

    public async Task SeedAsync(ApplicationDbContext context, IServiceProvider services)
    {
        if (!context.Users.Any())
        {
            _userManager = services.GetRequiredService<UserManager<ApplicationUser>>();

            var defaultUser = new ApplicationUser
            {
                UserName = "Administrator",
                Email = "786744873@qq.com",
                NormalizedUserName = "admin"
            };

            var result = await _userManager.CreateAsync(defaultUser, "Password$123");
            if (!result.Succeeded)
            {
                throw new Exception("初始默认用户失败");
            }
        }
    }
}
那么如何调用呢?接下来我们写一个WebHost的扩展方法类WebHostMigrationExtensions.cs来调用ApplicationDbContextSeed方法
public static class WebHostMigrationExtensions
{
    public static IWebHost MigrateDbContext<TContext>(this IWebHost host, Action<TContext, IServiceProvider> sedder) where TContext : DbContext
    {
        using (var scope = host.Services.CreateScope())
        {//只在本区间内有效
            var services = scope.ServiceProvider;
            var logger = services.GetRequiredService<ILogger<TContext>>();
            var context = services.GetService<TContext>();

            try
            {
                context.Database.Migrate();
                sedder(context, services);

                logger.LogInformation($"执行DBContext {typeof(TContext).Name} seed执行成功");
            }
            catch (Exception ex)
            {
                logger.LogError(ex, $"执行DBContext {typeof(TContext).Name} seed方法失败");
            }
        }

        return host;
    }
}
那么我们程序启动的时候要怎调用呢?
要在Program.cs中执行
public static void Main(string[] args)
{
    CreateWebHostBuilder(args).Build()
        //自动初始化数据库开始
        .MigrateDbContext<ApplicationDbContext>((context, services) =>
            {
                new ApplicationDbContextSeed().SeedAsync(context, services).Wait();
            })
        //自动初始化数据库结束
        .Run();
}
然后运行即可自动化创建数据库和数据
ProfileService实现(调试)
在 Services 文件夹下添加 ProfileService.cs
public class ProfileService : IProfileService
    {
        private readonly UserManager<ApplicationUser> _userManager;//创建用户的

        public ProfileService(UserManager<ApplicationUser> userManager)
        {
            _userManager = userManager;
        }

        private async Task<List<Claim>> GetClaimsFromUserAsync(ApplicationUser user)
        {
            var claims=new List<Claim>()
            {
                new Claim(JwtClaimTypes.Subject,user.Id.ToString()),
                new Claim(JwtClaimTypes.PreferredUserName,user.UserName)
            };

            var roles =await _userManager.GetRolesAsync(user);
            foreach (var role in roles)
            {
                claims.Add(new Claim(JwtClaimTypes.Role,role));
            }

            if (!string.IsNullOrWhiteSpace(user.Avatar))
            {
                claims.Add(new Claim("avatar", user.Avatar));
            }

            return claims;
        }

        public async Task GetProfileDataAsync(ProfileDataRequestContext context)
        {
            var subjectId = context.Subject.Claims.FirstOrDefault(c => c.Type == "sub").Value;
            var user = await _userManager.FindByIdAsync(subjectId);

            var claims =await GetClaimsFromUserAsync(user);
            context.IssuedClaims = claims;
        }

        public async Task IsActiveAsync(IsActiveContext context)
        {
            context.IsActive = false;

            var subjectId = context.Subject.Claims.FirstOrDefault(c => c.Type == "sub").Value;
            var user = await _userManager.FindByIdAsync(subjectId);

            context.IsActive = user != null;
        }
    }
修改 Config.cs 中的GetClients方法
public static IEnumerable<Client> GetClients()
{
    return new Client[]
    {
        new Client()
        {
            ClientId = "mvc",
            AllowedGrantTypes = GrantTypes.HybridAndClientCredentials,//模式:混合模式
            ClientSecrets =//私钥
            {
                new Secret("secret".Sha256())
            },
            AllowedScopes =//运行访问的资源
            {
                IdentityServerConstants.StandardScopes.OpenId,
                IdentityServerConstants.StandardScopes.Profile,
                IdentityServerConstants.StandardScopes.Email,
                IdentityServerConstants.StandardScopes.OfflineAccess,
                "api1"

            },
            RedirectUris = { "http://localhost:5001/signin-oidc" },//跳转登录到的客户端的地址
            PostLogoutRedirectUris = { "http://localhost:5001/signout-callback-oidc" },//跳转登出到的客户端的地址
            RequireConsent=true,//是否需要用户点击确认进行跳转,改为点击确认后进行跳转
            AlwaysIncludeUserClaimsInIdToken = true,
            AllowOfflineAccess = true,//允许脱机访问

            ClientName = "MVC Client",
            ClientUri = "http://localhost:5001",
            LogoUri = "https://img-prod-cms-rt-microsoft-com.akamaized.net/cms/api/am/imageFileData/RE1Mu3b?ver=5c31",
            AllowRememberConsent = true,
        }
    };
}
修改 Startup.cs
services.AddIdentityServer()
    .AddDeveloperSigningCredential()//添加开发人员签名凭据
    .AddInMemoryApiResources(Config.GetApiResources())//添加内存apiresource
    .AddInMemoryClients(Config.GetClients())//添加内存client
    .AddInMemoryIdentityResources(Config.GetIdentityResources())//添加系统中的资源
    //.AddTestUsers(Config.GetTestUsers())//添加测试用户(这里不需要测试用户了)
    .AddAspNetIdentity<ApplicationUser>()
    .Services.AddScoped<IProfileService,ProfileService>();
修改MvcClient项目中的 Startup.cs
services.AddAuthentication(options =>
    {
        options.DefaultScheme = "Cookies";//使用Cookies认证
        options.DefaultChallengeScheme = "oidc";//使用oidc
    })
    .AddCookie("Cookies")//配置Cookies认证
    .AddOpenIdConnect("oidc", options =>//配置oidc
    {
        options.SignInScheme = "Cookies";
        options.Authority = "http://localhost:5000";
        options.RequireHttpsMetadata = false;
        options.ResponseType = OpenIdConnectResponseType.CodeIdToken;
        options.ClientId = "mvc";
        options.ClientSecret = "secret";
        options.SaveTokens = true;
        //options.GetClaimsFromUserInfoEndpoint = true;

        //options.ClaimActions.MapJsonKey("sub", "sub");
        //options.ClaimActions.MapJsonKey("preferred_username", "preferred_username");
        //options.ClaimActions.MapJsonKey("sub", "sub");
        //options.ClaimActions.MapJsonKey("avatar", "avatar");
        //options.ClaimActions.MapCustomJson("role", jobj => jobj["role"].ToString());

        options.Scope.Add("offline_access");
        options.Scope.Add("openid");
        options.Scope.Add("profile");
    });
源码:链接: https://pan.baidu.com/s/1EM-MC9N6RKb6MS2KjccIig 提取码: cq4c
集成EFCore配置Client和API
接下来的步骤是,以取代当前 AddInMemoryClients,AddInMemoryIdentityResources和AddInMemoryApiResources 在ConfigureServices在方法Startup.cs。我们将使用以下代码替换它们:
修改MvcCookieAuthSample项目中的ConfigureServices方法,copy链接字符串,这是一个官方的字符串,直接复制过来,放在上面。
const string connectionString = @"Data Source=(LocalDb)\MSSQLLocalDB;database=IdentityServer4.Quickstart.EntityFramework-2.0.0;trusted_connection=yes;";

添加包的引用
IdentityServer4.EntityFramework
引入IdentityServer4.EntityFramework的命名空间
初始化我们的数据库,OperationStore的配置。这里实际上有两套表, 一套存Client这些信息,Operation这套用来存token
加上ConfigrationStore和OperationStore以后就可以移除上面的三行代码,那三行代码之前都是从Config类里面获取数据的,先在通过数据库的方式去回去,所以这里不再需要了
services.AddIdentityServer()
    .AddDeveloperSigningCredential()//添加开发人员签名凭据
    //.AddInMemoryApiResources(Config.GetApiResources())//添加内存apiresource
    //.AddInMemoryClients(Config.GetClients())//添加内存client
    //.AddInMemoryIdentityResources(Config.GetIdentityResources())//添加系统中的资源
    .AddConfigurationStore(options =>
        {
            options.ConfigureDbContext = builder => { builder.UseSqlServer(connectionString,sql=>sql.MigrationsAssembly(migrationsAssembly)); };
        })
    // this adds the operational data from DB (codes, tokens, consents)
    .AddOperationalStore(options =>
    {
        options.ConfigureDbContext = b =>
            b.UseSqlServer(connectionString,
                sql => sql.MigrationsAssembly(migrationsAssembly));

        // this enables automatic token cleanup. this is optional.
        options.EnableTokenCleanup = true;
    })
    //.AddTestUsers(Config.GetTestUsers())//添加测试用户(这里不需要测试用户了)
    .AddAspNetIdentity<ApplicationUser>()
    .Services.AddScoped<IProfileService,ProfileService>();
添加数据库迁移
Add-Migration init -Context PersistedGrantDbContext -OutputDir Data/Migrations/IdentityServer/PersistedGrantDb
Add-Migration init -Context ConfigurationDbContext -OutputDir Data/Migrations/IdentityServer/ConfigurationDb
更新数据库结构
Update-Database -c ConfigurationDbContext
这时数据库会生成库和表结构
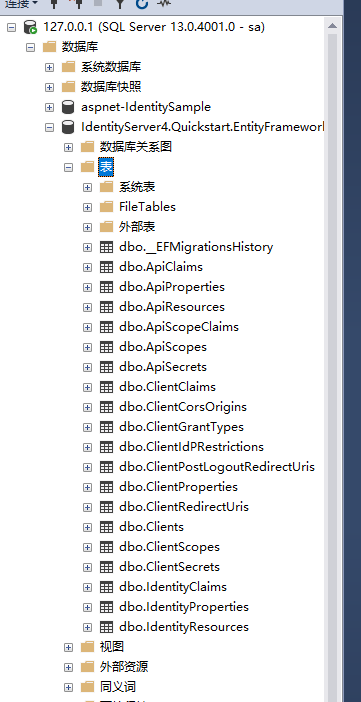
初始化数据
在Startup.cs中添加此方法以帮助初始化数据库:
private void InitializeDatabase(IApplicationBuilder app)
{
    using (var serviceScope = app.ApplicationServices.GetService<IServiceScopeFactory>().CreateScope())
    {
        serviceScope.ServiceProvider.GetRequiredService<PersistedGrantDbContext>().Database.Migrate();

        var context = serviceScope.ServiceProvider.GetRequiredService<ConfigurationDbContext>();
        context.Database.Migrate();
        if (!context.Clients.Any())
        {
            foreach (var client in Config.GetClients())
            {
                context.Clients.Add(client.ToEntity());
            }
            context.SaveChanges();
        }

        if (!context.IdentityResources.Any())
        {
            foreach (var resource in Config.GetIdentityResources())
            {
                context.IdentityResources.Add(resource.ToEntity());
            }
            context.SaveChanges();
        }

        if (!context.ApiResources.Any())
        {
            foreach (var resource in Config.GetApiResources())
            {
                context.ApiResources.Add(resource.ToEntity());
            }
            context.SaveChanges();
        }
    }
}
然后我们可以从 Configure 方法中调用它:
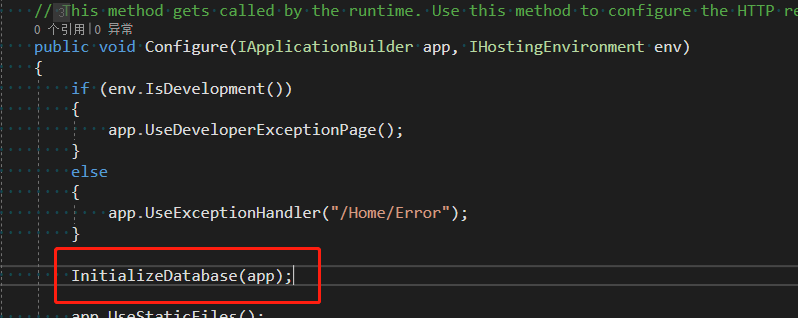
然后运行,我们可以看到在 Clients 表中已经有了数据

源码:链接: https://pan.baidu.com/s/1BauxqrclWtlOJk9h6uxtAg 提取码: dq4e
-------------------------------------------
个性签名:独学而无友,则孤陋而寡闻。做一个灵魂有趣的人!
如果觉得这篇文章对你有小小的帮助的话,记得在右下角点个“推荐”哦,博主在此感谢!
万水千山总是情,打赏一分行不行,所以如果你心情还比较高兴,也是可以扫码打赏博主,哈哈哈(っ•̀ω•́)っ✎⁾⁾!


 浙公网安备 33010602011771号