
Spring加载properties文件的两种方式
在项目中如果有些参数经常需要修改,或者后期可能需要修改,那我们最好把这些参数放到properties文件中,源代码中读取properties里面的配置,这样后期只需要改动properties文件即可,不需要修改源代码,这样更加方便。在Spring中也可以这么做,而且Spring有两种加载properties文件的方式:基于xml方式和基于注解方式。下面分别讨论下这两种方式。
1. 通过xml方式加载properties文件
我们以Spring实例化dataSource为例,我们一般会在beans.xml文件中进行如下配置:
- <!-- com.mchange.v2.c3p0.ComboPooledDataSource类在c3p0-0.9.5.1.jar包的com.mchange.v2.c3p0包中 -->
- <bean id="dataSource" class="com.mchange.v2.c3p0.ComboPooledDataSource">
- <property name="driverClass" value="com.mysql.jdbc.Driver" />
- <property name="jdbcUrl" value="jdbc:mysql://localhost:3306/shop" />
- <property name="user" value="root" />
- <property name="password" value="root" />
- </bean>
现在如果我们要改变dataSource,我们就得修改这些源代码,但是我们如果使用properties文件的话,只需要修改那里面的即可,就不管源代码的东西了。那么如何做呢?
Spring中有个<context:property-placeholder location=""/>标签,可以用来加载properties配置文件,location是配置文件的路径,我们现在在工程目录的src下新建一个conn.properties文件,里面写上上面dataSource的配置:
- dataSource=com.mchange.v2.c3p0.ComboPooledDataSource
- driverClass=com.mysql.jdbc.Driver
- jdbcUrl=jdbc\:mysql\://localhost\:3306/shop
- user=root
- password=root
现在只需要在beans.xml中做如下修改即可:
- <context:property-placeholder location="classpath:conn.properties"/><!-- 加载配置文件 -->
- <!-- com.mchange.v2.c3p0.ComboPooledDataSource类在c3p0-0.9.5.1.jar包的com.mchange.v2.c3p0包中 -->
- <bean id="dataSource" class="${dataSource}"> <!-- 这些配置Spring在启动时会去conn.properties中找 -->
- <property name="driverClass" value="${driverClass}" />
- <property name="jdbcUrl" value="${jdbcUrl}" />
- <property name="user" value="${user}" />
- <property name="password" value="${password}" />
- </bean>
<context:property-placeholder location=""/>标签也可以用下面的<bean>标签来代替,<bean>标签我们更加熟悉,可读性更强:
- <!-- 与上面的配置等价,下面的更容易理解 -->
- <bean class="org.springframework.beans.factory.config.PropertyPlaceholderConfigurer">
- <property name="locations"> <!-- PropertyPlaceholderConfigurer类中有个locations属性,接收的是一个数组,即我们可以在下面配好多个properties文件 -->
- <array>
- <value>classpath:conn.properties</value>
- </array>
- </property>
- </bean>
虽然看起来没有上面的<context:property-placeholder location=""/>简洁,但是更加清晰,建议使用后面的这种。但是这个只限于xml的方式,即在beans.xml中用${key}获取配置文件中的值value。
2. 通过注解方式加载properties文件
还有一种就是通过注解的方式,在java代码中使用@Value注解来加载配置文件中的值。
我们来看一个例子:假如我们要在程序中获取某个文件的绝对路径,我们很自然会想到不能在程序中写死,那么我们也可以卸载properties文件中。还是在src目录下新建一个public.properties文件,假设里面写了一条记录:
- filePath=E\:\\web\\apache-tomcat-8.0.26\\webapps\\E_shop\\image
如果想在java代码中通过注解来获取这个filePath的话,首先得在beans.xml文件中配置一下注解的方式:
- <!-- 第二种方式是使用注解的方式注入,主要用在java代码中使用注解注入properties文件中相应的value值 -->
- <bean id="prop" class="org.springframework.beans.factory.config.PropertiesFactoryBean">
- <property name="locations"><!-- 这里是PropertiesFactoryBean类,它也有个locations属性,也是接收一个数组,跟上面一样
- <array>
- <value>classpath:public.properties</value>
- </array>
- </property>
- </bean>
现在我们可以在java代码中使用注解来获取filePath的值了:
- @Component
- public class FileUploadUtil{
- private String filePath;
- @Value("#{prop.filePath}")
- //@Value表示去beans.xml文件中找id="prop"的bean,它是通过注解的方式读取properties配置文件的,然后去相应的配置文件中读取key=filePath的对应的value值
- public void setFilePath(String filePath) {
- System.out.println(filePath);
- this.filePath = filePath;
- }
注意要有set方法才能被注入进来,注解写在set方法上即可。在setFilePath方法中通过控制台打印filePath是为了在启动tomcat的时候,观察控制台有没有输出来,如果有,说明Spring在启动时,已经将filePath给加载好了,我们看一下控制台的启动信息:
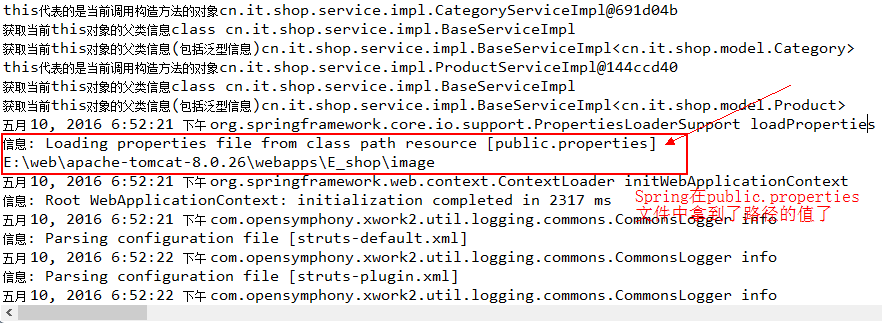
以上就是Spring加载properties配置文件的两种方式。实际上,上面基于xml方式中的PropertyPlaceholderConfigurer类和这里基于注解方式的PropertiesFactoryBean类都是继承PropertiesLoaderSupport,都是用来加载properties配置文件的。
以上转:https://blog.csdn.net/eson_15/article/details/51365707
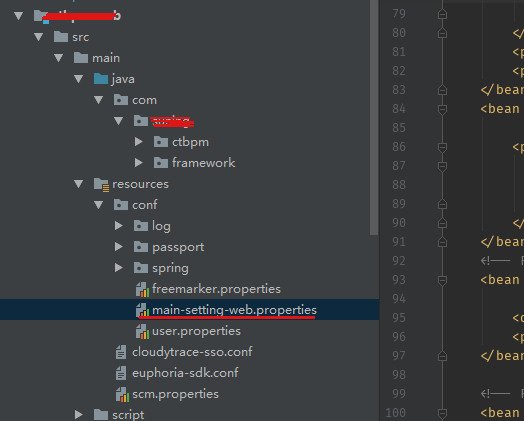
3. 通过注解方式加载properties文件
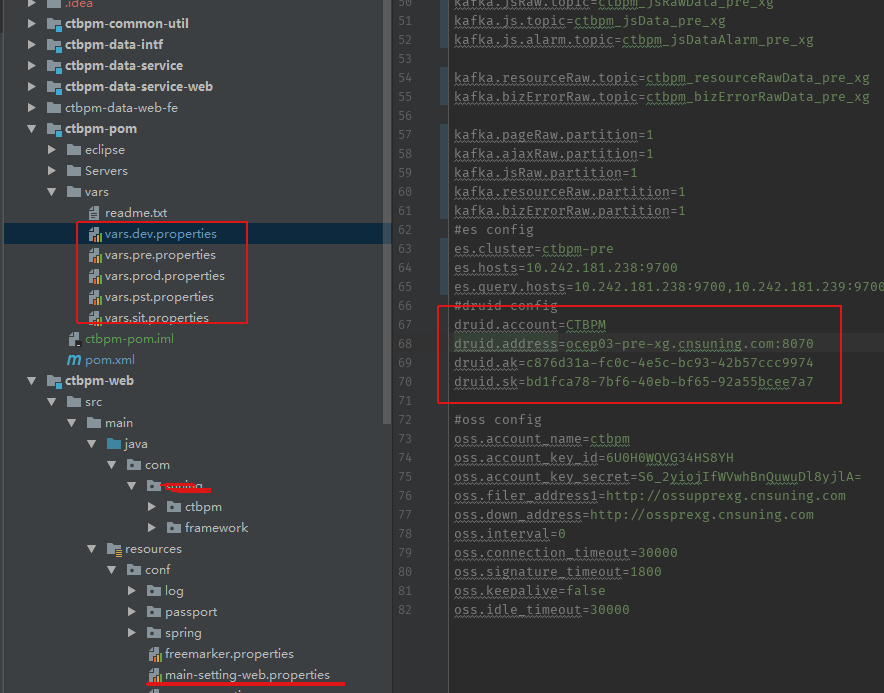
main-setting-web.properties里面内容:
#Druid config
druidAddress=$[druid.address]
druidAccount=$[druid.account]
druidAk=$[druid.ak]
druidSk=$[druid.sk]
@PropertySource({"classpath:/conf/main-setting-web.properties"})
public class AbstractDruidDAO implements InitializingBean {
    /**
     * Context property
     **/
    protected Context context;
    @Value("${druidAddress}")
    protected String druidAddress;
    @Value("${druidAccount}")
    protected String druidAccount;
    @Value("${druidAk}")
    protected String druidAk;
    @Value("${druidSk}")
    protected String druidSk;
}
扩展知识:
Spring中使用@value
一、配置文件配置
1.1、直接配置
在src/main/resources下添加配置文件application.properties
例如修改端口号
#端口号
server.port=8089
分环境配置
在src/main/resources下添加,application-pro.properties,application-dev.properties和application.properties三个文件
application.properties
spring.profiles.active=dev
application-pro.properties
#端口号
server.port=80
#自定义端口号读取
my.name=pzr.dev
application-dev.properties
#端口号
server.port=8089
#自定义端口号读取
my.name=pzr.pro
当application.propertie设置spring.profiles.active=dev时,则说明是指定使用application-dev.properties文件进行配置
二、配置文件参数读取
2.1、注解方式读取
1、@PropertySource配置文件路径设置,在类上添加注解,如果在默认路径下可以不添加该注解。
需要用@PropertySource的有:
- 例如非application.properties,classpath:config/my.properties指的是src/main/resources目录下config目录下的my.properties文件,
- 例如有
多配置文件引用,若取两个配置文件中有相同属性名的值,则取值为最后一个配置文件中的值 在application.properties中的文件,直接使用@Value读取即可,applicarion的读取优先级最高
@PropertySource({"classpath:config/my.properties","classpath:config/config.properties"})
public class TestController
2、@Value属性名,在属性名上添加该注解
@Value("${my.name}")
private String myName;
示例1:使用@Value读取application.properties里的配置内容
配置文件application.properties
spring.application.name=springbootdemo
server.port=8080
mail.username=application-duan
mail.password=application-duan123456
启动类
package com.dxz.property5;

import org.springframework.boot.autoconfigure.SpringBootApplication;
import org.springframework.boot.builder.SpringApplicationBuilder;

@SpringBootApplication
public class TestProperty5 {

    public static void main(String[] args) {
        //SpringApplication.run(TestProperty1.class, args);
        new SpringApplicationBuilder(TestProperty5.class).web(true).run(args);

    }
}
测试类:
package com.dxz.property5;

import org.springframework.beans.factory.annotation.Autowired;
import org.springframework.beans.factory.annotation.Value;
import org.springframework.context.annotation.PropertySource;
import org.springframework.web.bind.annotation.RequestMapping;
import org.springframework.web.bind.annotation.RestController;

@RestController
@RequestMapping("/task")
//@PropertySource("classpath:mail.properties")
public class TaskController {

    @Value("${mail.username}")
    private String userName;

    @Value("${mail.password}")
    private String password;

    @RequestMapping(value = { "/", "" })
    public String hellTask() {
        System.out.println("userName:" + userName);
        System.out.println("password:" + password);
        return "hello task !!";
    }

}
结果:
userName:application-duan
password:application-duan123456
示例2:使用@Value+@PropertySource读取其它配置文件(多个)内容
读取mail.properties配置
package com.dxz.property5;

import org.springframework.beans.factory.annotation.Autowired;
import org.springframework.beans.factory.annotation.Value;
import org.springframework.context.annotation.PropertySource;
import org.springframework.web.bind.annotation.RequestMapping;
import org.springframework.web.bind.annotation.RestController;

@RestController
@RequestMapping("/task")
@PropertySource("classpath:mail.properties")
public class TaskController {
    @Value("${mail.smtp.auth}")
    private String userName;

    @Value("${mail.from}")
    private String password;

    @RequestMapping(value = { "/", "" })
    public String hellTask() {
        System.out.println("userName:" + userName);
        System.out.println("password:" + password);
        return "hello task !!";
    }

}
结果:
userName:false
password:me@localhost
