谷粒商城之分布式基础
谷粒商城之分布式基础
- 谷粒商城之分布式基础
- 前言
- 1 项目简介
- 2 分布式基础
- 3 环境搭建
- 4 SpringCloud Alibaba -- 分布式组件
- 5 前端
- 6 商品服务
- 7 仓库服务
- 8 项目中的分页逻辑分析
- 9 bug收集
- 10 分布式基础篇总结
前言
我们将开始一个大型电商项目的实战:真正从一个项目的基础到架构完成,综合我们之前学习的所有内容,当然也有许多新的内容。
在项目开发中,会经常用到 java8的新特性,下面是 关于这方面知识的补充,也可以说是复习吧。
1 项目简介
1.1 项目背景
1.1.1 电商模式
市面上有5 种常见的电商模式B2B、B2C、C2B、C2C、O2O;
1、B2B 模式
B2B (Business to Business), 是指商家与商家建立的商业关系。如:阿里巴巴。
2、B2C 模式
B2C (Business to Consumer), 就是我们经常看到的供应商直接把商品卖给用户,即“商对客”
模式,也就是通常说的商业零售,直接面向消费者销售产品和服务。如:苏宁易购、京东、天猫、小米商城。
3、C2B 模式
C2B (Customer to Business),即消费者对企业。先有消费者需求产生而后有企业生产,即先有消费者提出需求,后有生产企业按需求组织生产。
4、C2C 模式
C2C (Customer to Consumer) ,客户之间自己把东西放上网去卖,如:淘宝,闲鱼。
5、O2O 模式
O2O 即Online To Offline,也即将线下商务的机会与互联网结合在了一起,让互联网成为线
下交易的前台。线上快速支付,线下优质服务。如:饿了么,美团,淘票票,京东到家。
1.1.2 谷粒商城
谷粒商城是一个B2C 模式的电商平台,销售自营商品给客户。
1.2 项目架构图
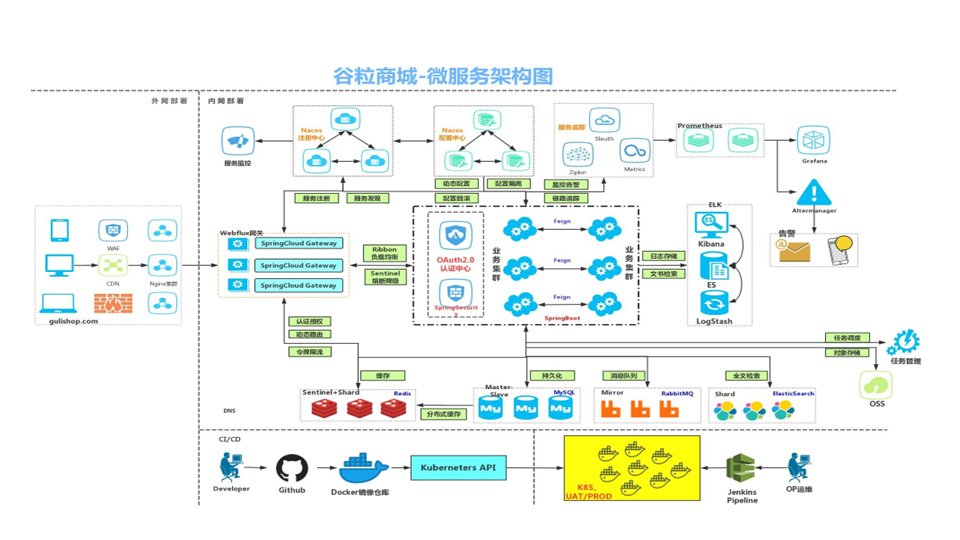
1.2.1 项目微服务架构图
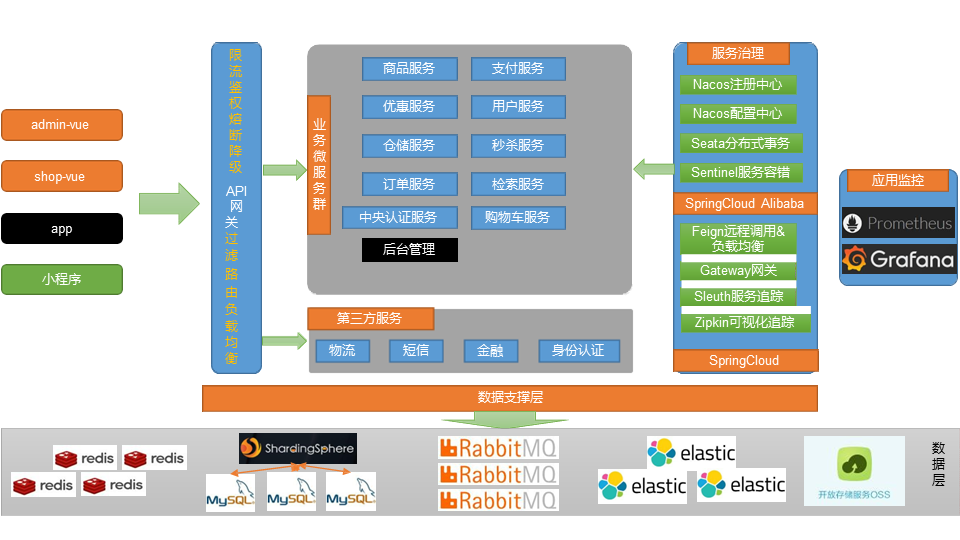
1.2.2 微服务划分图
1.2.3 项目技术&特色
- 前后分离开发,并开发基于vue 的后台管理系统
- SpringCloud 全新的解决方案
- 应用监控、限流、网关、熔断降级等分布式方案全方位涉及
- 透彻讲解分布式事务、分布式锁等分布式系统的难点
- 分析高并发场景的编码方式,线程池,异步编排等使用
- 压力测试与性能优化
- 各种集群技术的区别以及使用
- CI/CD 使用
- ....
1.2.4 项目前置要求
- 学习项目的前置知识
- 熟悉SpringBoot 以及常见整合 方案
- 了解SpringCloud
- 熟悉git,maven
- 熟悉linux,redis,docker 基本操作
- 了解html,css,js,vue
- 熟练使用idea 开发项目
2 分布式基础
2.1 微服务
微服务架构风格,就像是把一个单独的应用程序开发为一套小服务,每个小服务运行在自己的进程中,并使用轻量级机制通信,通常是HTTP API。这些服务围绕业务能力来构建,并通过完全自动化部署机制来独立部署。这些服务使用不同的编程语言书写,以及不同数据存储技术,并保持最低限度的集中式管理。
简而言之:拒绝大型单体应用,基于业务边界进行服务微化拆分,各个服务独立部署运行。

2.2 集群&分布式&节点
集群是个物理状态,分布式是个工作方式。
只要是一堆机器,也可以叫做集群,他们是不是一起协作干活,这谁也不知道。
《分布式系统原理与范型》
定义:分布式系统是若干独立计算机的集合,这些计算机对于用户来说像单个系统分布式系统 (distributed system) 是建立网络之上的软件系统
分布式是指根据不同的业务分布在不同的地方。
集群指的是将几台服务器集中在一起,实现同一业务。
例如:京东是一个分布式系统,众多业务运行在不同的机器上,所有业务构成一个大型的分布式业务集群,每一个小的业务,比如用户系统,访问压力大的时候一台服务器是不够的,我们就应该将用户系统部署到多个服务器,也就是每一个业务系统也可以做集群化。
分布式中的每一个节点,都可以做集群,而集群并不一定就是分布式的。
节点:集群中的一个服务器。
2.3 远程调用
在分布式系统中,各个服务可能处于不同主机,但是服务之间不可避免的需要互相调用,我们称之为远程调用。
SpringCloud中使用HTTP+JSON的方式来完成远程调用

2.4 负载均衡

分布式系统中,A 服务需要调用B服务,B服务在多台机器中都存在, A调用任意一个服务器均可完成功能。
为了使每一个服务器都不要太或者太闲,我们可以负载均衡调用每一个服务器,提升网站的健壮性。
常见的负载均衡算法:
- 轮询:为第一个请求选择健康池中的每一个后端服务器,然后按顺序往后依次选择,直到最后一个,然后循环;
- 最小连接:优先选择链接数最少,也就是压力最小的后端服务器,在会话较长的情况下可以考虑采取这种方式。
- 散列:根据请求源的 IP 的散列(hash)来选择要转发的服务器。这种方式可以一定程度上保证特定用户能连接到相同的服务器。如果你的应用需要处理状态而要求用户能连接到和之前相同的服务器,可以考虑采取这种方式。
2.5 服务注册/发现&注册中心
A服务调用B服务,A服务不知道B服务当前在哪几台服务器上有,哪些正常的,哪些服务已经下线,解决这个问题可以引入注册中心。

如果某些服务下线,我们其他人可以实时的感知到其他服务的状态,从而避免调用不可用的服务。
2.6 配置中心

每一个服务最终都有大量的配置,并且每个服务都可能部署在多台机器上。我们经常需要变更配置,我们可以让每个服务在配置中心获取自己的配置。
配置中心用来集中管理微服务的配置信息。
2.7 服务熔断&服务降级
在微服务架构中,微服务之间通过网络来进行通信,存在相互依赖,当其中一个服务不可用时,有可能会造成雪崩效应,要防止这种情况,必须要有容错机制来保护服务。
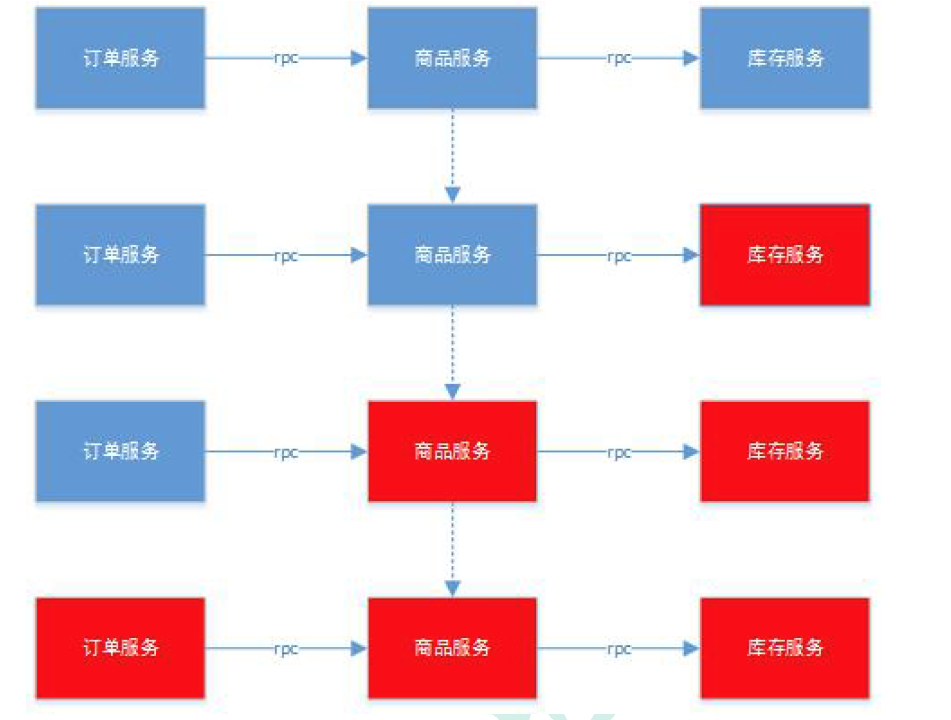
情景:
订单服务 --> 商品服务 --> 库存服务
库存服务出现故障导致响应慢,导致商品服务需要等待,可能等到10s后库存服务才能响应。库存服务的不可用导致商品服务阻塞,商品服务等的期间,订单服务也处于阻塞。一个服务不可用导致整个服务链都阻塞。如果是高并发,第一个请求调用后阻塞10s得不到结果,第二个请求直接阻塞10s。更多的请求进来导致请求积压,全部阻塞,最终服务器的资源耗尽。导致雪崩。
-
服务熔断
设置服务的超时,当被调用的服务经常失败到达某个阈值,我们可以开启断路保护机制,后来的请求不再去调用这个服务,本地直接返回默认的数据。 -
服务降级
在运维期间,当系统处于高峰期,系统资源紧张,我们可以让非核心业务降级运行;降级:某些服务不处理,或者简单处理【抛异常,返回NULL,调用 Mock数据,调用 FallBack 处理逻辑】。
2.8 API网关
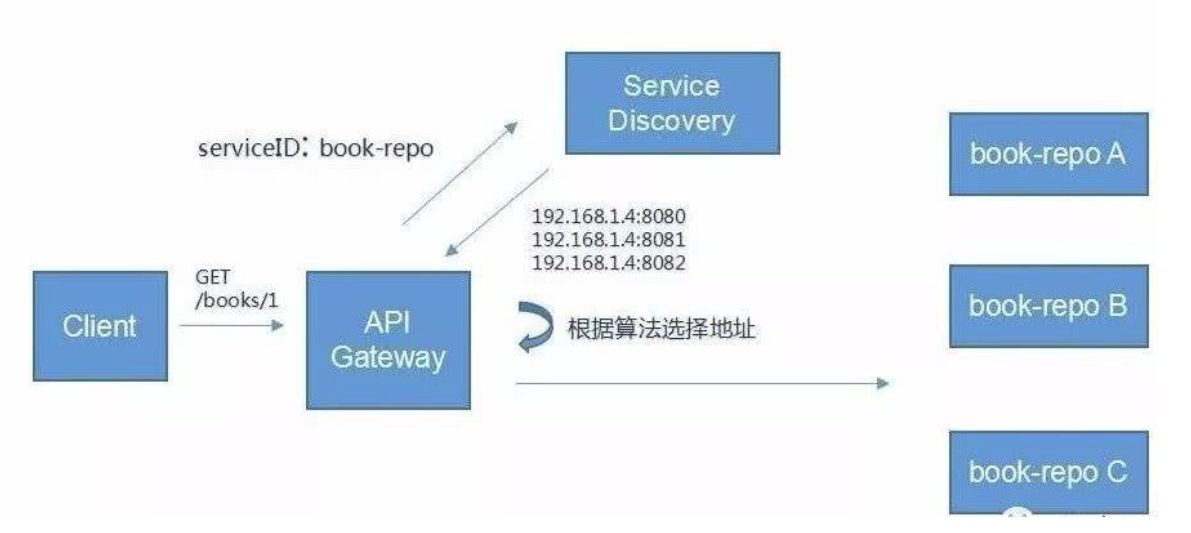
在微服务架构中,API Gateway 作为整体架构的重要组件,它抽象了服务中需要的公共功能,同时它提供了客户端负载均衡,服务自动熔断,灰度发布,统一认证,限流监控,日志统计等丰富功能,帮助我们解决很多 API 管理的难题。
3 环境搭建
3.1 安装Linux虚拟机
3.1.1 软件下载
-
我们下载 virtual box 这个虚拟机软件 ,官网地址

进行傻瓜式安装即可。
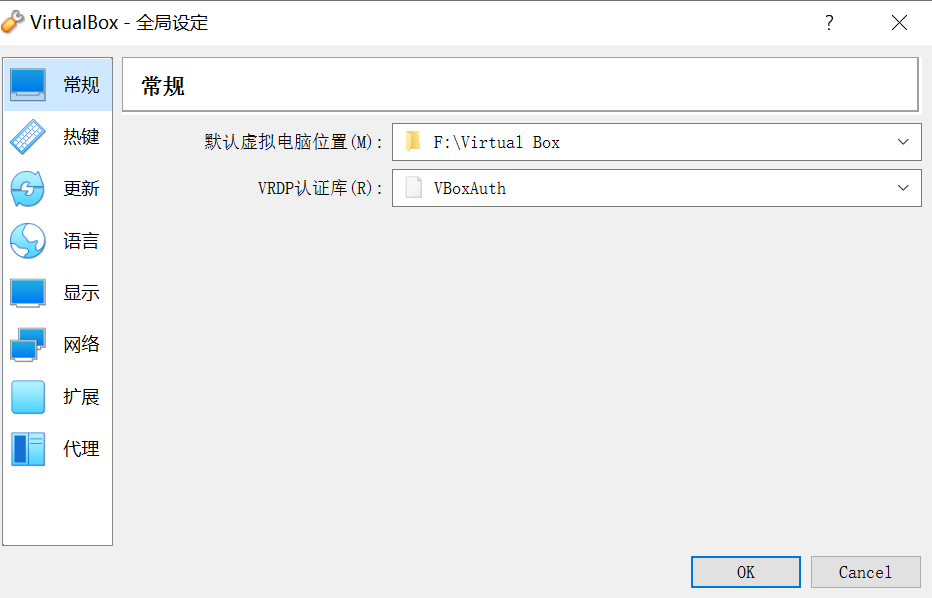
注意设置全局虚拟机路径。因为这个到时候虚拟机默认在c盘当前用户下。当然你c盘很大那无需设置。
- 下载vagrant 这个软件,官网地址,这个软件可以帮助我们自动安装虚拟机和其配置流程。

傻瓜式安装,注意这个软件安装之后需要重启电脑。

vagrant镜像仓库:https://app.vagrantup.com/boxes/search。
这个就是vagrant搭配的第三方centos7镜像。
3.1.2 电脑开启CPU虚拟化


虚拟机软件一般都要开启这个。
3.1.3 安装
- 打开 window cmd 窗口,运行
Vagrant init centos/7,即可初始化一个 centos7 系统 - 运行
vagrant up即可启动虚拟机。系统 root 用户的密码是 vagrant。 - vagrant 其他常用命令:
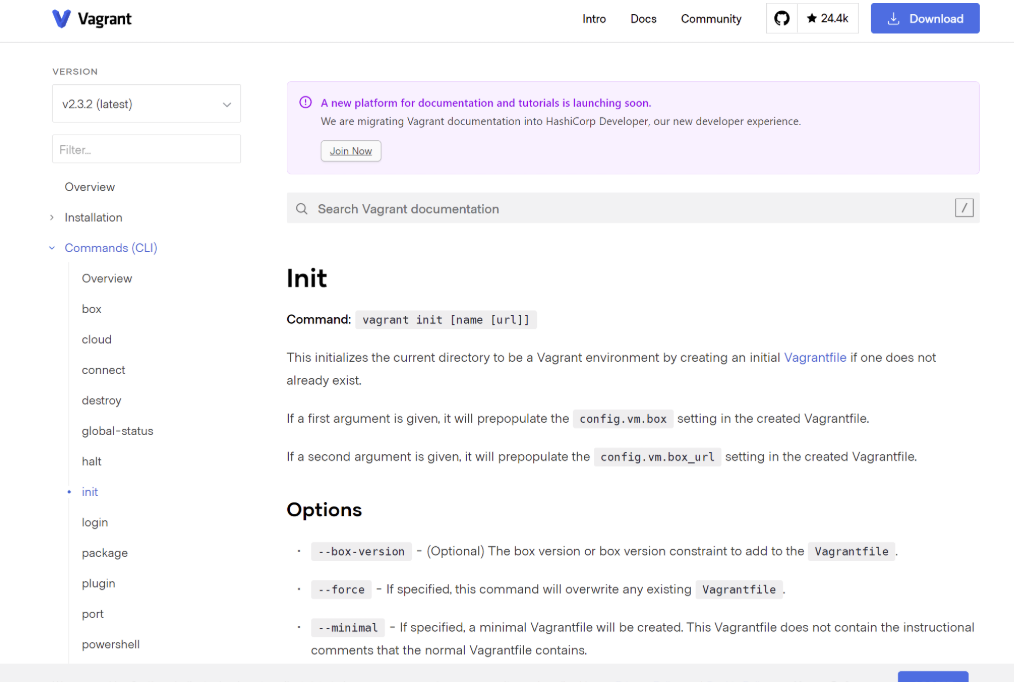
vagrant ssh:自动使用 vagrant 用户连接虚拟机。vagrant upload source [destination] [name|id]:上传文件- https://www.vagrantup.com/docs/cli/init.html Vagrant 命令行
3.1.4 修改ip
虚拟机默认的 ip 地址不是固定 ip,开发不方便.
- 修改 Vagrantfile

windows下cmd命令行中输入ifconfig查看 virtual box的 ip 网段。

config.vm.network "private_network", ip: "192.168.56.10"将文件这一行注释掉,改为这行代码。目的是:使其在同一网段

注意:改完之后在命令行输入 vagrant reload 才行,否则会不生效(大坑,否则一直是2个,不会是3个有固定Ip地址的)。 - 重新使用
vagrant up启动机器即可。然后再vagrant ssh连接机器。
3.1.5 使用第三方工具登录

课件上面,修改 PasswordAuthentication yes 这个选项。
网上找到另一种方法来使用第三方ssh登录工具。

成功。
3.1.6 从vagrant用户切换为管理员用户
不知道大家有没有发现。前面我们登录之后命令符是 $ ,这个是普通用户。但是对于我们开发测试学习来说,普通用户权限太低,对于一些配置文件的修改有很大的限制,所以我们可以使用命令切换到root用户。

3.1.7 修改yum源(下载安装更快)
注意要在root用户下。
- 备份原yum源
mv /etc/yum.repos.d/CentOS-Base.repo /etc/yum.repos.d/CentOS-Base.repo.backup - 使用新yum 源
curl -o /etc/yum.repos.d/CentOS-Base.repo http://mirrors.163.com/.help/CentOS7-Base-163.repo - 生成缓存
yum makecache

3.2 安装docker
本项目将会使用 docker工具 进行开发工作。

sudo ---让普通用户可以拥有超级管理员权限。
Docker 安装文档:https://docs.docker.com/install/linux/docker-ce/centos/
3.2.1 卸载系统之前的docker
sudo yum remove docker \
				docker-client \
				docker-client-latest \
				docker-common \
				docker-latest \
				docker-latest-logrotate \
				docker-logrotate \
				docker-engine
3.2.2 安装Docker-CE
- 安装必须的依赖
sudo yum install -y yum-utils \
		device-mapper-persistent-data \
		lvm2
- 设置docker repo 的yum 位置
sudo yum-config-manager \
		--add-repo \
		https://download.docker.com/linux/centos/docker-ce.repo
- 安装docker,以及docker-cli
sudo yum install docker-ce docker-ce-cli containerd.io
3.3.3 启动docker
sudo systemctl start docker
3.3.4 设置docker 开机自启
sudo systemctl enable docker
注意:docker 要在root用户下进行测试。
3.3.6 配置docker 镜像加速 --- 阿里云镜像加速服务
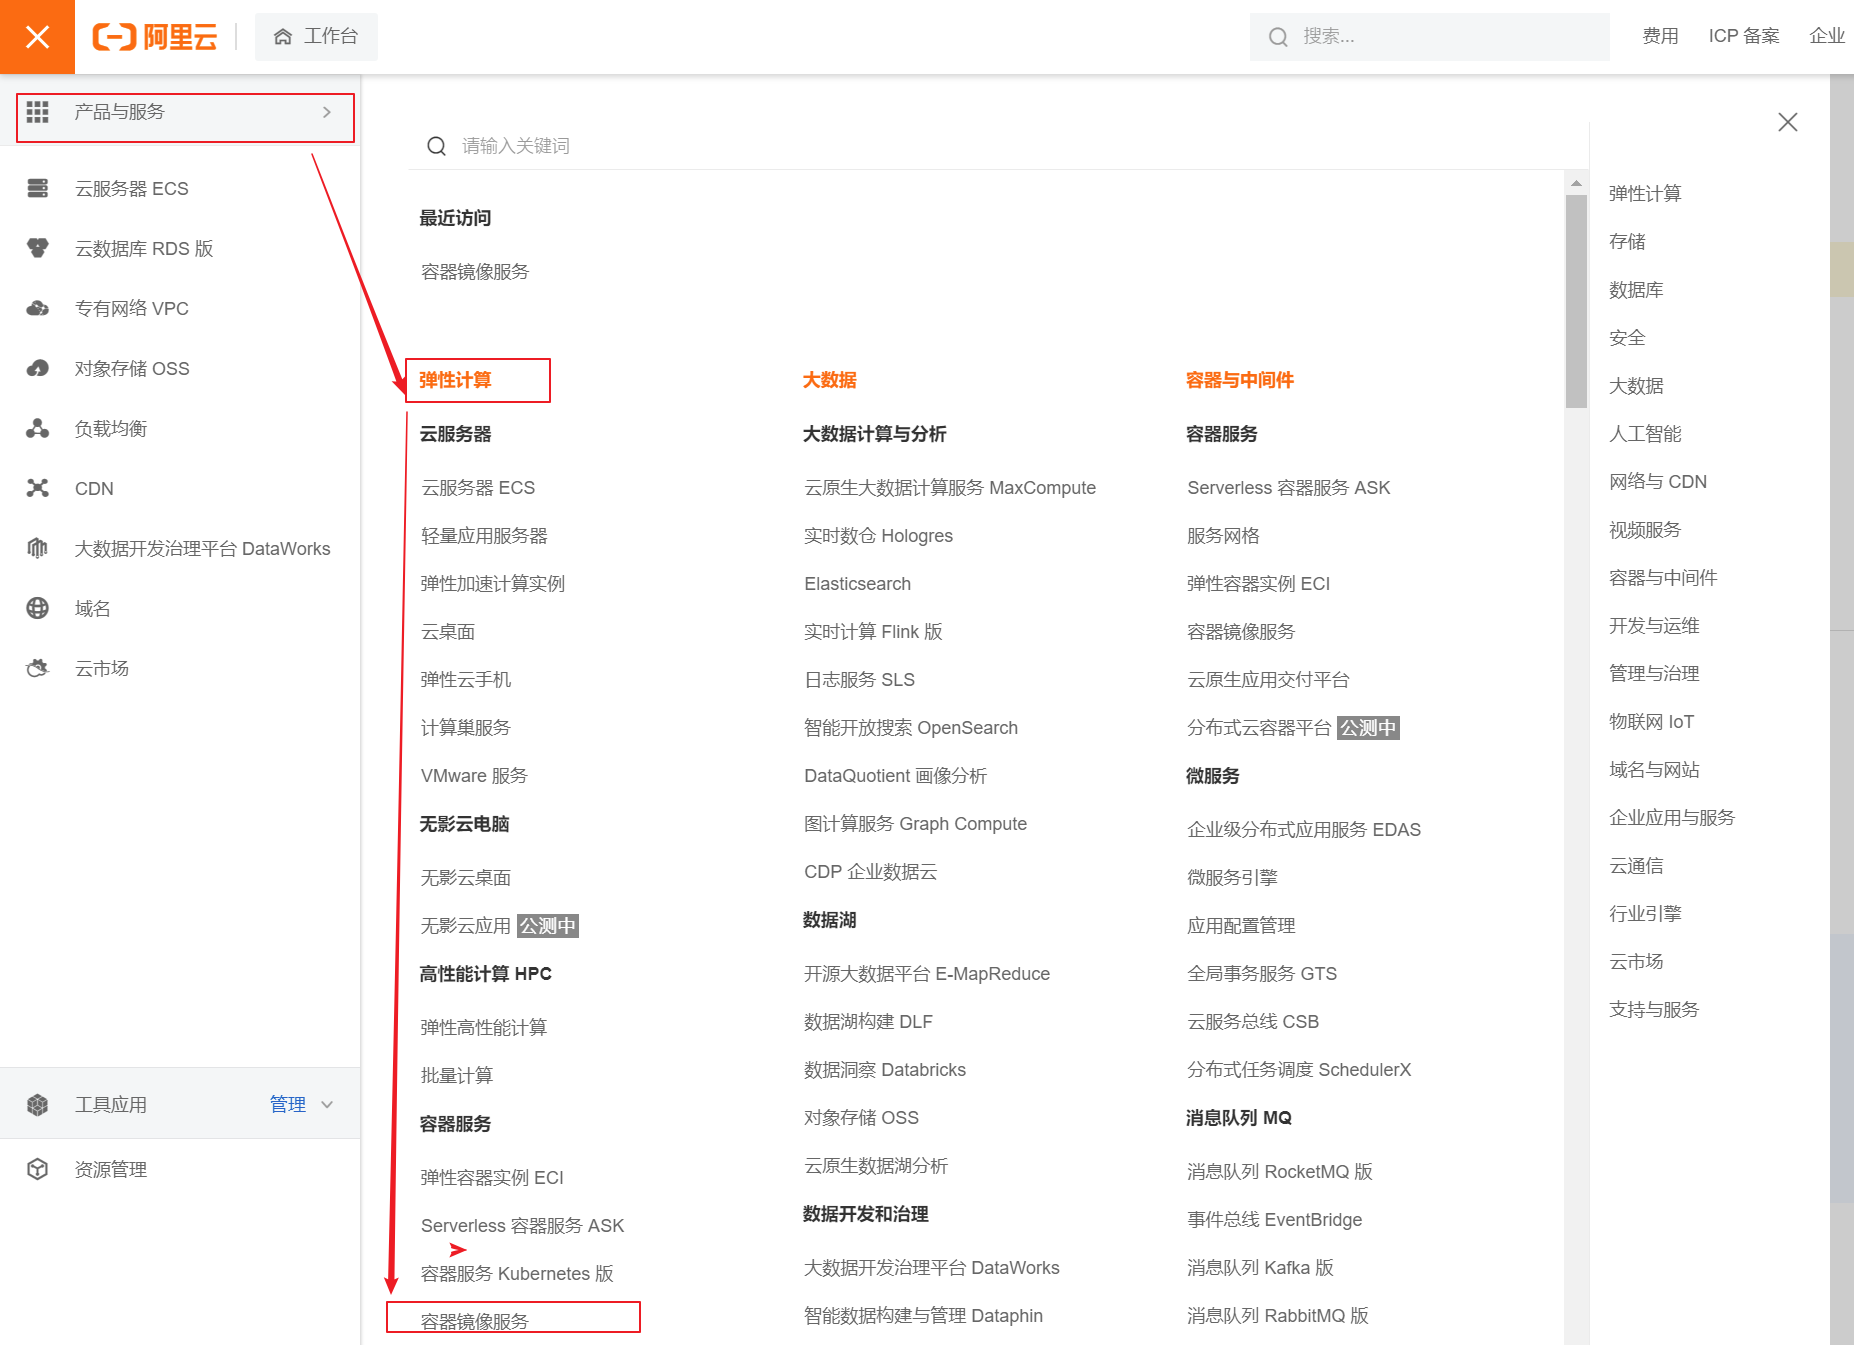
获取加速器地址
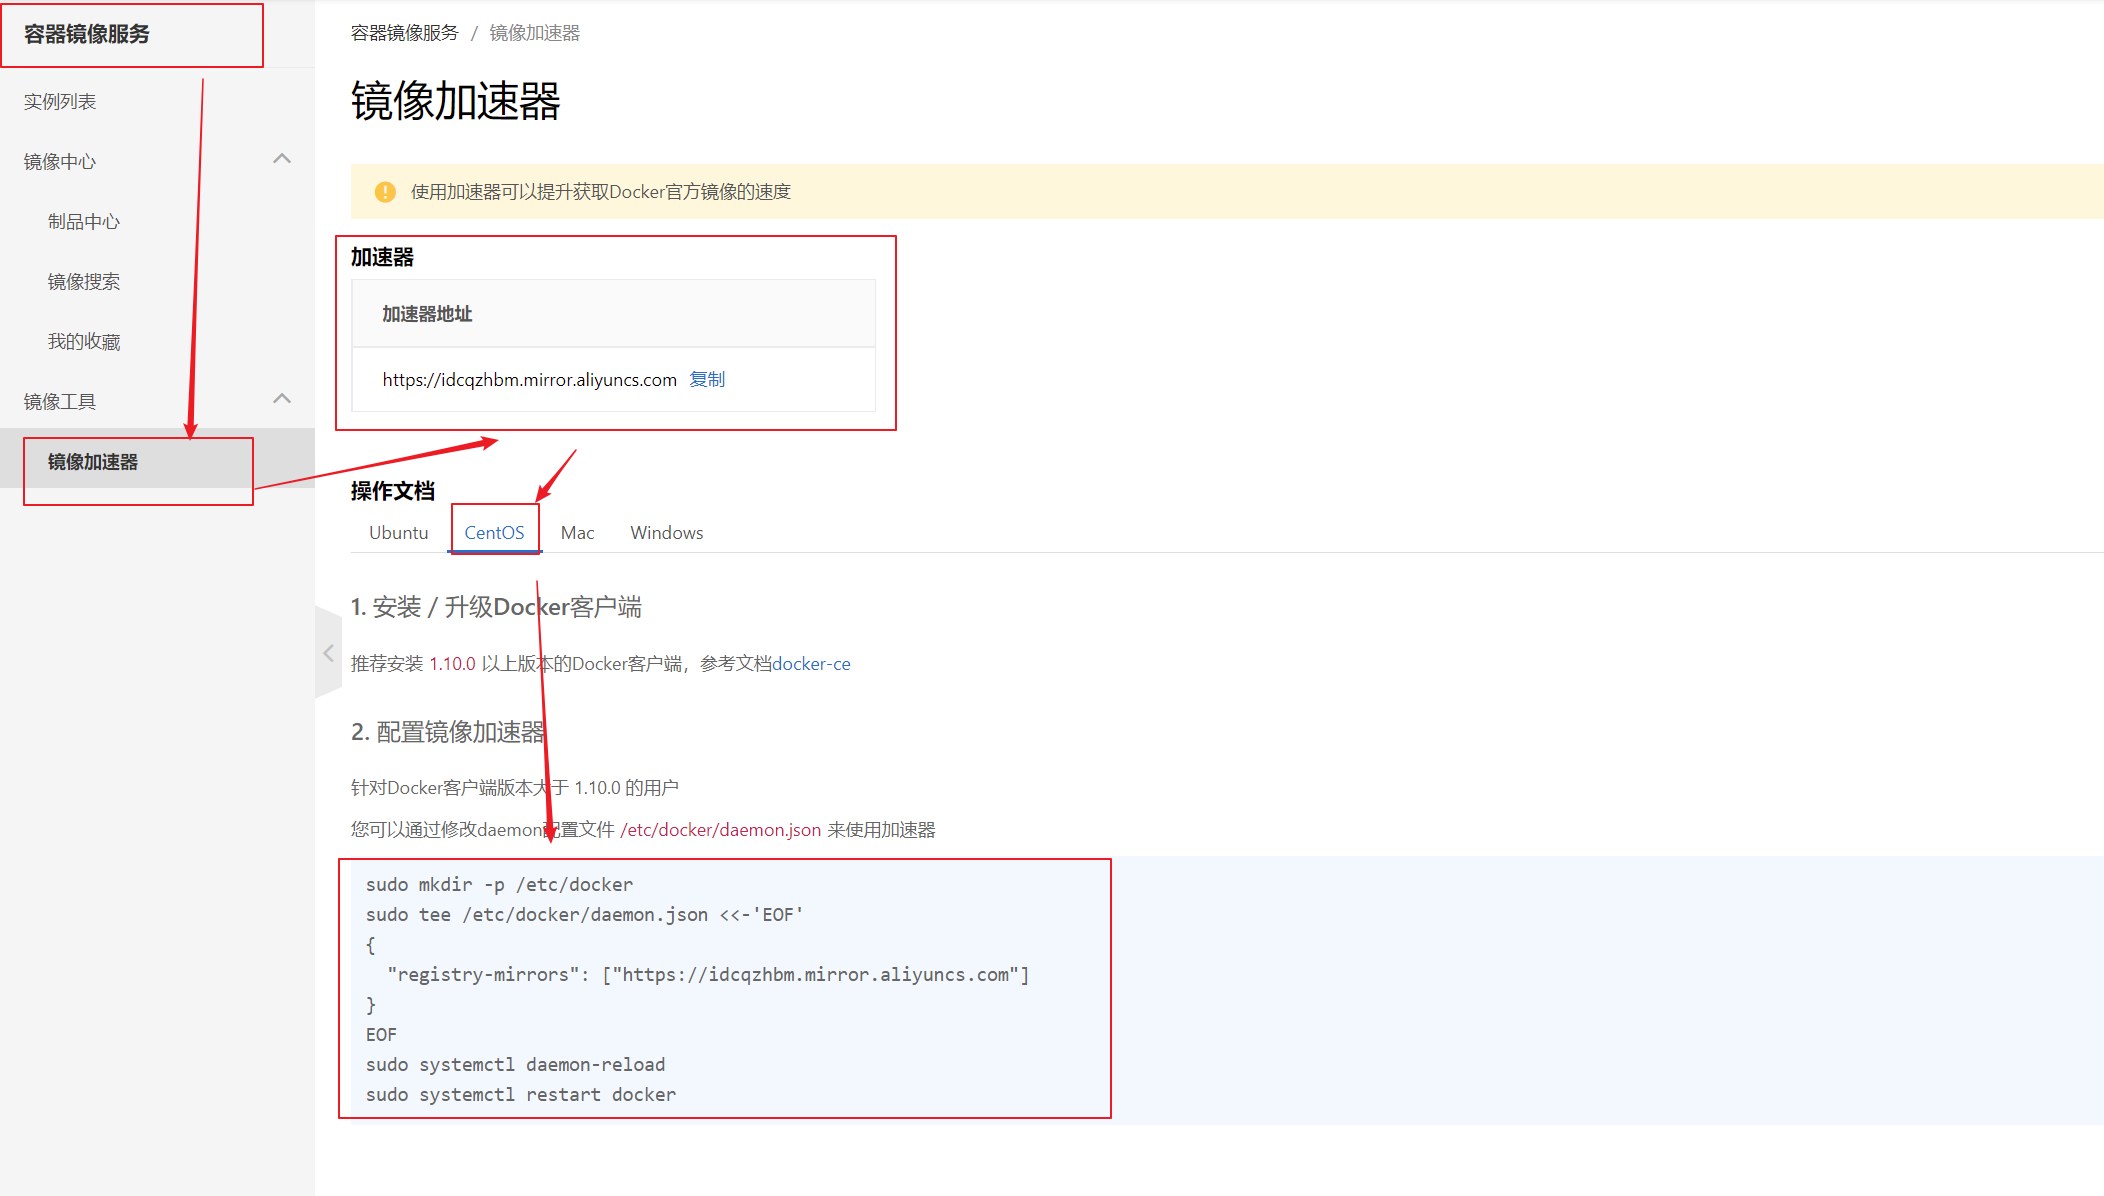
1.mkdir -p /etc/docker

2.tee /etc/docker/daemon.json <<-'EOF'
{
  "registry-mirrors": ["https://idcqzhbm.mirror.aliyuncs.com"]
}
EOF
sudo systemctl daemon-reload #重启docker后台线程sudo systemctl restart docker
3.3 docker 安装MySQL

3.3.1 下载镜像文件
docker pull mysql:5.7
3.3.2 创建实例并启动
docker run -p 3306:3306 --name mysql \
						-v /mydata/mysql/log:/var/log/mysql \
						-v /mydata/mysql/data:/var/lib/mysql \
						-v /mydata/mysql/conf:/etc/mysql \
						-e MYSQL_ROOT_PASSWORD=root \
						-d mysql:5.7
参数说明
--name指定容器名字 -v目录挂载 -p指定端口映射  -e设置mysql参数 -d后台运行
具体如下:
-p 3306:3306:将容器的3306 端口映射到主机的3306 端口
-v /mydata/mysql/conf:/etc/mysql:将配置文件夹挂载到主机
-v /mydata/mysql/log:/var/log/mysql:将日志文件夹挂载到主机
-v /mydata/mysql/data:/var/lib/mysql/:将配置文件夹挂载到主机
-e MYSQL_ROOT_PASSWORD=root:初始化root 用户的密码
3.3.3 配置MYSQL
主要是配置编码方式,因为默认有些不是utf-8。
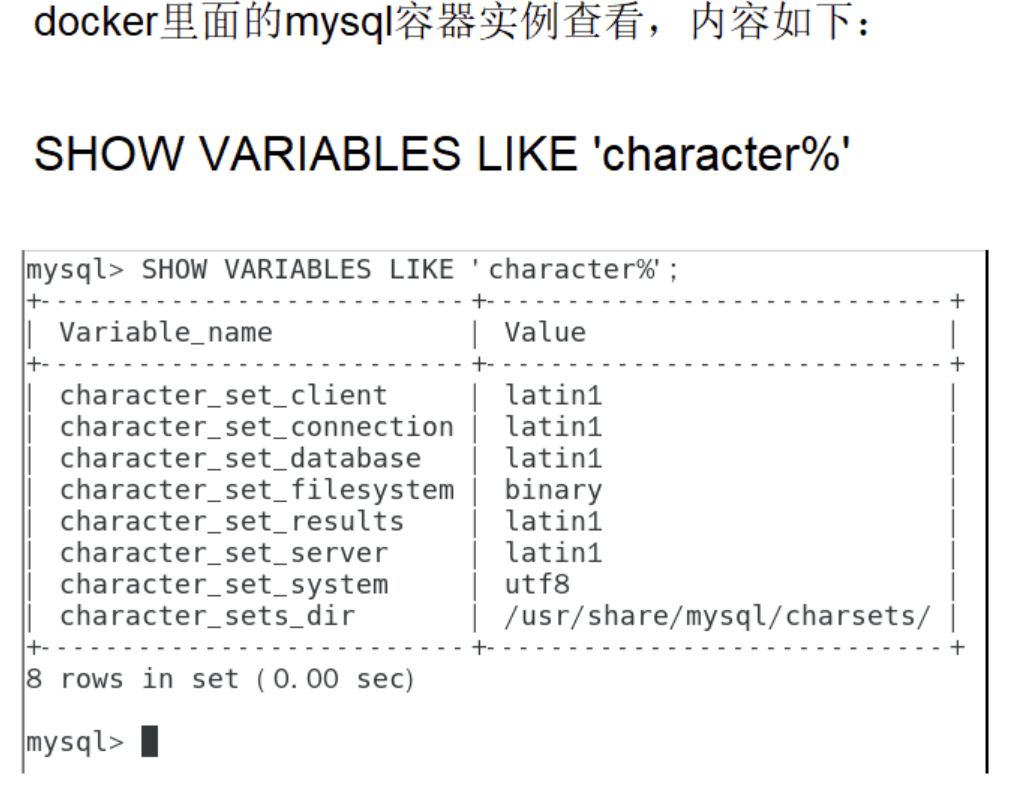
所以我们需要进行一些配置,使得变为utf-8,支持中文编码方式,不会乱码。
vi /mydata/mysql/conf/my.cnf


[client]
default-character-set=utf8


[mysql]
default-character-set=utf8


[mysqld]
init_connect='SET collation_connection = utf8_unicode_ci'
init_connect='SET NAMES utf8'
character-set-server=utf8
collation-server=utf8_unicode_ci
skip-character-set-client-handshake
skip-name-resolve
注意:解决MySQL 连接慢的问题
在配置文件中加入如下,并重启mysql
[mysqld]
skip-name-resolve
解释:
skip-name-resolve:跳过域名解析
3.3.4 通过容器的mysql 命令行工具连接
docker exec -it mysql mysql -uroot -proot
3.3.5 设置root 远程访问
grant all privileges on *.* to 'root'@'%' identified by 'root' with grant option;
flush privileges;
3.3.6 进入 mysql 文件系统
docker exec -it mysql /bin/bash
3.4 docker 安装redis
3.4.1 下载镜像文件
docker pull redis
3.4.2 创建实例并启动
1. mkdir -p /mydata/redis/conf   # 提前创建好redis挂载文件目录,因为不提前设置:mydata/redis/conf/redis.conf 这个redis.conf会被认为是一个文件夹,不会是文件

2. touch /mydata/redis/conf/redis.conf     # 创建redis 启动的配置文件


3. docker run -p 6379:6379 --name redis -v /mydata/redis/data:/data \
-v /mydata/redis/conf/redis.conf:/etc/redis/redis.conf \
-d redis redis-server /etc/redis/redis.conf

参数解释:
-v /mydata/redis/data:/data \    # 将数据目录挂在到本地保证数据安全
-v /mydata/redis/conf/redis.conf:/etc/redis/redis.conf \    # 将配置文件挂在到本地修改方便
需要注意的是:在reids.conf中设置开启数据持久化。

redis 自描述文件:
https://raw.githubusercontent.com/antirez/redis/4.0/redis.conf
如果还需要设置其他的可以去上面这个文件中看。
3.4.3 使用redis 镜像执行redis-cli 命令连接
docker exec -it redis redis-cli
3.4.4 Redis 图形化界面

连接自己的redis。

3.5 开发环境统一

因为我们创建了Mysql 和redis的容器,所以设置 自启 来避免每次都要重新去运行。
3.5.1 Maven
在maven的配置文件中修改镜像源和jdk版本。
配置阿里云镜像
<mirrors>
		<mirror>
				<id>nexus-aliyun</id>
				<mirrorOf>central</mirrorOf>
				<name>Nexus aliyun</name>
				<url>http://maven.aliyun.com/nexus/content/groups/public</url>
		</mirror>
</mirrors>
配置jdk1.8 编译项目
<profiles>
		<profile>
				<id>jdk-1.8</id>
				<activation>
				<activeByDefault>true</activeByDefault>
				<jdk>1.8</jdk>
				</activation>
				<properties>
				<maven.compiler.source>1.8</maven.compiler.source>
				<maven.compiler.target>1.8</maven.compiler.target>
				<maven.compiler.compilerVersion>1.8</maven.compiler.compilerVersion>
				</properties>
		</profile>
</profiles>
3.5.2 Idea&VsCode
- idea 安装lombok、mybatisx 插件
- 下载 vs code 软件----前端必备 https://code.visualstudio.com/
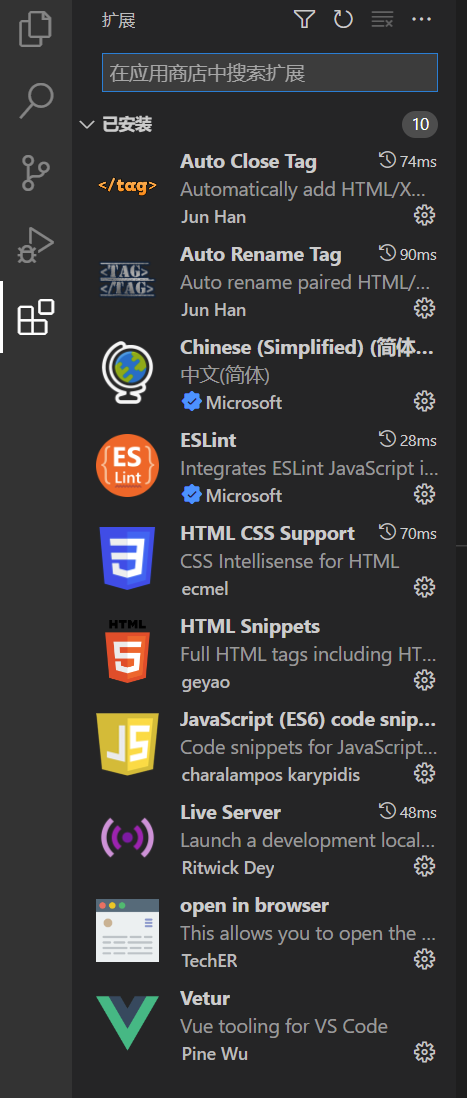
Vscode 安装开发必备插件
- Vetur —— 语法高亮、智能感知、Emmet 等,包含格式化功能, Alt+Shift+F (格式化全文),Ctrl+K Ctrl+F(格式化选中代码,两个Ctrl需要同时按着)
- EsLint —— 语法纠错
- Auto Close Tag —— 自动闭合HTML/XML 标签
- Auto Rename Tag —— 自动完成另一侧标签的同步修改
- JavaScript(ES6) code snippets — — ES6 语法智能提示以及快速输入, 除js 外还支持.ts,.jsx,.tsx,.html,.vue,省去了配置其支持各种包含js 代码文件的时间
- HTML CSS Support —— 让html 标签上写class 智能提示当前项目所支持的样式
- HTML Snippets —— html 快速自动补全
- Open in browser —— 浏览器快速打开
- Live Server —— 以内嵌服务器方式打开
- Chinese (Simplified) Language Pack for Visual Studio Code —— 中文语言包
3.5.3 安装配置git ---- 配合码云
- 下载git;https://git-scm.com
- 配置 git,进入git bash
# 配置用户名
git config --global user.name "username" //(名字)
# 配置邮箱
git config --global user.email "username@email.com" //(注册账号时用的邮箱)
- 配置ssh 免密登录----配合码云
可以参考码云给出的方法。 https://gitee.com/help/articles/4181#article-header0
进入git bash;使用:ssh-keygen -t rsa -C "xxxxx@xxxxx.com"命令。连续三次回车。
一般用户目录下会有

或者cat ~/.ssh/id_rsa.pub
登录进入gitee,在设置里面找到SSH KEY 将.pub 文件的内容粘贴进去
使用ssh -T git@gitee.com测试是否成功即可
Git+码云教程 https://gitee.com/help/articles/4104
3.5.4 创建谷粒商城基础项目仓库----以码云为例

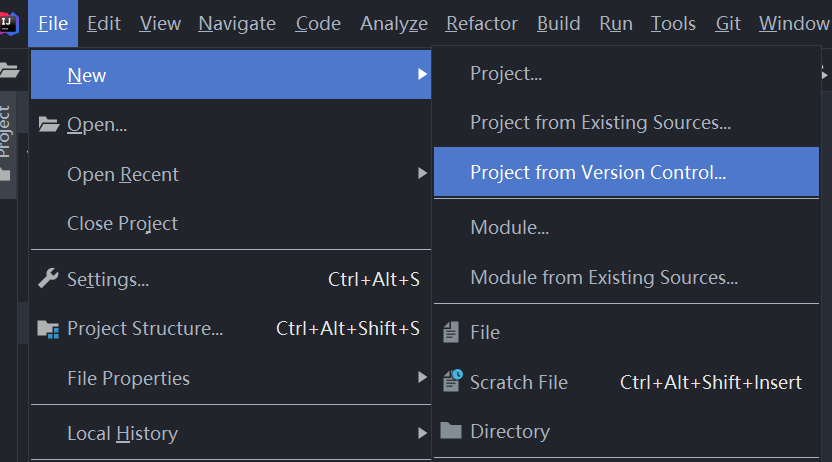
远程仓库创建之后在idea中进行clone下载到本地项目。

3.3.6 创建微服务
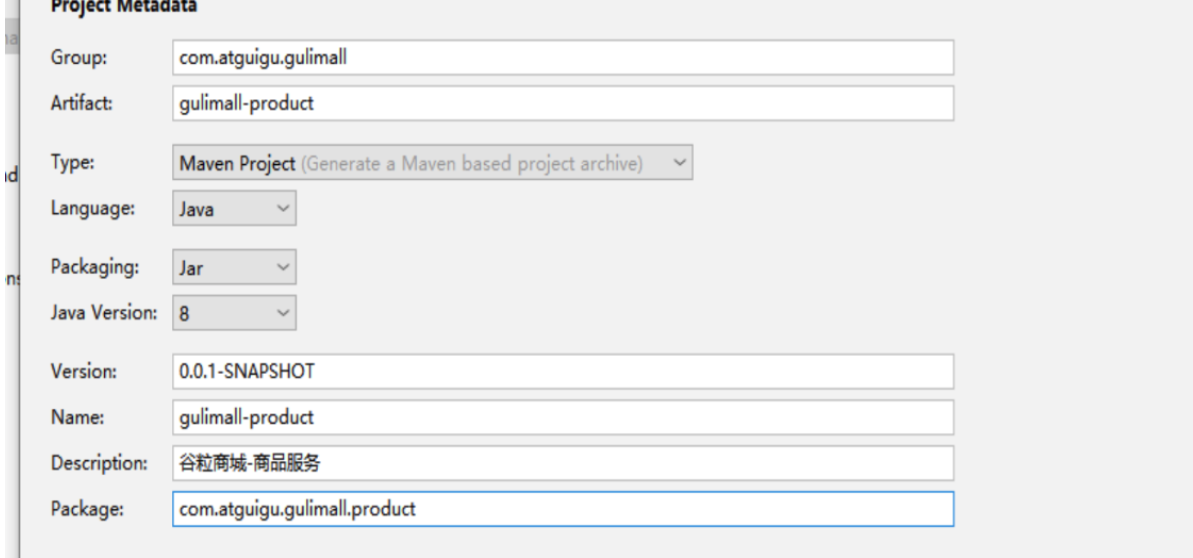
老师课件

同理创建其他微服务。
Group:com.atguigu.gulimall
Artifact: gulimall-product gulimall-order gulimall-ware gulimall-member gulimall-coupon
微服务详解:
商品服务product
仓储服务ware
订单服务order
优惠券服务coupon
用户服务member
每个模块导入web和openFeign
openFeign 让各个微服务之间可以进行调用
项目架构:
创建各个微服务完成之后,赋值一个pom文件作为聚合服务 的pom文件,并且进行修改
创建父模块:在gulimall中创建pom.xml,并且将各个微服务整合进来:
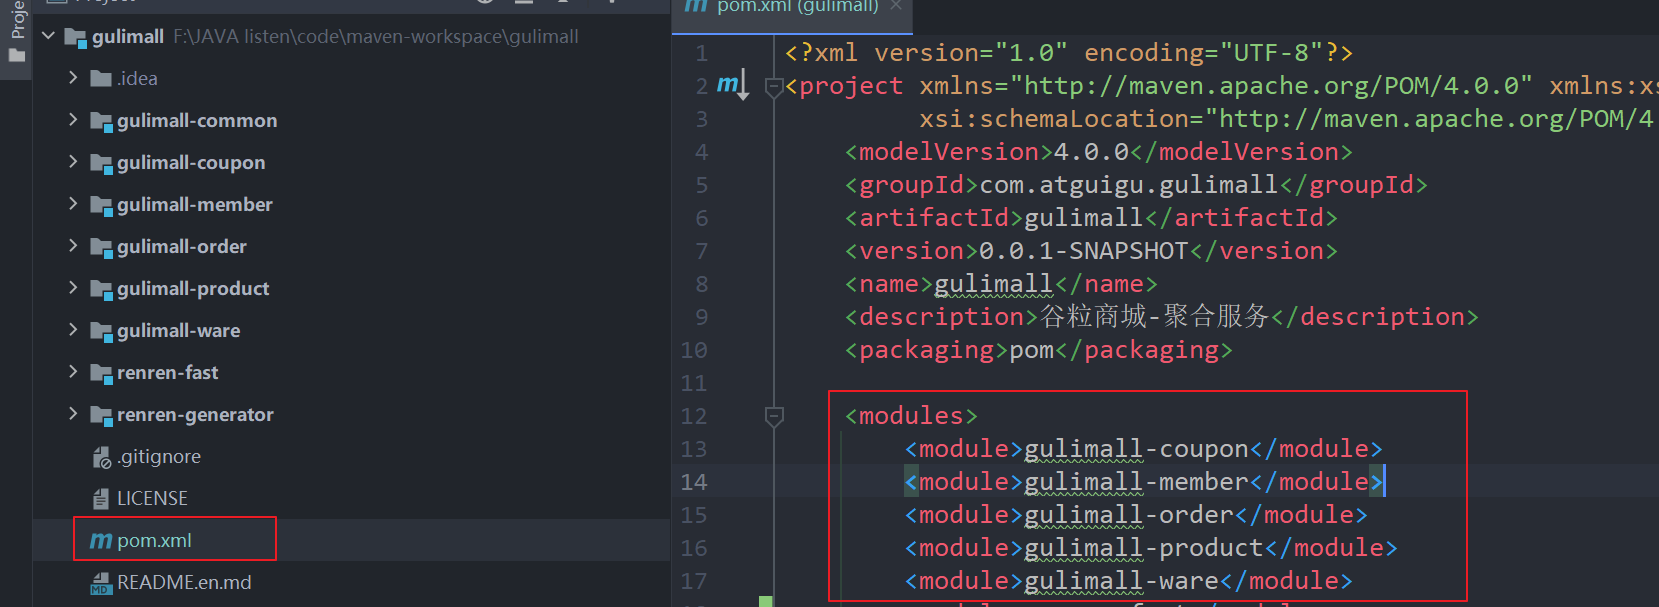
<?xml version="1.0" encoding="UTF-8"?>
<project xmlns="http://maven.apache.org/POM/4.0.0" xmlns:xsi="http://www.w3.org/2001/XMLSchema-instance"
         xsi:schemaLocation="http://maven.apache.org/POM/4.0.0 https://maven.apache.org/xsd/maven-4.0.0.xsd">
    <modelVersion>4.0.0</modelVersion>
    <groupId>com.atguigu.gulimall</groupId>
    <artifactId>gulimall</artifactId>
    <version>0.0.1-SNAPSHOT</version>
    <name>gulimall</name>
    <description>谷粒商城-聚合服务</description>
    <packaging>pom</packaging>

    <modules>
        <module>gulimall-coupon</module>
        <module>gulimall-member</module>
        <module>gulimall-order</module>
        <module>gulimall-product</module>
        <module>gulimall-ware</module>
    </modules>
</project>
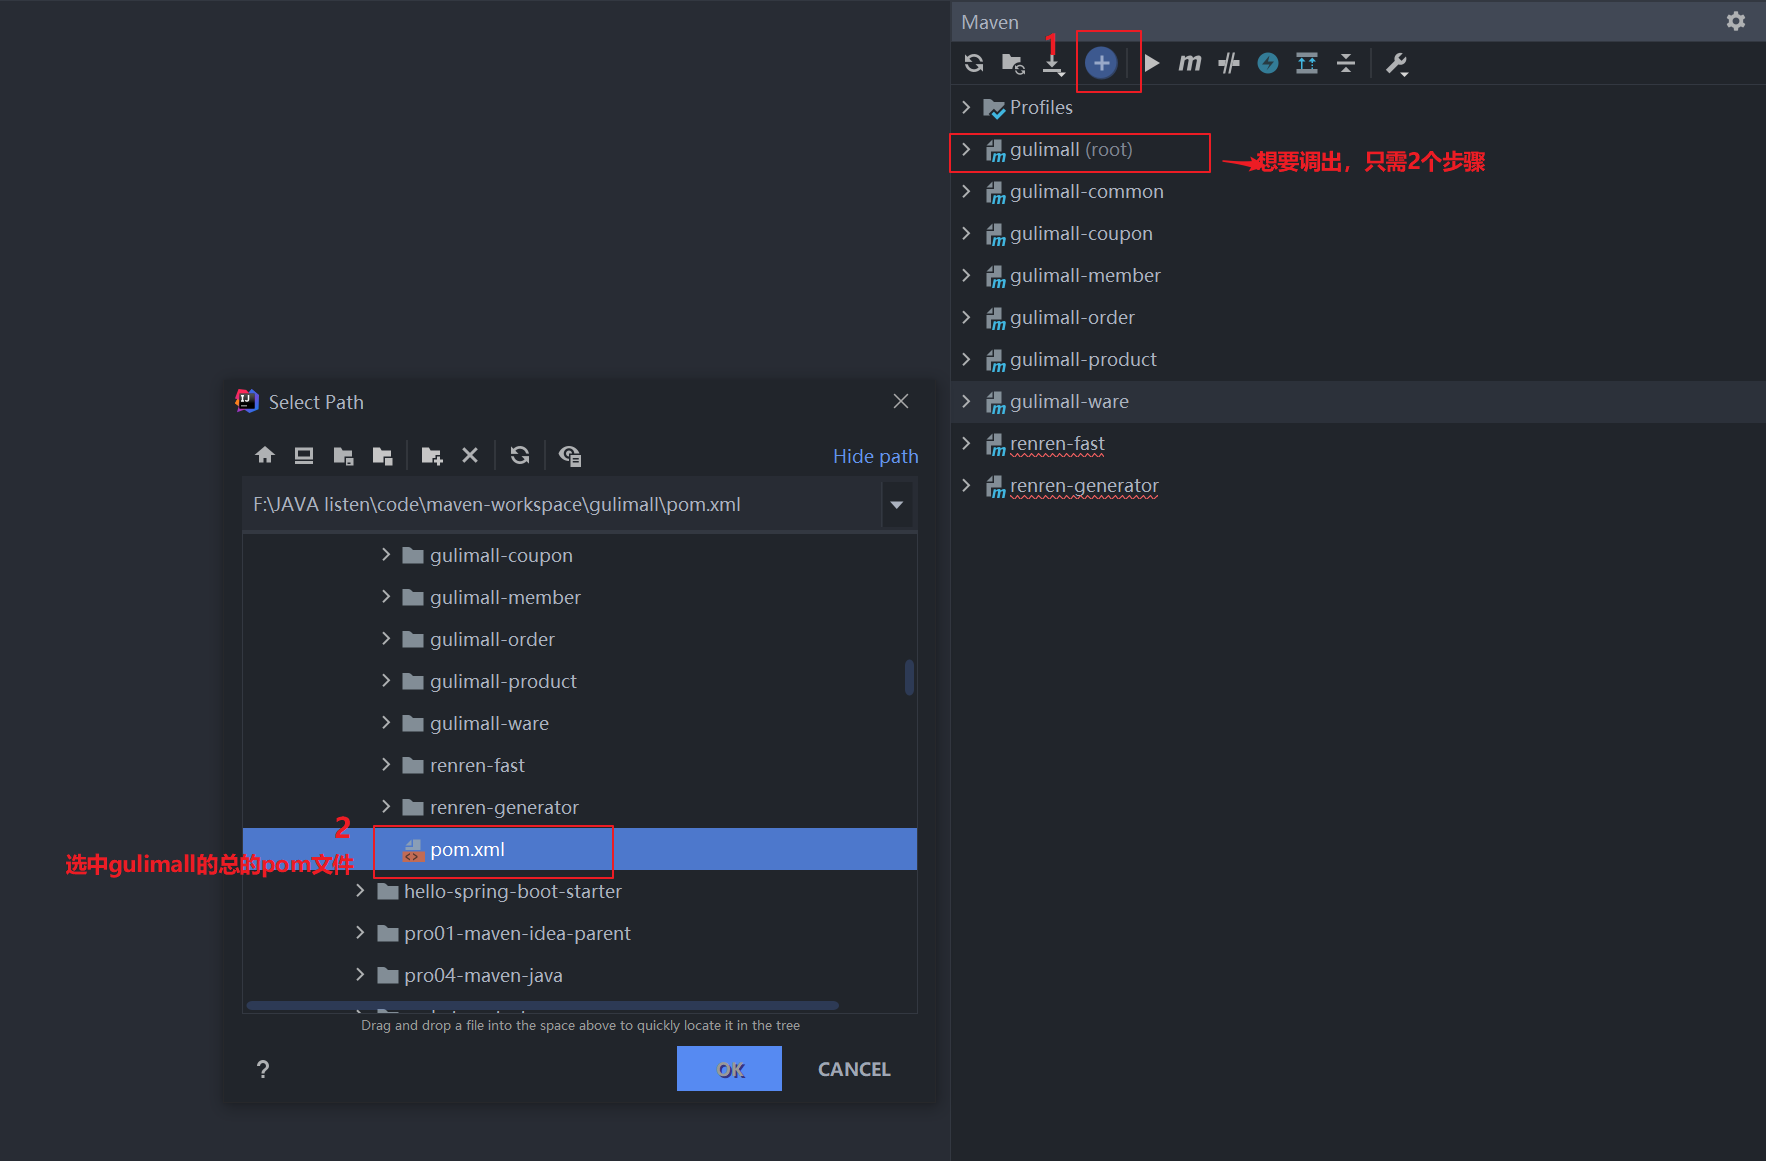
此外,如果想在 maven 处调出 聚合服务 gulimall的信息,需要以下步骤:
在maven窗口刷新,并点击+号,找到刚才的pom.xml添加进来,发现多了个root。这样比如运行root的clean命令,其他项目也一起clean了。
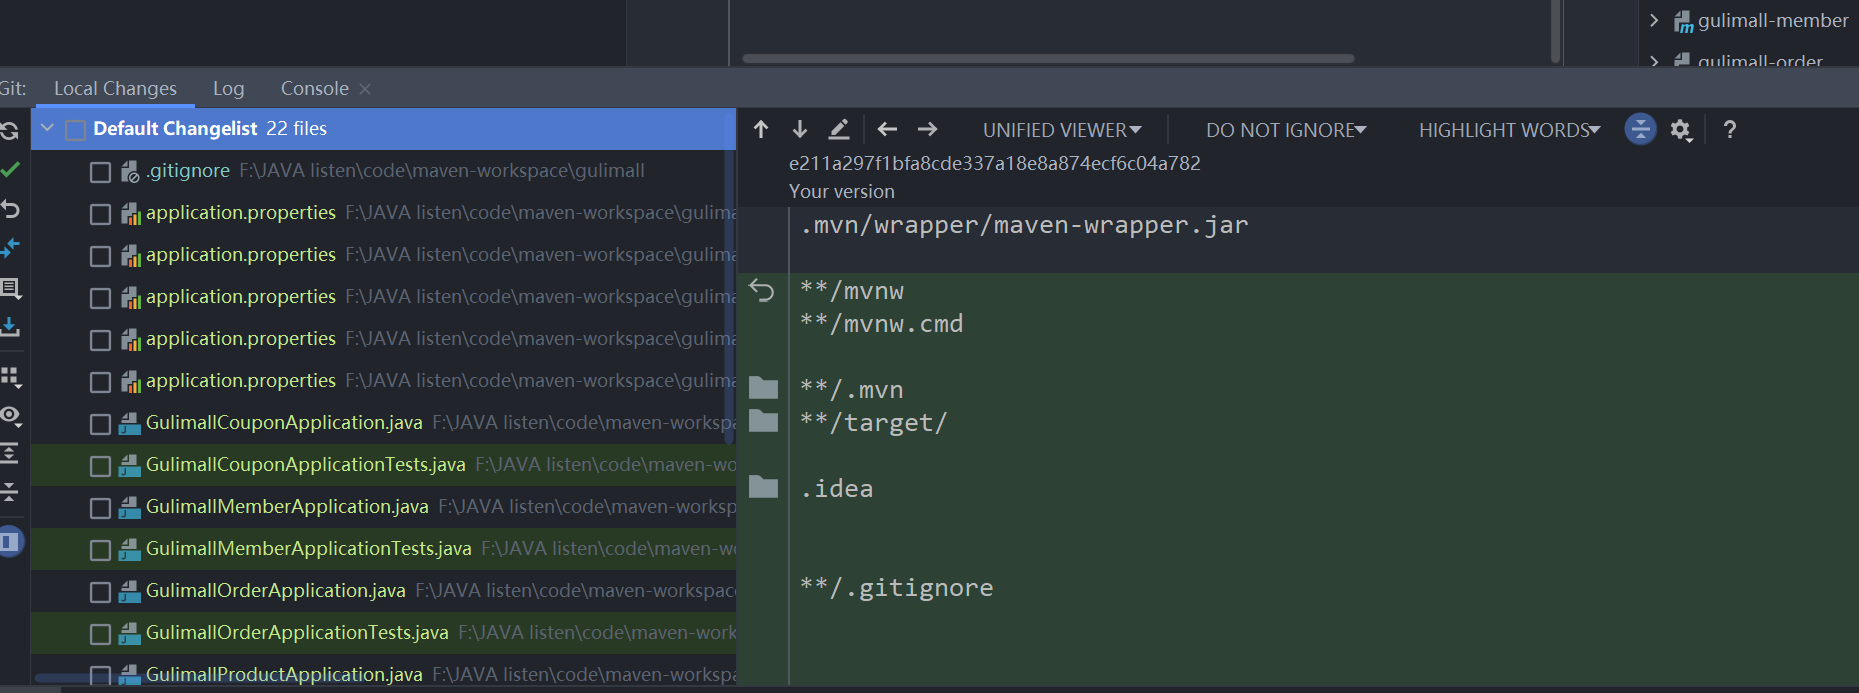
在进行git上传到远程仓库的时候,我们需要忽略一些文件,保证上传 src 和 pom 文件即可
在父工程的.gitignore文件中设置我们要忽略的文件。
总体效果:
调出 LocalChanges , idea新版默认在 commit 时才会调出该窗口。

3.3.7 数据库准备
创建数据库。

字符集选utf8mb4,他能兼容utf8且能解决一些乱码的问题。
建立下面数据库
gulimall_oms
gulimall_pms
gulimall_sms
gulimall_ums
gulimall_wms所有的数据库数据再复杂也不建立外键,因为在电商系统里,数据量大,做外键关联很耗性能。
对于数据库设计,这些内容将在后面会讲到。


gulimall-oms.sql

drop table if exists oms_order;

drop table if exists oms_order_item;

drop table if exists oms_order_operate_history;

drop table if exists oms_order_return_apply;

drop table if exists oms_order_return_reason;

drop table if exists oms_order_setting;

drop table if exists oms_payment_info;

drop table if exists oms_refund_info;

/*==============================================================*/
/* Table: oms_order                                             */
/*==============================================================*/
create table oms_order
(
   id                   bigint not null auto_increment comment 'id',
   member_id            bigint comment 'member_id',
   order_sn             char(32) comment '订单号',
   coupon_id            bigint comment '使用的优惠券',
   create_time          datetime comment 'create_time',
   member_username      varchar(200) comment '用户名',
   total_amount         decimal(18,4) comment '订单总额',
   pay_amount           decimal(18,4) comment '应付总额',
   freight_amount       decimal(18,4) comment '运费金额',
   promotion_amount     decimal(18,4) comment '促销优化金额(促销价、满减、阶梯价)',
   integration_amount   decimal(18,4) comment '积分抵扣金额',
   coupon_amount        decimal(18,4) comment '优惠券抵扣金额',
   discount_amount      decimal(18,4) comment '后台调整订单使用的折扣金额',
   pay_type             tinyint comment '支付方式【1->支付宝;2->微信;3->银联; 4->货到付款;】',
   source_type          tinyint comment '订单来源[0->PC订单;1->app订单]',
   status               tinyint comment '订单状态【0->待付款;1->待发货;2->已发货;3->已完成;4->已关闭;5->无效订单】',
   delivery_company     varchar(64) comment '物流公司(配送方式)',
   delivery_sn          varchar(64) comment '物流单号',
   auto_confirm_day     int comment '自动确认时间(天)',
   integration          int comment '可以获得的积分',
   growth               int comment '可以获得的成长值',
   bill_type            tinyint comment '发票类型[0->不开发票;1->电子发票;2->纸质发票]',
   bill_header          varchar(255) comment '发票抬头',
   bill_content         varchar(255) comment '发票内容',
   bill_receiver_phone  varchar(32) comment '收票人电话',
   bill_receiver_email  varchar(64) comment '收票人邮箱',
   receiver_name        varchar(100) comment '收货人姓名',
   receiver_phone       varchar(32) comment '收货人电话',
   receiver_post_code   varchar(32) comment '收货人邮编',
   receiver_province    varchar(32) comment '省份/直辖市',
   receiver_city        varchar(32) comment '城市',
   receiver_region      varchar(32) comment '区',
   receiver_detail_address varchar(200) comment '详细地址',
   note                 varchar(500) comment '订单备注',
   confirm_status       tinyint comment '确认收货状态[0->未确认;1->已确认]',
   delete_status        tinyint comment '删除状态【0->未删除;1->已删除】',
   use_integration      int comment '下单时使用的积分',
   payment_time         datetime comment '支付时间',
   delivery_time        datetime comment '发货时间',
   receive_time         datetime comment '确认收货时间',
   comment_time         datetime comment '评价时间',
   modify_time          datetime comment '修改时间',
   primary key (id)
);

alter table oms_order comment '订单';

/*==============================================================*/
/* Table: oms_order_item                                        */
/*==============================================================*/
create table oms_order_item
(
   id                   bigint not null auto_increment comment 'id',
   order_id             bigint comment 'order_id',
   order_sn             char(32) comment 'order_sn',
   spu_id               bigint comment 'spu_id',
   spu_name             varchar(255) comment 'spu_name',
   spu_pic              varchar(500) comment 'spu_pic',
   spu_brand            varchar(200) comment '品牌',
   category_id          bigint comment '商品分类id',
   sku_id               bigint comment '商品sku编号',
   sku_name             varchar(255) comment '商品sku名字',
   sku_pic              varchar(500) comment '商品sku图片',
   sku_price            decimal(18,4) comment '商品sku价格',
   sku_quantity         int comment '商品购买的数量',
   sku_attrs_vals       varchar(500) comment '商品销售属性组合(JSON)',
   promotion_amount     decimal(18,4) comment '商品促销分解金额',
   coupon_amount        decimal(18,4) comment '优惠券优惠分解金额',
   integration_amount   decimal(18,4) comment '积分优惠分解金额',
   real_amount          decimal(18,4) comment '该商品经过优惠后的分解金额',
   gift_integration     int comment '赠送积分',
   gift_growth          int comment '赠送成长值',
   primary key (id)
);

alter table oms_order_item comment '订单项信息';

/*==============================================================*/
/* Table: oms_order_operate_history                             */
/*==============================================================*/
create table oms_order_operate_history
(
   id                   bigint not null auto_increment comment 'id',
   order_id             bigint comment '订单id',
   operate_man          varchar(100) comment '操作人[用户;系统;后台管理员]',
   create_time          datetime comment '操作时间',
   order_status         tinyint comment '订单状态【0->待付款;1->待发货;2->已发货;3->已完成;4->已关闭;5->无效订单】',
   note                 varchar(500) comment '备注',
   primary key (id)
);

alter table oms_order_operate_history comment '订单操作历史记录';

/*==============================================================*/
/* Table: oms_order_return_apply                                */
/*==============================================================*/
create table oms_order_return_apply
(
   id                   bigint not null auto_increment comment 'id',
   order_id             bigint comment 'order_id',
   sku_id               bigint comment '退货商品id',
   order_sn             char(32) comment '订单编号',
   create_time          datetime comment '申请时间',
   member_username      varchar(64) comment '会员用户名',
   return_amount        decimal(18,4) comment '退款金额',
   return_name          varchar(100) comment '退货人姓名',
   return_phone         varchar(20) comment '退货人电话',
   status               tinyint(1) comment '申请状态[0->待处理;1->退货中;2->已完成;3->已拒绝]',
   handle_time          datetime comment '处理时间',
   sku_img              varchar(500) comment '商品图片',
   sku_name             varchar(200) comment '商品名称',
   sku_brand            varchar(200) comment '商品品牌',
   sku_attrs_vals       varchar(500) comment '商品销售属性(JSON)',
   sku_count            int comment '退货数量',
   sku_price            decimal(18,4) comment '商品单价',
   sku_real_price       decimal(18,4) comment '商品实际支付单价',
   reason               varchar(200) comment '原因',
   description述         varchar(500) comment '描述',
   desc_pics            varchar(2000) comment '凭证图片,以逗号隔开',
   handle_note          varchar(500) comment '处理备注',
   handle_man           varchar(200) comment '处理人员',
   receive_man          varchar(100) comment '收货人',
   receive_time         datetime comment '收货时间',
   receive_note         varchar(500) comment '收货备注',
   receive_phone        varchar(20) comment '收货电话',
   company_address      varchar(500) comment '公司收货地址',
   primary key (id)
);

alter table oms_order_return_apply comment '订单退货申请';

/*==============================================================*/
/* Table: oms_order_return_reason                               */
/*==============================================================*/
create table oms_order_return_reason
(
   id                   bigint not null auto_increment comment 'id',
   name                 varchar(200) comment '退货原因名',
   sort                 int comment '排序',
   status               tinyint(1) comment '启用状态',
   create_time          datetime comment 'create_time',
   primary key (id)
);

alter table oms_order_return_reason comment '退货原因';

/*==============================================================*/
/* Table: oms_order_setting                                     */
/*==============================================================*/
create table oms_order_setting
(
   id                   bigint not null auto_increment comment 'id',
   flash_order_overtime int comment '秒杀订单超时关闭时间(分)',
   normal_order_overtime int comment '正常订单超时时间(分)',
   confirm_overtime     int comment '发货后自动确认收货时间(天)',
   finish_overtime      int comment '自动完成交易时间,不能申请退货(天)',
   comment_overtime     int comment '订单完成后自动好评时间(天)',
   member_level         tinyint(2) comment '会员等级【0-不限会员等级,全部通用;其他-对应的其他会员等级】',
   primary key (id)
);

alter table oms_order_setting comment '订单配置信息';

/*==============================================================*/
/* Table: oms_payment_info                                      */
/*==============================================================*/
create table oms_payment_info
(
   id                   bigint not null auto_increment comment 'id',
   order_sn             char(32) comment '订单号(对外业务号)',
   order_id             bigint comment '订单id',
   alipay_trade_no      varchar(50) comment '支付宝交易流水号',
   total_amount         decimal(18,4) comment '支付总金额',
   subject              varchar(200) comment '交易内容',
   payment_status       varchar(20) comment '支付状态',
   create_time          datetime comment '创建时间',
   confirm_time         datetime comment '确认时间',
   callback_content     varchar(4000) comment '回调内容',
   callback_time        datetime comment '回调时间',
   primary key (id)
);

alter table oms_payment_info comment '支付信息表';

/*==============================================================*/
/* Table: oms_refund_info                                       */
/*==============================================================*/
create table oms_refund_info
(
   id                   bigint not null auto_increment comment 'id',
   order_return_id      bigint comment '退款的订单',
   refund               decimal(18,4) comment '退款金额',
   refund_sn            varchar(64) comment '退款交易流水号',
   refund_status        tinyint(1) comment '退款状态',
   refund_channel       tinyint comment '退款渠道[1-支付宝,2-微信,3-银联,4-汇款]',
   refund_content       varchar(5000),
   primary key (id)
);

alter table oms_refund_info comment '退款信息';
gulimall-pms.sql

drop table if exists pms_attr;

drop table if exists pms_attr_attrgroup_relation;

drop table if exists pms_attr_group;

drop table if exists pms_brand;

drop table if exists pms_category;

drop table if exists pms_category_brand_relation;

drop table if exists pms_comment_replay;

drop table if exists pms_product_attr_value;

drop table if exists pms_sku_images;

drop table if exists pms_sku_info;

drop table if exists pms_sku_sale_attr_value;

drop table if exists pms_spu_comment;

drop table if exists pms_spu_images;

drop table if exists pms_spu_info;

drop table if exists pms_spu_info_desc;

/*==============================================================*/
/* Table: pms_attr                                              */
/*==============================================================*/
create table pms_attr
(
   attr_id              bigint not null auto_increment comment '属性id',
   attr_name            char(30) comment '属性名',
   search_type          tinyint comment '是否需要检索[0-不需要,1-需要]',
   icon                 varchar(255) comment '属性图标',
   value_select         char(255) comment '可选值列表[用逗号分隔]',
   attr_type            tinyint comment '属性类型[0-销售属性,1-基本属性,2-既是销售属性又是基本属性]',
   enable               bigint comment '启用状态[0 - 禁用,1 - 启用]',
   catelog_id           bigint comment '所属分类',
   show_desc            tinyint comment '快速展示【是否展示在介绍上;0-否 1-是】,在sku中仍然可以调整',
   primary key (attr_id)
);

alter table pms_attr comment '商品属性';

/*==============================================================*/
/* Table: pms_attr_attrgroup_relation                           */
/*==============================================================*/
create table pms_attr_attrgroup_relation
(
   id                   bigint not null auto_increment comment 'id',
   attr_id              bigint comment '属性id',
   attr_group_id        bigint comment '属性分组id',
   attr_sort            int comment '属性组内排序',
   primary key (id)
);

alter table pms_attr_attrgroup_relation comment '属性&属性分组关联';

/*==============================================================*/
/* Table: pms_attr_group                                        */
/*==============================================================*/
create table pms_attr_group
(
   attr_group_id        bigint not null auto_increment comment '分组id',
   attr_group_name      char(20) comment '组名',
   sort                 int comment '排序',
   descript             varchar(255) comment '描述',
   icon                 varchar(255) comment '组图标',
   catelog_id           bigint comment '所属分类id',
   primary key (attr_group_id)
);

alter table pms_attr_group comment '属性分组';

/*==============================================================*/
/* Table: pms_brand                                             */
/*==============================================================*/
create table pms_brand
(
   brand_id             bigint not null auto_increment comment '品牌id',
   name                 char(50) comment '品牌名',
   logo                 varchar(2000) comment '品牌logo地址',
   descript             longtext comment '介绍',
   show_status          tinyint comment '显示状态[0-不显示;1-显示]',
   first_letter         char(1) comment '检索首字母',
   sort                 int comment '排序',
   primary key (brand_id)
);

alter table pms_brand comment '品牌';

/*==============================================================*/
/* Table: pms_category                                          */
/*==============================================================*/
create table pms_category
(
   cat_id               bigint not null auto_increment comment '分类id',
   name                 char(50) comment '分类名称',
   parent_cid           bigint comment '父分类id',
   cat_level            int comment '层级',
   show_status          tinyint comment '是否显示[0-不显示,1显示]',
   sort                 int comment '排序',
   icon                 char(255) comment '图标地址',
   product_unit         char(50) comment '计量单位',
   product_count        int comment '商品数量',
   primary key (cat_id)
);

alter table pms_category comment '商品三级分类';

/*==============================================================*/
/* Table: pms_category_brand_relation                           */
/*==============================================================*/
create table pms_category_brand_relation
(
   id                   bigint not null auto_increment,
   brand_id             bigint comment '品牌id',
   catelog_id           bigint comment '分类id',
   brand_name           varchar(255),
   catelog_name         varchar(255),
   primary key (id)
);

alter table pms_category_brand_relation comment '品牌分类关联';

/*==============================================================*/
/* Table: pms_comment_replay                                    */
/*==============================================================*/
create table pms_comment_replay
(
   id                   bigint not null auto_increment comment 'id',
   comment_id           bigint comment '评论id',
   reply_id             bigint comment '回复id',
   primary key (id)
);

alter table pms_comment_replay comment '商品评价回复关系';

/*==============================================================*/
/* Table: pms_product_attr_value                                */
/*==============================================================*/
create table pms_product_attr_value
(
   id                   bigint not null auto_increment comment 'id',
   spu_id               bigint comment '商品id',
   attr_id              bigint comment '属性id',
   attr_name            varchar(200) comment '属性名',
   attr_value           varchar(200) comment '属性值',
   attr_sort            int comment '顺序',
   quick_show           tinyint comment '快速展示【是否展示在介绍上;0-否 1-是】',
   primary key (id)
);

alter table pms_product_attr_value comment 'spu属性值';

/*==============================================================*/
/* Table: pms_sku_images                                        */
/*==============================================================*/
create table pms_sku_images
(
   id                   bigint not null auto_increment comment 'id',
   sku_id               bigint comment 'sku_id',
   img_url              varchar(255) comment '图片地址',
   img_sort             int comment '排序',
   default_img          int comment '默认图[0 - 不是默认图,1 - 是默认图]',
   primary key (id)
);

alter table pms_sku_images comment 'sku图片';

/*==============================================================*/
/* Table: pms_sku_info                                          */
/*==============================================================*/
create table pms_sku_info
(
   sku_id               bigint not null auto_increment comment 'skuId',
   spu_id               bigint comment 'spuId',
   sku_name             varchar(255) comment 'sku名称',
   sku_desc             varchar(2000) comment 'sku介绍描述',
   catalog_id           bigint comment '所属分类id',
   brand_id             bigint comment '品牌id',
   sku_default_img      varchar(255) comment '默认图片',
   sku_title            varchar(255) comment '标题',
   sku_subtitle         varchar(2000) comment '副标题',
   price                decimal(18,4) comment '价格',
   sale_count           bigint comment '销量',
   primary key (sku_id)
);

alter table pms_sku_info comment 'sku信息';

/*==============================================================*/
/* Table: pms_sku_sale_attr_value                               */
/*==============================================================*/
create table pms_sku_sale_attr_value
(
   id                   bigint not null auto_increment comment 'id',
   sku_id               bigint comment 'sku_id',
   attr_id              bigint comment 'attr_id',
   attr_name            varchar(200) comment '销售属性名',
   attr_value           varchar(200) comment '销售属性值',
   attr_sort            int comment '顺序',
   primary key (id)
);

alter table pms_sku_sale_attr_value comment 'sku销售属性&值';

/*==============================================================*/
/* Table: pms_spu_comment                                       */
/*==============================================================*/
create table pms_spu_comment
(
   id                   bigint not null auto_increment comment 'id',
   sku_id               bigint comment 'sku_id',
   spu_id               bigint comment 'spu_id',
   spu_name             varchar(255) comment '商品名字',
   member_nick_name     varchar(255) comment '会员昵称',
   star                 tinyint(1) comment '星级',
   member_ip            varchar(64) comment '会员ip',
   create_time          datetime comment '创建时间',
   show_status          tinyint(1) comment '显示状态[0-不显示,1-显示]',
   spu_attributes       varchar(255) comment '购买时属性组合',
   likes_count          int comment '点赞数',
   reply_count          int comment '回复数',
   resources            varchar(1000) comment '评论图片/视频[json数据;[{type:文件类型,url:资源路径}]]',
   content              text comment '内容',
   member_icon          varchar(255) comment '用户头像',
   comment_type         tinyint comment '评论类型[0 - 对商品的直接评论,1 - 对评论的回复]',
   primary key (id)
);

alter table pms_spu_comment comment '商品评价';

/*==============================================================*/
/* Table: pms_spu_images                                        */
/*==============================================================*/
create table pms_spu_images
(
   id                   bigint not null auto_increment comment 'id',
   spu_id               bigint comment 'spu_id',
   img_name             varchar(200) comment '图片名',
   img_url              varchar(255) comment '图片地址',
   img_sort             int comment '顺序',
   default_img          tinyint comment '是否默认图',
   primary key (id)
);

alter table pms_spu_images comment 'spu图片';

/*==============================================================*/
/* Table: pms_spu_info                                          */
/*==============================================================*/
create table pms_spu_info
(
   id                   bigint not null auto_increment comment '商品id',
   spu_name             varchar(200) comment '商品名称',
   spu_description      varchar(1000) comment '商品描述',
   catalog_id           bigint comment '所属分类id',
   brand_id             bigint comment '品牌id',
   weight               decimal(18,4),
   publish_status       tinyint comment '上架状态[0 - 下架,1 - 上架]',
   create_time          datetime,
   update_time          datetime,
   primary key (id)
);

alter table pms_spu_info comment 'spu信息';

/*==============================================================*/
/* Table: pms_spu_info_desc                                     */
/*==============================================================*/
create table pms_spu_info_desc
(
   spu_id               bigint not null comment '商品id',
   decript              longtext comment '商品介绍',
   primary key (spu_id)
);

alter table pms_spu_info_desc comment 'spu信息介绍';
gulimall_sms.sql

drop table if exists sms_coupon;

drop table if exists sms_coupon_history;

drop table if exists sms_coupon_spu_category_relation;

drop table if exists sms_coupon_spu_relation;

drop table if exists sms_home_adv;

drop table if exists sms_home_subject;

drop table if exists sms_home_subject_spu;

drop table if exists sms_member_price;

drop table if exists sms_seckill_promotion;

drop table if exists sms_seckill_session;

drop table if exists sms_seckill_sku_notice;

drop table if exists sms_seckill_sku_relation;

drop table if exists sms_sku_full_reduction;

drop table if exists sms_sku_ladder;

drop table if exists sms_spu_bounds;

/*==============================================================*/
/* Table: sms_coupon                                            */
/*==============================================================*/
create table sms_coupon
(
   id                   bigint not null auto_increment comment 'id',
   coupon_type          tinyint(1) comment '优惠卷类型[0->全场赠券;1->会员赠券;2->购物赠券;3->注册赠券]',
   coupon_img           varchar(2000) comment '优惠券图片',
   coupon_name          varchar(100) comment '优惠卷名字',
   num                  int comment '数量',
   amount               decimal(18,4) comment '金额',
   per_limit            int comment '每人限领张数',
   min_point            decimal(18,4) comment '使用门槛',
   start_time           datetime comment '开始时间',
   end_time             datetime comment '结束时间',
   use_type             tinyint(1) comment '使用类型[0->全场通用;1->指定分类;2->指定商品]',
   note                 varchar(200) comment '备注',
   publish_count        int(11) comment '发行数量',
   use_count            int(11) comment '已使用数量',
   receive_count        int(11) comment '领取数量',
   enable_start_time    datetime comment '可以领取的开始日期',
   enable_end_time      datetime comment '可以领取的结束日期',
   code                 varchar(64) comment '优惠码',
   member_level         tinyint(1) comment '可以领取的会员等级[0->不限等级,其他-对应等级]',
   publish              tinyint(1) comment '发布状态[0-未发布,1-已发布]',
   primary key (id)
);

alter table sms_coupon comment '优惠券信息';

/*==============================================================*/
/* Table: sms_coupon_history                                    */
/*==============================================================*/
create table sms_coupon_history
(
   id                   bigint not null auto_increment comment 'id',
   coupon_id            bigint comment '优惠券id',
   member_id            bigint comment '会员id',
   member_nick_name     varchar(64) comment '会员名字',
   get_type             tinyint(1) comment '获取方式[0->后台赠送;1->主动领取]',
   create_time          datetime comment '创建时间',
   use_type             tinyint(1) comment '使用状态[0->未使用;1->已使用;2->已过期]',
   use_time             datetime comment '使用时间',
   order_id             bigint comment '订单id',
   order_sn             bigint comment '订单号',
   primary key (id)
);

alter table sms_coupon_history comment '优惠券领取历史记录';

/*==============================================================*/
/* Table: sms_coupon_spu_category_relation                      */
/*==============================================================*/
create table sms_coupon_spu_category_relation
(
   id                   bigint not null auto_increment comment 'id',
   coupon_id            bigint comment '优惠券id',
   category_id          bigint comment '产品分类id',
   category_name        varchar(64) comment '产品分类名称',
   primary key (id)
);

alter table sms_coupon_spu_category_relation comment '优惠券分类关联';

/*==============================================================*/
/* Table: sms_coupon_spu_relation                               */
/*==============================================================*/
create table sms_coupon_spu_relation
(
   id                   bigint not null auto_increment comment 'id',
   coupon_id            bigint comment '优惠券id',
   spu_id               bigint comment 'spu_id',
   spu_name             varchar(255) comment 'spu_name',
   primary key (id)
);

alter table sms_coupon_spu_relation comment '优惠券与产品关联';

/*==============================================================*/
/* Table: sms_home_adv                                          */
/*==============================================================*/
create table sms_home_adv
(
   id                   bigint not null auto_increment comment 'id',
   name                 varchar(100) comment '名字',
   pic                  varchar(500) comment '图片地址',
   start_time           datetime comment '开始时间',
   end_time             datetime comment '结束时间',
   status               tinyint(1) comment '状态',
   click_count          int comment '点击数',
   url                  varchar(500) comment '广告详情连接地址',
   note                 varchar(500) comment '备注',
   sort                 int comment '排序',
   publisher_id         bigint comment '发布者',
   auth_id              bigint comment '审核者',
   primary key (id)
);

alter table sms_home_adv comment '首页轮播广告';

/*==============================================================*/
/* Table: sms_home_subject                                      */
/*==============================================================*/
create table sms_home_subject
(
   id                   bigint not null auto_increment comment 'id',
   name                 varchar(200) comment '专题名字',
   title                varchar(255) comment '专题标题',
   sub_title            varchar(255) comment '专题副标题',
   status               tinyint(1) comment '显示状态',
   url                  varchar(500) comment '详情连接',
   sort                 int comment '排序',
   img                  varchar(500) comment '专题图片地址',
   primary key (id)
);

alter table sms_home_subject comment '首页专题表【jd首页下面很多专题,每个专题链接新的页面,展示专题商品信息】';

/*==============================================================*/
/* Table: sms_home_subject_spu                                  */
/*==============================================================*/
create table sms_home_subject_spu
(
   id                   bigint not null auto_increment comment 'id',
   name                 varchar(200) comment '专题名字',
   subject_id           bigint comment '专题id',
   spu_id               bigint comment 'spu_id',
   sort                 int comment '排序',
   primary key (id)
);

alter table sms_home_subject_spu comment '专题商品';

/*==============================================================*/
/* Table: sms_member_price                                      */
/*==============================================================*/
create table sms_member_price
(
   id                   bigint not null auto_increment comment 'id',
   sku_id               bigint comment 'sku_id',
   member_level_id      bigint comment '会员等级id',
   member_level_name    varchar(100) comment '会员等级名',
   member_price         decimal(18,4) comment '会员对应价格',
   add_other            tinyint(1) comment '可否叠加其他优惠[0-不可叠加优惠,1-可叠加]',
   primary key (id)
);

alter table sms_member_price comment '商品会员价格';

/*==============================================================*/
/* Table: sms_seckill_promotion                                 */
/*==============================================================*/
create table sms_seckill_promotion
(
   id                   bigint not null auto_increment comment 'id',
   title                varchar(255) comment '活动标题',
   start_time           datetime comment '开始日期',
   end_time             datetime comment '结束日期',
   status               tinyint comment '上下线状态',
   create_time          datetime comment '创建时间',
   user_id              bigint comment '创建人',
   primary key (id)
);

alter table sms_seckill_promotion comment '秒杀活动';

/*==============================================================*/
/* Table: sms_seckill_session                                   */
/*==============================================================*/
create table sms_seckill_session
(
   id                   bigint not null auto_increment comment 'id',
   name                 varchar(200) comment '场次名称',
   start_time           datetime comment '每日开始时间',
   end_time             datetime comment '每日结束时间',
   status               tinyint(1) comment '启用状态',
   create_time          datetime comment '创建时间',
   primary key (id)
);

alter table sms_seckill_session comment '秒杀活动场次';

/*==============================================================*/
/* Table: sms_seckill_sku_notice                                */
/*==============================================================*/
create table sms_seckill_sku_notice
(
   id                   bigint not null auto_increment comment 'id',
   member_id            bigint comment 'member_id',
   sku_id               bigint comment 'sku_id',
   session_id           bigint comment '活动场次id',
   subcribe_time        datetime comment '订阅时间',
   send_time            datetime comment '发送时间',
   notice_type          tinyint(1) comment '通知方式[0-短信,1-邮件]',
   primary key (id)
);

alter table sms_seckill_sku_notice comment '秒杀商品通知订阅';

/*==============================================================*/
/* Table: sms_seckill_sku_relation                              */
/*==============================================================*/
create table sms_seckill_sku_relation
(
   id                   bigint not null auto_increment comment 'id',
   promotion_id         bigint comment '活动id',
   promotion_session_id bigint comment '活动场次id',
   sku_id               bigint comment '商品id',
   seckill_price        decimal comment '秒杀价格',
   seckill_count        decimal comment '秒杀总量',
   seckill_limit        decimal comment '每人限购数量',
   seckill_sort         int comment '排序',
   primary key (id)
);

alter table sms_seckill_sku_relation comment '秒杀活动商品关联';

/*==============================================================*/
/* Table: sms_sku_full_reduction                                */
/*==============================================================*/
create table sms_sku_full_reduction
(
   id                   bigint not null auto_increment comment 'id',
   sku_id               bigint comment 'spu_id',
   full_price           decimal(18,4) comment '满多少',
   reduce_price         decimal(18,4) comment '减多少',
   add_other            tinyint(1) comment '是否参与其他优惠',
   primary key (id)
);

alter table sms_sku_full_reduction comment '商品满减信息';

/*==============================================================*/
/* Table: sms_sku_ladder                                        */
/*==============================================================*/
create table sms_sku_ladder
(
   id                   bigint not null auto_increment comment 'id',
   sku_id               bigint comment 'spu_id',
   full_count           int comment '满几件',
   discount             decimal(4,2) comment '打几折',
   price                decimal(18,4) comment '折后价',
   add_other            tinyint(1) comment '是否叠加其他优惠[0-不可叠加,1-可叠加]',
   primary key (id)
);

alter table sms_sku_ladder comment '商品阶梯价格';

/*==============================================================*/
/* Table: sms_spu_bounds                                        */
/*==============================================================*/
create table sms_spu_bounds
(
   id                   bigint not null auto_increment comment 'id',
   spu_id               bigint,
   grow_bounds          decimal(18,4) comment '成长积分',
   buy_bounds           decimal(18,4) comment '购物积分',
   work                 tinyint(1) comment '优惠生效情况[1111(四个状态位,从右到左);0 - 无优惠,成长积分是否赠送;1 - 无优惠,购物积分是否赠送;2 - 有优惠,成长积分是否赠送;3 - 有优惠,购物积分是否赠送【状态位0:不赠送,1:赠送】]',
   primary key (id)
);

alter table sms_spu_bounds comment '商品spu积分设置';
gulimall_ums.sql

drop table if exists ums_growth_change_history;

drop table if exists ums_integration_change_history;

drop table if exists ums_member;

drop table if exists ums_member_collect_spu;

drop table if exists ums_member_collect_subject;

drop table if exists ums_member_level;

drop table if exists ums_member_login_log;

drop table if exists ums_member_receive_address;

drop table if exists ums_member_statistics_info;

/*==============================================================*/
/* Table: ums_growth_change_history                             */
/*==============================================================*/
create table ums_growth_change_history
(
   id                   bigint not null auto_increment comment 'id',
   member_id            bigint comment 'member_id',
   create_time          datetime comment 'create_time',
   change_count         int comment '改变的值(正负计数)',
   note                 varchar(0) comment '备注',
   source_type          tinyint comment '积分来源[0-购物,1-管理员修改]',
   primary key (id)
);

alter table ums_growth_change_history comment '成长值变化历史记录';

/*==============================================================*/
/* Table: ums_integration_change_history                        */
/*==============================================================*/
create table ums_integration_change_history
(
   id                   bigint not null auto_increment comment 'id',
   member_id            bigint comment 'member_id',
   create_time          datetime comment 'create_time',
   change_count         int comment '变化的值',
   note                 varchar(255) comment '备注',
   source_tyoe          tinyint comment '来源[0->购物;1->管理员修改;2->活动]',
   primary key (id)
);

alter table ums_integration_change_history comment '积分变化历史记录';

/*==============================================================*/
/* Table: ums_member                                            */
/*==============================================================*/
create table ums_member
(
   id                   bigint not null auto_increment comment 'id',
   level_id             bigint comment '会员等级id',
   username             char(64) comment '用户名',
   password             varchar(64) comment '密码',
   nickname             varchar(64) comment '昵称',
   mobile               varchar(20) comment '手机号码',
   email                varchar(64) comment '邮箱',
   header               varchar(500) comment '头像',
   gender               tinyint comment '性别',
   birth                date comment '生日',
   city                 varchar(500) comment '所在城市',
   job                  varchar(255) comment '职业',
   sign                 varchar(255) comment '个性签名',
   source_type          tinyint comment '用户来源',
   integration          int comment '积分',
   growth               int comment '成长值',
   status               tinyint comment '启用状态',
   create_time          datetime comment '注册时间',
   primary key (id)
);

alter table ums_member comment '会员';

/*==============================================================*/
/* Table: ums_member_collect_spu                                */
/*==============================================================*/
create table ums_member_collect_spu
(
   id                   bigint not null comment 'id',
   member_id            bigint comment '会员id',
   spu_id               bigint comment 'spu_id',
   spu_name             varchar(500) comment 'spu_name',
   spu_img              varchar(500) comment 'spu_img',
   create_time          datetime comment 'create_time',
   primary key (id)
);

alter table ums_member_collect_spu comment '会员收藏的商品';

/*==============================================================*/
/* Table: ums_member_collect_subject                            */
/*==============================================================*/
create table ums_member_collect_subject
(
   id                   bigint not null auto_increment comment 'id',
   subject_id           bigint comment 'subject_id',
   subject_name         varchar(255) comment 'subject_name',
   subject_img          varchar(500) comment 'subject_img',
   subject_urll         varchar(500) comment '活动url',
   primary key (id)
);

alter table ums_member_collect_subject comment '会员收藏的专题活动';

/*==============================================================*/
/* Table: ums_member_level                                      */
/*==============================================================*/
create table ums_member_level
(
   id                   bigint not null auto_increment comment 'id',
   name                 varchar(100) comment '等级名称',
   growth_point         int comment '等级需要的成长值',
   default_status       tinyint comment '是否为默认等级[0->不是;1->是]',
   free_freight_point   decimal(18,4) comment '免运费标准',
   comment_growth_point int comment '每次评价获取的成长值',
   priviledge_free_freight tinyint comment '是否有免邮特权',
   priviledge_member_price tinyint comment '是否有会员价格特权',
   priviledge_birthday  tinyint comment '是否有生日特权',
   note                 varchar(255) comment '备注',
   primary key (id)
);

alter table ums_member_level comment '会员等级';

/*==============================================================*/
/* Table: ums_member_login_log                                  */
/*==============================================================*/
create table ums_member_login_log
(
   id                   bigint not null auto_increment comment 'id',
   member_id            bigint comment 'member_id',
   create_time          datetime comment '创建时间',
   ip                   varchar(64) comment 'ip',
   city                 varchar(64) comment 'city',
   login_type           tinyint(1) comment '登录类型[1-web,2-app]',
   primary key (id)
);

alter table ums_member_login_log comment '会员登录记录';

/*==============================================================*/
/* Table: ums_member_receive_address                            */
/*==============================================================*/
create table ums_member_receive_address
(
   id                   bigint not null auto_increment comment 'id',
   member_id            bigint comment 'member_id',
   name                 varchar(255) comment '收货人姓名',
   phone                varchar(64) comment '电话',
   post_code            varchar(64) comment '邮政编码',
   province             varchar(100) comment '省份/直辖市',
   city                 varchar(100) comment '城市',
   region               varchar(100) comment '区',
   detail_address       varchar(255) comment '详细地址(街道)',
   areacode             varchar(15) comment '省市区代码',
   default_status       tinyint(1) comment '是否默认',
   primary key (id)
);

alter table ums_member_receive_address comment '会员收货地址';

/*==============================================================*/
/* Table: ums_member_statistics_info                            */
/*==============================================================*/
create table ums_member_statistics_info
(
   id                   bigint not null auto_increment comment 'id',
   member_id            bigint comment '会员id',
   consume_amount       decimal(18,4) comment '累计消费金额',
   coupon_amount        decimal(18,4) comment '累计优惠金额',
   order_count          int comment '订单数量',
   coupon_count         int comment '优惠券数量',
   comment_count        int comment '评价数',
   return_order_count   int comment '退货数量',
   login_count          int comment '登录次数',
   attend_count         int comment '关注数量',
   fans_count           int comment '粉丝数量',
   collect_product_count int comment '收藏的商品数量',
   collect_subject_count int comment '收藏的专题活动数量',
   collect_comment_count int comment '收藏的评论数量',
   invite_friend_count  int comment '邀请的朋友数量',
   primary key (id)
);

alter table ums_member_statistics_info comment '会员统计信息';
gulimall_wms.sql

/*
SQLyog Ultimate v11.25 (64 bit)
MySQL - 5.7.27 : Database - gulimall_wms
*********************************************************************
*/


/*!40101 SET NAMES utf8 */;

/*!40101 SET SQL_MODE=''*/;

/*!40014 SET @OLD_UNIQUE_CHECKS=@@UNIQUE_CHECKS, UNIQUE_CHECKS=0 */;
/*!40014 SET @OLD_FOREIGN_KEY_CHECKS=@@FOREIGN_KEY_CHECKS, FOREIGN_KEY_CHECKS=0 */;
/*!40101 SET @OLD_SQL_MODE=@@SQL_MODE, SQL_MODE='NO_AUTO_VALUE_ON_ZERO' */;
/*!40111 SET @OLD_SQL_NOTES=@@SQL_NOTES, SQL_NOTES=0 */;
CREATE DATABASE /*!32312 IF NOT EXISTS*/`gulimall_wms` /*!40100 DEFAULT CHARACTER SET utf8mb4 */;

USE `gulimall_wms`;

/*Table structure for table `undo_log` */

DROP TABLE IF EXISTS `undo_log`;

CREATE TABLE `undo_log` (
  `id` bigint(20) NOT NULL AUTO_INCREMENT,
  `branch_id` bigint(20) NOT NULL,
  `xid` varchar(100) NOT NULL,
  `context` varchar(128) NOT NULL,
  `rollback_info` longblob NOT NULL,
  `log_status` int(11) NOT NULL,
  `log_created` datetime NOT NULL,
  `log_modified` datetime NOT NULL,
  `ext` varchar(100) DEFAULT NULL,
  PRIMARY KEY (`id`),
  UNIQUE KEY `ux_undo_log` (`xid`,`branch_id`) USING BTREE
) ENGINE=InnoDB DEFAULT CHARSET=utf8;

/*Data for the table `undo_log` */

/*Table structure for table `wms_purchase` */

DROP TABLE IF EXISTS `wms_purchase`;

CREATE TABLE `wms_purchase` (
  `id` bigint(20) NOT NULL AUTO_INCREMENT,
  `assignee_id` bigint(20) DEFAULT NULL,
  `assignee_name` varchar(255) DEFAULT NULL,
  `phone` char(13) DEFAULT NULL,
  `priority` int(4) DEFAULT NULL,
  `status` int(4) DEFAULT NULL,
  `ware_id` bigint(20) DEFAULT NULL,
  `amount` decimal(18,4) DEFAULT NULL,
  `create_time` datetime DEFAULT NULL,
  `update_time` datetime DEFAULT NULL,
  PRIMARY KEY (`id`)
) ENGINE=InnoDB DEFAULT CHARSET=utf8mb4 COMMENT='采购信息';

/*Data for the table `wms_purchase` */

/*Table structure for table `wms_purchase_detail` */

DROP TABLE IF EXISTS `wms_purchase_detail`;

CREATE TABLE `wms_purchase_detail` (
  `id` bigint(20) NOT NULL AUTO_INCREMENT,
  `purchase_id` bigint(20) DEFAULT NULL COMMENT '采购单id',
  `sku_id` bigint(20) DEFAULT NULL COMMENT '采购商品id',
  `sku_num` int(11) DEFAULT NULL COMMENT '采购数量',
  `sku_price` decimal(18,4) DEFAULT NULL COMMENT '采购金额',
  `ware_id` bigint(20) DEFAULT NULL COMMENT '仓库id',
  `status` int(11) DEFAULT NULL COMMENT '状态[0新建,1已分配,2正在采购,3已完成,4采购失败]',
  PRIMARY KEY (`id`)
) ENGINE=InnoDB DEFAULT CHARSET=utf8mb4;

/*Data for the table `wms_purchase_detail` */

/*Table structure for table `wms_ware_info` */

DROP TABLE IF EXISTS `wms_ware_info`;

CREATE TABLE `wms_ware_info` (
  `id` bigint(20) NOT NULL AUTO_INCREMENT COMMENT 'id',
  `name` varchar(255) DEFAULT NULL COMMENT '仓库名',
  `address` varchar(255) DEFAULT NULL COMMENT '仓库地址',
  `areacode` varchar(20) DEFAULT NULL COMMENT '区域编码',
  PRIMARY KEY (`id`)
) ENGINE=InnoDB DEFAULT CHARSET=utf8mb4 COMMENT='仓库信息';

/*Data for the table `wms_ware_info` */

/*Table structure for table `wms_ware_order_task` */

DROP TABLE IF EXISTS `wms_ware_order_task`;

CREATE TABLE `wms_ware_order_task` (
  `id` bigint(20) NOT NULL AUTO_INCREMENT COMMENT 'id',
  `order_id` bigint(20) DEFAULT NULL COMMENT 'order_id',
  `order_sn` varchar(255) DEFAULT NULL COMMENT 'order_sn',
  `consignee` varchar(100) DEFAULT NULL COMMENT '收货人',
  `consignee_tel` char(15) DEFAULT NULL COMMENT '收货人电话',
  `delivery_address` varchar(500) DEFAULT NULL COMMENT '配送地址',
  `order_comment` varchar(200) DEFAULT NULL COMMENT '订单备注',
  `payment_way` tinyint(1) DEFAULT NULL COMMENT '付款方式【 1:在线付款 2:货到付款】',
  `task_status` tinyint(2) DEFAULT NULL COMMENT '任务状态',
  `order_body` varchar(255) DEFAULT NULL COMMENT '订单描述',
  `tracking_no` char(30) DEFAULT NULL COMMENT '物流单号',
  `create_time` datetime DEFAULT NULL COMMENT 'create_time',
  `ware_id` bigint(20) DEFAULT NULL COMMENT '仓库id',
  `task_comment` varchar(500) DEFAULT NULL COMMENT '工作单备注',
  PRIMARY KEY (`id`)
) ENGINE=InnoDB DEFAULT CHARSET=utf8mb4 COMMENT='库存工作单';

/*Data for the table `wms_ware_order_task` */

/*Table structure for table `wms_ware_order_task_detail` */

DROP TABLE IF EXISTS `wms_ware_order_task_detail`;

CREATE TABLE `wms_ware_order_task_detail` (
  `id` bigint(20) NOT NULL AUTO_INCREMENT COMMENT 'id',
  `sku_id` bigint(20) DEFAULT NULL COMMENT 'sku_id',
  `sku_name` varchar(255) DEFAULT NULL COMMENT 'sku_name',
  `sku_num` int(11) DEFAULT NULL COMMENT '购买个数',
  `task_id` bigint(20) DEFAULT NULL COMMENT '工作单id',
  `ware_id` bigint(20) DEFAULT NULL COMMENT '仓库id',
  `lock_status` int(1) DEFAULT NULL COMMENT '1-已锁定  2-已解锁  3-扣减',
  PRIMARY KEY (`id`)
) ENGINE=InnoDB DEFAULT CHARSET=utf8mb4 COMMENT='库存工作单';

/*Data for the table `wms_ware_order_task_detail` */

/*Table structure for table `wms_ware_sku` */

DROP TABLE IF EXISTS `wms_ware_sku`;

CREATE TABLE `wms_ware_sku` (
  `id` bigint(20) NOT NULL AUTO_INCREMENT COMMENT 'id',
  `sku_id` bigint(20) DEFAULT NULL COMMENT 'sku_id',
  `ware_id` bigint(20) DEFAULT NULL COMMENT '仓库id',
  `stock` int(11) DEFAULT NULL COMMENT '库存数',
  `sku_name` varchar(200) DEFAULT NULL COMMENT 'sku_name',
  `stock_locked` int(11) DEFAULT '0' COMMENT '锁定库存',
  PRIMARY KEY (`id`),
  KEY `sku_id` (`sku_id`) USING BTREE,
  KEY `ware_id` (`ware_id`) USING BTREE
) ENGINE=InnoDB DEFAULT CHARSET=utf8mb4 COMMENT='商品库存';

/*Data for the table `wms_ware_sku` */

/*!40101 SET SQL_MODE=@OLD_SQL_MODE */;
/*!40014 SET FOREIGN_KEY_CHECKS=@OLD_FOREIGN_KEY_CHECKS */;
/*!40014 SET UNIQUE_CHECKS=@OLD_UNIQUE_CHECKS */;
/*!40111 SET SQL_NOTES=@OLD_SQL_NOTES */;
3.3.8 安装Node.js
前端开发,少不了node.js;Node.js 是一个基于Chrome V8 引擎的 JavaScript 运行环境。
node 下载 :https://nodejs.org/en/
NPM 是随同NodeJS 一起安装的包管理工具,JavaScript-NPM,Java-Maven;

- 检查版本------node 是否安装成功

- 配置npm 使用淘宝镜像
npm config set registry http://registry.npm.taobao.org/

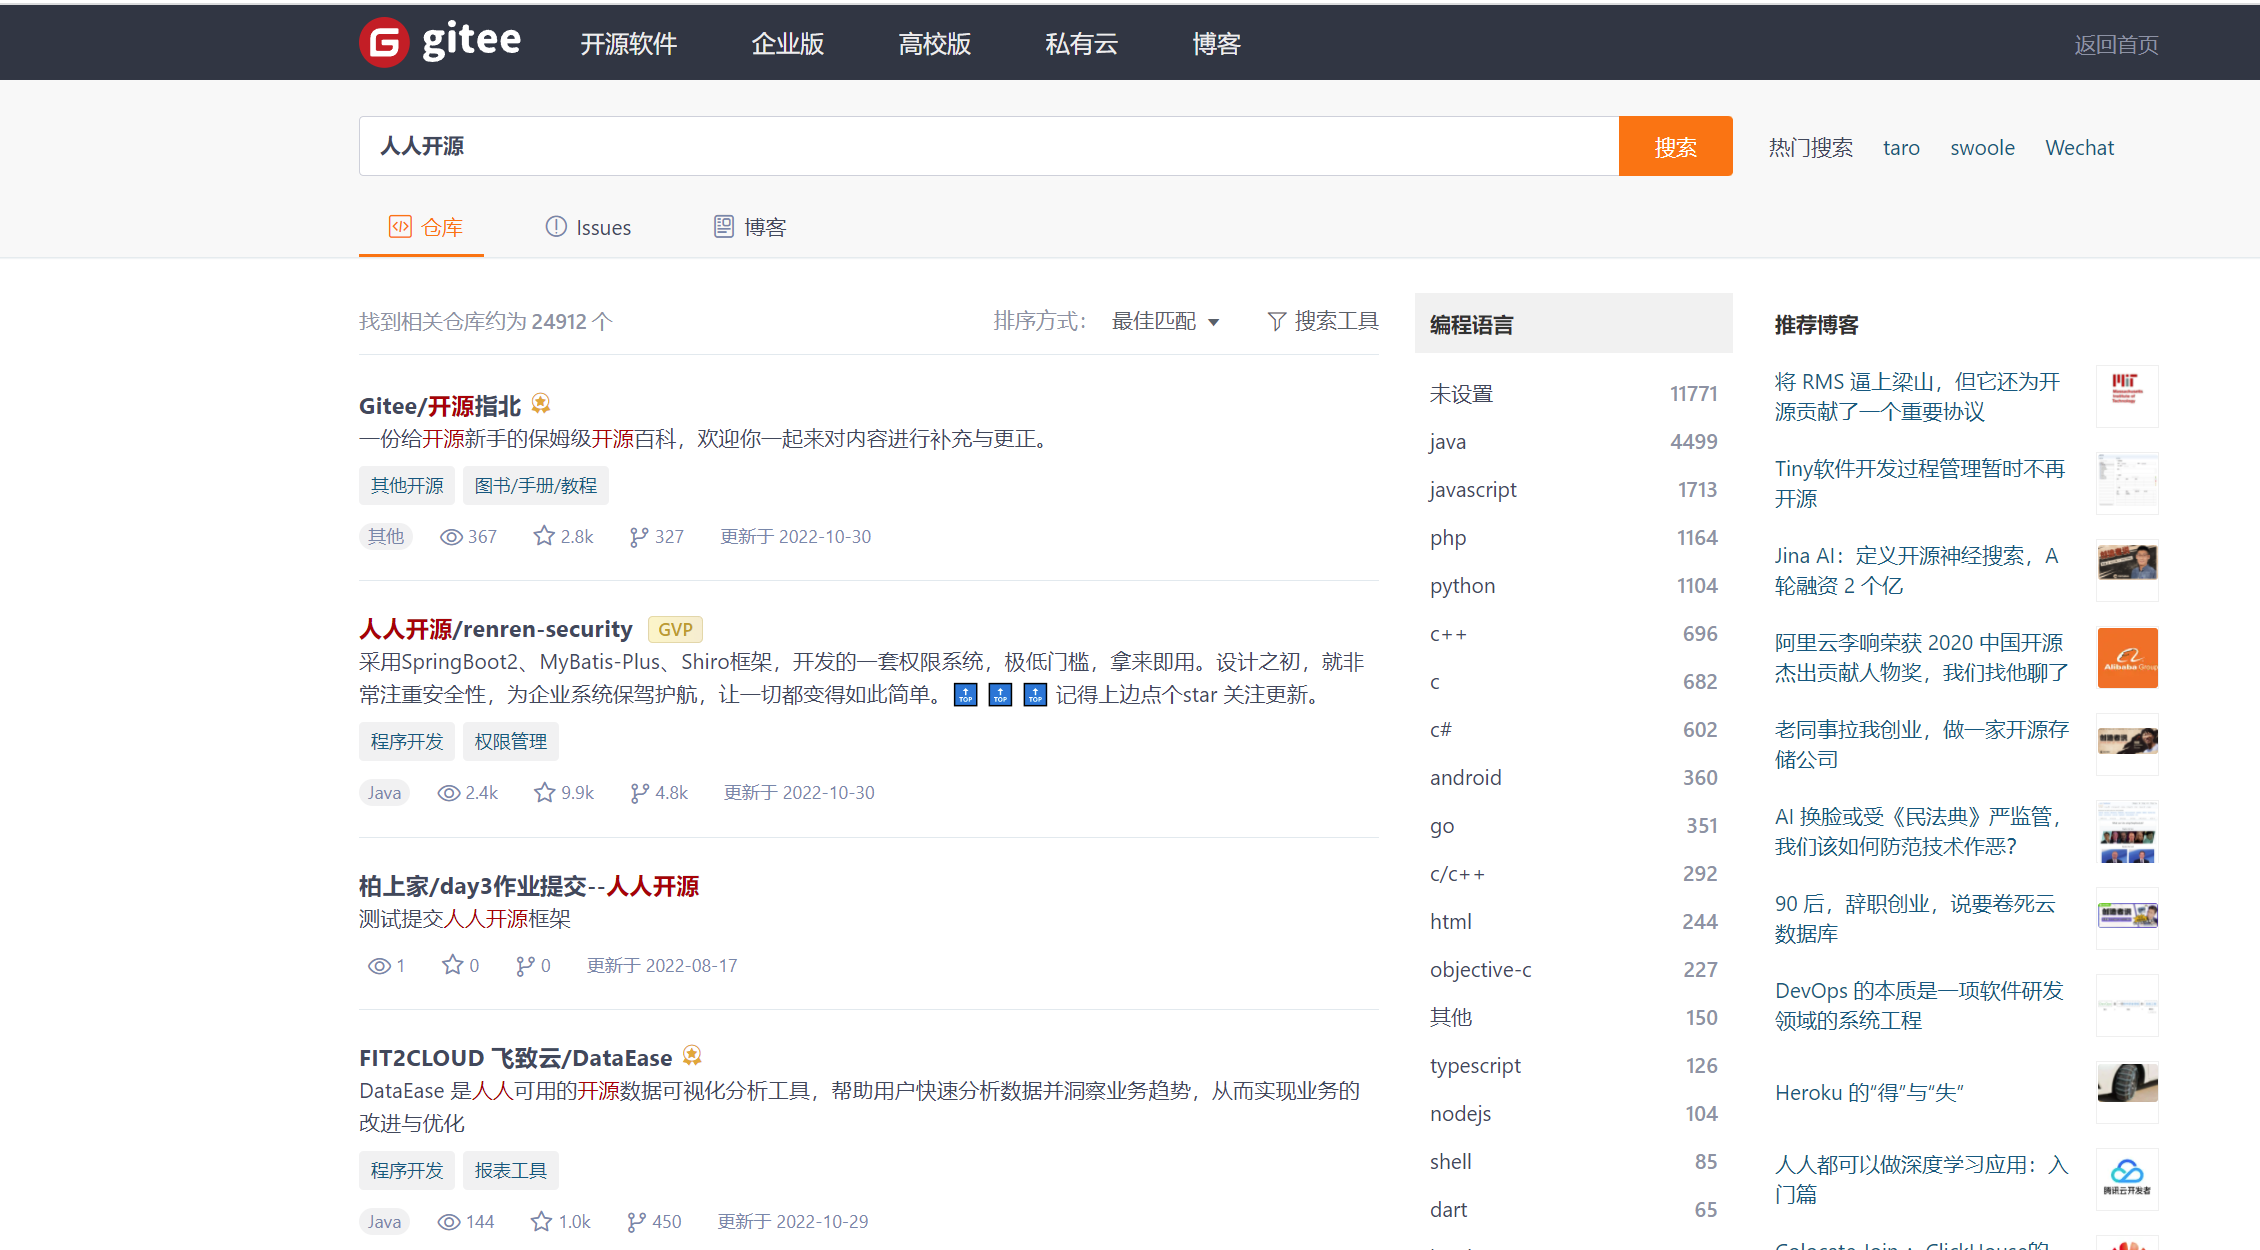
3.3.9 使用人人开源后台管理系统
去gitee上面搜索人人开源后台管理系统,
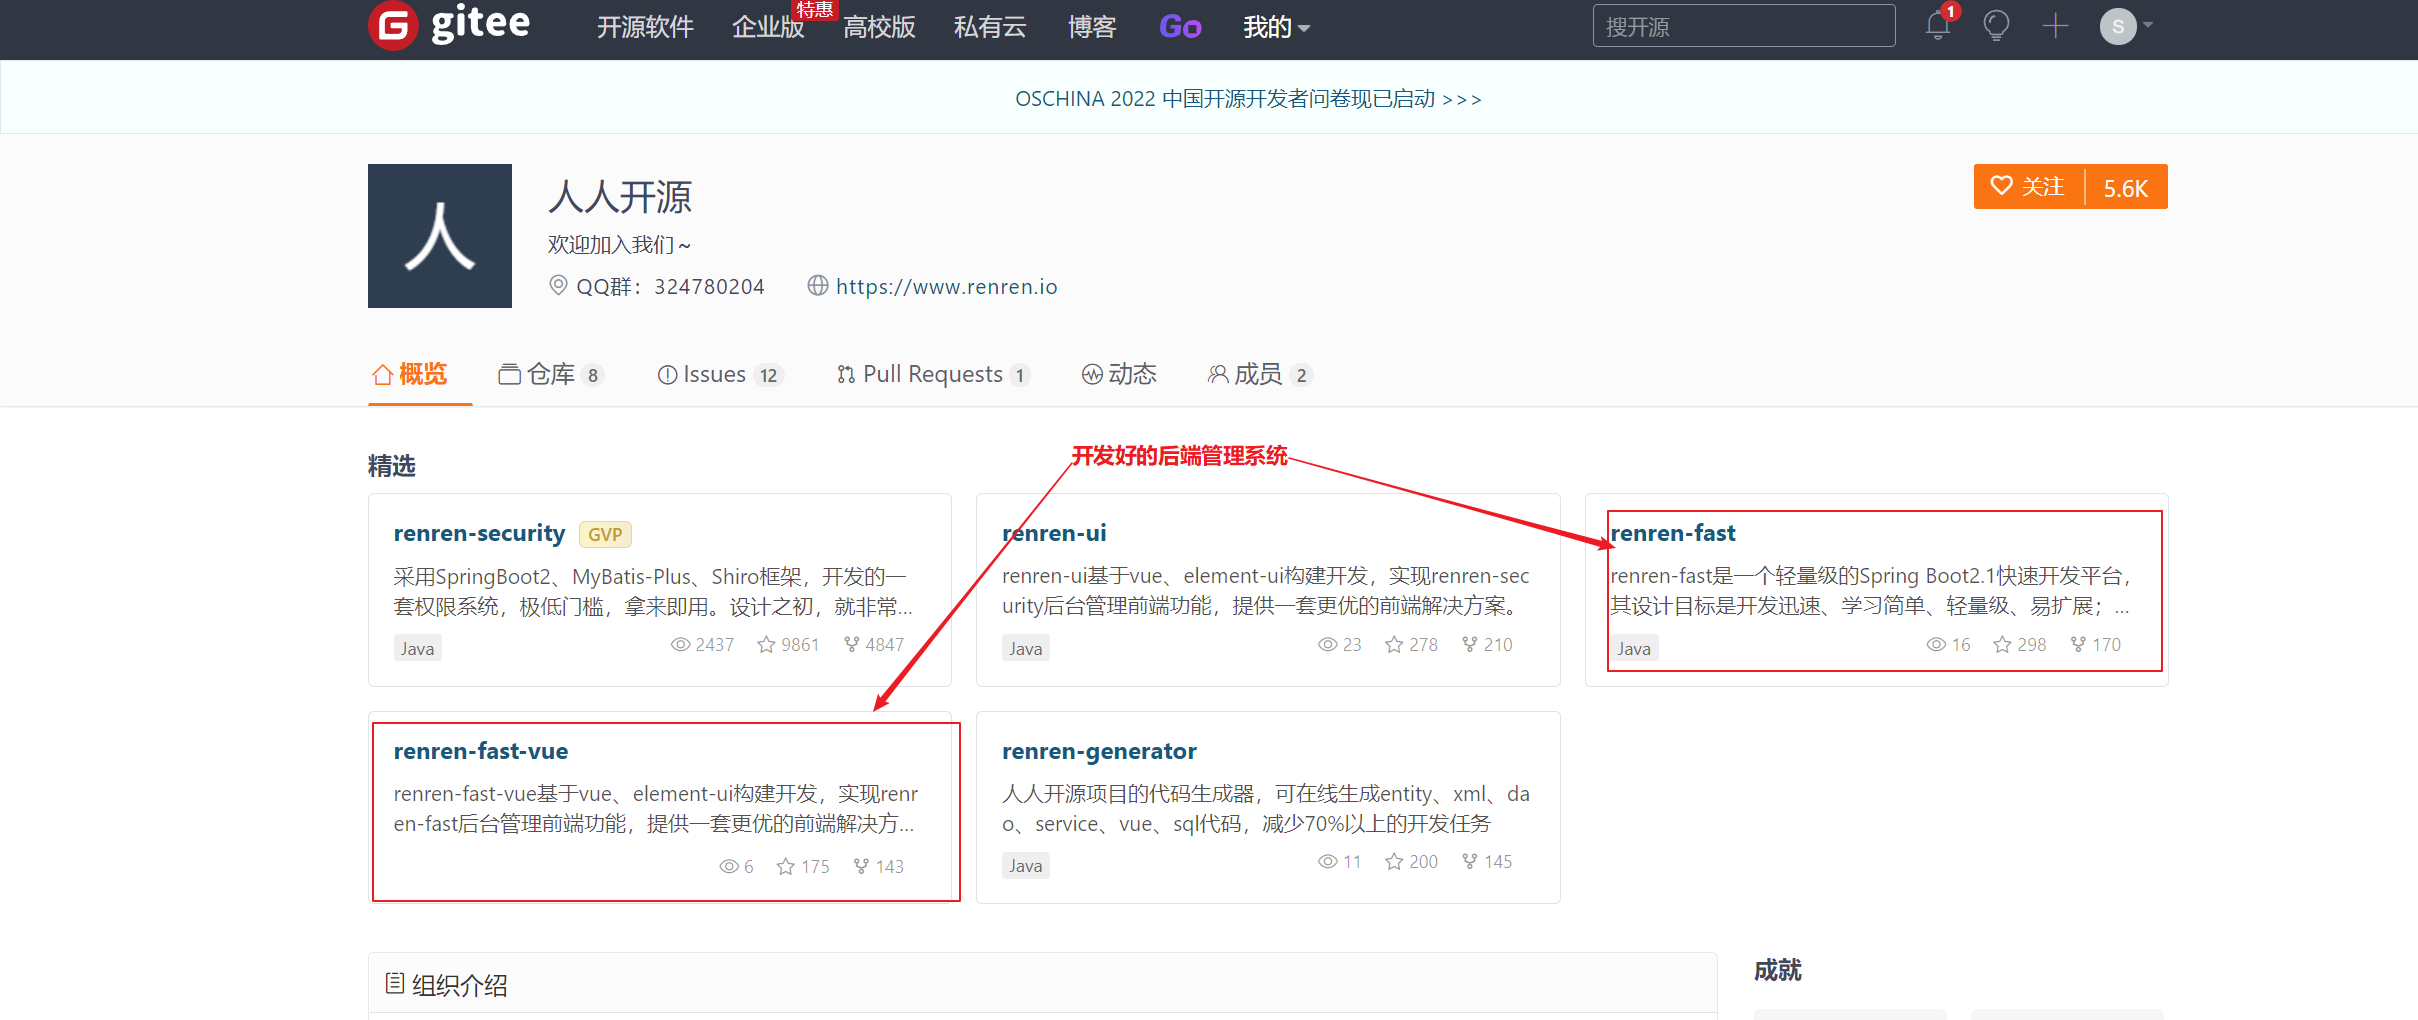
-
下载 Git clone到本地

打开 git bash 工具 ,利用
git clong xxxxxxxxxx下载
-
将 renren-fast复制到gulimall项目下。并删除掉其中的.git文件夹。


前端文件renren-fast-vue到时候用 vscode打开,不过一样要删掉里面的git 文件。
- idea中修改
renren-fast配置
从模块中不难看出,已经自带了sql文件,所以我们去mysql中创建一个数据库,sql即为该模块下自带的sql.
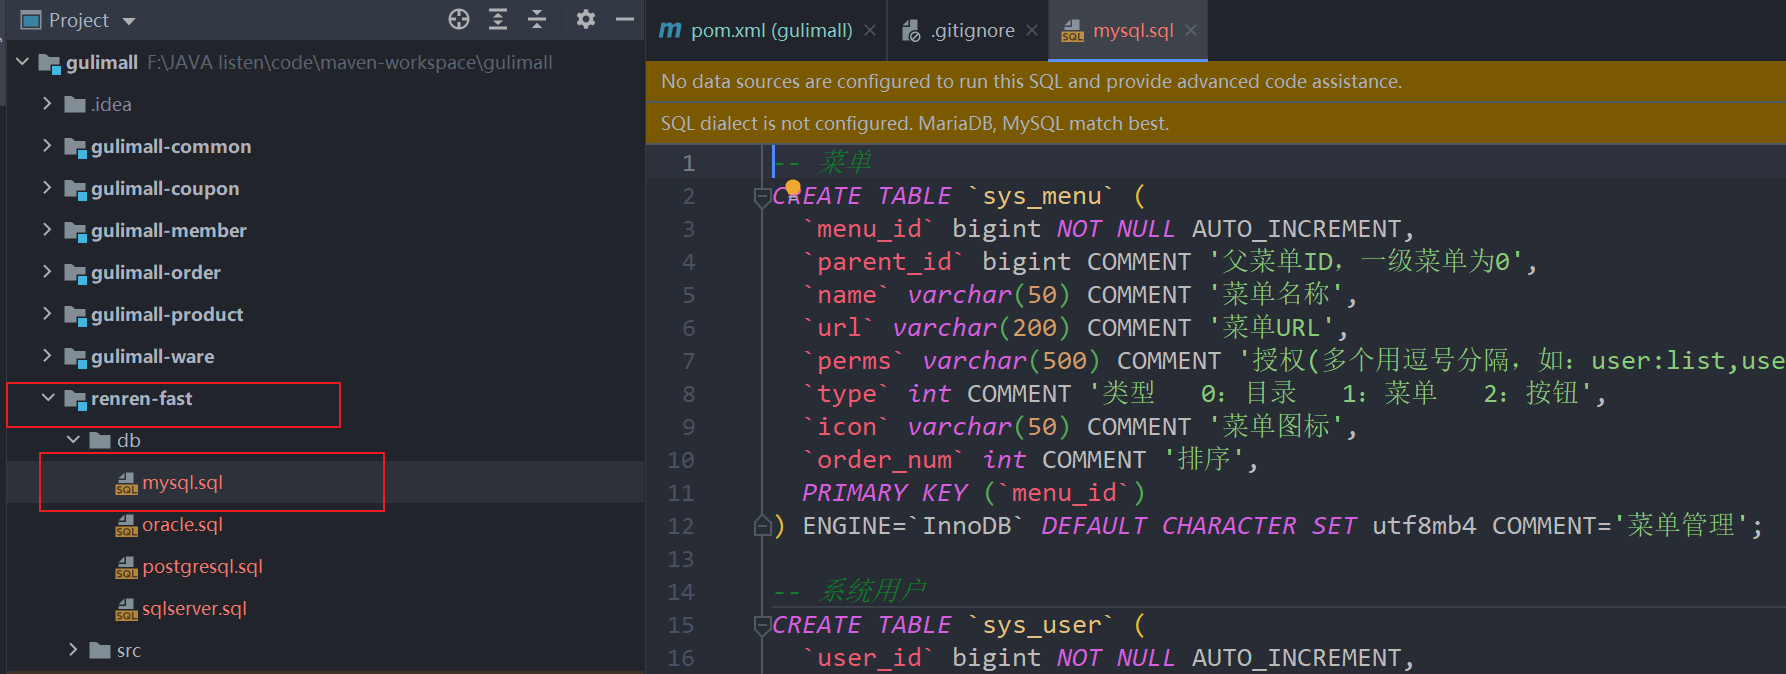
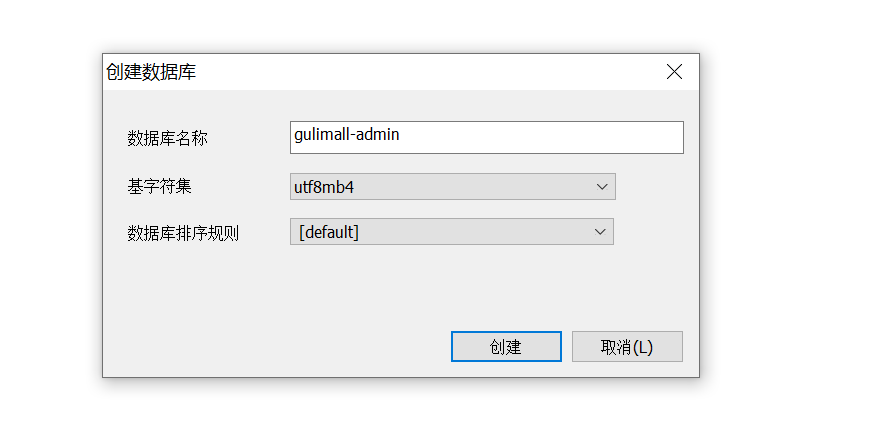
- 在模块
renren-fast中的application-dev.yml文件中修改成我们自己ip地址,数据库连接。
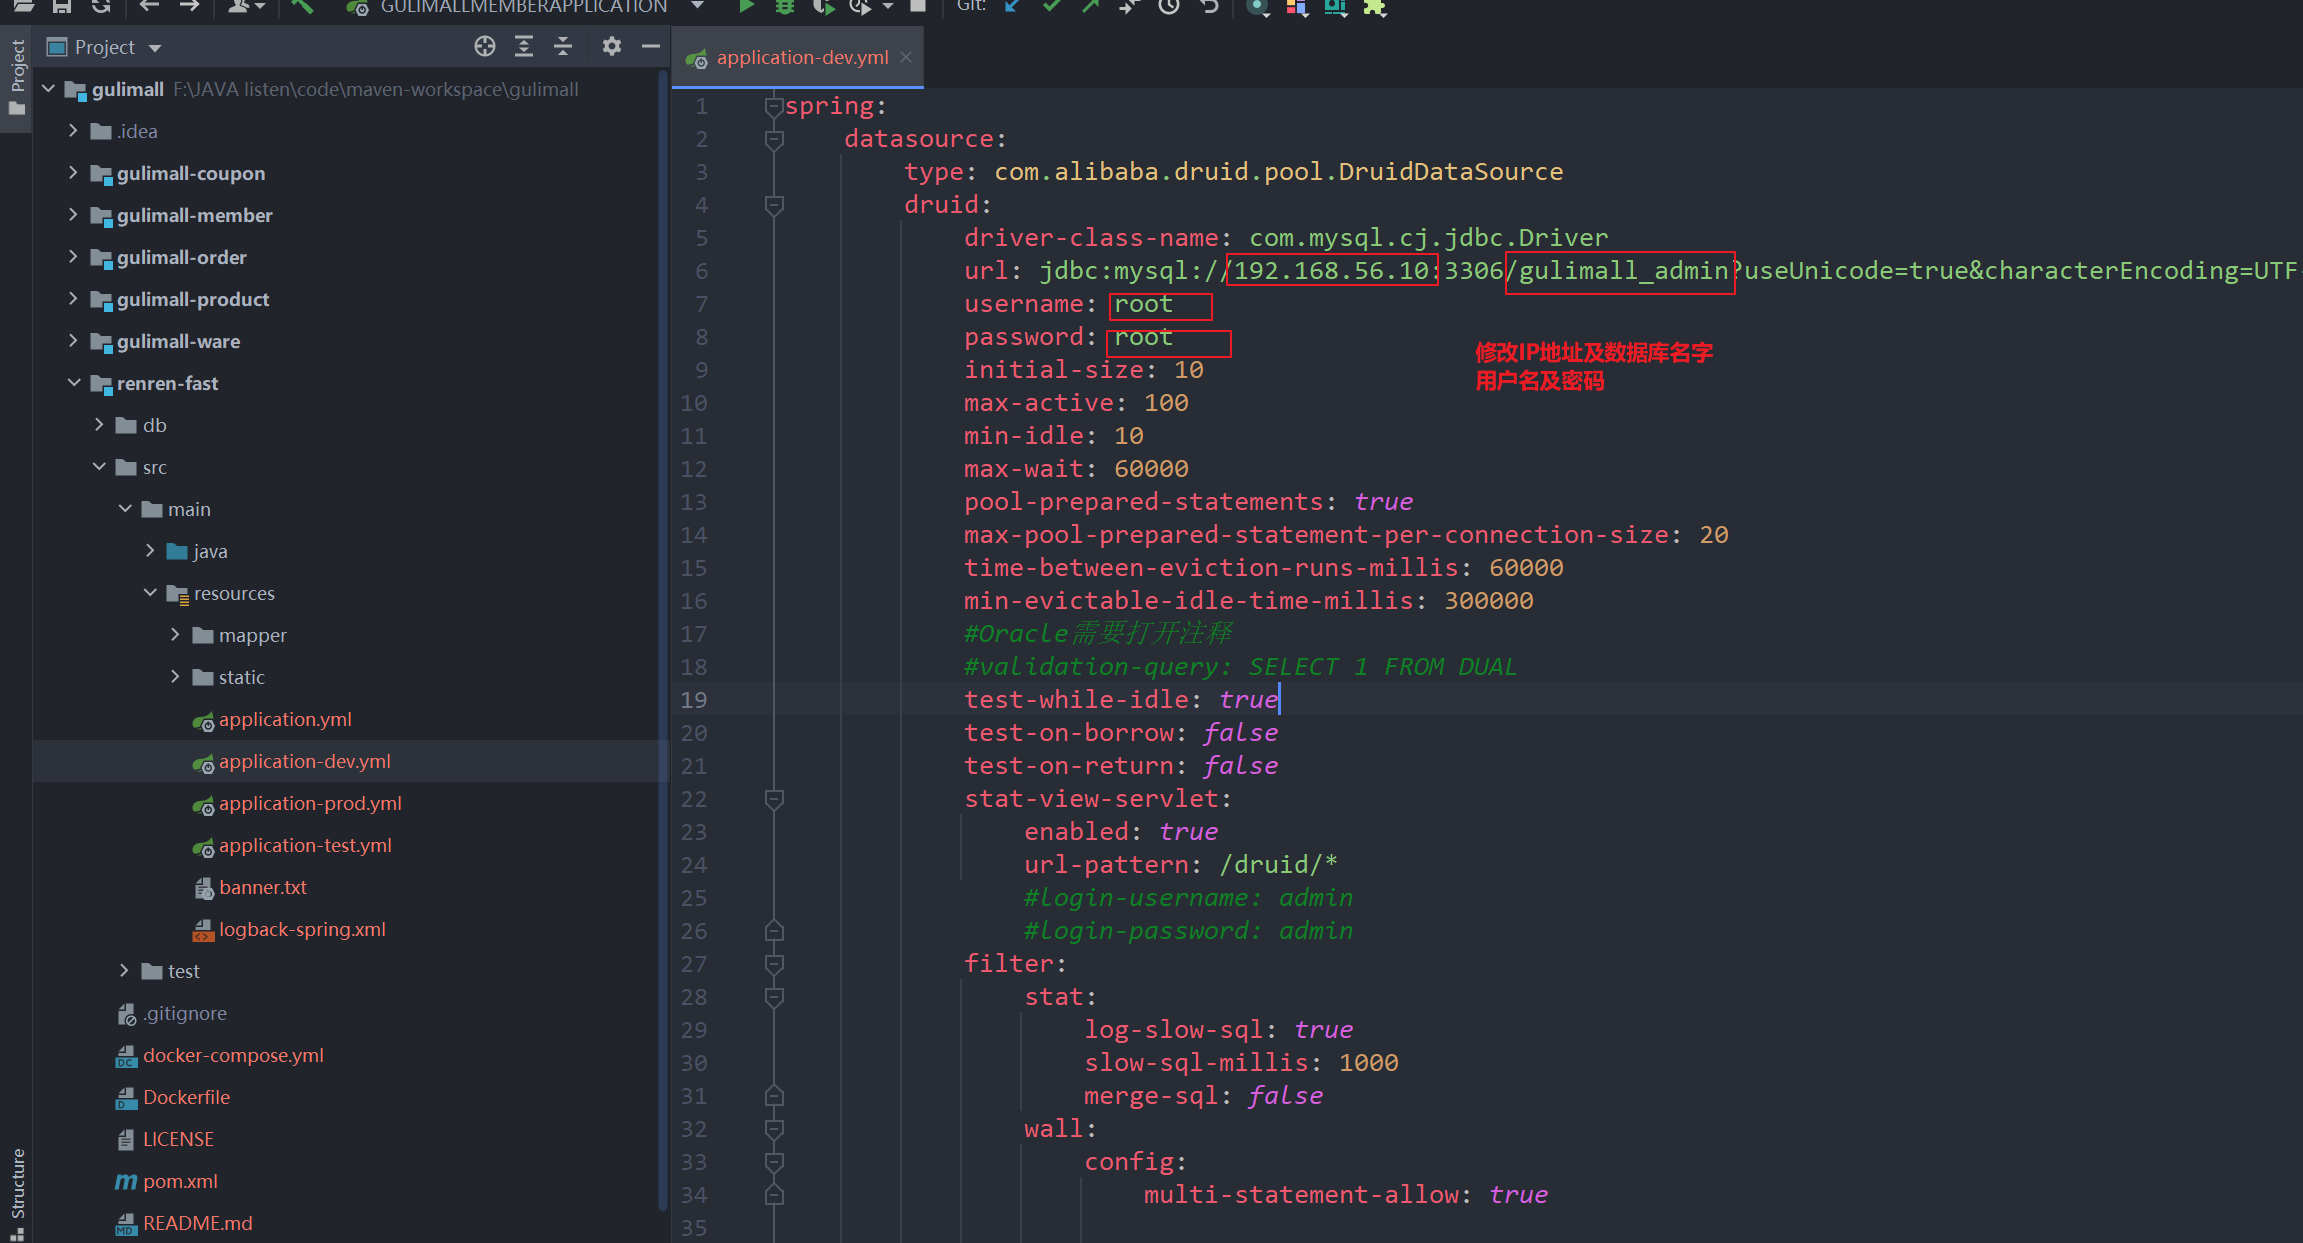
- 启动renren-fast模块 进行前后端联调-----最后我们只需要修改其中的部分代码即可完成 一个管理系统的 开发。


测试后端,正常。
接下来是前端页面。
-
前端联调。将renren-fast-vue用vs code打开。

控制台输入
npm install,如果出现错误,关闭vs code之后重新打开即可。


然后输入npm run dev进行前后端联调。


3.6 使用代码生成器快速CRUD----逆向工程搭建
同 renren-fast 一样,去人人开源项目克隆下载 renren-generator -> 代码快速生成 CRUD
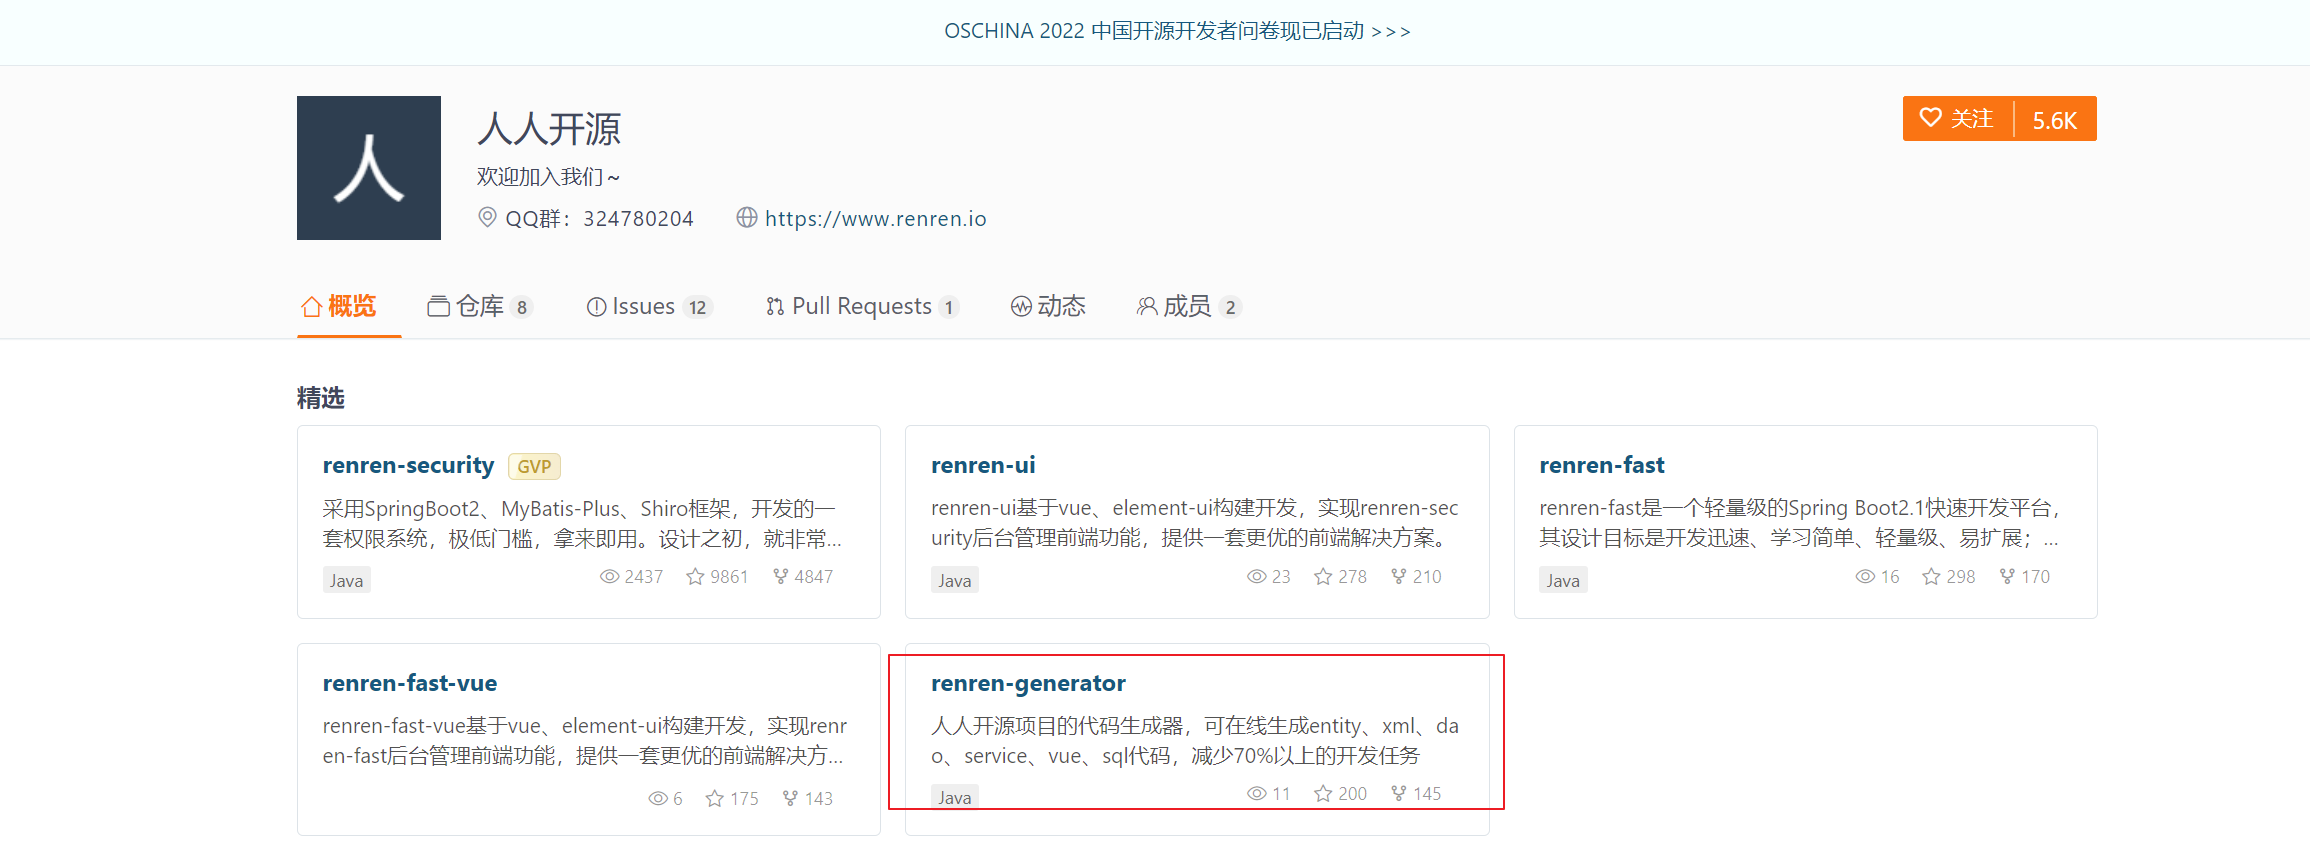

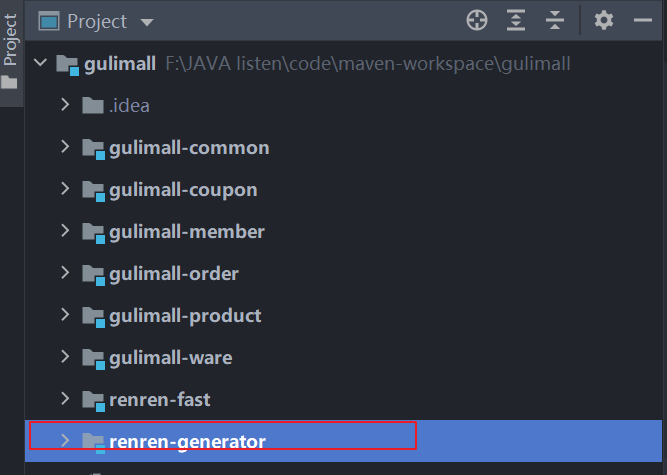
删除 文件夹中的 .git 文件后,放入 gulimall 项目中。
3.6.1 以gulimall_pms为例,对应的是product微服务。
-
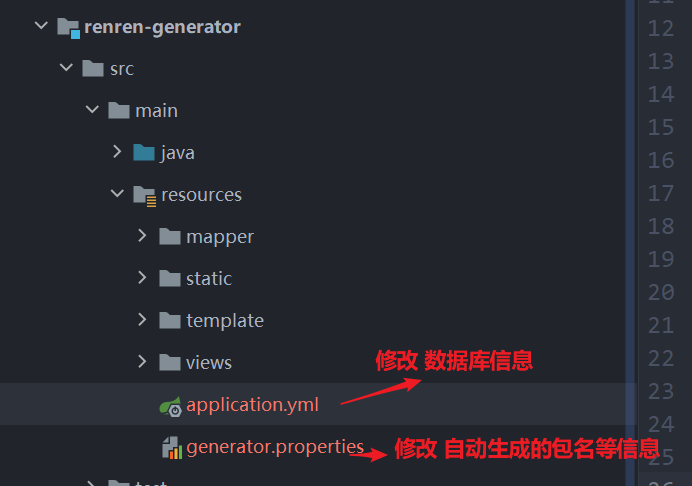
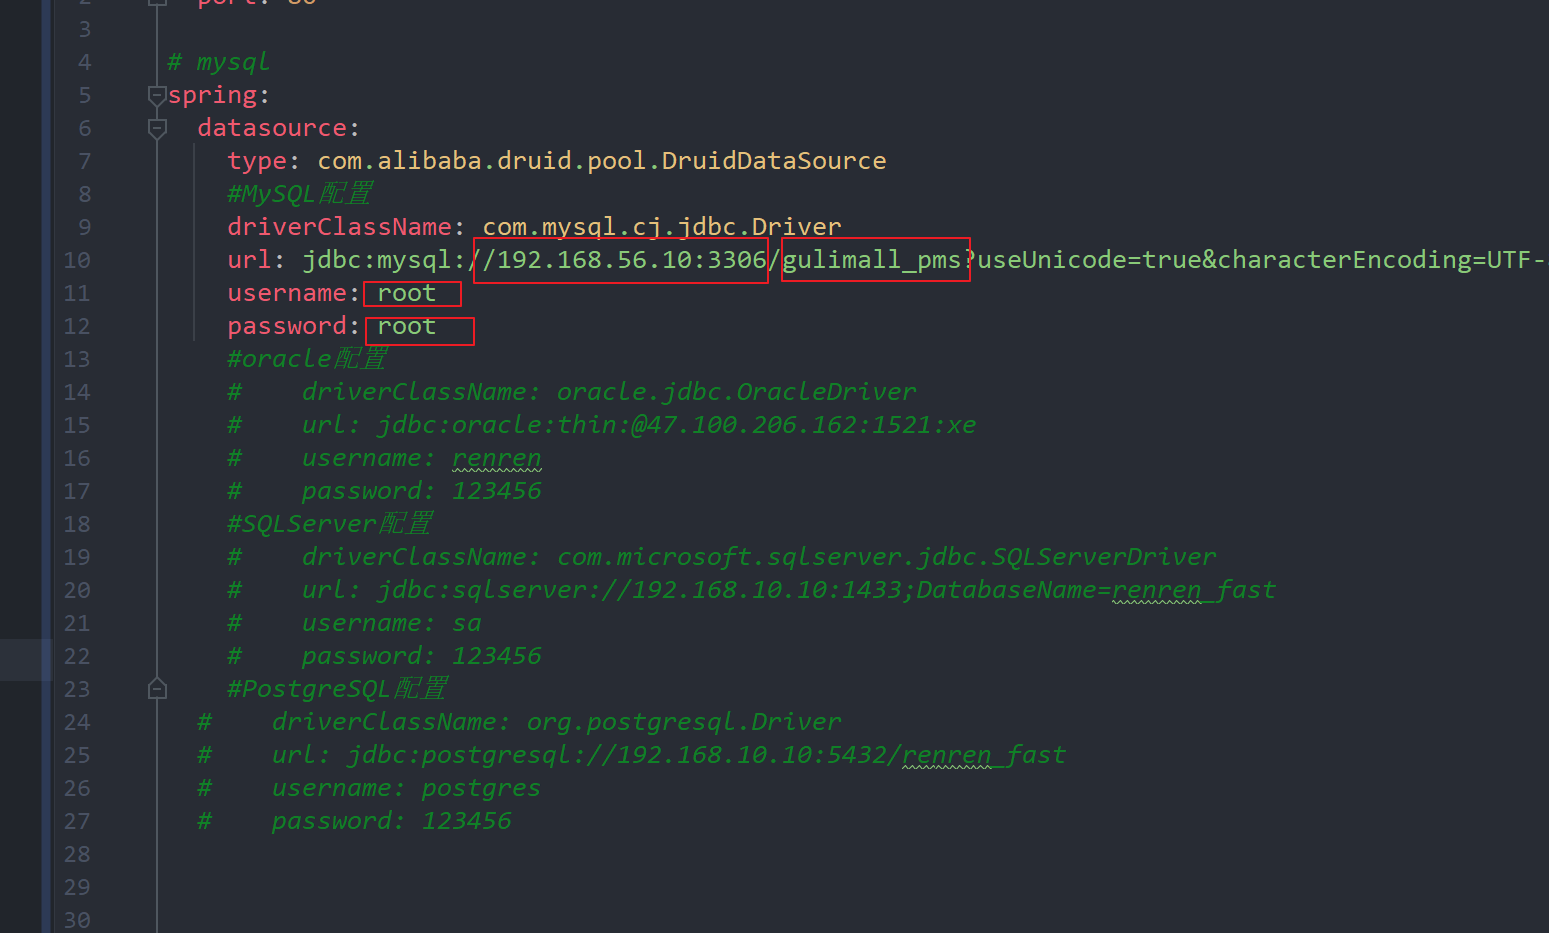
在
renren-generator这个模块下修改成我们要连接的数据库名称,账户和密码。
-
在配置文件中修改成我们要使用代码生成器生成的代码。
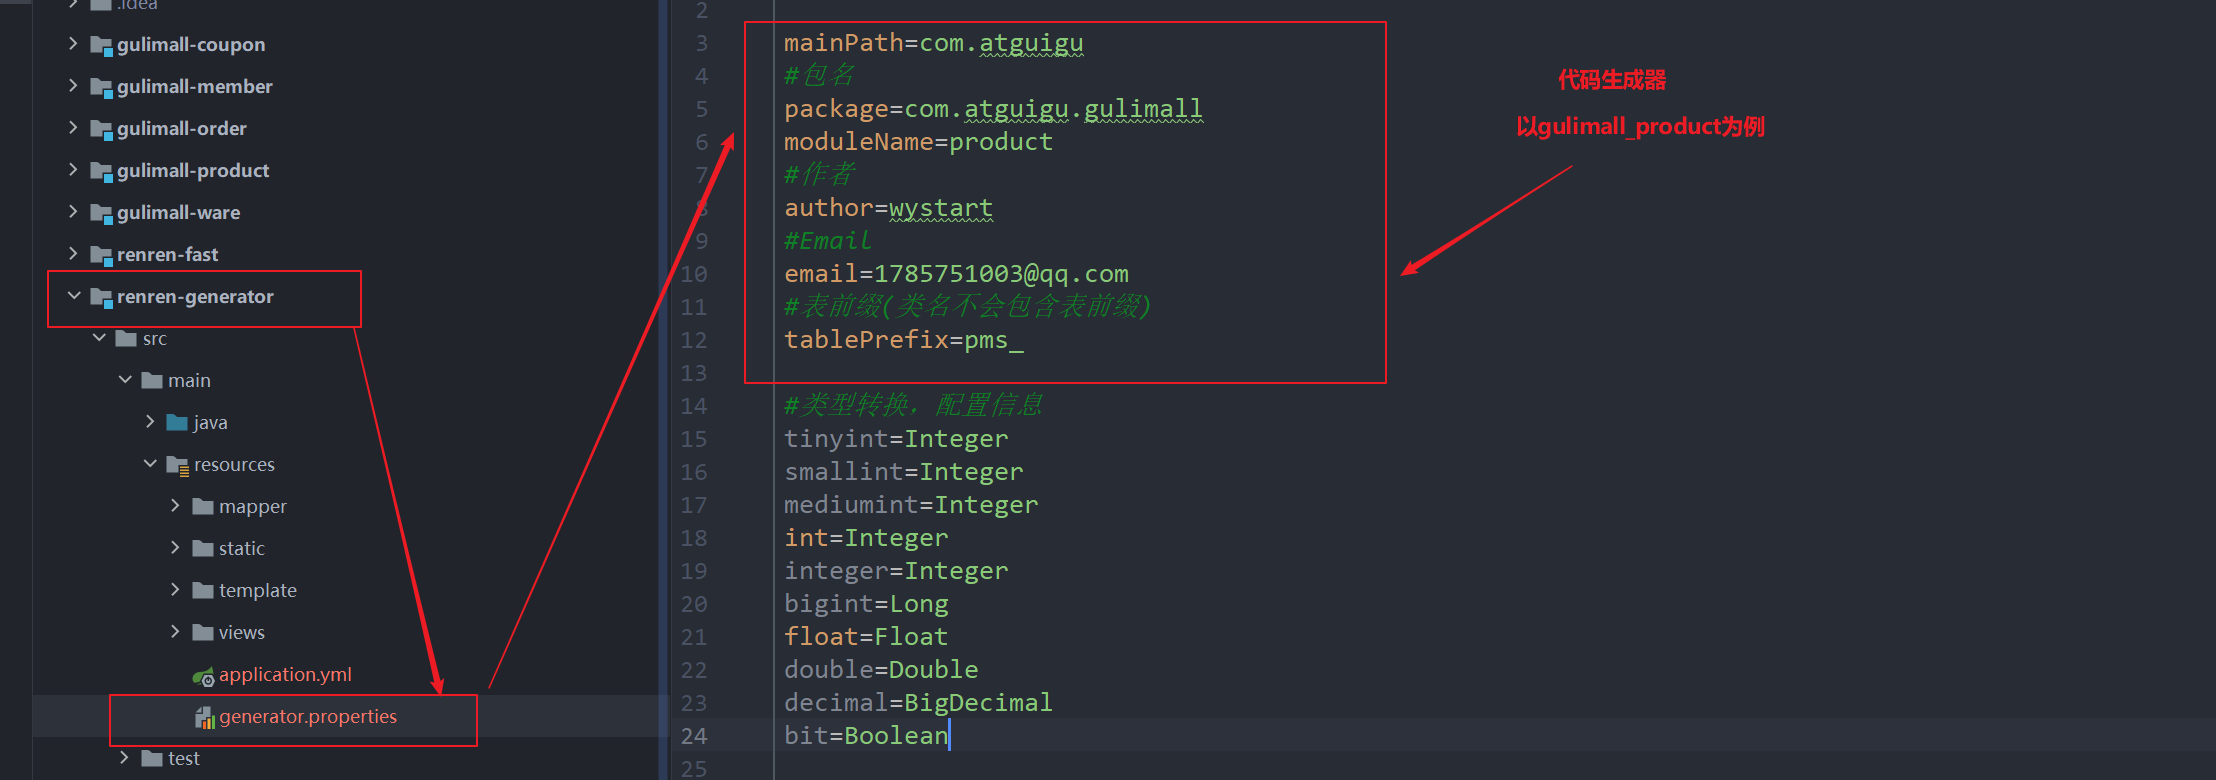
-
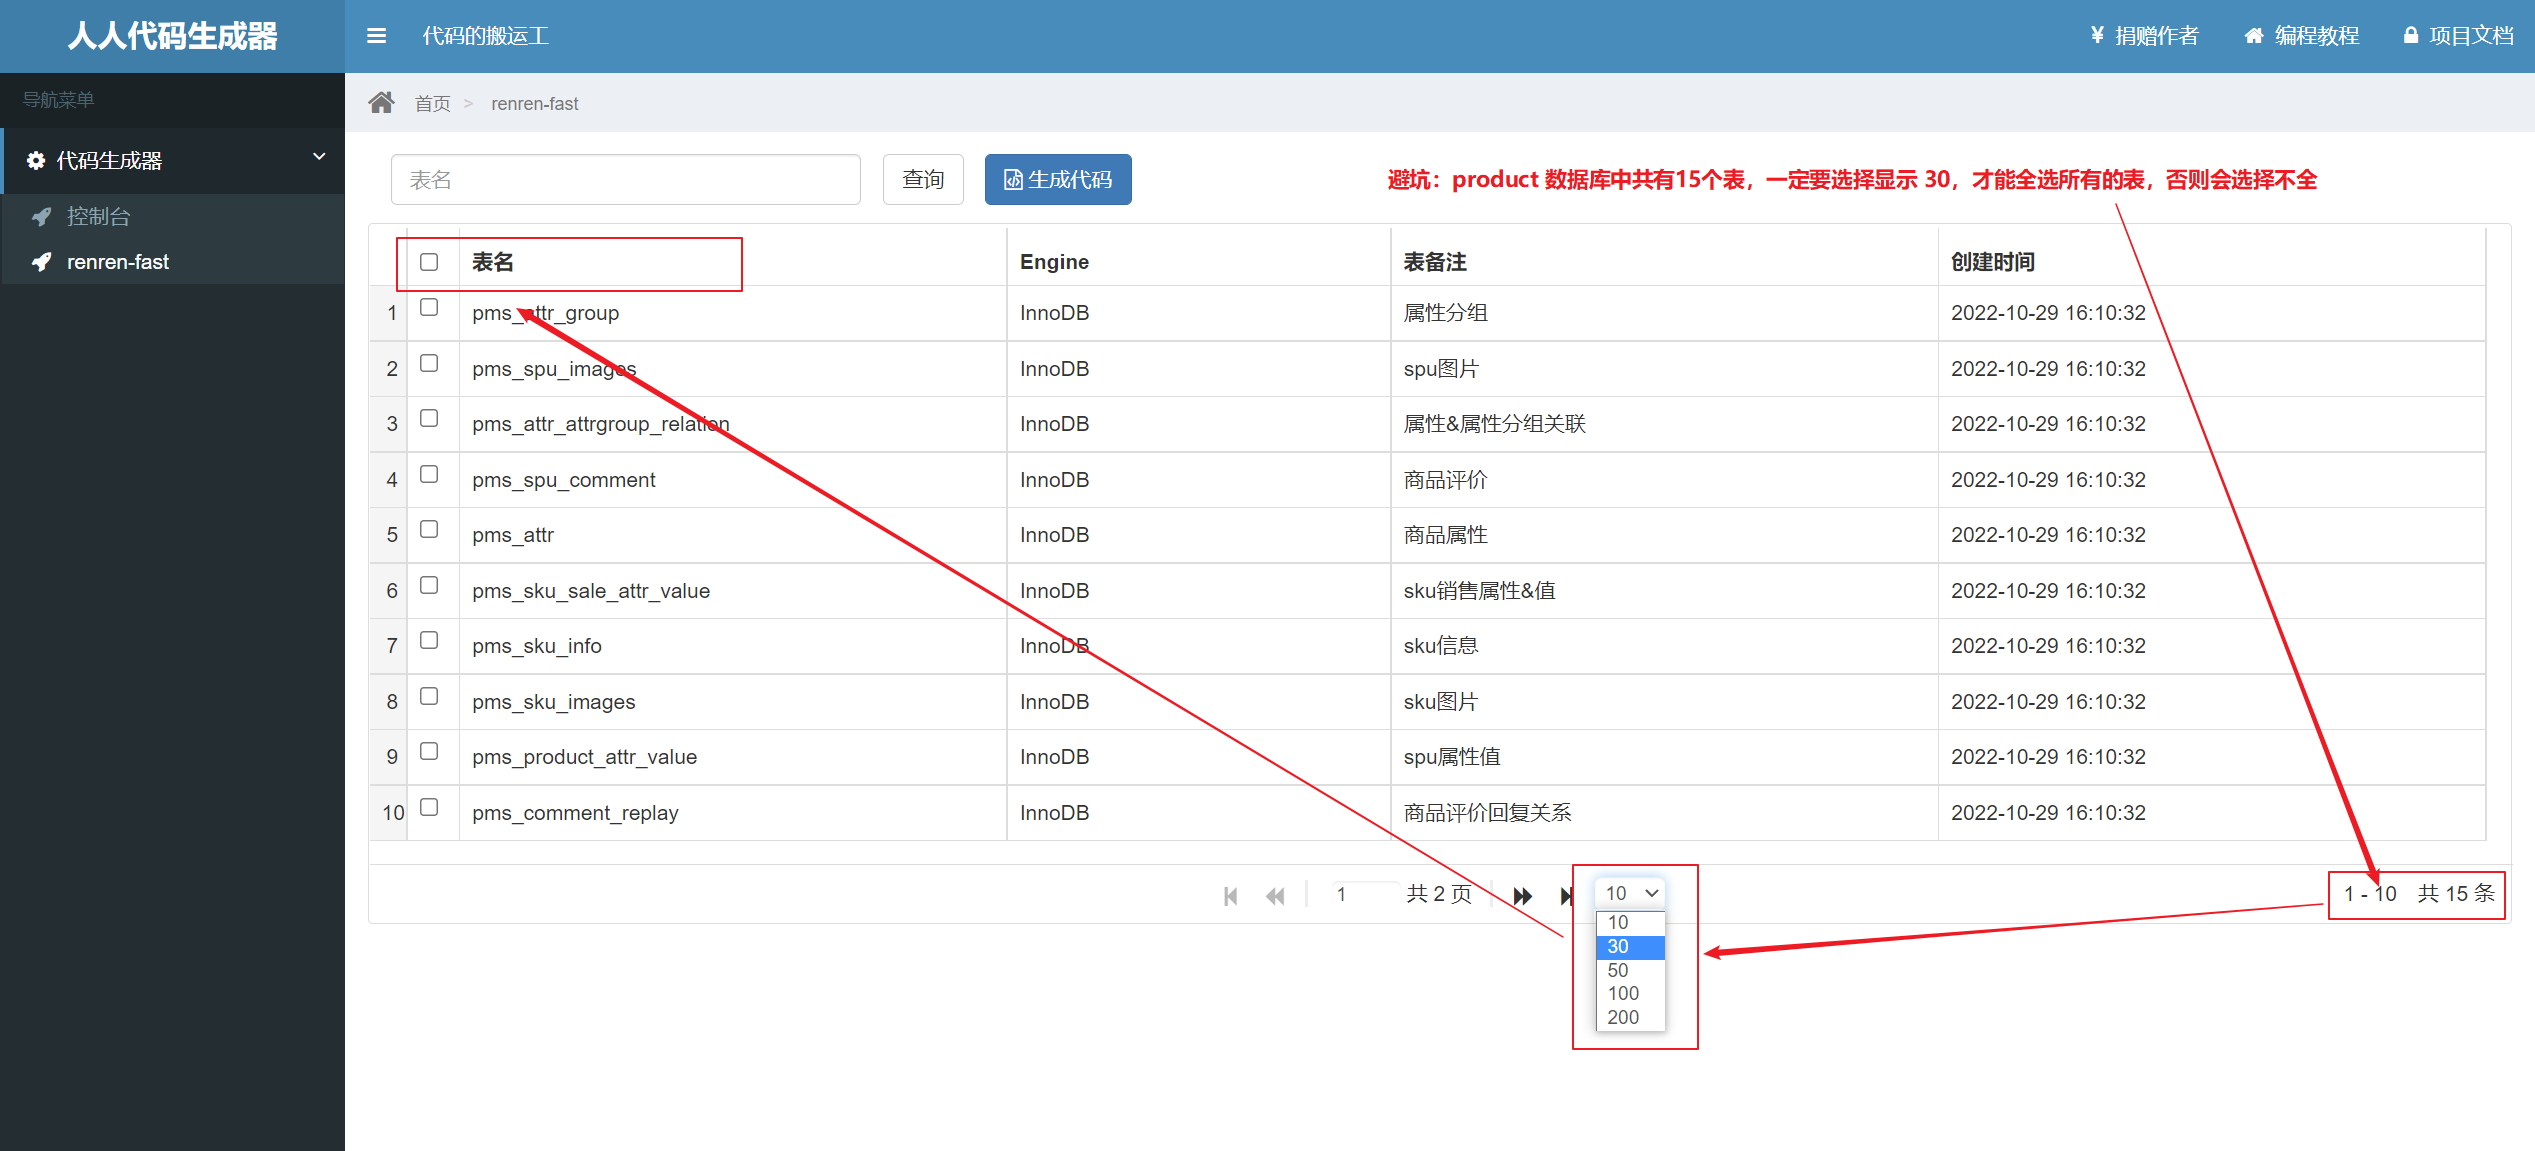
浏览器中访问代码生成器,代码生成器会根据配置文件帮我们生成,然后我们
全选下载。下载之后是压缩包,我们可以将压缩包解压。注意避坑:全选一定要选全:有些服务会超过10条,选择显示30条记录,进而可以全部选择。
-
解压之后里面帮我们把代码和sql也一起生成了,main中是代码。

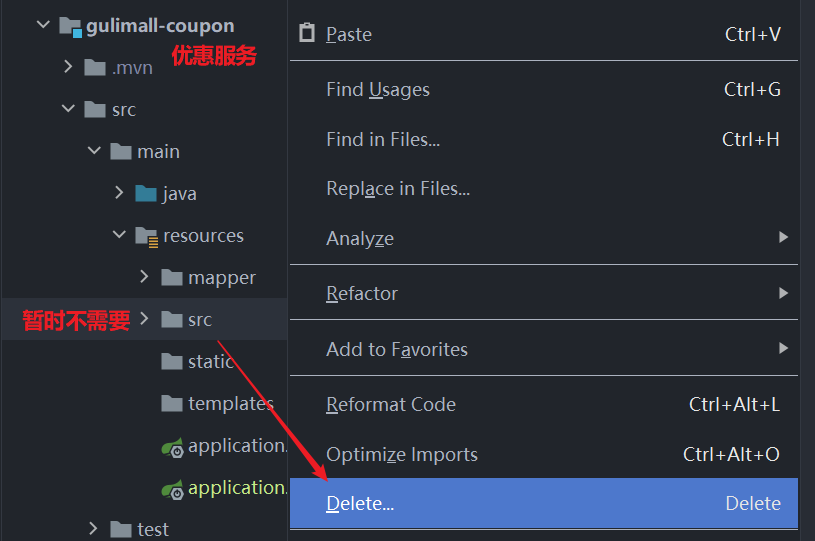
main->resources->src里面的前端代码我们暂时不需要。


这个里面帮我们也生成了vue代码,目前暂时用不到所以我们需要将其删除。
-
创建gulimall-common 工程
每一个微服务都需要引入一些相同的依赖和类。我们索性创建一个gulimall-common工程,到时候其他微服务只要引入这个依赖就可以通过maven的传递性引入依赖。
用代码生成器帮我们生成的这些代码,还多依赖还没有,所以我们需要进行一个微服务公共依赖的导入。


3.6.2 依赖引入
-
gulimall-common中,引入mybatis-plus的依赖。

-
我们发现controller中有这个@RequiresPermissions这个注解,我们暂时不需要这个。如果我们只是简单的将其在一个微服务的controller中注解掉,那么其他的微服务怎么办呢?

-
我们直接在代码生成器中controller中的这个注解直接给注释掉。这样以后用这个代码生成器的就不会每个微服务都有了。

-
修改之后重启代码生成器,然后将其生成的代码生成器的代码中的
controller重新复制到gulimall-product模块下。 -
整合mybatis-plus

- 查看mysql

根据版本找对应的mysql的依赖。其实mysql的依赖的很多都可以直接使用最新的。
<!--导入mysql驱动-->
        <!-- https://mvnrepository.com/artifact/mysql/mysql-connector-java -->
        <dependency>
            <groupId>mysql</groupId>
            <artifactId>mysql-connector-java</artifactId>
            <version>8.0.17</version>
        </dependency>
- 引入 servlet-api 依赖

-
有些暂时用不掉的我们可以删掉。

我们到时候不用这个。

- 创建application.yml,并配置数据源及SQL映射文件位置
-
spring:
  datasource:
    username: root
    password: root
    url: jdbc:mysql://192.168.56.10:3306/gulimall_pms
    driver-class-name: com.mysql.jdbc.Driver

# sql映射文件位置
mybatis-plus:
  mapper-locations: classpath:/mapper/**/*.xml #classpath*中带有* 表示其他第三jar包中都会扫描,这里我们去掉*,精确扫描自己包下的
  global-config:
    db-config:
      id-type: auto  #主键自增
然后在主启动类上加上注解@MapperScan()
/**
 * 1.整合mybatis-plus
 *   1).导入依赖
 *       <dependency>
 *             <groupId>com.baomidou</groupId>
 *             <artifactId>mybatis-plus-boot-starter</artifactId>
 *             <version>3.2.0</version>
 *       </dependency>
 *   2)、配置
 *      1、配置数据源:
 *        1)、导入数据库的驱动  mysql-connector
 *        2)、 在application.yml配置数据源相关信息
 *     2、配置mybatis-plus;
 *        1)、使用@MapperScan告诉mybatis-plus dao 接口在哪
 *        2)、告诉mybatis-plus,SQL映射文件位置,否则他去哪找?
 *        3)、主键自增  id.type :auto
 */


@MapperScan("com.atguigu.gulimall.product.dao")
@SpringBootApplication
public class GulimallProductApplication {

    public static void main(String[] args) {
        SpringApplication.run(GulimallProductApplication.class, args);
    }

}
3.6.3 product 微服务测试
在gulimall-product的 GulimallProductApplicationTests简单进行测试。
@Autowired
    BrandService brandService;

    @Test
    void contextLoads() {

        BrandEntity brandEntity = new BrandEntity();
        //测试 添加品牌
        // brandEntity.setDescript("hello");
        // brandEntity.setName("华为");
        // brandService.save(brandEntity);
        // System.out.println("保存成功");

        //测试更新
        // brandEntity.setBrandId(1L);
        // brandEntity.setDescript("华为");
        // brandService.updateById(brandEntity);

        //测试查询
        List<BrandEntity> list = brandService.list(new QueryWrapper<BrandEntity>().eq("brand_id", 1L));
        list.forEach((item)->{
            System.out.println(item);
        });


    }
-
注意这里会一个这个会报错。

最开始解决办法是:将接口放到utils下面。但是这个解决办法应该是错误的,因为工具类总一般是不会放置接口。

暂时解决办法是:直接导入renren这个依赖

测试通过。

在数据库中查看是否保存成功。


测试更新及查询


3.6.4 其他微服务逆向工程搭建
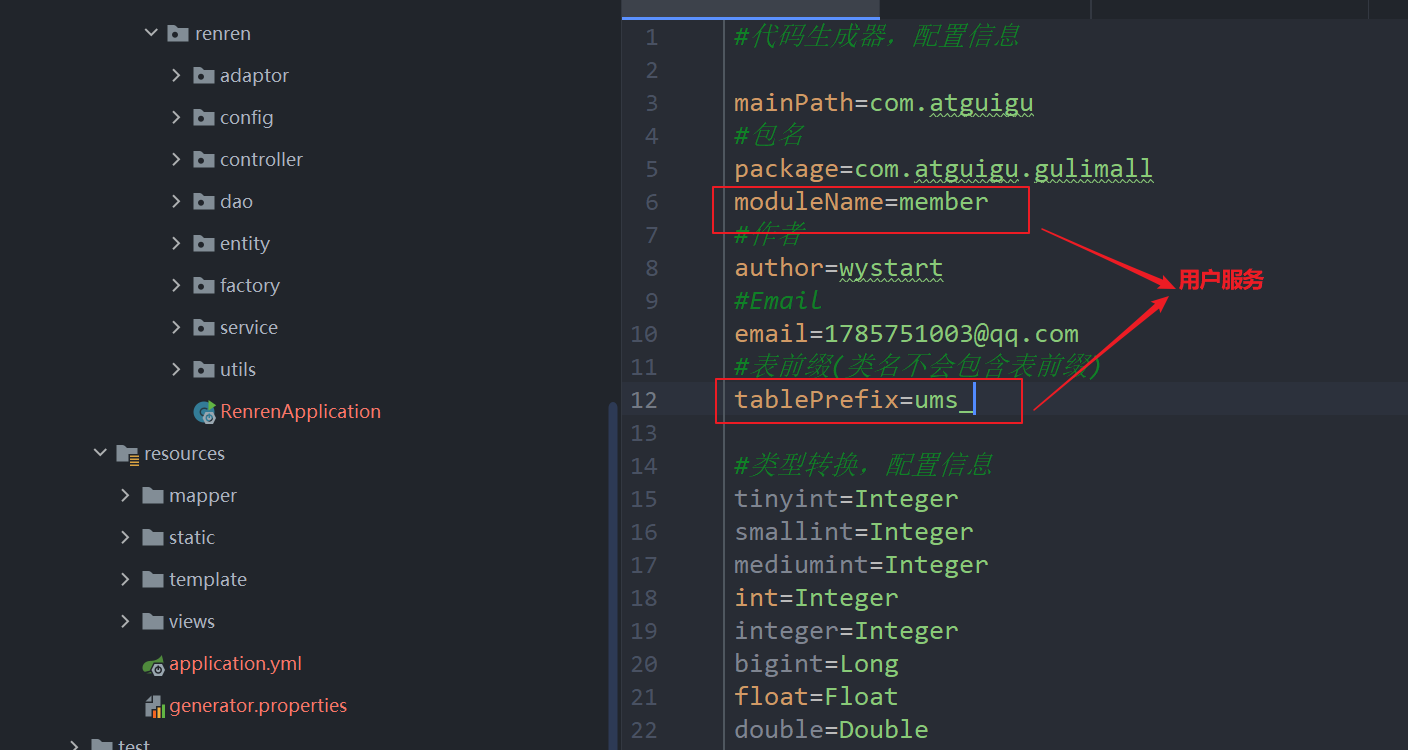
[1]gulimall-coupon:sms优惠微服务
同理快速生成其他微服务。比如说gulimall-sms这个优惠服务。
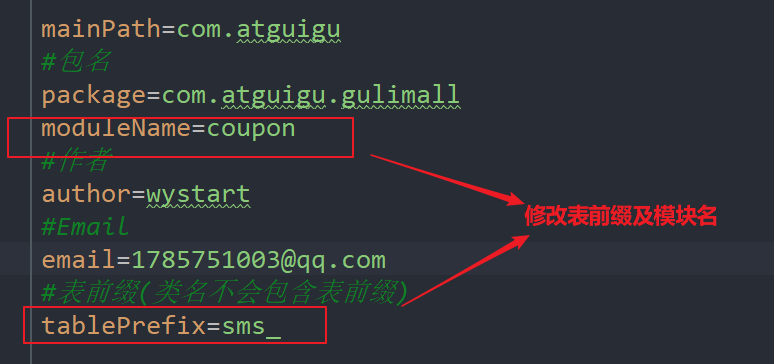

注意避坑:
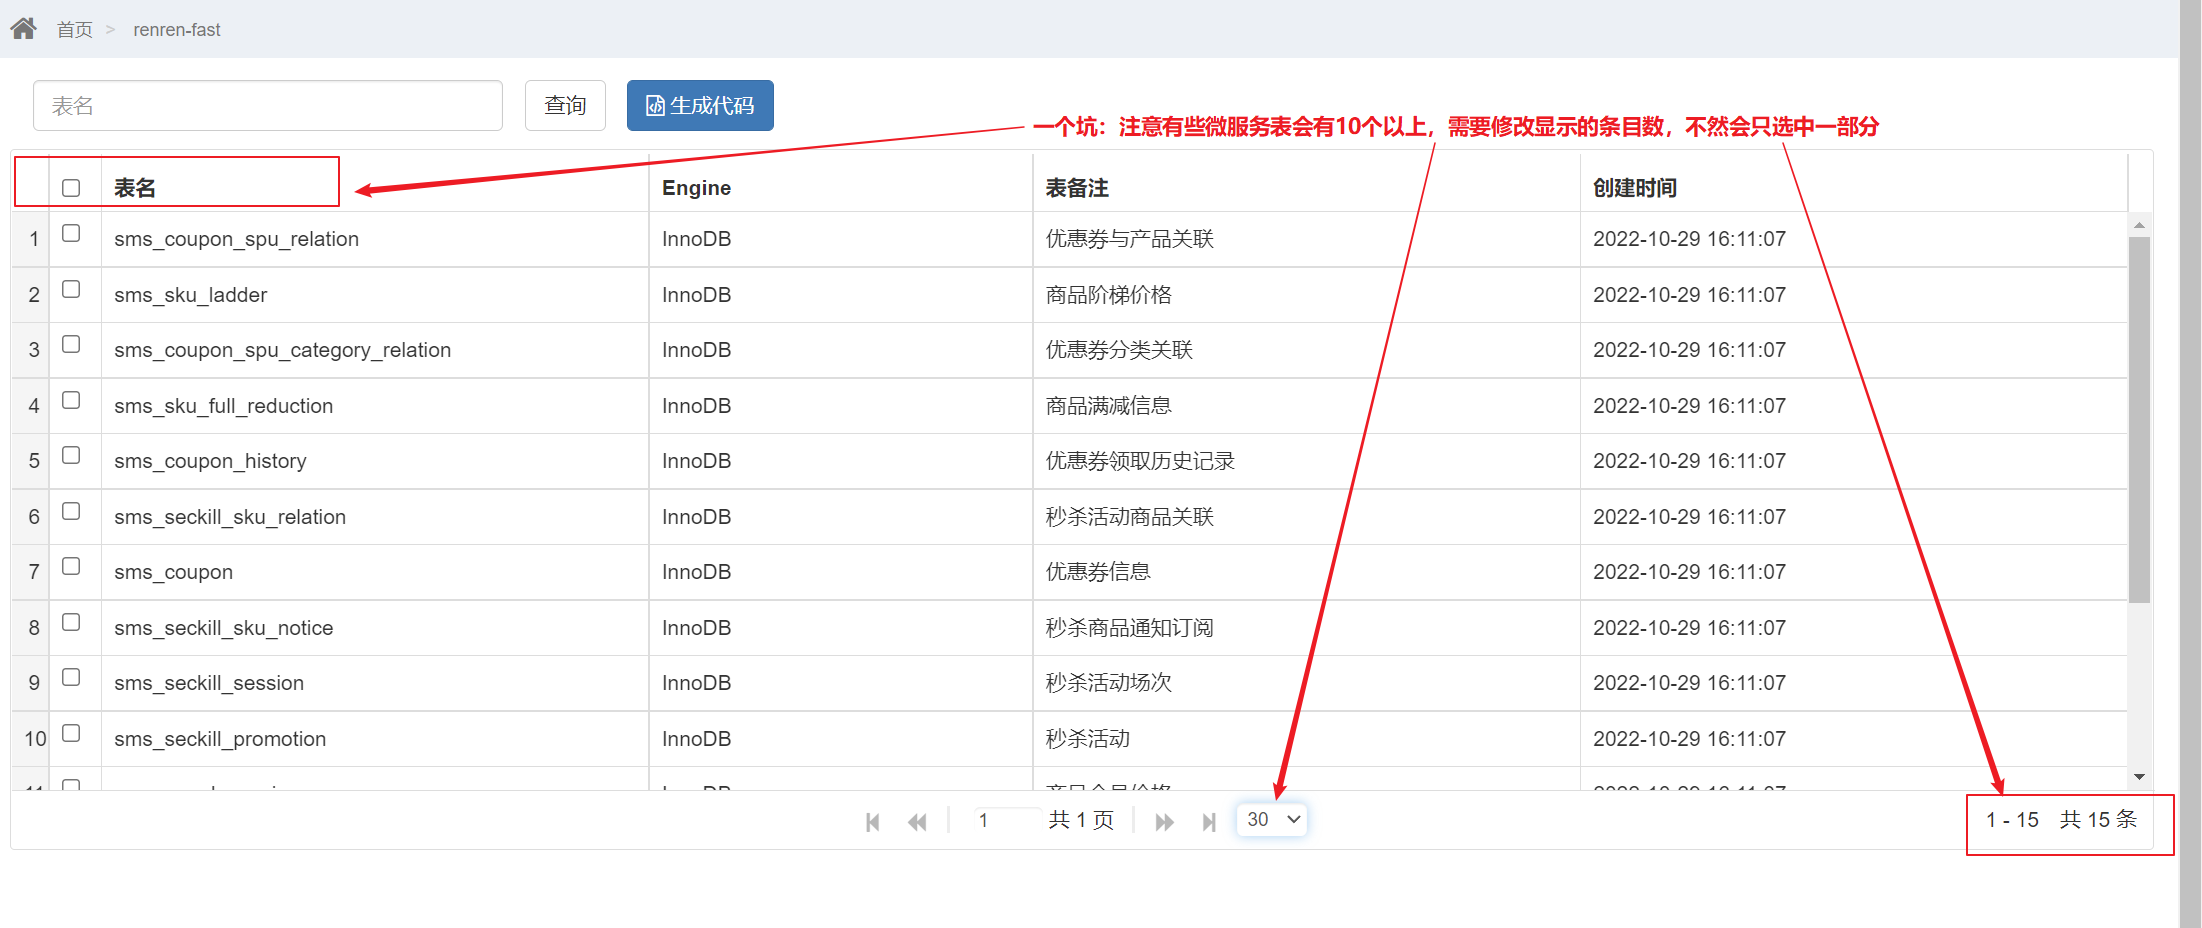

给每一个微服务设置端口:
coupon端口是7000,member是8000,order是9000,product 是1000,ware是11000。
以后比如order系统要复制多份,他的端口计算9001、9002。。。
测试:

[2]gulimall-member:ums用户微服务


测试
-

[3]gulimall-order:oms 订单微服务


测试:
 [4]gulimall-ware:wms 仓储微服务
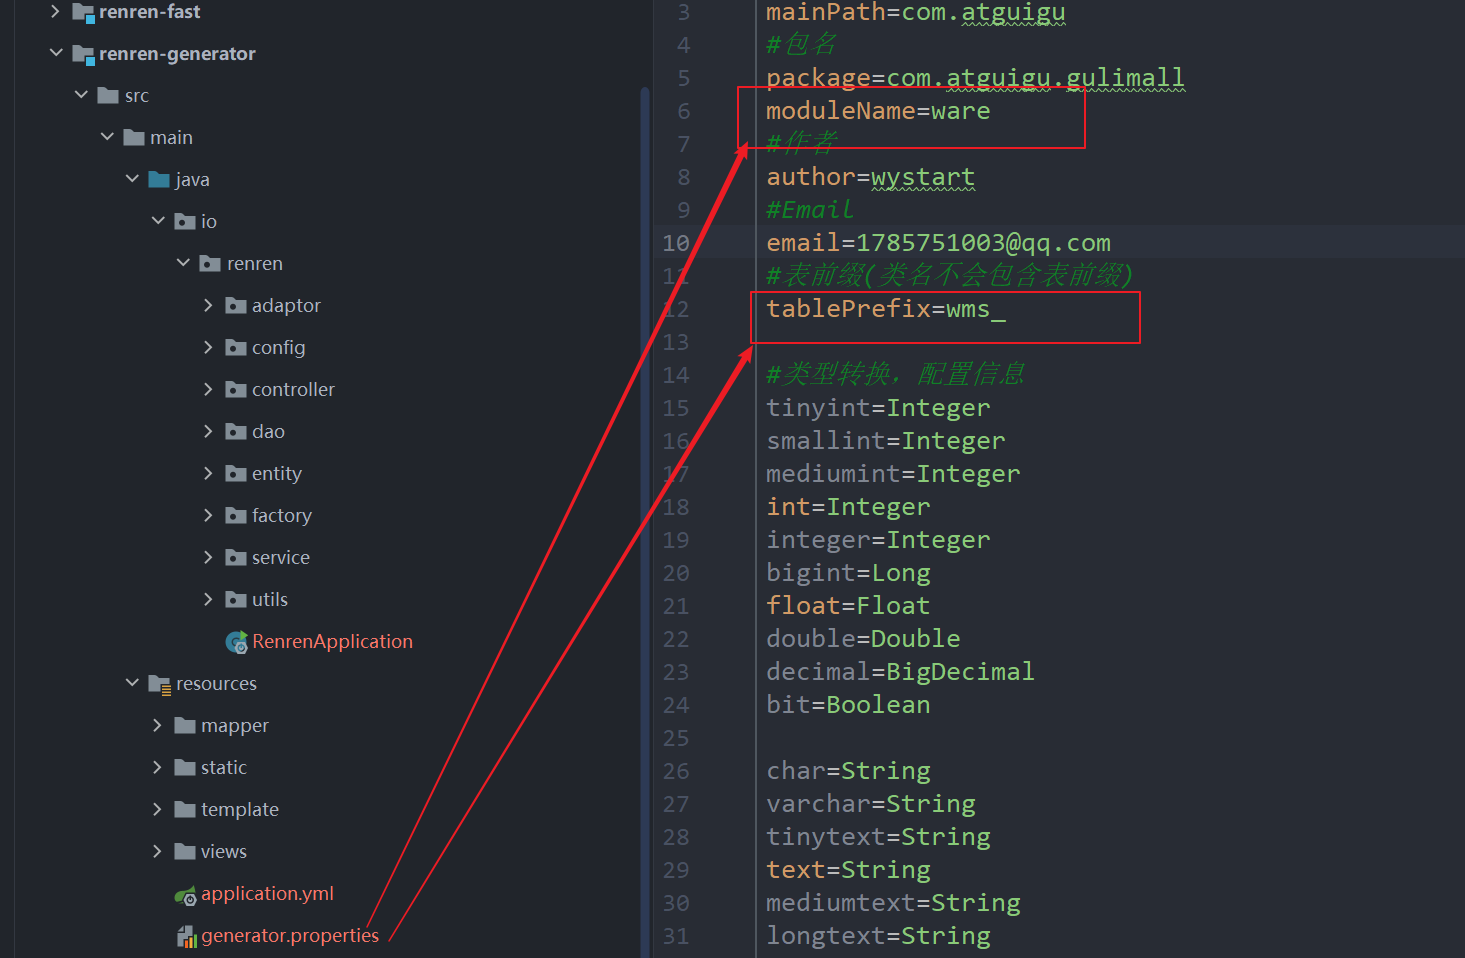


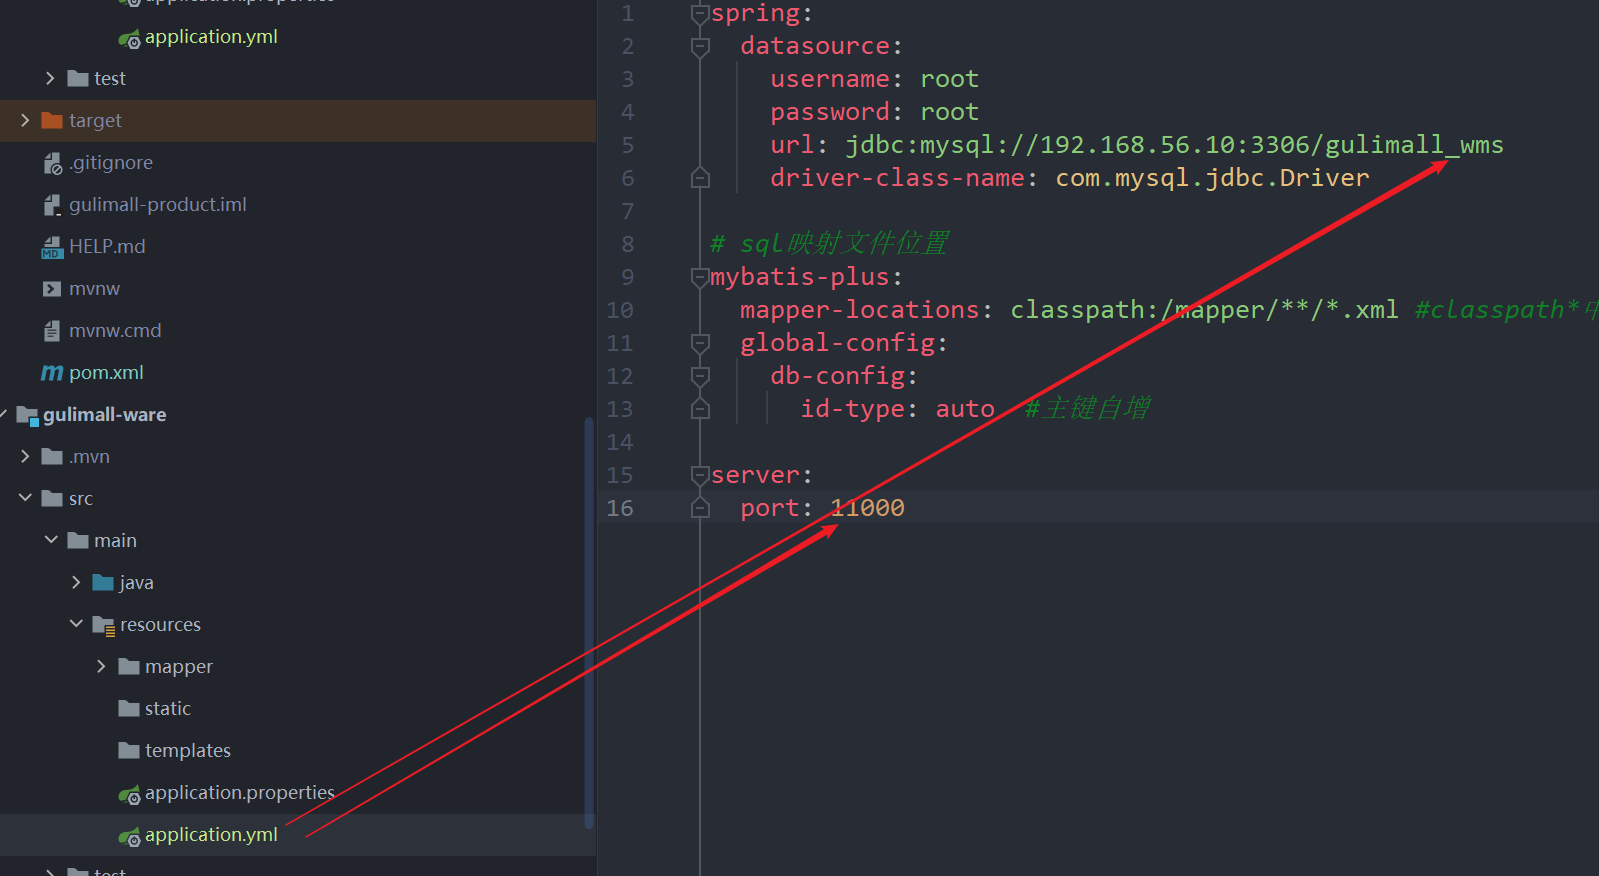
测试:

4 SpringCloud Alibaba -- 分布式组件
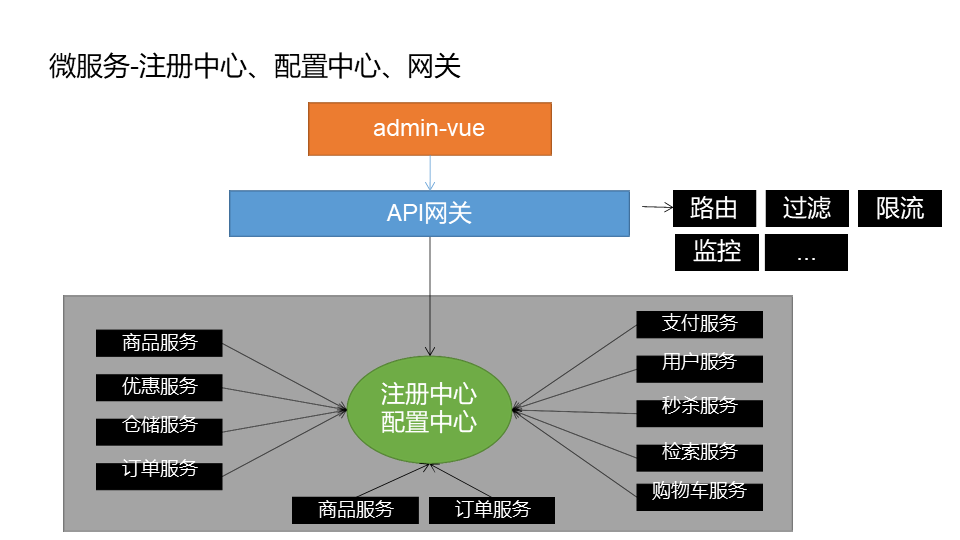
4.1 SpringCloud Alibaba-Nacos[作为注册中心]
4.1.1 下载
地址:https://github.com/alibaba/nacos/releases?page=3 下载这个版本的保持和老师教课一样,避免其他版本问题。
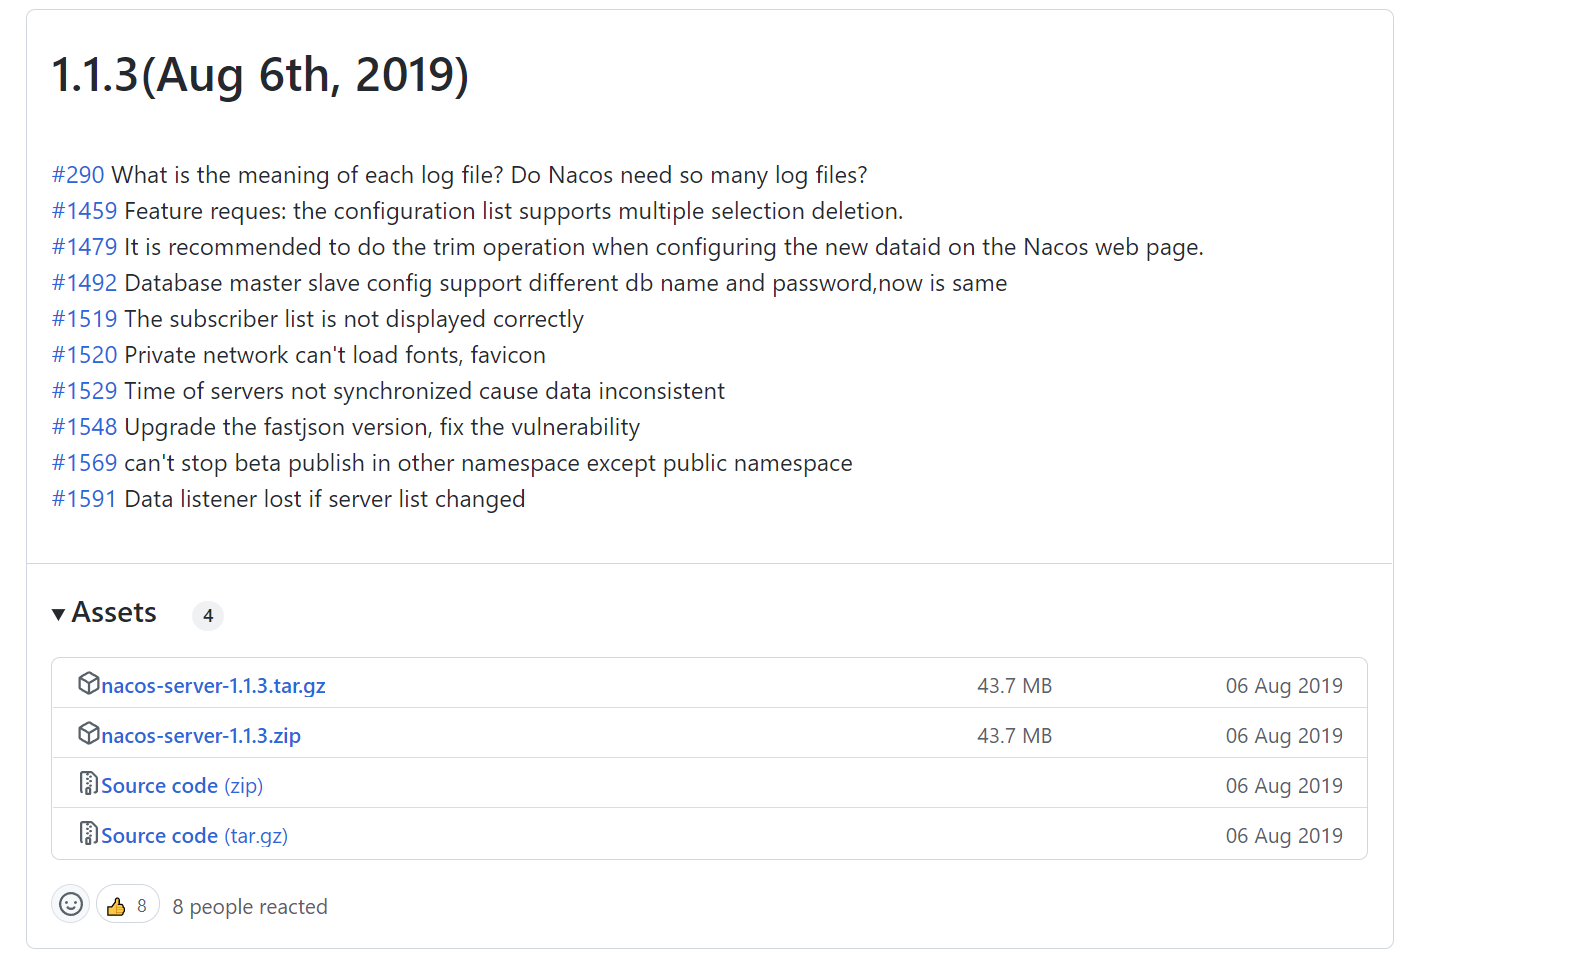
4.1.2 启动nacos:
-
双击bin 中的startup.cmd 文件
出现启动不了的问题:
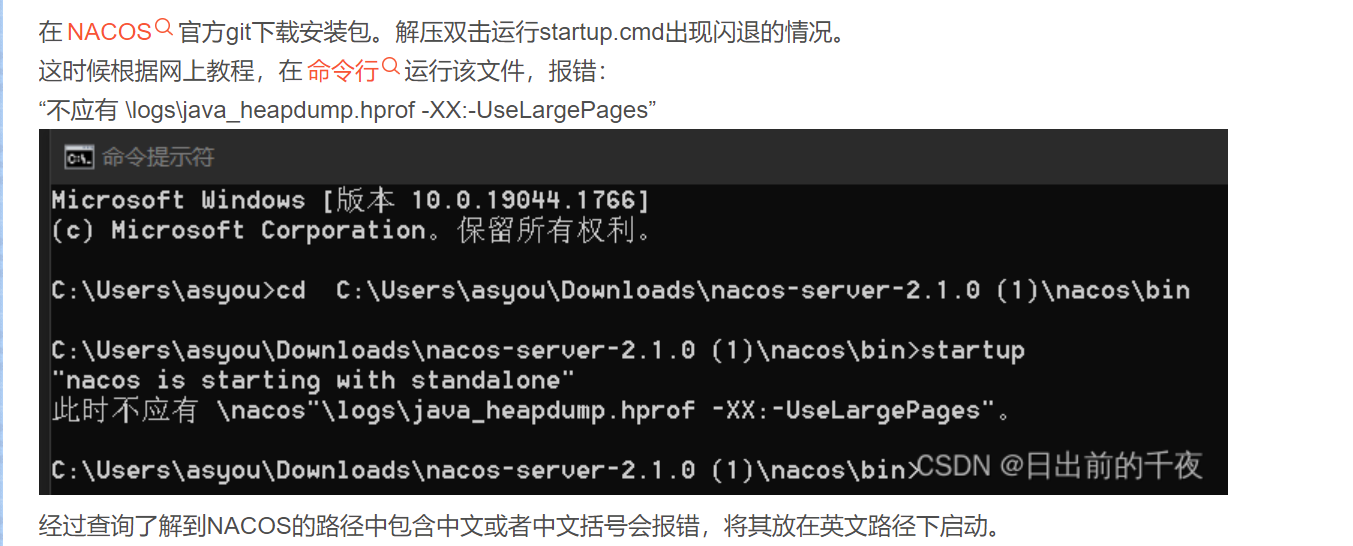
-
访问http://localhost:8848/nacos/
-
使用默认的nacos/nacos 进行登录

4.1.3 将微服务注册到nacos中
- 首先,修改
gulimall-common模块下的pom.xml 文件,引入Nacos Discovery Starter依赖
<dependency>
		<groupId>com.alibaba.cloud</groupId>
		<artifactId>spring-cloud-starter-alibaba-nacos-discovery</artifactId>
</dependency>
-
在应用的
/src/main/resources/application.properties配置文件中配置 Nacos Server 地址
spring.cloud.nacos.discovery.server-addr=127.0.0.1:8848ps:此处是作为服务注册发现中心的地址
-
使用
@EnableDiscoveryClient开启服务注册发现功能

-
启动应用,观察nacos 服务列表是否已经注册上服务:
Nacos 使用三步
1、导依赖包 nacos-discovery
2、写配置,指定 nacos 地址,指定应用的名字
3、开启服务注册发现功能 @EnableDiscoveryClient

4.2 openfegin[远程调用]
声明式远程调用
feign是一个声明式的HTTP客户端,他的目的就是让远程调用更加简单。给远程服务发的是HTTP请求。
会员服务想要远程调用优惠券服务,只需要给会员服务里引入openfeign依赖,他就有了远程调用其他服务的能力。

本次以 gulimall-member 会员服务 远程调用 gulimall-coupon 优惠券服务 中的方法为例。
4.2.1 首先在 gulimall-coupon中的 CouponController 方法中写一个测试方法,以供调用。

 /**
     * 测试 open-feign
     */
    @RequestMapping("/member/list")
    public R memberCoupons(){    //全系统的所有返回都返回 R
        //正常来说应该去数据库查用户对应的优惠券,这里简单测试,就直接返回一个优惠券给用户
        CouponEntity couponEntity = new CouponEntity();
        couponEntity.setCouponName("满100减10");  //优惠券的名字
        return  R.ok().put("coupons", Arrays.asList(couponEntity));
    }
4.2.2 在 gulimall-member 中创建一个feign包,我们将feign接口都放在feign包中。
@FeifnClient注解:告诉springcloud这个接口是一个远程客户端,它要调用远程服务。
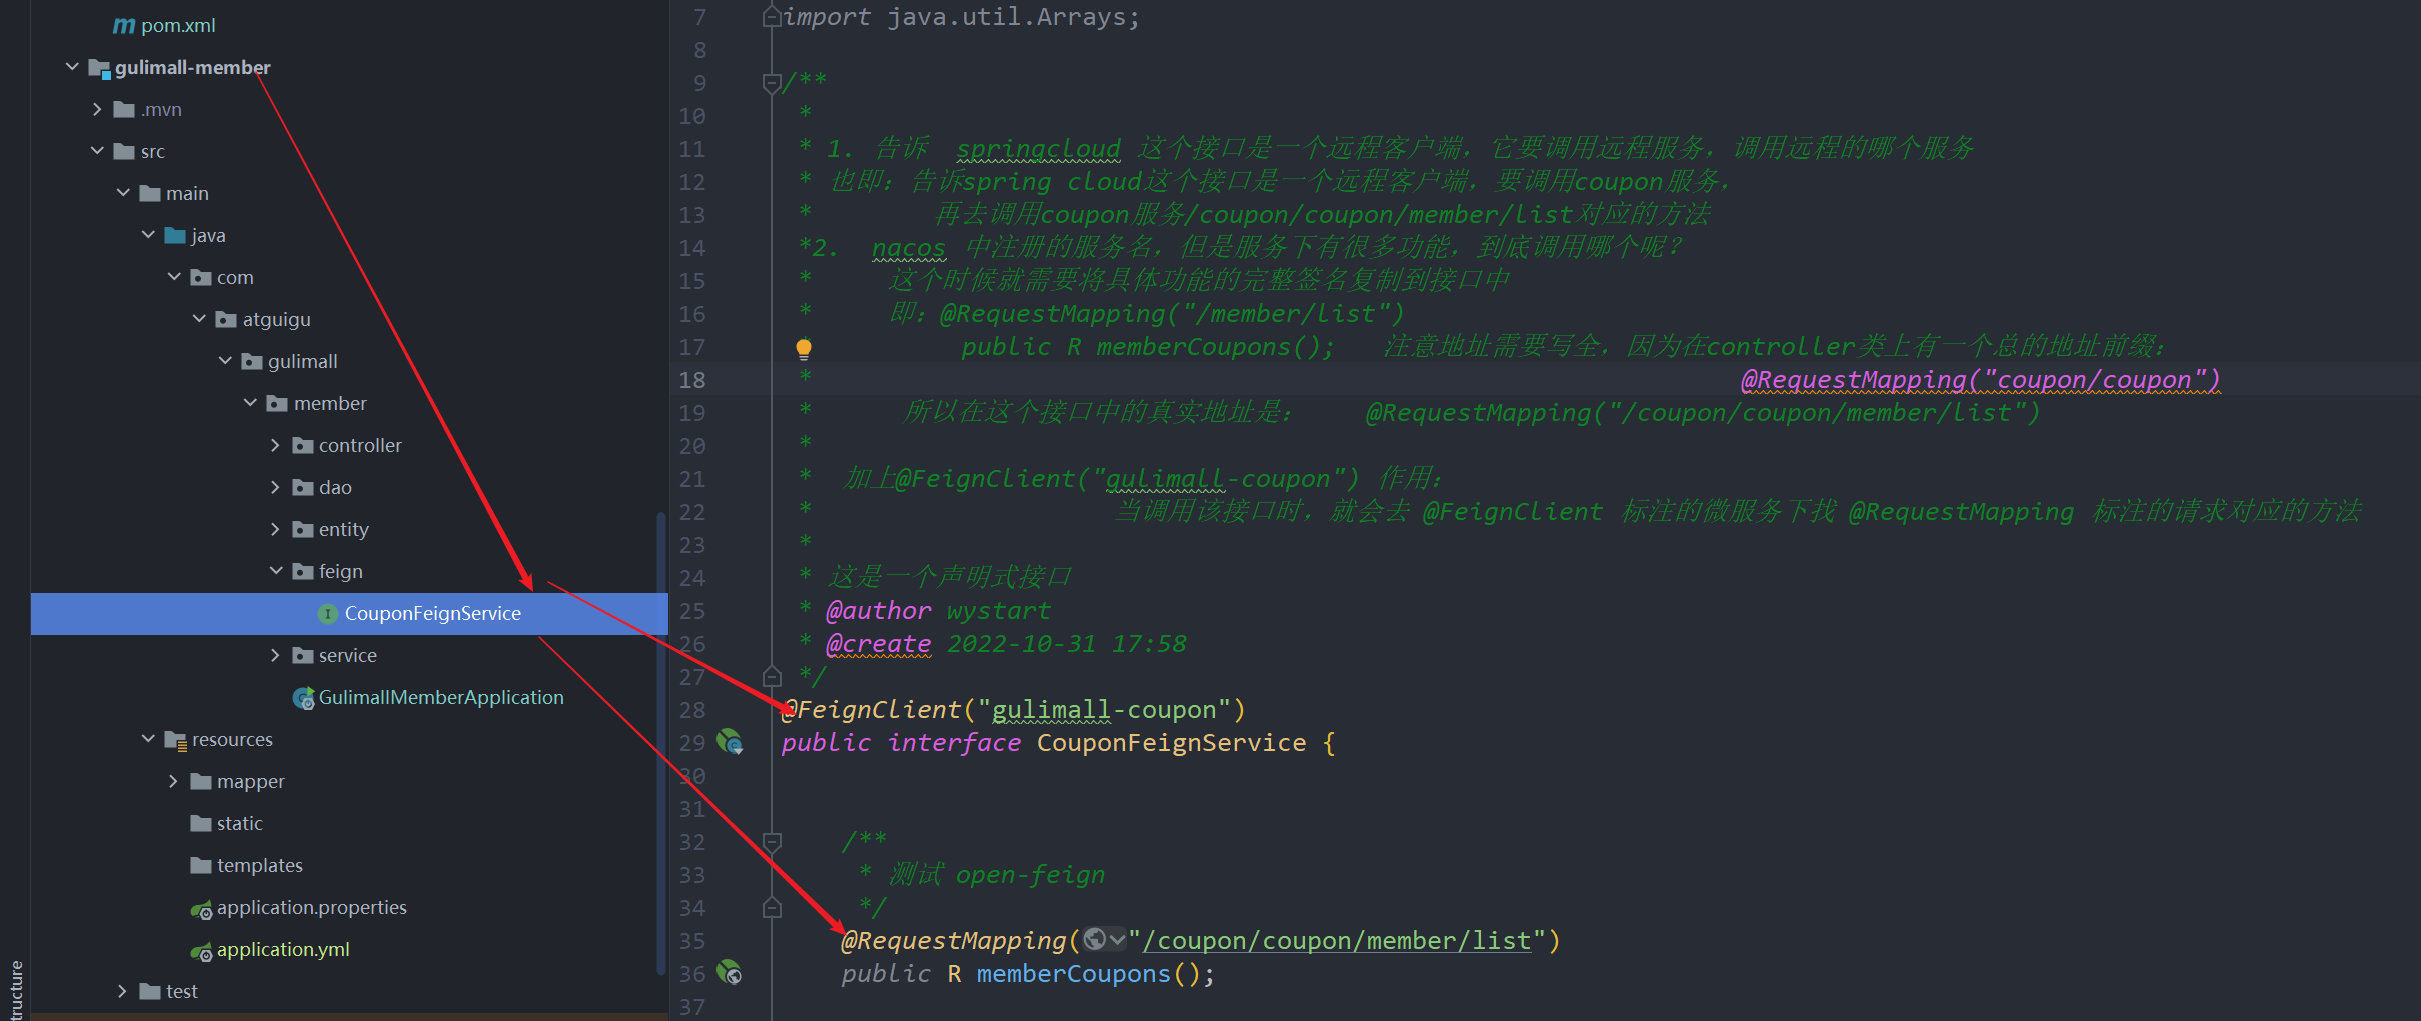
创建一个接口 CouponFeignService:
/*
 * 这是一个声明式接口
 */
@FeignClient("gulimall-coupon")
public interface CouponFeignService {
    /**
     * 测试 open-feign
     */
    @RequestMapping("/coupon/coupon/member/list")
    public R memberCoupons();
}
1. 告诉  springcloud 这个接口是一个远程客户端,它要调用远程服务,调用远程的哪个服务
 * 也即:告诉spring cloud这个接口是一个远程客户端,要调用coupon服务,
 *      再去调用coupon服务/coupon/coupon/member/list对应的方法
2.  nacos 中注册的服务名,但是服务下有很多功能,到底调用哪个呢?
 *     这个时候就需要将具体功能的完整签名复制到接口中
 *     即:@RequestMapping("/member/list")
 *          public R memberCoupons();   注意地址需要写全,因为在controller类上有一个总的地址前缀:                                                               @RequestMapping("coupon/coupon")
 *      所以在这个接口中的真实地址是:    @RequestMapping("/coupon/coupon/member/list")
3. 加上@FeignClient("gulimall-coupon") 作用:当调用该接口时,就会去 @FeignClient 标注的微服务下找 @RequestMapping 标注的请求对应的方法;
4.2.3 在gulimall-member的MemberController方法中调用feign接口

    @Autowired
    private CouponFeignService couponFeignService;

    /**
     * 测试 open-feign
     */
    @RequestMapping("/coupons")
    public R test(){
        MemberEntity memberEntity = new MemberEntity();
        memberEntity.setNickname("张三");
        R memberCoupons = couponFeignService.memberCoupons();  //假设张三去数据库查了后返回了张三的优惠券信息
        //第一个 put  打印会员---从本地获取到的  ;   put("member",memberEntity)
        // 第二个 put从 coupons中  打印优惠券信息 -----memberCoupons.get("coupons")  远程调用
        return       R.ok().put("member",memberEntity).put("coupons",memberCoupons.get("coupons"));
    }
4.2.4 在调用微服务gulimall-member中的启动类上加注解@EnableFeignClients
@EnableFeignClients(basePackages = "com.atguigu.gulimall.member.feign")  //自动扫描包下的feign接口
@EnableDiscoveryClient
@SpringBootApplication
public class GulimallMemberApplication {

    public static void main(String[] args) {
        SpringApplication.run(GulimallMemberApplication.class, args);
    }

}
* 1、开启feign客户端的远程调用功能 @EnableFeignClients ,还要设置调用哪个包下的feign,进而当容器启动的时候,就会自动扫描包下面的feign接口,feign接口上说明了 哪个微服务,进而调用具体微服务下的具体的请求。
4.2.5 启动这两个微服务。
记住:
- 遇到的坑-1:SpringCloud启动报错
Did you forget to include spring-cloud-starter-loadbalancer
添加匹配当前OpenFeign的负载均衡依赖
由于SpringCloud Feign在Hoxton.M2 RELEASED版本之后不再使用Ribbon而是使用spring-cloud-loadbalancer,所以不引入spring-cloud-loadbalancer会报错
解决方法 : 加入spring-cloud-loadbalancer依赖, 并且在nacos中排除ribbon依赖,不然loadbalancer无效
 <dependency>
            <groupId>com.alibaba.cloud</groupId>
            <artifactId>spring-cloud-starter-alibaba-nacos-discovery</artifactId>
            <exclusions>
                <exclusion>
                    <groupId>com.netflix.ribbon</groupId>
                    <artifactId>ribbon</artifactId>
                </exclusion>
            </exclusions>
        </dependency>


        <dependency>
            <groupId>org.springframework.cloud</groupId>
            <artifactId>spring-cloud-loadbalancer</artifactId>
            <version>3.1.1</version>
        </dependency>
gulimall-comon中添加以上注解解决问题。
-
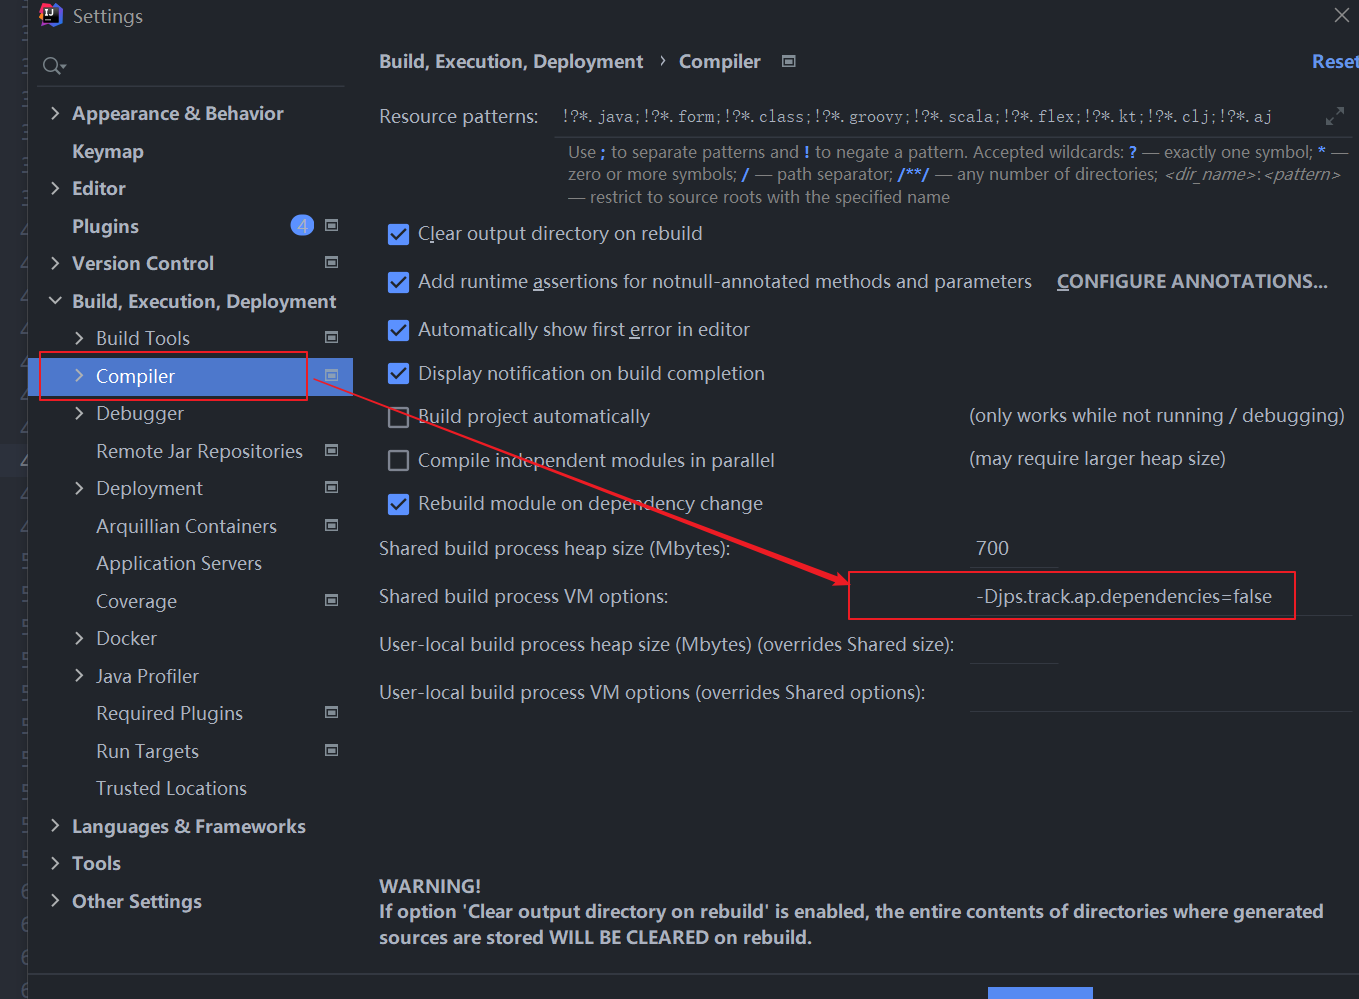
遇到的坑 -2:

解决办法:

注意:
以上遇到的坑,均是版本问题导致,后续将会将版本和老师课件版本统一,避免遇到各种类似的bug问题出现。
再次进行测试,如下图,测试成功。

Feign 使用三步
1、导包openfeign
2、开启@EnableFeignClients 功能 :自动扫描feign
3、编写接口,进行远程调用:feign接口上开启@FeignClient:进行远程调用服务,具体到某一个微服务
4.3 SpringCloud Alibaba-Nacos[作为配置中心]
4.3.1 gulimall-common模块的 pom.xml 引入Nacos Config Starter依赖
<dependency>
			<groupId>com.alibaba.cloud</groupId>
			<artifactId>spring-cloud-starter-alibaba-nacos-config</artifactId>
</dependency>
4.3.2 在 gulimall-coupon 的resources/bootstrap.properties 配置文件中配置Nacos Config 元数据
#bootstrap.properties ,这个文件是
#springboot里规定的,他优先级别application.properties高
#改名字,对应nacos里的配置文件名
spring.application.name=gulimall-coupon
spring.cloud.nacos.config.server-addr=127.0.0.1:8848
4.3.3 在nacos 中添加配置
在 nacos 中创建一个 应用名.properties 配置文件并编写配置(做到一处修改,处处生效):
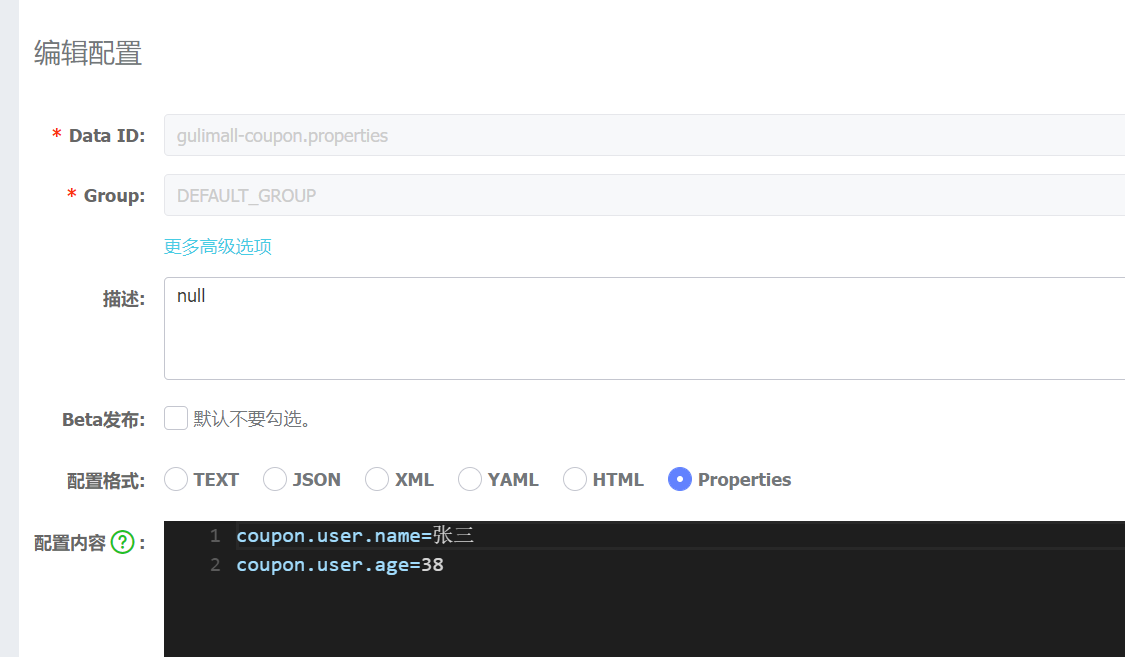
测试:
@RestController
@RequestMapping("coupon/coupon")
public class CouponController {
    @Autowired
    private CouponService couponService;


    //@Value  读取配置文件中的值
    @Value("${coupon.user.name}")
    private String name;
    @Value("${coupon.user.age}")
    private String age;
    /**
     * 测试配置中心
     */
    @RequestMapping("/test")
    public R test(){
        return R.ok().put("name",name).put("age",age);
    }

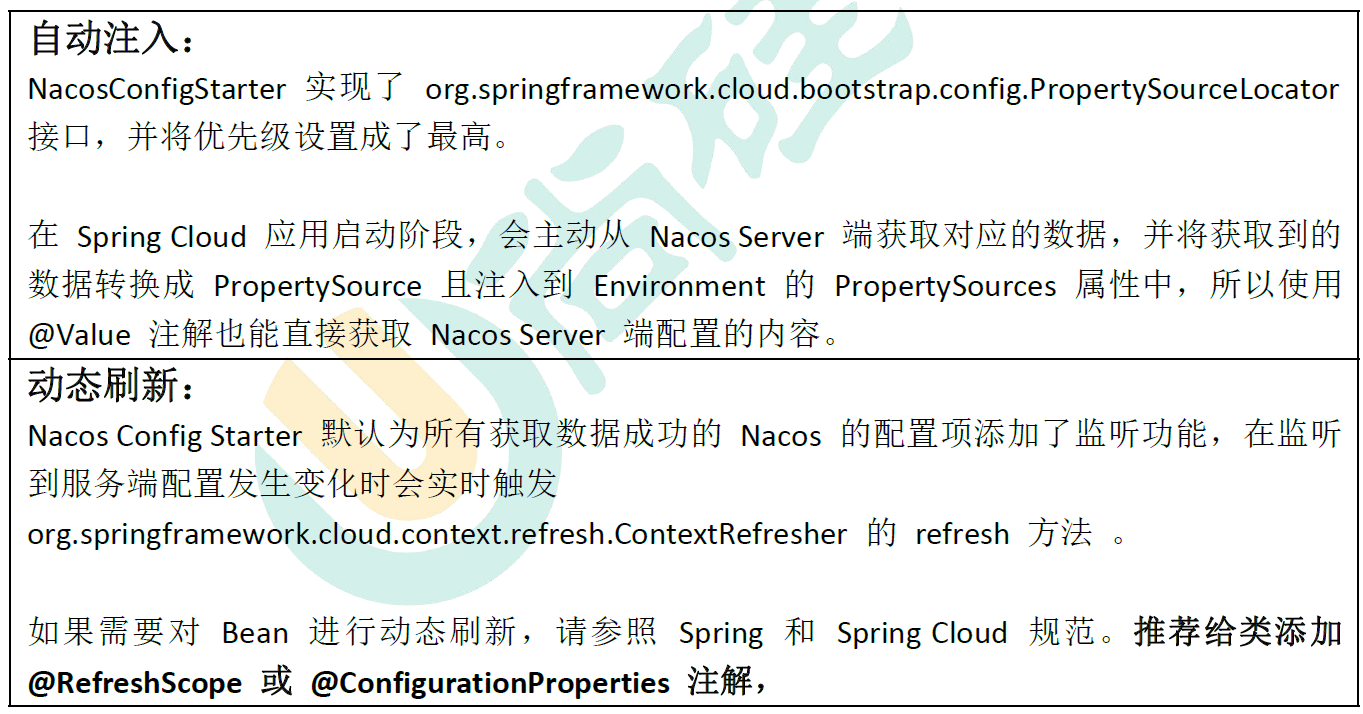
但是修改怎么办?实际生产中不能重启应用。在coupon的控制层上添加动态刷新功能的注解:@RefreshScope
该注解支持文件修改后动态刷新功能。
最终代码效果:
@RefreshScope  //打开动态刷新功能
@RestController
@RequestMapping("coupon/coupon")
public class CouponController {
    @Autowired
    private CouponService couponService;


    //@Value  读取配置文件中的值
    @Value("${coupon.user.name}")
    private String name;
    @Value("${coupon.user.age}")
    private String age;
    /**
     * 测试配置中心
     */
    @RequestMapping("/test")
    public R test(){
        return R.ok().put("name",name).put("age",age);
    }
重启后,在nacos浏览器里修改配置,修改就可以观察到能动态修改了
nacos的配置内容优先于项目本地的配置内容。
小总结:
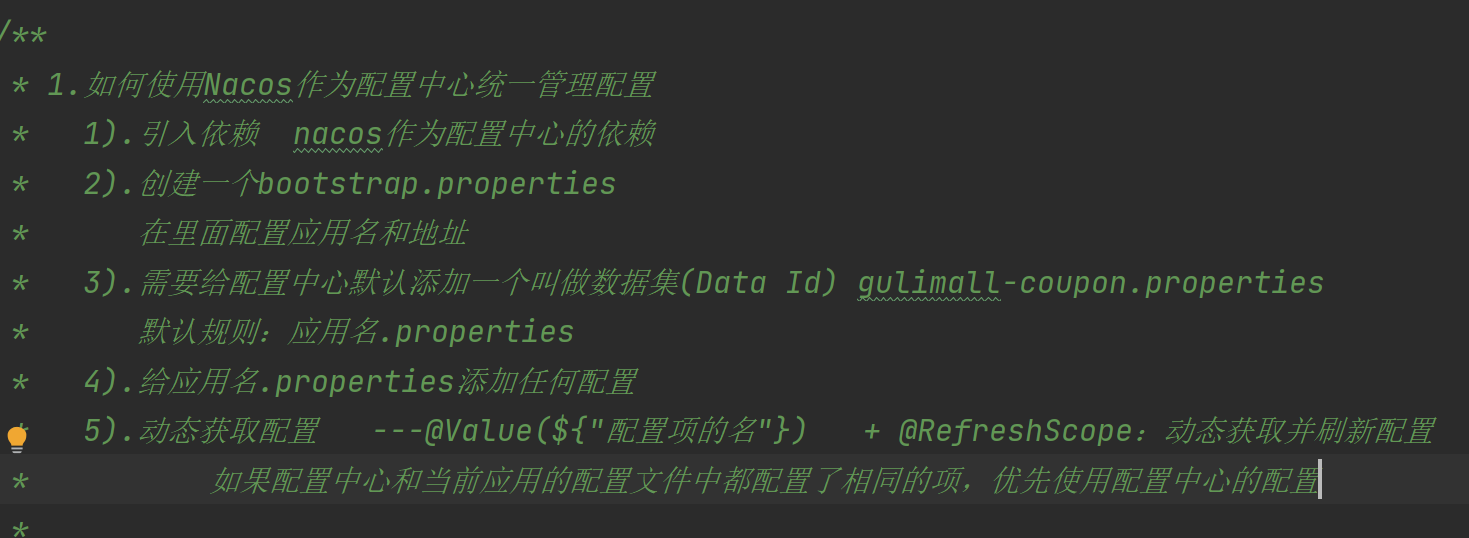
/**
 * 1、如何使用nacos作为配置中心统一管理配置
 *
 * 1)、引入依赖:
 *  <dependency>
 *             <groupId>com.alibaba.cloud</groupId>
 *             <artifactId>spring-cloud-starter-alibaba-nacos-config</artifactId>
 *         </dependency>
 * 2)、创建一个 bootstrap.properties
 *      spring.application.name=gulimall-coupon
 *      spring.cloud.nacos.config.server-addr=127.0.0.1:8848
 *3)、需要给配置中心默认添加一个叫 数据集(Data Id) gulimall-coupon.properties:默认规则:应用名.properties
 *4)、给  应用名.properties 添加任何配置
 *5)、动态获取配置:
 *       @RefreshScope:动态获取并刷新配置
 *       @Value("${配置项的名}"):获取到配置。
 *      如果配置中心和当前应用的配置文件中都配置了相同的项,优先使用配置中心的配置。
 */
知识点回顾:
Nacos Config 数据结构
Nacos Config 主要通过dataId 和group 来唯一确定一条配置。
Nacos Client 从Nacos Server 端获取数据时,调用的是此接口ConfigService.getConfig(String
dataId, String group, long timeoutMs)。Spring Cloud 应用获取数据
dataID:
在Nacos Config Starter 中,dataId 的拼接格式如下- ${prefix} - ${spring.profiles.active} . ${file-extension} prefix 默认为spring.application.name的值,也可以通过配置项spring.cloud.nacos.config.prefix 来配置。-
- spring.profiles.active 即为当前环境对应的profile
注意,当activeprofile 为空时,对应的连接符- 也将不存在,dataId 的拼接格式变成
${prefix}.${file-extension}
file-extension 为配置内容的数据格式,可以通过配置项
spring.cloud.nacos.config.file-extension 来配置。目前只支持properties 类型Group:
Group 默认为 DEFAULT_GROUP ,可以通过spring.cloud.nacos.config.group 配置。
4.3.4 测试中遇到的坑
- 坑,启动报错:
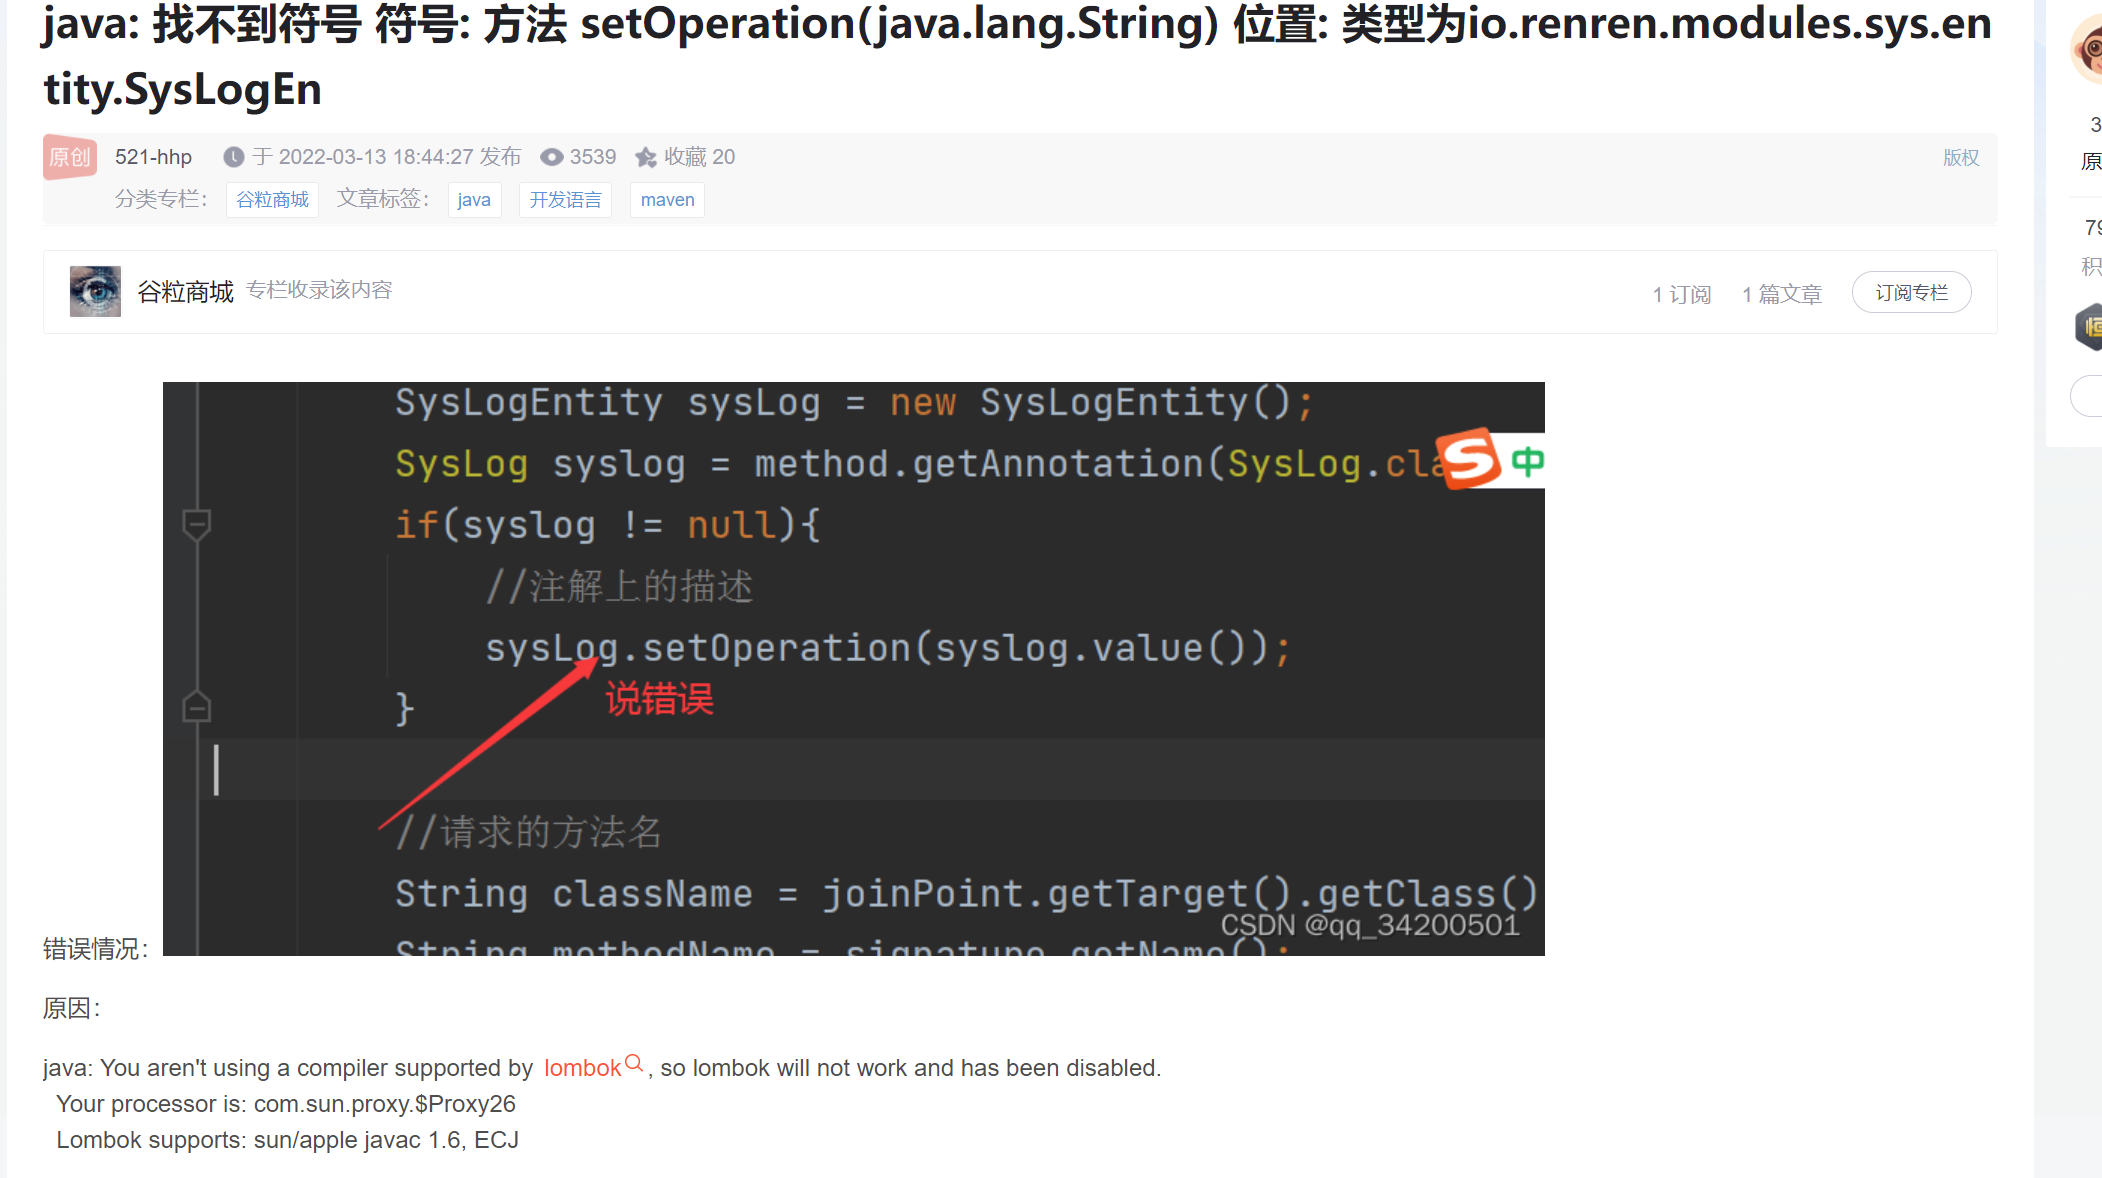
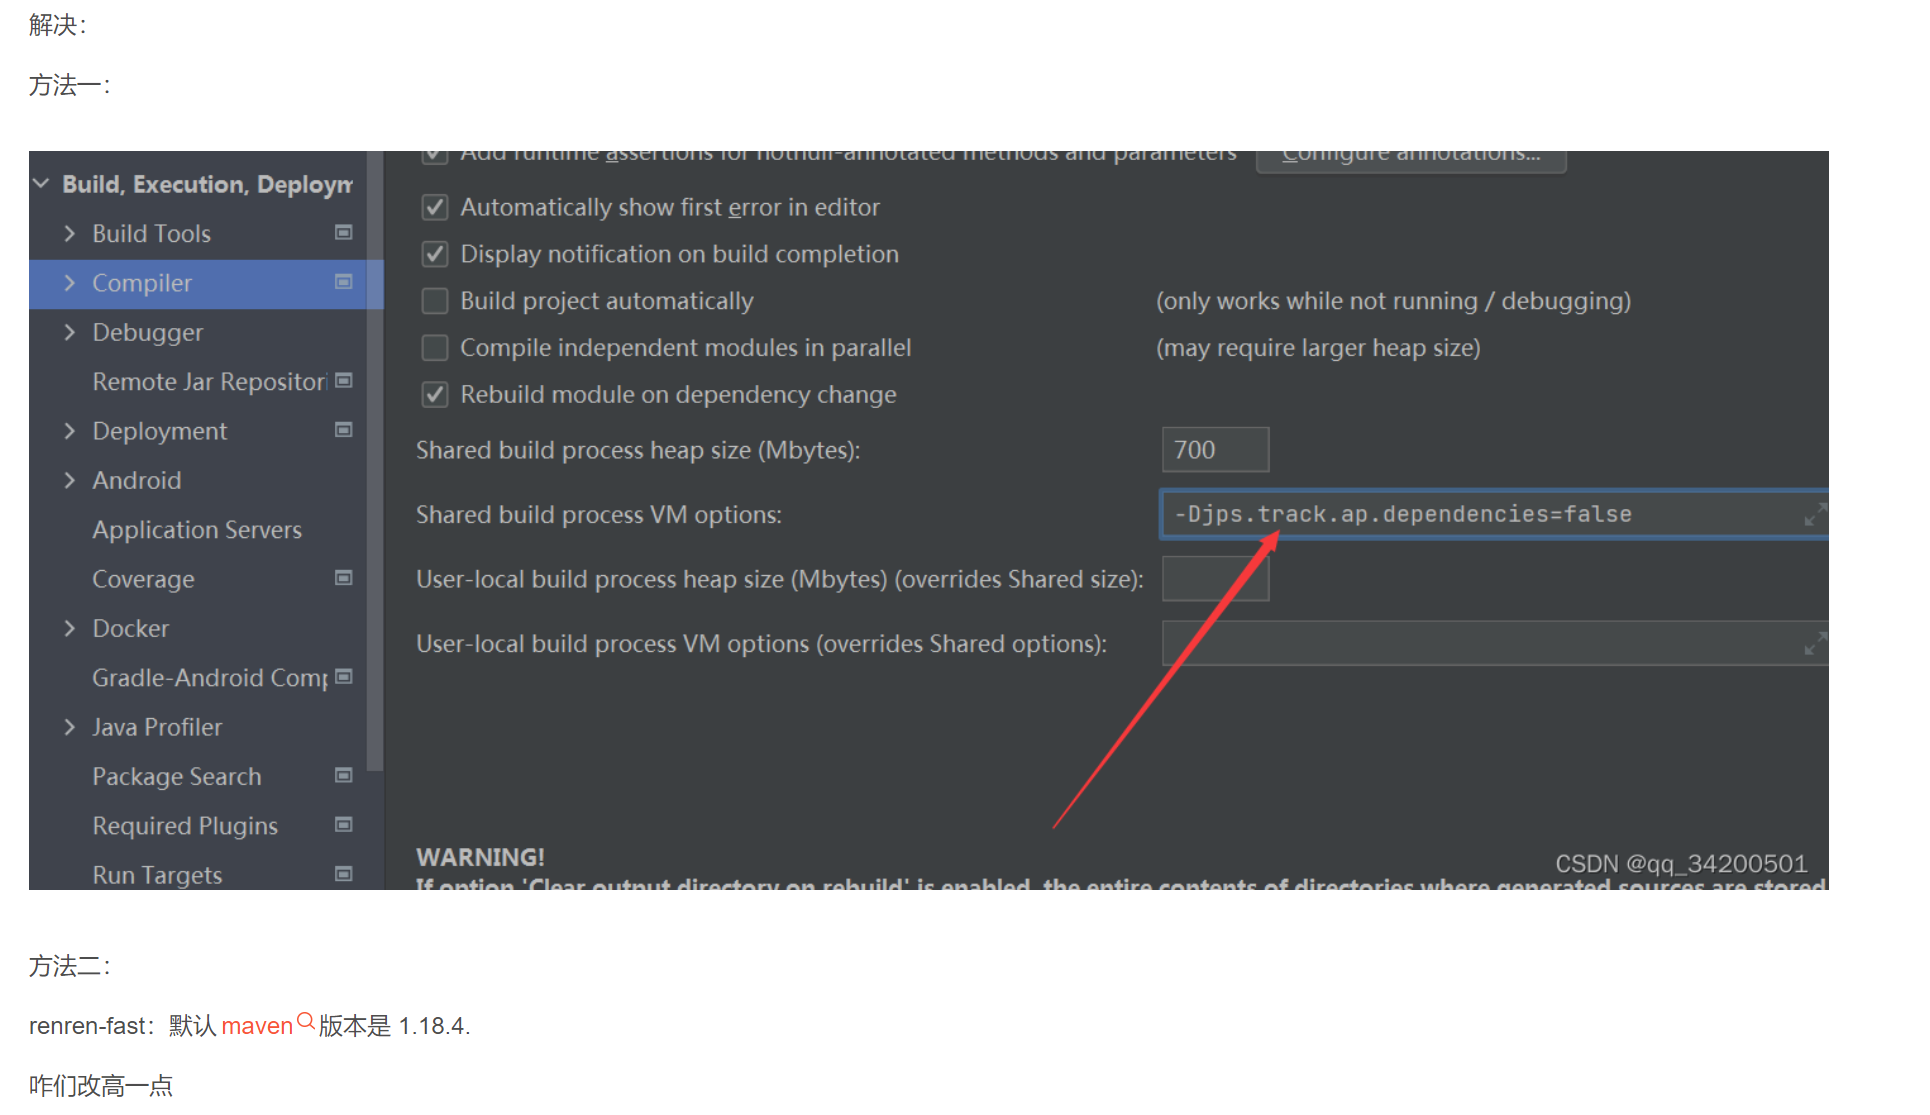
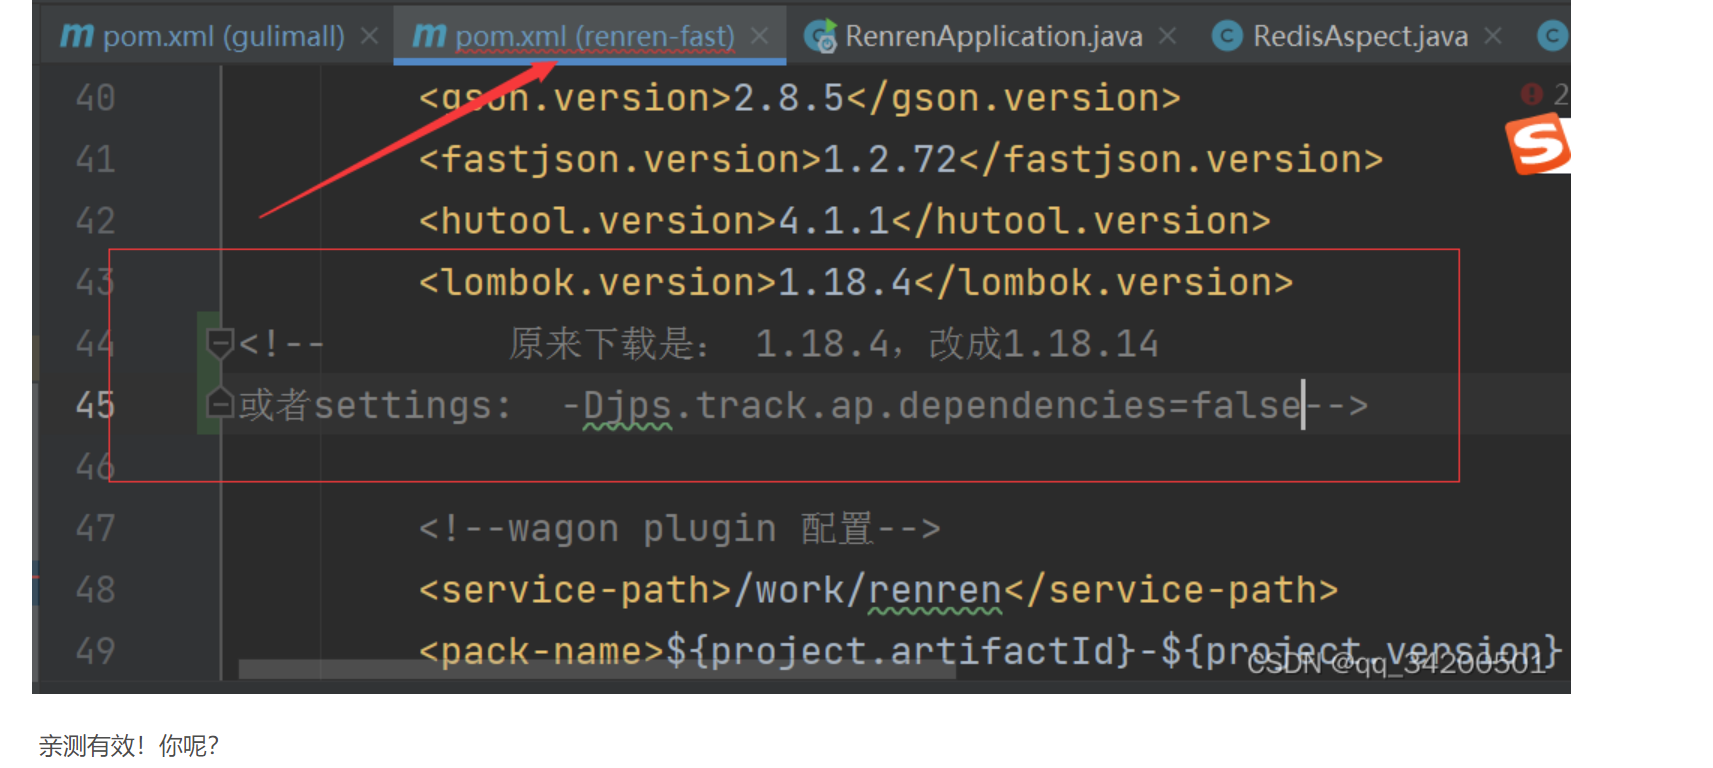
- 踩坑 :配置中心不起作用,真的是这个问题。
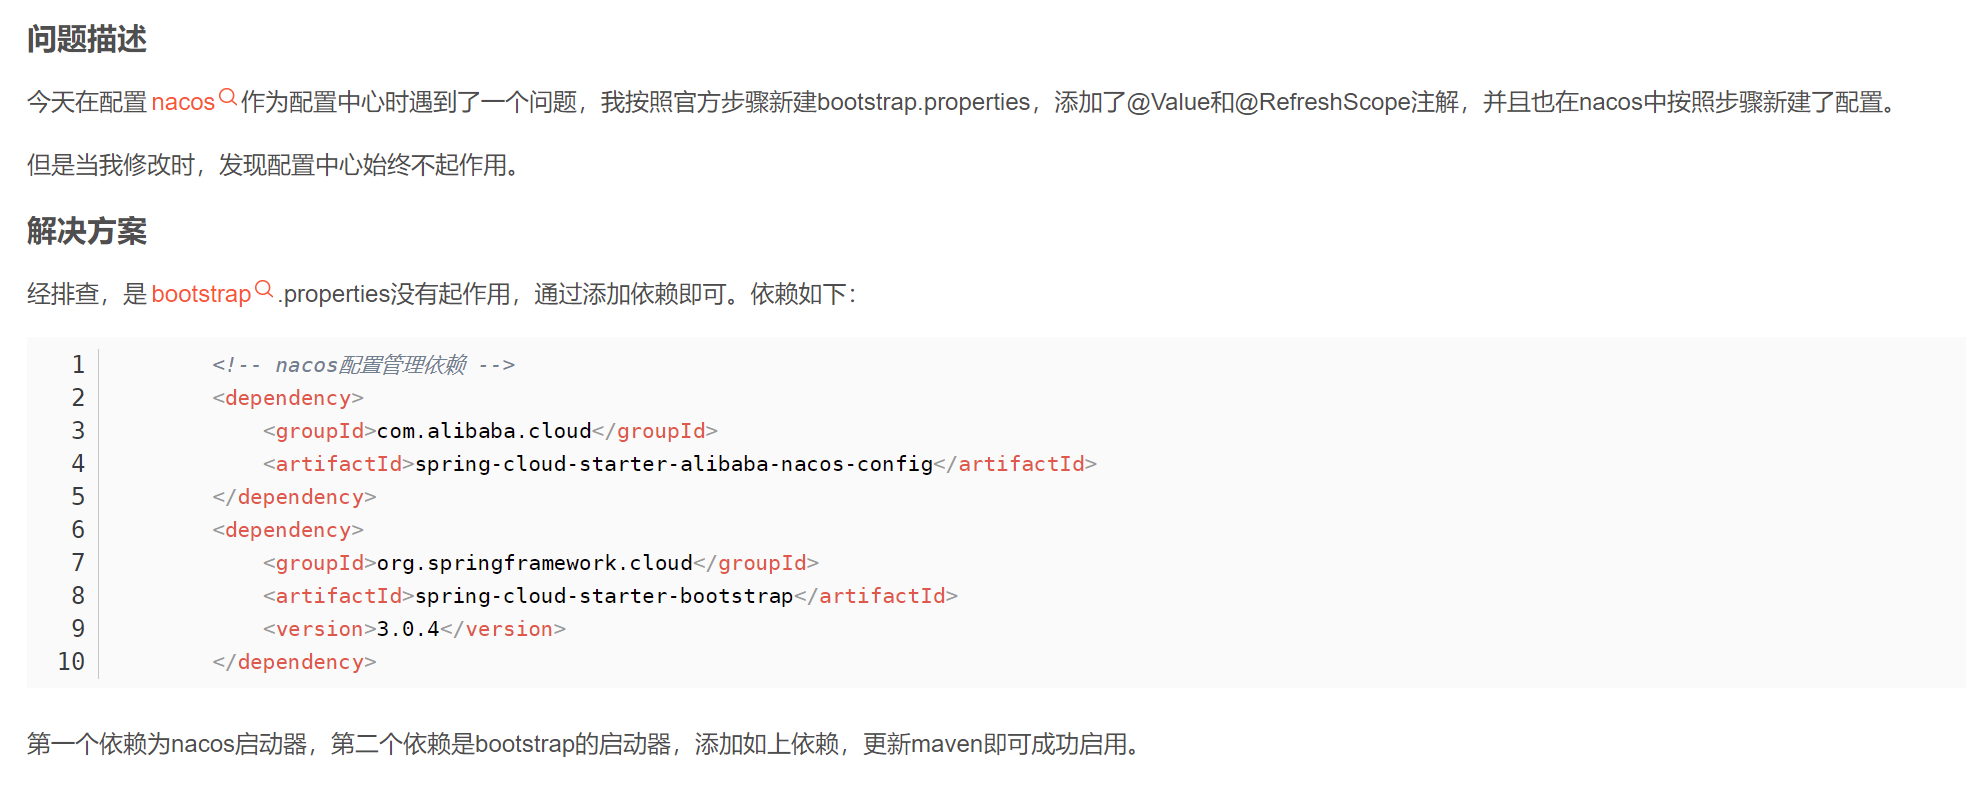
4.4 进阶
4.4.1 核心概念

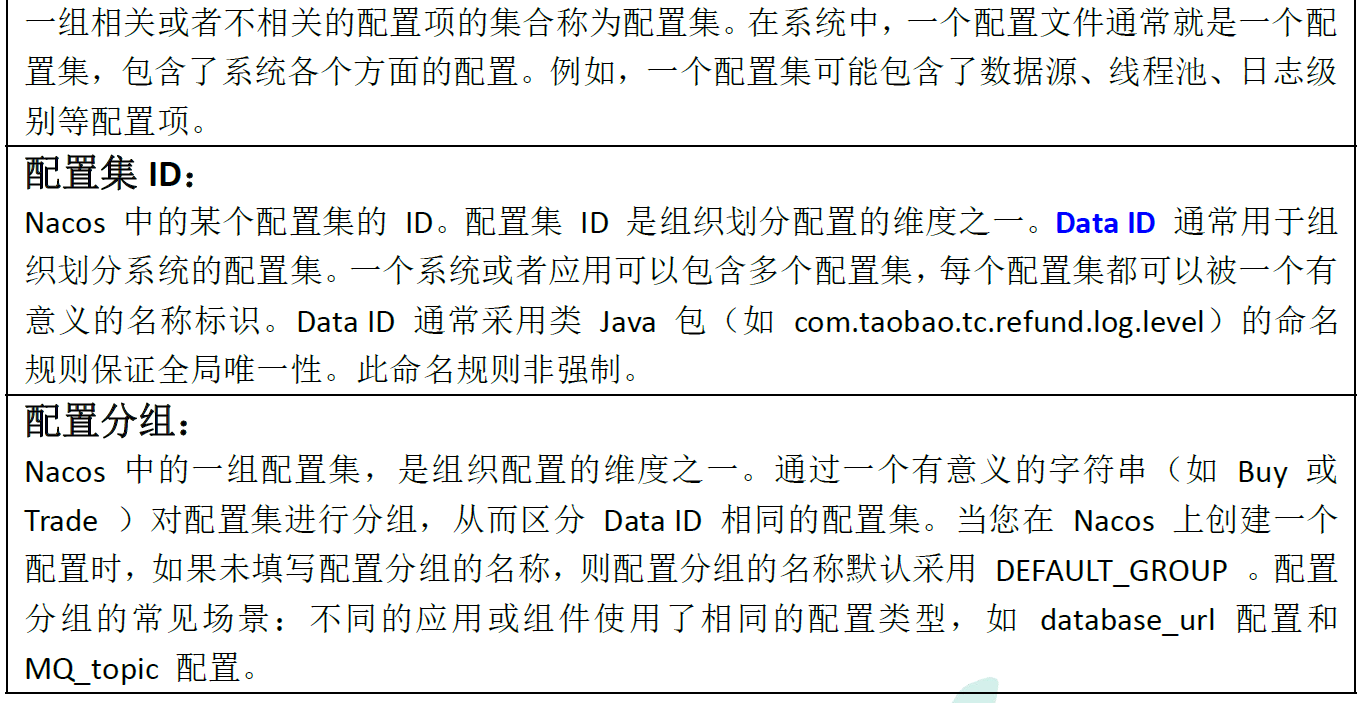
4.4.2 原理
4.4.3 配置文件整合
命名空间:用作配置隔离。(一般每个微服务一个命名空间)
我们将微服务中的配置文件进行整合。就是在nacos中每一个微服务都有自己的命名空间。每一个微服务的命名空间下有很多个配置列表,这些配置将我们原本在java本地的代码放到注册中心中,然后我们使用boostrap.properties来对命名空间进行设置。具体还可以进行分组。dev prod test这三组。
每个微服务的命名空间区分:

命名空间下开发、测试、生产分组:

ps:
*  2、细节
*  1)、命名空间:配置隔离:
*        默认:public(保留空间):默认新增的所有配置都在public空间。
*        1、开发,测试,生产:利用命名空间来做环境隔离。----基于环境隔离
*        注意:在bootstrap.properties:配置上,需要使用哪个命名空间下的配置。
*        spring.cloud.nacos.config.namespace=ee95e5d5-8928-448d-b038-e09b3792c308
*        2、每一个微服务之间相互隔离配置,每一个微服务都创建自己的命名空间,只加载自己命名空间下的所有配置--基于微服务隔离
* 2)、配置集:所有的配置的集合
*
* 3)、配置集ID:类似文件名
*      Data ID:类似文件名
*
* 4)、配置分组
*      默认所有的配置集都属于:DEFAULT_GROUP;
*      1111,618,1212     或者  dev test  prop
* 项目中的使用:每个微服务创建自己的命名空间,使用配置分组区分环境,dev,test,prop
*
* 3、同时加载多个配置集
* 1)、微服务任何配置信息,任何配置文件都可以放在配置中心中
* 2)、只需要在 bootstrap.properties 说明加载配置中心中哪些配置文件即可
* 3)、@Value,@ConfigurationProperties。。。。都可以获取
* 以前SpringBoot任何方法从配置文件中获取值,都能使用。
* 配置中心有的优先使用配置中心的,没有再使用配置文件中的配置。
注意如果在注册中心中找不到就去找默认的,默认的在注册中心中也找不到的时候,就会去找本地的。

最终在 bootstrap.properties 中:
#命名空间
spring.cloud.nacos.config.namespace=8496c545-7972-474a-8d7b-faa0bc46f753
#分组
spring.cloud.nacos.config.group=dev

#测试配置集,下面的这种新版本已经不推荐使用了
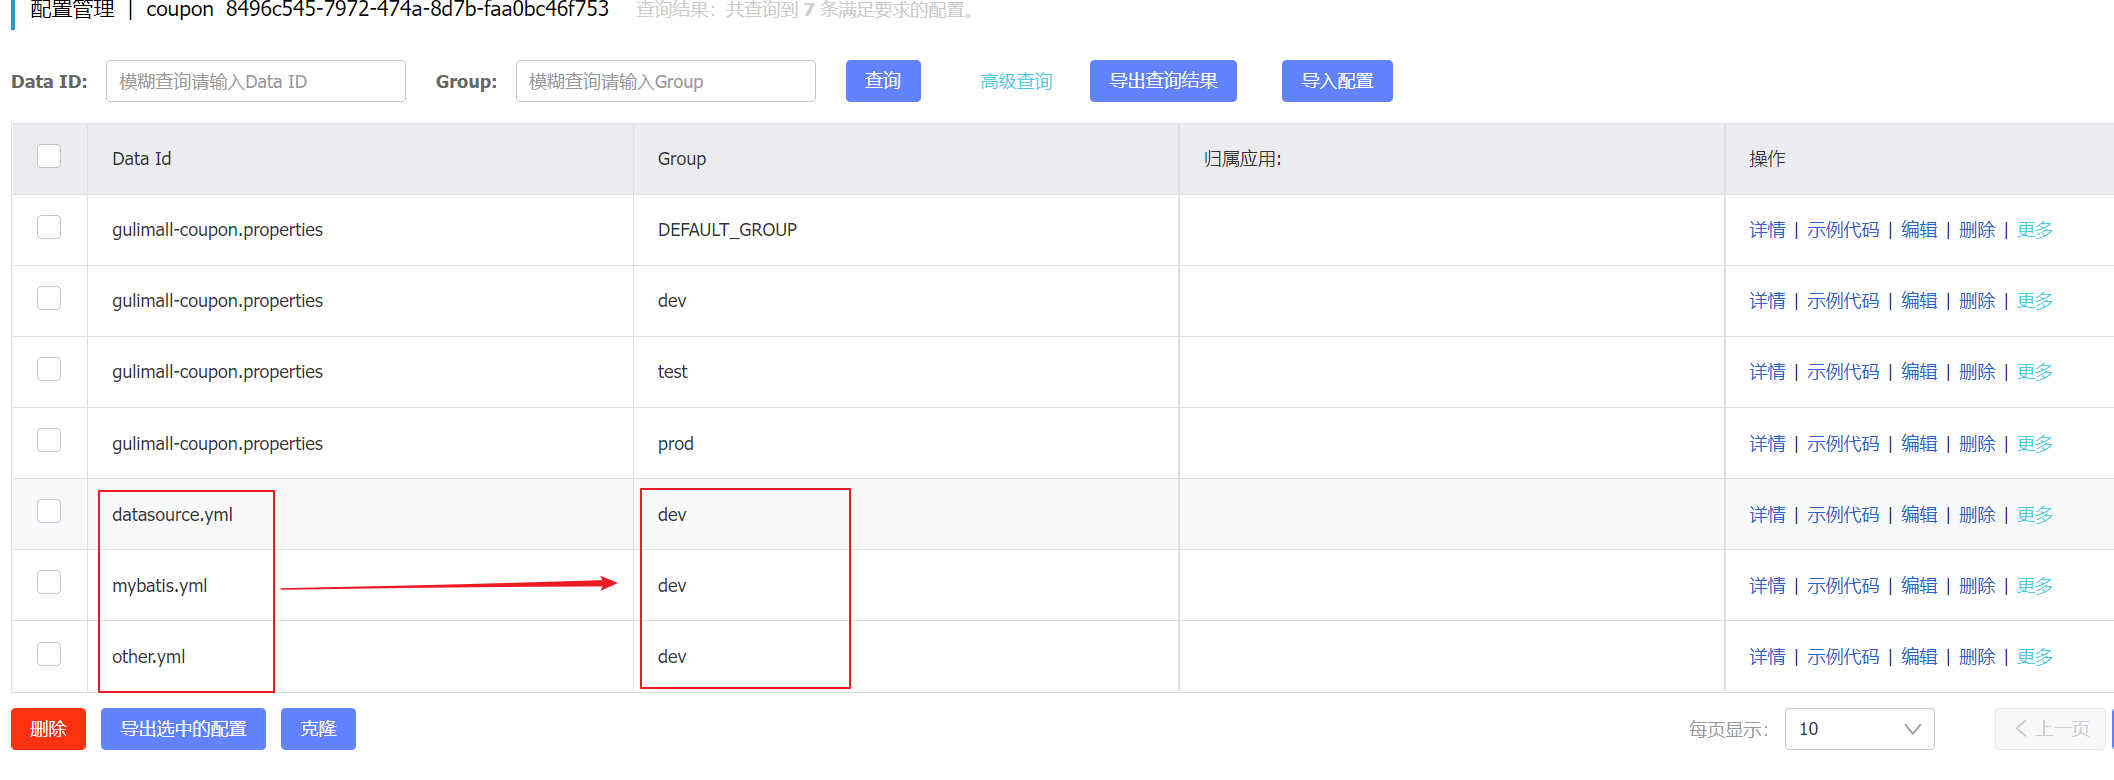
spring.cloud.nacos.config.ext-config[0].data-id=datasource.yml
spring.cloud.nacos.config.ext-config[0].group=dev
spring.cloud.nacos.config.ext-config[0].refresh=true

spring.cloud.nacos.config.ext-config[1].data-id=mybatis.yml
spring.cloud.nacos.config.ext-config[1].group=dev
spring.cloud.nacos.config.ext-config[1].refresh=true

spring.cloud.nacos.config.ext-config[2].data-id=other.yml
spring.cloud.nacos.config.ext-config[2].group=dev
spring.cloud.nacos.config.ext-config[2].refresh=true
相应的,nacos中需要创建相应的配置文件
这样配置后,application.yml 中的配置就可以注释掉,效果
spring:
#  datasource:
#    username: root
#    password: root
#    url: jdbc:mysql://192.168.56.10:3306/gulimall_sms
#    driver-class-name: com.mysql.jdbc.Driver
#  cloud:
#    nacos:
#      discovery:
#        server-addr: 127.0.0.1:8848
##
##  application:
##    name: gulimall-coupon  #不设置服务名字的话,nacos服务注册不了,也就发现不了
##
##
##
### sql映射文件位置
##mybatis-plus:
##  mapper-locations: classpath:/mapper/**/*.xml #classpath*中带有* 表示其他第三jar包中都会扫描,这里我们去掉*,精确扫描自己包下的
##  global-config:
##    db-config:
##      id-type: auto  #主键自增
##
##server:
##  port: 7000
测试结果:

也就是说,可以通过配置数据集的方式将 application.yml文件中的配置搬运到 nacos中。
4.5 前面遇到的坑的究极问题-------版本问题

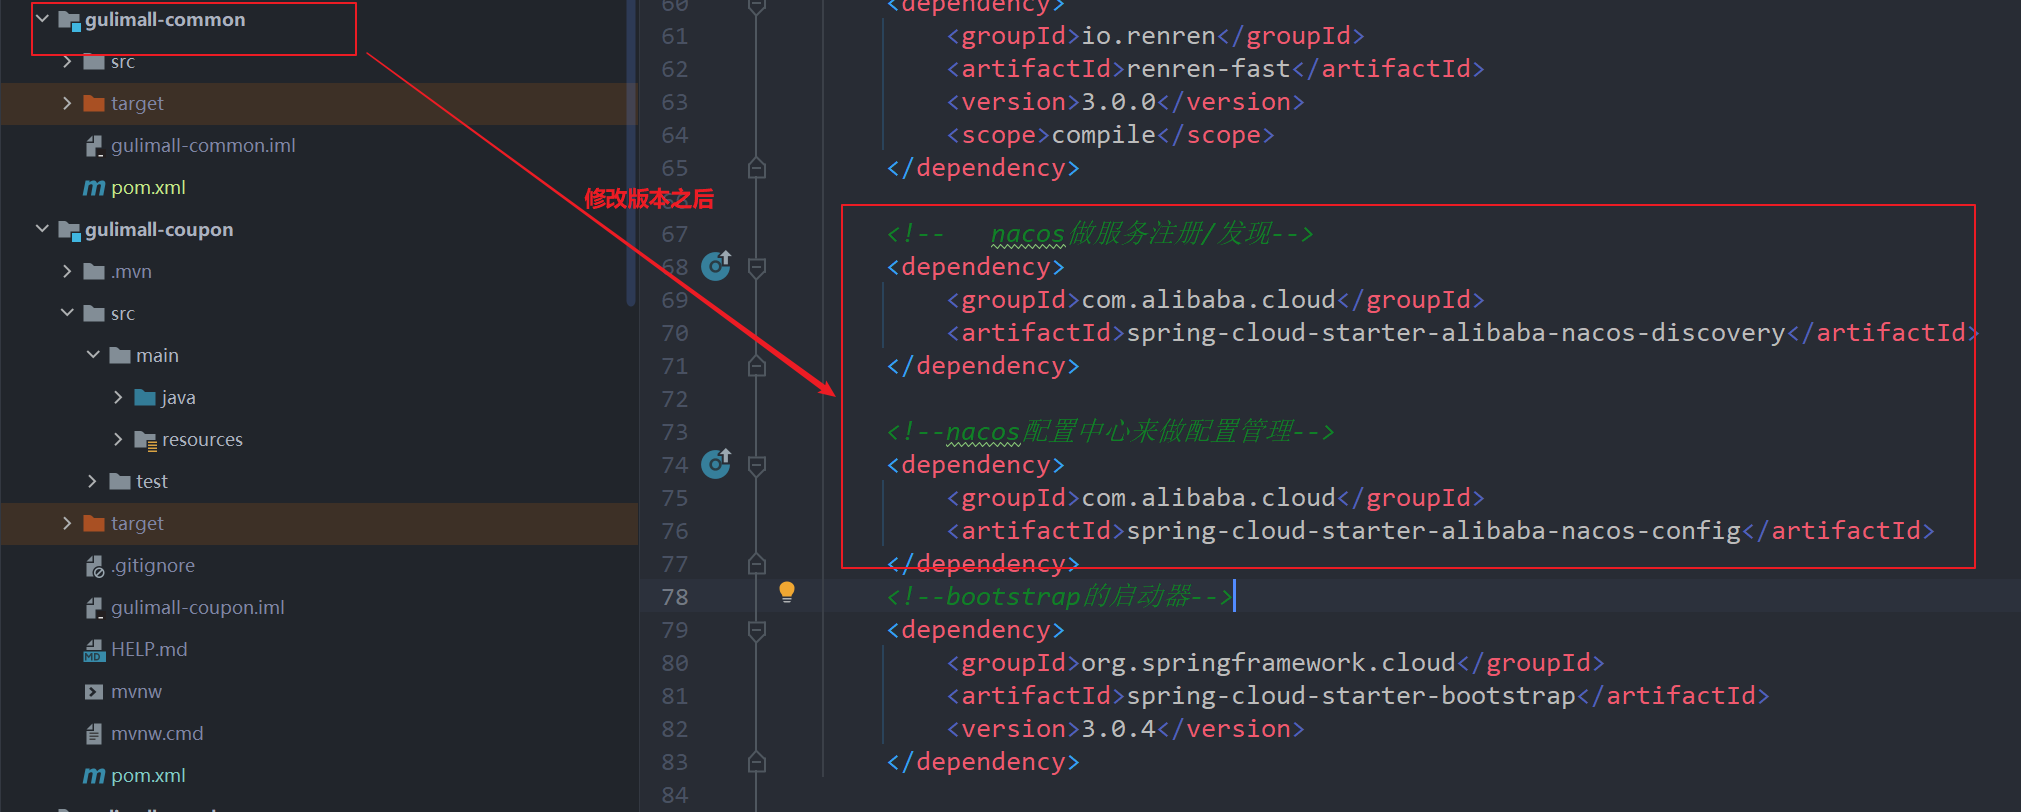
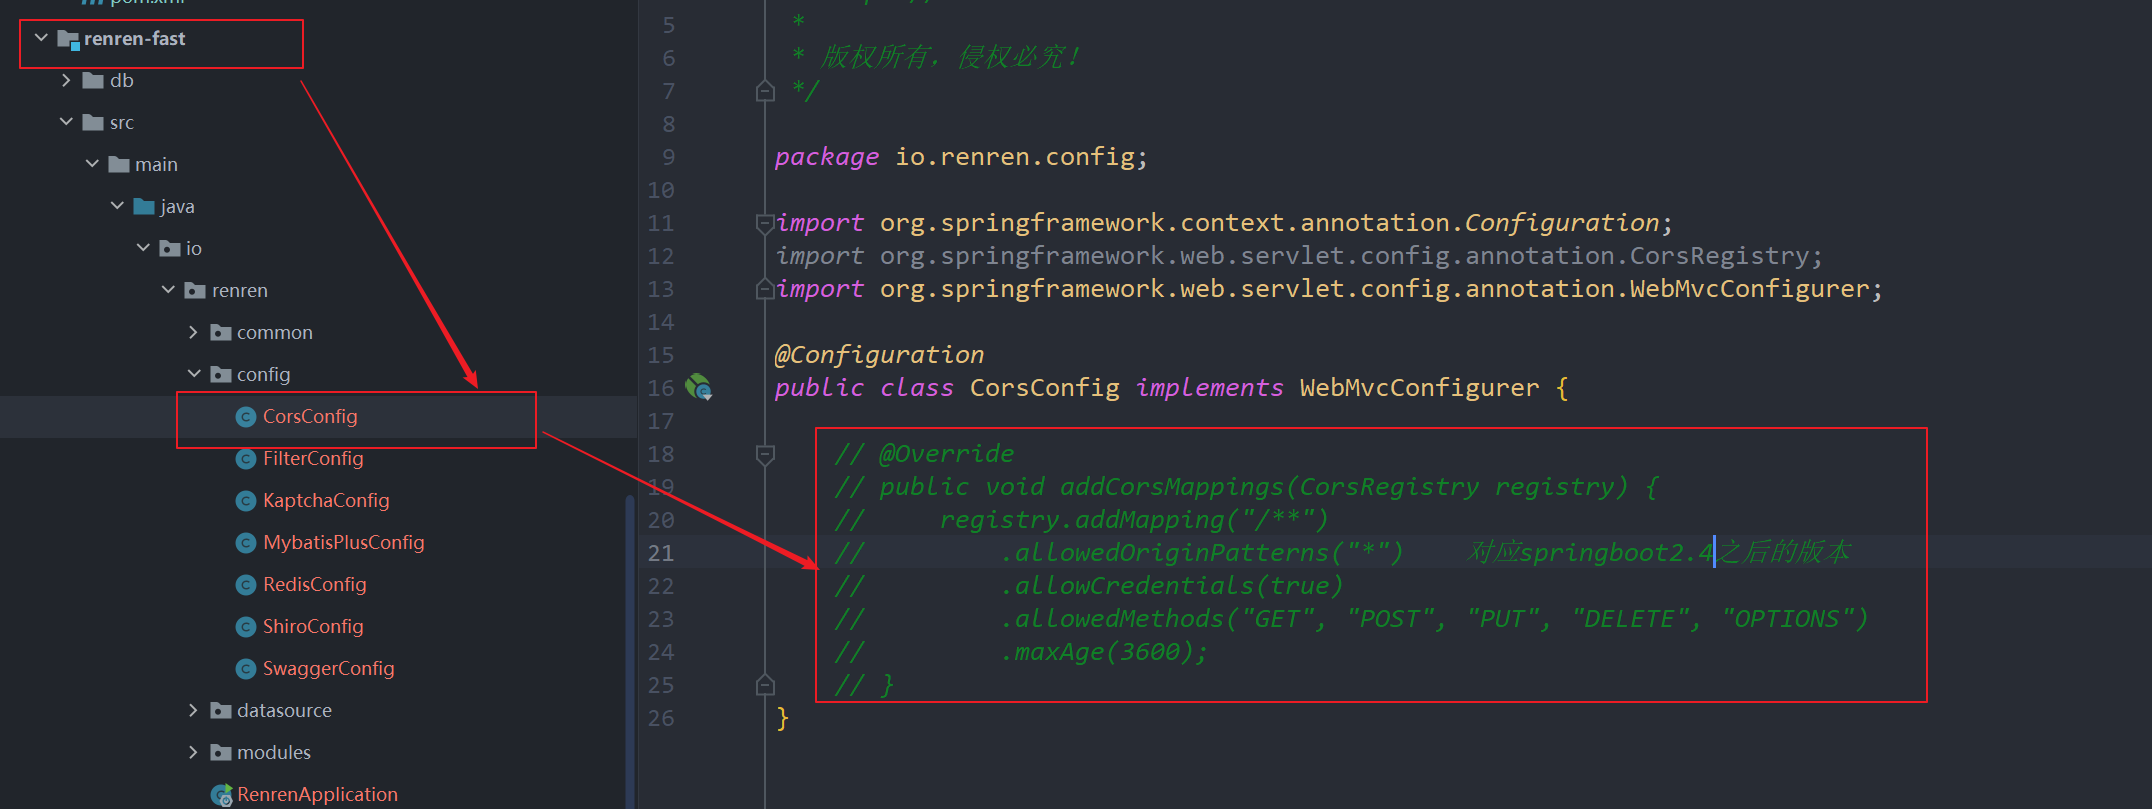
突然发现前面为什么和老师一样的代码会报红了,原来是因为springcloud版本不一样导致。怪不得会莫名其妙的报错,为了以后能少点报错,将springboot和springcloud的版本都换成和老师一样的版本吧。

- 之前修改过版本需要重新降级(之前版本没有修改和老师一样,所以有些依赖版本修改了):


4.5.1 依赖没写错,更改版本仍然报错的解决方法---- 清除缓存

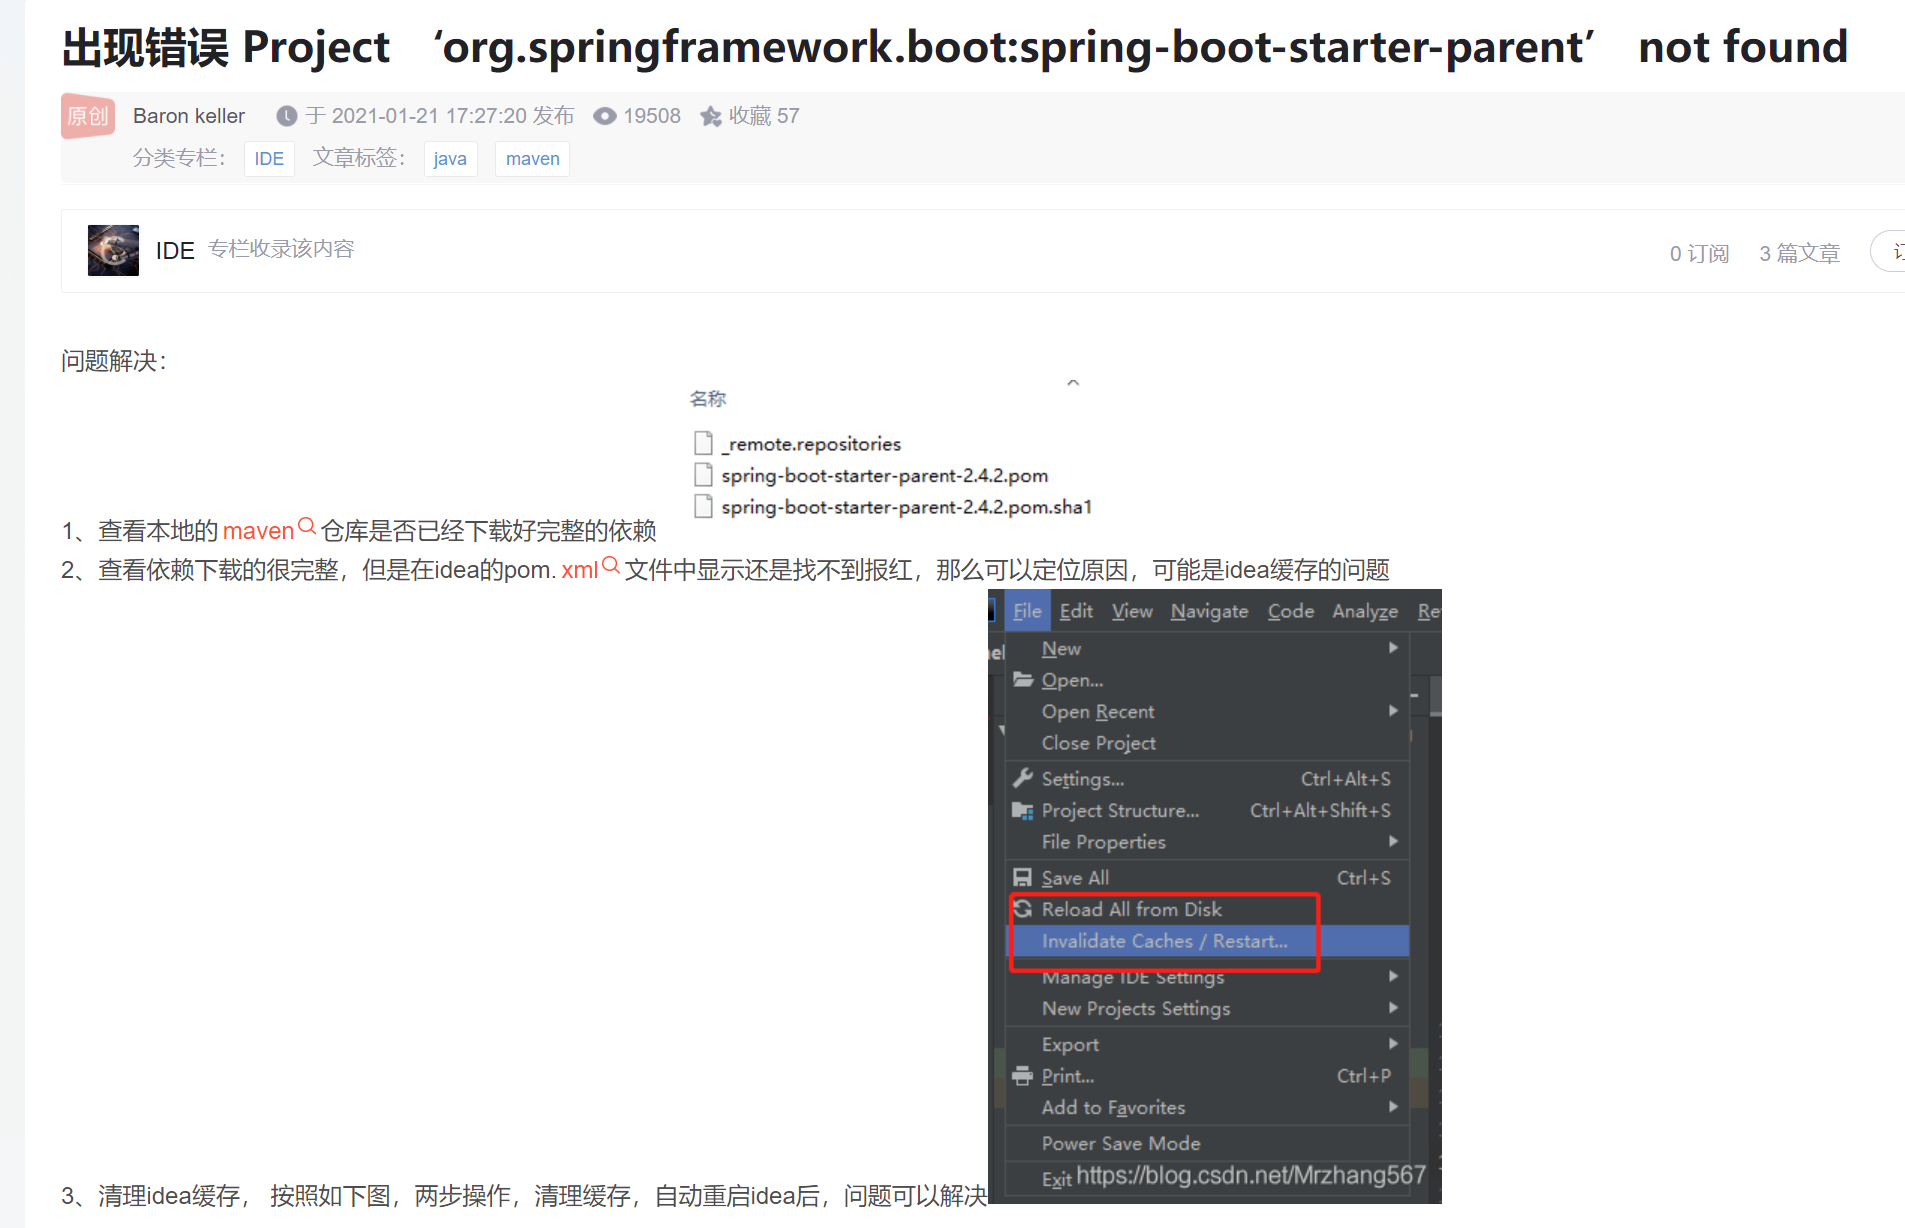

4.5.2 版本切换后测试
- 对于以前踩的坑的解决办法引入的在老师之外的依赖,尝试进行注释掉,测试能否正常运行。
- http://localhost:8000/member/member/coupons
修改之后进行重新测试,并且将前面遇到的坑的解决加入的依赖都给注释掉,发现仍然正常运行,即版本正确。

4.6 springcloud ----- gateway---网关
4.6.1 简介
网关作为流量的入口,常用功能包括路由转发、权限校验、限流控制等。而springcloud gateway作为SpringCloud 官方推出的第二代网关框架,取代了Zuul 网关。
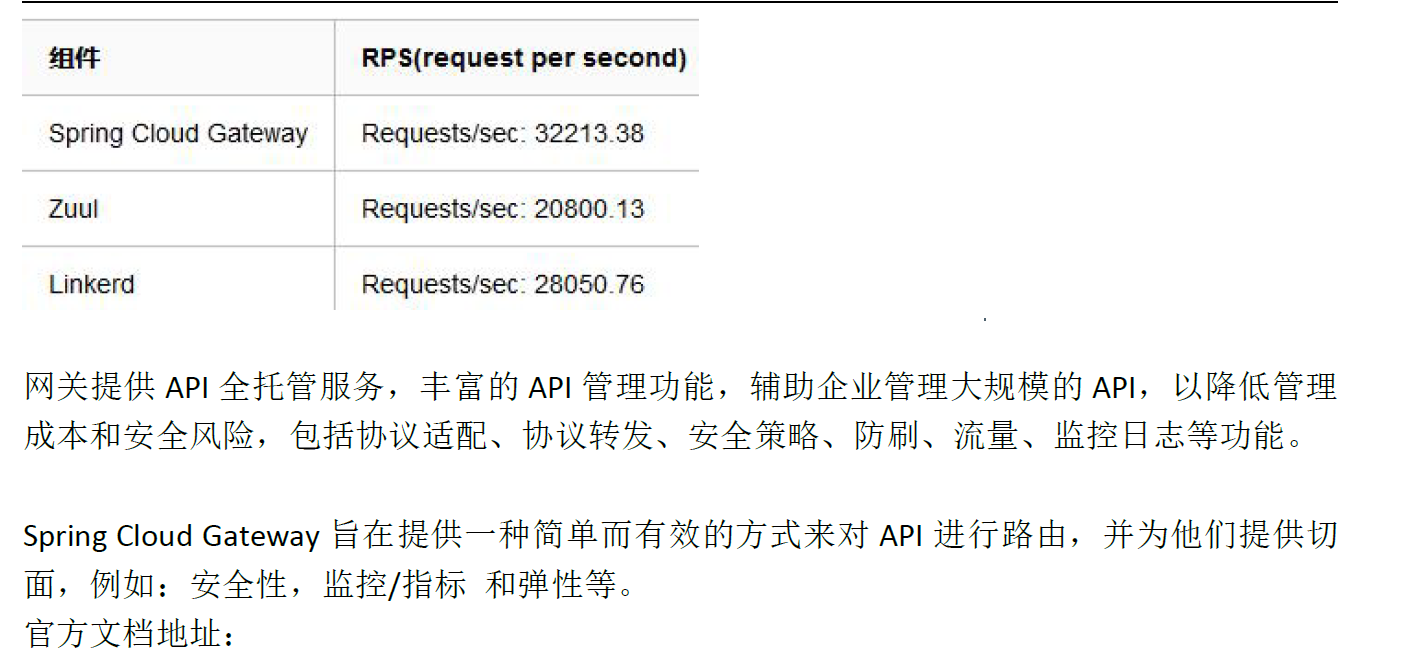
官网文档地址:https://cloud.spring.io/spring-cloud-static/spring-cloud-gateway/2.1.3.RELEASE/single/spring-cloud-gateway.html
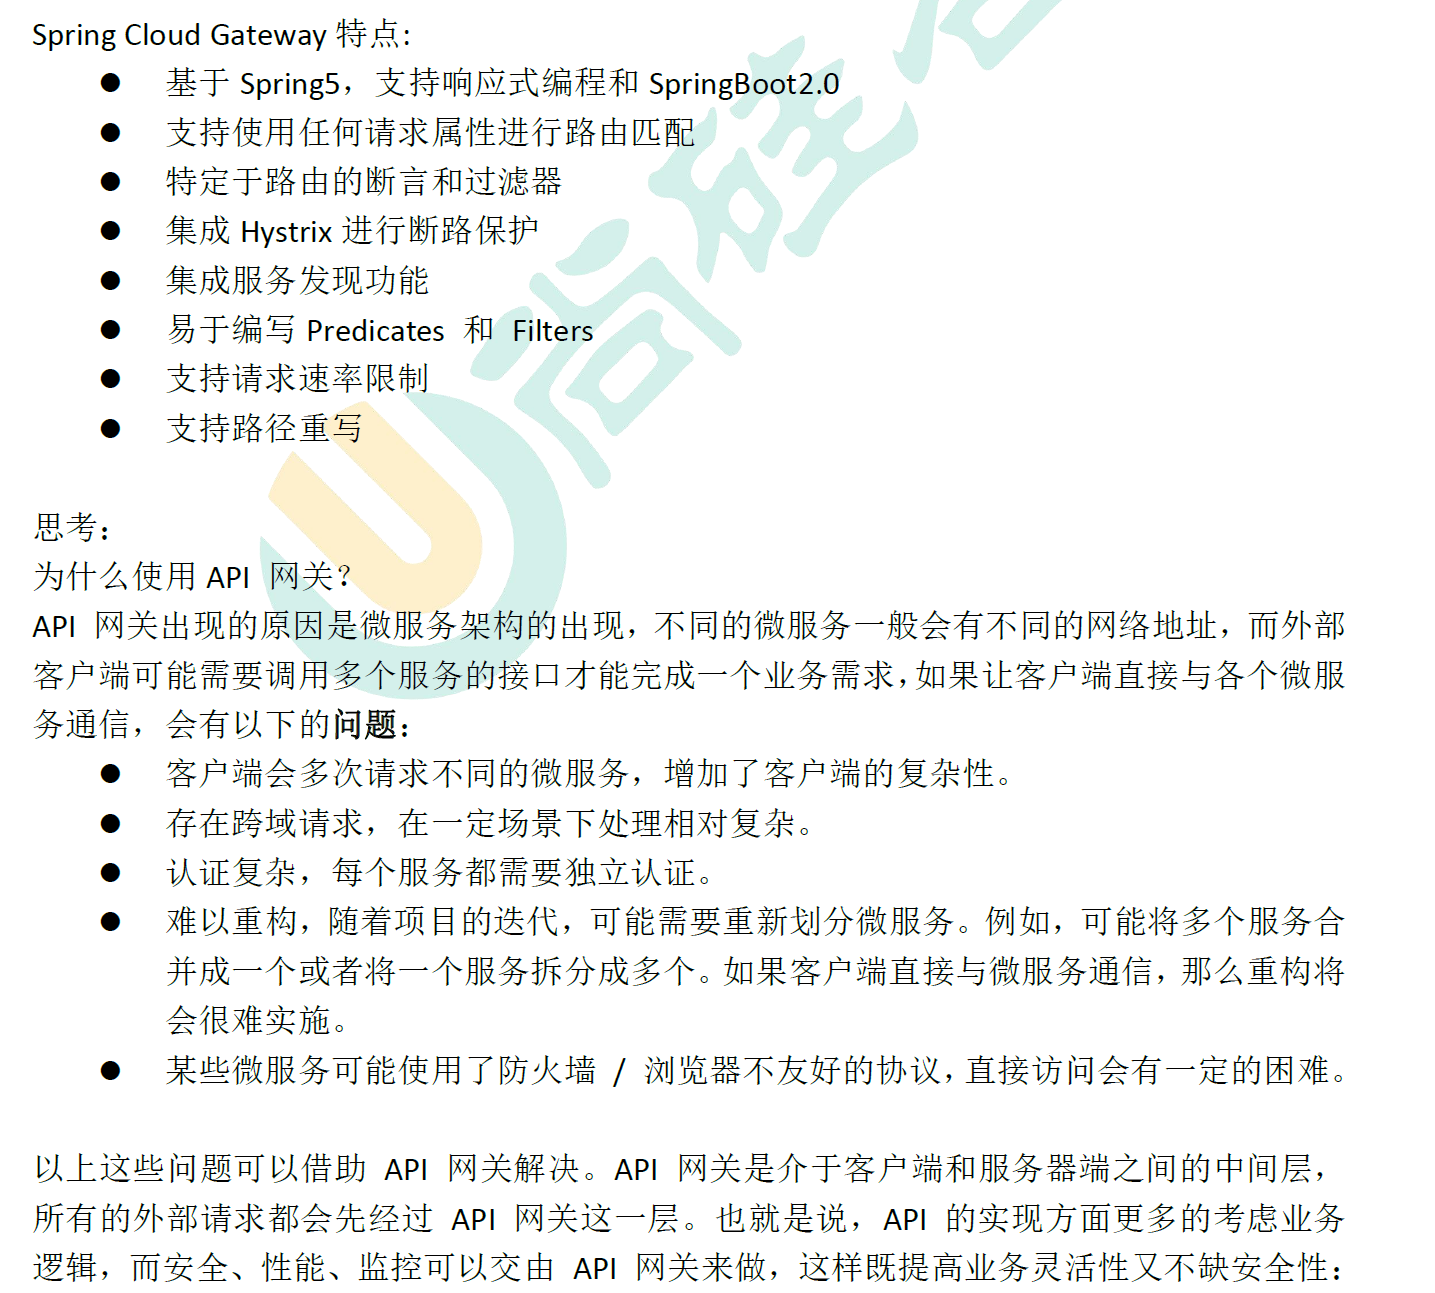
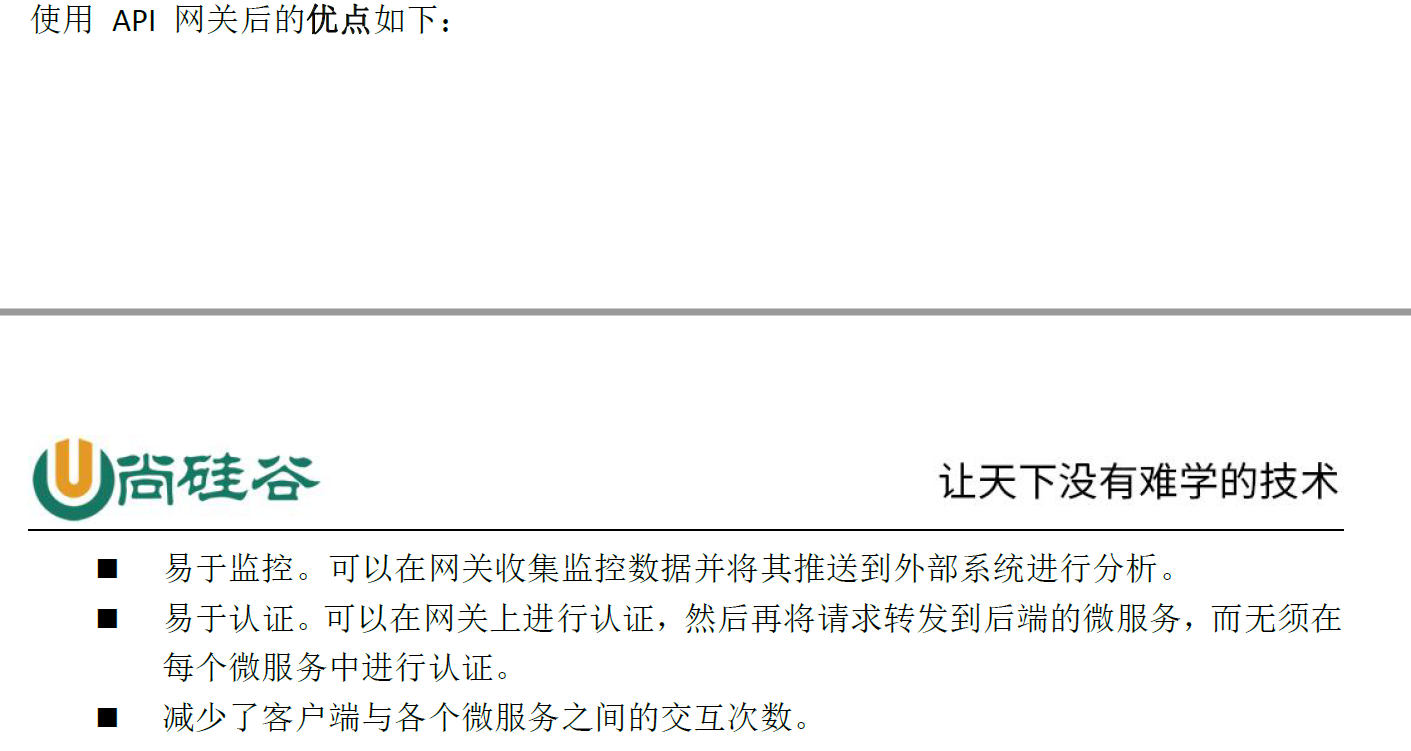
4.6.2 核心概念

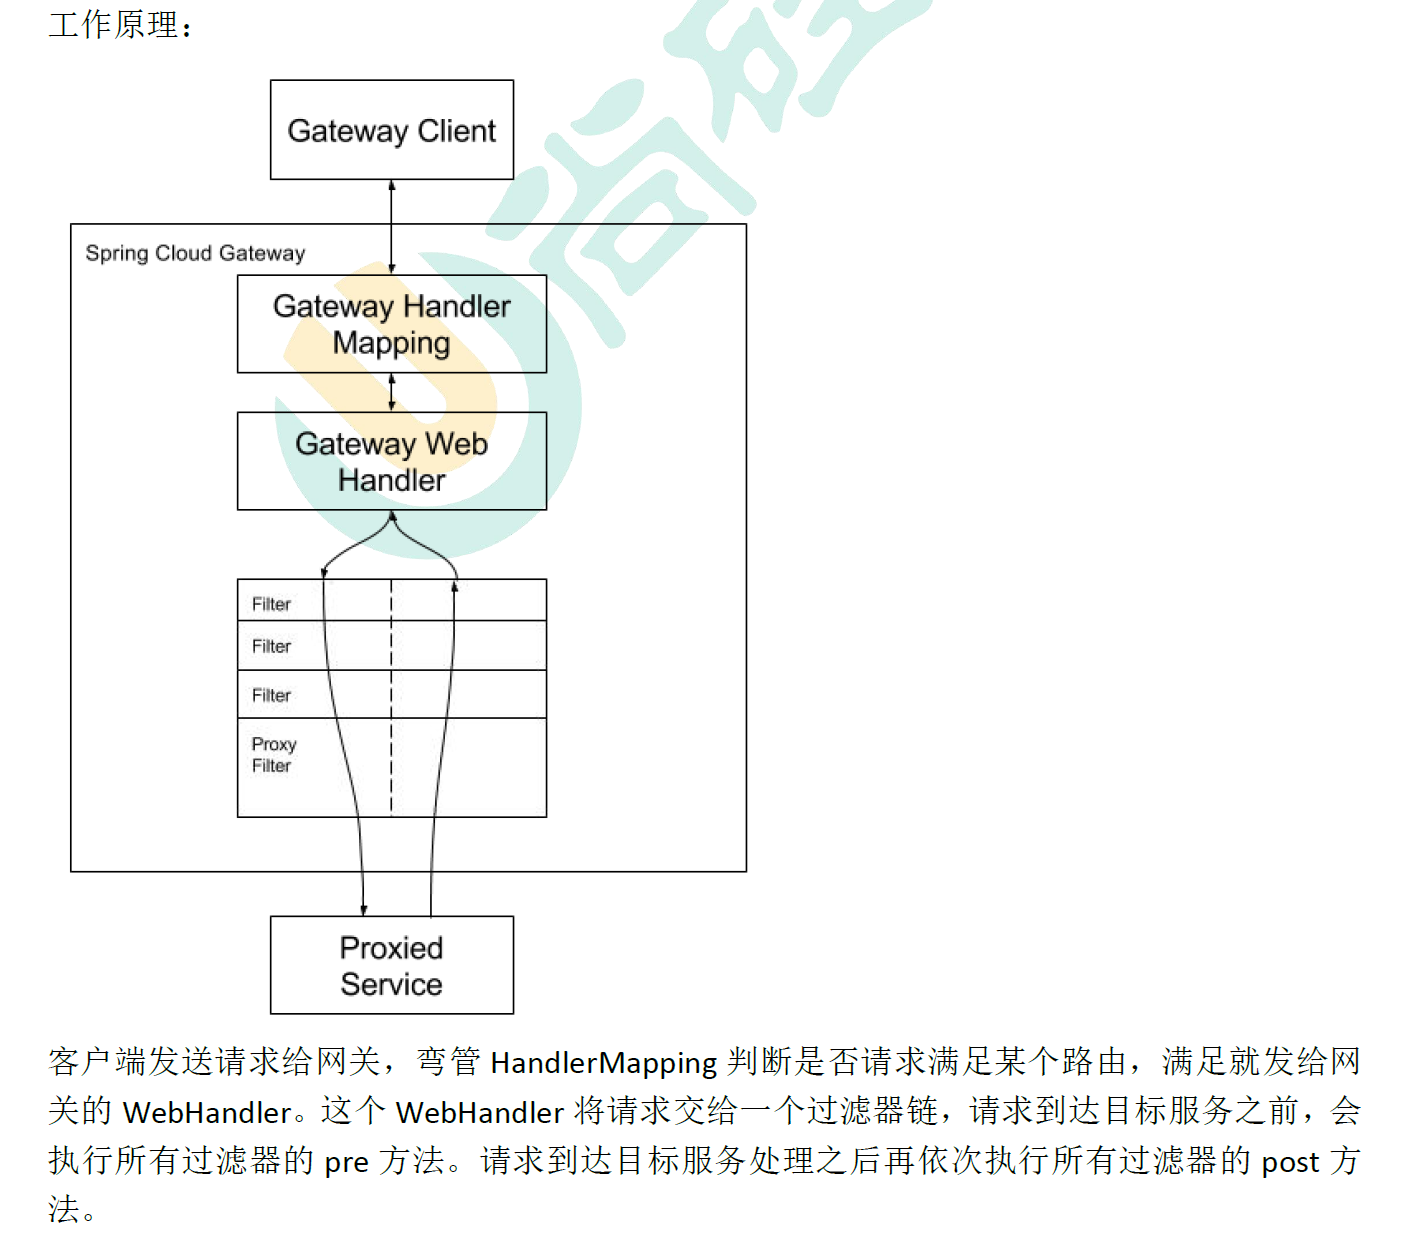

4.6.3 使用
- 创建 gulimall-gateway 网关微服务

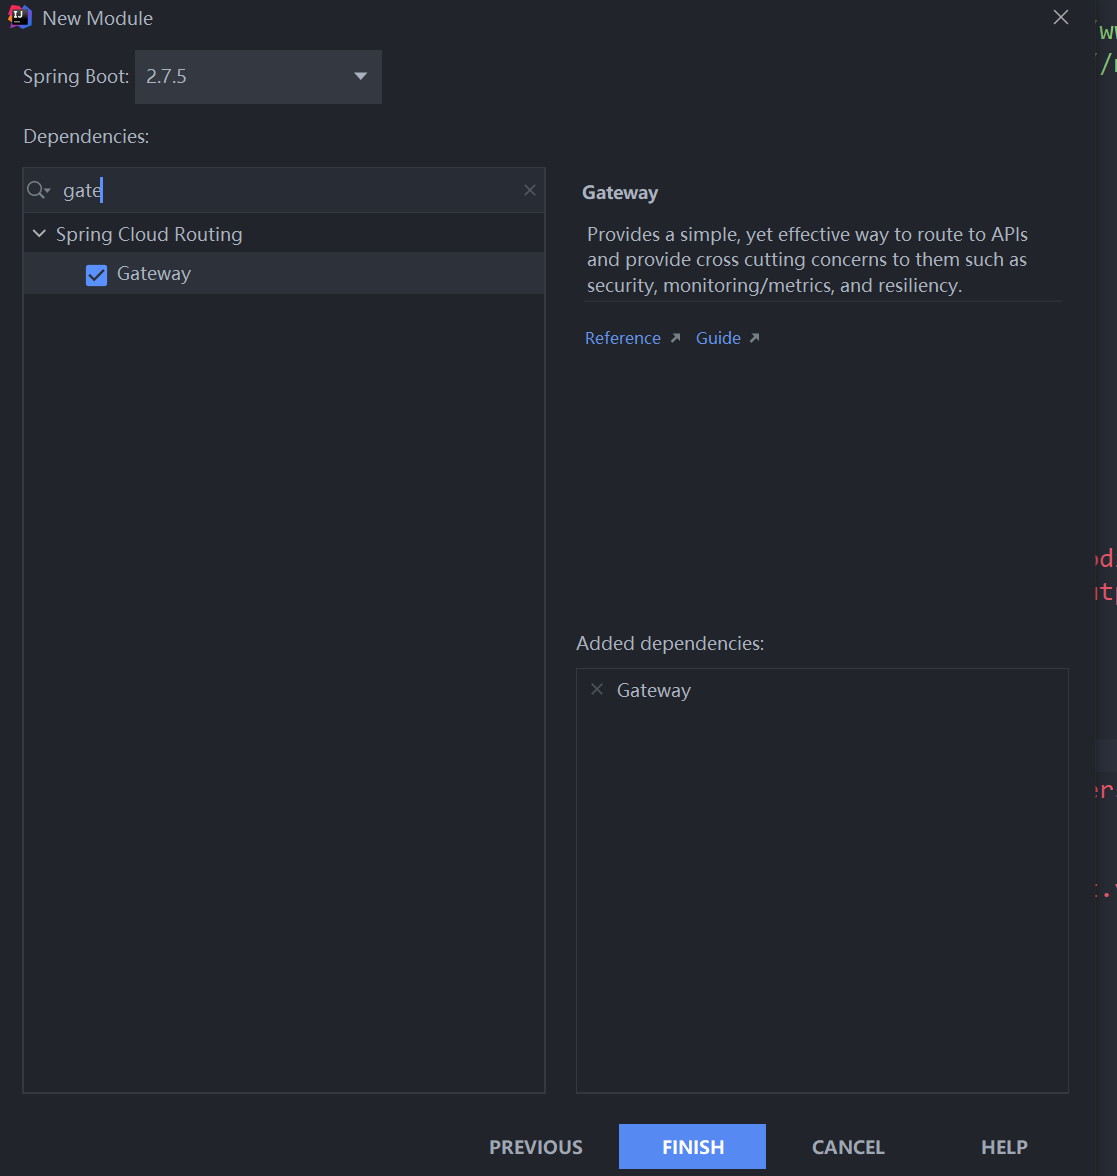
- 加入gateway依赖
- 编写网关配置文件
首先也要将其注册到 nacos 注册中心,并且为其创建单独的 命名空间 及 端口号 。
-
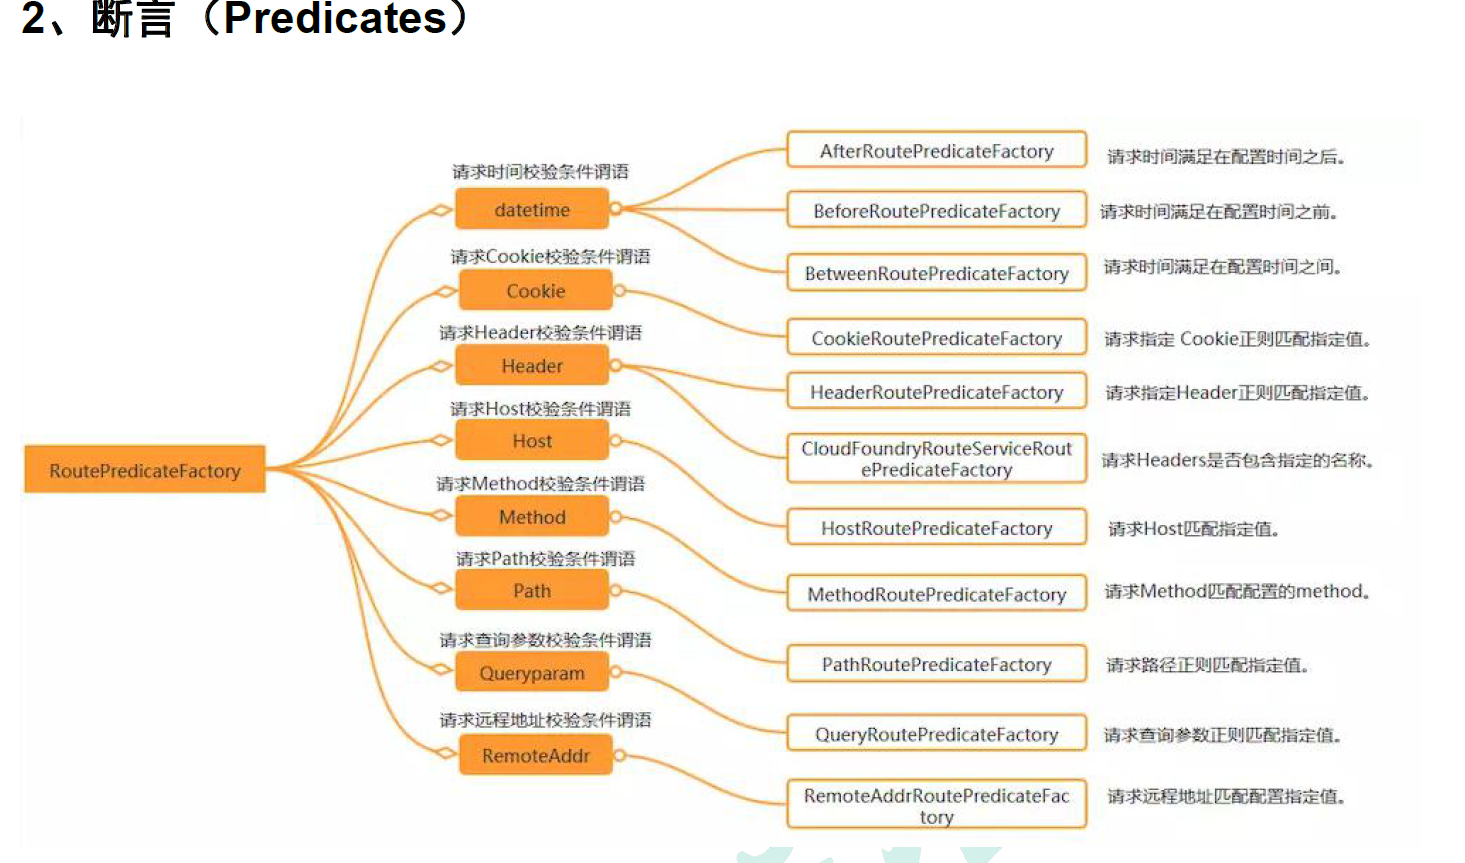
断言(Predicates)
-
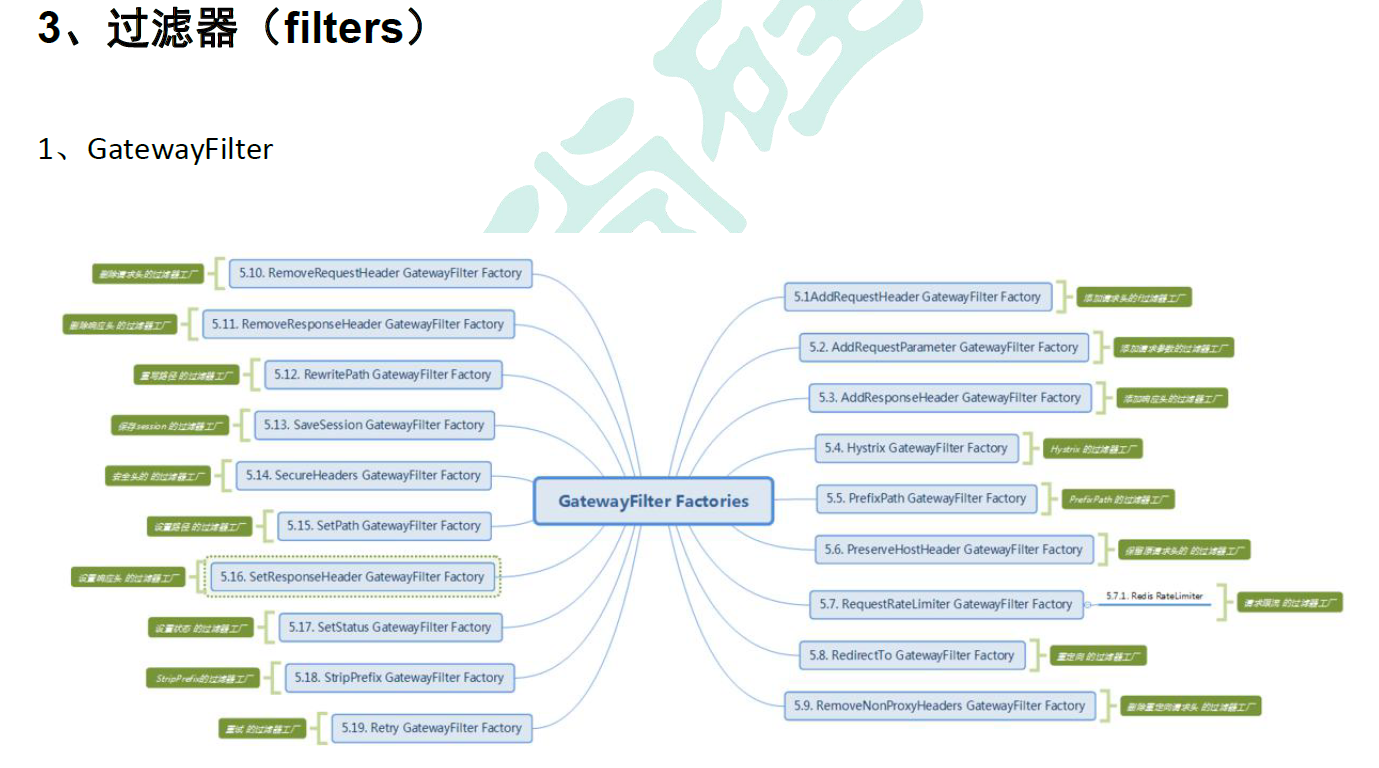
过滤器
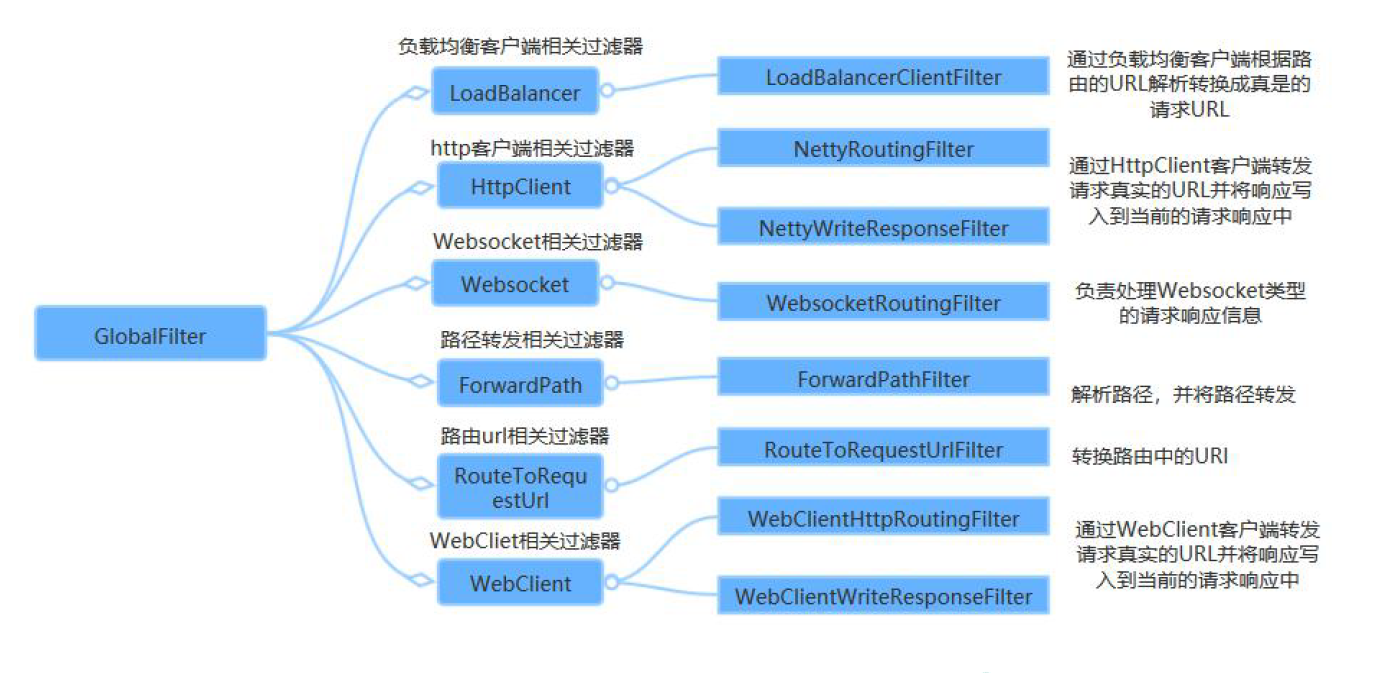
-
application.properties ---- 配置服务注册发现即 配置nacos注册中心地址
# 因为导入了gulicommon公共依赖,进而就导入了nacos,想要启用nacos的服务注册发现功能: # 首先得启动, # 然后在 application.properties中配置nacos服务地址及服务名字---切记是 nacos.discovery.server-addr spring.cloud.nacos.discovery.server-addr=127.0.0.1:8848 spring.application.name=gulimall-gateway server.port=88 -
bootstrap.properties----配置nacos配置中心
#因为 bootstrap.properties 加载顺序优先 application.properties,所以服务一启动我们需要知道项目的名字 spring.application.name=gulimall-gateway # 因为导入了gulicommon公共依赖,进而就导入了nacos,想要启用nacos的配置中心管理功能: # 首先得启动, # 然后在 application.properties中配置nacos配置中心服务地址及名称空间(一般我们习惯每一个项目都有自己的名称空间) # ---切记是 nacos.config.server-addr spring.cloud.nacos.config.server-addr=127.0.0.1:8848 spring.cloud.nac -
application.yml
# 在 yml 配置文件中配置,可以很方便的让我们在 项目上线后将配置直接转移到配置中心 spring: cloud: gateway: routes: - id: test_route uri: https://www.baidu.com predicates: - Query=url,baidu - id: qq_route uri: https://www.qq.com predicates: - Query=url,qq -
nacos里创建命名空间gateway,然后在命名空间里创建文件guilmall-gateway.yml
spring:
    application:
        name: gulimall-gateway
id:路由的id,没有固定规则但要求唯一
uri:匹配后提供服务的路由地址
path:断言,路径相匹配的进行路由
Query:查询相匹配的进行路由
如果我们在地址栏中访问的地址有qq,或者baidu就会进行转发。
- 启动测试
测试报错:
-
网关启动报错 坑:
Error creating bean with name 'routeDefinitionRouteLocator' defined in class path resource [org/springframework/cloud/gateway/config/GatewayAutoConfiguration.class]: Unsatisfied dependency expressed through method 'routeDefinitionRouteLocator' parameter 4; nested exception is org.springframework.beans.factory.NoSuchBeanDefinitionException: No qualifying bean of type 'org.springframework.core.convert.ConversionService' available: expe
-
网上搜索到的解决办法,我采用的是排除web内置容器的解决办法。
-
解决办法:

1)解决办法1
<dependency>
    <groupId>org.springframework.boot</groupId>
    <artifactId>spring-boot-starter-web</artifactId>
    <!-- Maven整个生命周期内排除内置容器,排除内置容器导出成war包可以让外部容器运行spring-boot项目-->
    <exclusions>
        <exclusion>
            <groupId>org.springframework.boot</groupId>
            <artifactId>spring-boot-starter-tomcat</artifactId>
        </exclusion>
    </exclusions>
</dependency>
2)解决办法2 : 使用 spring-webflux 模块,webflux 有一个全新的非堵塞的函数式 Reactive Web 框架,可以用来构建异步的、非堵塞的、事件驱动的服务
<dependency>
    <groupId>org.springframework.boot</groupId>
    <artifactId>spring-boot-starter-webflux</artifactId>
</dependency>
最后主启动类还要排除数据源:
@SpringBootApplication(exclude = {DruidDataSourceAutoConfigure.class,DataSourceAutoConfiguration.class})
排除的原因是我们将gateway也引入了gulimall-common,而这里面又有数据源配置(mybatis-plus),启动找不到对应的配置就会报错。解决办法就是排除数据源。
否则会报以下错误:

最后成功启动项目

5 前端

5.1 VSCode 使用
1、安装常用插件 见 3.5.2 Idea&VsCode 章节
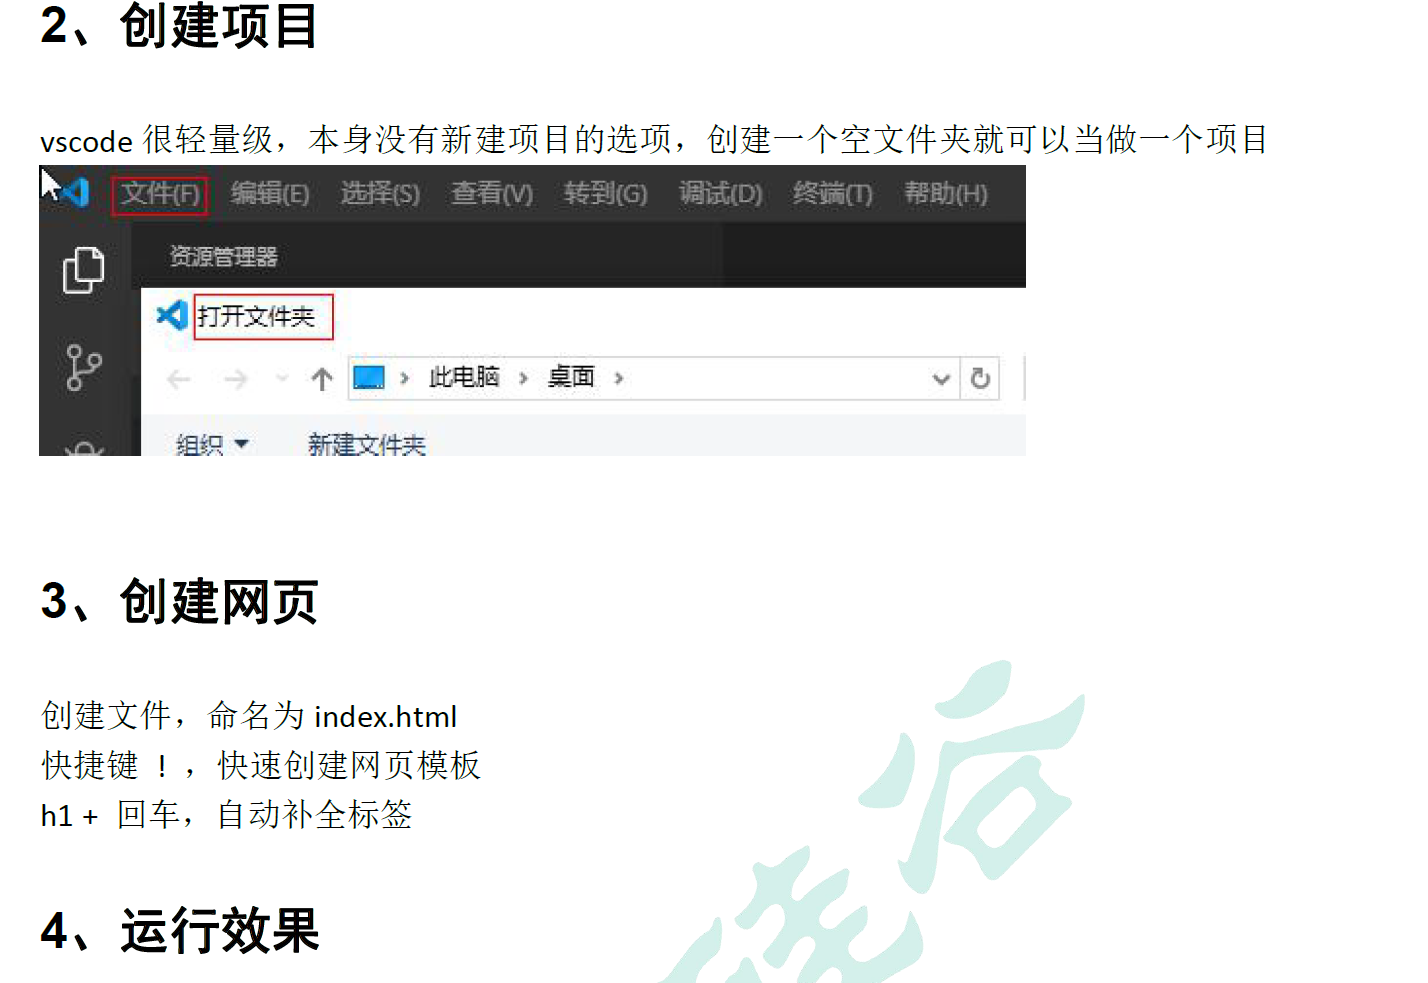
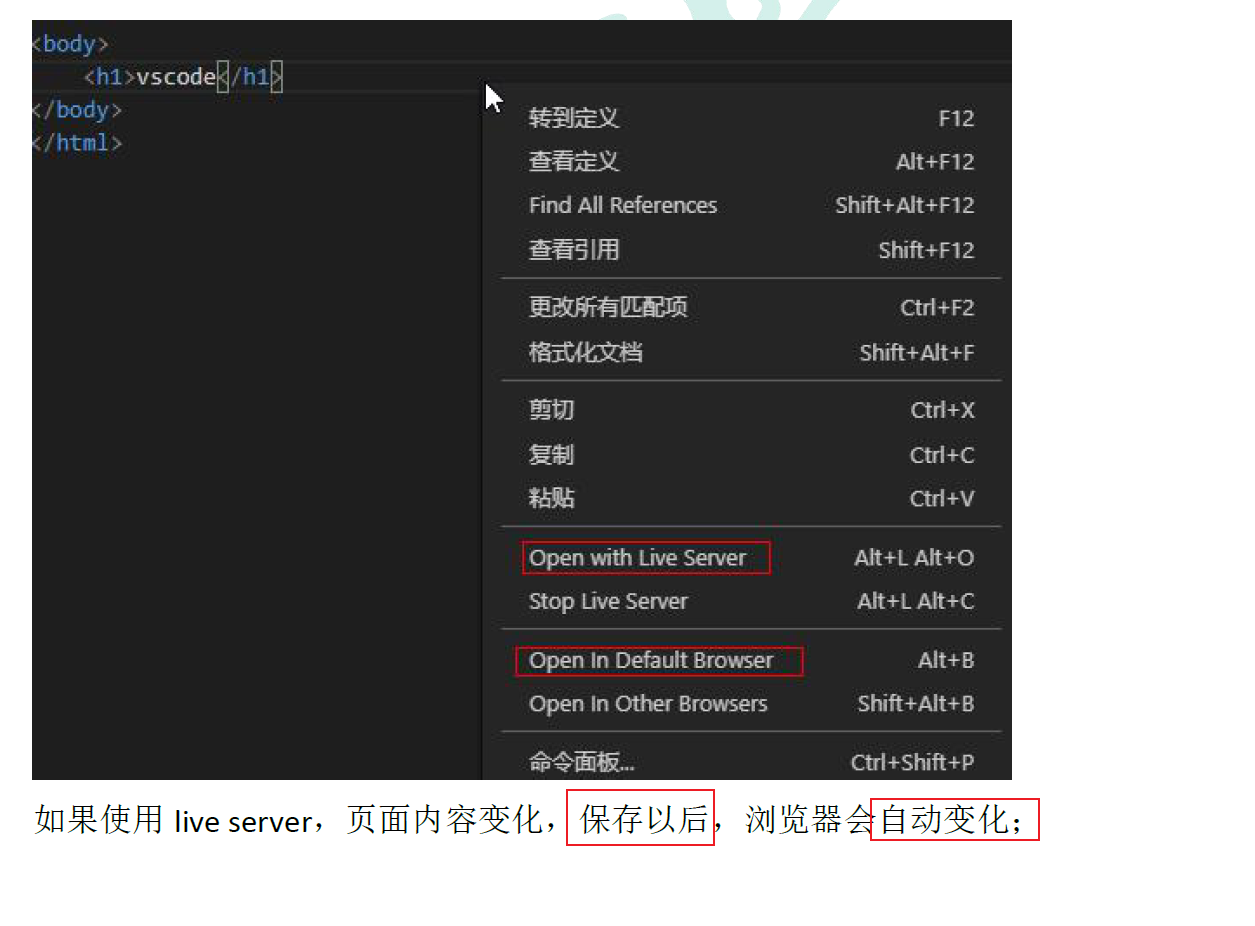
如果不想手动保存可以选择以下方法:
前端中Live Server 不起作用是因为需要设置自动保存代码或者是自己修改后手动保存才会热更新。
在设置中找到 autosave 选择
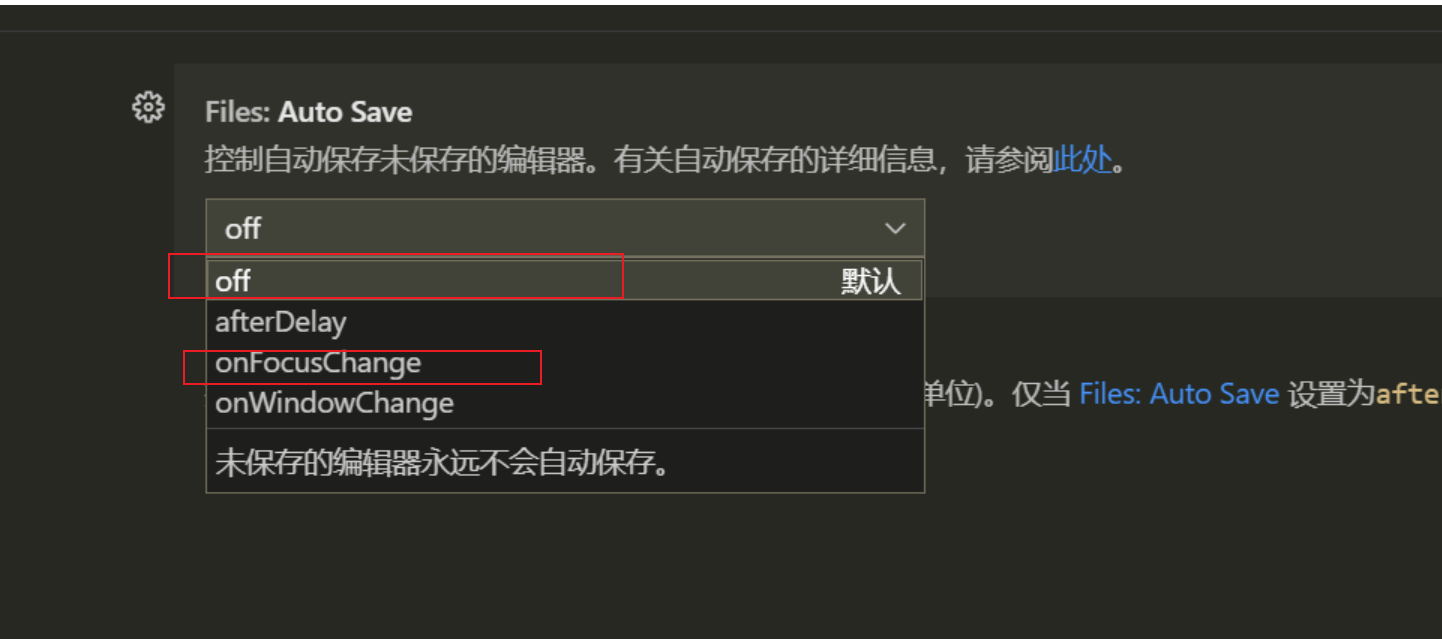
这个即可,代码会自动保存,热更新插件会成功运行。
5.2 ES6
5.2.1 简介
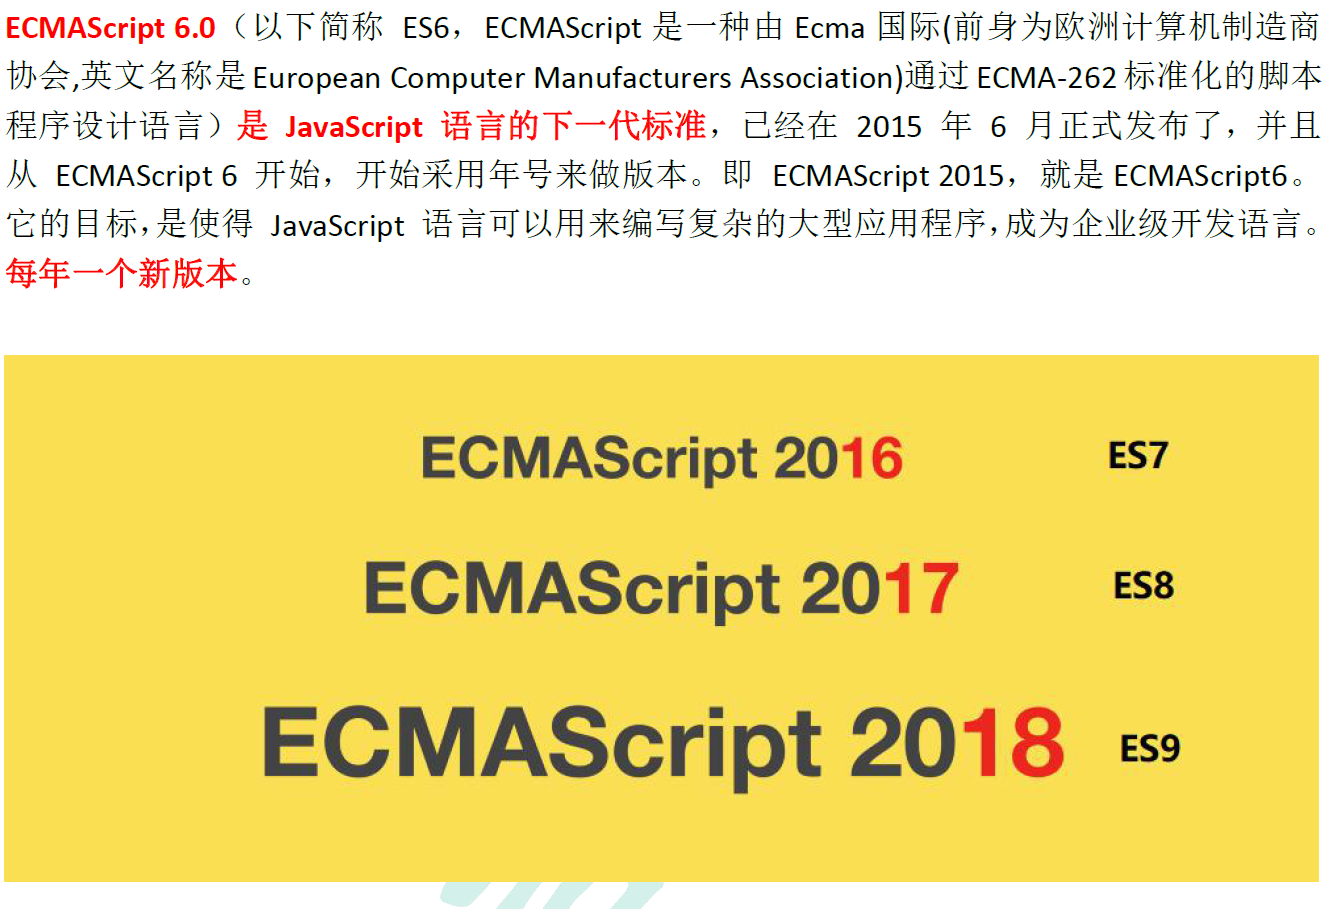
5.2.2 什么是ECMAScript
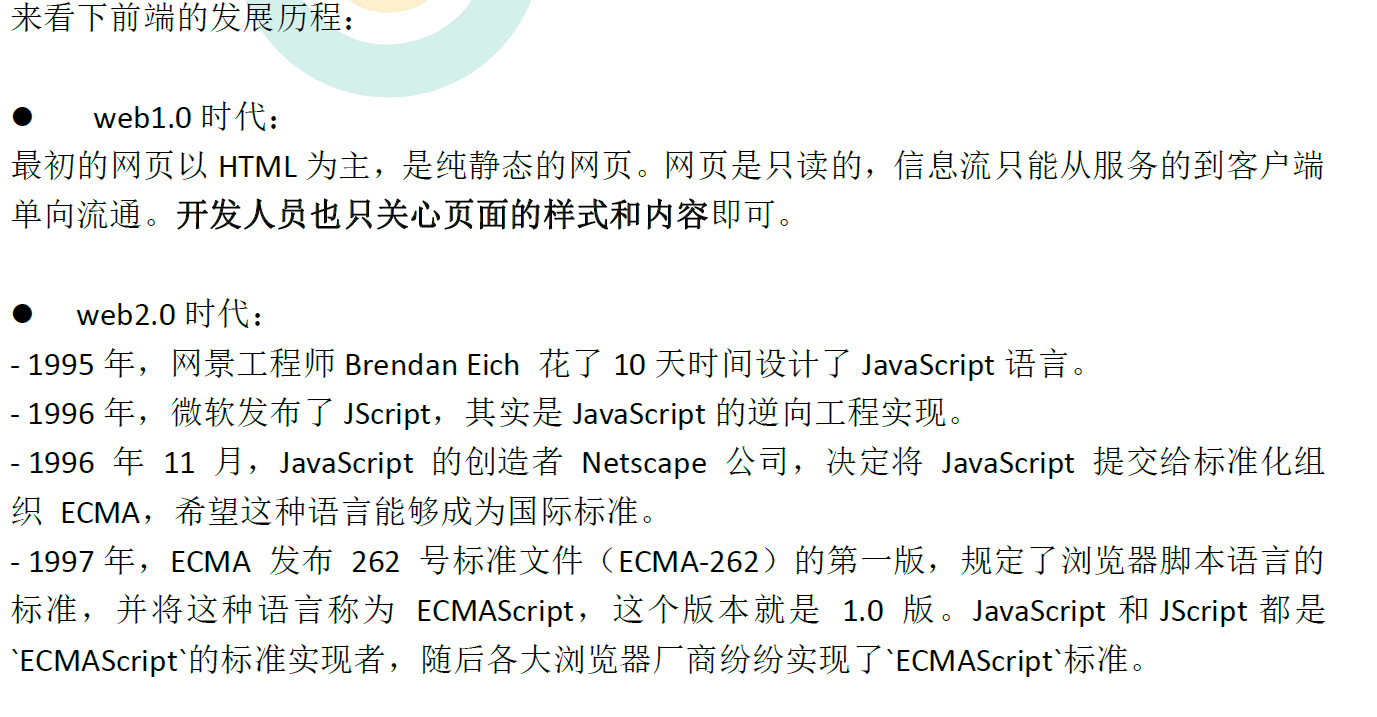

5.2.3 ES6 新特性
快捷键:
shift + ! --- 快速生成 html 模板
代码格式化:shift + alt + f
放大或缩小: ctrl + ctrl -
1、 let 声明变量
- let声明后不能作用于{}外,var可以
- let只能声明一次,var可以声明多次
- var会变量提升(使用在定义之前),let必须先定义再使用
// var 声明的变量往往会越域
// let 声明的变量有严格局部作用域
{
var a = 1;
let b = 2;
}
console.log(a); // 1
console.log(b); // ReferenceError: b is not defined
// var 可以声明多次
// let 只能声明一次
var m = 1
var m = 2
let n = 3
// let n = 4
console.log(m) // 2
console.log(n) // Identifier 'n' has already been declared
// var 会变量提升
// let 不存在变量提升
console.log(x); // undefined
var x = 10;
console.log(y); //ReferenceError: y is not defined
let y = 20;
2、 const 声明常量(只读变量)
- const一旦初始化后,不能改变
// 1. 声明之后不允许改变
// 2. 一但声明必须初始化,否则会报错
const a = 1;
a = 3; //Uncaught TypeError: Assignment to constant variable.
3、解构表达式
- 数组解构 let arr = [1,2,3]; let [a,b,c] = arr
- 对象解构 const{name:abc, age, language} = person 其中 name:abc代表把 name 改名为 abc
1)、数组解构
let arr = [1,2,3];
//以前我们想获取其中的值,只能通过角标。ES6 可以这样:
const [x,y,z] = arr;// x,y,z 将与arr 中的每个位置对应来取值
// 然后打印
console.log(x,y,z);
2)、对象解构
const person = {
name: "jack",
age: 21,
language: ['java', 'js', 'css']
}
// 解构表达式获取值,将person 里面每一个属性和左边对应赋值
const { name, age, language } = person;
// 等价于下面
// const name = person.name;
// const age = person.age;
// const language = person.language;
// 可以分别打印
console.log(name);
console.log(age);
console.log(language);
//扩展:如果想要将name 的值赋值给其他变量,可以如下,nn 是新的变量名
const { name: nn, age, language } = person;
console.log(nn);
console.log(age);
console.log(language);
4、字符串扩展
- 字符串函数 str.startsWith();str.endsWith();str.includes();str.includes()
- 字符串模板,``支持一个字符串定义为多行
- 占位符功能 ${}
1)、几个新的API
ES6 为字符串扩展了几个新的API:
includes():返回布尔值,表示是否找到了参数字符串。startsWith():返回布尔值,表示参数字符串是否在原字符串的头部。endsWith():返回布尔值,表示参数字符串是否在原字符串的尾部。
let str = "hello.vue";
console.log(str.startsWith("hello"));//true
console.log(str.endsWith(".vue"));//true
console.log(str.includes("e"));//true
console.log(str.includes("hello"));//true
2)、字符串模板
模板字符串相当于加强版的字符串,用反引号`,除了作为普通字符串,还可以用来定义多行字符串,还可以在字符串中加入变量和表达式。
// 1、多行字符串
let ss = `
<div>
<span>hello world<span>
</div>
`
console.log(ss)

// 2、字符串插入变量和表达式。变量名写在${} 中,${} 中可以放
入JavaScript 表达式。
let name = "张三";
let age = 18;
let info = `我是${name},今年${age}了`;
console.log(info)

// 3、字符串中调用函数
function fun() {
return "这是一个函数"
}
let sss = `O(∩_∩)O 哈哈~,${fun()}`;
console.log(sss); // O(∩_∩)O 哈哈~,这是一个函数
5、函数优化
- 支持函数形参默认值 function add(a, b = 1){}
- 支持不定参数 function fun(...values){}
- 支持箭头函数 var print = obj => console.log(obj);
- 支持箭头函数+解构函数 var hello2 = ({name}) => console.log("hello," +name); hello2(person);
1)、函数参数默认值
//在ES6 以前,我们无法给一个函数参数设置默认值,只能采用变通写法:
function add(a, b) {
// 判断b 是否为空,为空就给默认值1
b = b || 1;
return a + b;
}
// 传一个参数
console.log(add(10));
//现在可以这么写:直接给参数写上默认值,没传就会自动使用默认值
function add2(a , b = 1) {
return a + b;
}
// 传一个参数
console.log(add2(10));
2)、不定参数
不定参数用来表示不确定参数个数,形如,...变量名,由...加上一个具名参数标识符组成。具名参数只能放在参数列表的最后,并且有且只有一个不定参数。
function fun(...values) {
console.log(values.length)
}
fun(1, 2) //2
fun(1, 2, 3, 4) //4
3)、箭头函数
ES6 中定义函数的简写方式:
- 一个参数时:
//以前声明一个方法
// var print = function (obj) {
// console.log(obj);
// }
// 可以简写为:
var print = obj => console.log(obj);
// 测试调用
print(100);
- 多个参数:
// 两个参数的情况:
var sum = function (a, b) {
return a + b;
}
// 简写为:
//当只有一行语句,并且需要返回结果时,可以省略{} , 结果会自动返回。
var sum2 = (a, b) => a + b;
//测试调用
console.log(sum2(10, 10));//20
// 代码不止一行,可以用`{}`括起来
var sum3 = (a, b) => {
c = a + b;
return c;
};
//测试调用
console.log(sum3(10, 20));//30
4)、实战:箭头函数结合解构表达式
//需求,声明一个对象,hello 方法需要对象的个别属性
//以前的方式:
const person = {
name: "jack",
age: 21,
language: ['java', 'js', 'css']
}
function hello(person) {
console.log("hello," + person.name)
}
//现在的方式
var hello2 = ({ name }) => { console.log("hello," + name) };
//测试
hello2(person);
6、对象优化
- 可以获取 map的键值对 Object.keys()、Object.values、Object.entries
- Object.assgn(target,source1,source2) 合并source1,source2到target
- 支持对象名声明简写:如果属性名和属性值的变量名相同可以省略
- let someone = {...person}取出person对象所有的属性拷贝到当前对象
1)、新增的API
ES6 给Object 拓展了许多新的方法,如:
- keys(obj):获取对象的所有key 形成的数组
- values(obj):获取对象的所有value 形成的数组
- entries(obj):获取对象的所有key 和value 形成的二维数组。格式:
[[k1,v1],[k2,v2],...] - assign(dest, ...src) :将多个src 对象的值拷贝到dest 中。(第一层为深拷贝,第二层为浅
拷贝)
const person = {
name: "jack",
age: 21,
language: ['java', 'js', 'css']
}
console.log(Object.keys(person));//["name", "age", "language"]
console.log(Object.values(person));//["jack", 21, Array(3)]
console.log(Object.entries(person));//[Array(2), Array(2), Array(2)]
const target = { a: 1 };
const source1 = { b: 2 };
const source2 = { c: 3 };
//Object.assign 方法的第一个参数是目标对象,后面的参数都是源对象。
Object.assign(target, source1, source2);
console.log(target)//{a: 1, b: 2, c: 3}
2)、声明对象简写
const age = 23
const name = "张三"
// 传统
const person1 = { age: age, name: name }
console.log(person1)
// ES6:属性名和属性值变量名一样,可以省略
const person2 = { age, name }
console.log(person2) //{age: 23, name: "张三"}
3)、对象的函数属性简写
let person = {
name: "jack",
// 以前:
eat: function (food) {
console.log(this.name + "在吃" + food);
},
// 箭头函数版:这里拿不到this
eat2: food => console.log(person.name + "在吃" + food),
// 简写版:
eat3(food) {
console.log(this.name + "在吃" + food);
}
}
person.eat("apple");
4)、对象拓展运算符
拓展运算符(...)用于取出参数对象所有可遍历属性然后拷贝到当前对象。
// 1、拷贝对象(深拷贝)
let person1 = { name: "Amy", age: 15 }
let someone = { ...person1 }
console.log(someone) //{name: "Amy", age: 15}
// 2、合并对象
let age = { age: 15 }
let name = { name: "Amy" }
let person2 = { ...age, ...name } //如果两个对象的字段名重复,后面对象字
段值会覆盖前面对象的字段值
console.log(person2) //{age: 15, name: "Amy"}
7、map 和reduce
数组中新增了map 和reduce 方法。
arr.map()接收一个函数,将arr中的所有元素用接收到的函数处理后放入新的数组arr.reduce()为数组中的每一个元素依次执行回调函数,不包括数组中被删除或从未被赋值的元素
1)、map
map():接收一个函数,将原数组中的所有元素用这个函数处理后放入新数组返回。
let arr = ['1', '20', '-5', '3'];
console.log(arr)
arr = arr.map(s => parseInt(s));
console.log(arr)
2)、reduce
语法:
arr.reduce(callback,[initialValue])
reduce 为数组中的每一个元素依次执行回调函数,不包括数组中被删除或从未被赋值的元
素,接受四个参数:初始值(或者上一次回调函数的返回值),当前元素值,当前索引,调
用reduce 的数组。
callback (执行数组中每个值的函数,包含四个参数)
1、previousValue (上一次调用回调返回的值,或者是提供的初始值(initialValue))
2、currentValue (数组中当前被处理的元素)
3、index (当前元素在数组中的索引)
4、array (调用reduce 的数组)
initialValue (作为第一次调用callback 的第一个参数。)
示例:
const arr = [1,20,-5,3];
//没有初始值:
console.log(arr.reduce((a,b)=>a+b));//19
console.log(arr.reduce((a,b)=>a*b));//-300
//指定初始值:
console.log(arr.reduce((a,b)=>a+b,1));//20
console.log(arr.reduce((a,b)=>a*b,0));//-0
8、Promise
在JavaScript 的世界中,所有代码都是单线程执行的。由于这个“缺陷”,导致JavaScript 的所有网络操作,浏览器事件,都必须是异步执行。异步执行可以用回调函数实现。一旦有一连串的ajax 请求a,b,c,d... 后面的请求依赖前面的请求结果,就需要层层嵌套。这种缩进和层层嵌套的方式,非常容易造成上下文代码混乱,我们不得不非常小心翼翼处理内层函数与外层函数的数据,一旦内层函数使用了上层函数的变量,这种混乱程度就会加剧......总之,这种层叠上下文的层层嵌套方式,着实增加了神经的紧张程度。
使用 promise 之后可以:
- 优化异步操作。封装ajax
- 把Ajax封装到Promise中,赋值给let p
- 在Ajax中成功使用resolve(data),失败使用reject(err)
- p.then().catch()
案例:用户登录,并展示该用户的各科成绩。在页面发送两次请求:
- 查询用户,查询成功说明可以登录
- 查询用户成功,查询科目
- 根据科目的查询结果,获取去成绩
分析:此时后台应该提供三个接口,一个提供用户查询接口,一个提供科目的接口,一个提供各科成绩的接口,为了渲染方便,最好响应json 数据。在这里就不编写后台接口了,而是提供三个json 文件,直接提供json 数据,模拟后台接口:
user.json:
{
"id": 1,
"name": "zhangsan",
"password": "123456"
}
user_corse_1.json:
{
"id": 10,
"name": "chinese"
}
corse_score_10.json:
{
"id": 100,
"score": 90
}
//回调函数嵌套的噩梦:层层嵌套。
$.ajax({
url: "mock/user.json",
success(data) {
console.log("查询用户:", data);
$.ajax({
url: `mock/user_corse_${data.id}.json`,
success(data) {
console.log("查询到课程:", data);
$.ajax({
url: `mock/corse_score_${data.id}.json`,
success(data) {
console.log("查询到分数:", data);
},
error(error) {
console.log("出现异常了:" + error);
}
});
},
error(error) {
console.log("出现异常了:" + error);
}
});
},
error(error) {
console.log("出现异常了:" + error);
}
});
我们可以通过Promise 解决以上问题。
1)、Promise 语法
  const promise = new Promise(function (resolve, reject) {
            // 执行异步操作
            if (/* 异步操作成功*/) {
                resolve(value);// 调用resolve,代表Promise 将返回成功的结果
            } else {
                reject(error);// 调用reject,代表Promise 会返回失败结果
            }
        });
使用箭头函数可以简写为:
     const promise = new Promise((resolve, reject) => {
            // 执行异步操作
            if (/* 异步操作成功*/) {
                resolve(value);// 调用resolve,代表Promise 将返回成功的结果
            } else {
                reject(error);// 调用reject,代表Promise 会返回失败结果
            }
        });
这样,在promise 中就封装了一段异步执行的结果。
2)、处理异步结果
如果我们想要等待异步执行完成,做一些事情,我们可以通过promise 的then 方法来实现。
如果想要处理promise 异步执行失败的事件,还可以跟上catch:
promise.then(function (value) {
// 异步执行成功后的回调
}).catch(function (error) {
// 异步执行失败后的回调
})
3)、Promise 改造以前嵌套方式
new Promise((resolve, reject) => {
            $.ajax({
                url: "mock/user.json",
                success(data) {
                    console.log("查询用户:", data);
                    resolve(data.id);
                },
                error(error) {
                    console.log("出现异常了:" + error);
                }
            });
        }).then((userId) => {
            return new Promise((resolve, reject) => {
                $.ajax({
                    url: `mock/user_corse_${userId}.json`,
                    success(data) {
                        console.log("查询到课程:", data);
                        resolve(data.id);
                    },
                    error(error) {
                        console.log("出现异常了:" + error);
                    }
                });
            });
        }).then((corseId) => {
            console.log(corseId);
            $.ajax({
                url: `mock/corse_score_${corseId}.json`,
                success(data) {
                    console.log("查询到分数:", data);
                },
                error(error) {
                    console.log("出现异常了:" + error);
                }
            });
        });
4)、优化处理
优化:通常在企业开发中,会把promise 封装成通用方法,如下:封装了一个通用的get 请求方法
function get(url, data) { // 实际开发中会单独放到common.js 中
            return new Promise((resolve, reject) => {
                $.ajax({
                    url: url,
                    data: data,
                    success: function (data) {
                        resolve(data);
                    },
                    error: function (err) {
                        reject(err)
                    }
                })
            });
        }

        get("mock/user.json")
            .then((data) => {
                console.log("用户查询成功~~~:", data)
                return get(`mock/user_corse_${data.id}.json`);
            })
            .then((data) => {
                console.log("课程查询成功~~~:", data)
                return get(`mock/corse_score_${data.id}.json`);
            })
            .then((data)=>{
                console.log("课程成绩查询成功~~~:", data)
            })
            .catch((err)=>{ //失败的话catch
                console.log("出现异常",err)
            });
通过比较,我们知道了Promise 的扁平化设计理念,也领略了这种上层设计带来的好处。
我们的项目中会使用到这种异步处理的方式;
9、模块化
1)、什么是模块化
模块化就是把代码进行拆分,方便重复利用。类似java 中的导包:要使用一个包,必须先
导包。而 JS 中没有包的概念,换来的是模块。
模块功能主要由两个命令构成:export和import。
export用于规定模块的对外接口,export不仅可以导出对象,一切JS变量都可以导出。比如:基本类型变量、函数、数组、对象import用于导入其他模块提供的功能
2)、export
比如我定义一个js 文件:hello.js,里面有一个对象:
const util = {
    sum(a, b) {
        return a + b;
    }
}
我可以使用export 将这个对象导出:
const util = {
    sum(a, b) {
        return a + b;
    }
}
export { util };
当然,也可以简写为:
export const util = {
    sum(a, b) {
        return a + b;
    }
}
export不仅可以导出对象,一切JS 变量都可以导出。比如:基本类型变量、函数、数组、
对象。
当要导出多个值时,还可以简写。比如我有一个文件:user.js:
var name = "jack"
var age = 21
export {name,age}
省略名称
上面的导出代码中,都明确指定了导出的变量名,这样其它人在导入使用时就必须准确写出
变量名,否则就会出错。
因此js 提供了default关键字,可以对导出的变量名进行省略
例如:
// 无需声明对象的名字
export default {
    sum(a, b) {
        return a + b;
    }
}
这样,当使用者导入时,可以任意起名字。
3)、import
使用export命令定义了模块的对外接口以后,其他JS 文件就可以通过import命令加载这个模块。
例如我要使用上面导出的util:
// 导入util
import util from 'hello.js'
// 调用util 中的属性
util.sum(1,2)
要批量导入前面导出的name 和age:
import {name, age} from 'user.js'
console.log(name + " , 今年"+ age +"岁了")
但是上面的代码暂时无法测试,因为浏览器目前还不支持ES6 的导入和导出功能。除非借助于工具,把ES6 的语法进行编译降级到ES5,比如Babel-cli工具我们暂时不做测试,大家了解即可。
5.3 Node.js
前端开发,少不了node.js;Node.js 是一个基于Chrome V8 引擎的JavaScript 运行环境。
Node.js的官方文档: http://nodejs.cn/api/
我们关注与node.js 的npm 功能就行;
NPM 是随同 NodeJS 一起安装的包管理工具,JavaScript-NPM,Java-Maven;
1)、官网下载安装 node.js ,并使用node -v 检查版本
2)、配置 npm 使用淘宝镜像
npm config set registry http://registry.npm.taobao.org/
3)、大家如果npm install 安装依赖出现chromedriver 之类问题,先在项目里运行下面命令
npm install chromedriver --chromedriver_cdnurl=http://cdn.npm.taobao.org/dist/chromedriver
然后再运行 npm install
5.4 Vue
1、MVVM 思想
- M:即Model,模型,包括数据和一些基本操作
- V:即View,视图,页面渲染结果
- VM:即View-Model,模型与视图间的双向操作(无需开发人员干涉)
在MVVM 之前,开发人员从后端获取需要的数据模型,然后要通过DOM 操作 Model 渲染到 View 中。而后当用户操作视图,我们还需要通过 DOM 获取 View 中的数据,然后同步到 Model 中。
而MVVM 中的 VM 要做的事情就是把DOM 操作完全封装起来,开发人员不用再关心Model和View 之间是如何互相影响的:
- 只要我们 Model 发生了改变,View 上自然就会表现出来。
- 当用户修改了 View,Model 中的数据也会跟着改变。
把开发人员从繁琐的DOM 操作中解放出来,把关注点放在如何操作Model 上。
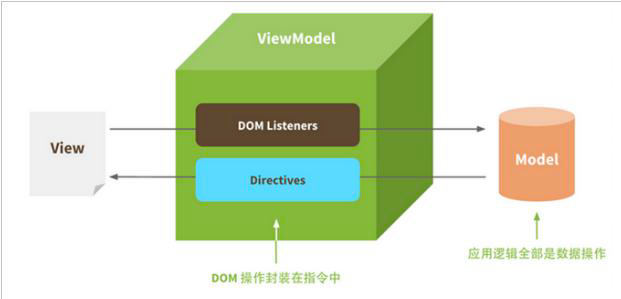
2、Vue 简介
Vue (读音/vjuː/,类似于view) 是一套用于构建用户界面的渐进式框架。与其它大型框架不同的是,Vue 被设计为可以自底向上逐层应用。Vue 的核心库只关注视图层,不仅易于上手,还便于与第三方库或既有项目整合。另一方面,当与现代化的工具链以及各种支持类库结合使用时,Vue 也完全能够为复杂的单页应用提供驱动。
官网:https://cn.vuejs.org/
参考:https://cn.vuejs.org/v2/guide/
Git 地址:https://github.com/vuejs
尤雨溪,Vue.js 创作者,Vue Technology 创始人,致力于Vue 的研究开发。
3、入门案例
1)、安装
官网文档提供了3 种安装方式:
- 直接script 引入本地vue 文件。需要通过官网下载vue 文件。
- 通过script 引入CDN 代理。需要联网,生产环境可以使用这种方式
- 通过npm 安装。这种方式也是官网推荐的方式,需要nodejs 环境。
本课程就采用第三种方式
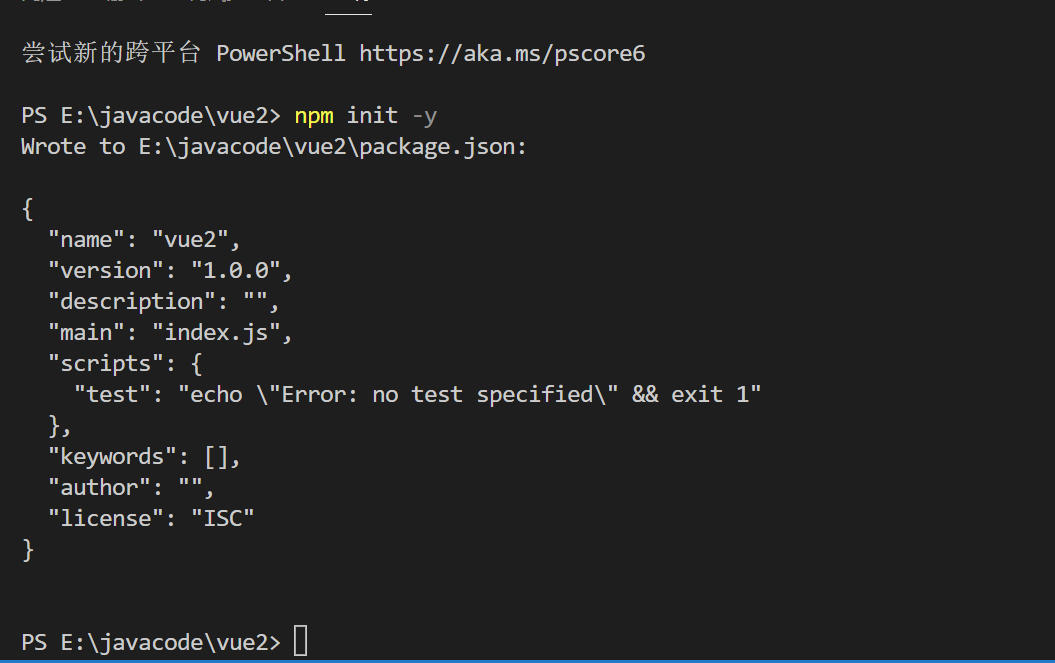

注意:
这里没有vue.js文件的,vue 版本错了,npm install vue@2 重装一下,npm 默认装的是vue3.0
2)、创建示例项目
1、新建文件夹 vue2 ,并使用 vscode 打开
2、使用 vscode 控制台终端,npm install -y;
项目会生成 package-lock.json 文件,类似于 maven 项目的 pom.xml 文件。
3、使用 npm install vue,给项目安装 vue;项目下会多 node_modules 目录,并且在下面有
一个vue 目录。

3)、HelloWorld
在hello.html 中,我们编写一段简单的代码。
h2 中要输出一句话:xx 非常帅。前面的xx是要渲染的数据。
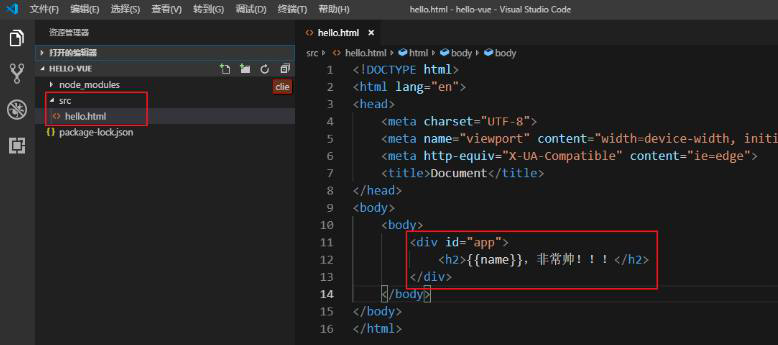
4)、vue 声明式渲染
页面代码
 <div id="app">
            <h1>{{name}},非常帅!!!</h1>
        </div>
        <script src="./node_modules/vue/dist/vue.min.js"></script>
        <script>
            let vm = new Vue({
                el: "#app",
                data: {
                    name: "张三"
                }
            });
        </script>
    </body>
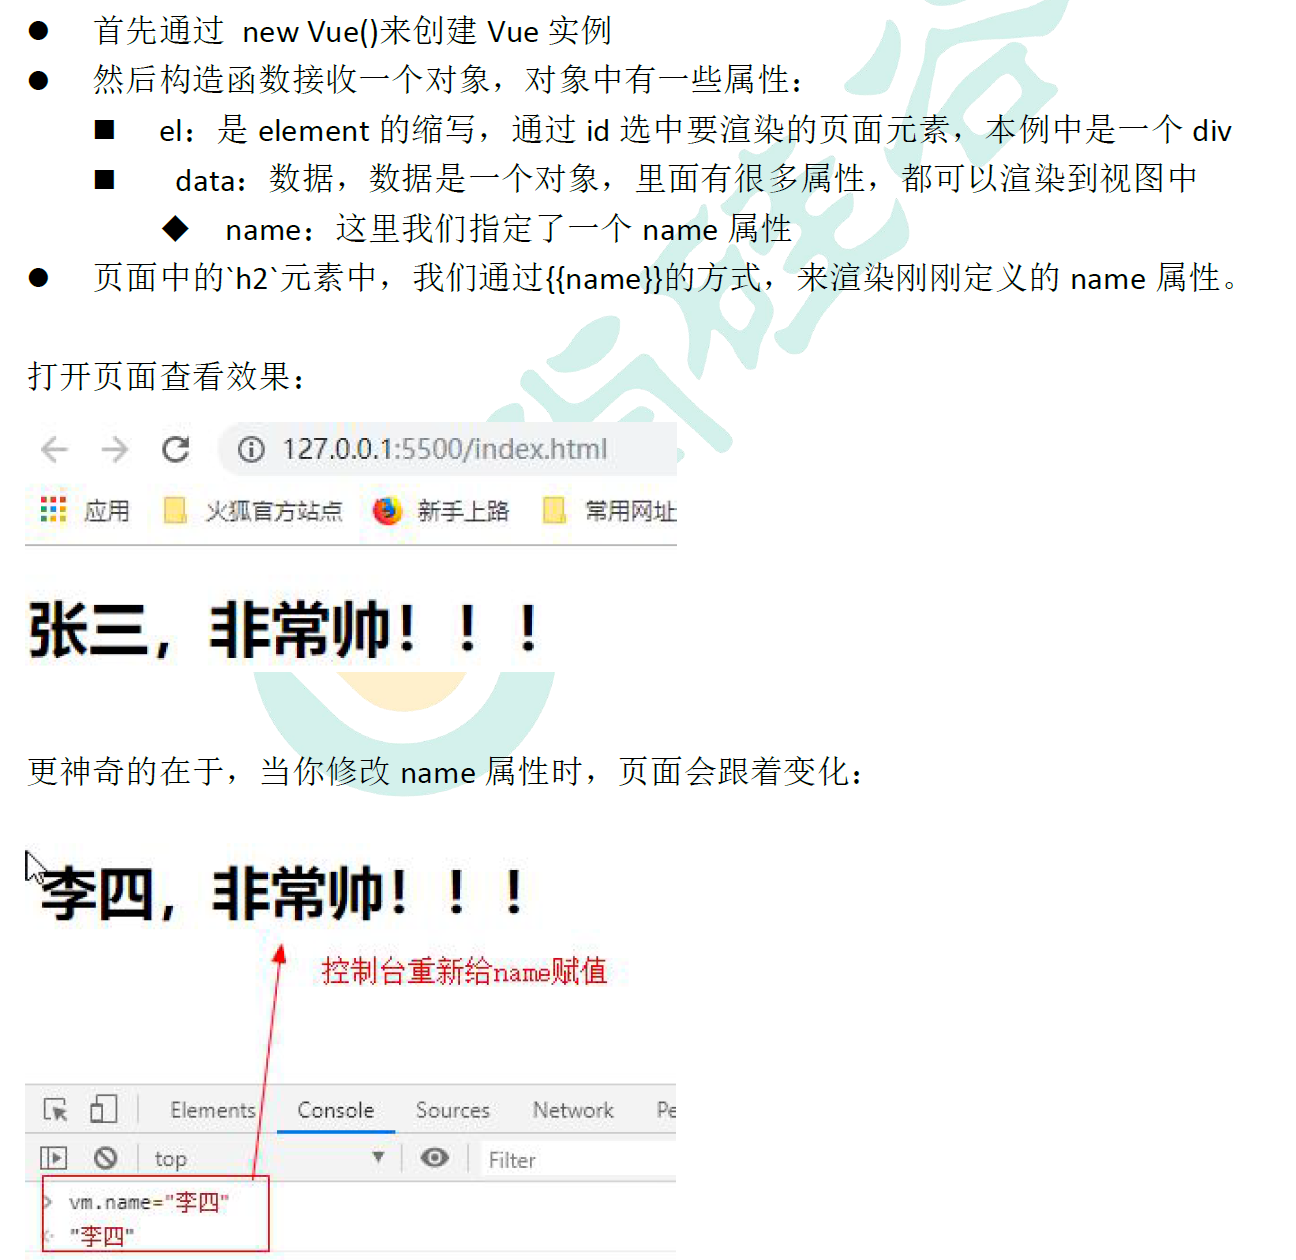
5)、双向绑定
我们对刚才的案例进行简单修改:
<div id="app">
            <input type="text" v-model="num">
            <h2>
                {{name}},非常帅!!!有{{num}}个人为他点赞。
            </h2>
        </div>
        <script src="./node_modules/vue/dist/vue.js"></script>
        <script>
            // 创建vue 实例
            let app = new Vue({
                el: "#app", // el 即element,该vue 实例要渲染的页面元素
                data: { // 渲染页面需要的数据
                    name: "张三",
                    num: 5
                }
            });
        </script>

6)、事件处理
给页面添加一个按钮:
<body>
 <div id="app">
            <input type="text" v-model="num">
            <button v-on:click="num++">点赞</button>
            <h2>
                {{name}},非常帅!!!有{{num}}个人为他点赞。
            </h2>
        </div>
        <script src="./node_modules/vue/dist/vue.js"></script>
        <script>
            // 创建vue 实例
            let app = new Vue({
                el: "#app", // el 即element,该vue 实例要渲染的页面元素
                data: { // 渲染页面需要的数据
                    name: "张三",
                    num: 5
                }
            });
        </script>
</body>


简单使用总结:
1)、使用Vue 实例管理DOM
2)、DOM 与数据/事件等进行相关绑定
3)、我们只需要关注数据,事件等处理,无需关心视图如何进行修改
4、概念
1、创建Vue 实例
每个Vue 应用都是通过用Vue 函数创建一个新的Vue 实例开始的:
let app = new Vue({
});
在构造函数中传入一个对象,并且在对象中声明各种Vue 需要的数据和方法,包括:
- el
- data
- methods
- ........
2、模板或元素
每个Vue 实例都需要关联一段 Html 模板,Vue 会基于此模板进行视图渲染。
我们可以通过 el 属性来指定。
例如一段html 模板:
<div id="app">
</div>
然后创建Vue 实例,关联这个div
let vm = new Vue({
el: "#app"
})
这样,Vue 就可以基于id 为app的 div 元素作为模板进行渲染了。在这个div 范围以外的部分是无法使用vue 特性的。
3、数据
当 Vue 实例被创建时,它会尝试获取在data 中定义的所有属性,用于视图的渲染,并且监视 data 中的属性变化, 当data 发生改变,所有相关的视图都将重新渲染,这就是“响应式“系统。
html:
<div id="app">
<input type="text" v-model="name" />
</div>
JS:
let vm = new Vue({
el: "#app",
data: {
name: "刘德华"
}
})
- name 的变化会影响到
input的值 - input 中输入的值,也会导致vm 中的name 发生改变
4、方法
Vue 实例中除了可以定义data 属性,也可以定义方法,并且在Vue 实例的作用范围内使用。
Html:
  <div id="app">
        {{num}}
        <button v-on:click="add">加</button>
  </div>
JS:
  let vm = new Vue({
            el: "#app",
            data: {
                num: 0
            },
            methods: {
                add: function () {
                    // this 代表的当前vue 实例
                    this.num++;
                }
            }
        });
5、安装vue-devtools 方便调试
- 将软件包中的vue-devtools 解压。
- 打开chrome 设置 -> 扩展程序
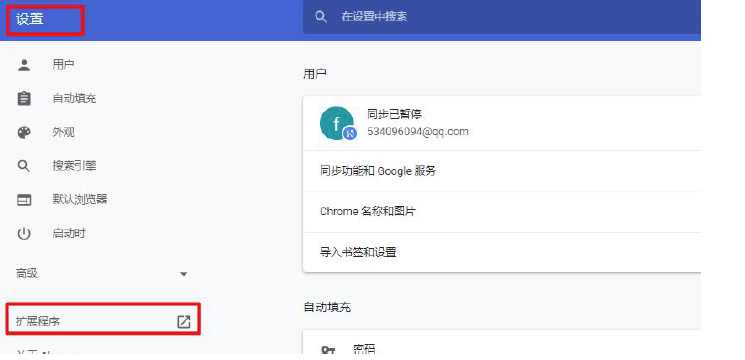
-
开启开发者模式,并加载插件
-
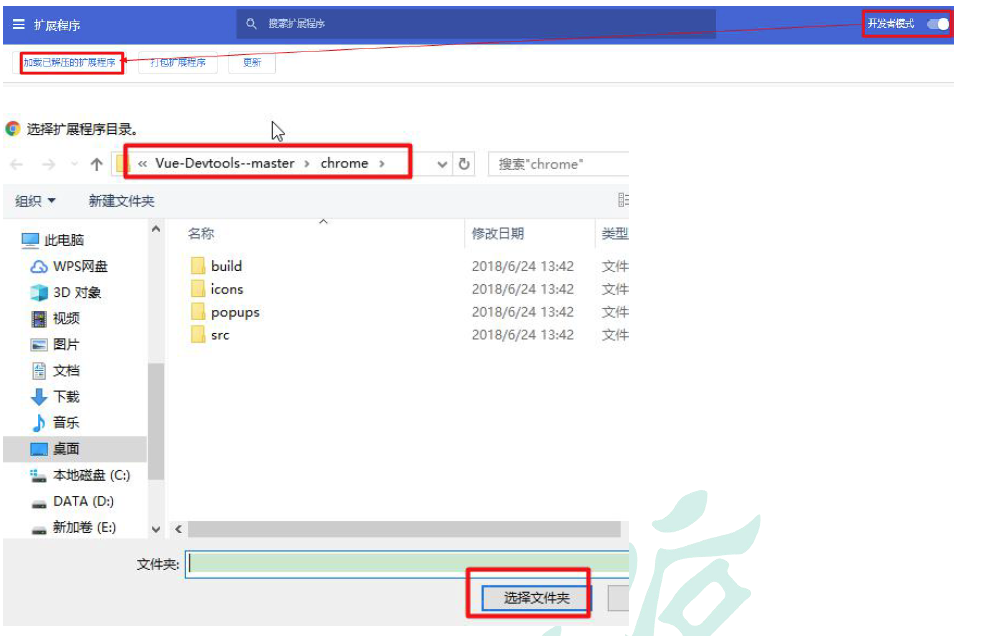
-
打开浏览器控制台,选择vue

6、安装vscode 的vue 插件

安装这个插件就可以有语法提示
5、指令
什么是指令?
-
指令(Directives) 是带有
v-前缀的特殊特性。 -
指令特性的预期值是:单个JavaScript 表达式。
-
指令的职责是,当表达式的值改变时,将其产生的连带影响,响应式地作用于DOM
例如我们在入门案例中的v-on,代表绑定事件。
1、插值表达式
1)、花括号
格式:{{ 表达式 }}
说明:
- 该表达式支持JS 语法,可以调用js 内置函数(必须有返回值)
- 表达式必须有返回结果。例如1 + 1,没有结果的表达式不允许使用,如:let a = 1 + 1;
- 可以直接获取Vue 实例中定义的数据或函数
2)、插值闪烁
使用 {{}} 方式在网速较慢时会出现问题。在数据未加载完成时,页面会显示出原始的{{}},加载完毕后才显示正确数据,我们称为插值闪烁。
我们将网速调慢一些,然后刷新页面,试试看刚才的案例:

3)、v-text 和v-html
可以使用v-text 和v-html 指令来替代{{}}
说明:
- v-text:将数据输出到元素内部,如果输出的数据有HTML 代码,会作为普通文本输出
- v-html:将数据输出到元素内部,如果输出的数据有HTML 代码,会被渲染
示例:
<div id="app">
v-text:<span v-text="hello"></span> <br />
v-html:<span v-html="hello"></span>
</div>
<script src="./node_modules/vue/dist/vue.js"></script>
<script>
let vm = new Vue({
el: "#app",
data: {
hello: "<h1>大家好</h1>"
}
})
</script>
效果:
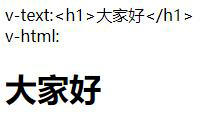
并且不会出现插值闪烁,当没有数据时,会显示空白或者默认数据。
2、单向绑定v-bind
花括号只能写在标签体内(<div 标签内> 标签体 ),不能用在标签内。
插值表达式只能用在标签体里,如果我们这么用是不起作用的,所以要用 v-bind
html 属性不能使用双大括号形式绑定,我们使用v-bind 指令给HTML 标签属性绑定值;
而且在将v-bind 用于class 和style 时,Vue.js 做了专门的增强。
1)、绑定class
<div class="static" v-bind:class="{ active: isActive, 'text-danger'
        : hasError }">
        </div>
        <script>
            let vm = new Vue({
                el: "#app",
                data: {
                    isActive: true,
                    hasError: false
                }
            })
        </script>
2)、绑定style
v-bind:style 的对象语法十分直观,看着非常像CSS,但其实是一个JavaScript 对象。style属性名可以用驼峰式(camelCase) 或短横线分隔(kebab-case,这种方式记得用单引号括起来) 来命名。
例如:font-size-->fontSize
<div id="app" v-bind:style="{ color: activeColor, fontSize: fontSiz
            e + 'px' }"></div>
    <script>
        let vm = new Vue({
            el: "#app",
            data: {
                activeColor: 'red',
                fontSize: 30
            }
        })

    </script>
结果:
3)、绑定其他任意属性
<div id="app" v-bind:style="{ color: activeColor, fontSize: fontS
            ize + 'px' }" v-bind:user="userName">
        </div>
        <script>
            let vm = new Vue({
                el: "#app",
                data: {
                    activeColor: 'red',
                    fontSize: 30,
                    userName: 'zhangsan'
                }
            })
        </script>
4)、v-bind 缩写
<div id="app" :style="{ color: activeColor, fontSize: fontSize +
            'px' }" :user="userName">
        </div>
3、v-model
刚才的v-text、v-html、v-bind 可以看做是单向绑定,数据影响了视图渲染,但是反过来就不
行。接下来学习的 v-model 是双向绑定,视图(View)和模型(Model)之间会互相影响。
既然是双向绑定,一定是在 视图 中可以修改数据,这样就限定了视图的元素类型。目前
v-model 的可使用元素有:
- input
- select
- textarea
- checkbox
- radio
- components(Vue 中的自定义组件)
基本上除了最后一项,其它都是表单的输入项。
示例:
       <div id="app">
            <input type="checkbox" v-model="language" value="Java" />Java<br />
            <input type="checkbox" v-model="language" value="PHP" />PHP<br />
            <input type="checkbox" v-model="language" value="Swift" />Swift<br />
            <h1>
                你选择了:{{language.join(',')}}
            </h1>
        </div>
        <script src="../node_modules/vue/dist/vue.js"></script>
        <script type="text/javascript">
            let vm = new Vue({
                el: "#app",
                data: {
                    language: []
                }
            })
        </script>
- 多个
checkbox对应一个model 时,model 的类型是一个数组,单个checkbox 值默认是boolean 类型 - radio 对应的值是input 的value 值
text和textarea默认对应的 model 是字符串select单选对应字符串,多选对应也是数组
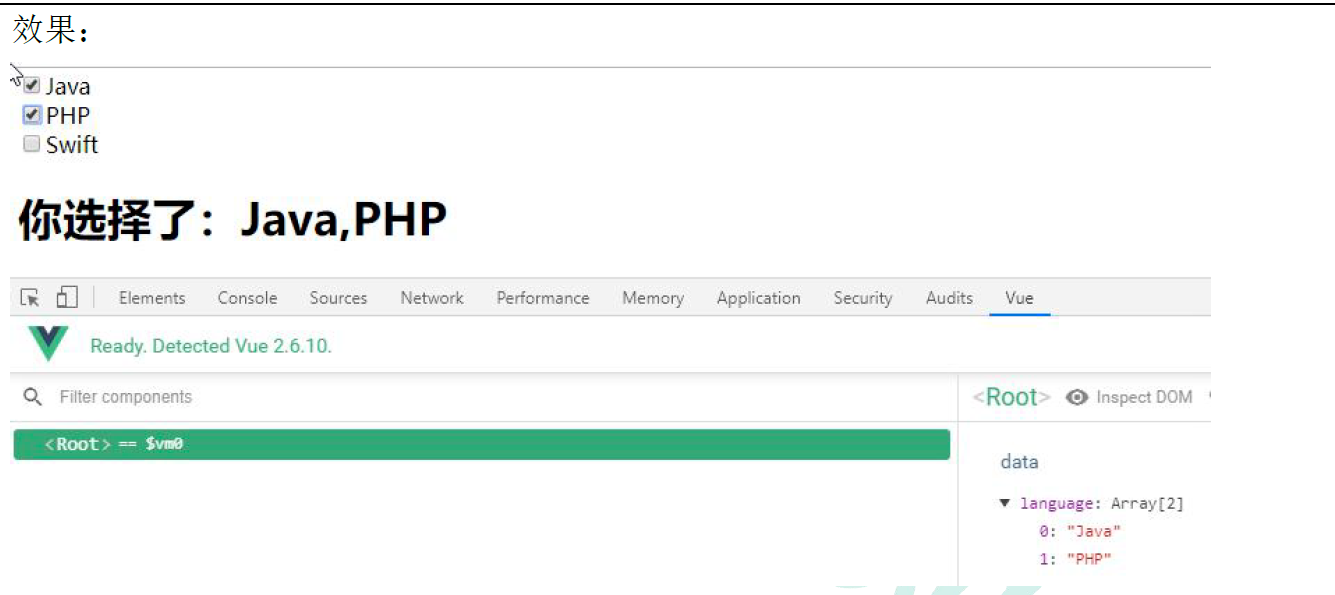
4、v-on
1、基本用法
- v-on 指令用于给页面元素绑定事件。
语法: v-on:事件名="js 片段或函数名"
示例:
 <div id="app">
            <!--事件中直接写js 片段-->
            <button v-on:click="num++">点赞</button>
            <!--事件指定一个回调函数,必须是Vue 实例中定义的函数-->
            <button v-on:click="decrement">取消</button>
            <h1>有{{num}}个赞</h1>
        </div>
        <script src="../node_modules/vue/dist/vue.js"></script>
        <script type="text/javascript">
            let vm = new Vue({
                el: "#app",
                data: {
                    num: 100
                },
                methods: {
                    decrement() {
                        this.num--; //要使用data 中的属性,必须this.属性名
                    }
                }
            })
        </script>
另外,事件绑定可以简写,例如v-on:click='add'可以简写为@click='add'
2、事件修饰符
在事件处理程序中调用event.preventDefault() 或event.stopPropagation() 是非常常见的
需求。尽管我们可以在方法中轻松实现这点,但更好的方式是:方法只有纯粹的数据逻辑,
而不是去处理DOM 事件细节。
为了解决这个问题,Vue.js 为v-on 提供了事件修饰符。修饰符是由点开头的指令后缀来
表示的。
.stop:阻止事件冒泡到父元素.prevent:阻止默认事件发生.capture:使用事件捕获模式.self:只有元素自身触发事件才执行。(冒泡或捕获的都不执行).once:只执行一次
<div id="app">
            <!--右击事件,并阻止默认事件发生-->
            <button v-on:contextmenu.prevent="num++">点赞</button>
            <br />
            <!--右击事件,不阻止默认事件发生-->
            <button v-on:contextmenu="decrement($event)">取消</button>
            <br />
            <h1>有{{num}}个赞</h1>
        </div>
        <script src="../node_modules/vue/dist/vue.js"></script>
        <script type="text/javascript">
            let app = new Vue({
                el: "#app",
                data: {
                    num: 100
                },
                methods: {
                    decrement(ev) {
                        // ev.preventDefault();
                        this.num--;
                    }
                }
            })
        </script>
效果:右键“点赞”,不会触发默认的浏览器右击事件;右键“取消”,会触发默认的浏览器右击事件)
3. 按键修饰符
4、组合按钮


5、v-for
遍历数据渲染页面是非常常用的需求,Vue 中通过v-for 指令来实现。
1、遍历数组
语法:v-for="item in items"
- items:要遍历的数组,需要在vue 的data 中定义好。
- item:迭代得到的当前正在遍历的元素
示例:
<div id="app">
            <ul>
                <li v-for="user in users">
                    {{user.name}} - {{user.gender}} - {{user.age}}
                </li>
            </ul>
        </div>
        <script src="../node_modules/vue/dist/vue.js"></script>
        <script type="text/javascript">
            let app = new Vue({
                el: "#app",
                data: {
                    users: [
                        { name: '柳岩', gender: '女', age: 21 },
                        { name: '张三', gender: '男', age: 18 },
                        { name: '范冰冰', gender: '女', age: 24 },
                        { name: '刘亦菲', gender: '女', age: 18 },
                        { name: '古力娜扎', gender: '女', age: 25 }
                    ]
                },
            })
        </script>
效果:
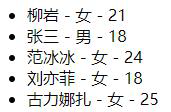
2、数组角标
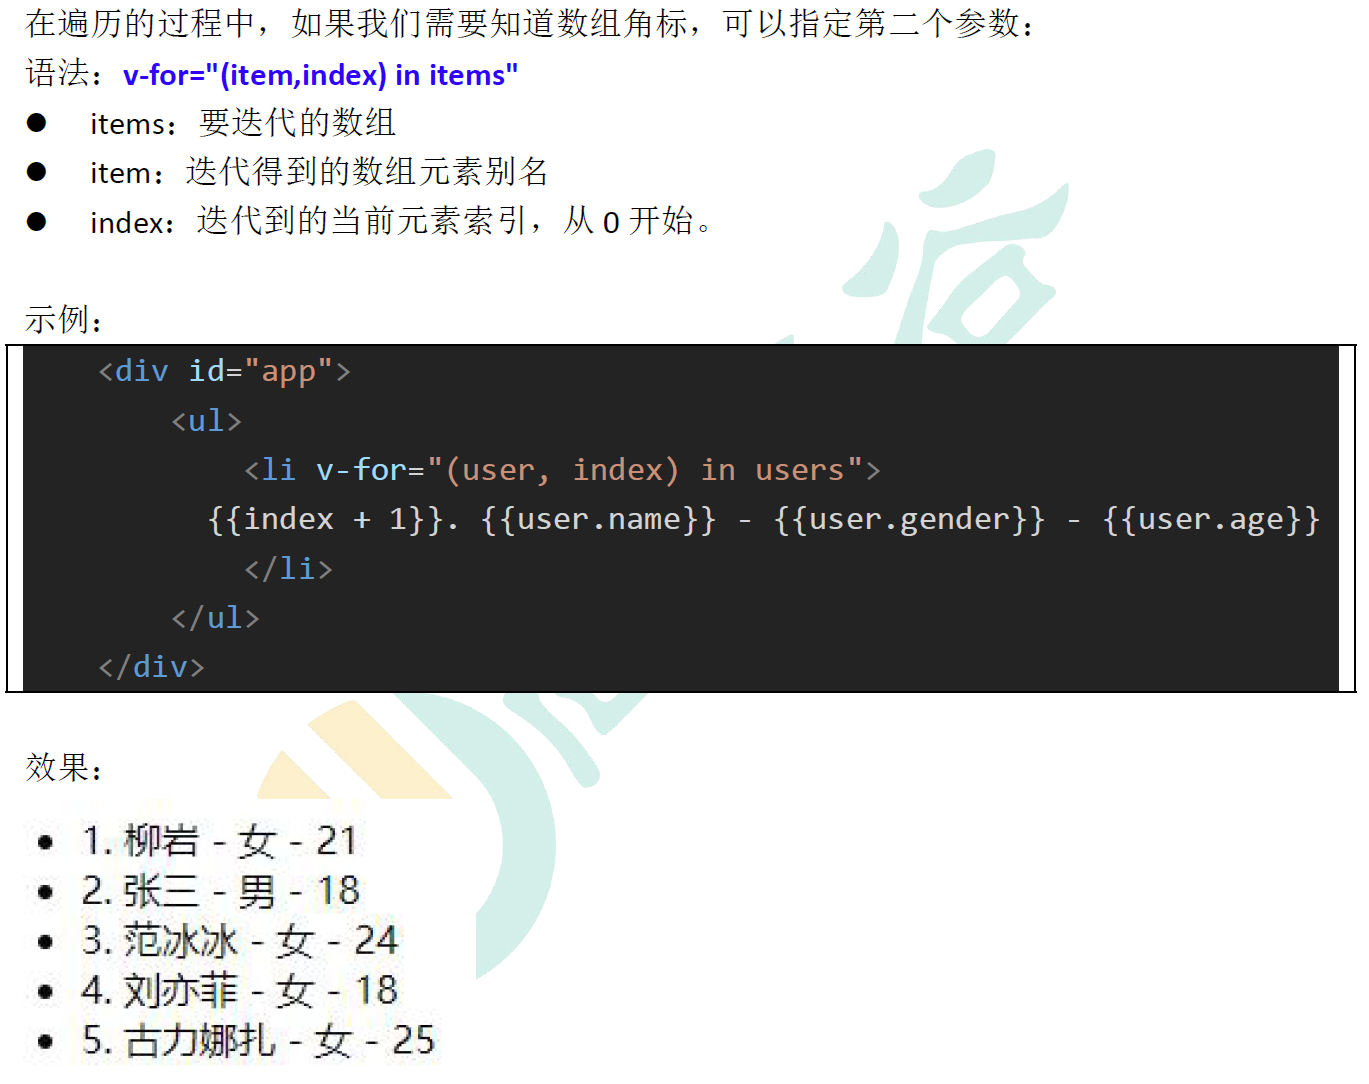
3、遍历对象

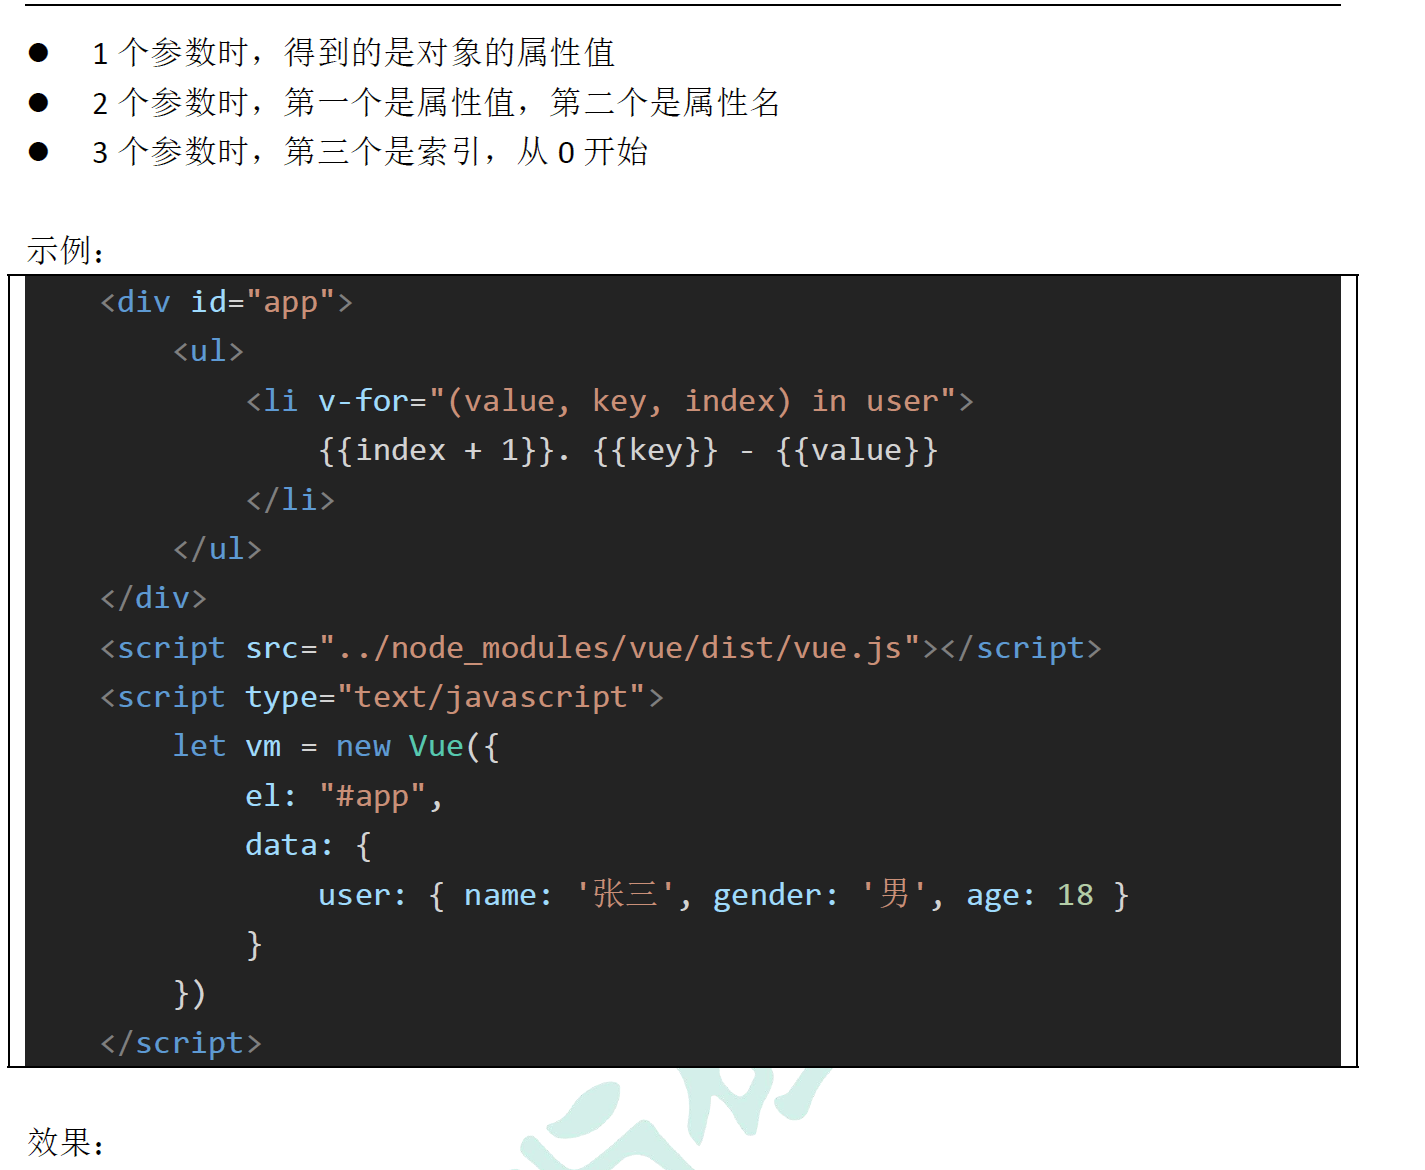

4、Key
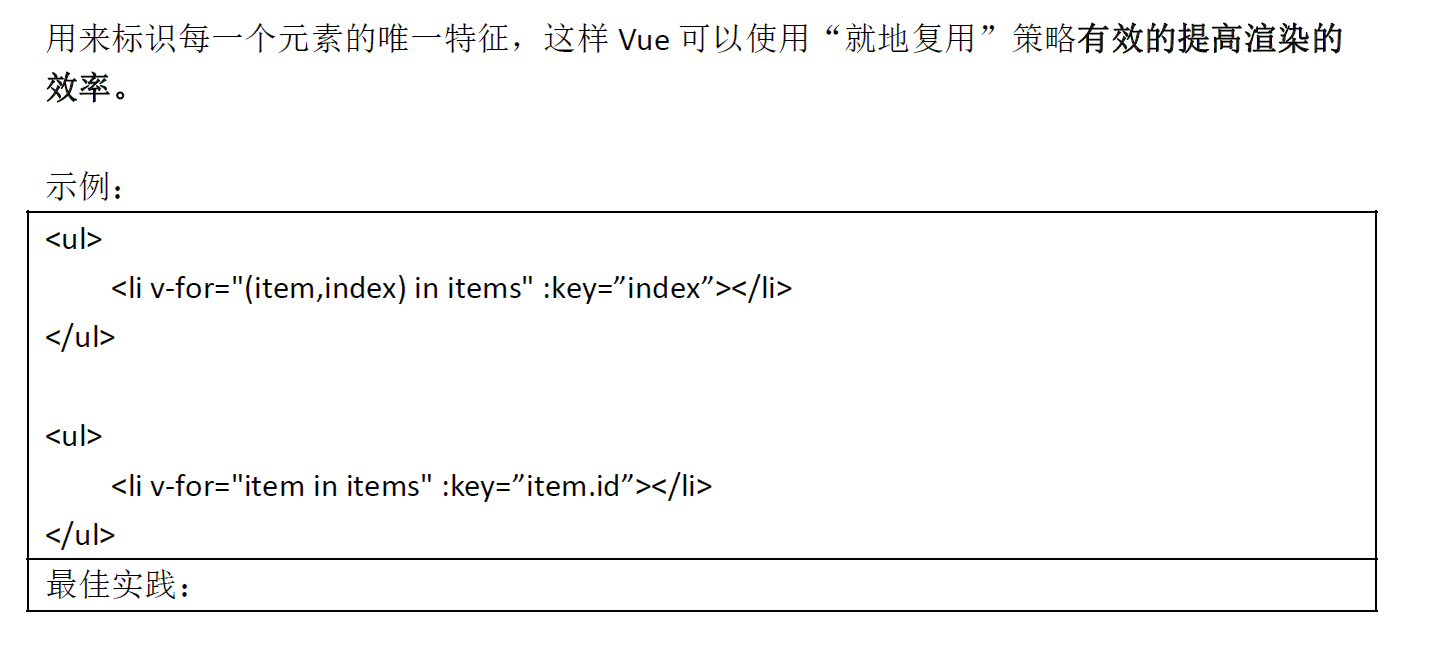

6、v-if 和v-show

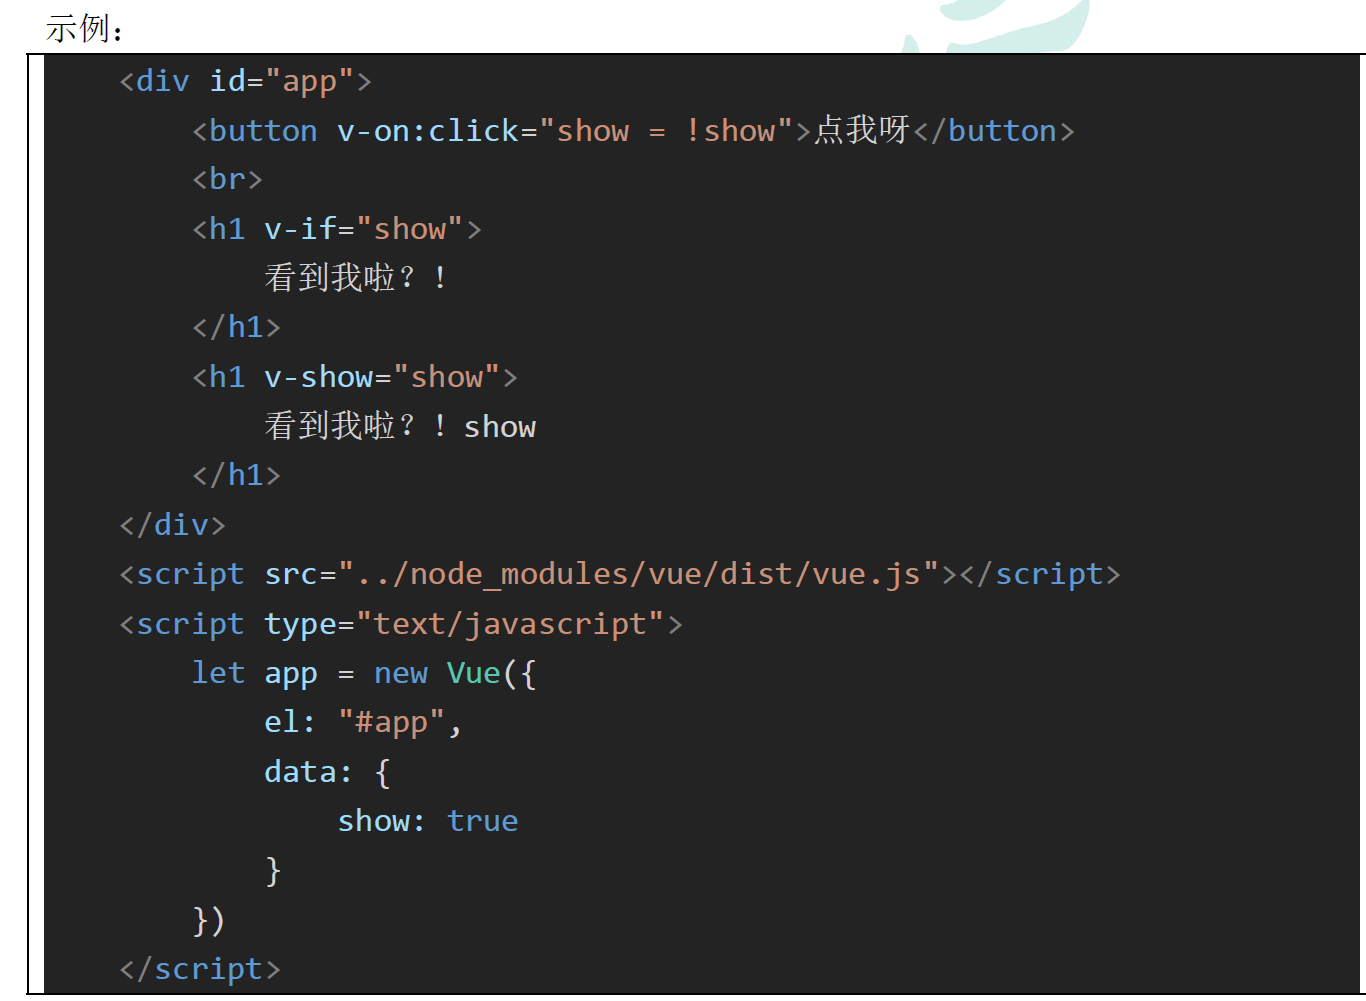


7、v-else 和v-else-if
v-else 元素必须紧跟在带v-if 或者v-else-if 的元素的后面,否则它将不会被识别。
示例:
<div id="app">
            <button v-on:click="random=Math.random()">点我呀
            </button><span>{{random}}</span>
            <h1 v-if="random >= 0.75">
                看到我啦?!v-if >= 0.75
            </h1>
            <h1 v-else-if="random > 0.5">
                看到我啦?!v-else-if > 0.5
            </h1>
            <h1 v-else-if="random > 0.25">
                看到我啦?!v-else-if > 0.25
            </h1>
            <h1 v-else>
                看到我啦?!v-else
            </h1>
        </div>
        <script src="../node_modules/vue/dist/vue.js"></script>
        <script type="text/javascript">
            let app = new Vue({
                el: "#app",
                data: {
                    random: 1
                }
            })
        </script>
6、计算属性和侦听器
1、计算属性(computed)
某些结果是基于之前数据实时计算出来的,我们可以利用计算属性。来完成
示例:
 <div id="app">
        <ul>
            <li>西游记:价格{{xyjPrice}},数量:
                <input type="number" v-model="xyjNum">
            </li>
            <li>水浒传:价格{{shzPrice}},数量:
                <input type="number" v-model="shzNum">
            </li>
            <li>总价:{{totalPrice}}</li>
        </ul>
    </div>
    <script src="../node_modules/vue/dist/vue.js"></script>
    <script type="text/javascript">
        let app = new Vue({
            el: "#app",
            data: {
                xyjPrice: 56.73,
                shzPrice: 47.98,
                xyjNum: 1,
                shzNum: 1
            },
            computed: {
                totalPrice() {
                    return this.xyjPrice * this.xyjNum + this.shzPrice * this.shzNum;
                }
            },
        })
    </script>

2、侦听(watch)
watch 可以让我们监控一个值的变化。从而做出相应的反应。
示例:
 <div id="app">
        <ul>
            <li>西游记:价格{{xyjPrice}},数量:
                <input type="number" v-model="xyjNum">
            </li>
            <li>水浒传:价格{{shzPrice}},数量:
                <input type="number" v-model="shzNum">
            </li>
            <li>总价:{{totalPrice}}</li>
            {{msg}}
        </ul>
    </div>
    <script src="../node_modules/vue/dist/vue.js"></script>
    <script type="text/javascript">
        let app = new Vue({
            el: "#app",
            data: {
                xyjPrice: 56.73,
                shzPrice: 47.98,
                xyjNum: 1,
                shzNum: 1,
                msg: ""
            },
            computed: {
                totalPrice() {
                    return this.xyjPrice * this.xyjNum + this.shzPrice * this.shzNum;
                }
            },
            watch: {
                xyjNum(newVal, oldVal) {
                    if (newVal >= 3) {
                        this.msg = "西游记没有更多库存了";
                        this.xyjNum = 3;
                    } else {
                        this.msg = "";
                    }
                }
            }
        })
    </script>

3、过滤器(filters)

<body>
            <div id="app">
                <table>
                    <tr v-for="user in userList">
                        <td>{{user.id}}</td>
                        <td>{{user.name}}</td>
                        <!-- 使用代码块实现,有代码侵入-->
                        <td>{{user.gender===1? "男":"女"}}</td>
                    </tr>
                </table>
            </div>
        </body>
        <script src="../node_modules/vue/dist/vue.js"></script>
        <script>
            let app = new Vue({
                el: "#app",
                data: {
                    userList: [
                        { id: 1, name: 'jacky', gender: 1 },
                        { id: 2, name: 'peter', gender: 0 }
                    ]
                }
            });
        </script>
1、局部过滤器
注册在当前vue 实例中,只有当前实例能用
let app = new Vue({
                el: "#app",
                data: {
                    userList: [
                        { id: 1, name: 'jacky', gender: 1 },
                        { id: 2, name: 'peter', gender: 0 }
                    ]
                },
                // filters 定义局部过滤器,只可以在当前vue 实例中使用
                filters: {
                    genderFilter(gender) {
                        return gender === 1 ? '男~' : '女~'
                    }
                }
            });

2、全局过滤器
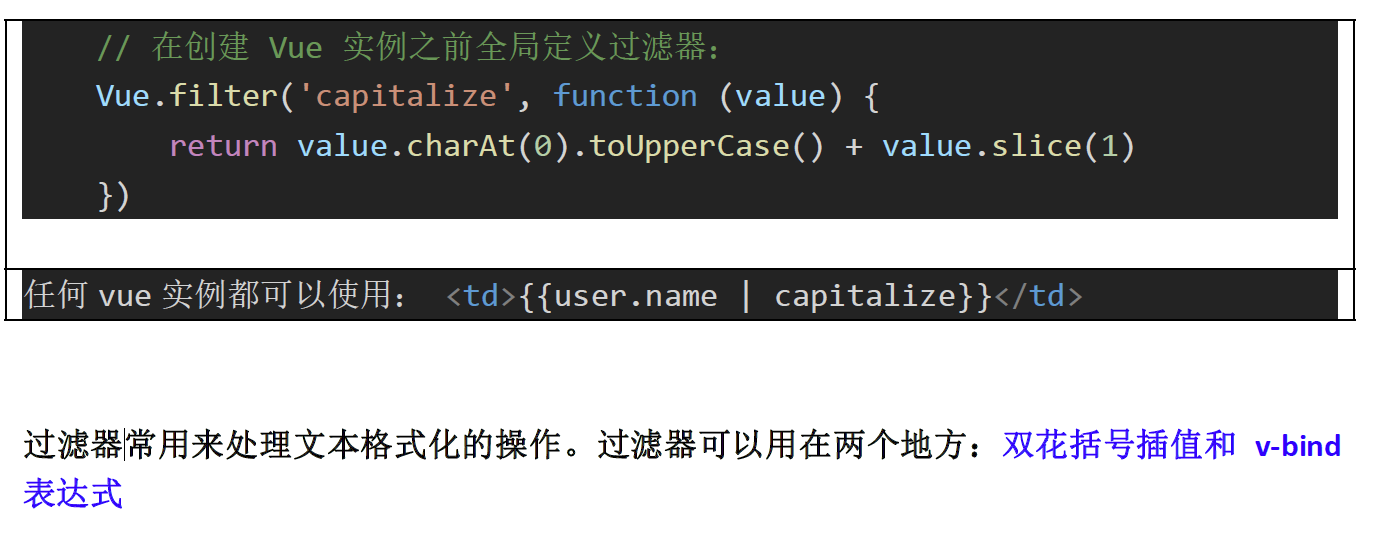
7、组件化
在大型应用开发的时候,页面可以划分成很多部分。往往不同的页面,也会有相同的部分。例如可能会有相同的头部导航。
但是如果每个页面都独自开发,这无疑增加了我们开发的成本。所以我们会把页面的不同部分拆分成独立的组件,然后在不同页面就可以共享这些组件,避免重复开发。在vue 里,所有的vue 实例都是组件。
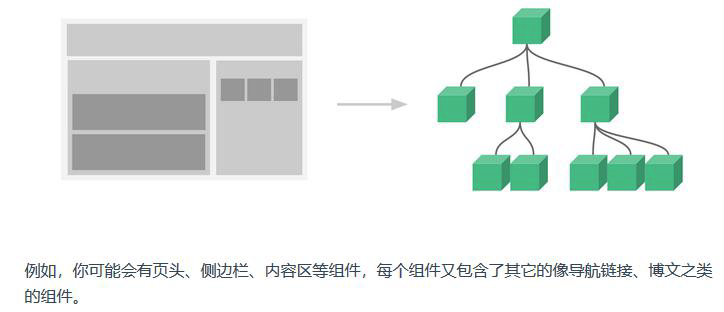
1、全局组件
我们通过Vue 的component 方法来定义一个全局组件。
 <div id="app">
        <!--使用定义好的全局组件-->
        <counter></counter>
    </div>
    <script src="../node_modules/vue/dist/vue.js"></script>
    <script type="text/javascript">
        // 定义全局组件,两个参数:1,组件名称。2,组件参数
        Vue.component("counter", {
            template: '<button v-on:click="count++">你点了我{{ count }} 次,我记住了.</button>',
            data() {
                return {
                    count: 0
                }
            }
        })
        let app = new Vue({
            el: "#app"
        })
    </script>

2、组件的复用
定义好的组件,可以任意复用多次:
<div id="app">
<!--使用定义好的全局组件-->
<counter></counter>
<counter></counter>
<counter></counter>
</div>
组件的data 属性必须是函数!
一个组件的data 选项必须是一个函数,因此每个实例可以维护一份被返回对象的独立的拷
贝;
否则:
https://cn.vuejs.org/v2/guide/components.html#data-必须是一个函数
3、局部组件
一旦全局注册,就意味着即便以后你不再使用这个组件,它依然会随着Vue 的加载而加载。因此,对于一些并不频繁使用的组件,我们会采用局部注册。
我们先在外部定义一个对象,结构与创建组件时传递的第二个参数一致:
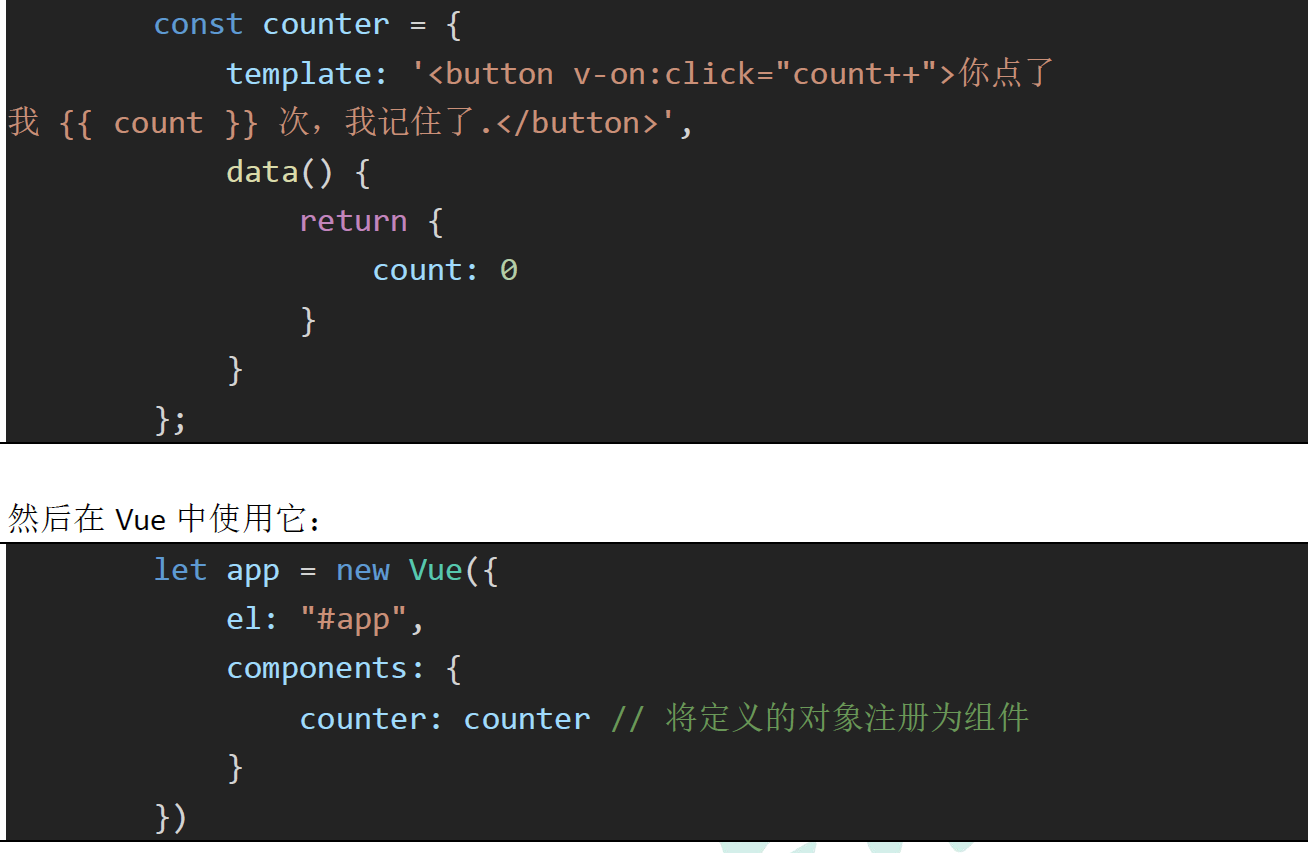
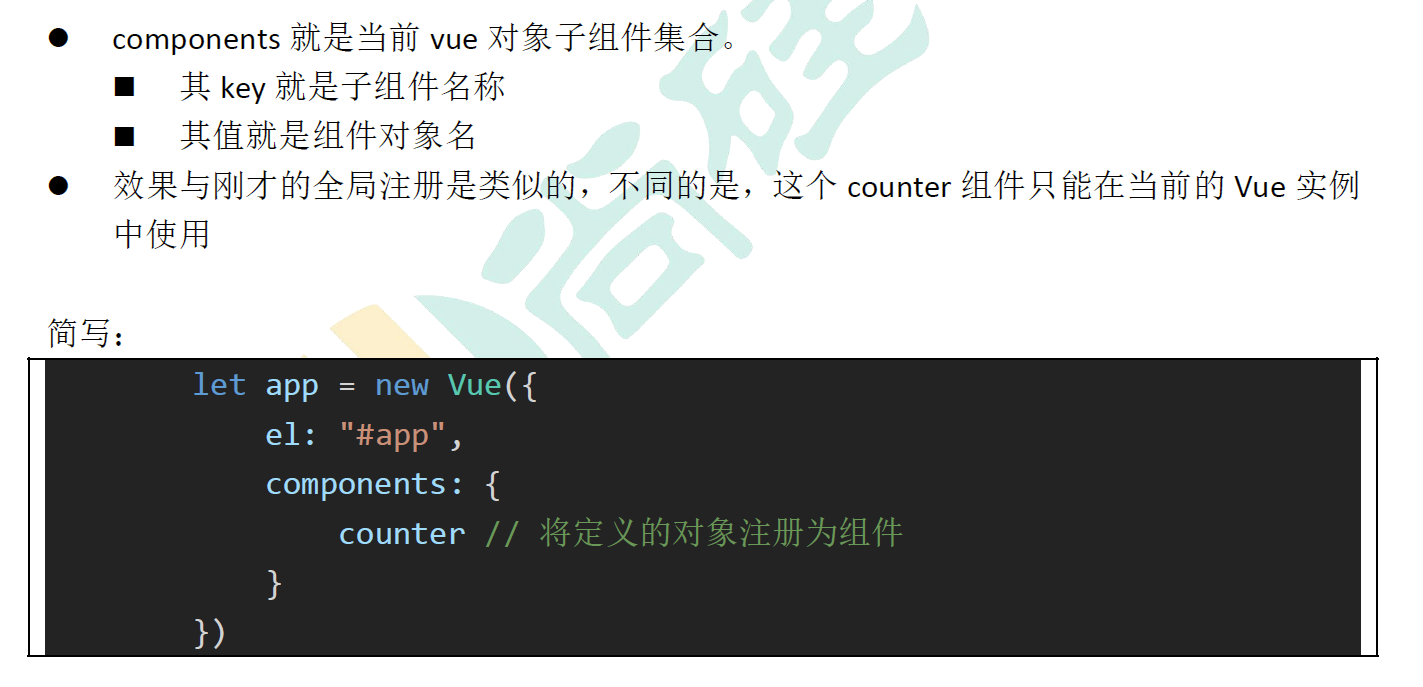
8、生命周期钩子函数
1、生命周期
每个Vue 实例在被创建时都要经过一系列的初始化过程:创建实例,装载模板,渲染模板等等。Vue 为生命周期中的每个状态都设置了钩子函数(监听函数)。每当Vue 实例处于不同的生命周期时,对应的函数就会被触发调用。
生命周期:你不需要立马弄明白所有的东西。
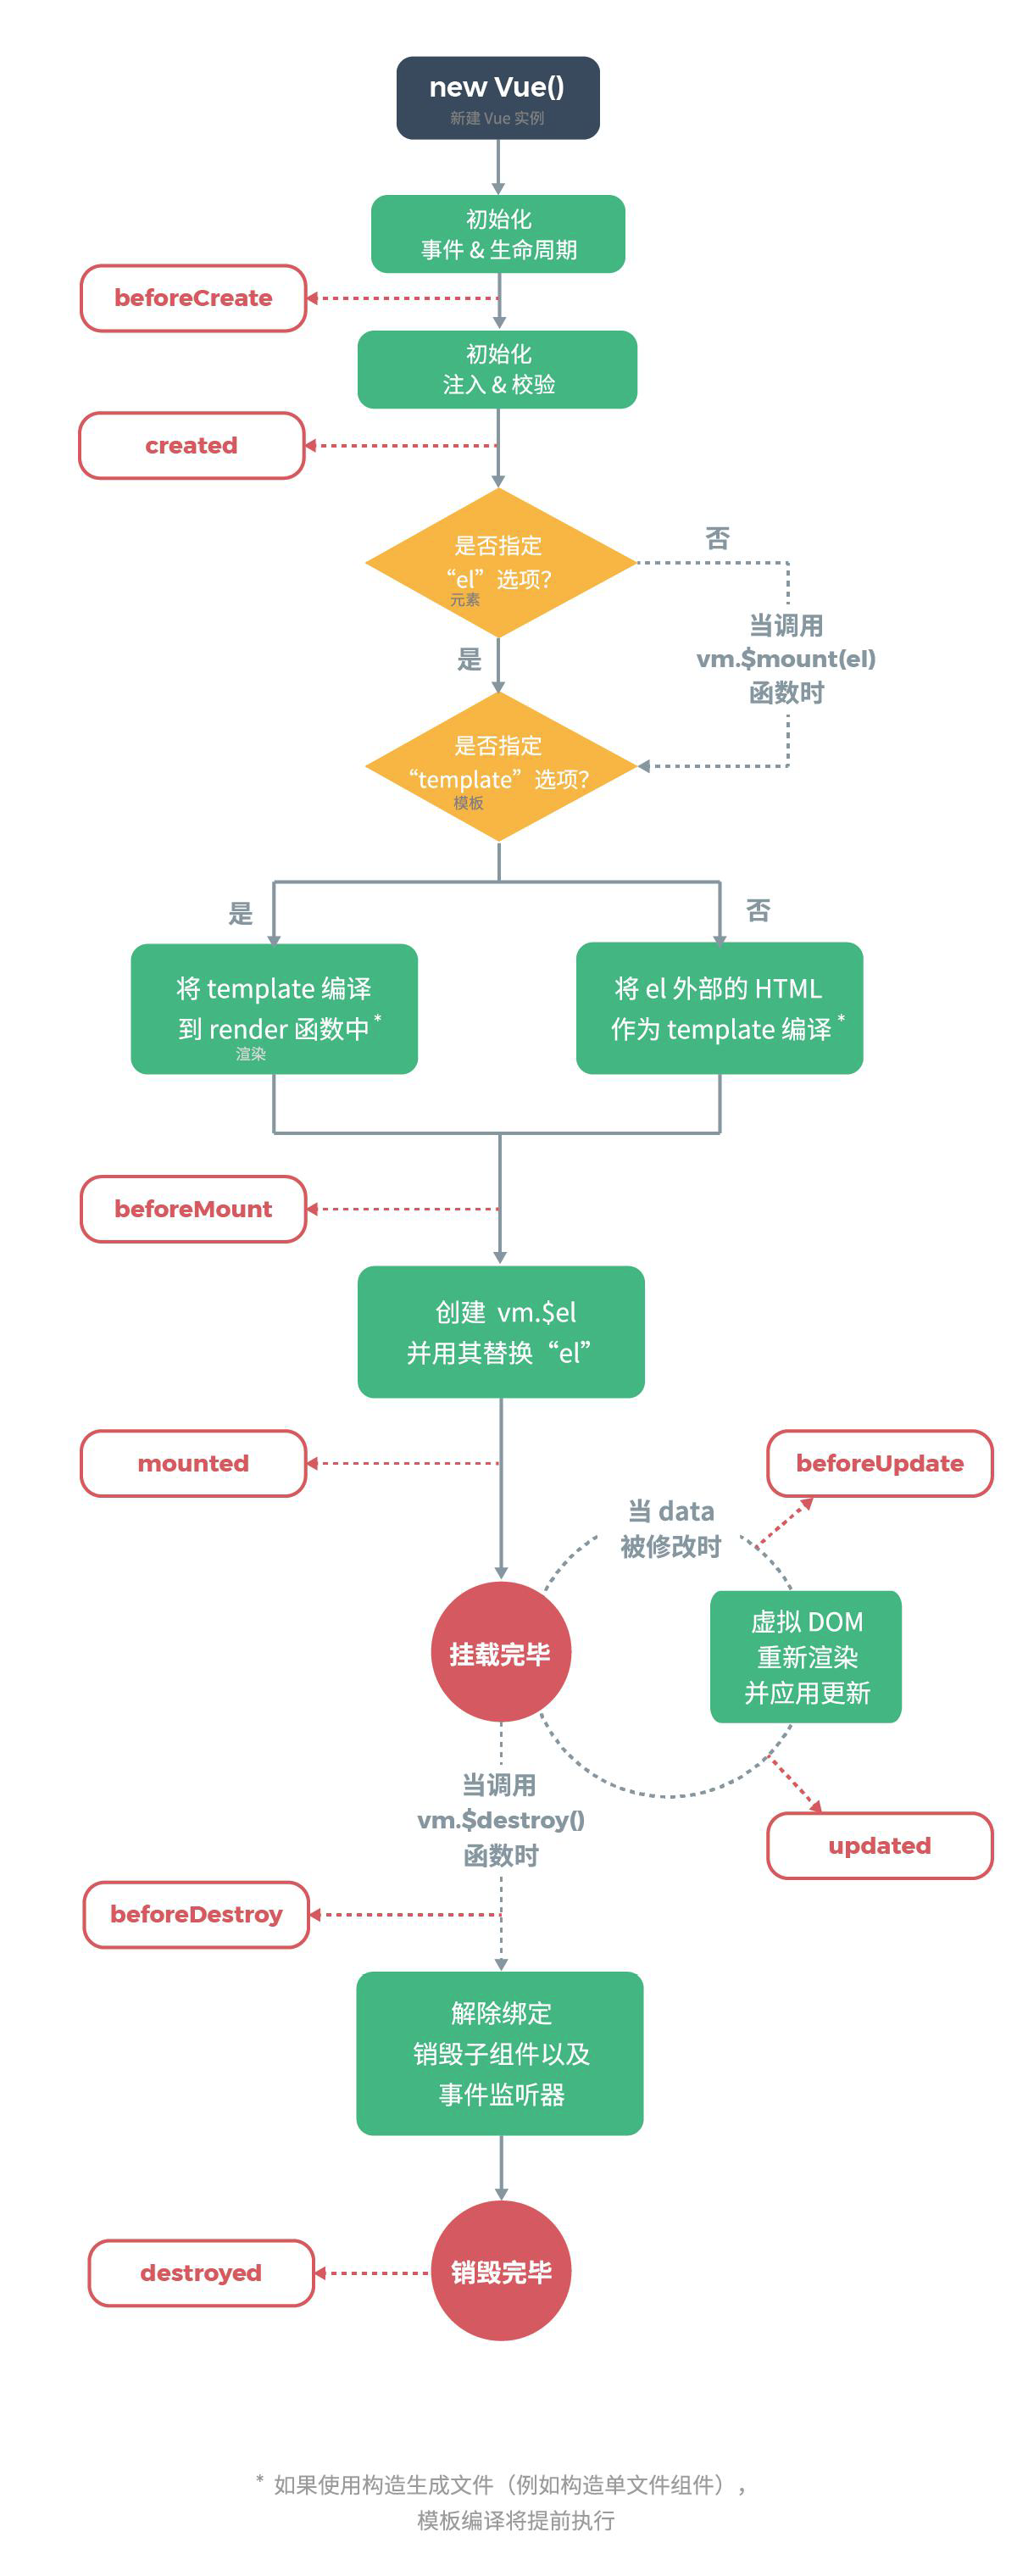
2、钩子函数
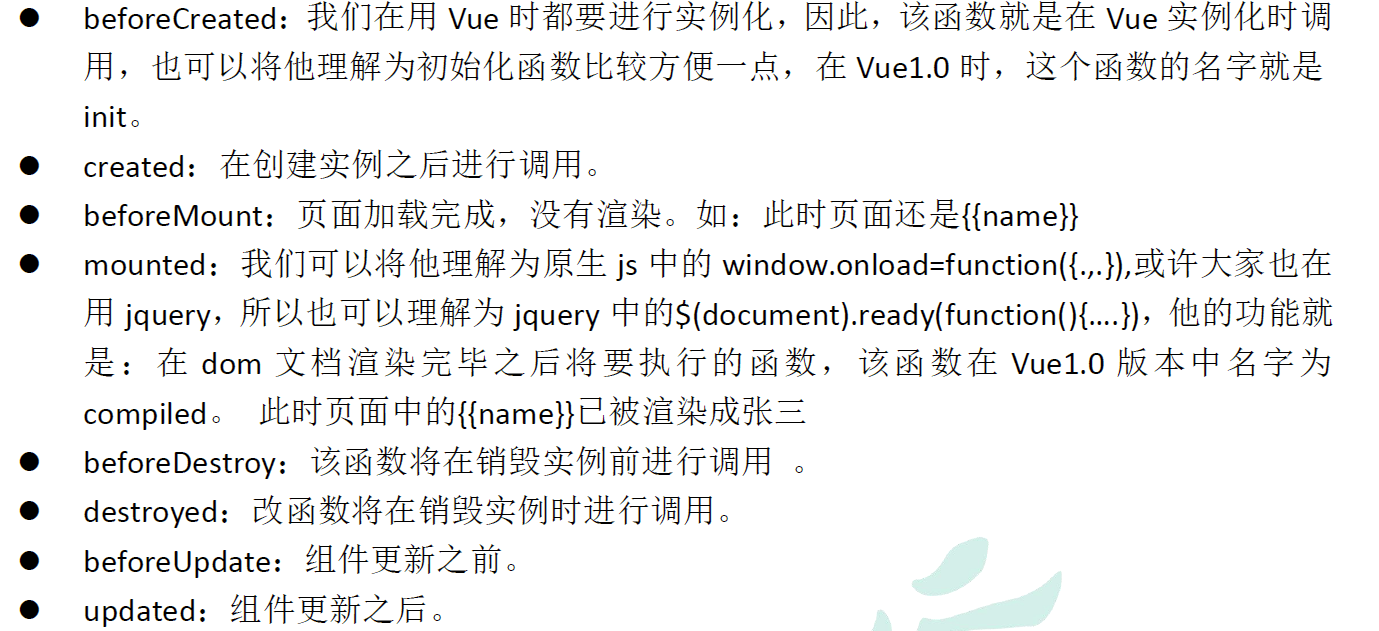
示例
<body>
    <div id="app">
        <span id="num">{{num}}</span>
        <button v-on:click="num++">赞!</button>
        <h2>
            {{name}},非常帅!!!有{{num}}个人点赞。
        </h2>
    </div>
</body>
<script src="../node_modules/vue/dist/vue.js"></script>
<script>
    let app = new Vue({
        el: "#app",
        data: {
            name: "张三",
            num: 100
        },
        methods: {
            show() {
                return this.name;
            },
            add() {
                this.num++;
            }
        },
        beforeCreate() {
            console.log("=========beforeCreate=============");
            console.log("数据模型未加载:" + this.name, this.num);
            console.log("方法未加载:" + this.show());
            console.log("html 模板未加载:" + document.getElementById("num"));
        },
        created: function () {
            console.log("=========created=============");
            console.log("数据模型已加载:" + this.name, this.num);
            console.log("方法已加载:" + this.show());
            console.log("html 模板已加载:" + document.getElementById("num"));
            console.log("html 模板未渲染:" + document.getElementById("num").innerText);
        },
        beforeMount() {
            console.log("=========beforeMount=============");
            console.log("html 模板未渲染:" + document.getElementById("num").innerText);
        },
        mounted() {
            console.log("=========mounted=============");
            console.log("html 模板已渲染:" + document.getElementById("num").innerText);
        },
        beforeUpdate() {
            console.log("=========beforeUpdate=============");
            console.log("数据模型已更新:" + this.num);
            console.log("html 模板未更新:" + document.getElementById("num").innerText);
        },
        updated() {
            console.log("=========updated=============");
            console.log("数据模型已更新:" + this.num);
            console.log("html 模板已更新:" + document.getElementById("num").innerText);
        }
    });
</script>

</body>
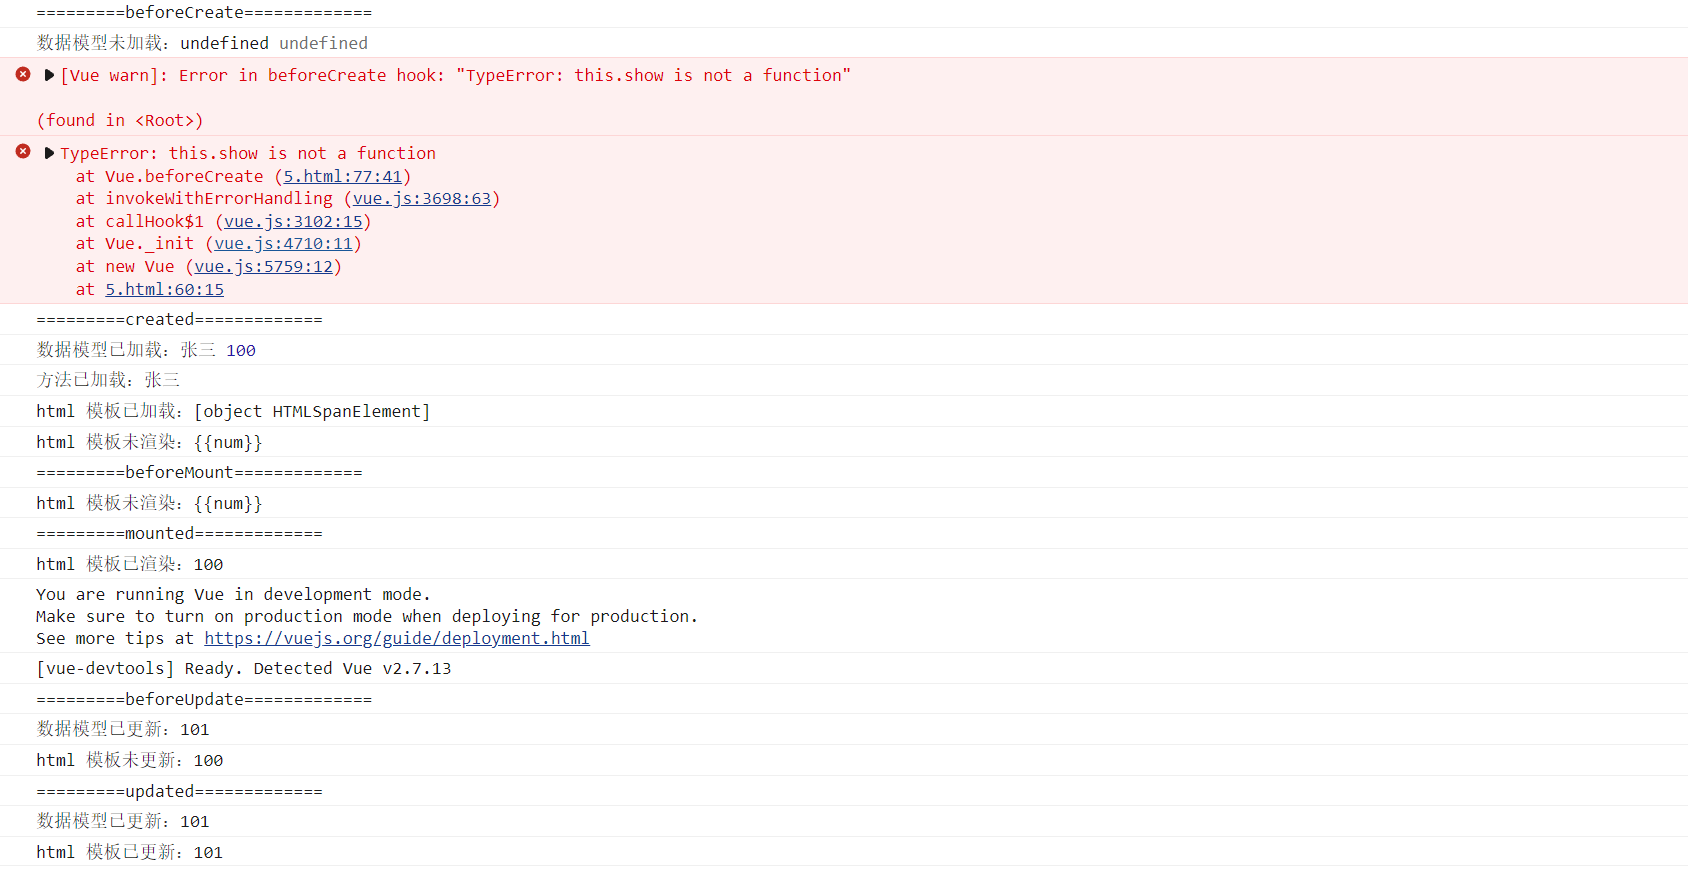
9、vue 模块化开发
1、npm install webpack -g
全局安装 webpack
2、npm install -g @vue/cli-init
全局安装 vue 脚手架
3、初始化vue 项目
vue init webpack appname:vue 脚手架使用webpack 模板初始化一个appname 项目

注意:
如果一直卡在downloading template,配置淘宝镜像
npm config set chromedriver_cdnurl https://npm.taobao.org/mirrors/chromedriver
4、启动vue 项目
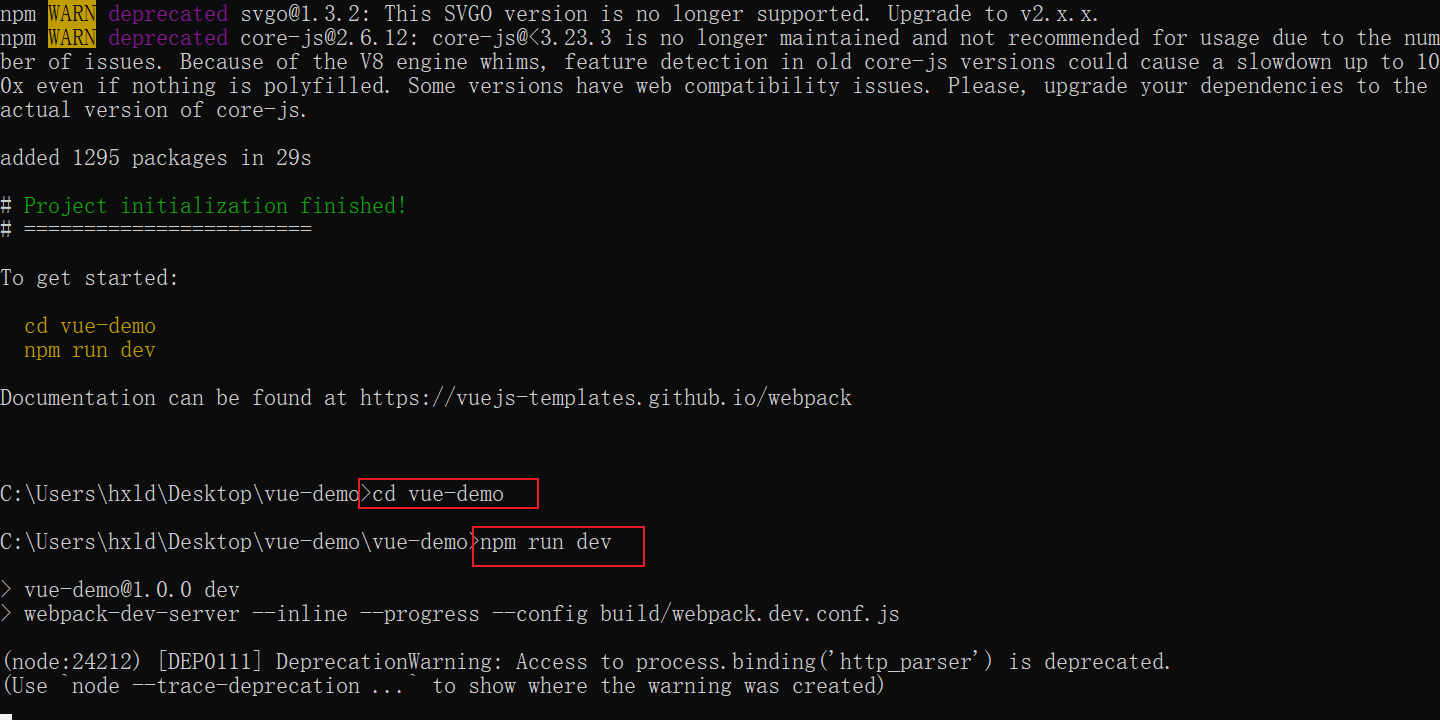
启动成功。
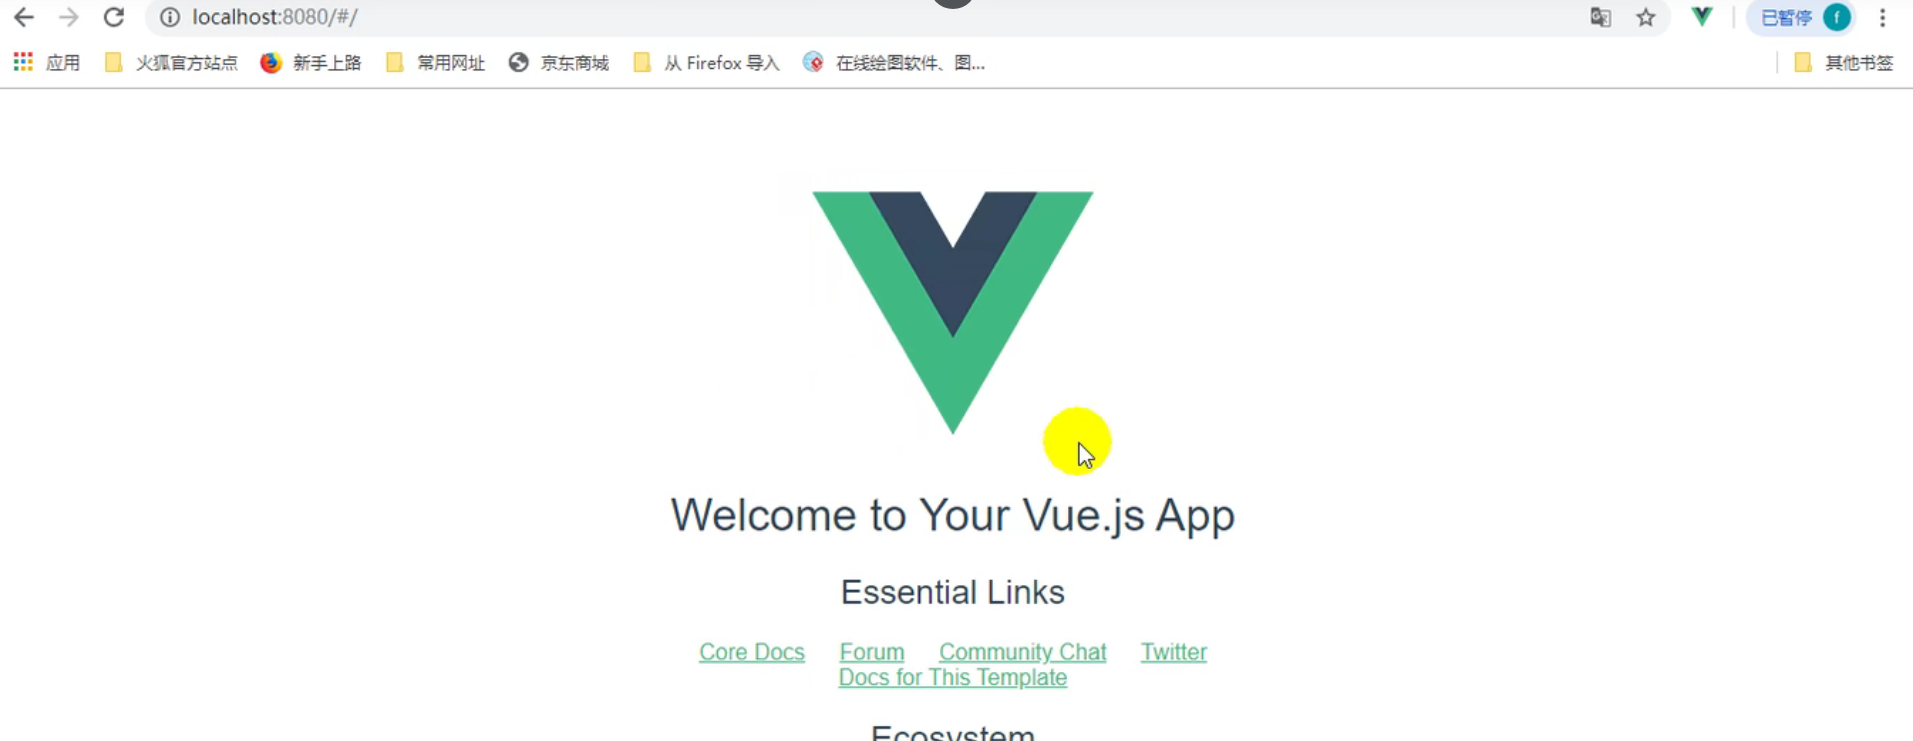
项目的 package.json 中有 scripts,代表我们能运行的命令
npm start = npm run dev:启动项目
npm run build:将项目打包
5、模块化开发
1、项目结构
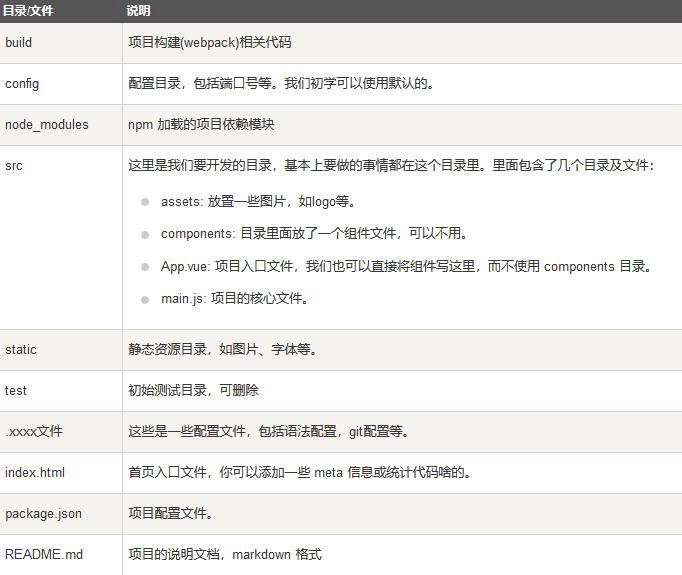
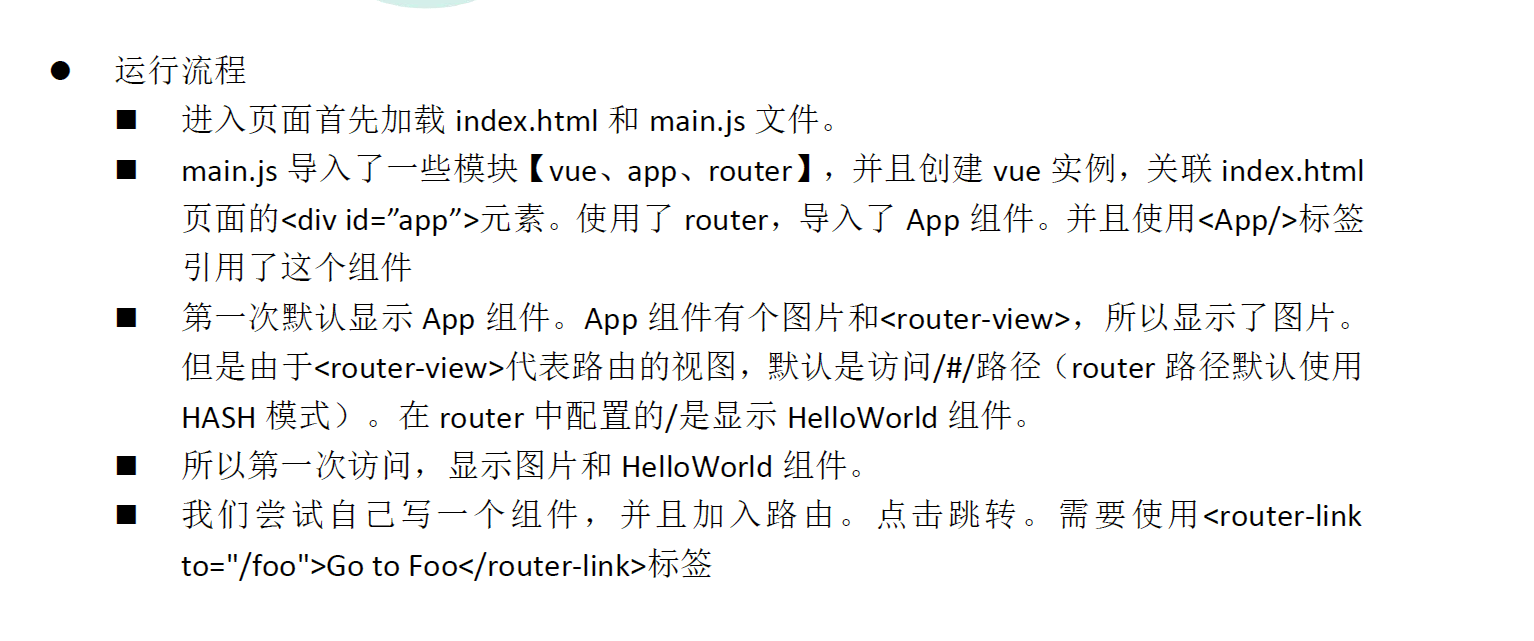
2、Vue 单文件组件
Vue 单文件组件模板有三个部分;
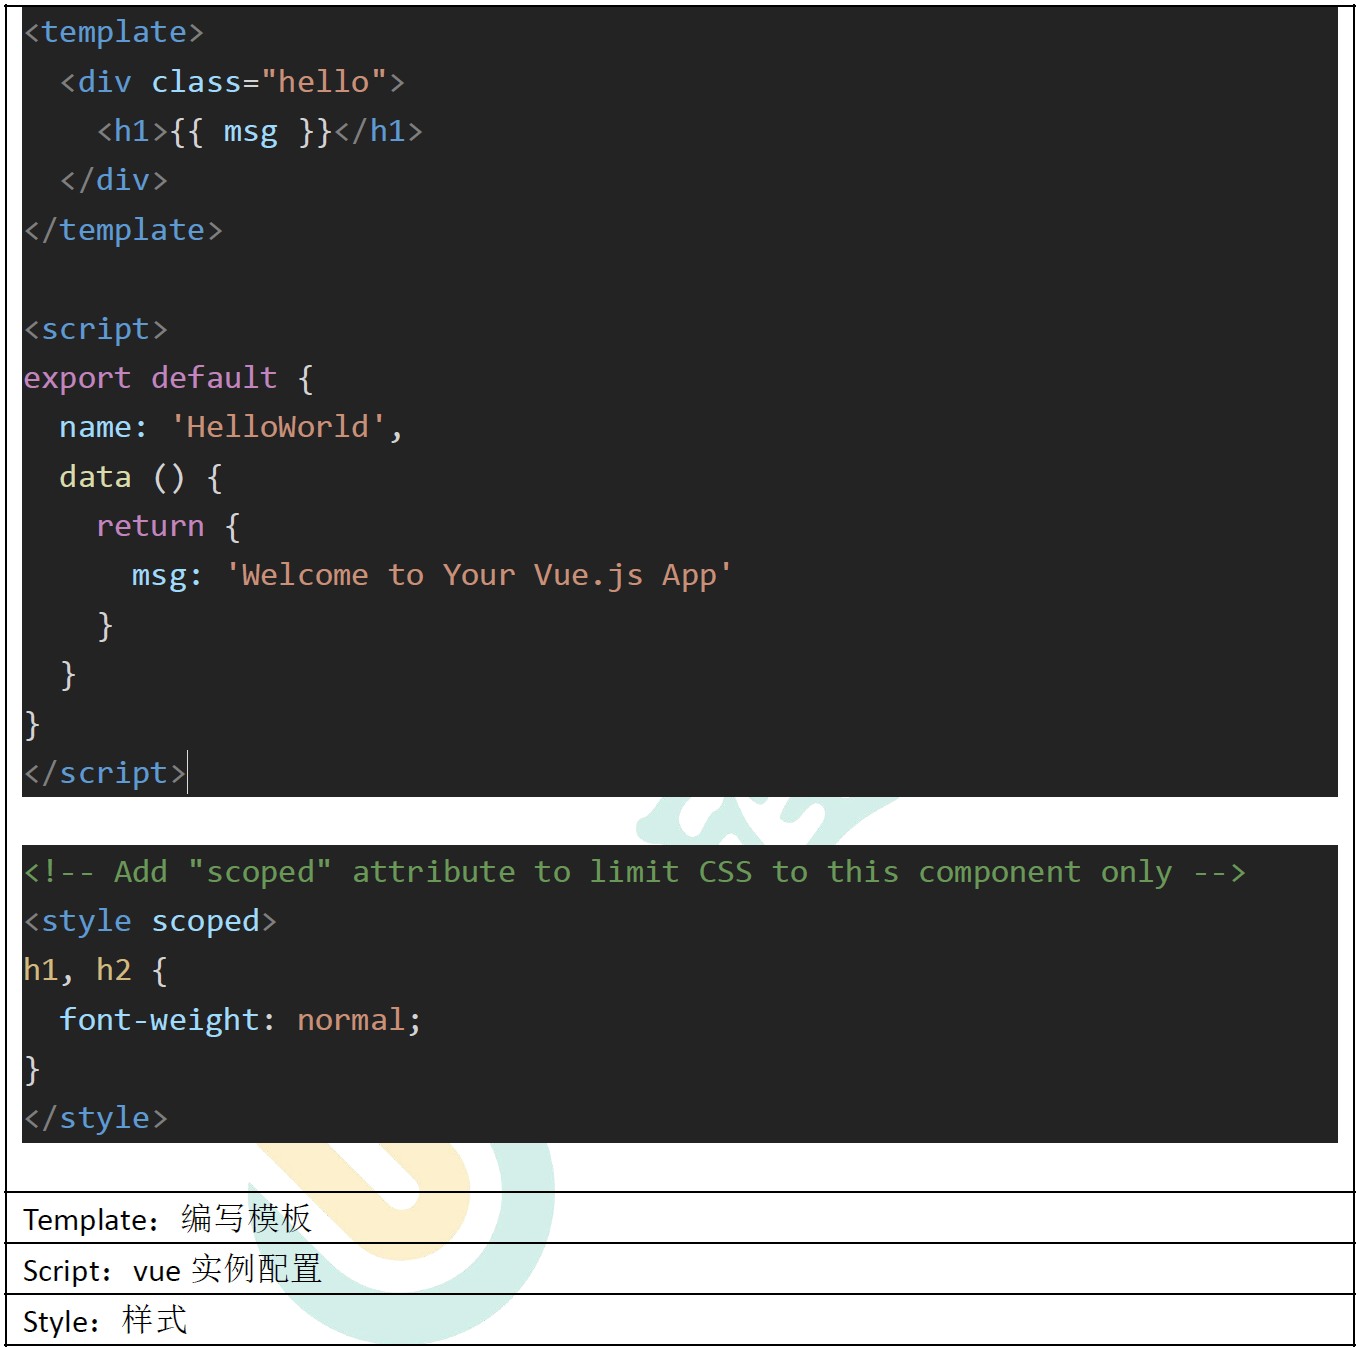
3、vscode 添加用户代码片段(快速生成vue 模板)

{
"生成vue 模板": {
"prefix": "vue",
"body": [
"<template>",
"<div></div>",
"</template>",
"",
"<script>",
"//这里可以导入其他文件(比如:组件,工具js,第三方插件js,json
文件,图片文件等等)",
"//例如:import 《组件名称》from '《组件路径》';",
"",
"export default {",
"//import 引入的组件需要注入到对象中才能使用",
"components: {},",
"props: {},",
"data() {",
"//这里存放数据",
"return {",
"",
"};",
"},",
"//计算属性类似于data 概念",
"computed: {},",
"//监控data 中的数据变化",
"watch: {},",
"//方法集合",
"methods: {",
"",
"},",
"//生命周期- 创建完成(可以访问当前this 实例)",
"created() {",
"",
"},",
"//生命周期- 挂载完成(可以访问DOM 元素)",
"mounted() {",
"",
"},",
"beforeCreate() {}, //生命周期- 创建之前",
"beforeMount() {}, //生命周期- 挂载之前",
"beforeUpdate() {}, //生命周期- 更新之前",
"updated() {}, //生命周期- 更新之后",
"beforeDestroy() {}, //生命周期- 销毁之前",
"destroyed() {}, //生命周期- 销毁完成",
"activated() {}, //如果页面有keep-alive 缓存功能,这个函数会触发
",
"}",
"</script>",
"<style lang='scss' scoped>",
"//@import url($3); 引入公共css 类",
"$4",
"</style>"
],
"description": "生成vue 模板"
}
}
在创建组件时直接输入vue点击回车就可生成模板
4、导入element-ui 快速开发
官方文档:https://element.eleme.cn/#/zh-CN/component/installation
-
安装element-ui:
npm i element-ui -
在main.js 中引入element-ui 就可以全局使用了。
import ElementUI from 'element-ui'
import 'element-ui/lib/theme-chalk/index.css'

Vue.use(ElementUI)
然后就可以使用elementui之中的组件。
-
将 App.vue 改为 element-ui 中的后台布局
-
添加测试路由、组件,测试跳转逻辑
(1) 、参照文档el-menu 添加 router 属性把
<el-main>中的数据列表换成路由视图<router-view></router-view>
(2) 、参照文档 el-menu-item 指定 index 需要跳转的地址
- 新建MyTable组件,用来显示用户数据
<!-- --> <template> <div class=""> <el-table :data="tableData"> <el-table-column prop="date" label="日期" width="140"> </el-table-column> <el-table-column prop="name" label="姓名" width="120"> </el-table-column> <el-table-column prop="address" label="地址"> </el-table-column> </el-table> </div> </template> <script> export default { data() { const item = { date: "2016-05-02", name: "王小虎", address: "上海市普陀区金沙江路 1518 弄", }; return { tableData: Array(20).fill(item), }; }, }; </script> <style scoped> </style>- 添加路由规则
   import MyTable from '@/components/MyTable'


   	{
         path: '/mytable',
         name: "mytable",
         components: MyTable
       }
3. 修改App.vue 
5.5 Babel
Babel 是一个JavaScript 编译器,我们可以使用es 的最新语法编程,而不用担心浏览器兼
容问题。他会自动转化为浏览器兼容的代码
5.6 Webpack
自动化项目构建工具。gulp 也是同类产品。
6 商品服务
6.1 三级分类

商城的商品页面展示是一个三级分类的。有一级分类、二级分类、三级分类。这就是我们接下来要进行的操作。
6.1.1 数据库
- 首先我们在
gulimall_pms这个数据库中的pms_category这个表下插入数据
DROP TABLE IF EXISTS `pms_category`;

CREATE TABLE `pms_category` (
  `cat_id` bigint(20) NOT NULL AUTO_INCREMENT COMMENT '分类id',
  `name` char(50) DEFAULT NULL COMMENT '分类名称',
  `parent_cid` bigint(20) DEFAULT NULL COMMENT '父分类id',
  `cat_level` int(11) DEFAULT NULL COMMENT '层级',
  `show_status` tinyint(4) DEFAULT NULL COMMENT '是否显示[0-不显示,1显示]',
  `sort` int(11) DEFAULT NULL COMMENT '排序',
  `icon` char(255) DEFAULT NULL COMMENT '图标地址',
  `product_unit` char(50) DEFAULT NULL COMMENT '计量单位',
  `product_count` int(11) DEFAULT NULL COMMENT '商品数量',
  PRIMARY KEY (`cat_id`)
) ENGINE=InnoDB AUTO_INCREMENT=1433 DEFAULT CHARSET=utf8mb4 COMMENT='商品三级分类';

/*Data for the table `pms_category` */

insert  into `pms_category`(`cat_id`,`name`,`parent_cid`,`cat_level`,`show_status`,`sort`,`icon`,`product_unit`,`product_count`) values (1,'图书、音像、电子书刊',0,1,1,0,NULL,NULL,0),(2,'手机',0,1,1,0,NULL,NULL,0),(3,'家用电器',0,1,1,0,NULL,NULL,0),(4,'数码',0,1,1,0,NULL,NULL,0),(5,'家居家装',0,1,1,0,NULL,NULL,0),(6,'电脑办公',0,1,1,0,NULL,NULL,0),(7,'厨具',0,1,1,0,NULL,NULL,0),(8,'个护化妆',0,1,1,0,NULL,NULL,0),(9,'服饰内衣',0,1,1,0,NULL,NULL,0),(10,'钟表',0,1,1,0,NULL,NULL,0),(11,'鞋靴',0,1,1,0,NULL,NULL,0),(12,'母婴',0,1,1,0,NULL,NULL,0),(13,'礼品箱包',0,1,1,0,NULL,NULL,0),(14,'食品饮料、保健食品',0,1,1,0,NULL,NULL,0),(15,'珠宝',0,1,1,0,NULL,NULL,0),(16,'汽车用品',0,1,1,0,NULL,NULL,0),(17,'运动健康',0,1,1,0,NULL,NULL,0),(18,'玩具乐器',0,1,1,0,NULL,NULL,0),(19,'彩票、旅行、充值、票务',0,1,1,0,NULL,NULL,0),(20,'生鲜',0,1,1,0,NULL,NULL,0),(21,'整车',0,1,1,0,NULL,NULL,0),(22,'电子书刊',1,2,1,0,NULL,NULL,0),(23,'音像',1,2,1,0,NULL,NULL,0),(24,'英文原版',1,2,1,0,NULL,NULL,0),(25,'文艺',1,2,1,0,NULL,NULL,0),(26,'少儿',1,2,1,0,NULL,NULL,0),(27,'人文社科',1,2,1,0,NULL,NULL,0),(28,'经管励志',1,2,1,0,NULL,NULL,0),(29,'生活',1,2,1,0,NULL,NULL,0),(30,'科技',1,2,1,0,NULL,NULL,0),(31,'教育',1,2,1,0,NULL,NULL,0),(32,'港台图书',1,2,1,0,NULL,NULL,0),(33,'其他',1,2,1,0,NULL,NULL,0),(34,'手机通讯',2,2,1,0,NULL,NULL,0),(35,'运营商',2,2,1,0,NULL,NULL,0),(36,'手机配件',2,2,1,0,NULL,NULL,0),(37,'大 家 电',3,2,1,0,NULL,NULL,0),(38,'厨卫大电',3,2,1,0,NULL,NULL,0),(39,'厨房小电',3,2,1,0,NULL,NULL,0),(40,'生活电器',3,2,1,0,NULL,NULL,0),(41,'个护健康',3,2,1,0,NULL,NULL,0),(42,'五金家装',3,2,1,0,NULL,NULL,0),(43,'摄影摄像',4,2,1,0,NULL,NULL,0),(44,'数码配件',4,2,1,0,NULL,NULL,0),(45,'智能设备',4,2,1,0,NULL,NULL,0),(46,'影音娱乐',4,2,1,0,NULL,NULL,0),(47,'电子教育',4,2,1,0,NULL,NULL,0),(48,'虚拟商品',4,2,1,0,NULL,NULL,0),(49,'家纺',5,2,1,0,NULL,NULL,0),(50,'灯具',5,2,1,0,NULL,NULL,0),(51,'生活日用',5,2,1,0,NULL,NULL,0),(52,'家装软饰',5,2,1,0,NULL,NULL,0),(53,'宠物生活',5,2,1,0,NULL,NULL,0),(54,'电脑整机',6,2,1,0,NULL,NULL,0),(55,'电脑配件',6,2,1,0,NULL,NULL,0),(56,'外设产品',6,2,1,0,NULL,NULL,0),(57,'游戏设备',6,2,1,0,NULL,NULL,0),(58,'网络产品',6,2,1,0,NULL,NULL,0),(59,'办公设备',6,2,1,0,NULL,NULL,0),(60,'文具/耗材',6,2,1,0,NULL,NULL,0),(61,'服务产品',6,2,1,0,NULL,NULL,0),(62,'烹饪锅具',7,2,1,0,NULL,NULL,0),(63,'刀剪菜板',7,2,1,0,NULL,NULL,0),(64,'厨房配件',7,2,1,0,NULL,NULL,0),(65,'水具酒具',7,2,1,0,NULL,NULL,0),(66,'餐具',7,2,1,0,NULL,NULL,0),(67,'酒店用品',7,2,1,0,NULL,NULL,0),(68,'茶具/咖啡具',7,2,1,0,NULL,NULL,0),(69,'清洁用品',8,2,1,0,NULL,NULL,0),(70,'面部护肤',8,2,1,0,NULL,NULL,0),(71,'身体护理',8,2,1,0,NULL,NULL,0),(72,'口腔护理',8,2,1,0,NULL,NULL,0),(73,'女性护理',8,2,1,0,NULL,NULL,0),(74,'洗发护发',8,2,1,0,NULL,NULL,0),(75,'香水彩妆',8,2,1,0,NULL,NULL,0),(76,'女装',9,2,1,0,NULL,NULL,0),(77,'男装',9,2,1,0,NULL,NULL,0),(78,'内衣',9,2,1,0,NULL,NULL,0),(79,'洗衣服务',9,2,1,0,NULL,NULL,0),(80,'服饰配件',9,2,1,0,NULL,NULL,0),(81,'钟表',10,2,1,0,NULL,NULL,0),(82,'流行男鞋',11,2,1,0,NULL,NULL,0),(83,'时尚女鞋',11,2,1,0,NULL,NULL,0),(84,'奶粉',12,2,1,0,NULL,NULL,0),(85,'营养辅食',12,2,1,0,NULL,NULL,0),(86,'尿裤湿巾',12,2,1,0,NULL,NULL,0),(87,'喂养用品',12,2,1,0,NULL,NULL,0),(88,'洗护用品',12,2,1,0,NULL,NULL,0),(89,'童车童床',12,2,1,0,NULL,NULL,0),(90,'寝居服饰',12,2,1,0,NULL,NULL,0),(91,'妈妈专区',12,2,1,0,NULL,NULL,0),(92,'童装童鞋',12,2,1,0,NULL,NULL,0),(93,'安全座椅',12,2,1,0,NULL,NULL,0),(94,'潮流女包',13,2,1,0,NULL,NULL,0),(95,'精品男包',13,2,1,0,NULL,NULL,0),(96,'功能箱包',13,2,1,0,NULL,NULL,0),(97,'礼品',13,2,1,0,NULL,NULL,0),(98,'奢侈品',13,2,1,0,NULL,NULL,0),(99,'婚庆',13,2,1,0,NULL,NULL,0),(100,'进口食品',14,2,1,0,NULL,NULL,0),(101,'地方特产',14,2,1,0,NULL,NULL,0),(102,'休闲食品',14,2,1,0,NULL,NULL,0),(103,'粮油调味',14,2,1,0,NULL,NULL,0),(104,'饮料冲调',14,2,1,0,NULL,NULL,0),(105,'食品礼券',14,2,1,0,NULL,NULL,0),(106,'茗茶',14,2,1,0,NULL,NULL,0),(107,'时尚饰品',15,2,1,0,NULL,NULL,0),(108,'黄金',15,2,1,0,NULL,NULL,0),(109,'K金饰品',15,2,1,0,NULL,NULL,0),(110,'金银投资',15,2,1,0,NULL,NULL,0),(111,'银饰',15,2,1,0,NULL,NULL,0),(112,'钻石',15,2,1,0,NULL,NULL,0),(113,'翡翠玉石',15,2,1,0,NULL,NULL,0),(114,'水晶玛瑙',15,2,1,0,NULL,NULL,0),(115,'彩宝',15,2,1,0,NULL,NULL,0),(116,'铂金',15,2,1,0,NULL,NULL,0),(117,'木手串/把件',15,2,1,0,NULL,NULL,0),(118,'珍珠',15,2,1,0,NULL,NULL,0),(119,'维修保养',16,2,1,0,NULL,NULL,0),(120,'车载电器',16,2,1,0,NULL,NULL,0),(121,'美容清洗',16,2,1,0,NULL,NULL,0),(122,'汽车装饰',16,2,1,0,NULL,NULL,0),(123,'安全自驾',16,2,1,0,NULL,NULL,0),(124,'汽车服务',16,2,1,0,NULL,NULL,0),(125,'赛事改装',16,2,1,0,NULL,NULL,0),(126,'运动鞋包',17,2,1,0,NULL,NULL,0),(127,'运动服饰',17,2,1,0,NULL,NULL,0),(128,'骑行运动',17,2,1,0,NULL,NULL,0),(129,'垂钓用品',17,2,1,0,NULL,NULL,0),(130,'游泳用品',17,2,1,0,NULL,NULL,0),(131,'户外鞋服',17,2,1,0,NULL,NULL,0),(132,'户外装备',17,2,1,0,NULL,NULL,0),(133,'健身训练',17,2,1,0,NULL,NULL,0),(134,'体育用品',17,2,1,0,NULL,NULL,0),(135,'适用年龄',18,2,1,0,NULL,NULL,0),(136,'遥控/电动',18,2,1,0,NULL,NULL,0),(137,'毛绒布艺',18,2,1,0,NULL,NULL,0),(138,'娃娃玩具',18,2,1,0,NULL,NULL,0),(139,'模型玩具',18,2,1,0,NULL,NULL,0),(140,'健身玩具',18,2,1,0,NULL,NULL,0),(141,'动漫玩具',18,2,1,0,NULL,NULL,0),(142,'益智玩具',18,2,1,0,NULL,NULL,0),(143,'积木拼插',18,2,1,0,NULL,NULL,0),(144,'DIY玩具',18,2,1,0,NULL,NULL,0),(145,'创意减压',18,2,1,0,NULL,NULL,0),(146,'乐器',18,2,1,0,NULL,NULL,0),(147,'彩票',19,2,1,0,NULL,NULL,0),(148,'机票',19,2,1,0,NULL,NULL,0),(149,'酒店',19,2,1,0,NULL,NULL,0),(150,'旅行',19,2,1,0,NULL,NULL,0),(151,'充值',19,2,1,0,NULL,NULL,0),(152,'游戏',19,2,1,0,NULL,NULL,0),(153,'票务',19,2,1,0,NULL,NULL,0),(154,'产地直供',20,2,1,0,NULL,NULL,0),(155,'水果',20,2,1,0,NULL,NULL,0),(156,'猪牛羊肉',20,2,1,0,NULL,NULL,0),(157,'海鲜水产',20,2,1,0,NULL,NULL,0),(158,'禽肉蛋品',20,2,1,0,NULL,NULL,0),(159,'冷冻食品',20,2,1,0,NULL,NULL,0),(160,'熟食腊味',20,2,1,0,NULL,NULL,0),(161,'饮品甜品',20,2,1,0,NULL,NULL,0),(162,'蔬菜',20,2,1,0,NULL,NULL,0),(163,'全新整车',21,2,1,0,NULL,NULL,0),(164,'二手车',21,2,1,0,NULL,NULL,0),(165,'电子书',22,3,1,0,NULL,NULL,0),(166,'网络原创',22,3,1,0,NULL,NULL,0),(167,'数字杂志',22,3,1,0,NULL,NULL,0),(168,'多媒体图书',22,3,1,0,NULL,NULL,0),(169,'音乐',23,3,1,0,NULL,NULL,0),(170,'影视',23,3,1,0,NULL,NULL,0),(171,'教育音像',23,3,1,0,NULL,NULL,0),(172,'少儿',24,3,1,0,NULL,NULL,0),(173,'商务投资',24,3,1,0,NULL,NULL,0),(174,'英语学习与考试',24,3,1,0,NULL,NULL,0),(175,'文学',24,3,1,0,NULL,NULL,0),(176,'传记',24,3,1,0,NULL,NULL,0),(177,'励志',24,3,1,0,NULL,NULL,0),(178,'小说',25,3,1,0,NULL,NULL,0),(179,'文学',25,3,1,0,NULL,NULL,0),(180,'青春文学',25,3,1,0,NULL,NULL,0),(181,'传记',25,3,1,0,NULL,NULL,0),(182,'艺术',25,3,1,0,NULL,NULL,0),(183,'少儿',26,3,1,0,NULL,NULL,0),(184,'0-2岁',26,3,1,0,NULL,NULL,0),(185,'3-6岁',26,3,1,0,NULL,NULL,0),(186,'7-10岁',26,3,1,0,NULL,NULL,0),(187,'11-14岁',26,3,1,0,NULL,NULL,0),(188,'历史',27,3,1,0,NULL,NULL,0),(189,'哲学',27,3,1,0,NULL,NULL,0),(190,'国学',27,3,1,0,NULL,NULL,0),(191,'政治/军事',27,3,1,0,NULL,NULL,0),(192,'法律',27,3,1,0,NULL,NULL,0),(193,'人文社科',27,3,1,0,NULL,NULL,0),(194,'心理学',27,3,1,0,NULL,NULL,0),(195,'文化',27,3,1,0,NULL,NULL,0),(196,'社会科学',27,3,1,0,NULL,NULL,0),(197,'经济',28,3,1,0,NULL,NULL,0),(198,'金融与投资',28,3,1,0,NULL,NULL,0),(199,'管理',28,3,1,0,NULL,NULL,0),(200,'励志与成功',28,3,1,0,NULL,NULL,0),(201,'生活',29,3,1,0,NULL,NULL,0),(202,'健身与保健',29,3,1,0,NULL,NULL,0),(203,'家庭与育儿',29,3,1,0,NULL,NULL,0),(204,'旅游',29,3,1,0,NULL,NULL,0),(205,'烹饪美食',29,3,1,0,NULL,NULL,0),(206,'工业技术',30,3,1,0,NULL,NULL,0),(207,'科普读物',30,3,1,0,NULL,NULL,0),(208,'建筑',30,3,1,0,NULL,NULL,0),(209,'医学',30,3,1,0,NULL,NULL,0),(210,'科学与自然',30,3,1,0,NULL,NULL,0),(211,'计算机与互联网',30,3,1,0,NULL,NULL,0),(212,'电子通信',30,3,1,0,NULL,NULL,0),(213,'中小学教辅',31,3,1,0,NULL,NULL,0),(214,'教育与考试',31,3,1,0,NULL,NULL,0),(215,'外语学习',31,3,1,0,NULL,NULL,0),(216,'大中专教材',31,3,1,0,NULL,NULL,0),(217,'字典词典',31,3,1,0,NULL,NULL,0),(218,'艺术/设计/收藏',32,3,1,0,NULL,NULL,0),(219,'经济管理',32,3,1,0,NULL,NULL,0),(220,'文化/学术',32,3,1,0,NULL,NULL,0),(221,'少儿',32,3,1,0,NULL,NULL,0),(222,'工具书',33,3,1,0,NULL,NULL,0),(223,'杂志/期刊',33,3,1,0,NULL,NULL,0),(224,'套装书',33,3,1,0,NULL,NULL,0),(225,'手机',34,3,1,0,NULL,NULL,0),(226,'对讲机',34,3,1,0,NULL,NULL,0),(227,'合约机',35,3,1,0,NULL,NULL,0),(228,'选号中心',35,3,1,0,NULL,NULL,0),(229,'装宽带',35,3,1,0,NULL,NULL,0),(230,'办套餐',35,3,1,0,NULL,NULL,0),(231,'移动电源',36,3,1,0,NULL,NULL,0),(232,'电池/移动电源',36,3,1,0,NULL,NULL,0),(233,'蓝牙耳机',36,3,1,0,NULL,NULL,0),(234,'充电器/数据线',36,3,1,0,NULL,NULL,0),(235,'苹果周边',36,3,1,0,NULL,NULL,0),(236,'手机耳机',36,3,1,0,NULL,NULL,0),(237,'手机贴膜',36,3,1,0,NULL,NULL,0),(238,'手机存储卡',36,3,1,0,NULL,NULL,0),(239,'充电器',36,3,1,0,NULL,NULL,0),(240,'数据线',36,3,1,0,NULL,NULL,0),(241,'手机保护套',36,3,1,0,NULL,NULL,0),(242,'车载配件',36,3,1,0,NULL,NULL,0),(243,'iPhone 配件',36,3,1,0,NULL,NULL,0),(244,'手机电池',36,3,1,0,NULL,NULL,0),(245,'创意配件',36,3,1,0,NULL,NULL,0),(246,'便携/无线音响',36,3,1,0,NULL,NULL,0),(247,'手机饰品',36,3,1,0,NULL,NULL,0),(248,'拍照配件',36,3,1,0,NULL,NULL,0),(249,'手机支架',36,3,1,0,NULL,NULL,0),(250,'平板电视',37,3,1,0,NULL,NULL,0),(251,'空调',37,3,1,0,NULL,NULL,0),(252,'冰箱',37,3,1,0,NULL,NULL,0),(253,'洗衣机',37,3,1,0,NULL,NULL,0),(254,'家庭影院',37,3,1,0,NULL,NULL,0),(255,'DVD/电视盒子',37,3,1,0,NULL,NULL,0),(256,'迷你音响',37,3,1,0,NULL,NULL,0),(257,'冷柜/冰吧',37,3,1,0,NULL,NULL,0),(258,'家电配件',37,3,1,0,NULL,NULL,0),(259,'功放',37,3,1,0,NULL,NULL,0),(260,'回音壁/Soundbar',37,3,1,0,NULL,NULL,0),(261,'Hi-Fi专区',37,3,1,0,NULL,NULL,0),(262,'电视盒子',37,3,1,0,NULL,NULL,0),(263,'酒柜',37,3,1,0,NULL,NULL,0),(264,'燃气灶',38,3,1,0,NULL,NULL,0),(265,'油烟机',38,3,1,0,NULL,NULL,0),(266,'热水器',38,3,1,0,NULL,NULL,0),(267,'消毒柜',38,3,1,0,NULL,NULL,0),(268,'洗碗机',38,3,1,0,NULL,NULL,0),(269,'料理机',39,3,1,0,NULL,NULL,0),(270,'榨汁机',39,3,1,0,NULL,NULL,0),(271,'电饭煲',39,3,1,0,NULL,NULL,0),(272,'电压力锅',39,3,1,0,NULL,NULL,0),(273,'豆浆机',39,3,1,0,NULL,NULL,0),(274,'咖啡机',39,3,1,0,NULL,NULL,0),(275,'微波炉',39,3,1,0,NULL,NULL,0),(276,'电烤箱',39,3,1,0,NULL,NULL,0),(277,'电磁炉',39,3,1,0,NULL,NULL,0),(278,'面包机',39,3,1,0,NULL,NULL,0),(279,'煮蛋器',39,3,1,0,NULL,NULL,0),(280,'酸奶机',39,3,1,0,NULL,NULL,0),(281,'电炖锅',39,3,1,0,NULL,NULL,0),(282,'电水壶/热水瓶',39,3,1,0,NULL,NULL,0),(283,'电饼铛',39,3,1,0,NULL,NULL,0),(284,'多用途锅',39,3,1,0,NULL,NULL,0),(285,'电烧烤炉',39,3,1,0,NULL,NULL,0),(286,'果蔬解毒机',39,3,1,0,NULL,NULL,0),(287,'其它厨房电器',39,3,1,0,NULL,NULL,0),(288,'养生壶/煎药壶',39,3,1,0,NULL,NULL,0),(289,'电热饭盒',39,3,1,0,NULL,NULL,0),(290,'取暖电器',40,3,1,0,NULL,NULL,0),(291,'净化器',40,3,1,0,NULL,NULL,0),(292,'加湿器',40,3,1,0,NULL,NULL,0),(293,'扫地机器人',40,3,1,0,NULL,NULL,0),(294,'吸尘器',40,3,1,0,NULL,NULL,0),(295,'挂烫机/熨斗',40,3,1,0,NULL,NULL,0),(296,'插座',40,3,1,0,NULL,NULL,0),(297,'电话机',40,3,1,0,NULL,NULL,0),(298,'清洁机',40,3,1,0,NULL,NULL,0),(299,'除湿机',40,3,1,0,NULL,NULL,0),(300,'干衣机',40,3,1,0,NULL,NULL,0),(301,'收录/音机',40,3,1,0,NULL,NULL,0),(302,'电风扇',40,3,1,0,NULL,NULL,0),(303,'冷风扇',40,3,1,0,NULL,NULL,0),(304,'其它生活电器',40,3,1,0,NULL,NULL,0),(305,'生活电器配件',40,3,1,0,NULL,NULL,0),(306,'净水器',40,3,1,0,NULL,NULL,0),(307,'饮水机',40,3,1,0,NULL,NULL,0),(308,'剃须刀',41,3,1,0,NULL,NULL,0),(309,'剃/脱毛器',41,3,1,0,NULL,NULL,0),(310,'口腔护理',41,3,1,0,NULL,NULL,0),(311,'电吹风',41,3,1,0,NULL,NULL,0),(312,'美容器',41,3,1,0,NULL,NULL,0),(313,'理发器',41,3,1,0,NULL,NULL,0),(314,'卷/直发器',41,3,1,0,NULL,NULL,0),(315,'按摩椅',41,3,1,0,NULL,NULL,0),(316,'按摩器',41,3,1,0,NULL,NULL,0),(317,'足浴盆',41,3,1,0,NULL,NULL,0),(318,'血压计',41,3,1,0,NULL,NULL,0),(319,'电子秤/厨房秤',41,3,1,0,NULL,NULL,0),(320,'血糖仪',41,3,1,0,NULL,NULL,0),(321,'体温计',41,3,1,0,NULL,NULL,0),(322,'其它健康电器',41,3,1,0,NULL,NULL,0),(323,'计步器/脂肪检测仪',41,3,1,0,NULL,NULL,0),(324,'电动工具',42,3,1,0,NULL,NULL,0),(325,'手动工具',42,3,1,0,NULL,NULL,0),(326,'仪器仪表',42,3,1,0,NULL,NULL,0),(327,'浴霸/排气扇',42,3,1,0,NULL,NULL,0),(328,'灯具',42,3,1,0,NULL,NULL,0),(329,'LED灯',42,3,1,0,NULL,NULL,0),(330,'洁身器',42,3,1,0,NULL,NULL,0),(331,'水槽',42,3,1,0,NULL,NULL,0),(332,'龙头',42,3,1,0,NULL,NULL,0),(333,'淋浴花洒',42,3,1,0,NULL,NULL,0),(334,'厨卫五金',42,3,1,0,NULL,NULL,0),(335,'家具五金',42,3,1,0,NULL,NULL,0),(336,'门铃',42,3,1,0,NULL,NULL,0),(337,'电气开关',42,3,1,0,NULL,NULL,0),(338,'插座',42,3,1,0,NULL,NULL,0),(339,'电工电料',42,3,1,0,NULL,NULL,0),(340,'监控安防',42,3,1,0,NULL,NULL,0),(341,'电线/线缆',42,3,1,0,NULL,NULL,0),(342,'数码相机',43,3,1,0,NULL,NULL,0),(343,'单电/微单相机',43,3,1,0,NULL,NULL,0),(344,'单反相机',43,3,1,0,NULL,NULL,0),(345,'摄像机',43,3,1,0,NULL,NULL,0),(346,'拍立得',43,3,1,0,NULL,NULL,0),(347,'运动相机',43,3,1,0,NULL,NULL,0),(348,'镜头',43,3,1,0,NULL,NULL,0),(349,'户外器材',43,3,1,0,NULL,NULL,0),(350,'影棚器材',43,3,1,0,NULL,NULL,0),(351,'冲印服务',43,3,1,0,NULL,NULL,0),(352,'数码相框',43,3,1,0,NULL,NULL,0),(353,'存储卡',44,3,1,0,NULL,NULL,0),(354,'读卡器',44,3,1,0,NULL,NULL,0),(355,'滤镜',44,3,1,0,NULL,NULL,0),(356,'闪光灯/手柄',44,3,1,0,NULL,NULL,0),(357,'相机包',44,3,1,0,NULL,NULL,0),(358,'三脚架/云台',44,3,1,0,NULL,NULL,0),(359,'相机清洁/贴膜',44,3,1,0,NULL,NULL,0),(360,'机身附件',44,3,1,0,NULL,NULL,0),(361,'镜头附件',44,3,1,0,NULL,NULL,0),(362,'电池/充电器',44,3,1,0,NULL,NULL,0),(363,'移动电源',44,3,1,0,NULL,NULL,0),(364,'数码支架',44,3,1,0,NULL,NULL,0),(365,'智能手环',45,3,1,0,NULL,NULL,0),(366,'智能手表',45,3,1,0,NULL,NULL,0),(367,'智能眼镜',45,3,1,0,NULL,NULL,0),(368,'运动跟踪器',45,3,1,0,NULL,NULL,0),(369,'健康监测',45,3,1,0,NULL,NULL,0),(370,'智能配饰',45,3,1,0,NULL,NULL,0),(371,'智能家居',45,3,1,0,NULL,NULL,0),(372,'体感车',45,3,1,0,NULL,NULL,0),(373,'其他配件',45,3,1,0,NULL,NULL,0),(374,'智能机器人',45,3,1,0,NULL,NULL,0),(375,'无人机',45,3,1,0,NULL,NULL,0),(376,'MP3/MP4',46,3,1,0,NULL,NULL,0),(377,'智能设备',46,3,1,0,NULL,NULL,0),(378,'耳机/耳麦',46,3,1,0,NULL,NULL,0),(379,'便携/无线音箱',46,3,1,0,NULL,NULL,0),(380,'音箱/音响',46,3,1,0,NULL,NULL,0),(381,'高清播放器',46,3,1,0,NULL,NULL,0),(382,'收音机',46,3,1,0,NULL,NULL,0),(383,'MP3/MP4配件',46,3,1,0,NULL,NULL,0),(384,'麦克风',46,3,1,0,NULL,NULL,0),(385,'专业音频',46,3,1,0,NULL,NULL,0),(386,'苹果配件',46,3,1,0,NULL,NULL,0),(387,'学生平板',47,3,1,0,NULL,NULL,0),(388,'点读机/笔',47,3,1,0,NULL,NULL,0),(389,'早教益智',47,3,1,0,NULL,NULL,0),(390,'录音笔',47,3,1,0,NULL,NULL,0),(391,'电纸书',47,3,1,0,NULL,NULL,0),(392,'电子词典',47,3,1,0,NULL,NULL,0),(393,'复读机',47,3,1,0,NULL,NULL,0),(394,'延保服务',48,3,1,0,NULL,NULL,0),(395,'杀毒软件',48,3,1,0,NULL,NULL,0),(396,'积分商品',48,3,1,0,NULL,NULL,0),(397,'桌布/罩件',49,3,1,0,NULL,NULL,0),(398,'地毯地垫',49,3,1,0,NULL,NULL,0),(399,'沙发垫套/椅垫',49,3,1,0,NULL,NULL,0),(400,'床品套件',49,3,1,0,NULL,NULL,0),(401,'被子',49,3,1,0,NULL,NULL,0),(402,'枕芯',49,3,1,0,NULL,NULL,0),(403,'床单被罩',49,3,1,0,NULL,NULL,0),(404,'毯子',49,3,1,0,NULL,NULL,0),(405,'床垫/床褥',49,3,1,0,NULL,NULL,0),(406,'蚊帐',49,3,1,0,NULL,NULL,0),(407,'抱枕靠垫',49,3,1,0,NULL,NULL,0),(408,'毛巾浴巾',49,3,1,0,NULL,NULL,0),(409,'电热毯',49,3,1,0,NULL,NULL,0),(410,'窗帘/窗纱',49,3,1,0,NULL,NULL,0),(411,'布艺软饰',49,3,1,0,NULL,NULL,0),(412,'凉席',49,3,1,0,NULL,NULL,0),(413,'台灯',50,3,1,0,NULL,NULL,0),(414,'节能灯',50,3,1,0,NULL,NULL,0),(415,'装饰灯',50,3,1,0,NULL,NULL,0),(416,'落地灯',50,3,1,0,NULL,NULL,0),(417,'应急灯/手电',50,3,1,0,NULL,NULL,0),(418,'LED灯',50,3,1,0,NULL,NULL,0),(419,'吸顶灯',50,3,1,0,NULL,NULL,0),(420,'五金电器',50,3,1,0,NULL,NULL,0),(421,'筒灯射灯',50,3,1,0,NULL,NULL,0),(422,'吊灯',50,3,1,0,NULL,NULL,0),(423,'氛围照明',50,3,1,0,NULL,NULL,0),(424,'保暖防护',51,3,1,0,NULL,NULL,0),(425,'收纳用品',51,3,1,0,NULL,NULL,0),(426,'雨伞雨具',51,3,1,0,NULL,NULL,0),(427,'浴室用品',51,3,1,0,NULL,NULL,0),(428,'缝纫/针织用品',51,3,1,0,NULL,NULL,0),(429,'洗晒/熨烫',51,3,1,0,NULL,NULL,0),(430,'净化除味',51,3,1,0,NULL,NULL,0),(431,'相框/照片墙',52,3,1,0,NULL,NULL,0),(432,'装饰字画',52,3,1,0,NULL,NULL,0),(433,'节庆饰品',52,3,1,0,NULL,NULL,0),(434,'手工/十字绣',52,3,1,0,NULL,NULL,0),(435,'装饰摆件',52,3,1,0,NULL,NULL,0),(436,'帘艺隔断',52,3,1,0,NULL,NULL,0),(437,'墙贴/装饰贴',52,3,1,0,NULL,NULL,0),(438,'钟饰',52,3,1,0,NULL,NULL,0),(439,'花瓶花艺',52,3,1,0,NULL,NULL,0),(440,'香薰蜡烛',52,3,1,0,NULL,NULL,0),(441,'创意家居',52,3,1,0,NULL,NULL,0),(442,'宠物主粮',53,3,1,0,NULL,NULL,0),(443,'宠物零食',53,3,1,0,NULL,NULL,0),(444,'医疗保健',53,3,1,0,NULL,NULL,0),(445,'家居日用',53,3,1,0,NULL,NULL,0),(446,'宠物玩具',53,3,1,0,NULL,NULL,0),(447,'出行装备',53,3,1,0,NULL,NULL,0),(448,'洗护美容',53,3,1,0,NULL,NULL,0),(449,'笔记本',54,3,1,0,NULL,NULL,0),(450,'超极本',54,3,1,0,NULL,NULL,0),(451,'游戏本',54,3,1,0,NULL,NULL,0),(452,'平板电脑',54,3,1,0,NULL,NULL,0),(453,'平板电脑配件',54,3,1,0,NULL,NULL,0),(454,'台式机',54,3,1,0,NULL,NULL,0),(455,'服务器/工作站',54,3,1,0,NULL,NULL,0),(456,'笔记本配件',54,3,1,0,NULL,NULL,0),(457,'一体机',54,3,1,0,NULL,NULL,0),(458,'CPU',55,3,1,0,NULL,NULL,0),(459,'主板',55,3,1,0,NULL,NULL,0),(460,'显卡',55,3,1,0,NULL,NULL,0),(461,'硬盘',55,3,1,0,NULL,NULL,0),(462,'SSD固态硬盘',55,3,1,0,NULL,NULL,0),(463,'内存',55,3,1,0,NULL,NULL,0),(464,'机箱',55,3,1,0,NULL,NULL,0),(465,'电源',55,3,1,0,NULL,NULL,0),(466,'显示器',55,3,1,0,NULL,NULL,0),(467,'刻录机/光驱',55,3,1,0,NULL,NULL,0),(468,'散热器',55,3,1,0,NULL,NULL,0),(469,'声卡/扩展卡',55,3,1,0,NULL,NULL,0),(470,'装机配件',55,3,1,0,NULL,NULL,0),(471,'组装电脑',55,3,1,0,NULL,NULL,0),(472,'移动硬盘',56,3,1,0,NULL,NULL,0),(473,'U盘',56,3,1,0,NULL,NULL,0),(474,'鼠标',56,3,1,0,NULL,NULL,0),(475,'键盘',56,3,1,0,NULL,NULL,0),(476,'鼠标垫',56,3,1,0,NULL,NULL,0),(477,'摄像头',56,3,1,0,NULL,NULL,0),(478,'手写板',56,3,1,0,NULL,NULL,0),(479,'硬盘盒',56,3,1,0,NULL,NULL,0),(480,'插座',56,3,1,0,NULL,NULL,0),(481,'线缆',56,3,1,0,NULL,NULL,0),(482,'UPS电源',56,3,1,0,NULL,NULL,0),(483,'电脑工具',56,3,1,0,NULL,NULL,0),(484,'游戏设备',56,3,1,0,NULL,NULL,0),(485,'电玩',56,3,1,0,NULL,NULL,0),(486,'电脑清洁',56,3,1,0,NULL,NULL,0),(487,'网络仪表仪器',56,3,1,0,NULL,NULL,0),(488,'游戏机',57,3,1,0,NULL,NULL,0),(489,'游戏耳机',57,3,1,0,NULL,NULL,0),(490,'手柄/方向盘',57,3,1,0,NULL,NULL,0),(491,'游戏软件',57,3,1,0,NULL,NULL,0),(492,'游戏周边',57,3,1,0,NULL,NULL,0),(493,'路由器',58,3,1,0,NULL,NULL,0),(494,'网卡',58,3,1,0,NULL,NULL,0),(495,'交换机',58,3,1,0,NULL,NULL,0),(496,'网络存储',58,3,1,0,NULL,NULL,0),(497,'4G/3G上网',58,3,1,0,NULL,NULL,0),(498,'网络盒子',58,3,1,0,NULL,NULL,0),(499,'网络配件',58,3,1,0,NULL,NULL,0),(500,'投影机',59,3,1,0,NULL,NULL,0),(501,'投影配件',59,3,1,0,NULL,NULL,0),(502,'多功能一体机',59,3,1,0,NULL,NULL,0),(503,'打印机',59,3,1,0,NULL,NULL,0),(504,'传真设备',59,3,1,0,NULL,NULL,0),(505,'验钞/点钞机',59,3,1,0,NULL,NULL,0),(506,'扫描设备',59,3,1,0,NULL,NULL,0),(507,'复合机',59,3,1,0,NULL,NULL,0),(508,'碎纸机',59,3,1,0,NULL,NULL,0),(509,'考勤机',59,3,1,0,NULL,NULL,0),(510,'收款/POS机',59,3,1,0,NULL,NULL,0),(511,'会议音频视频',59,3,1,0,NULL,NULL,0),(512,'保险柜',59,3,1,0,NULL,NULL,0),(513,'装订/封装机',59,3,1,0,NULL,NULL,0),(514,'安防监控',59,3,1,0,NULL,NULL,0),(515,'办公家具',59,3,1,0,NULL,NULL,0),(516,'白板',59,3,1,0,NULL,NULL,0),(517,'硒鼓/墨粉',60,3,1,0,NULL,NULL,0),(518,'墨盒',60,3,1,0,NULL,NULL,0),(519,'色带',60,3,1,0,NULL,NULL,0),(520,'纸类',60,3,1,0,NULL,NULL,0),(521,'办公文具',60,3,1,0,NULL,NULL,0),(522,'学生文具',60,3,1,0,NULL,NULL,0),(523,'财会用品',60,3,1,0,NULL,NULL,0),(524,'文件管理',60,3,1,0,NULL,NULL,0),(525,'本册/便签',60,3,1,0,NULL,NULL,0),(526,'计算器',60,3,1,0,NULL,NULL,0),(527,'笔类',60,3,1,0,NULL,NULL,0),(528,'画具画材',60,3,1,0,NULL,NULL,0),(529,'刻录碟片/附件',60,3,1,0,NULL,NULL,0),(530,'上门安装',61,3,1,0,NULL,NULL,0),(531,'延保服务',61,3,1,0,NULL,NULL,0),(532,'维修保养',61,3,1,0,NULL,NULL,0),(533,'电脑软件',61,3,1,0,NULL,NULL,0),(534,'京东服务',61,3,1,0,NULL,NULL,0),(535,'炒锅',62,3,1,0,NULL,NULL,0),(536,'煎锅',62,3,1,0,NULL,NULL,0),(537,'压力锅',62,3,1,0,NULL,NULL,0),(538,'蒸锅',62,3,1,0,NULL,NULL,0),(539,'汤锅',62,3,1,0,NULL,NULL,0),(540,'奶锅',62,3,1,0,NULL,NULL,0),(541,'锅具套装',62,3,1,0,NULL,NULL,0),(542,'煲类',62,3,1,0,NULL,NULL,0),(543,'水壶',62,3,1,0,NULL,NULL,0),(544,'火锅',62,3,1,0,NULL,NULL,0),(545,'菜刀',63,3,1,0,NULL,NULL,0),(546,'剪刀',63,3,1,0,NULL,NULL,0),(547,'刀具套装',63,3,1,0,NULL,NULL,0),(548,'砧板',63,3,1,0,NULL,NULL,0),(549,'瓜果刀/刨',63,3,1,0,NULL,NULL,0),(550,'多功能刀',63,3,1,0,NULL,NULL,0),(551,'保鲜盒',64,3,1,0,NULL,NULL,0),(552,'烘焙/烧烤',64,3,1,0,NULL,NULL,0),(553,'饭盒/提锅',64,3,1,0,NULL,NULL,0),(554,'储物/置物架',64,3,1,0,NULL,NULL,0),(555,'厨房DIY/小工具',64,3,1,0,NULL,NULL,0),(556,'塑料杯',65,3,1,0,NULL,NULL,0),(557,'运动水壶',65,3,1,0,NULL,NULL,0),(558,'玻璃杯',65,3,1,0,NULL,NULL,0),(559,'陶瓷/马克杯',65,3,1,0,NULL,NULL,0),(560,'保温杯',65,3,1,0,NULL,NULL,0),(561,'保温壶',65,3,1,0,NULL,NULL,0),(562,'酒杯/酒具',65,3,1,0,NULL,NULL,0),(563,'杯具套装',65,3,1,0,NULL,NULL,0),(564,'餐具套装',66,3,1,0,NULL,NULL,0),(565,'碗/碟/盘',66,3,1,0,NULL,NULL,0),(566,'筷勺/刀叉',66,3,1,0,NULL,NULL,0),(567,'一次性用品',66,3,1,0,NULL,NULL,0),(568,'果盘/果篮',66,3,1,0,NULL,NULL,0),(569,'自助餐炉',67,3,1,0,NULL,NULL,0),(570,'酒店餐具',67,3,1,0,NULL,NULL,0),(571,'酒店水具',67,3,1,0,NULL,NULL,0),(572,'整套茶具',68,3,1,0,NULL,NULL,0),(573,'茶杯',68,3,1,0,NULL,NULL,0),(574,'茶壶',68,3,1,0,NULL,NULL,0),(575,'茶盘茶托',68,3,1,0,NULL,NULL,0),(576,'茶叶罐',68,3,1,0,NULL,NULL,0),(577,'茶具配件',68,3,1,0,NULL,NULL,0),(578,'茶宠摆件',68,3,1,0,NULL,NULL,0),(579,'咖啡具',68,3,1,0,NULL,NULL,0),(580,'其他',68,3,1,0,NULL,NULL,0),(581,'纸品湿巾',69,3,1,0,NULL,NULL,0),(582,'衣物清洁',69,3,1,0,NULL,NULL,0),(583,'清洁工具',69,3,1,0,NULL,NULL,0),(584,'驱虫用品',69,3,1,0,NULL,NULL,0),(585,'家庭清洁',69,3,1,0,NULL,NULL,0),(586,'皮具护理',69,3,1,0,NULL,NULL,0),(587,'一次性用品',69,3,1,0,NULL,NULL,0),(588,'洁面',70,3,1,0,NULL,NULL,0),(589,'乳液面霜',70,3,1,0,NULL,NULL,0),(590,'面膜',70,3,1,0,NULL,NULL,0),(591,'剃须',70,3,1,0,NULL,NULL,0),(592,'套装',70,3,1,0,NULL,NULL,0),(593,'精华',70,3,1,0,NULL,NULL,0),(594,'眼霜',70,3,1,0,NULL,NULL,0),(595,'卸妆',70,3,1,0,NULL,NULL,0),(596,'防晒',70,3,1,0,NULL,NULL,0),(597,'防晒隔离',70,3,1,0,NULL,NULL,0),(598,'T区护理',70,3,1,0,NULL,NULL,0),(599,'眼部护理',70,3,1,0,NULL,NULL,0),(600,'精华露',70,3,1,0,NULL,NULL,0),(601,'爽肤水',70,3,1,0,NULL,NULL,0),(602,'沐浴',71,3,1,0,NULL,NULL,0),(603,'润肤',71,3,1,0,NULL,NULL,0),(604,'颈部',71,3,1,0,NULL,NULL,0),(605,'手足',71,3,1,0,NULL,NULL,0),(606,'纤体塑形',71,3,1,0,NULL,NULL,0),(607,'美胸',71,3,1,0,NULL,NULL,0),(608,'套装',71,3,1,0,NULL,NULL,0),(609,'精油',71,3,1,0,NULL,NULL,0),(610,'洗发护发',71,3,1,0,NULL,NULL,0),(611,'染发/造型',71,3,1,0,NULL,NULL,0),(612,'香薰精油',71,3,1,0,NULL,NULL,0),(613,'磨砂/浴盐',71,3,1,0,NULL,NULL,0),(614,'手工/香皂',71,3,1,0,NULL,NULL,0),(615,'洗发',71,3,1,0,NULL,NULL,0),(616,'护发',71,3,1,0,NULL,NULL,0),(617,'染发',71,3,1,0,NULL,NULL,0),(618,'磨砂膏',71,3,1,0,NULL,NULL,0),(619,'香皂',71,3,1,0,NULL,NULL,0),(620,'牙膏/牙粉',72,3,1,0,NULL,NULL,0),(621,'牙刷/牙线',72,3,1,0,NULL,NULL,0),(622,'漱口水',72,3,1,0,NULL,NULL,0),(623,'套装',72,3,1,0,NULL,NULL,0),(624,'卫生巾',73,3,1,0,NULL,NULL,0),(625,'卫生护垫',73,3,1,0,NULL,NULL,0),(626,'私密护理',73,3,1,0,NULL,NULL,0),(627,'脱毛膏',73,3,1,0,NULL,NULL,0),(628,'其他',73,3,1,0,NULL,NULL,0),(629,'洗发',74,3,1,0,NULL,NULL,0),(630,'护发',74,3,1,0,NULL,NULL,0),(631,'染发',74,3,1,0,NULL,NULL,0),(632,'造型',74,3,1,0,NULL,NULL,0),(633,'假发',74,3,1,0,NULL,NULL,0),(634,'套装',74,3,1,0,NULL,NULL,0),(635,'美发工具',74,3,1,0,NULL,NULL,0),(636,'脸部护理',74,3,1,0,NULL,NULL,0),(637,'香水',75,3,1,0,NULL,NULL,0),(638,'底妆',75,3,1,0,NULL,NULL,0),(639,'腮红',75,3,1,0,NULL,NULL,0),(640,'眼影',75,3,1,0,NULL,NULL,0),(641,'唇部',75,3,1,0,NULL,NULL,0),(642,'美甲',75,3,1,0,NULL,NULL,0),(643,'眼线',75,3,1,0,NULL,NULL,0),(644,'美妆工具',75,3,1,0,NULL,NULL,0),(645,'套装',75,3,1,0,NULL,NULL,0),(646,'防晒隔离',75,3,1,0,NULL,NULL,0),(647,'卸妆',75,3,1,0,NULL,NULL,0),(648,'眉笔',75,3,1,0,NULL,NULL,0),(649,'睫毛膏',75,3,1,0,NULL,NULL,0),(650,'T恤',76,3,1,0,NULL,NULL,0),(651,'衬衫',76,3,1,0,NULL,NULL,0),(652,'针织衫',76,3,1,0,NULL,NULL,0),(653,'雪纺衫',76,3,1,0,NULL,NULL,0),(654,'卫衣',76,3,1,0,NULL,NULL,0),(655,'马甲',76,3,1,0,NULL,NULL,0),(656,'连衣裙',76,3,1,0,NULL,NULL,0),(657,'半身裙',76,3,1,0,NULL,NULL,0),(658,'牛仔裤',76,3,1,0,NULL,NULL,0),(659,'休闲裤',76,3,1,0,NULL,NULL,0),(660,'打底裤',76,3,1,0,NULL,NULL,0),(661,'正装裤',76,3,1,0,NULL,NULL,0),(662,'小西装',76,3,1,0,NULL,NULL,0),(663,'短外套',76,3,1,0,NULL,NULL,0),(664,'风衣',76,3,1,0,NULL,NULL,0),(665,'毛呢大衣',76,3,1,0,NULL,NULL,0),(666,'真皮皮衣',76,3,1,0,NULL,NULL,0),(667,'棉服',76,3,1,0,NULL,NULL,0),(668,'羽绒服',76,3,1,0,NULL,NULL,0),(669,'大码女装',76,3,1,0,NULL,NULL,0),(670,'中老年女装',76,3,1,0,NULL,NULL,0),(671,'婚纱',76,3,1,0,NULL,NULL,0),(672,'打底衫',76,3,1,0,NULL,NULL,0),(673,'旗袍/唐装',76,3,1,0,NULL,NULL,0),(674,'加绒裤',76,3,1,0,NULL,NULL,0),(675,'吊带/背心',76,3,1,0,NULL,NULL,0),(676,'羊绒衫',76,3,1,0,NULL,NULL,0),(677,'短裤',76,3,1,0,NULL,NULL,0),(678,'皮草',76,3,1,0,NULL,NULL,0),(679,'礼服',76,3,1,0,NULL,NULL,0),(680,'仿皮皮衣',76,3,1,0,NULL,NULL,0),(681,'羊毛衫',76,3,1,0,NULL,NULL,0),(682,'设计师/潮牌',76,3,1,0,NULL,NULL,0),(683,'衬衫',77,3,1,0,NULL,NULL,0),(684,'T恤',77,3,1,0,NULL,NULL,0),(685,'POLO衫',77,3,1,0,NULL,NULL,0),(686,'针织衫',77,3,1,0,NULL,NULL,0),(687,'羊绒衫',77,3,1,0,NULL,NULL,0),(688,'卫衣',77,3,1,0,NULL,NULL,0),(689,'马甲/背心',77,3,1,0,NULL,NULL,0),(690,'夹克',77,3,1,0,NULL,NULL,0),(691,'风衣',77,3,1,0,NULL,NULL,0),(692,'毛呢大衣',77,3,1,0,NULL,NULL,0),(693,'仿皮皮衣',77,3,1,0,NULL,NULL,0),(694,'西服',77,3,1,0,NULL,NULL,0),(695,'棉服',77,3,1,0,NULL,NULL,0),(696,'羽绒服',77,3,1,0,NULL,NULL,0),(697,'牛仔裤',77,3,1,0,NULL,NULL,0),(698,'休闲裤',77,3,1,0,NULL,NULL,0),(699,'西裤',77,3,1,0,NULL,NULL,0),(700,'西服套装',77,3,1,0,NULL,NULL,0),(701,'大码男装',77,3,1,0,NULL,NULL,0),(702,'中老年男装',77,3,1,0,NULL,NULL,0),(703,'唐装/中山装',77,3,1,0,NULL,NULL,0),(704,'工装',77,3,1,0,NULL,NULL,0),(705,'真皮皮衣',77,3,1,0,NULL,NULL,0),(706,'加绒裤',77,3,1,0,NULL,NULL,0),(707,'卫裤/运动裤',77,3,1,0,NULL,NULL,0),(708,'短裤',77,3,1,0,NULL,NULL,0),(709,'设计师/潮牌',77,3,1,0,NULL,NULL,0),(710,'羊毛衫',77,3,1,0,NULL,NULL,0),(711,'文胸',78,3,1,0,NULL,NULL,0),(712,'女式内裤',78,3,1,0,NULL,NULL,0),(713,'男式内裤',78,3,1,0,NULL,NULL,0),(714,'睡衣/家居服',78,3,1,0,NULL,NULL,0),(715,'塑身美体',78,3,1,0,NULL,NULL,0),(716,'泳衣',78,3,1,0,NULL,NULL,0),(717,'吊带/背心',78,3,1,0,NULL,NULL,0),(718,'抹胸',78,3,1,0,NULL,NULL,0),(719,'连裤袜/丝袜',78,3,1,0,NULL,NULL,0),(720,'美腿袜',78,3,1,0,NULL,NULL,0),(721,'商务男袜',78,3,1,0,NULL,NULL,0),(722,'保暖内衣',78,3,1,0,NULL,NULL,0),(723,'情侣睡衣',78,3,1,0,NULL,NULL,0),(724,'文胸套装',78,3,1,0,NULL,NULL,0),(725,'少女文胸',78,3,1,0,NULL,NULL,0),(726,'休闲棉袜',78,3,1,0,NULL,NULL,0),(727,'大码内衣',78,3,1,0,NULL,NULL,0),(728,'内衣配件',78,3,1,0,NULL,NULL,0),(729,'打底裤袜',78,3,1,0,NULL,NULL,0),(730,'打底衫',78,3,1,0,NULL,NULL,0),(731,'秋衣秋裤',78,3,1,0,NULL,NULL,0),(732,'情趣内衣',78,3,1,0,NULL,NULL,0),(733,'服装洗护',79,3,1,0,NULL,NULL,0),(734,'太阳镜',80,3,1,0,NULL,NULL,0),(735,'光学镜架/镜片',80,3,1,0,NULL,NULL,0),(736,'围巾/手套/帽子套装',80,3,1,0,NULL,NULL,0),(737,'袖扣',80,3,1,0,NULL,NULL,0),(738,'棒球帽',80,3,1,0,NULL,NULL,0),(739,'毛线帽',80,3,1,0,NULL,NULL,0),(740,'遮阳帽',80,3,1,0,NULL,NULL,0),(741,'老花镜',80,3,1,0,NULL,NULL,0),(742,'装饰眼镜',80,3,1,0,NULL,NULL,0),(743,'防辐射眼镜',80,3,1,0,NULL,NULL,0),(744,'游泳镜',80,3,1,0,NULL,NULL,0),(745,'女士丝巾/围巾/披肩',80,3,1,0,NULL,NULL,0),(746,'男士丝巾/围巾',80,3,1,0,NULL,NULL,0),(747,'鸭舌帽',80,3,1,0,NULL,NULL,0),(748,'贝雷帽',80,3,1,0,NULL,NULL,0),(749,'礼帽',80,3,1,0,NULL,NULL,0),(750,'真皮手套',80,3,1,0,NULL,NULL,0),(751,'毛线手套',80,3,1,0,NULL,NULL,0),(752,'防晒手套',80,3,1,0,NULL,NULL,0),(753,'男士腰带/礼盒',80,3,1,0,NULL,NULL,0),(754,'女士腰带/礼盒',80,3,1,0,NULL,NULL,0),(755,'钥匙扣',80,3,1,0,NULL,NULL,0),(756,'遮阳伞/雨伞',80,3,1,0,NULL,NULL,0),(757,'口罩',80,3,1,0,NULL,NULL,0),(758,'耳罩/耳包',80,3,1,0,NULL,NULL,0),(759,'假领',80,3,1,0,NULL,NULL,0),(760,'毛线/布面料',80,3,1,0,NULL,NULL,0),(761,'领带/领结/领带夹',80,3,1,0,NULL,NULL,0),(762,'男表',81,3,1,0,NULL,NULL,0),(763,'瑞表',81,3,1,0,NULL,NULL,0),(764,'女表',81,3,1,0,NULL,NULL,0),(765,'国表',81,3,1,0,NULL,NULL,0),(766,'日韩表',81,3,1,0,NULL,NULL,0),(767,'欧美表',81,3,1,0,NULL,NULL,0),(768,'德表',81,3,1,0,NULL,NULL,0),(769,'儿童手表',81,3,1,0,NULL,NULL,0),(770,'智能手表',81,3,1,0,NULL,NULL,0),(771,'闹钟',81,3,1,0,NULL,NULL,0),(772,'座钟挂钟',81,3,1,0,NULL,NULL,0),(773,'钟表配件',81,3,1,0,NULL,NULL,0),(774,'商务休闲鞋',82,3,1,0,NULL,NULL,0),(775,'正装鞋',82,3,1,0,NULL,NULL,0),(776,'休闲鞋',82,3,1,0,NULL,NULL,0),(777,'凉鞋/沙滩鞋',82,3,1,0,NULL,NULL,0),(778,'男靴',82,3,1,0,NULL,NULL,0),(779,'功能鞋',82,3,1,0,NULL,NULL,0),(780,'拖鞋/人字拖',82,3,1,0,NULL,NULL,0),(781,'雨鞋/雨靴',82,3,1,0,NULL,NULL,0),(782,'传统布鞋',82,3,1,0,NULL,NULL,0),(783,'鞋配件',82,3,1,0,NULL,NULL,0),(784,'帆布鞋',82,3,1,0,NULL,NULL,0),(785,'增高鞋',82,3,1,0,NULL,NULL,0),(786,'工装鞋',82,3,1,0,NULL,NULL,0),(787,'定制鞋',82,3,1,0,NULL,NULL,0),(788,'高跟鞋',83,3,1,0,NULL,NULL,0),(789,'单鞋',83,3,1,0,NULL,NULL,0),(790,'休闲鞋',83,3,1,0,NULL,NULL,0),(791,'凉鞋',83,3,1,0,NULL,NULL,0),(792,'女靴',83,3,1,0,NULL,NULL,0),(793,'雪地靴',83,3,1,0,NULL,NULL,0),(794,'拖鞋/人字拖',83,3,1,0,NULL,NULL,0),(795,'踝靴',83,3,1,0,NULL,NULL,0),(796,'筒靴',83,3,1,0,NULL,NULL,0),(797,'帆布鞋',83,3,1,0,NULL,NULL,0),(798,'雨鞋/雨靴',83,3,1,0,NULL,NULL,0),(799,'妈妈鞋',83,3,1,0,NULL,NULL,0),(800,'鞋配件',83,3,1,0,NULL,NULL,0),(801,'特色鞋',83,3,1,0,NULL,NULL,0),(802,'鱼嘴鞋',83,3,1,0,NULL,NULL,0),(803,'布鞋/绣花鞋',83,3,1,0,NULL,NULL,0),(804,'马丁靴',83,3,1,0,NULL,NULL,0),(805,'坡跟鞋',83,3,1,0,NULL,NULL,0),(806,'松糕鞋',83,3,1,0,NULL,NULL,0),(807,'内增高',83,3,1,0,NULL,NULL,0),(808,'防水台',83,3,1,0,NULL,NULL,0),(809,'婴幼奶粉',84,3,1,0,NULL,NULL,0),(810,'孕妈奶粉',84,3,1,0,NULL,NULL,0),(811,'益生菌/初乳',85,3,1,0,NULL,NULL,0),(812,'米粉/菜粉',85,3,1,0,NULL,NULL,0),(813,'果泥/果汁',85,3,1,0,NULL,NULL,0),(814,'DHA',85,3,1,0,NULL,NULL,0),(815,'宝宝零食',85,3,1,0,NULL,NULL,0),(816,'钙铁锌/维生素',85,3,1,0,NULL,NULL,0),(817,'清火/开胃',85,3,1,0,NULL,NULL,0),(818,'面条/粥',85,3,1,0,NULL,NULL,0),(819,'婴儿尿裤',86,3,1,0,NULL,NULL,0),(820,'拉拉裤',86,3,1,0,NULL,NULL,0),(821,'婴儿湿巾',86,3,1,0,NULL,NULL,0),(822,'成人尿裤',86,3,1,0,NULL,NULL,0),(823,'奶瓶奶嘴',87,3,1,0,NULL,NULL,0),(824,'吸奶器',87,3,1,0,NULL,NULL,0),(825,'暖奶消毒',87,3,1,0,NULL,NULL,0),(826,'儿童餐具',87,3,1,0,NULL,NULL,0),(827,'水壶/水杯',87,3,1,0,NULL,NULL,0),(828,'牙胶安抚',87,3,1,0,NULL,NULL,0),(829,'围兜/防溅衣',87,3,1,0,NULL,NULL,0),(830,'辅食料理机',87,3,1,0,NULL,NULL,0),(831,'食物存储',87,3,1,0,NULL,NULL,0),(832,'宝宝护肤',88,3,1,0,NULL,NULL,0),(833,'洗发沐浴',88,3,1,0,NULL,NULL,0),(834,'奶瓶清洗',88,3,1,0,NULL,NULL,0),(835,'驱蚊防晒',88,3,1,0,NULL,NULL,0),(836,'理发器',88,3,1,0,NULL,NULL,0),(837,'洗澡用具',88,3,1,0,NULL,NULL,0),(838,'婴儿口腔清洁',88,3,1,0,NULL,NULL,0),(839,'洗衣液/皂',88,3,1,0,NULL,NULL,0),(840,'日常护理',88,3,1,0,NULL,NULL,0),(841,'座便器',88,3,1,0,NULL,NULL,0),(842,'婴儿推车',89,3,1,0,NULL,NULL,0),(843,'餐椅摇椅',89,3,1,0,NULL,NULL,0),(844,'婴儿床',89,3,1,0,NULL,NULL,0),(845,'学步车',89,3,1,0,NULL,NULL,0),(846,'三轮车',89,3,1,0,NULL,NULL,0),(847,'自行车',89,3,1,0,NULL,NULL,0),(848,'电动车',89,3,1,0,NULL,NULL,0),(849,'扭扭车',89,3,1,0,NULL,NULL,0),(850,'滑板车',89,3,1,0,NULL,NULL,0),(851,'婴儿床垫',89,3,1,0,NULL,NULL,0),(852,'婴儿外出服',90,3,1,0,NULL,NULL,0),(853,'婴儿内衣',90,3,1,0,NULL,NULL,0),(854,'婴儿礼盒',90,3,1,0,NULL,NULL,0),(855,'婴儿鞋帽袜',90,3,1,0,NULL,NULL,0),(856,'安全防护',90,3,1,0,NULL,NULL,0),(857,'家居床品',90,3,1,0,NULL,NULL,0),(858,'睡袋/抱被',90,3,1,0,NULL,NULL,0),(859,'爬行垫',90,3,1,0,NULL,NULL,0),(860,'妈咪包/背婴带',91,3,1,0,NULL,NULL,0),(861,'产后塑身',91,3,1,0,NULL,NULL,0),(862,'文胸/内裤',91,3,1,0,NULL,NULL,0),(863,'防辐射服',91,3,1,0,NULL,NULL,0),(864,'孕妈装',91,3,1,0,NULL,NULL,0),(865,'孕期营养',91,3,1,0,NULL,NULL,0),(866,'孕妇护肤',91,3,1,0,NULL,NULL,0),(867,'待产护理',91,3,1,0,NULL,NULL,0),(868,'月子装',91,3,1,0,NULL,NULL,0),(869,'防溢乳垫',91,3,1,0,NULL,NULL,0),(870,'套装',92,3,1,0,NULL,NULL,0),(871,'上衣',92,3,1,0,NULL,NULL,0),(872,'裤子',92,3,1,0,NULL,NULL,0),(873,'裙子',92,3,1,0,NULL,NULL,0),(874,'内衣/家居服',92,3,1,0,NULL,NULL,0),(875,'羽绒服/棉服',92,3,1,0,NULL,NULL,0),(876,'亲子装',92,3,1,0,NULL,NULL,0),(877,'儿童配饰',92,3,1,0,NULL,NULL,0),(878,'礼服/演出服',92,3,1,0,NULL,NULL,0),(879,'运动鞋',92,3,1,0,NULL,NULL,0),(880,'皮鞋/帆布鞋',92,3,1,0,NULL,NULL,0),(881,'靴子',92,3,1,0,NULL,NULL,0),(882,'凉鞋',92,3,1,0,NULL,NULL,0),(883,'功能鞋',92,3,1,0,NULL,NULL,0),(884,'户外/运动服',92,3,1,0,NULL,NULL,0),(885,'提篮式',93,3,1,0,NULL,NULL,0),(886,'安全座椅',93,3,1,0,NULL,NULL,0),(887,'增高垫',93,3,1,0,NULL,NULL,0),(888,'钱包',94,3,1,0,NULL,NULL,0),(889,'手拿包',94,3,1,0,NULL,NULL,0),(890,'单肩包',94,3,1,0,NULL,NULL,0),(891,'双肩包',94,3,1,0,NULL,NULL,0),(892,'手提包',94,3,1,0,NULL,NULL,0),(893,'斜挎包',94,3,1,0,NULL,NULL,0),(894,'钥匙包',94,3,1,0,NULL,NULL,0),(895,'卡包/零钱包',94,3,1,0,NULL,NULL,0),(896,'男士钱包',95,3,1,0,NULL,NULL,0),(897,'男士手包',95,3,1,0,NULL,NULL,0),(898,'卡包名片夹',95,3,1,0,NULL,NULL,0),(899,'商务公文包',95,3,1,0,NULL,NULL,0),(900,'双肩包',95,3,1,0,NULL,NULL,0),(901,'单肩/斜挎包',95,3,1,0,NULL,NULL,0),(902,'钥匙包',95,3,1,0,NULL,NULL,0),(903,'电脑包',96,3,1,0,NULL,NULL,0),(904,'拉杆箱',96,3,1,0,NULL,NULL,0),(905,'旅行包',96,3,1,0,NULL,NULL,0),(906,'旅行配件',96,3,1,0,NULL,NULL,0),(907,'休闲运动包',96,3,1,0,NULL,NULL,0),(908,'拉杆包',96,3,1,0,NULL,NULL,0),(909,'登山包',96,3,1,0,NULL,NULL,0),(910,'妈咪包',96,3,1,0,NULL,NULL,0),(911,'书包',96,3,1,0,NULL,NULL,0),(912,'相机包',96,3,1,0,NULL,NULL,0),(913,'腰包/胸包',96,3,1,0,NULL,NULL,0),(914,'火机烟具',97,3,1,0,NULL,NULL,0),(915,'礼品文具',97,3,1,0,NULL,NULL,0),(916,'军刀军具',97,3,1,0,NULL,NULL,0),(917,'收藏品',97,3,1,0,NULL,NULL,0),(918,'工艺礼品',97,3,1,0,NULL,NULL,0),(919,'创意礼品',97,3,1,0,NULL,NULL,0),(920,'礼盒礼券',97,3,1,0,NULL,NULL,0),(921,'鲜花绿植',97,3,1,0,NULL,NULL,0),(922,'婚庆节庆',97,3,1,0,NULL,NULL,0),(923,'京东卡',97,3,1,0,NULL,NULL,0),(924,'美妆礼品',97,3,1,0,NULL,NULL,0),(925,'礼品定制',97,3,1,0,NULL,NULL,0),(926,'京东福卡',97,3,1,0,NULL,NULL,0),(927,'古董文玩',97,3,1,0,NULL,NULL,0),(928,'箱包',98,3,1,0,NULL,NULL,0),(929,'钱包',98,3,1,0,NULL,NULL,0),(930,'服饰',98,3,1,0,NULL,NULL,0),(931,'腰带',98,3,1,0,NULL,NULL,0),(932,'太阳镜/眼镜框',98,3,1,0,NULL,NULL,0),(933,'配件',98,3,1,0,NULL,NULL,0),(934,'鞋靴',98,3,1,0,NULL,NULL,0),(935,'饰品',98,3,1,0,NULL,NULL,0),(936,'名品腕表',98,3,1,0,NULL,NULL,0),(937,'高档化妆品',98,3,1,0,NULL,NULL,0),(938,'婚嫁首饰',99,3,1,0,NULL,NULL,0),(939,'婚纱摄影',99,3,1,0,NULL,NULL,0),(940,'婚纱礼服',99,3,1,0,NULL,NULL,0),(941,'婚庆服务',99,3,1,0,NULL,NULL,0),(942,'婚庆礼品/用品',99,3,1,0,NULL,NULL,0),(943,'婚宴',99,3,1,0,NULL,NULL,0),(944,'饼干蛋糕',100,3,1,0,NULL,NULL,0),(945,'糖果/巧克力',100,3,1,0,NULL,NULL,0),(946,'休闲零食',100,3,1,0,NULL,NULL,0),(947,'冲调饮品',100,3,1,0,NULL,NULL,0),(948,'粮油调味',100,3,1,0,NULL,NULL,0),(949,'牛奶',100,3,1,0,NULL,NULL,0),(950,'其他特产',101,3,1,0,NULL,NULL,0),(951,'新疆',101,3,1,0,NULL,NULL,0),(952,'北京',101,3,1,0,NULL,NULL,0),(953,'山西',101,3,1,0,NULL,NULL,0),(954,'内蒙古',101,3,1,0,NULL,NULL,0),(955,'福建',101,3,1,0,NULL,NULL,0),(956,'湖南',101,3,1,0,NULL,NULL,0),(957,'四川',101,3,1,0,NULL,NULL,0),(958,'云南',101,3,1,0,NULL,NULL,0),(959,'东北',101,3,1,0,NULL,NULL,0),(960,'休闲零食',102,3,1,0,NULL,NULL,0),(961,'坚果炒货',102,3,1,0,NULL,NULL,0),(962,'肉干肉脯',102,3,1,0,NULL,NULL,0),(963,'蜜饯果干',102,3,1,0,NULL,NULL,0),(964,'糖果/巧克力',102,3,1,0,NULL,NULL,0),(965,'饼干蛋糕',102,3,1,0,NULL,NULL,0),(966,'无糖食品',102,3,1,0,NULL,NULL,0),(967,'米面杂粮',103,3,1,0,NULL,NULL,0),(968,'食用油',103,3,1,0,NULL,NULL,0),(969,'调味品',103,3,1,0,NULL,NULL,0),(970,'南北干货',103,3,1,0,NULL,NULL,0),(971,'方便食品',103,3,1,0,NULL,NULL,0),(972,'有机食品',103,3,1,0,NULL,NULL,0),(973,'饮用水',104,3,1,0,NULL,NULL,0),(974,'饮料',104,3,1,0,NULL,NULL,0),(975,'牛奶乳品',104,3,1,0,NULL,NULL,0),(976,'咖啡/奶茶',104,3,1,0,NULL,NULL,0),(977,'冲饮谷物',104,3,1,0,NULL,NULL,0),(978,'蜂蜜/柚子茶',104,3,1,0,NULL,NULL,0),(979,'成人奶粉',104,3,1,0,NULL,NULL,0),(980,'月饼',105,3,1,0,NULL,NULL,0),(981,'大闸蟹',105,3,1,0,NULL,NULL,0),(982,'粽子',105,3,1,0,NULL,NULL,0),(983,'卡券',105,3,1,0,NULL,NULL,0),(984,'铁观音',106,3,1,0,NULL,NULL,0),(985,'普洱',106,3,1,0,NULL,NULL,0),(986,'龙井',106,3,1,0,NULL,NULL,0),(987,'绿茶',106,3,1,0,NULL,NULL,0),(988,'红茶',106,3,1,0,NULL,NULL,0),(989,'乌龙茶',106,3,1,0,NULL,NULL,0),(990,'花草茶',106,3,1,0,NULL,NULL,0),(991,'花果茶',106,3,1,0,NULL,NULL,0),(992,'养生茶',106,3,1,0,NULL,NULL,0),(993,'黑茶',106,3,1,0,NULL,NULL,0),(994,'白茶',106,3,1,0,NULL,NULL,0),(995,'其它茶',106,3,1,0,NULL,NULL,0),(996,'项链',107,3,1,0,NULL,NULL,0),(997,'手链/脚链',107,3,1,0,NULL,NULL,0),(998,'戒指',107,3,1,0,NULL,NULL,0),(999,'耳饰',107,3,1,0,NULL,NULL,0),(1000,'毛衣链',107,3,1,0,NULL,NULL,0),(1001,'发饰/发卡',107,3,1,0,NULL,NULL,0),(1002,'胸针',107,3,1,0,NULL,NULL,0),(1003,'饰品配件',107,3,1,0,NULL,NULL,0),(1004,'婚庆饰品',107,3,1,0,NULL,NULL,0),(1005,'黄金吊坠',108,3,1,0,NULL,NULL,0),(1006,'黄金项链',108,3,1,0,NULL,NULL,0),(1007,'黄金转运珠',108,3,1,0,NULL,NULL,0),(1008,'黄金手镯/手链/脚链',108,3,1,0,NULL,NULL,0),(1009,'黄金耳饰',108,3,1,0,NULL,NULL,0),(1010,'黄金戒指',108,3,1,0,NULL,NULL,0),(1011,'K金吊坠',109,3,1,0,NULL,NULL,0),(1012,'K金项链',109,3,1,0,NULL,NULL,0),(1013,'K金手镯/手链/脚链',109,3,1,0,NULL,NULL,0),(1014,'K金戒指',109,3,1,0,NULL,NULL,0),(1015,'K金耳饰',109,3,1,0,NULL,NULL,0),(1016,'投资金',110,3,1,0,NULL,NULL,0),(1017,'投资银',110,3,1,0,NULL,NULL,0),(1018,'投资收藏',110,3,1,0,NULL,NULL,0),(1019,'银吊坠/项链',111,3,1,0,NULL,NULL,0),(1020,'银手镯/手链/脚链',111,3,1,0,NULL,NULL,0),(1021,'银戒指',111,3,1,0,NULL,NULL,0),(1022,'银耳饰',111,3,1,0,NULL,NULL,0),(1023,'足银手镯',111,3,1,0,NULL,NULL,0),(1024,'宝宝银饰',111,3,1,0,NULL,NULL,0),(1025,'裸钻',112,3,1,0,NULL,NULL,0),(1026,'钻戒',112,3,1,0,NULL,NULL,0),(1027,'钻石项链/吊坠',112,3,1,0,NULL,NULL,0),(1028,'钻石耳饰',112,3,1,0,NULL,NULL,0),(1029,'钻石手镯/手链',112,3,1,0,NULL,NULL,0),(1030,'项链/吊坠',113,3,1,0,NULL,NULL,0),(1031,'手镯/手串',113,3,1,0,NULL,NULL,0),(1032,'戒指',113,3,1,0,NULL,NULL,0),(1033,'耳饰',113,3,1,0,NULL,NULL,0),(1034,'挂件/摆件/把件',113,3,1,0,NULL,NULL,0),(1035,'玉石孤品',113,3,1,0,NULL,NULL,0),(1036,'项链/吊坠',114,3,1,0,NULL,NULL,0),(1037,'耳饰',114,3,1,0,NULL,NULL,0),(1038,'手镯/手链/脚链',114,3,1,0,NULL,NULL,0),(1039,'戒指',114,3,1,0,NULL,NULL,0),(1040,'头饰/胸针',114,3,1,0,NULL,NULL,0),(1041,'摆件/挂件',114,3,1,0,NULL,NULL,0),(1042,'琥珀/蜜蜡',115,3,1,0,NULL,NULL,0),(1043,'碧玺',115,3,1,0,NULL,NULL,0),(1044,'红宝石/蓝宝石',115,3,1,0,NULL,NULL,0),(1045,'坦桑石',115,3,1,0,NULL,NULL,0),(1046,'珊瑚',115,3,1,0,NULL,NULL,0),(1047,'祖母绿',115,3,1,0,NULL,NULL,0),(1048,'葡萄石',115,3,1,0,NULL,NULL,0),(1049,'其他天然宝石',115,3,1,0,NULL,NULL,0),(1050,'项链/吊坠',115,3,1,0,NULL,NULL,0),(1051,'耳饰',115,3,1,0,NULL,NULL,0),(1052,'手镯/手链',115,3,1,0,NULL,NULL,0),(1053,'戒指',115,3,1,0,NULL,NULL,0),(1054,'铂金项链/吊坠',116,3,1,0,NULL,NULL,0),(1055,'铂金手镯/手链/脚链',116,3,1,0,NULL,NULL,0),(1056,'铂金戒指',116,3,1,0,NULL,NULL,0),(1057,'铂金耳饰',116,3,1,0,NULL,NULL,0),(1058,'小叶紫檀',117,3,1,0,NULL,NULL,0),(1059,'黄花梨',117,3,1,0,NULL,NULL,0),(1060,'沉香木',117,3,1,0,NULL,NULL,0),(1061,'金丝楠',117,3,1,0,NULL,NULL,0),(1062,'菩提',117,3,1,0,NULL,NULL,0),(1063,'其他',117,3,1,0,NULL,NULL,0),(1064,'橄榄核/核桃',117,3,1,0,NULL,NULL,0),(1065,'檀香',117,3,1,0,NULL,NULL,0),(1066,'珍珠项链',118,3,1,0,NULL,NULL,0),(1067,'珍珠吊坠',118,3,1,0,NULL,NULL,0),(1068,'珍珠耳饰',118,3,1,0,NULL,NULL,0),(1069,'珍珠手链',118,3,1,0,NULL,NULL,0),(1070,'珍珠戒指',118,3,1,0,NULL,NULL,0),(1071,'珍珠胸针',118,3,1,0,NULL,NULL,0),(1072,'机油',119,3,1,0,NULL,NULL,0),(1073,'正时皮带',119,3,1,0,NULL,NULL,0),(1074,'添加剂',119,3,1,0,NULL,NULL,0),(1075,'汽车喇叭',119,3,1,0,NULL,NULL,0),(1076,'防冻液',119,3,1,0,NULL,NULL,0),(1077,'汽车玻璃',119,3,1,0,NULL,NULL,0),(1078,'滤清器',119,3,1,0,NULL,NULL,0),(1079,'火花塞',119,3,1,0,NULL,NULL,0),(1080,'减震器',119,3,1,0,NULL,NULL,0),(1081,'柴机油/辅助油',119,3,1,0,NULL,NULL,0),(1082,'雨刷',119,3,1,0,NULL,NULL,0),(1083,'车灯',119,3,1,0,NULL,NULL,0),(1084,'后视镜',119,3,1,0,NULL,NULL,0),(1085,'轮胎',119,3,1,0,NULL,NULL,0),(1086,'轮毂',119,3,1,0,NULL,NULL,0),(1087,'刹车片/盘',119,3,1,0,NULL,NULL,0),(1088,'维修配件',119,3,1,0,NULL,NULL,0),(1089,'蓄电池',119,3,1,0,NULL,NULL,0),(1090,'底盘装甲/护板',119,3,1,0,NULL,NULL,0),(1091,'贴膜',119,3,1,0,NULL,NULL,0),(1092,'汽修工具',119,3,1,0,NULL,NULL,0),(1093,'改装配件',119,3,1,0,NULL,NULL,0),(1094,'导航仪',120,3,1,0,NULL,NULL,0),(1095,'安全预警仪',120,3,1,0,NULL,NULL,0),(1096,'行车记录仪',120,3,1,0,NULL,NULL,0),(1097,'倒车雷达',120,3,1,0,NULL,NULL,0),(1098,'蓝牙设备',120,3,1,0,NULL,NULL,0),(1099,'车载影音',120,3,1,0,NULL,NULL,0),(1100,'净化器',120,3,1,0,NULL,NULL,0),(1101,'电源',120,3,1,0,NULL,NULL,0),(1102,'智能驾驶',120,3,1,0,NULL,NULL,0),(1103,'车载电台',120,3,1,0,NULL,NULL,0),(1104,'车载电器配件',120,3,1,0,NULL,NULL,0),(1105,'吸尘器',120,3,1,0,NULL,NULL,0),(1106,'智能车机',120,3,1,0,NULL,NULL,0),(1107,'冰箱',120,3,1,0,NULL,NULL,0),(1108,'汽车音响',120,3,1,0,NULL,NULL,0),(1109,'车载生活电器',120,3,1,0,NULL,NULL,0),(1110,'车蜡',121,3,1,0,NULL,NULL,0),(1111,'补漆笔',121,3,1,0,NULL,NULL,0),(1112,'玻璃水',121,3,1,0,NULL,NULL,0),(1113,'清洁剂',121,3,1,0,NULL,NULL,0),(1114,'洗车工具',121,3,1,0,NULL,NULL,0),(1115,'镀晶镀膜',121,3,1,0,NULL,NULL,0),(1116,'打蜡机',121,3,1,0,NULL,NULL,0),(1117,'洗车配件',121,3,1,0,NULL,NULL,0),(1118,'洗车机',121,3,1,0,NULL,NULL,0),(1119,'洗车水枪',121,3,1,0,NULL,NULL,0),(1120,'毛巾掸子',121,3,1,0,NULL,NULL,0),(1121,'脚垫',122,3,1,0,NULL,NULL,0),(1122,'座垫',122,3,1,0,NULL,NULL,0),(1123,'座套',122,3,1,0,NULL,NULL,0),(1124,'后备箱垫',122,3,1,0,NULL,NULL,0),(1125,'头枕腰靠',122,3,1,0,NULL,NULL,0),(1126,'方向盘套',122,3,1,0,NULL,NULL,0),(1127,'香水',122,3,1,0,NULL,NULL,0),(1128,'空气净化',122,3,1,0,NULL,NULL,0),(1129,'挂件摆件',122,3,1,0,NULL,NULL,0),(1130,'功能小件',122,3,1,0,NULL,NULL,0),(1131,'车身装饰件',122,3,1,0,NULL,NULL,0),(1132,'车衣',122,3,1,0,NULL,NULL,0),(1133,'安全座椅',123,3,1,0,NULL,NULL,0),(1134,'胎压监测',123,3,1,0,NULL,NULL,0),(1135,'防盗设备',123,3,1,0,NULL,NULL,0),(1136,'应急救援',123,3,1,0,NULL,NULL,0),(1137,'保温箱',123,3,1,0,NULL,NULL,0),(1138,'地锁',123,3,1,0,NULL,NULL,0),(1139,'摩托车',123,3,1,0,NULL,NULL,0),(1140,'充气泵',123,3,1,0,NULL,NULL,0),(1141,'储物箱',123,3,1,0,NULL,NULL,0),(1142,'自驾野营',123,3,1,0,NULL,NULL,0),(1143,'摩托车装备',123,3,1,0,NULL,NULL,0),(1144,'清洗美容',124,3,1,0,NULL,NULL,0),(1145,'功能升级',124,3,1,0,NULL,NULL,0),(1146,'保养维修',124,3,1,0,NULL,NULL,0),(1147,'油卡充值',124,3,1,0,NULL,NULL,0),(1148,'车险',124,3,1,0,NULL,NULL,0),(1149,'加油卡',124,3,1,0,NULL,NULL,0),(1150,'ETC',124,3,1,0,NULL,NULL,0),(1151,'驾驶培训',124,3,1,0,NULL,NULL,0),(1152,'赛事服装',125,3,1,0,NULL,NULL,0),(1153,'赛事用品',125,3,1,0,NULL,NULL,0),(1154,'制动系统',125,3,1,0,NULL,NULL,0),(1155,'悬挂系统',125,3,1,0,NULL,NULL,0),(1156,'进气系统',125,3,1,0,NULL,NULL,0),(1157,'排气系统',125,3,1,0,NULL,NULL,0),(1158,'电子管理',125,3,1,0,NULL,NULL,0),(1159,'车身强化',125,3,1,0,NULL,NULL,0),(1160,'赛事座椅',125,3,1,0,NULL,NULL,0),(1161,'跑步鞋',126,3,1,0,NULL,NULL,0),(1162,'休闲鞋',126,3,1,0,NULL,NULL,0),(1163,'篮球鞋',126,3,1,0,NULL,NULL,0),(1164,'板鞋',126,3,1,0,NULL,NULL,0),(1165,'帆布鞋',126,3,1,0,NULL,NULL,0),(1166,'足球鞋',126,3,1,0,NULL,NULL,0),(1167,'乒羽网鞋',126,3,1,0,NULL,NULL,0),(1168,'专项运动鞋',126,3,1,0,NULL,NULL,0),(1169,'训练鞋',126,3,1,0,NULL,NULL,0),(1170,'拖鞋',126,3,1,0,NULL,NULL,0),(1171,'运动包',126,3,1,0,NULL,NULL,0),(1172,'羽绒服',127,3,1,0,NULL,NULL,0),(1173,'棉服',127,3,1,0,NULL,NULL,0),(1174,'运动裤',127,3,1,0,NULL,NULL,0),(1175,'夹克/风衣',127,3,1,0,NULL,NULL,0),(1176,'卫衣/套头衫',127,3,1,0,NULL,NULL,0),(1177,'T恤',127,3,1,0,NULL,NULL,0),(1178,'套装',127,3,1,0,NULL,NULL,0),(1179,'乒羽网服',127,3,1,0,NULL,NULL,0),(1180,'健身服',127,3,1,0,NULL,NULL,0),(1181,'运动背心',127,3,1,0,NULL,NULL,0),(1182,'毛衫/线衫',127,3,1,0,NULL,NULL,0),(1183,'运动配饰',127,3,1,0,NULL,NULL,0),(1184,'折叠车',128,3,1,0,NULL,NULL,0),(1185,'山地车/公路车',128,3,1,0,NULL,NULL,0),(1186,'电动车',128,3,1,0,NULL,NULL,0),(1187,'其他整车',128,3,1,0,NULL,NULL,0),(1188,'骑行服',128,3,1,0,NULL,NULL,0),(1189,'骑行装备',128,3,1,0,NULL,NULL,0),(1190,'平衡车',128,3,1,0,NULL,NULL,0),(1191,'鱼竿鱼线',129,3,1,0,NULL,NULL,0),(1192,'浮漂鱼饵',129,3,1,0,NULL,NULL,0),(1193,'钓鱼桌椅',129,3,1,0,NULL,NULL,0),(1194,'钓鱼配件',129,3,1,0,NULL,NULL,0),(1195,'钓箱鱼包',129,3,1,0,NULL,NULL,0),(1196,'其它',129,3,1,0,NULL,NULL,0),(1197,'泳镜',130,3,1,0,NULL,NULL,0),(1198,'泳帽',130,3,1,0,NULL,NULL,0),(1199,'游泳包防水包',130,3,1,0,NULL,NULL,0),(1200,'女士泳衣',130,3,1,0,NULL,NULL,0),(1201,'男士泳衣',130,3,1,0,NULL,NULL,0),(1202,'比基尼',130,3,1,0,NULL,NULL,0),(1203,'其它',130,3,1,0,NULL,NULL,0),(1204,'冲锋衣裤',131,3,1,0,NULL,NULL,0),(1205,'速干衣裤',131,3,1,0,NULL,NULL,0),(1206,'滑雪服',131,3,1,0,NULL,NULL,0),(1207,'羽绒服/棉服',131,3,1,0,NULL,NULL,0),(1208,'休闲衣裤',131,3,1,0,NULL,NULL,0),(1209,'抓绒衣裤',131,3,1,0,NULL,NULL,0),(1210,'软壳衣裤',131,3,1,0,NULL,NULL,0),(1211,'T恤',131,3,1,0,NULL,NULL,0),(1212,'户外风衣',131,3,1,0,NULL,NULL,0),(1213,'功能内衣',131,3,1,0,NULL,NULL,0),(1214,'军迷服饰',131,3,1,0,NULL,NULL,0),(1215,'登山鞋',131,3,1,0,NULL,NULL,0),(1216,'雪地靴',131,3,1,0,NULL,NULL,0),(1217,'徒步鞋',131,3,1,0,NULL,NULL,0),(1218,'越野跑鞋',131,3,1,0,NULL,NULL,0),(1219,'休闲鞋',131,3,1,0,NULL,NULL,0),(1220,'工装鞋',131,3,1,0,NULL,NULL,0),(1221,'溯溪鞋',131,3,1,0,NULL,NULL,0),(1222,'沙滩/凉拖',131,3,1,0,NULL,NULL,0),(1223,'户外袜',131,3,1,0,NULL,NULL,0),(1224,'帐篷/垫子',132,3,1,0,NULL,NULL,0),(1225,'睡袋/吊床',132,3,1,0,NULL,NULL,0),(1226,'登山攀岩',132,3,1,0,NULL,NULL,0),(1227,'户外配饰',132,3,1,0,NULL,NULL,0),(1228,'背包',132,3,1,0,NULL,NULL,0),(1229,'户外照明',132,3,1,0,NULL,NULL,0),(1230,'户外仪表',132,3,1,0,NULL,NULL,0),(1231,'户外工具',132,3,1,0,NULL,NULL,0),(1232,'望远镜',132,3,1,0,NULL,NULL,0),(1233,'旅游用品',132,3,1,0,NULL,NULL,0),(1234,'便携桌椅床',132,3,1,0,NULL,NULL,0),(1235,'野餐烧烤',132,3,1,0,NULL,NULL,0),(1236,'军迷用品',132,3,1,0,NULL,NULL,0),(1237,'救援装备',132,3,1,0,NULL,NULL,0),(1238,'滑雪装备',132,3,1,0,NULL,NULL,0),(1239,'极限户外',132,3,1,0,NULL,NULL,0),(1240,'冲浪潜水',132,3,1,0,NULL,NULL,0),(1241,'综合训练器',133,3,1,0,NULL,NULL,0),(1242,'其他大型器械',133,3,1,0,NULL,NULL,0),(1243,'哑铃',133,3,1,0,NULL,NULL,0),(1244,'仰卧板/收腹机',133,3,1,0,NULL,NULL,0),(1245,'其他中小型器材',133,3,1,0,NULL,NULL,0),(1246,'瑜伽舞蹈',133,3,1,0,NULL,NULL,0),(1247,'甩脂机',133,3,1,0,NULL,NULL,0),(1248,'踏步机',133,3,1,0,NULL,NULL,0),(1249,'武术搏击',133,3,1,0,NULL,NULL,0),(1250,'健身车/动感单车',133,3,1,0,NULL,NULL,0),(1251,'跑步机',133,3,1,0,NULL,NULL,0),(1252,'运动护具',133,3,1,0,NULL,NULL,0),(1253,'羽毛球',134,3,1,0,NULL,NULL,0),(1254,'乒乓球',134,3,1,0,NULL,NULL,0),(1255,'篮球',134,3,1,0,NULL,NULL,0),(1256,'足球',134,3,1,0,NULL,NULL,0),(1257,'网球',134,3,1,0,NULL,NULL,0),(1258,'排球',134,3,1,0,NULL,NULL,0),(1259,'高尔夫',134,3,1,0,NULL,NULL,0),(1260,'台球',134,3,1,0,NULL,NULL,0),(1261,'棋牌麻将',134,3,1,0,NULL,NULL,0),(1262,'轮滑滑板',134,3,1,0,NULL,NULL,0),(1263,'其他',134,3,1,0,NULL,NULL,0),(1264,'0-6个月',135,3,1,0,NULL,NULL,0),(1265,'6-12个月',135,3,1,0,NULL,NULL,0),(1266,'1-3岁',135,3,1,0,NULL,NULL,0),(1267,'3-6岁',135,3,1,0,NULL,NULL,0),(1268,'6-14岁',135,3,1,0,NULL,NULL,0),(1269,'14岁以上',135,3,1,0,NULL,NULL,0),(1270,'遥控车',136,3,1,0,NULL,NULL,0),(1271,'遥控飞机',136,3,1,0,NULL,NULL,0),(1272,'遥控船',136,3,1,0,NULL,NULL,0),(1273,'机器人',136,3,1,0,NULL,NULL,0),(1274,'轨道/助力',136,3,1,0,NULL,NULL,0),(1275,'毛绒/布艺',137,3,1,0,NULL,NULL,0),(1276,'靠垫/抱枕',137,3,1,0,NULL,NULL,0),(1277,'芭比娃娃',138,3,1,0,NULL,NULL,0),(1278,'卡通娃娃',138,3,1,0,NULL,NULL,0),(1279,'智能娃娃',138,3,1,0,NULL,NULL,0),(1280,'仿真模型',139,3,1,0,NULL,NULL,0),(1281,'拼插模型',139,3,1,0,NULL,NULL,0),(1282,'收藏爱好',139,3,1,0,NULL,NULL,0),(1283,'炫舞毯',140,3,1,0,NULL,NULL,0),(1284,'爬行垫/毯',140,3,1,0,NULL,NULL,0),(1285,'户外玩具',140,3,1,0,NULL,NULL,0),(1286,'戏水玩具',140,3,1,0,NULL,NULL,0),(1287,'电影周边',141,3,1,0,NULL,NULL,0),(1288,'卡通周边',141,3,1,0,NULL,NULL,0),(1289,'网游周边',141,3,1,0,NULL,NULL,0),(1290,'摇铃/床铃',142,3,1,0,NULL,NULL,0),(1291,'健身架',142,3,1,0,NULL,NULL,0),(1292,'早教启智',142,3,1,0,NULL,NULL,0),(1293,'拖拉玩具',142,3,1,0,NULL,NULL,0),(1294,'积木',143,3,1,0,NULL,NULL,0),(1295,'拼图',143,3,1,0,NULL,NULL,0),(1296,'磁力棒',143,3,1,0,NULL,NULL,0),(1297,'立体拼插',143,3,1,0,NULL,NULL,0),(1298,'手工彩泥',144,3,1,0,NULL,NULL,0),(1299,'绘画工具',144,3,1,0,NULL,NULL,0),(1300,'情景玩具',144,3,1,0,NULL,NULL,0),(1301,'减压玩具',145,3,1,0,NULL,NULL,0),(1302,'创意玩具',145,3,1,0,NULL,NULL,0),(1303,'钢琴',146,3,1,0,NULL,NULL,0),(1304,'电子琴/电钢琴',146,3,1,0,NULL,NULL,0),(1305,'吉他/尤克里里',146,3,1,0,NULL,NULL,0),(1306,'打击乐器',146,3,1,0,NULL,NULL,0),(1307,'西洋管弦',146,3,1,0,NULL,NULL,0),(1308,'民族管弦乐器',146,3,1,0,NULL,NULL,0),(1309,'乐器配件',146,3,1,0,NULL,NULL,0),(1310,'电脑音乐',146,3,1,0,NULL,NULL,0),(1311,'工艺礼品乐器',146,3,1,0,NULL,NULL,0),(1312,'口琴/口风琴/竖笛',146,3,1,0,NULL,NULL,0),(1313,'手风琴',146,3,1,0,NULL,NULL,0),(1314,'双色球',147,3,1,0,NULL,NULL,0),(1315,'大乐透',147,3,1,0,NULL,NULL,0),(1316,'福彩3D',147,3,1,0,NULL,NULL,0),(1317,'排列三',147,3,1,0,NULL,NULL,0),(1318,'排列五',147,3,1,0,NULL,NULL,0),(1319,'七星彩',147,3,1,0,NULL,NULL,0),(1320,'七乐彩',147,3,1,0,NULL,NULL,0),(1321,'竞彩足球',147,3,1,0,NULL,NULL,0),(1322,'竞彩篮球',147,3,1,0,NULL,NULL,0),(1323,'新时时彩',147,3,1,0,NULL,NULL,0),(1324,'国内机票',148,3,1,0,NULL,NULL,0),(1325,'国内酒店',149,3,1,0,NULL,NULL,0),(1326,'酒店团购',149,3,1,0,NULL,NULL,0),(1327,'度假',150,3,1,0,NULL,NULL,0),(1328,'景点',150,3,1,0,NULL,NULL,0),(1329,'租车',150,3,1,0,NULL,NULL,0),(1330,'火车票',150,3,1,0,NULL,NULL,0),(1331,'旅游团购',150,3,1,0,NULL,NULL,0),(1332,'手机充值',151,3,1,0,NULL,NULL,0),(1333,'游戏点卡',152,3,1,0,NULL,NULL,0),(1334,'QQ充值',152,3,1,0,NULL,NULL,0),(1335,'电影票',153,3,1,0,NULL,NULL,0),(1336,'演唱会',153,3,1,0,NULL,NULL,0),(1337,'话剧歌剧',153,3,1,0,NULL,NULL,0),(1338,'音乐会',153,3,1,0,NULL,NULL,0),(1339,'体育赛事',153,3,1,0,NULL,NULL,0),(1340,'舞蹈芭蕾',153,3,1,0,NULL,NULL,0),(1341,'戏曲综艺',153,3,1,0,NULL,NULL,0),(1342,'东北',154,3,1,0,NULL,NULL,0),(1343,'华北',154,3,1,0,NULL,NULL,0),(1344,'西北',154,3,1,0,NULL,NULL,0),(1345,'华中',154,3,1,0,NULL,NULL,0),(1346,'华东',154,3,1,0,NULL,NULL,0),(1347,'华南',154,3,1,0,NULL,NULL,0),(1348,'西南',154,3,1,0,NULL,NULL,0),(1349,'苹果',155,3,1,0,NULL,NULL,0),(1350,'橙子',155,3,1,0,NULL,NULL,0),(1351,'奇异果/猕猴桃',155,3,1,0,NULL,NULL,0),(1352,'车厘子/樱桃',155,3,1,0,NULL,NULL,0),(1353,'芒果',155,3,1,0,NULL,NULL,0),(1354,'蓝莓',155,3,1,0,NULL,NULL,0),(1355,'火龙果',155,3,1,0,NULL,NULL,0),(1356,'葡萄/提子',155,3,1,0,NULL,NULL,0),(1357,'柚子',155,3,1,0,NULL,NULL,0),(1358,'香蕉',155,3,1,0,NULL,NULL,0),(1359,'牛油果',155,3,1,0,NULL,NULL,0),(1360,'梨',155,3,1,0,NULL,NULL,0),(1361,'菠萝/凤梨',155,3,1,0,NULL,NULL,0),(1362,'桔/橘',155,3,1,0,NULL,NULL,0),(1363,'柠檬',155,3,1,0,NULL,NULL,0),(1364,'草莓',155,3,1,0,NULL,NULL,0),(1365,'桃/李/杏',155,3,1,0,NULL,NULL,0),(1366,'更多水果',155,3,1,0,NULL,NULL,0),(1367,'水果礼盒/券',155,3,1,0,NULL,NULL,0),(1368,'牛肉',156,3,1,0,NULL,NULL,0),(1369,'羊肉',156,3,1,0,NULL,NULL,0),(1370,'猪肉',156,3,1,0,NULL,NULL,0),(1371,'内脏类',156,3,1,0,NULL,NULL,0),(1372,'鱼类',157,3,1,0,NULL,NULL,0),(1373,'虾类',157,3,1,0,NULL,NULL,0),(1374,'蟹类',157,3,1,0,NULL,NULL,0),(1375,'贝类',157,3,1,0,NULL,NULL,0),(1376,'海参',157,3,1,0,NULL,NULL,0),(1377,'海产干货',157,3,1,0,NULL,NULL,0),(1378,'其他水产',157,3,1,0,NULL,NULL,0),(1379,'海产礼盒',157,3,1,0,NULL,NULL,0),(1380,'鸡肉',158,3,1,0,NULL,NULL,0),(1381,'鸭肉',158,3,1,0,NULL,NULL,0),(1382,'蛋类',158,3,1,0,NULL,NULL,0),(1383,'其他禽类',158,3,1,0,NULL,NULL,0),(1384,'水饺/馄饨',159,3,1,0,NULL,NULL,0),(1385,'汤圆/元宵',159,3,1,0,NULL,NULL,0),(1386,'面点',159,3,1,0,NULL,NULL,0),(1387,'火锅丸串',159,3,1,0,NULL,NULL,0),(1388,'速冻半成品',159,3,1,0,NULL,NULL,0),(1389,'奶酪黄油',159,3,1,0,NULL,NULL,0),(1390,'熟食',160,3,1,0,NULL,NULL,0),(1391,'腊肠/腊肉',160,3,1,0,NULL,NULL,0),(1392,'火腿',160,3,1,0,NULL,NULL,0),(1393,'糕点',160,3,1,0,NULL,NULL,0),(1394,'礼品卡券',160,3,1,0,NULL,NULL,0),(1395,'冷藏果蔬汁',161,3,1,0,NULL,NULL,0),(1396,'冰激凌',161,3,1,0,NULL,NULL,0),(1397,'其他',161,3,1,0,NULL,NULL,0),(1398,'叶菜类',162,3,1,0,NULL,NULL,0),(1399,'茄果瓜类',162,3,1,0,NULL,NULL,0),(1400,'根茎类',162,3,1,0,NULL,NULL,0),(1401,'鲜菌菇',162,3,1,0,NULL,NULL,0),(1402,'葱姜蒜椒',162,3,1,0,NULL,NULL,0),(1403,'半加工蔬菜',162,3,1,0,NULL,NULL,0),(1404,'微型车',163,3,1,0,NULL,NULL,0),(1405,'小型车',163,3,1,0,NULL,NULL,0),(1406,'紧凑型车',163,3,1,0,NULL,NULL,0),(1407,'中型车',163,3,1,0,NULL,NULL,0),(1408,'中大型车',163,3,1,0,NULL,NULL,0),(1409,'豪华车',163,3,1,0,NULL,NULL,0),(1410,'MPV',163,3,1,0,NULL,NULL,0),(1411,'SUV',163,3,1,0,NULL,NULL,0),(1412,'跑车',163,3,1,0,NULL,NULL,0),(1413,'微型车(二手)',164,3,1,0,NULL,NULL,0),(1414,'小型车(二手)',164,3,1,0,NULL,NULL,0),(1415,'紧凑型车(二手)',164,3,1,0,NULL,NULL,0),(1416,'中型车(二手)',164,3,1,0,NULL,NULL,0),(1417,'中大型车(二手)',164,3,1,0,NULL,NULL,0),(1418,'豪华车(二手)',164,3,1,0,NULL,NULL,0),(1419,'MPV(二手)',164,3,1,0,NULL,NULL,0),(1420,'SUV(二手)',164,3,1,0,NULL,NULL,0),(1421,'跑车(二手)',164,3,1,0,NULL,NULL,0),(1422,'皮卡(二手)',164,3,1,0,NULL,NULL,0),(1423,'面包车(二手)',164,3,1,0,NULL,NULL,0),(1431,'dsa323',1,2,1,NULL,NULL,NULL,NULL),(1432,'fdsffdsadddd大萨达',1431,3,1,NULL,NULL,NULL,NULL);
以上就将商品分类的表和数据都给创建好了,接下来我们就需要进行代码编写了。
6.1.2 查出所有分类及其子分类
1、CategoryController
gulimall-product中的controller包下的CategoryController
- 在类中对原来逆向生成的代码进行修改,
@RestController
@RequestMapping("product/category")
public class CategoryController {
    @Autowired
    private CategoryService categoryService;
    /**
     * 查出所有分类以及子分类,以树形结构组装起来
     */
    @RequestMapping("/list/tree")
    public R list(){
        List<CategoryEntity> entities =  categoryService.listWithTree();

        return R.ok().put("data", entities);
    }
 }
2、CategoryService
接着我们使用idea自带的工具帮助我们生成相应的方法。
/**
 * 商品三级分类
 */
public interface CategoryService extends IService<CategoryEntity> {

    List<CategoryEntity> listWithTree();
}
3、CategoryServiceImpl
@Service("categoryService")
public class CategoryServiceImpl extends ServiceImpl<CategoryDao, CategoryEntity> implements CategoryService {

	// @Autowired
    // CategoryDao  categoryDao; //其实这里因为继承了ServiceImpl,且其泛型就是 CategoryDao,
    // 所以我们可以直接使用 ServiceImpl里面的 baseMapper来直接注入

	.......

    /**
     * 1、Lambda表达式
     * 1、举例:(o1, o2)->Integer.compare(o1, o2)
     *
     * 2、格式:
     *
     * -> :lambda操作符 或 箭头操作符
     * -> 左边: lambda形参列表(其实就是接口中的抽象方法的形参)
     * -> 右边: lambda体(其实就是重写的抽象方法的方法体)
     * 3、总结:
     *
     * -> 左边: lambda形参列表的参数类型可以省略(类型推断),如果形参列表只有一个参数,其一对()也可以省略
     *
     * -> 右边: lambda体应该使用一对{}包裹;如果lambda体只执行一条语句(可能是return语句),可以省略这一对{}和return关键字
     *右边
     */
    @Override
    public List<CategoryEntity> listWithTree() {

        //1.查出所有分类
        //没有查询条件,就是代表查询所有
        List<CategoryEntity> entities = baseMapper.selectList(null);

        //2.组装成父子的树形结构
        //2.1 找到所有的一级分类  (categoryEntity) -> {} lambda 表达式
        List<CategoryEntity> level1Menus = entities.stream()
                // .filter((categoryEntity) -> { return categoryEntity.getParentCid() == 0}) 下面的lambda表达式省略了return及{}及()
                .filter(categoryEntity -> categoryEntity.getParentCid() == 0)   //过滤出一级分类,因为其父类id是0
                .map((menu) -> {   //在菜单收集成list之前先通过递归找到菜单的所有子分类,放在map中,然后排序,即将当前菜单改了之后重新返回, 然后再收集菜单。
                    //设置一级分类的子分类
                    menu.setChildren(getChildren(menu, entities));
                    return menu;
                }).sorted((menu1, menu2) -> {
                    //排序,menu1:之前的菜单     menu2:之后的菜单
                    return (menu1.getSort() == null ? 0 : menu1.getSort()) - (menu2.getSort() == null ? 0 : menu2.getSort());//子菜单肯定有有前一个和后一个之分
                })
                .collect(Collectors.toList());


        return level1Menus;
    }

    //递归查找所有菜单的子菜单
    // root 当前菜单   all 所有菜单
    private List<CategoryEntity> getChildren(CategoryEntity root, List<CategoryEntity> all) {

        List<CategoryEntity> children = all.stream().filter(categoryEntity -> {
            return categoryEntity.getParentCid() == root.getCatId();   //二级菜单的父分类id == 一级分类的catid
        }).map(categoryEntity -> {
            //1.找到子菜单
            //递归查找
            categoryEntity.setChildren(getChildren(categoryEntity, all));//二级菜单下还有三级菜单,继续查找
            return categoryEntity;

            //2.菜单的排序
        }).sorted((menu1, menu2) -> {   //sorted() 定制排序
            return (menu1.getSort() == null ? 0 : menu1.getSort() - (menu2.getSort() == null ? 0 : menu2.getSort()));
        }).collect(Collectors.toList());

        return children;
    }
这里使用的是流式编程,对于这方面我们可去参考java8新特性的StreamAPI来进行相应的学习。

在学习的过程中,看到老师使用TODO才知道IDEA有一个类似备忘录的功能。
4、启动测试
我们启动gulimall-product微服务进行测试查询。
-
我们接着进行测试,浏览器发送
http://localhost:10000/product/category/list/tree,测试结果如下图,显示正确。这里我们推荐浏览器装一个Json格式的处理的插件可以很好的帮助我们查看Json数据。 -

6.1.3 配置网关路由与路径重写
前后端联调:
启动后台:renren-fast微服务(idea);
启动前端:renren-fast-vue(vscode);
接着我们来到后台系统进行菜单模块的添加。
1、 后台添加目录和菜单
注意:避坑指南
如果系统登录不上,可能是 跨域配置默认不开启
登录成功之后,我们就可以开始进行后台系统的编辑和完善了。
-
在菜单管理中添加一个商品系统的目录。如下图。

-
在商品系统中新增一个分类维护的菜单。菜单的路由其实就是我们商品微服务中的访问路径。
希望的效果:在左侧点击【分类维护】,希望在此展示3级分类
注意地址栏http://localhost:8001/#/product-category 可以注意到product-category我们的/被替换为了-

我们在后台系统中修改的,在数据库的gulimall-admin中也会同步进行修改。

-
我们可以看到如果我们点击角色管理的话,地址栏是
/sys-role,但是我们实际发送的请求应该是/sys/role,sys-role 具体的视图在 renren-fast-vue/views/modules/sys/role.vue
所以由此可以知道后台会将
/自动转换为-,同理我们去访问/product/category也会自动被转换为/product-category。具体地址栏如下所示:


-
我们在
renren-fast-vue中可以看到有一个文件,对应的其实就是/sys-role对应的页面视图,,即sys文件夹下的role.vue对应的就是角色管理这个页面的展示。所以对于商品分类/product/category,我们接下来要做的就是在renren-fast-vue下创建一个product文件夹,文件夹中创建一个category.vue来进行页面展示。
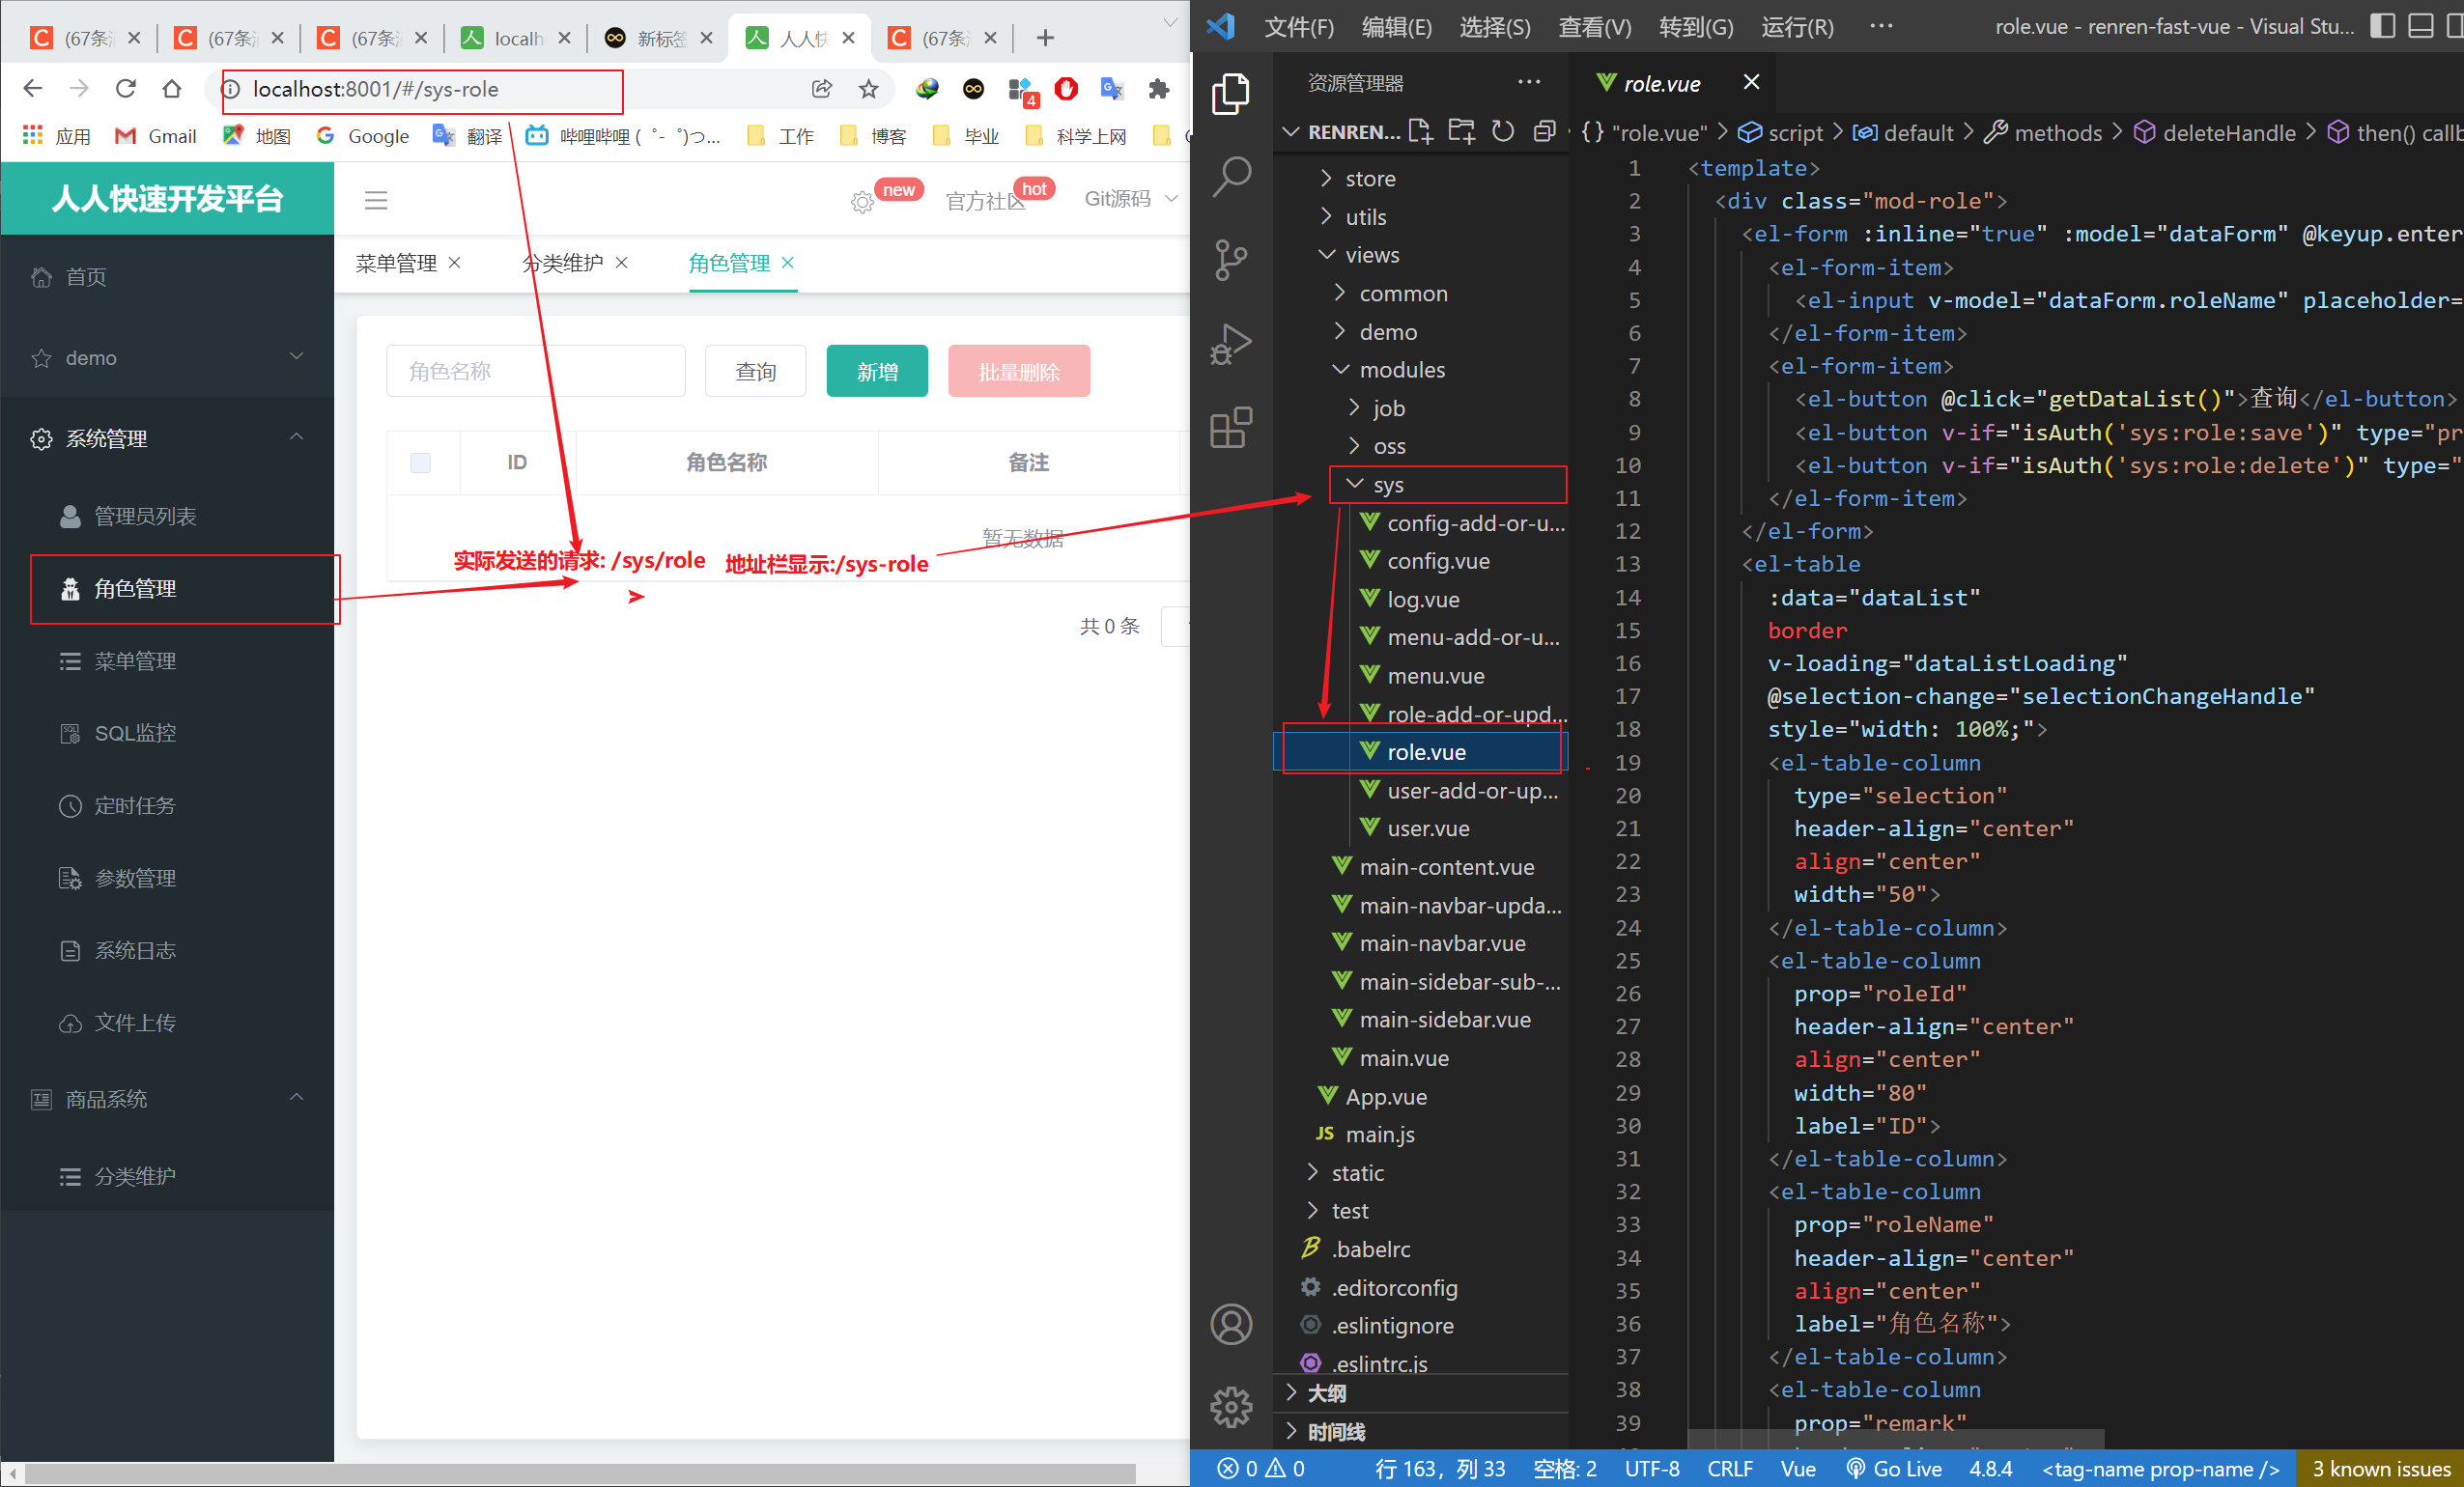

2、编写树形结构
- 对于这一段前端开发的代码,我们可以借鉴
element.eleme.cn中的快速开发指南进行编写。
<template>
    <el-tree :data="data" :props="defaultProps" @node-click="handleNodeClick"></el-tree>
</template>

<script>
export default {
    name: 'category',
    components: {},
    directives: {},
     data() {
      return {
        data: [],
        defaultProps: {
          children: 'children',
          label: 'label'
        }
      };
    },
    mounted() {

    },
    methods: {
        handleNodeClick(data) {
        console.log(data);
      },
      getMenus(){
        this.$http({
          url: this.$http.adornUrl('/product/category/list/tree'),
          method: 'get'
        }).then(data=>{
            console.log(data)
        })
      }
    },
    created(){
        this.getMenus();
    }
};
</script>

<style scoped>

</style>
- 进行测试
测试中发现检查网页源代码发现,本来应该是给商品微服务10000端口发送的查询的,但是发送到了renren-fast 8080端口去了。
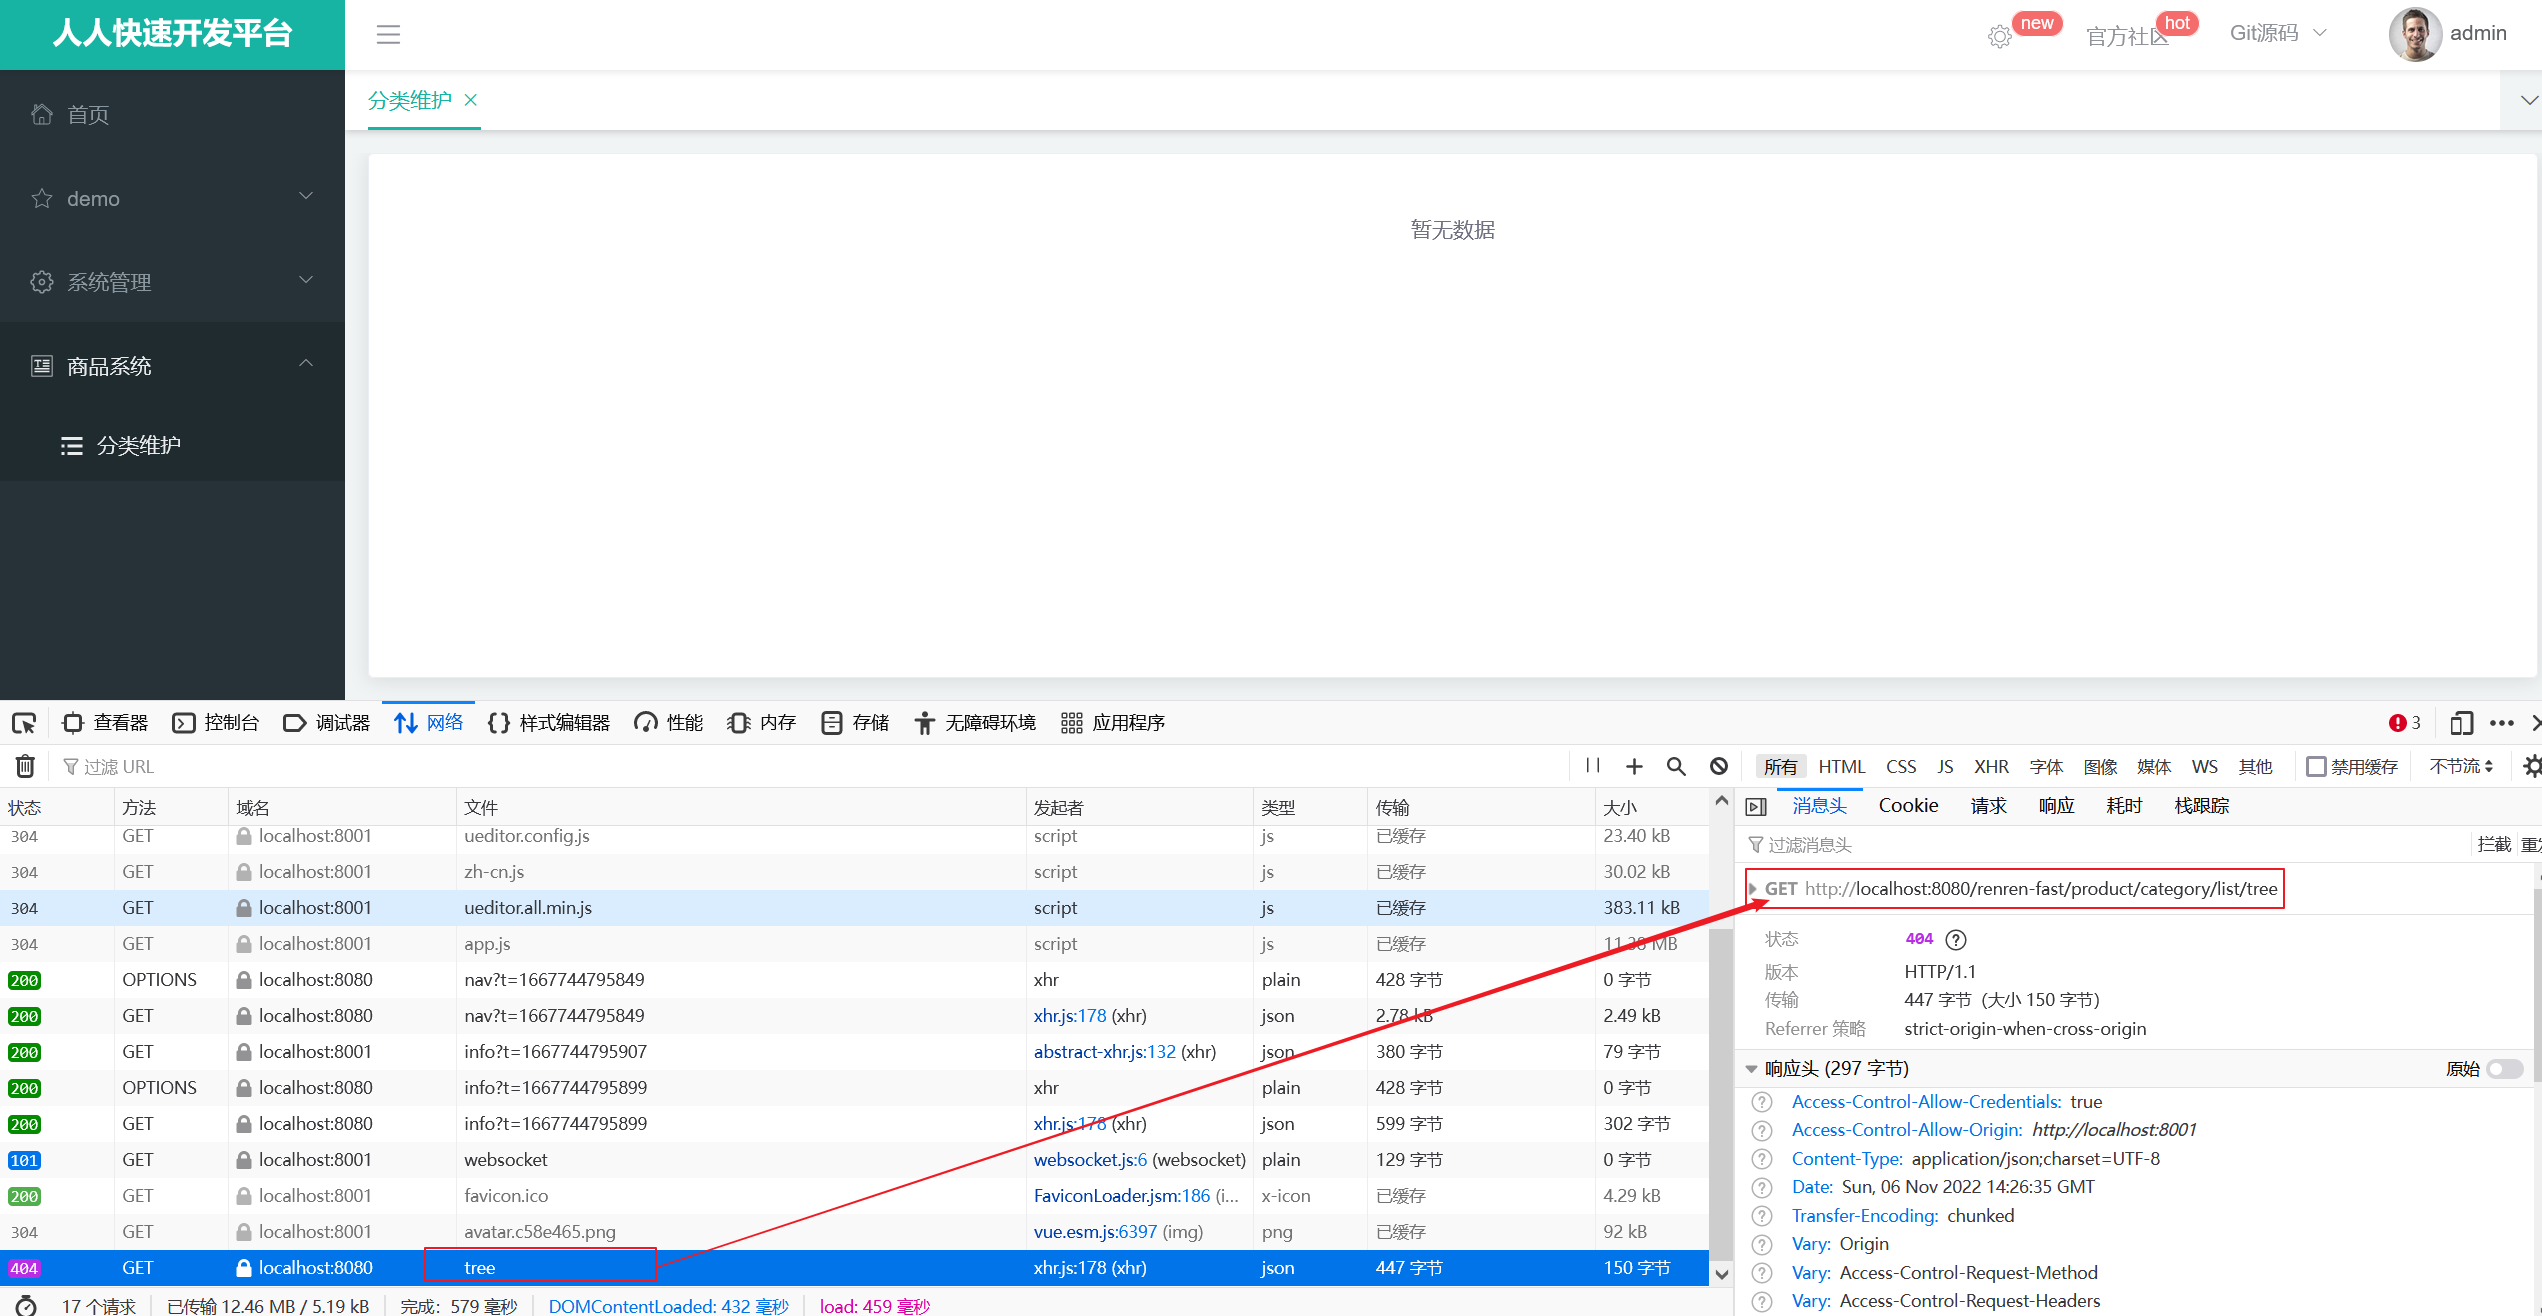

我们以后还会同时发向更多的端口,所以需要配置网关,前端只向网关发送请求,然后由网关自己路由到相应服务器端口。
renren-fast-vue中有一个 Index.js是管理 api 接口请求地址的,如下图。如果我们本次只是简单的将8080改为10000端口,那么当下次如果是10001呢?难道每次都要改吗?所以我们的下一步做法是使用网关进行路由。通过网关映射到具体的请求地址。
ps:此处也可以参考其他人的理解:
借鉴:他要给8080发请求读取数据,但是数据是在10000端口上,如果找到了这个请求改端口那改起来很麻烦。方法1是改vue项目里的全局配置,方法2是搭建个网关,让网关路由到10000。
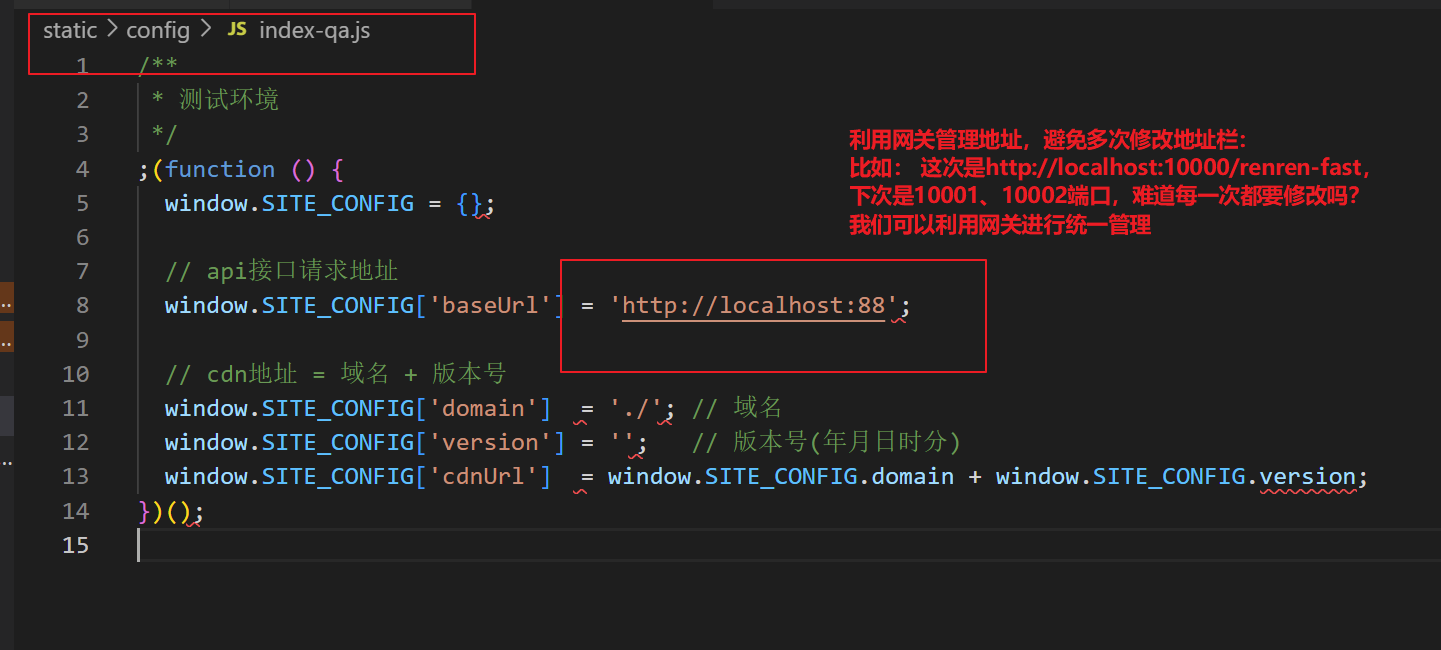
ps: 上面这个图明显有错误,vscode 已经报错,这里我没有注意到,以致 后面处理 跨域问题的时候 白白浪费了我 9个半 小时的时间啊!!!!1
前端项目报错也会影响!!!
切记!!!!!!!!!!!!!!!!
在这里,对于微服务,后面我们统一改为加 api 前缀能路由过去。
  // api接口请求地址
  window.SITE_CONFIG['baseUrl'] = 'http://localhost:88/api'
接下来进行测试访问

我们发现 验证码 一直加载不出来。检查网页源代码发现是因为我们直接给网关发送验证码请求了。但是真实的应该是给 renren-fast 发送请求。
分析原因:前端给网关发验证码请求,但是验证码请求在 renren-fast服务里,所以要想使验证码好使,需要把 renren-fast服务注册到服务中心,并且由网关进行路由

3、将renren-fast注册进 nacos ,使用网关进行统一管理
问题引入:他要去 nacos 中查找api服务,但是nacos里是fast服务,就通过把api改成fast服务,所以让fast注册到服务注册中心,这样请求88网关转发到8080fast。
让fast里加入注册中心的依赖,所以引入common
- 引入gulimall-common

-
在renren-fast的 application.yml文件中配置nacos注册中心地址
spring: application: name: renren-fast //给 renren-fast 起一个名字,方便nacos服务注册发现 cloud: nacos: discovery: server-addr: 127.0.0.1:8848 //注册进nacos -
在renren-fast的主启动类上加入
@EnableDiscoveryClient注解,使得该微服务会被注册中心发现
-
注册成功

4、启动测试(有坑)
- 最开始进行启动,在renren-fast的CorsConfig跨域配置中,allowedOriginPatterns报错。出现原因是因为:我们使用的springboot版本是2.1.8.RELEASE。所以将这个.allowedOriginPatterns换成.allowedOrigins即可。


-
最开始报错,在b站看了评论和弹幕之后将gulimall-common这个依赖给取消了,因为启动报依赖循环报错。后面我将所有的依赖都换成老师的同样的版本之后就没有了。
启动报错:
java: Annotation processing is not supported for module cycles. Please ensure that all modules from cycle [gulimall-common,renren-fast] are excluded from annotation processing
指的是 循环依赖的问题
 >解决办法:不要引入公共依赖,直接引入 nacos的服务注册发现的依赖
		<!--nacos作为注册中心,服务注册与发现-->
        <dependency>
            <groupId>com.alibaba.cloud</groupId>
            <artifactId>spring-cloud-starter-alibaba-nacos-discovery</artifactId>
            <version>2.1.0.RELEASE</version>
        </dependency>
		<!--<dependency>-->
        <!--    <groupId>com.atguigu.gulimall</groupId>-->
        <!--    <artifactId>gulimall-common</artifactId>-->
        <!--    <version>0.0.1-SNAPSHOT</version>-->
        <!--</dependency>-->
启动成功

鉴于上面出现很多错误,但是老师视频中没有出现这些错误,大概率是因为依赖的原因,所以对于gulimall中所有的依赖进行统一,按照老师的依赖进行配置。以防止后面出现很多突发的错误。
- 根据老师的依赖进行重新设置,然后重新运行网关。
启动报错:Caused by: org.yaml.snakeyaml.scanner.ScannerException: mapping values are not allowed here
这个地方报错的原因大概率是yml文件语法错误:注意这个坑找了好久,id uri predicates filters都要对齐,同一层级。

完整代码示例如下:
# 在 yml  配置文件中配置,可以很方便的让我们在 项目上线后将配置直接转移到配置中心
spring:
  cloud:
    gateway:
      routes:
        - id: admin_route
          uri: lb://renren-fast    # 路由给renren-fast,lb代表负载均衡
          predicates:            # 什么情况下路由给它
            - Path=/api/**     # 把所有api开头的请求都转发给renren-fast:因为默认前端项目都带上api前缀,
          filters:
            - RewritePath=/api/(?<segment>/?.*), /renren-fast/$\{segment}
            # 默认规则, 请求过来:http://localhost:88/api/captcha.jpg   转发-->  http://renren-fast:8080/api/captcha.jpg
            # 但是真正的路径是http://renren-fast:8080/renren-fast/captcha.jpg
            # 所以使用路径重写把/api/* 改变成 /renren-fast/*
修改后运行成功,验证码出现。
5、浏览器跨域问题
上面我们验证码出现了,但是我们登录却报错,原因在于浏览器的跨域问题。
从 8001访问88,引发 CORS 跨域请求,浏览器会拒绝跨域请求


跨域
问题描述:已拦截跨源请求:同源策略禁止读取位于 http://localhost:88/api/sys/login 的远程资源。(原因:CORS 头缺少 ‘Access-Control-Allow-Origin’)。
问题分析:这是一种跨域问题。访问的域名和端口和原来的请求不同,请求就会被限制
跨域:指的是浏览器不能执行其他网站的脚本。它是由浏览器的同源策略造成的,是浏览器对js施加的安全限制。(ajax可以)
同源策略:是指协议,域名,端囗都要相同,其中有一个不同都会产生跨域;
-
引入浏览器跨域知识
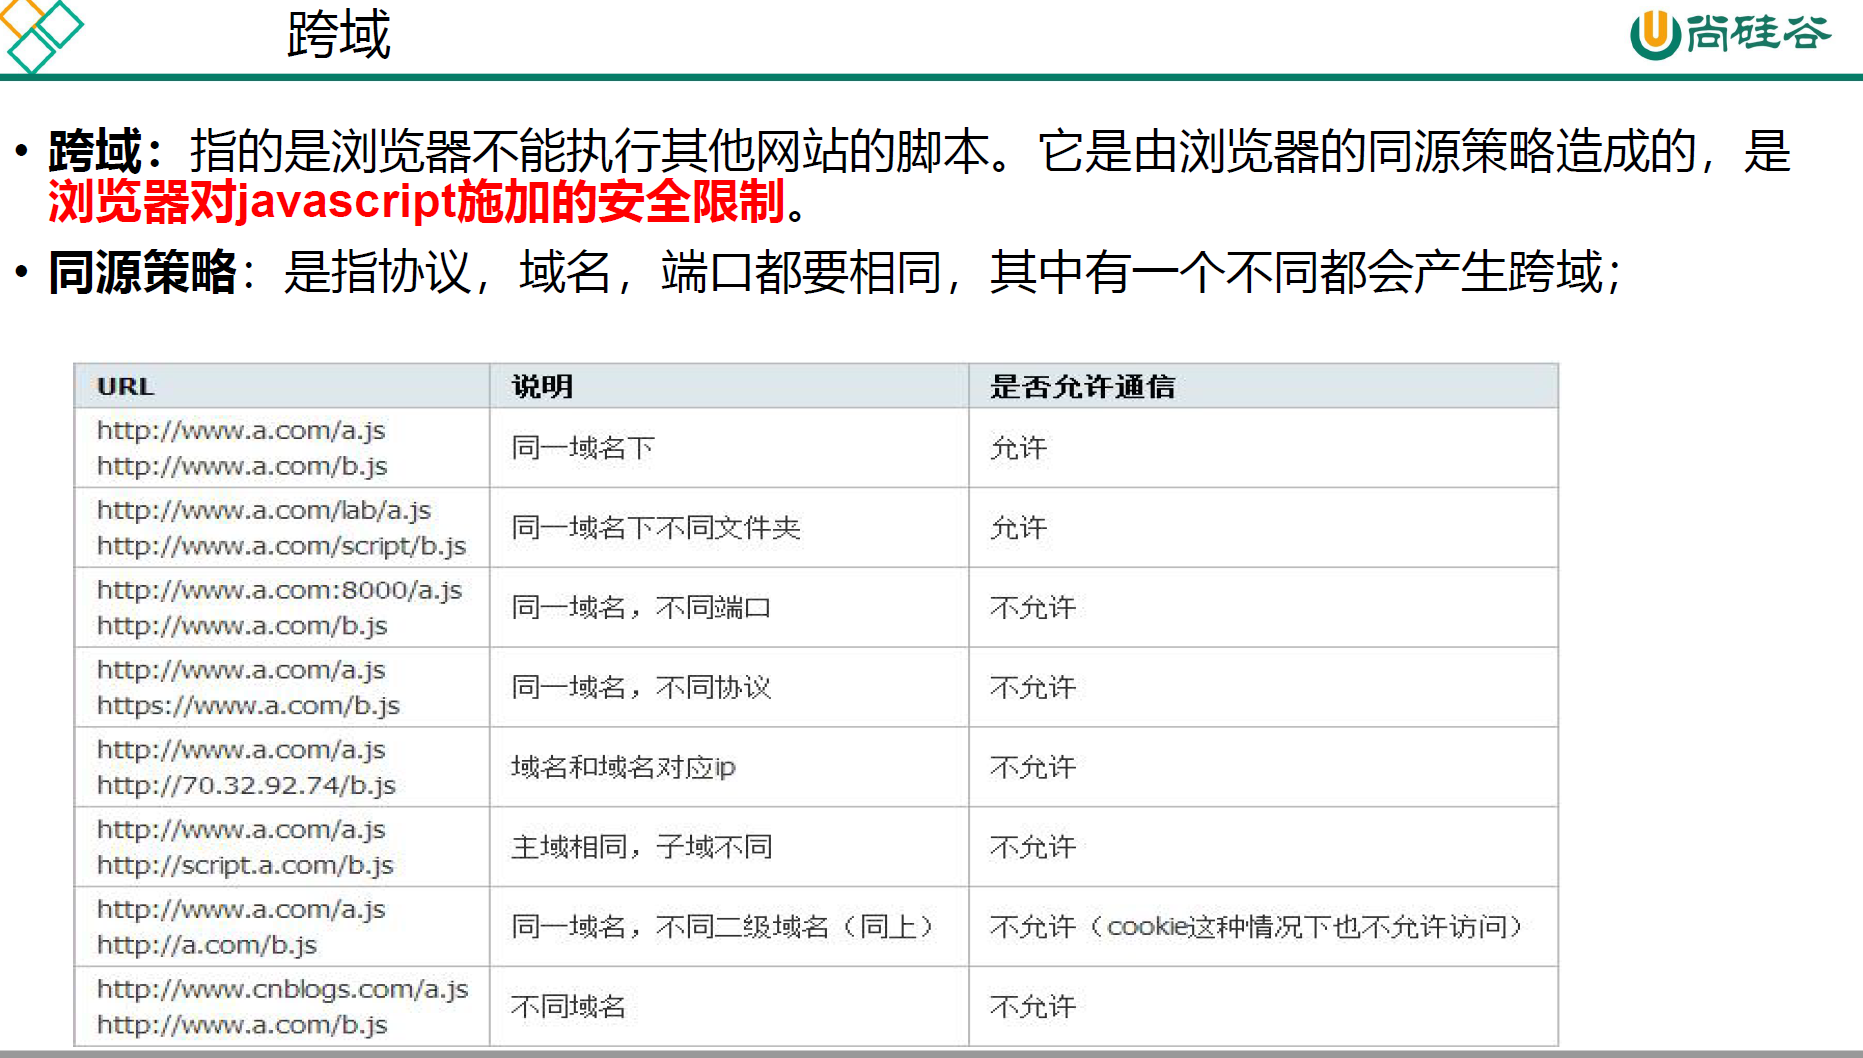
跨域流程:
这个跨域请求的实现是通过预检请求实现的,先发送一个OPSTIONS探路,收到响应允许跨域后再发送真实请求
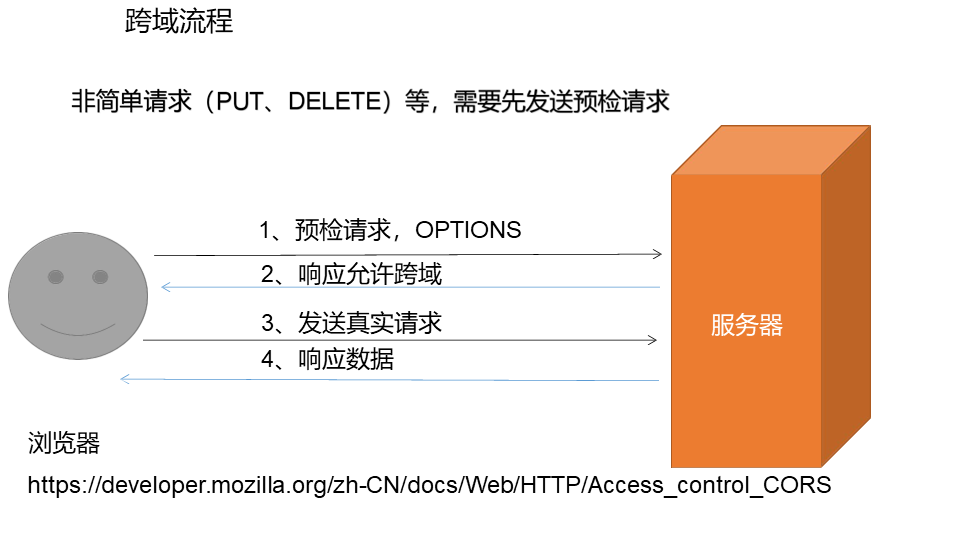
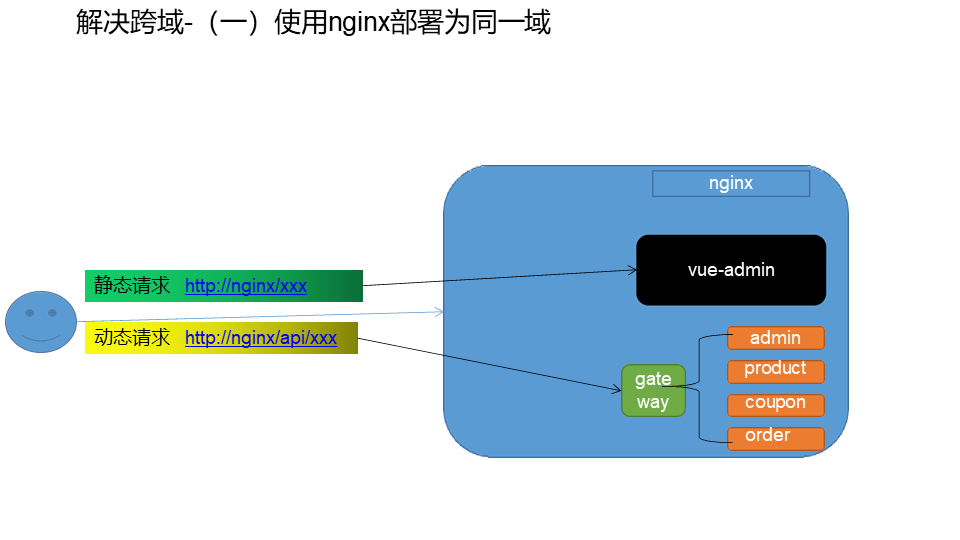
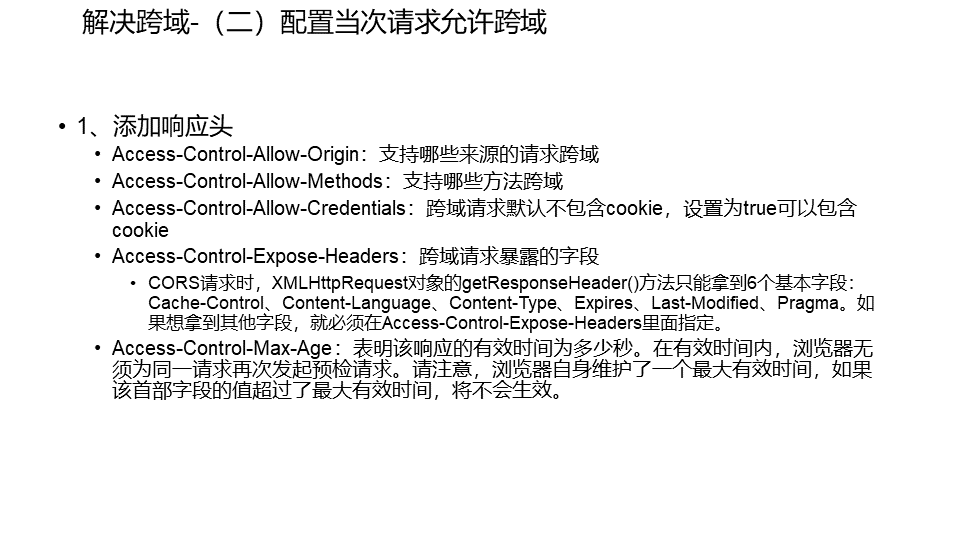
前面跨域的解决方案:
方法1:设置nginx包含admin和gateway
方法2:让服务器告诉预检请求能跨域- 这里我们采用的解决办法:在
gulimall-gateway中配置跨域配置列GulimallCorsConfiguration解决跨域问题------配置filter,每个请求来了以后,返回给浏览器之前都添加上那些字段
我们在gulimall-gateway中创建一个config来存放GulimallCorsConfiguration。注意这个包一定是要在gateway这个包下,否则启动报错(坑)。
@Configuration public class GulimallCorsConfiguration { @Bean // 添加过滤器,当请求一过来走完 corsWebFilter 就给他们添加上跨域的相应配置 public CorsWebFilter corsWebFilter(){ // 基于url路径跨域,选择reactive包下的 UrlBasedCorsConfigurationSource source = new UrlBasedCorsConfigurationSource(); // 跨域配置信息 CorsConfiguration corsConfiguration = new CorsConfiguration(); // 允许跨域的头 corsConfiguration.addAllowedHeader("*"); // 允许跨域的请求方式 corsConfiguration.addAllowedMethod("*"); // 允许跨域的请求来源 corsConfiguration.addAllowedOrigin("*"); // 是否允许携带cookie跨域 corsConfiguration.setAllowCredentials(true); // 任意url都要进行跨域配置 //对接口进行配置,“/*”代表所有,“/**”代表适配的所有接口 source.registerCorsConfiguration("/**",corsConfiguration); //CorsWebFilter的构造器需要传递一个 //org.springframework.web.cors.reactive.CorsConfigurationSource的接口作为参数 //接口不能实例化,所以选择CorsConfigurationSource的实现类 //UrlBasedCorsConfigurationSource作为参数 return new CorsWebFilter(source); } }- 再次启动测试
浏览器检查报错,报错的原因是:renren-fast 中也配置了跨域,但是我们只需要一个,所以要给注释掉。
http://localhost:8001/renren已拦截跨源请求:同源策略禁止读取位于 http://localhost:88/api/sys/login 的远程资源。(原因:不允许有多个 ‘Access-Control-Allow-Origin’ CORS 头)n-fast/captcha.jpg?uuid=69c79f02-d15b-478a-8465-a07fd09001e6
出现了多个请求,并且也存在多个跨源请求。
为了解决这个问题,需要修改renren-fast项目,注释掉“io.renren.config.CorsConfig”类。然后再次进行访问。

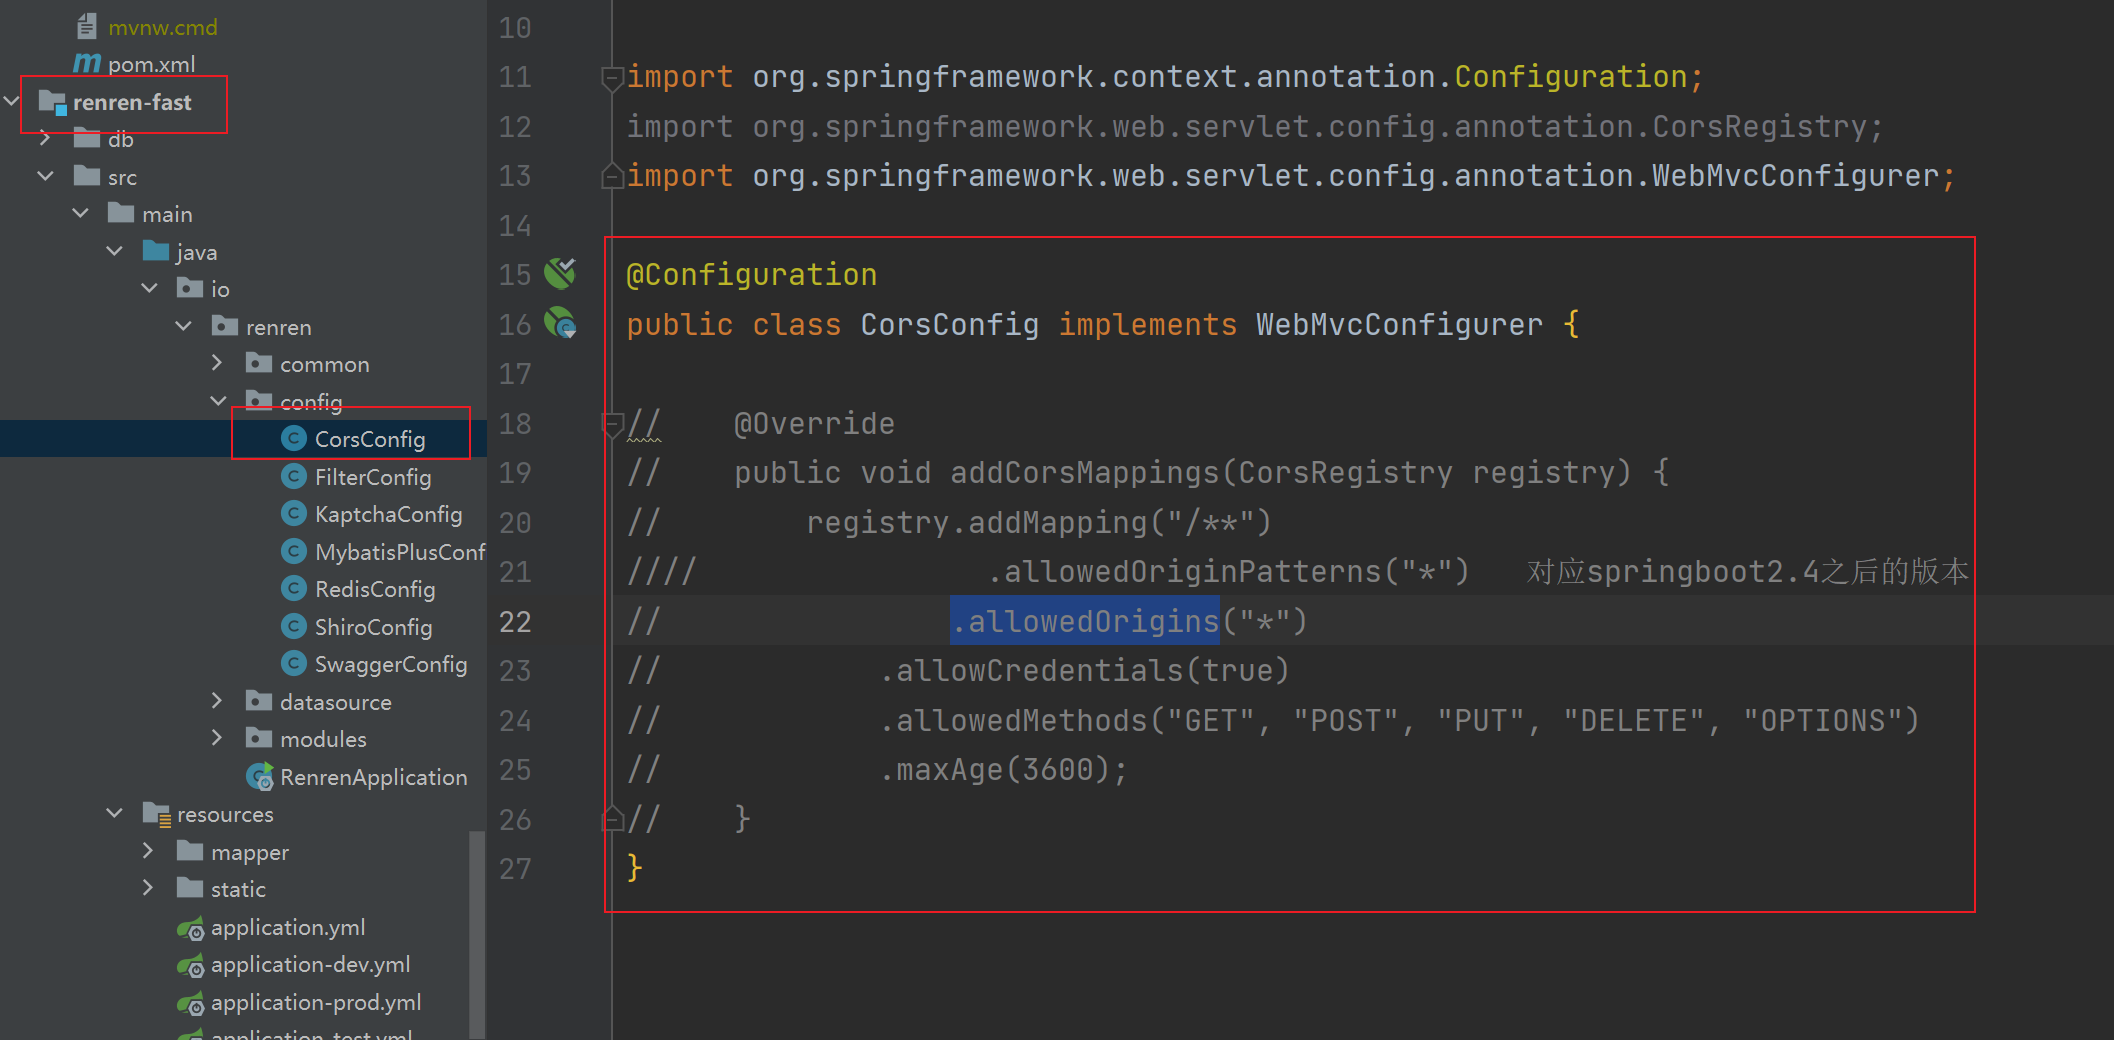
-
跨域问题困扰了我 9个半小时的时间,最后发现 竟然是 renren-fast-vue 前端代码 格式问题,真是崩溃了。
这里也给了我一个 提醒,有时候需要从多方面进行问题的查找,不能 一颗树上吊死!!!!
前端 有时候也会报错,一定要注意。 其实只要依赖版本和老师的一样,有很多坑是可以避免的。
- 这里我们采用的解决办法:在
6.1.4 树形展示三级分类数据
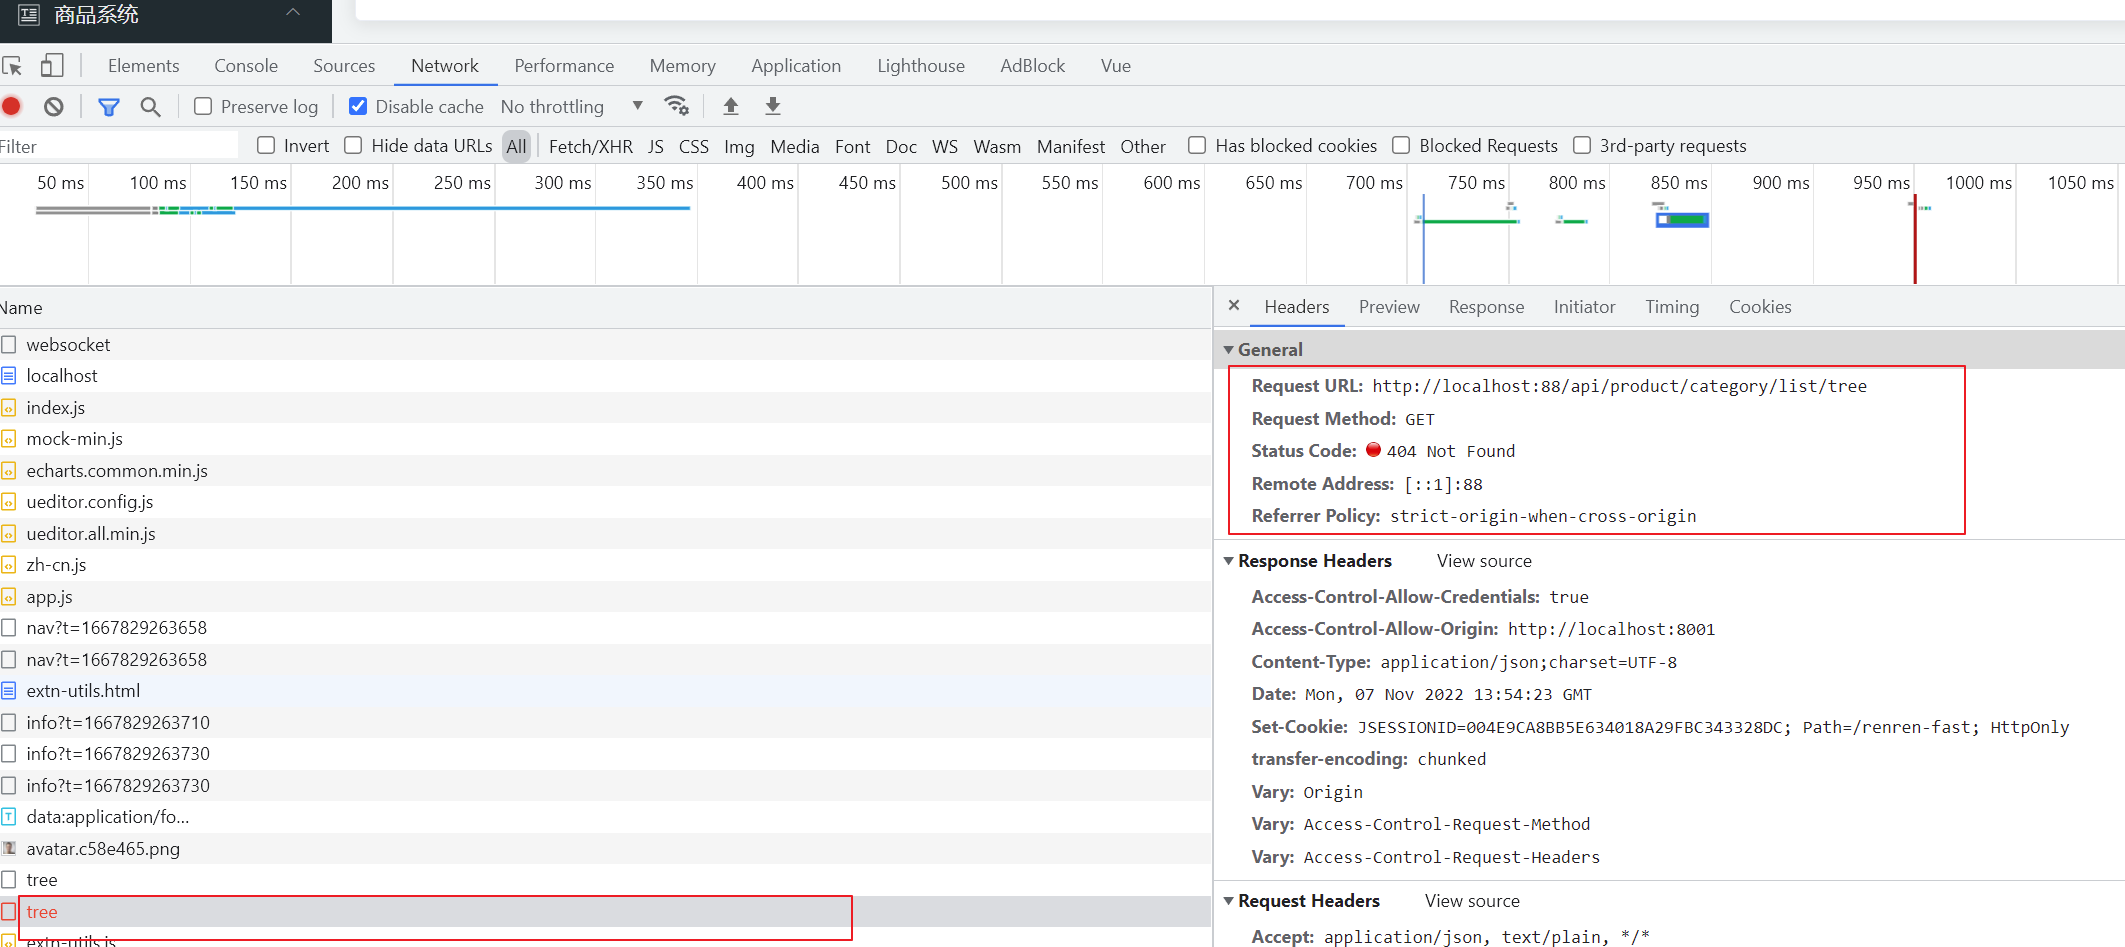

在显示商品系统/分类信息的时候,出现了404异常,请求的http://localhost:88/api/product/category/list/tree不存在
只有通过http://localhost:10000/product/category/list/tree路径才能够正常访问,所以会报404异常。这是路径映射错误。我们需要在网关中进行路径重写,让网关帮我们转到正确的地址。

1、 商品微服务注册进nacos
首先我们需要将 gulimall-product 服务 注册进 nacos,方便网关进行路由。
我们在nacos中新建一个 product 命名空间,以后关于 product商品微服务下的配置就放在该命名空间下,目前我们注册微服务的话,都默认放在 public 命名空间下就行,配置文件放在各自微服务的命名空间下即可。
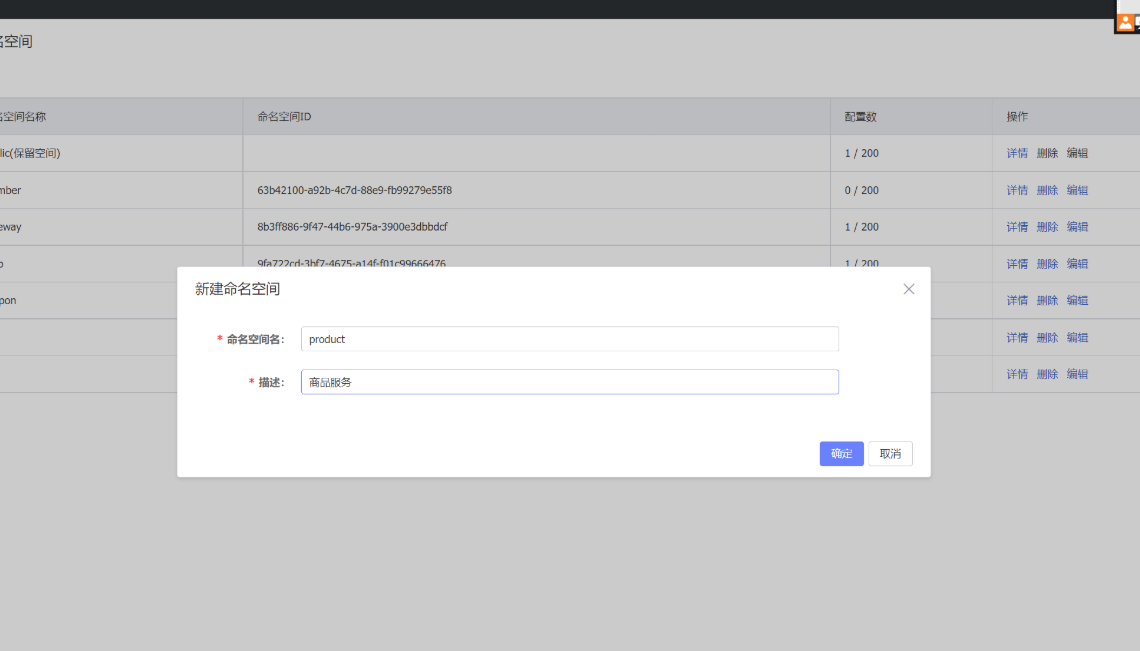
首先这里我们先回顾一下 nacos的配置步骤:
- 微服务注册进nacos:
- 首先 需要在 application.yml / application.properties 文件中配置nacos的服务注册地址,并且最好每一个微服务都有属于自己的一个 应用名字
  spring:
    cloud:
      nacos:
        discovery:
          server-addr: 127.0.0.1:8848
- 微服务 配置 进 nacos
- 如果想要 用nacos作为配置中心 ,需要 新建 bootstrap.properties 文件,然后在里面配置nacos 配置中心的地址; 此外,我们规定每一个微服务都有属于自己的命名空间,以后隶属于该微服务下的配置文件都配置在 该命名空间中。
  spring.application.name=gulimall-product
  # 配置nacos 配置中心地址
  spring.cloud.nacos.config.server-addr=127.0.0.1:8848
  spring.cloud.nacos.config.namespace=832f36b7-7878-47b7-8968-408f7b98b1e6
- 在启动类 上 添加注解 @EnableDiscoveryClient : 为了发现服务注册和配置

注册和配置成功。
2、在网关配置文件中配置路由规则,进行路径重写
在 gulimall-gateway 下的 application.yml中进行配置
      - id: product_route
          uri: lb://gulimall_product
          predicates:
            - Path=/api/product/**
          filters:
            - RewritePath=/api/(?<segment>/?.*), /$\{segment}
        #          http://localhost:88/api/product/category/list/tree  http://localhost:10000/product/category/list/tree
注意:
如果直接访问 localhost:88/api/product/category/list/tree invalid token这个url地址的话,会提示非法令牌,后台管理系统中没有登录,所以没有带令牌

原因:先匹配的先路由,renren-fast 和 product 路由重叠,fast 要求登录
修正:在路由规则的顺序上,将精确的路由规则放置到模糊的路由规则的前面,否则的话,精确的路由规则将不会被匹配到,类似于异常体系中try catch子句中异常的处理顺序。
http://localhost:88/api/product/category/list/tree 正常
访问http://localhost:8001/#/product-category,正常
原因是:先访问网关88,网关路径重写后访问nacos8848,nacos找到服务
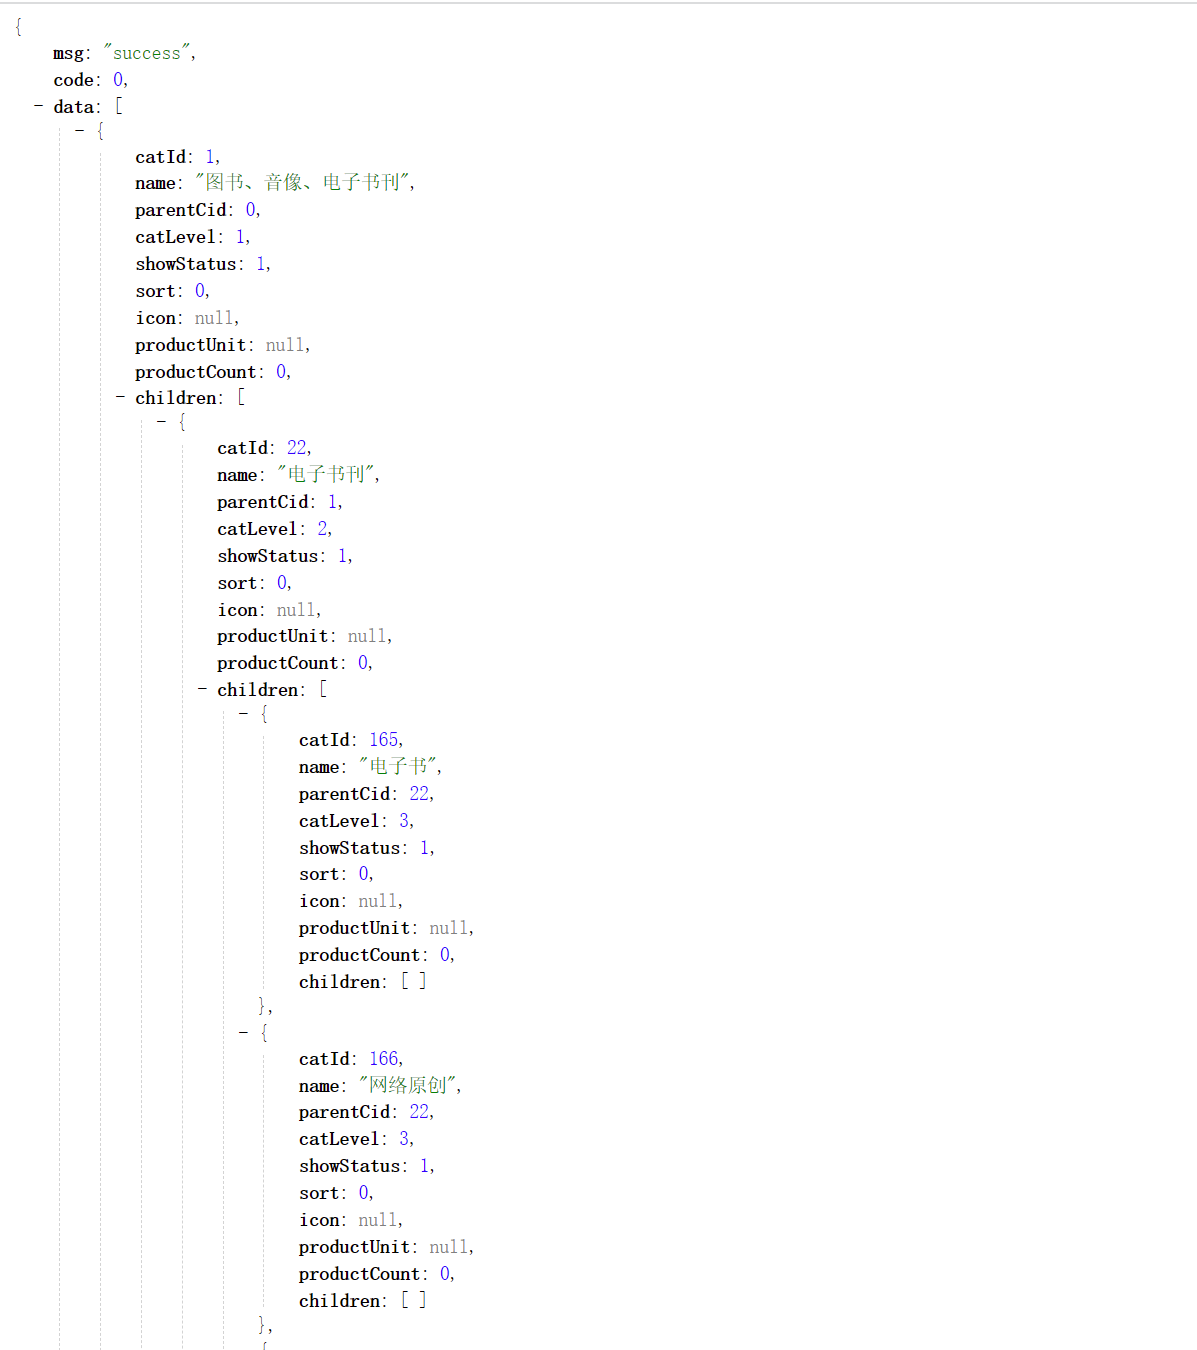
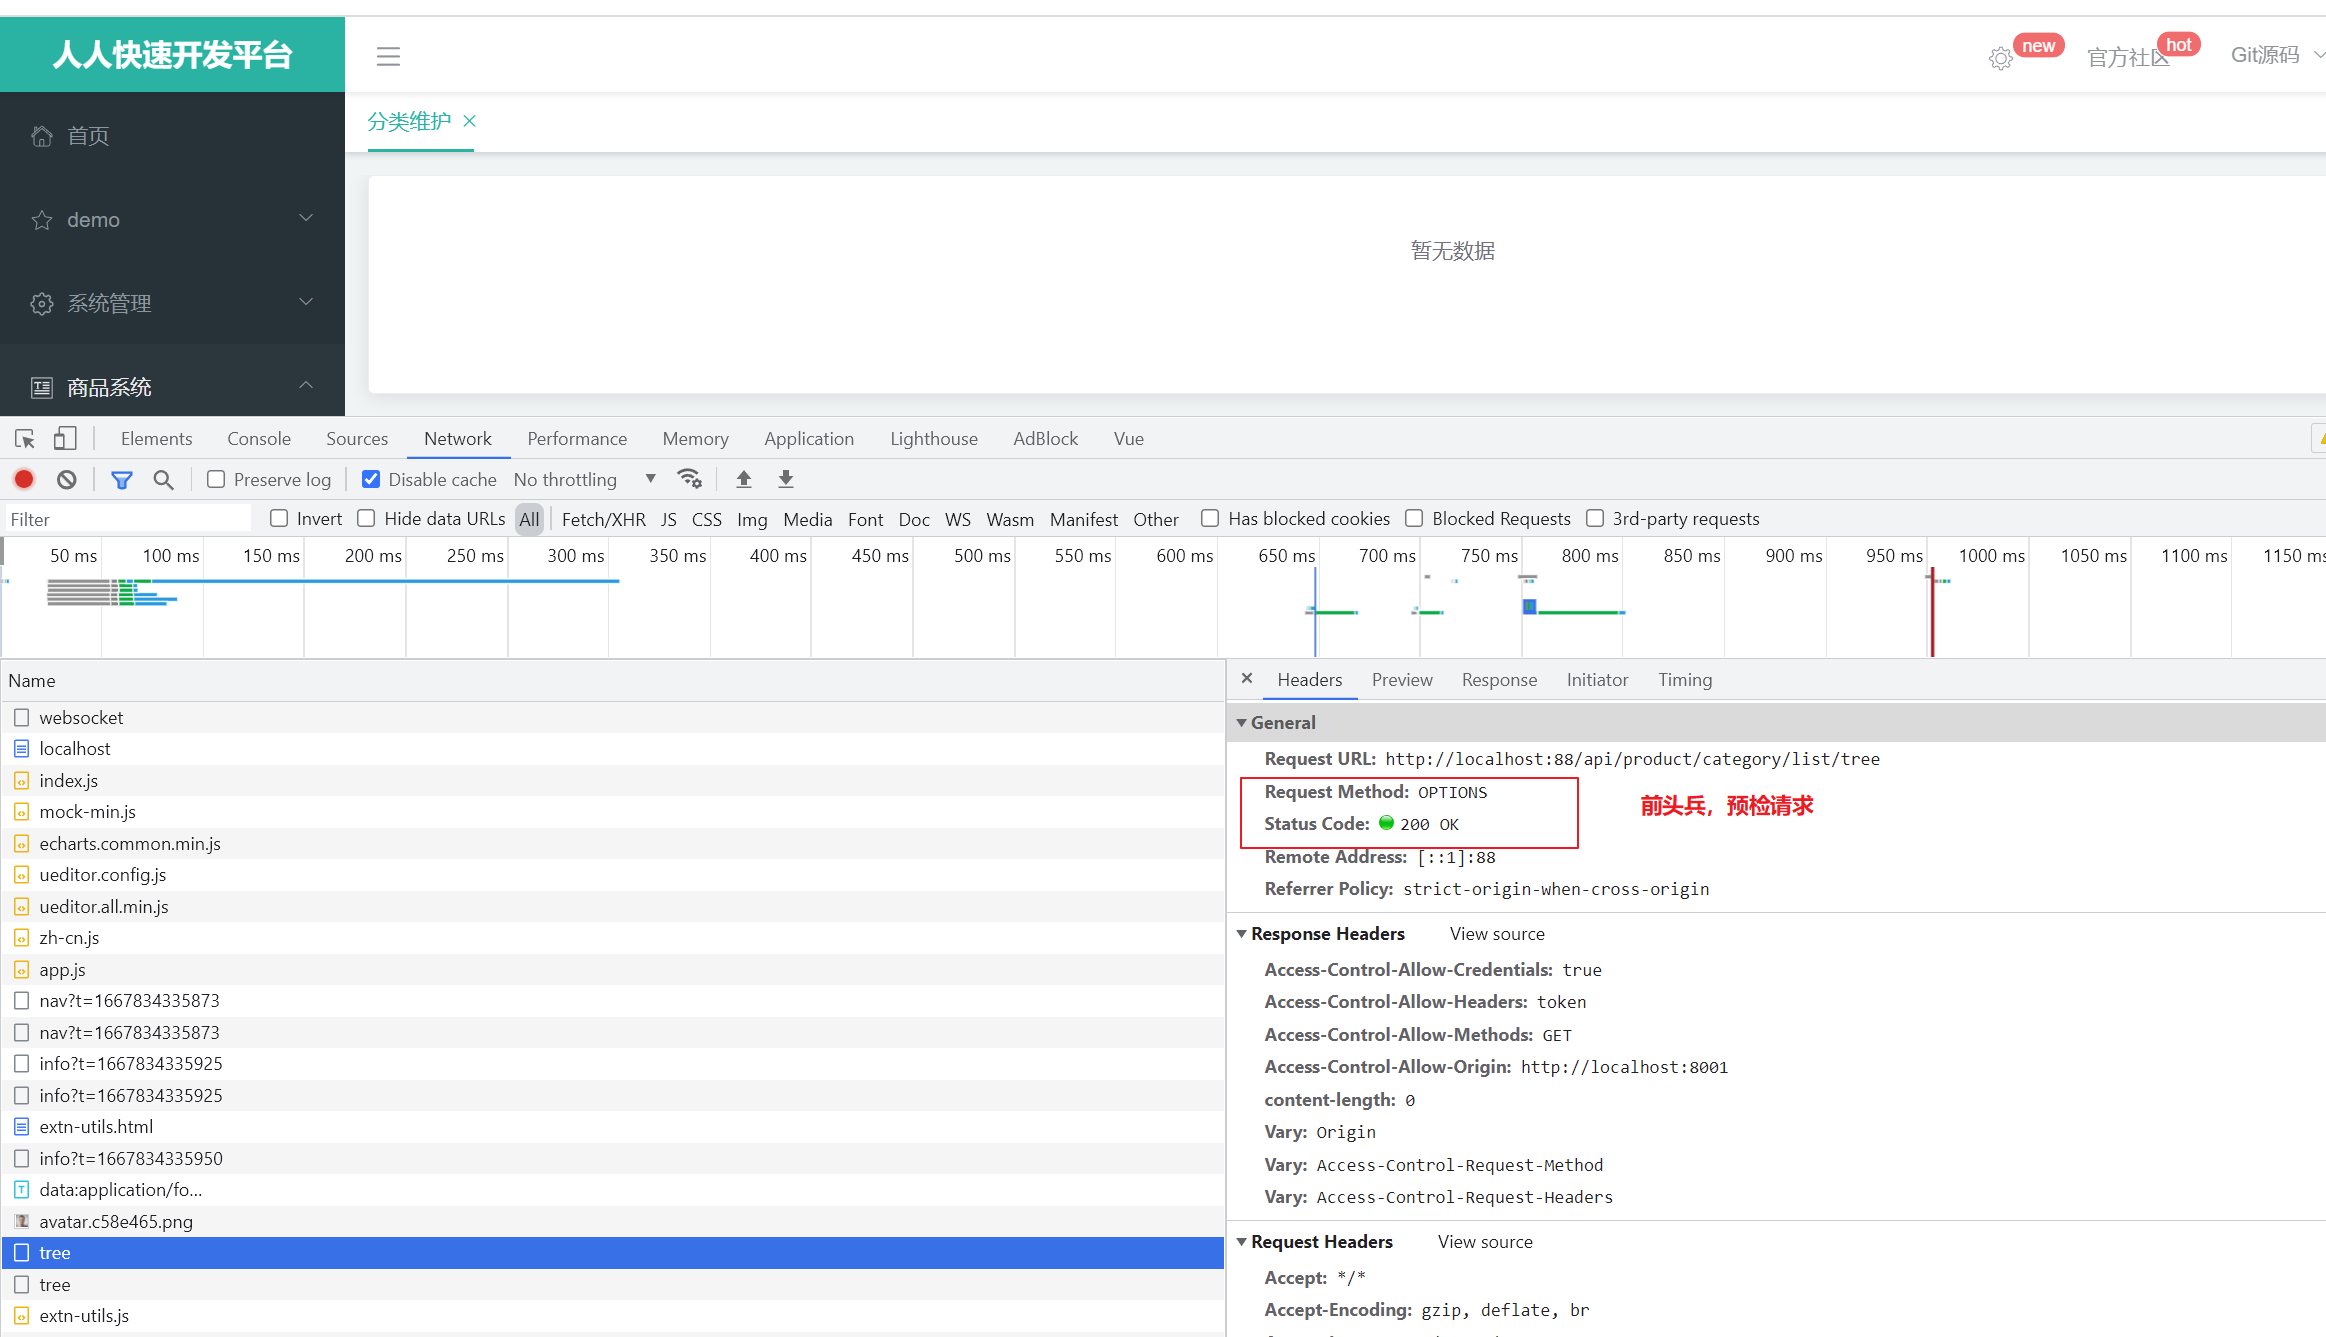

成功访问。
3、前端代码修改

因为我们 对 整个对象 中的 data 数据感兴趣 ,所以我们 将 对象中的 data 解构出来。
我们使用{}将data的数据进行解构:data.data是我们需要的数组内容

 //获取菜单集合
    methods: {
        handleNodeClick(data) {
            console.log(data);
        },
        //获取后台数据
        getMenus() {
            this.$http({
                url: this.$http.adornUrl('/product/category/list/tree'),
                method: 'get'
            }).then(({data}) => {  //将整个对象中的data数据结构出来,因为只有data才是我们需要的
                console.log("成功了获取到菜单数据....", data.data)
                this.menus = data.data; // 数组内容,把数据给menus,就是给了vue实例,最后绑定到视图上
            })
        }
    },
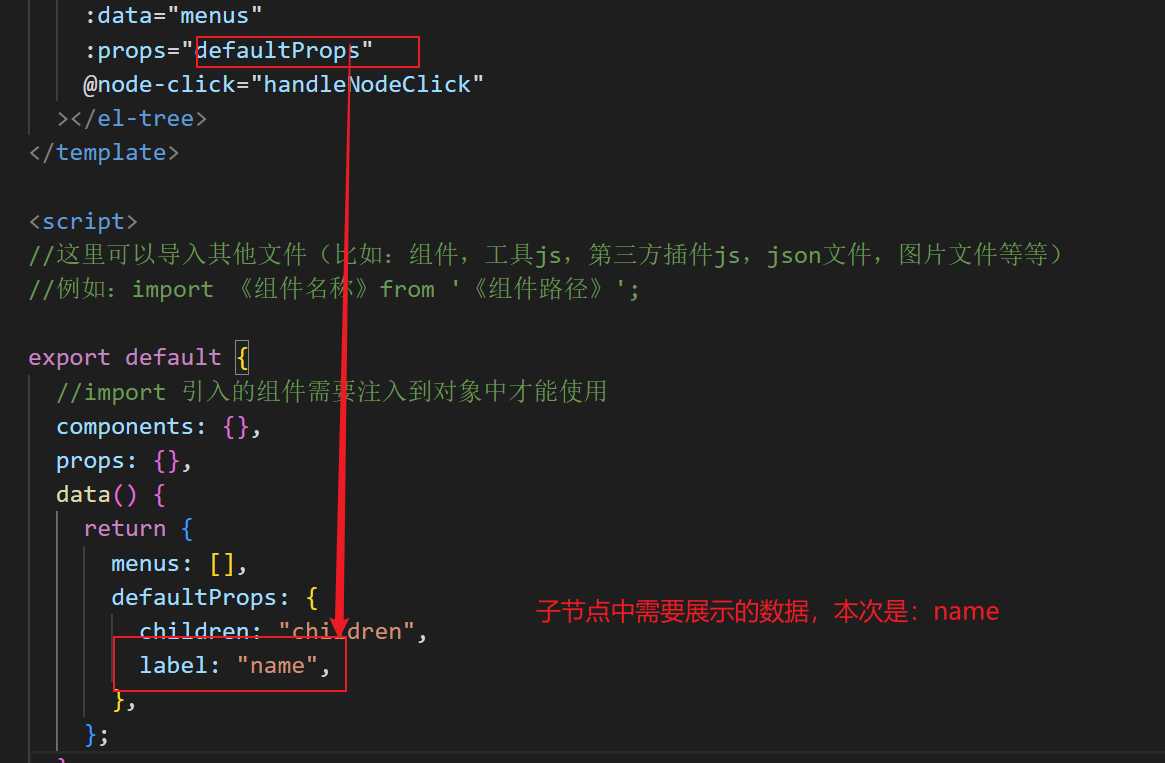
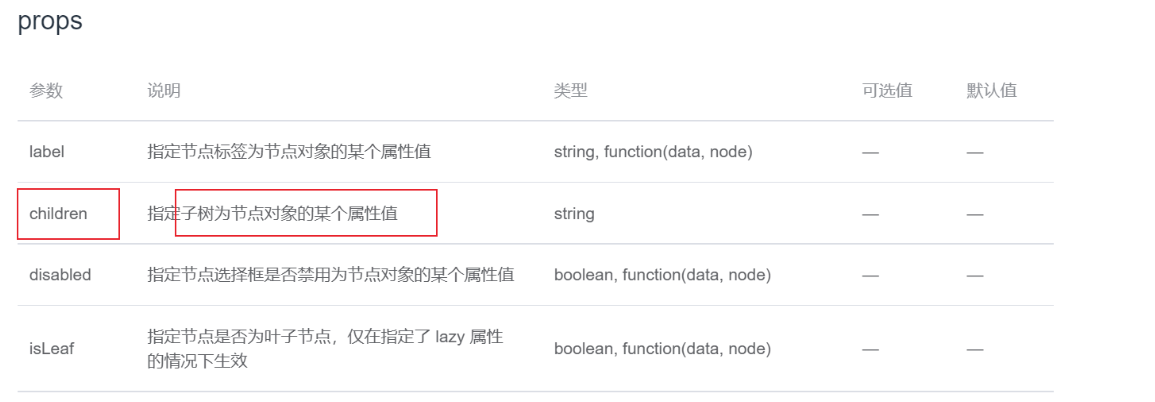
此时有了3级结构,但是没有数据,在category.vue的模板中,数据是menus,而还有一个props。这是element-ui的规则
<template>
    <el-tree :data="menus" :props="defaultProps" @node-click="handleNodeClick"></el-tree>
</template>

export default {
    //import引入的组件需要注入到对象中才能使用
    components: {},
    data() {
        return {
            menus: [],  //真正的数据需要发送请求从数据库中进行查找
            defaultProps: {
                children: 'children', //子节点
                label: 'name'  //name属性作为标签的值,展示出来
            }
        };
    },
修改完毕后,测试:
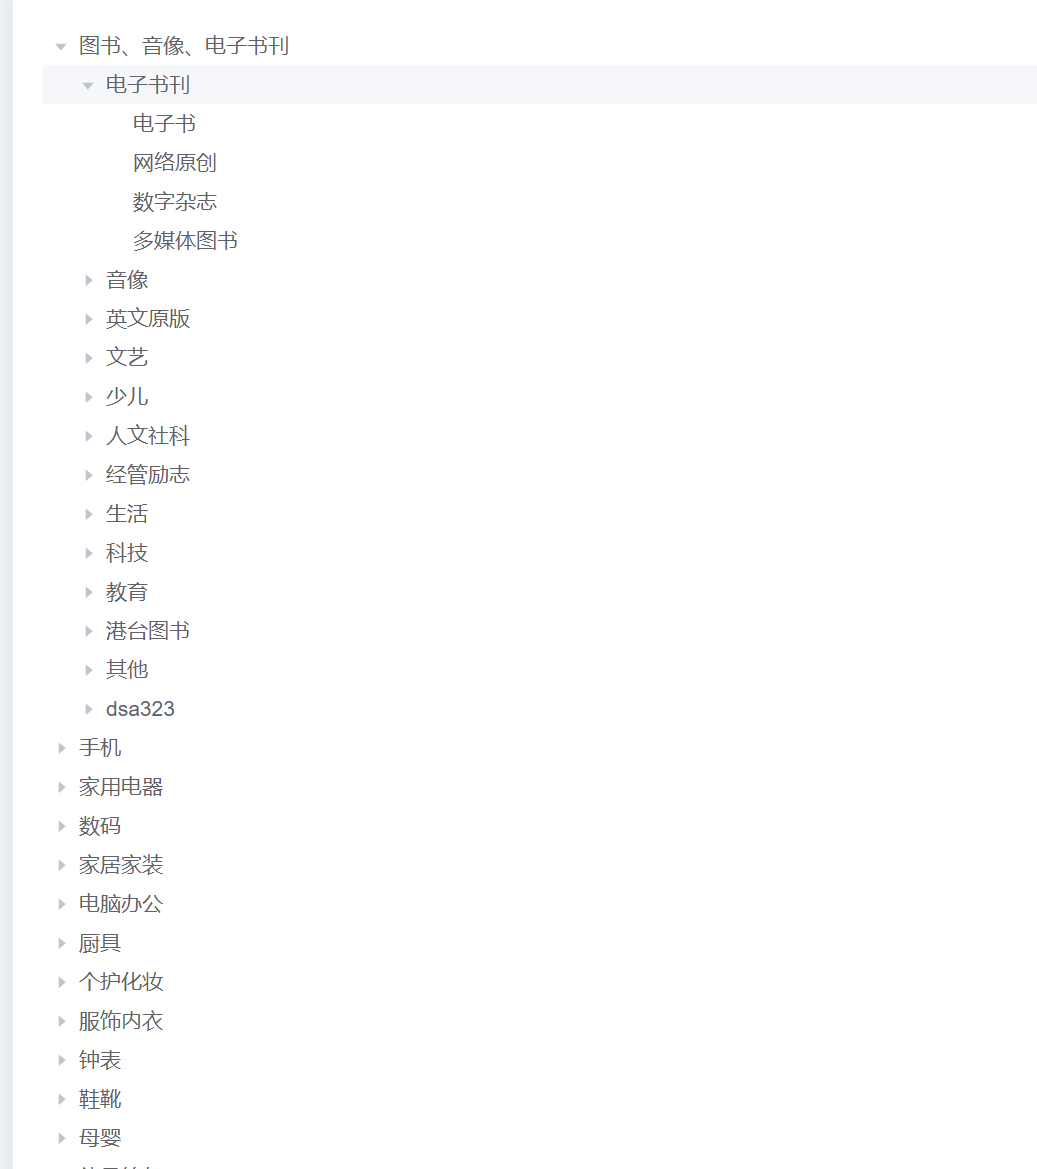
6.1.5 删除数据----逻辑删除
1、前端代码
node 与 data
在element-ui的tree中,有2个非常重要的属性node代表当前节点对象(是否展开等信息,element-ui自带属性)
data是节点数据,是自己的数据。
data从哪里来:前面ajax发送请求,拿到data,赋值给menus属性,而menus属性绑定到标签的data属性。而node是 ui 的默认规则
删除效果预想:
- 在每一个菜单后面添加 append, delete
- 点击按钮时,不进行菜单的打开合并:expand-on-click-node="false"
- 当没有子菜单或者没有引用(后台数据库判断是否有被引用,这里暂时不考虑)的时候,才可以显示delete按钮。当为一级、二级菜单时,才显示append按钮
- 利用 v-if 进行判断是否显示 按钮:
- 如果 当前节点 node 的等级 ≤ 2,表示是一级菜单或二级菜单,不显示删除按钮------- v-if="node.level <= 2", level表示当前 是几级节点;
- 如果 当前节点 的子节点的 数组长度为0,表示 没有子菜单----v-if="node.childNodes.length == 0"
- 添加多选框 show-checkbox ,可以多选
- 设置 node-key=""标识每一个节点的不同
<!--  -->
<template>
  <el-tree
    :data="menus"
    show-checkbox
    :props="defaultProps"
    @node-click="handleNodeClick"
    :expand-on-click-node="false"
    node-key="catId"
  >
    <span class="custom-tree-node" slot-scope="{ node, data }">
      <span>{{ node.label }}</span>
      <span>
        <el-button
          type="text"
          v-if="node.level <= 2"
          size="mini"
          @click="() => append(data)"
        >
          Append
        </el-button>
        <el-button
          type="text"
          v-if="node.childNodes.length == 0"
          size="mini"
          @click="() => remove(node, data)"
        >
          Delete
        </el-button>
      </span>
    </span>
  </el-tree>
</template>

<script>
//这里可以导入其他文件(比如:组件,工具js,第三方插件js,json文件,图片文件等等)
//例如:import 《组件名称》 from '《组件路径》';

export default {
  //import引入的组件需要注入到对象中才能使用
  components: {},
  data() {
    return {
      menus: [],
      defaultProps: {
        children: "children", //子节点
        label: "name", //name属性作为标签的值,展示出来
      },
    };
  },
  methods: {
    handleNodeClick(data) {},
    getMenus() {
      this.$http({
        url: this.$http.adornUrl("/product/category/list/tree"),
        method: "get",
      }).then(({ data }) => {
        console.log("成功了获取到菜单数据....", data.data);
        this.menus = data.data;
      });
    },
    append(data) {
      console.log("append", data);
    },
    remove(node, data) {
      console.log("remove", node, data);
    },
  },
  //监听属性 类似于data概念
  computed: {},
  //监控data中的数据变化
  watch: {},
  //生命周期 - 创建完成(可以访问当前this实例)
  created() {
    this.getMenus();
  },
  //生命周期 - 挂载完成(可以访问DOM元素)
  mounted() {},
  beforeCreate() {}, //生命周期 - 创建之前
  beforeMount() {}, //生命周期 - 挂载之前
  beforeUpdate() {}, //生命周期 - 更新之前
  updated() {}, //生命周期 - 更新之后
  beforeDestroy() {}, //生命周期 - 销毁之前
  destroyed() {}, //生命周期 - 销毁完成
  activated() {}, //如果页面有keep-alive缓存功能,这个函数会触发
};
</script>
<style scoped>
</style>
效果展示:
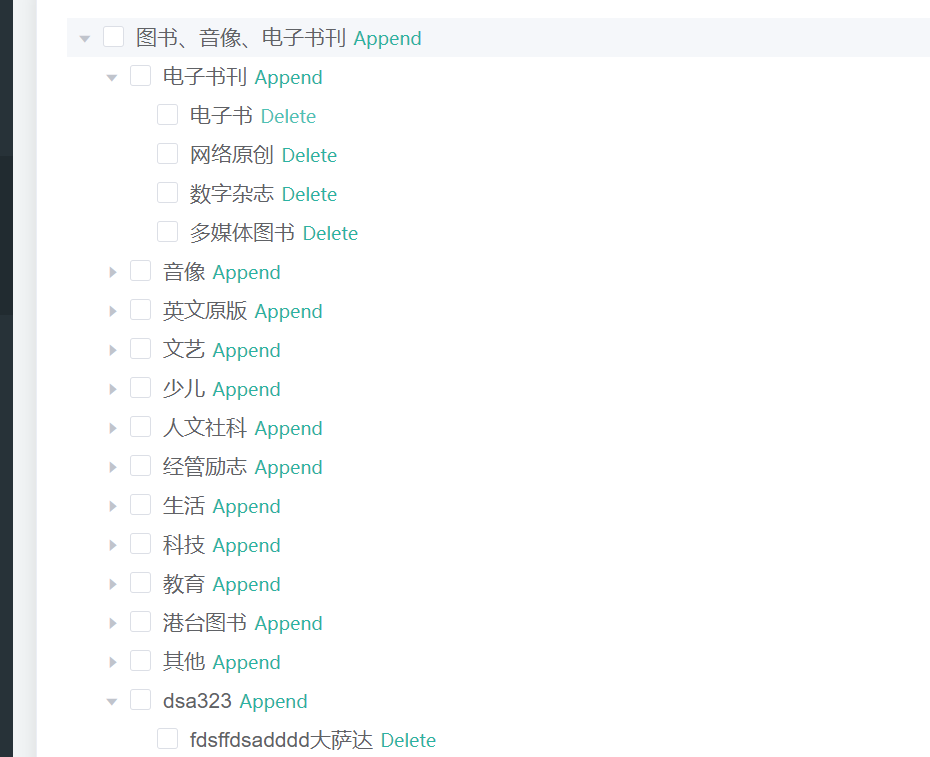
2、逻辑删除
- 首先我们先测试一下 gulimall-product中的 CategoryController删除功能。
测试删除数据,打开postman(APIfox也可以)输入“ http://localhost:88/api/product/category/delete ”,请求方式设置为POST,请求体body选 json 数组
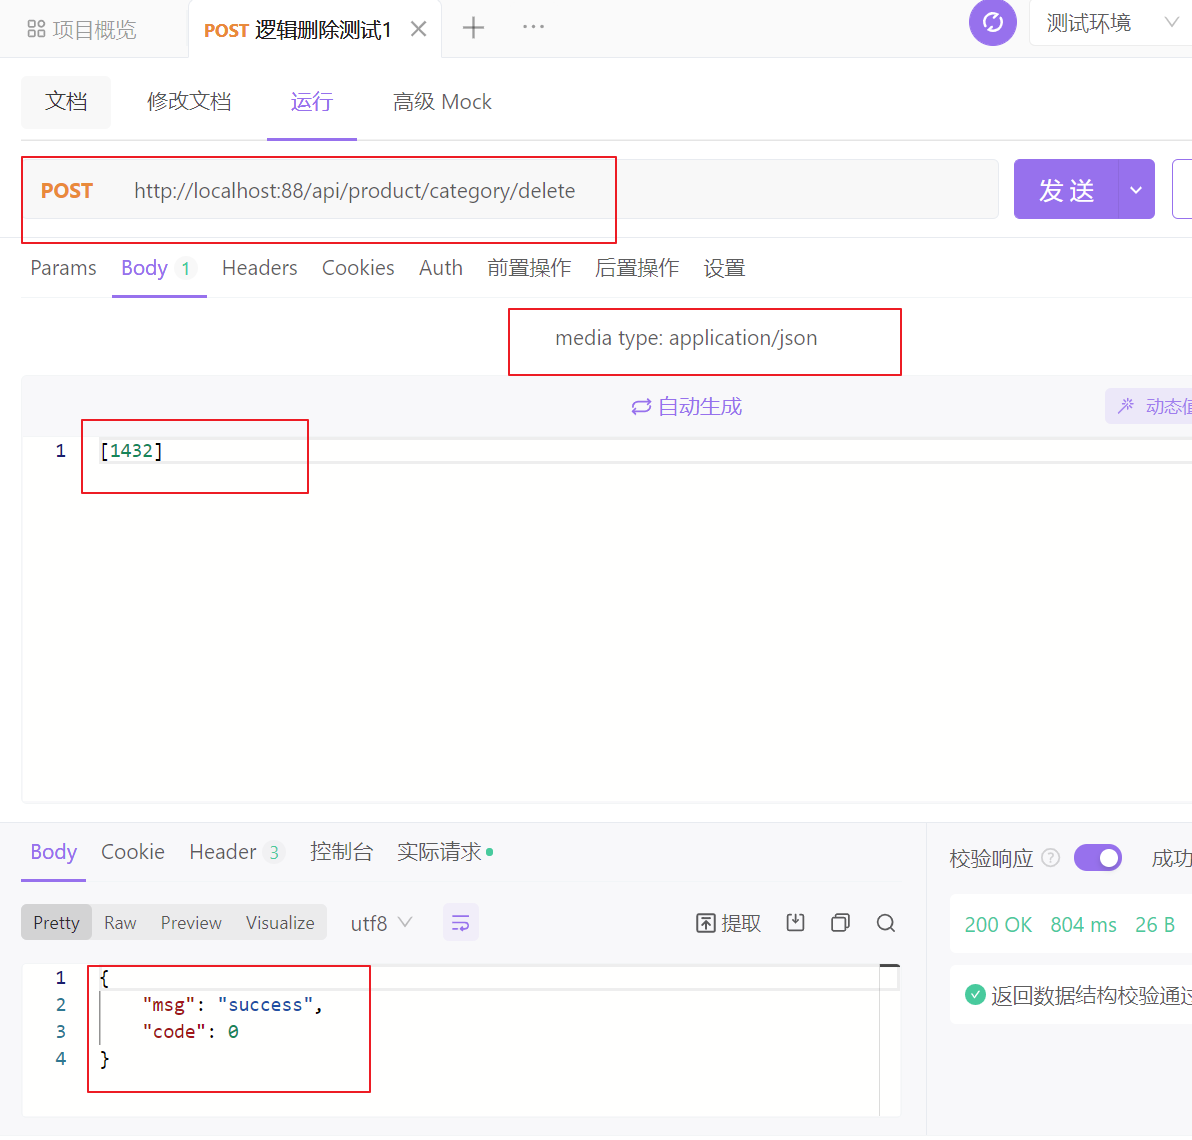
可以看到删除成功,而且数据库中也没有该数据了。
ps:这里将限制行数给取消勾选,不然默认是只显示 1000行。

这是一种 物理删除(不推荐),数据库中也同样被修改了。
接下来我们正式编写删除逻辑。
- 在真正的删除之前,我们要先检查该菜单是否被引用了。
- 修改gulimall-product 中的CategoryController类
 @RequestMapping("/delete")
    public R delete(@RequestBody Long[] catIds){
        //删除之前需要判断待删除的菜单那是否被别的地方所引用。
//		categoryService.removeByIds(Arrays.asList(catIds));

        categoryService.removeMenuByIds(Arrays.asList(catIds));
        return R.ok();
    }
- CategoryServiceImpl类
@Override
    public void removeMenuByIds(List<Long> asList) {
        //TODO 1.检查当前删除的菜单,是否被别的地方引用
        //其实开发中使用的都是逻辑删除,并不是真正物理意义上的删除
        baseMapper.deleteBatchIds(asList);
    }
这里我们还不清楚后面有哪些服务需要用到product,所以我们建一个备忘录,以后再来补充。
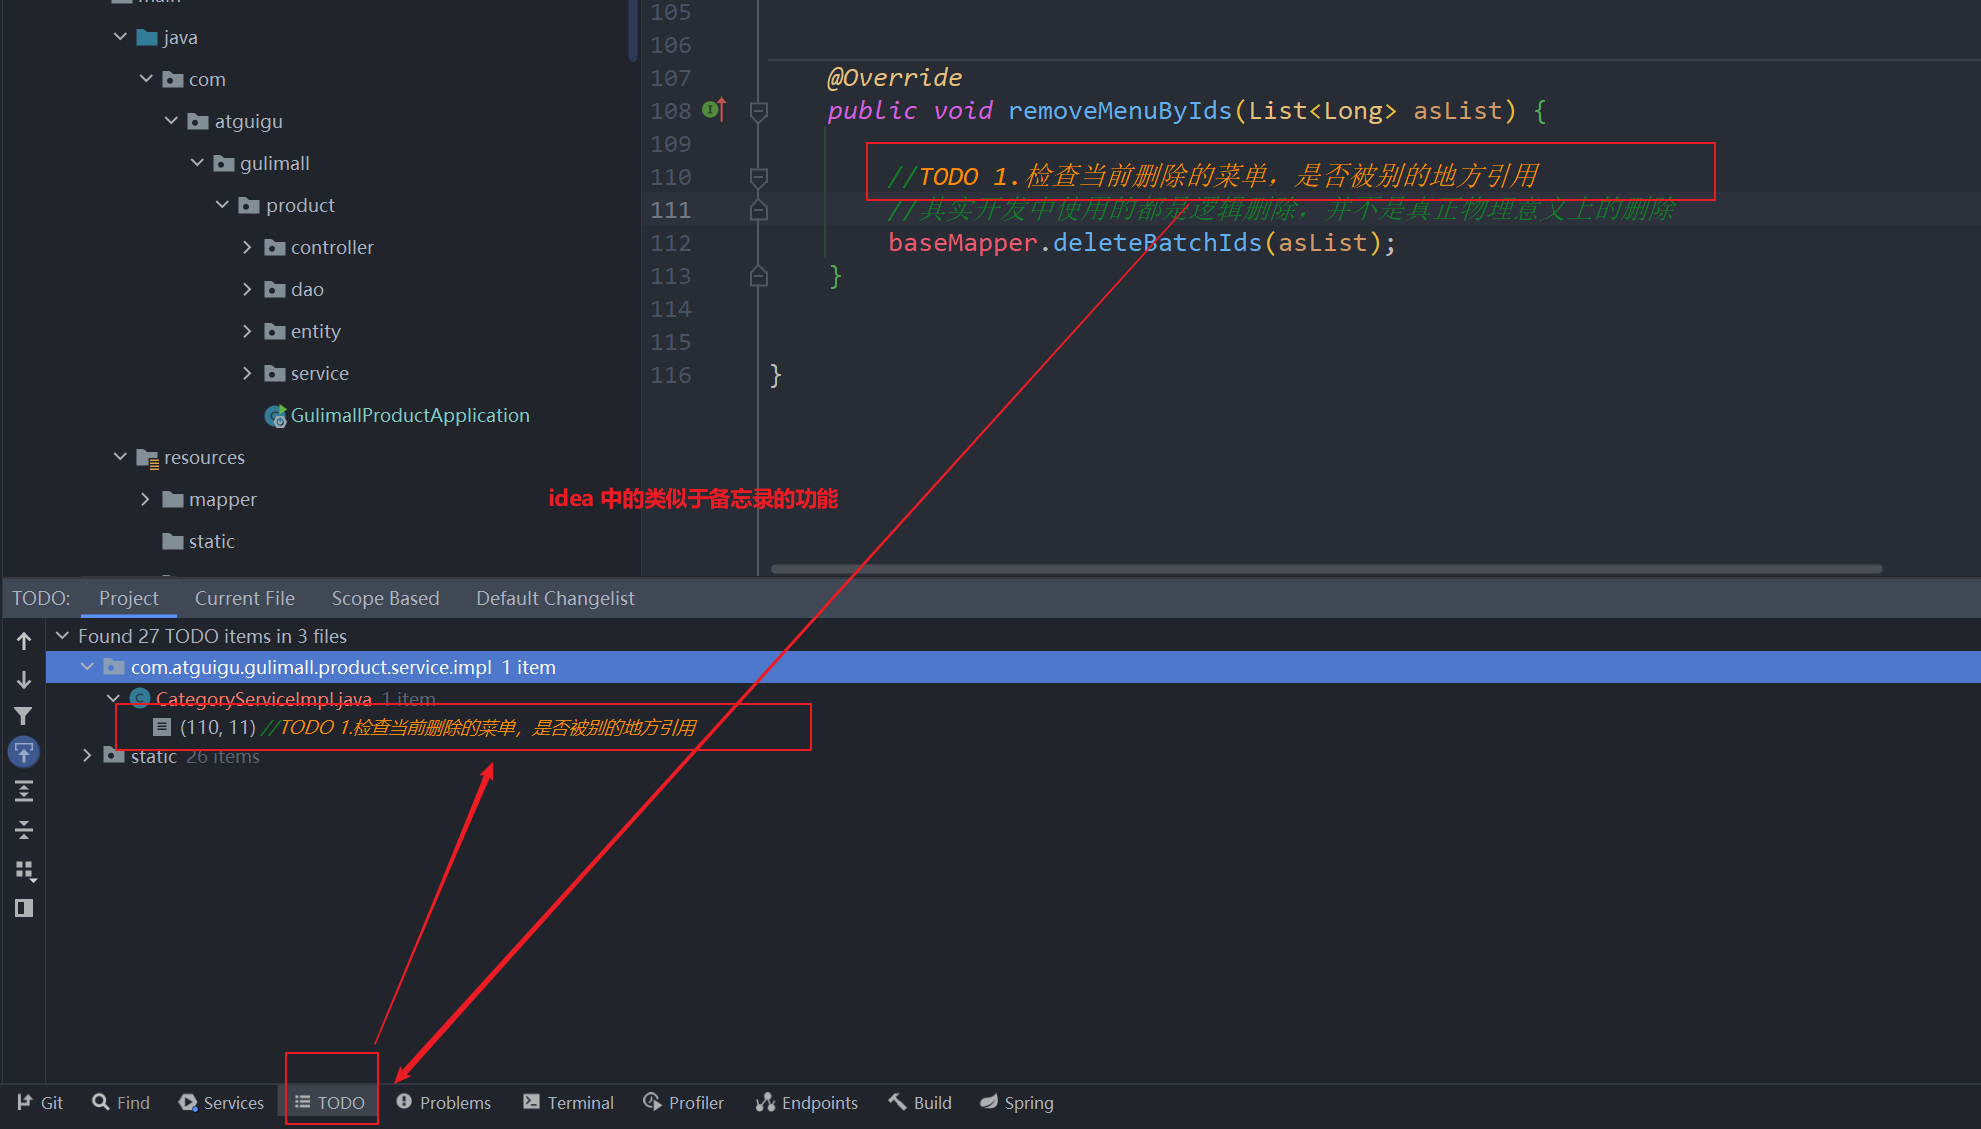
在学习的过程中,看到老师使用TODO才知道IDEA有一个类似备忘录的功能。
-
对于开发中,我们常常采用的是逻辑删除(我们并不希望删除数据,而是标记它被删除了,这就是逻辑删除),即在数据库表设计时设计一个表示逻辑删除状态的字段,在
pms_category我们选择 show_status 字段,当它为0,表示被删除。逻辑删除是mybatis-plus 的内容,会在项目中配置一些内容,告诉此项目执行delete语句时并不删除,只是标志位。
我们使用mybatis-plus中的逻辑删除语法:
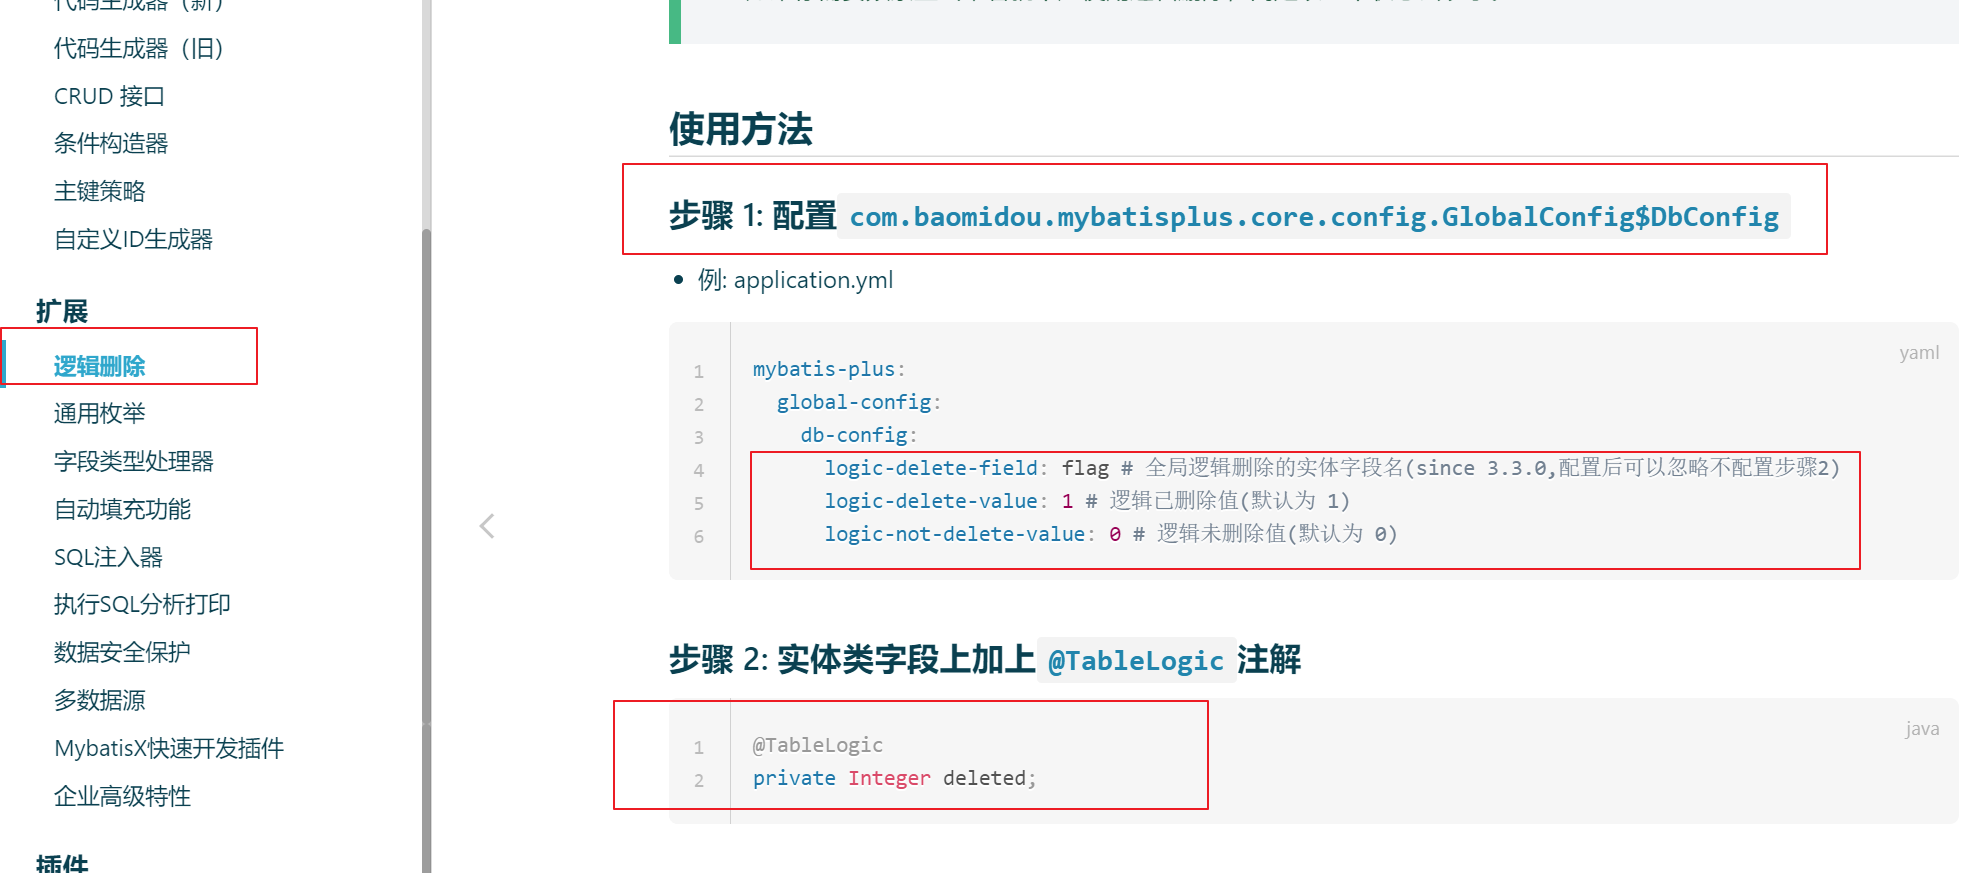
1)、配置全局逻辑删除规则
application.yml中
mybatis-plus:
  mapper-locations: classpath*:/mapper/**/*.xml
  global-config:
    db-config:
      id-type: auto             #主键自增
      logic-delete-value: 1     #1表示删除
      logic-not-delete-value: 0   #0表示未删除
注意:这里有一个坑,数据库中我们最开始设置的是1:未删除,0:删除。这个坑马上解决。
/**
	 * 是否显示[0-不显示,1显示]
	 */
	@TableLogic(value = "1",delval = "0")//因为application.yml和数据库中的设置刚好相反,所以我们这里按数据库中的效果单独设置
	private Integer showStatus;
配置之后,我们可以继续使用APIFox进行测试,实际测试成功。为了验证,我们也可以在application.yml设置一个全局打印日志,将sql语句打印出来。

logging:
  level:
    com.atguigu.gulimall: debug  #设置日志打印级别
3、测试删除
测试删除数据,打开postman或者是APIFox都可以(推荐使用APIFox)
输入“ http://localhost:88/api/product/category/delete ”,请求方式设置为POST,为了比对效果,可以在删除之前查询数据库的pms_category表:
delete请求传入的是数组,所以我们使用json数据。

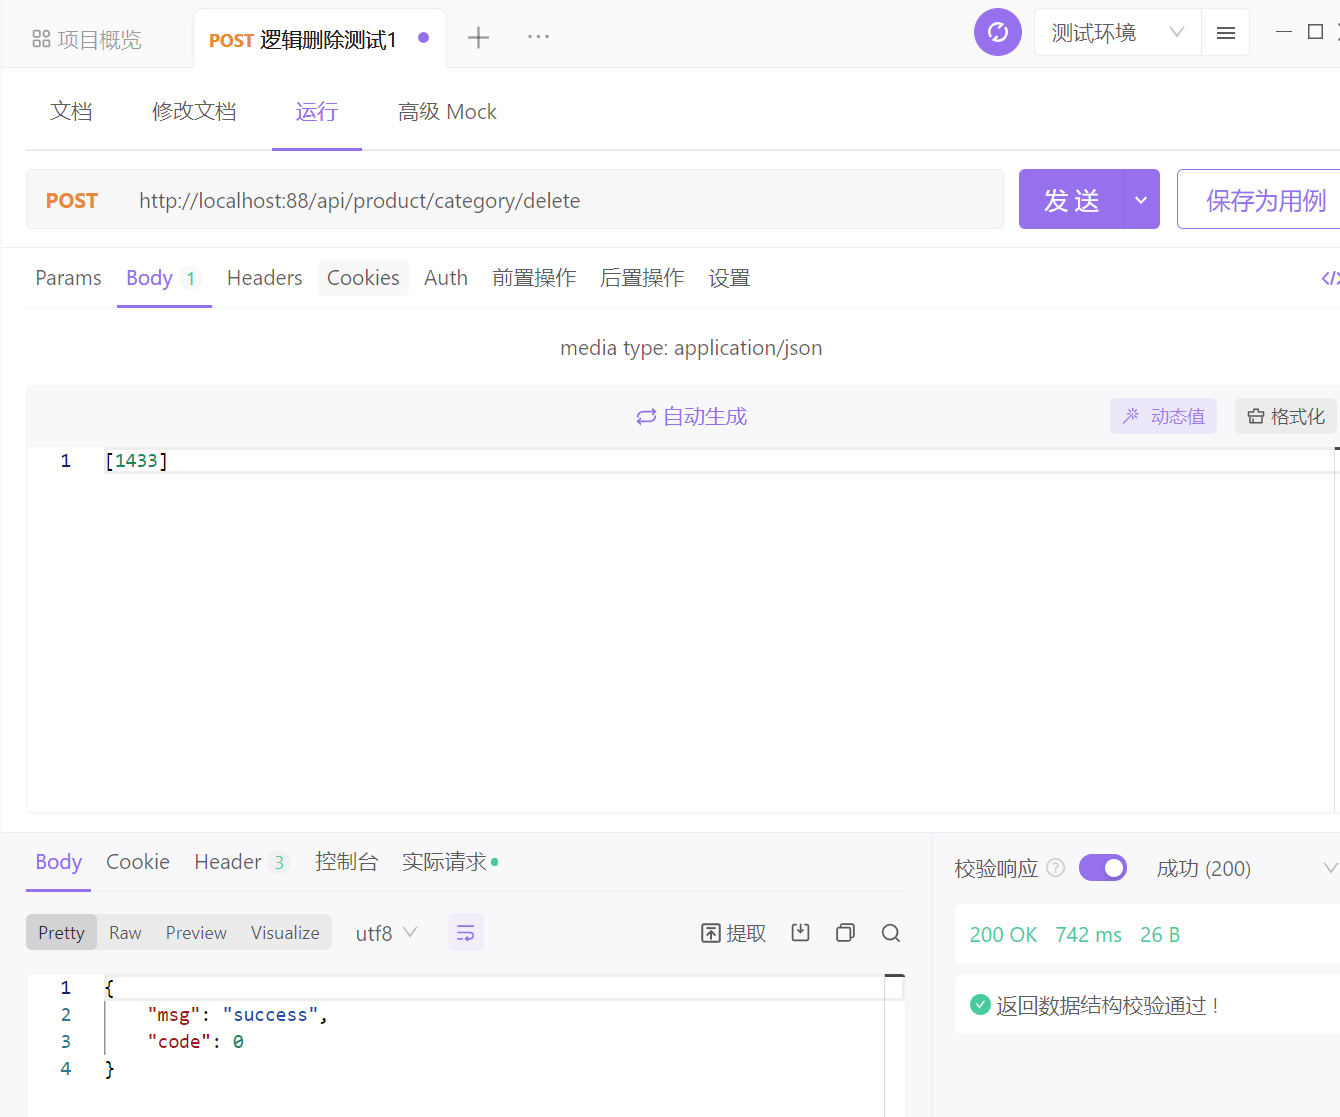
删除1433,之后从 数据库中 show_status 1--->0,即逻辑删除正确。

控制台打印的SQL语句:
Preparing: UPDATE pms_category SET show_status=0 WHERE cat_id IN ( ? ) AND show_status=1
Parameters: 1433(Long)
Updates: 1
由此可见,逻辑删除成功,SQL语句为 更新字段。
4、前端代码编写
发送的请求:delete
发送的数据:this.$http.adornData(ids, false)
util/httpRequest.js中,封装了一些拦截器
http.adornParams是封装get请求的数据
http.adornData封装post请求的数据
ajax 的 get 请求第一次向服务器请求数据之后,后续的请求可能会被缓存,就不会请求服务器要新的数据了。
所以为了不缓存,我们在url后面拼接个 date时间戳 或者一个随机数,让他每次都请求服务器获取实时的数据了。
- 编写前端 remove 方法,实现向后端发送请求
- 点击delete弹出提示框,是否删除这个节点: elementui 中 MessageBox 弹框中的确认消息添加到删除之前
- 删除成功后有消息提示: elementui 中 Message 消息提示
- 原来展开状态的菜单栏,在删除之后也应该展开: el-tree组件的 default-expanded-keys 属性,默认展开。 每次删除之后,把删除菜单的父菜单的id值赋给默认展开值即可。
注意:
前端向后端发送post请求和get请求。对于这个我们可以设置一个自定义的代码块。文件->首选项->用户片段,以后我们就可以通过快捷键直接进行输出了。
"http-get请求": {
        "prefix": "httpget",
        "body":[
            "this.\\$http({",
            "url: this.\\$http.adornUrl(''),",
            "method:'get',",
            "params:this.\\$http.adornParams({})",
            "}).then(({data})=>{",
            "})"
        ],
        "description":"httpGET请求"
    },

    "http-post请求":{
        "prefix":"httppost",
        "body":[
            "this.\\$http({",
            "url:this.\\$http.adornUrl(''),",
            "method:'post',",
            "data: this.\\$http.adornData(data, false)",
            "}).then(({data})=>{ })"
        ],
        "description":"httpPOST请求"
    }
要求:删除之后,显示弹窗,而且展开的菜单仍然展开。

//在el-tree中设置默认展开属性,绑定给expandedKey
:default-expanded-keys="expandedKey"

//data中添加属性
expandedKey: [],

//完整的remove方法
    remove(node, data) {
      var ids = [data.catId];
      this.$confirm(`是否删除【${data.name}】菜单?`, "提示", {
        confirmButtonText: "确定",
        cancelButtonText: "取消",
        type: "warning",
      })
        .then(() => {
          this.$http({
            url: this.$http.adornUrl("/product/category/delete"),
            method: "post",
            data: this.$http.adornData(ids, false),
          }).then(({ data }) => {
            this.$message({
              message: "菜单删除成功",
              type: "success",
            });
            //刷新出新的菜单
            this.getMenus();
            //设置需要默认展开的菜单
            this.expandedKey = [node.parent.data.catId]
          });
        })
        .catch(() => {});
    },
6.1.6 新增分类
1、elementui中 Dialog 对话框
- 一个会话的属性为:visible.sync=“dialogVisible”
- 导出的data中"dialogVisible = false"
- 点击确认或者取消后的逻辑都是@click=“dialogVisible = false” 关闭会话即关闭弹框
2、点击 append,弹出对话框,输入分类名称
3、点击确定,添加到数据库: 新建方法addCategory发送post请求到后端; 因为要把数据添加到数据库,所以在前端数据中按照数据库的格式声明一个category。点击append时,计算category属性(比如 父id,以及当前层级等),点击确定时发送 post 请求(后台代码使用的是 @RequestBody 注解,需要发送 post请求)。
4、点击确定后,需要刷新菜单,显示出新的菜单;此外还需要展开菜单方便查看。
<!--对话框组件-->
	<el-dialog title="提示" :visible.sync="dialogVisible" width="30%">
      <el-form :model="categroy">
        <el-form-item label="分类名称">
          <el-input v-model="categroy.name" autocomplete="off"></el-input>
        </el-form-item>
      </el-form>
      <span slot="footer" class="dialog-footer">
        <el-button @click="dialogVisible = false">取 消</el-button>
        <el-button type="primary" @click="addCategory">确 定</el-button>
      </span>
    </el-dialog>
//data中新增数据
//按照数据库格式声明的数据
      categroy: { name: "", parentCid: 0, catLevel: 0, showStatus: 1, sort: 0 },
//判断是否显示对话框
      dialogVisible: false,


//修改append方法,新增addCategory方法
//点击append后,计算category属性,显示对话框
    append(data) {
      console.log("append", data);
      this.dialogVisible = true;
      this.categroy.parentCid = data.catId;
      this.categroy.catLevel = data.catLevel * 1 + 1;
    },

//点击确定后,发送post请求
//成功后显示添加成功,展开刚才的菜单
    addCategory() {
      console.log("提交的数据", this.categroy);
      this.$http({
        url: this.$http.adornUrl("/product/category/save"),
        method: "post",
        data: this.$http.adornData(this.categroy, false),
      }).then(({ data }) => {
          this.$message({
              message: "添加成功",
              type: "success",
            });
            //刷新出新的菜单
            this.getMenus();
            //设置需要默认展开的菜单
            this.expandedKey = [this.categroy.parentCid];
            this.dialogVisible = false;
      });
6.1.7 修改分类
gulimall-product中的CategoryController下
/**
     * 信息
     */
    @RequestMapping("/info/{catId}")
    //@RequiresPermissions("product:category:info")
    public R info(@PathVariable("catId") Long catId){
		CategoryEntity category = categoryService.getById(catId);

        return R.ok().put("data", category); //我们统一 为 data
    }
2.前端代码
实现修改名称,图标,计量单位。
1、新增Edit按钮:复制之前的append
2、查看controller,发现updata方法是由id进行更新的,所以data中的category中新增catId
3、增加、修改的时候也修改图标和计量单位,所以data的category新增inco,productUnit
4、新建edit方法,用来绑定Edit按钮。新建editCategory方法,用来绑定对话框的确定按钮。
5、复用对话框:
data数据中新增dialogType,用来标记此时对话框是由 edit打开的,还是由 append打开的。
新建方法 submitData,与对话框的确定按钮进行绑定,在方法中判断,如果 dialogTypeadd调用addCategory(),如果 dialogTypeedit调用editCategory()
data数据中新增 title,绑定对话框的title,用来做提示信息。判断dialogType的值,来选择提示信息。
6、防止多个人同时操作,对话框中的回显的信息应该是由数据库中读出来的:点击Edit按钮,发送httpget请求。(看好返回的数据)7、编辑editCategory方法:
controller之中的更新是动态更新,根据id,发回去什么值修改什么值,所以把要修改的数据发回后端就好。
成功之后发送提示消息,展开刚才的菜单。
8、编辑之后,再点击添加,发现会回显刚才编辑的信息。所以在append方法中重置回显的信息。9、这里给 对话框 添加一个 close-on-click-modal = false:这样我们点对话框之外的空白处就不会直接不显示对话框了。

<!--编辑按钮-->
		  <el-button type="text" size="mini" @click="() => edit(data)">
            Edit
          </el-button>

<!--可复用的对话框-->
	 <el-dialog :title="title" :visible.sync="dialogVisible" width="30%" :close-on-click-modal="false">
            <el-form :model="category">
                <el-form-item label="分类名称">
                    <el-input v-model="category.name" autocomplete="off"></el-input>
                </el-form-item>
                <el-form-item label="图标">
                    <el-input v-model="category.icon" autocomplete="off"></el-input>
                </el-form-item>
                <el-form-item label="计量单位">
                    <el-input v-model="category.productUnit" autocomplete="off"></el-input>
                </el-form-item>
            </el-form>
            <span slot="footer" class="dialog-footer">
                <el-button @click="dialogVisible = false">取 消</el-button>
                <el-button type="primary" @click="submitData">确 定</el-button>
            </span>
        </el-dialog>
//data, 新增了title、dialogType。 categroy中新增了inco、productUnit、catId
  data() {
        return {
            title: "",
            dialogType: "", //edit,add
            dialogVisible: false,
            menus: [],
            expandedKey: [],
            category: {
                name: "",
                parentCid: 0,
                catLevel: 0,
                showStatus: 1,
                sort: 0,
                icon: "",
                productUnit: "",
                catId: null,
            },
            defaultProps: {
                children: "children",  //子节点
                label: "name",  //name属性作为标签的值,展示出来
            },
        };
    },

//方法
     //绑定对话框的确定按钮,根据dialogType判断调用哪个函数
    submitData() {
            if (this.dialogType == "add") {
                this.addCategory();
            }
            if (this.dialogType == "edit") {
                this.editCategory();
            }
        },

        //绑定Edit按钮,设置dialogType、title,从后台读取数据,展示到对话框内
    edit(data) {
            console.log("要修改的数据", data);
            this.dialogType = "edit";
            this.title = "修改分类";
            // 发送请求获取节点最新的数据
            this.$http({
                url: this.$http.adornUrl(`/product/category/info/${data.catId}`),
                method: "get",
            }).then(({ data }) => {
                // 请求成功
                console.log("要回显的数据", data);
                this.category.name = data.data.name;
                this.category.catId = data.data.catId;
                this.category.icon = data.data.icon;
                this.category.productUnit = data.data.productUnit;
                this.category.parentCid = data.data.parentCid;
                this.dialogVisible = true;
            });
        },

       //修改三级分类数据
        //绑定对话框的确定按钮,向后台发送更新请求,传过去想要修改的字段
        editCategory() {
            var { catId, name, icon, productUnit } = this.category;
            this.$http({
                url: this.$http.adornUrl("/product/category/update"),
                method: "post",
                data: this.$http.adornData({ catId, name, icon, productUnit }, false),
            })
                .then(({ data }) => {
                    this.$message({
                        type: "success",
                        message: "菜单修改成功!",
                    });
                    // 关闭对话框
                    this.dialogVisible = false;
                    // 刷新出新的菜单
                    this.getMenus();
                    // 设置需要默认展开的菜单
                    this.expandedKey = [this.category.parentCid];
                })
                .catch(() => { });
        },

    //点击append按钮,清空编辑之后的回显数据
        append(data) {
            console.log("append----", data);
            this.dialogType = "add";
            this.title = "添加分类";
            this.category.parentCid = data.catId;
            this.category.catLevel = data.catLevel * 1 + 1;
            this.category.catId = null;
            this.category.name = null;
            this.category.icon = "";
            this.category.productUnit = "";
            this.category.sort = 0;
            this.category.showStatus = 1;
            this.dialogVisible = true;
        },
6.1.8 拖曳效果
1、前端代码
1、拖拽功能的前端实现:ementui树型控件->可拖拽节点
- 在
中加入属性 draggable表示节点可拖拽。 - 在
中加入属性 :allow-drop="allowDrop",拖拽时判定目标节点能否被放置。 - allowDrop有三个参数: draggingNode表示拖拽的节点, dropNode表示拖拽到哪个节点,type表示拖拽的类型 ’prev’、‘inner’ 和 ‘next’,表示拖拽到目标节点之前、里面、之后。
- allowDrop函数实现判断,拖拽后必须保持树形的三层结构。
- 节点的深度 = 最深深度 - 当前深度 + 1
- 当拖拽节点拖拽到目标节点的内部,要满足: 拖拽节点的深度 + 目标节点的深度 <= 3
- 当拖拽节点拖拽的目标节点的两侧,要满足: 拖拽节点的深度 + 目标节点的父节点的深度 <= 3
<!--el-tree中添加属性-->
	   draggable
      :allow-drop="allowDrop"
// data中新增属性,用来记录当前节点的最大深度
maxLevel: 0,


//新增方法
    allowDrop(draggingNode, dropNode, type) {
            //1、被拖动的当前节点以及所在的父节点总层数不能>3

            //1)、被拖动的当前节点总层数
            console.log("allowDrop", draggingNode, dropNode, type);
            this.countNodeLevel(draggingNode.data);
            //当前正在拖动的节点+父节点所在的深度不大于3即可
            let deep = this.maxLevel - draggingNode.data.catLevel + 1;
            console.log("深度:", deep);

            //this.maxLevel
            if (type == "inner") {
                return (deep + dropNode.level) <= 3;
            } else {
                return (deep + dropNode.parent.level) <= 3;
            }
        },

   //计算当前节点的最大深度
        countNodeLevel(node) {
            //找到所有子节点,求出最大深度
            if (node.children != null && node.children.length > 0) {
                for (let i = 0; i < node.children.length; i++) {
                    if (node.children[i].catLevel > this.maxLevel) {
                        this.maxLevel = node.children[i].catLevel;
                    }
                    this.countNodeLevel(node.children[i]);
                }
            }
        },
- 拖拽功能的数据收集
- 在
中加入属性@node-drop="handleDrop", 表示拖拽事件结束后触发事件handleDrop,handleDrop共四个参数:
- draggingNode:被拖拽节点对应的 Node;
- dropNode:结束拖拽时最后进入的节点;
- dropType:被拖拽节点的放置位置(before、after、inner);
- ev:event
- 拖拽可能影响的节点的数据:parentCid、catLevel、sort
- data中新增updateNodes ,把所有要修改的节点都传进来。
- 要修改的数据:拖拽节点的parentCid、catLevel、sort
- 要修改的数据:新的兄弟节点的sort (把新的节点收集起来,然后重新排序)
- 要修改的数据:子节点的catLeve
//el-tree中新增属性,绑定handleDrop,表示拖拽完触发
@node-drop="handleDrop"

//data 中新增数据,用来记录需要更新的节点(拖拽的节点(parentCid、catLevel、sort),拖拽后的兄弟节点(sort),拖拽节点的子节点(catLevel))
updateNodes: [],


//新增方法
    handleDrop(draggingNode, dropNode, dropType, ev) {
      console.log("handleDrop: ", draggingNode, dropNode, dropType);
      //1、当前节点最新父节点的id
      let pCid = 0;
      //拖拽后的兄弟节点,分两种情况,一种是拖拽到两侧,一种是拖拽到内部
      let sibings = null;
      if (dropType == "before" || dropType == "after") {
        pCid = dropNode.parent.data.catId == undefined ? 0: dropNode.parent.data.catId;
        sibings = dropNode.parent.childNodes;
      } else {
        pCid = dropNode.data.catId;
        sibings = dropNode.childNodes;
      }

      //2、当前拖拽节点的最新顺序
      //遍历所有的兄弟节点,如果是拖拽节点,传入(catId,sort,parentCid,catLevel),如果是兄弟节点传入(catId,sort)
      for (let i = 0; i < sibings.length; i++) {
          if (sibings[i].data.catId == draggingNode.data.catId){
              //如果遍历的是当前正在拖拽的节点
              let catLevel = draggingNode.level;
              if (sibings[i].level != draggingNode.level){
                  //当前节点的层级发生变化
                  catLevel = sibings[i].level;
                  //修改他子节点的层级
                  this.updateChildNodeLevel(sibings[i]);
              }
              this.updateNodes.push({catId:sibings[i].data.catId, sort: i, parentCid: pCid, catLevel:catLevel});
          }else{
              this.updateNodes.push({catId:sibings[i].data.catId, sort: i});
          }

      }

      //3 当前拖拽节点的最新层级
     console.log("updateNodes", this.updateNodes);
    }

// 修改拖拽节点的子节点的层级
updateChildNodeLevel(node){
        if (node.childNodes.length > 0){
            for (let i = 0; i < node.childNodes.length; i++){
                //遍历子节点,传入(catId,catLevel)
                var cNode = node.childNodes[i].data;
                this.updateNodes.push({catId:cNode.catId,catLevel:node.childNodes[i].level});
                //处理子节点的子节点
                this.updateChildNodeLevel(node.childNodes[i]);
            }
        }
    },
- 拖拽功能实现
- 在后端编写批量修改的方法
update/sort- 前端发送post请求,把要修改的数据发送过来
- 提示信息,展开拖拽节点的父节点
CategoryController修改方法
@RestController
@RequestMapping("product/category")
public class CategoryController {
    @Autowired
    private CategoryService categoryService;


    /**
     * 批量修改分类
     */
    @RequestMapping("/update/sort")
    // @RequiresPermissions("product:category:update")
    public R update(@RequestBody CategoryEntity[] category){

        categoryService.updateBatchById(Arrays.asList(category));
        return R.ok();
    }

}
利用 APIfox 测试 批量修改效果
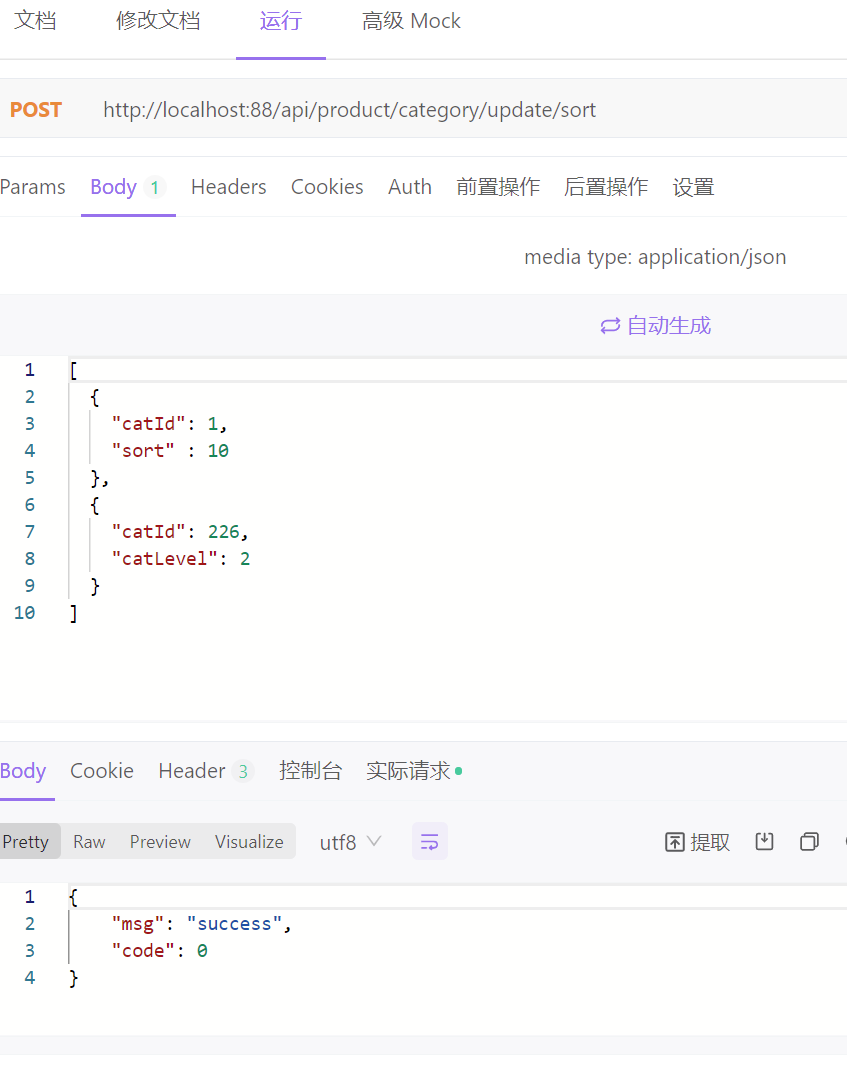
测试成功。接下来我们完善下 前端的代码。
前端发送请求:
//3 当前拖拽节点的最新层级
            console.log("updateNodes", this.updateNodes);
            this.$http({
                url: this.$http.adornUrl("/product/category/update/sort"),
                method: 'post',
                data: this.$http.adornData(this.updateNodes, false)
            }).then(({ data }) => {
                this.$message({
                    message: "菜单顺序等修改成功",
                    type: "success",
                });
                //刷新出新的菜单
                this.getMenus();
                //设置需要默认展开的菜单
                this.expandedKey = [pCid];
                //每次拖拽后把数据清空,否则要修改的节点将会越拖越多
                this.updateNodes = [],
                this.maxLevel = 0
            });
- 批量拖拽功能
- 添加开关,控制拖拽功能是否开启
- 每次拖拽都要和数据库交互,不合理。批量拖拽过后,一次性保存。
<!--添加拖拽开关和批量保存按钮-->
	<el-switch
      v-model="draggable"
      active-text="开启拖拽"
      inactive-text="关闭拖拽"
    >
    </el-switch>
    <el-button v-if="draggable" size="small" round @click="batchSave"
      >批量保存</el-button
    >

    <el-tree
  :draggable="draggable"
   </el-tree>
//data中新增数据
 pCid:[], //批量保存过后要展开的菜单id
 draggable: false, //绑定拖拽开关是否打开


//修改了一些方法,修复bug,修改过的方法都贴在下面了

//点击批量保存按钮,发送请求
        batchSave() {
            this.$http({
                url: this.$http.adornUrl("/product/category/update/sort"),
                method: 'post',
                data: this.$http.adornData(this.updateNodes, false)
            }).then(({ data }) => {
                this.$message({
                    message: "菜单顺序等修改成功",
                    type: "success",
                });
                //刷新出新的菜单
                this.getMenus();
                //设置需要默认展开的菜单
                this.expandedKey = this.pCid;
                //每次拖拽后把数据清空,否则要修改的节点将会越拖越多
                this.updateNodes = [],
                this.maxLevel = 0;
                // this.pCid = 0;
            })
                .catch(() => { });
        },


    handleDrop(draggingNode, dropNode, dropType, ev) {
            console.log("handleDrop: ", draggingNode, dropNode, dropType);

            //1、当前节点最新父节点的id
            let pCid = 0;
            //拖拽后的兄弟节点,分两种情况,一种是拖拽到两侧,一种是拖拽到内部
            let sibings = null;
            if (dropType == "before" || dropType == "after") {
                pCid = dropNode.parent.data.catId == undefined ? 0 : dropNode.parent.data.catId;
                sibings = dropNode.parent.childNodes;
            } else {
                pCid = dropNode.data.catId;
                sibings = dropNode.childNodes;
            }
            this.pCid.push(pCid);

            //2、当前拖拽节点的最新顺序
            //遍历所有的兄弟节点,如果是拖拽节点,传入(catId,sort,parentCid,catLevel),如果是兄弟节点传入(catId,sort)
            for (let i = 0; i < sibings.length; i++) {
                if (sibings[i].data.catId == draggingNode.data.catId) {
                    //如果遍历的是当前正在拖拽的节点
                    let catLevel = draggingNode.level;
                    if (sibings[i].level != draggingNode.level) {
                        //当前节点的层级发生变化
                        catLevel = sibings[i].level;
                        //修改他子节点的层级
                        this.updateChildNodeLevel(sibings[i]);
                    }
                    this.updateNodes.push({ catId: sibings[i].data.catId, sort: i, parentCid: pCid, catLevel: catLevel });
                } else {
                    this.updateNodes.push({ catId: sibings[i].data.catId, sort: i });
                }

            }
            //3 当前拖拽节点的最新层级
            console.log("updateNodes", this.updateNodes);
        },


// 修改拖拽判断逻辑
    allowDrop(draggingNode, dropNode, type) {
            //1 被拖动的当前节点以及所在的父节点总层数不能大于3

            //1 被拖动的当前节点总层数
            console.log("allowDrop:", draggingNode, dropNode, type);

            var level = this.countNodeLevel(draggingNode);

            // 当前正在拖动的节点+父节点所在的深度不大于3即可
            let deep = Math.abs(this.maxLevel - draggingNode.level) + 1;
            console.log("深度:", deep);

            // this.maxLevel
            if (type == "innner") {
                return deep + dropNode.level <= 3;
            } else {
                return deep + dropNode.parent.level <= 3;
            }
        },

//计算当前节点的最大深度
        countNodeLevel(node) {
            // 找到所有子节点,求出最大深度
            if (node.childNodes != null && node.childNodes.length > 0) {
                for (let i = 0; i < node.childNodes.length; i++) {
                    if (node.childNodes[i].level > this.maxLevel) {
                        this.maxLevel = node.childNodes[i].level;
                    }
                     this.countNodeLevel(node.childNodes[i]);
                }
            }
        },
6.1.9 批量删除
前端代码
- 新增删除按钮
<el-button type="danger" size="small" @click="batchDelete" round>批量删除</el-button>

<!--eltree中新增属性,用作组件的唯一标示-->
ref="menuTree"
- 批量删除方法
//批量删除
        batchDelete() {
            let catIds = [];
            let catNames = [];
            let checkedNodes = this.$refs.menuTree.getCheckedNodes();
            console.log("被选中的元素", checkedNodes);
            for (let i = 0; i < checkedNodes.length; i++) {
                catIds.push(checkedNodes[i].catId);
                catNames.push(checkedNodes[i].name);
            }

            this.$confirm(`是否删除【${catNames}】菜单?`, "提示", {
                confirmButtonText: "确定",
                cancelButtonText: "取消",
                type: "warning",
            })
                .then(() => {
                    this.$http({
                        url: this.$http.adornUrl("/product/category/delete"),
                        method: 'post',
                            data: this.$http.adornData(catIds, false)
                    })
                        .then(({ data }) => {
                            this.$message({
                                message: "菜单删除成功",
                                type: "success",
                            });
                            //刷新出新的菜单
                            this.getMenus();
                        })
                        .catch(() => { });
                })
                .catch(() => { });
        },
6.1.10 前端代码(总)
<!--  -->
<template>
    <div>
        <el-switch v-model="draggable" active-text="开启拖拽" inactive-text="关闭拖拽">
        </el-switch>
        <el-button v-if="draggable" size="small" round @click="batchSave">批量保存</el-button>
        <el-button type="danger" size="small" @click="batchDelete" round>批量删除</el-button>
        <el-tree :data="menus"
        :props="defaultProps"
        :expand-on-click-node="false"
        show-checkbox node-key="catId"
        :default-expanded-keys="expandedKey" :draggable="draggable" :allow-drop="allowDrop" @node-drop="handleDrop"
            ref="menuTree">
            <span class="custom-tree-node" slot-scope="{ node, data }">
                <span>{{ node.label }}</span>
                <span>
                    <el-button v-if="node.level <= 2" type="text" size="mini" @click="() => append(data)">
                        Append
                    </el-button>
                    <el-button type="text" size="mini" @click="() => edit(data)">
                        Edit
                    </el-button>
                    <el-button v-if="node.childNodes.length == 0" type="text" size="mini"
                        @click="() => remove(node, data)">
                        Delete
                    </el-button>
                </span>
            </span>
        </el-tree>
        <el-dialog :title="title" :visible.sync="dialogVisible" width="30%" :close-on-click-modal="false">
            <el-form :model="category">
                <el-form-item label="分类名称">
                    <el-input v-model="category.name" autocomplete="off"></el-input>
                </el-form-item>
                <el-form-item label="图标">
                    <el-input v-model="category.icon" autocomplete="off"></el-input>
                </el-form-item>
                <el-form-item label="计量单位">
                    <el-input v-model="category.productUnit" autocomplete="off"></el-input>
                </el-form-item>
            </el-form>
            <span slot="footer" class="dialog-footer">
                <el-button @click="dialogVisible = false">取 消</el-button>
                <el-button type="primary" @click="submitData">确 定</el-button>
            </span>
        </el-dialog>
    </div>
</template>


<script>
//这里可以导入其他文件(比如:组件,工具js,第三方插件js,json文件,图片文件等等)
//例如:import 《组件名称》 from '《组件路径》';

export default {
    //import引入的组件需要注入到对象中才能使用
    components: {},
    props: {},
    data() {
        return {
            pCid: [], //批量保存过后需要展开的菜单id
            draggable: false, //绑定拖拽开关是否打开
            title: "",
            dialogType: "", //edit,add
            dialogVisible: false,
            menus: [],
            expandedKey: [],
            maxLevel: 0, // data中新增属性,用来记录初始化当前节点的最大深度
            updateNodes: [],//data 中新增数据,用来记录需要更新的节点(拖拽的节点(parentCid、catLevel、sort),拖拽后的兄弟节点(sort),拖拽节点的子节点(catLevel))
            category: {
                name: "",
                parentCid: 0,
                catLevel: 0,
                showStatus: 1,
                sort: 0,
                icon: "",
                productUnit: "",
                catId: null,
            },
            defaultProps: {
                children: "children",  //子节点
                label: "name",  //name属性作为标签的值,展示出来
            },
        };
    },
    //监听属性 类似于data概念
    computed: {},
    //监控data中的数据变化
    watch: {},
    //获取菜单集合
    methods: {
        handleNodeClick(data) {
            console.log(data);
        },
        //获取后台数据
        getMenus() {
            this.$http({
                url: this.$http.adornUrl('/product/category/list/tree'),
                method: 'get'
            }).then(({ data }) => {  //将整个对象中的data数据结构出来,因为只有data才是我们需要的
                console.log("成功了获取到菜单数据....", data.data)
                this.menus = data.data; // 数组内容,把数据给menus,就是给了vue实例,最后绑定到视图上
            })
        },
        //点击append按钮,清空编辑之后的回显数据
        append(data) {
            console.log("append----", data);
            this.dialogType = "add";
            this.title = "添加分类";
            this.category.parentCid = data.catId;
            this.category.catLevel = data.catLevel * 1 + 1;
            this.category.catId = null;
            this.category.name = null;
            this.category.icon = "";
            this.category.productUnit = "";
            this.category.sort = 0;
            this.category.showStatus = 1;
            this.dialogVisible = true;
        },
        //添加三级分类
        // 点击确定按钮后,因为后台是@RequestBody 注解,所以需要发送post请求
        //成功后显示添加成功,展开刚才的菜单
        addCategory() {
            console.log("提交的数据", this.category);
            this.$http({
                url: this.$http.adornUrl("/product/category/save"),
                method: 'post',
                data: this.$http.adornData(this.category, false)
            }).then(({ data }) => {
                this.$message({
                    message: "添加成功",
                    type: "success",
                });
                //刷新出新的菜单
                this.getMenus();
                //设置需要默认展开的菜单
                this.expandedKey = [this.category.parentCid];
                //关闭对话框
                this.dialogVisible = false;
            })
                .catch(() => { });
        },
        //绑定对话框的确定按钮,根据dialogType判断调用哪个函数
        submitData() {
            if (this.dialogType == "add") {
                this.addCategory();
            }
            if (this.dialogType == "edit") {
                this.editCategory();
            }
        },
        //绑定Edit按钮,设置dialogType、title,从后台读取数据,展示到对话框内
        edit(data) {
            console.log("要修改的数据", data);
            this.dialogType = "edit";
            this.title = "修改分类";
            // 发送请求获取节点最新的数据
            this.$http({
                url: this.$http.adornUrl(`/product/category/info/${data.catId}`),
                method: "get",
            }).then(({ data }) => {
                // 请求成功
                console.log("要回显的数据", data);
                this.category.name = data.data.name;
                this.category.catId = data.data.catId;
                this.category.icon = data.data.icon;
                this.category.productUnit = data.data.productUnit;
                this.category.parentCid = data.data.parentCid;
                this.dialogVisible = true;
            });
        },
        //修改三级分类数据
        //绑定对话框的确定按钮,向后台发送更新请求,传过去想要修改的字段
        editCategory() {
            var { catId, name, icon, productUnit } = this.category;
            this.$http({
                url: this.$http.adornUrl("/product/category/update"),
                method: "post",
                data: this.$http.adornData({ catId, name, icon, productUnit }, false),
            })
                .then(({ data }) => {
                    this.$message({
                        type: "success",
                        message: "菜单修改成功!",
                    });
                    // 关闭对话框
                    this.dialogVisible = false;
                    // 刷新出新的菜单
                    this.getMenus();
                    // 设置需要默认展开的菜单
                    this.expandedKey = [this.category.parentCid];
                })
                .catch(() => { });
        },
        allowDrop(draggingNode, dropNode, type) {
            //1 被拖动的当前节点以及所在的父节点总层数不能大于3

            //1 被拖动的当前节点总层数
            console.log("allowDrop:", draggingNode, dropNode, type);

            var level = this.countNodeLevel(draggingNode);

            // 当前正在拖动的节点+父节点所在的深度不大于3即可
            let deep = Math.abs(this.maxLevel - draggingNode.level) + 1;
            console.log("深度:", deep);

            // this.maxLevel
            if (type == "inner") {

                return deep + dropNode.level <= 3;
            } else {
                return deep + dropNode.parent.level <= 3;
            }
        },
        //计算当前节点的最大深度
        countNodeLevel(node) {
            // 找到所有子节点,求出最大深度
            if (node.childNodes != null && node.childNodes.length > 0) {
                for (let i = 0; i < node.childNodes.length; i++) {
                    if (node.childNodes[i].level > this.maxLevel) {
                        this.maxLevel = node.childNodes[i].level;
                    }
                    this.countNodeLevel(node.childNodes[i]);
                }
            }
        },
        //点击批量保存按钮,发送请求
        batchSave() {
            this.$http({
                url: this.$http.adornUrl("/product/category/update/sort"),
                method: 'post',
                data: this.$http.adornData(this.updateNodes, false)
            }).then(({ data }) => {
                this.$message({
                    message: "菜单顺序等修改成功",
                    type: "success",
                });
                //刷新出新的菜单
                this.getMenus();
                //设置需要默认展开的菜单
                this.expandedKey = this.pCid;
                //每次拖拽后把数据清空,否则要修改的节点将会越拖越多
                this.updateNodes = [],
                    this.maxLevel = 0;
                // this.pCid = 0;
            })
                .catch(() => { });
        },
        handleDrop(draggingNode, dropNode, dropType, ev) {
            console.log("handleDrop: ", draggingNode, dropNode, dropType);

            //1、当前节点最新父节点的id
            let pCid = 0;
            //拖拽后的兄弟节点,分两种情况,一种是拖拽到两侧,一种是拖拽到内部
            let sibings = null;
            if (dropType == "before" || dropType == "after") {
                pCid = dropNode.parent.data.catId == undefined ? 0 : dropNode.parent.data.catId;
                sibings = dropNode.parent.childNodes;
            } else {
                pCid = dropNode.data.catId;
                sibings = dropNode.childNodes;
            }
            this.pCid.push(pCid);

            //2、当前拖拽节点的最新顺序
            //遍历所有的兄弟节点,如果是拖拽节点,传入(catId,sort,parentCid,catLevel),如果是兄弟节点传入(catId,sort)
            for (let i = 0; i < sibings.length; i++) {
                if (sibings[i].data.catId == draggingNode.data.catId) {
                    //如果遍历的是当前正在拖拽的节点
                    let catLevel = draggingNode.level;
                    if (sibings[i].level != draggingNode.level) {
                        //当前节点的层级发生变化
                        catLevel = sibings[i].level;
                        //修改他子节点的层级
                        this.updateChildNodeLevel(sibings[i]);
                    }
                    this.updateNodes.push({ catId: sibings[i].data.catId, sort: i, parentCid: pCid, catLevel: catLevel });
                } else {
                    this.updateNodes.push({ catId: sibings[i].data.catId, sort: i });
                }

            }
            //3 当前拖拽节点的最新层级
            console.log("updateNodes", this.updateNodes);
        },
        // 修改拖拽节点的子节点的层级
        updateChildNodeLevel(node) {
            if (node.childNodes.length > 0) {
                for (let i = 0; i < node.childNodes.length; i++) {
                    //遍历子节点,传入(catId,catLevel)
                    var cNode = node.childNodes[i].data;
                    this.updateNodes.push({ catId: cNode.catId, catLevel: node.childNodes[i].level });
                    //处理子节点的子节点
                    this.updateChildNodeLevel(node.childNodes[i]);
                }
            }
        },
        //批量删除
        batchDelete() {
            let catIds = [];
            let catNames = [];
            let checkedNodes = this.$refs.menuTree.getCheckedNodes();
            console.log("被选中的元素", checkedNodes);
            for (let i = 0; i < checkedNodes.length; i++) {
                catIds.push(checkedNodes[i].catId);
                catNames.push(checkedNodes[i].name);
            }

            this.$confirm(`是否删除【${catNames}】菜单?`, "提示", {
                confirmButtonText: "确定",
                cancelButtonText: "取消",
                type: "warning",
            })
                .then(() => {
                    this.$http({
                        url: this.$http.adornUrl("/product/category/delete"),
                        method: 'post',
                            data: this.$http.adornData(catIds, false)
                    })
                        .then(({ data }) => {
                            this.$message({
                                message: "菜单删除成功",
                                type: "success",
                            });
                            //刷新出新的菜单
                            this.getMenus();
                        })
                        .catch(() => { });
                })
                .catch(() => { });
        },
        remove(node, data) {
            var ids = [data.catId];
            this.$confirm(`是否删除【${data.name}】菜单?`, "提示", {
                confirmButtonText: "确定",
                cancelButtonText: "取消",
                type: "warning",
            })
                .then(() => {
                    this.$http({
                        url: this.$http.adornUrl("/product/category/delete"),
                        method: "post",
                        data: this.$http.adornData(ids, false),
                    }).then(({ data }) => {
                        this.$message({
                            message: "菜单删除成功",
                            type: "success",
                        });
                        //刷新出新的菜单
                        this.getMenus();
                        //设置需要默认展开的菜单
                        this.expandedKey = [node.parent.data.catId]
                    });
                })
                .catch(() => { });
        },
    },

    //生命周期 - 创建完成(可以访问当前this实例)
    created() {
        //创建完成时,就调用getMenus函数
        this.getMenus();
    },
    //生命周期 - 挂载完成(可以访问DOM元素)
    mounted() {

    },
    beforeCreate() { }, //生命周期 - 创建之前
    beforeMount() { }, //生命周期 - 挂载之前
    beforeUpdate() { }, //生命周期 - 更新之前
    updated() { }, //生命周期 - 更新之后
    beforeDestroy() { }, //生命周期 - 销毁之前
    destroyed() { }, //生命周期 - 销毁完成
    activated() { }, //如果页面有keep-alive缓存功能,这个函数会触发
}
</script>
<style scoped>

</style>
至此三级分类告一段落。
6.2 品牌管理
这次要用到的代码是通过renren-generator代码生成器中生成的前端代码。在前面中如果我们不小心进行删除了,可以通过idea自带的恢复功能进行恢复。
步骤:
- 右键点击resources->Local History->Show History
- 找到删除前端的记录
- 右键->Revert。 找回成功!
6.2.1 使用逆向工程前端代码
- 菜单管理---新增菜单
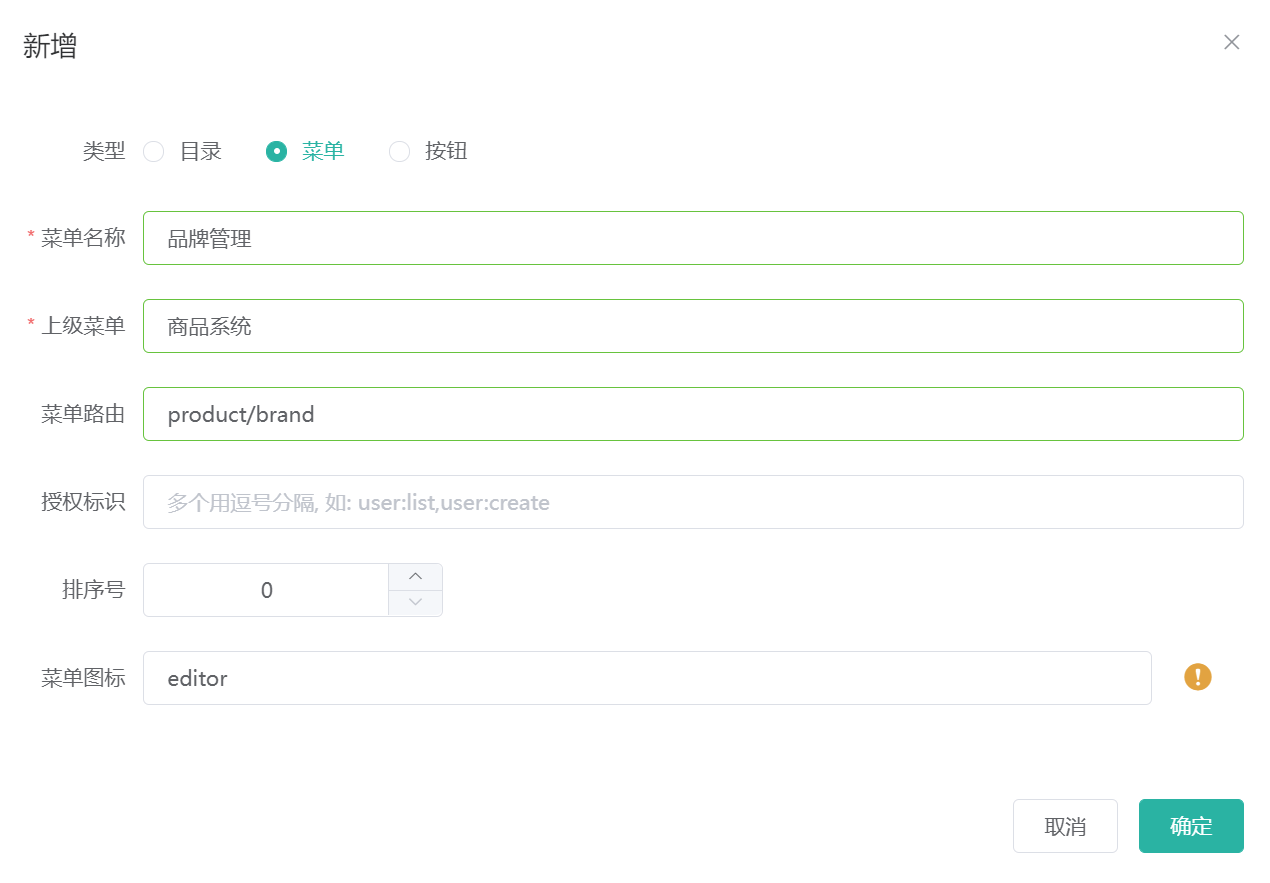
- 将gulimall-product中的前端代码复制到前端工程product下。

- 没有新增删除按钮: 修改权限,Ctrl+Shift+F查找
isAuth,全部返回为true


- 查看效果

这里提一嘴,我们可以将es6语法检查关闭。

6.2.2 效果优化-快速显示开关
- 在列表中添加自定义列:中间加标签。可以通过 Scoped slot 可以获取到 row, column, $index 和 store(table 内部的状态管理)的数据
- 修改开关状态,发送修改请求
- 数据库中showStatus是0和1,开关默认值是true/false。 所以在开关中设置:active-value="1" 、:inactive-value="0"属性,与数据库同步
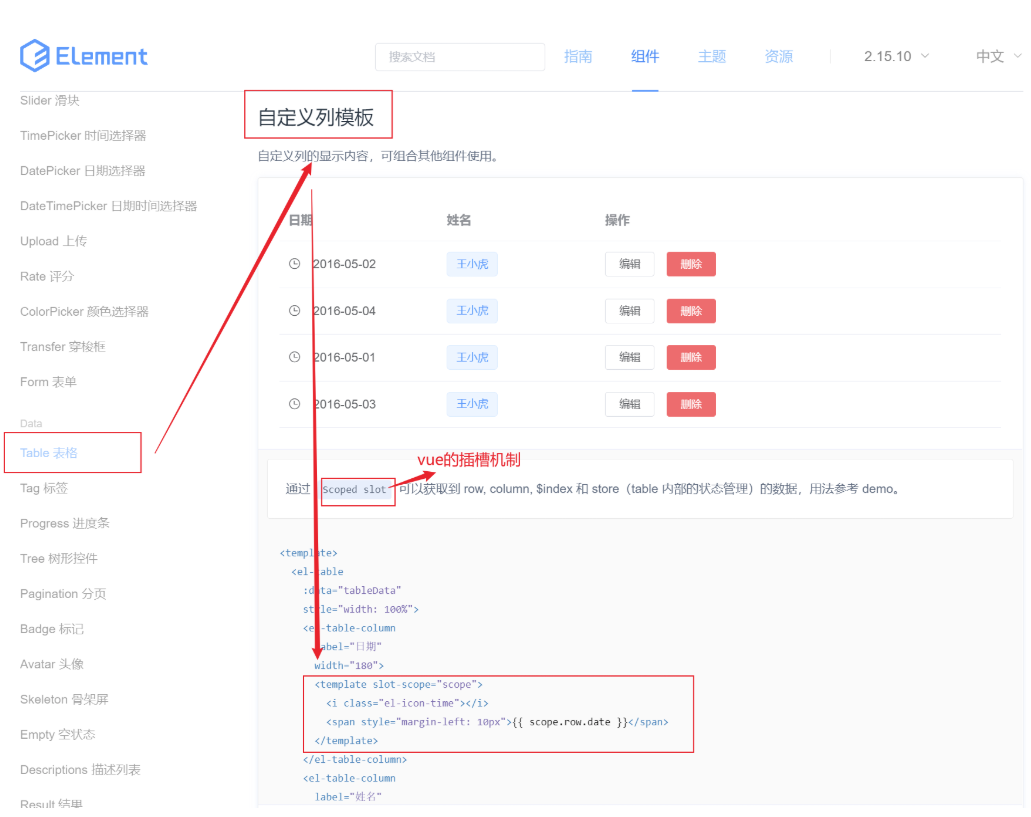
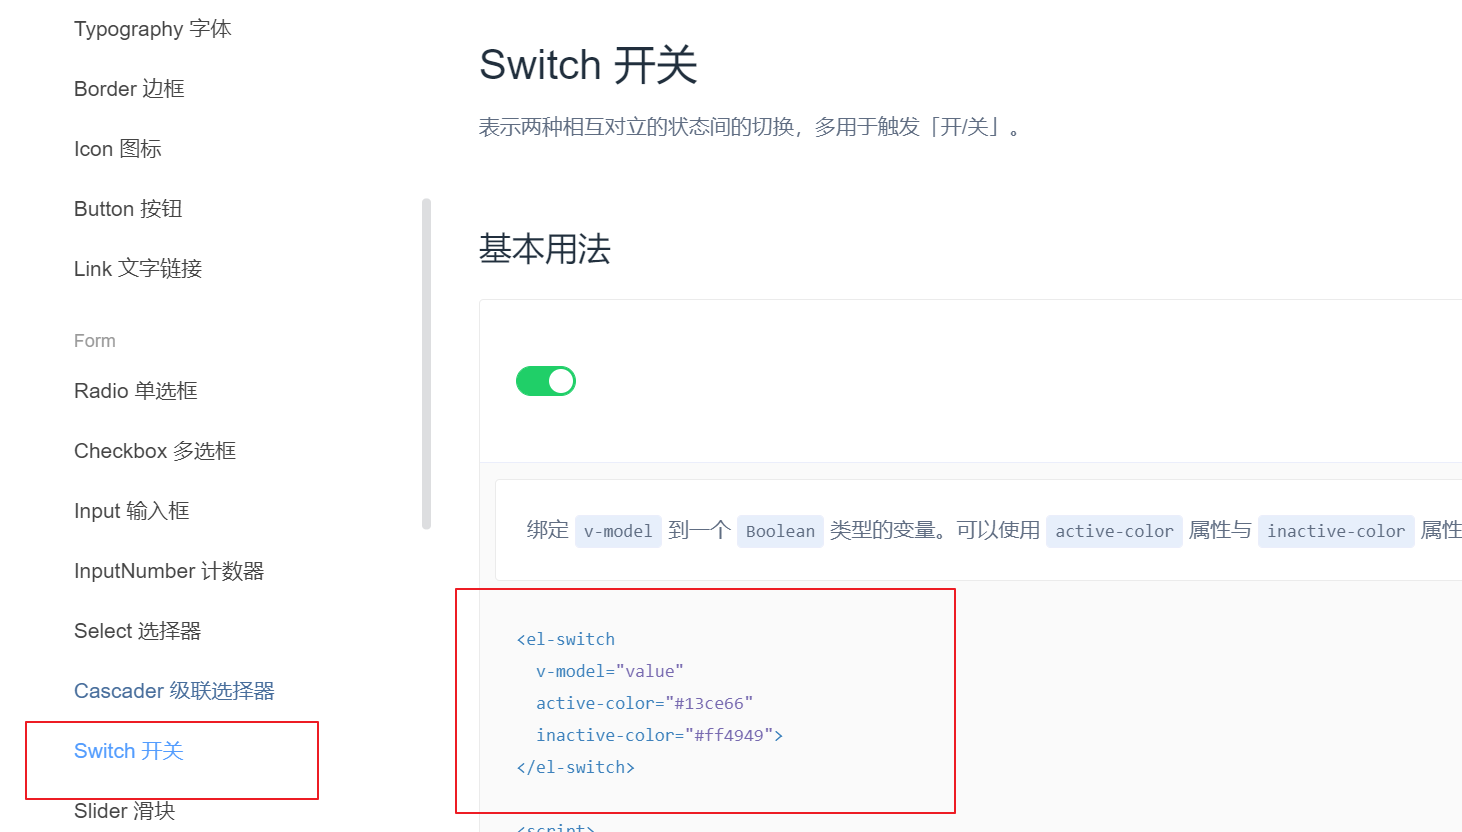
<!--brand.vue中显示状态那一列-->
      <el-table-column
        prop="showStatus"
        header-align="center"
        align="center"
        label="显示状态"
      >
        <template slot-scope="scope">
          <el-switch
            v-model="scope.row.showStatus"
            active-color="#13ce66"
            inactive-color="#ff4949"
            :active-value="1"
            :inactive-value="0"
            @change="updateBrandStatus(scope.row)"
          >
          </el-switch>
        </template>
      </el-table-column>

<!--brand-add-or-update.vue中显示状态那一列-->
      <el-form-item label="显示状态" prop="showStatus">
        <el-switch
          v-model="dataForm.showStatus"
          active-color="#13ce66"
          inactive-color="#ff4949"
        >
        </el-switch>
      </el-form-item>

效果如下:品牌logo地址显示在一栏了。

//brand.vue中新增方法,用来修改状态
updateBrandStatus(data) {
      console.log("最新信息",data);
      let { brandId, showStatus } = data;
      this.$http({
        url: this.$http.adornUrl("/product/brand/update"),
        method: 'post',
        data: this.$http.adornData({brandId,showStatus}, false)
      }).then(({ data }) => {
        this.$message({
          type:"success",
          message:"状态更新成功"
        })
      });
    },
6.2.3 文件上传功能
- 知识补充
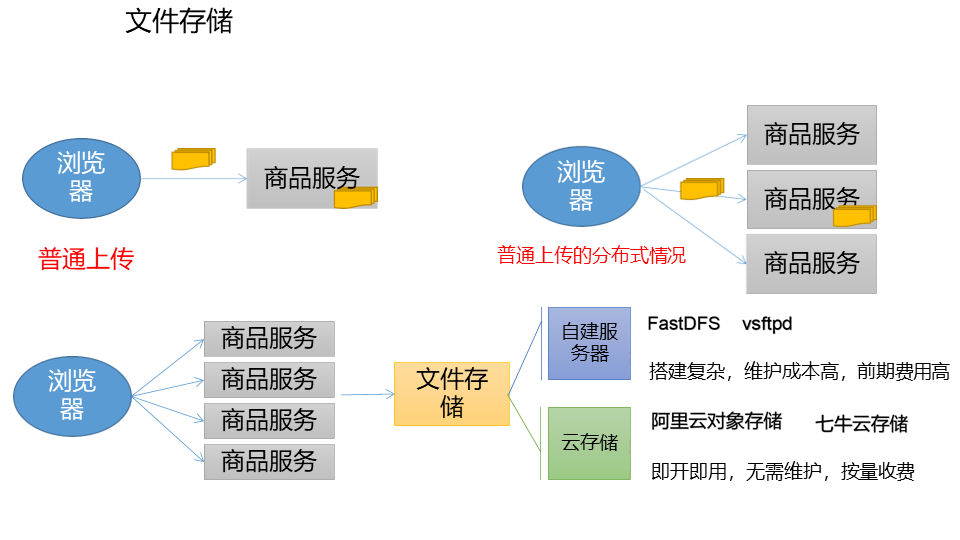
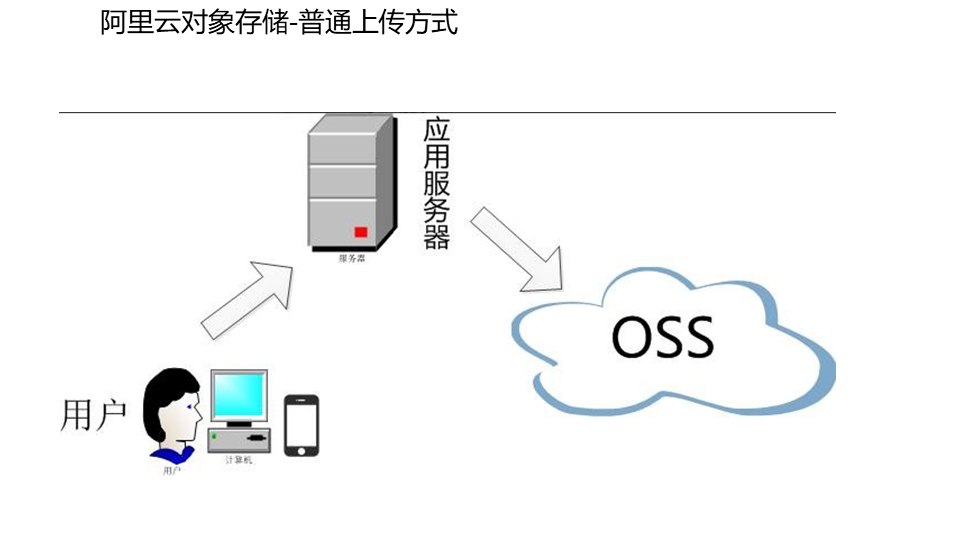
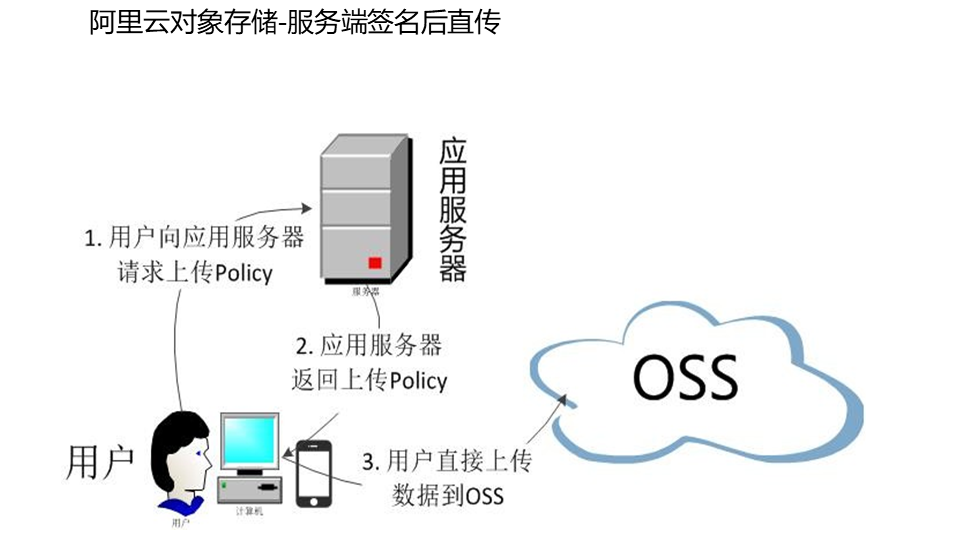
这里我们选用服务端签名后直传进行文件上传功能,好处是:
上传的账号信息存储在应用服务器
上传先找应用服务器要一个policy上传策略,生成防伪签名
- 开通阿里云OSS对象存储服务,并创建新的Bucket
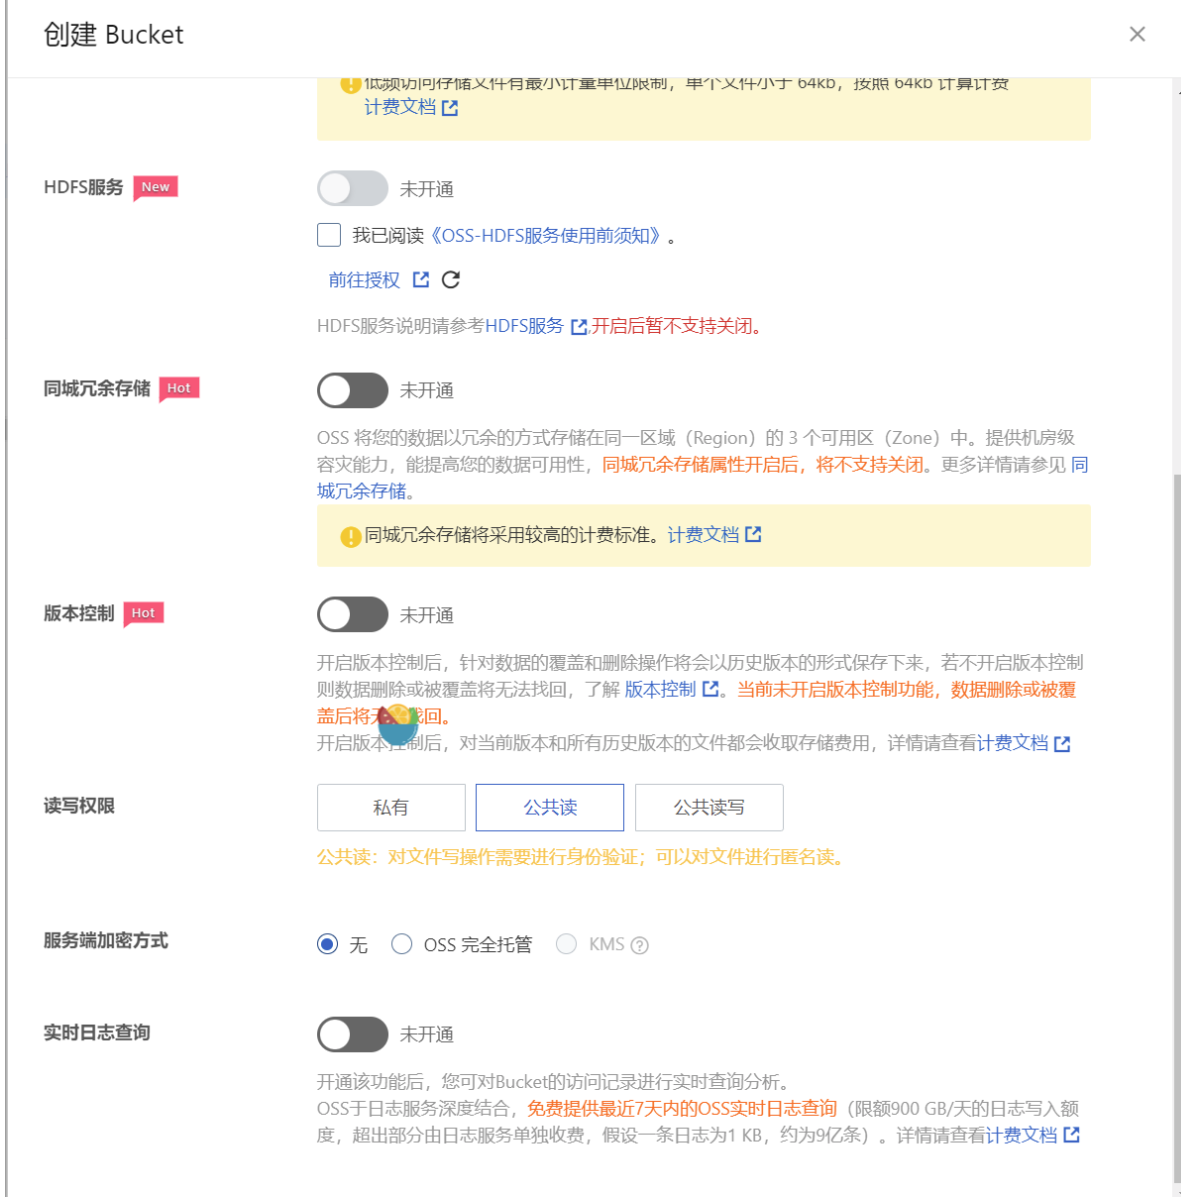
https://help.aliyun.com/document_detail/32007.html sdk--java版本
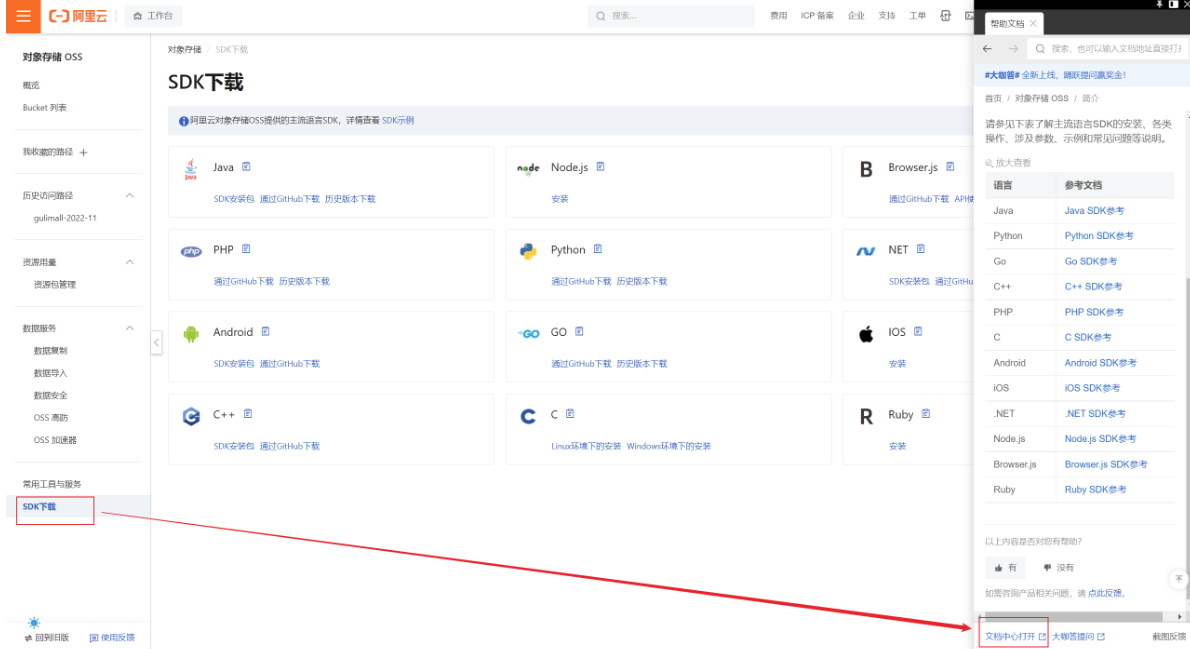
- 如何使用
根据官网的文档,我们可以直接在项目中引入依赖进行安装
这个依赖是最原始的。配置什么要写一大堆。
<dependency>
    <groupId>com.aliyun.oss</groupId>
    <artifactId>aliyun-sdk-oss</artifactId>
    <version>3.15.0</version>
</dependency>
文件上传的具体配置,我们在 gulimall-product 的 test 包下的 GulimallProductApplicationTests类中进行测试,代码如下:
 @Test
    public void testUpload() throws FileNotFoundException {
        // Endpoint以杭州为例,其它Region请按实际情况填写。
        String endpoint = "oss-cn-hangzhou.aliyuncs.com";
        // 云账号AccessKey有所有API访问权限,建议遵循阿里云安全最佳实践,创建并使用RAM子账号进行API访问或日常运维,请登录 https://ram.console.aliyun.com 创建。
        String accessKeyId = "LTAI5tABh1pjUprZGrKi92w1";
        String accessKeySecret = "enVYmXd9p1sHvVub5gBf21E3tjuIFJ";

        // // 创建OSSClient实例。
        OSS ossClient = new OSSClientBuilder().build(endpoint, accessKeyId, accessKeySecret);

        // 上传文件流。
        InputStream inputStream = new FileInputStream("F:\\JAVA listen\\尚硅谷Java学科全套教程(总207.77GB)\\谷粒商城\\课件\\课件和文档\\基础篇\\资料\\pics\\0d40c24b264aa511.jpg");
        ossClient.putObject("gulimall-wystart", "0d40c24b264aa511.jpg", inputStream);

        // 关闭OSSClient。
        ossClient.shutdown();
        System.out.println("上传成功");
    }
endpoint的取值:点击概览就可以看到你的endpoint信息,endpoint在
这里就是上海等地区,如 oss-cn-qingdao.aliyuncs.com
bucket域名:就是签名加上bucket,如gulimall-fermhan.oss-cn-qingdao.aliyuncs.com
accessKeyId和accessKeySecret需要创建一个RAM账号:
接下来就是具体如何获取的示例:
-
获取Endpoint
、AccessKey ID、AccessKey Secret-
Endpoint
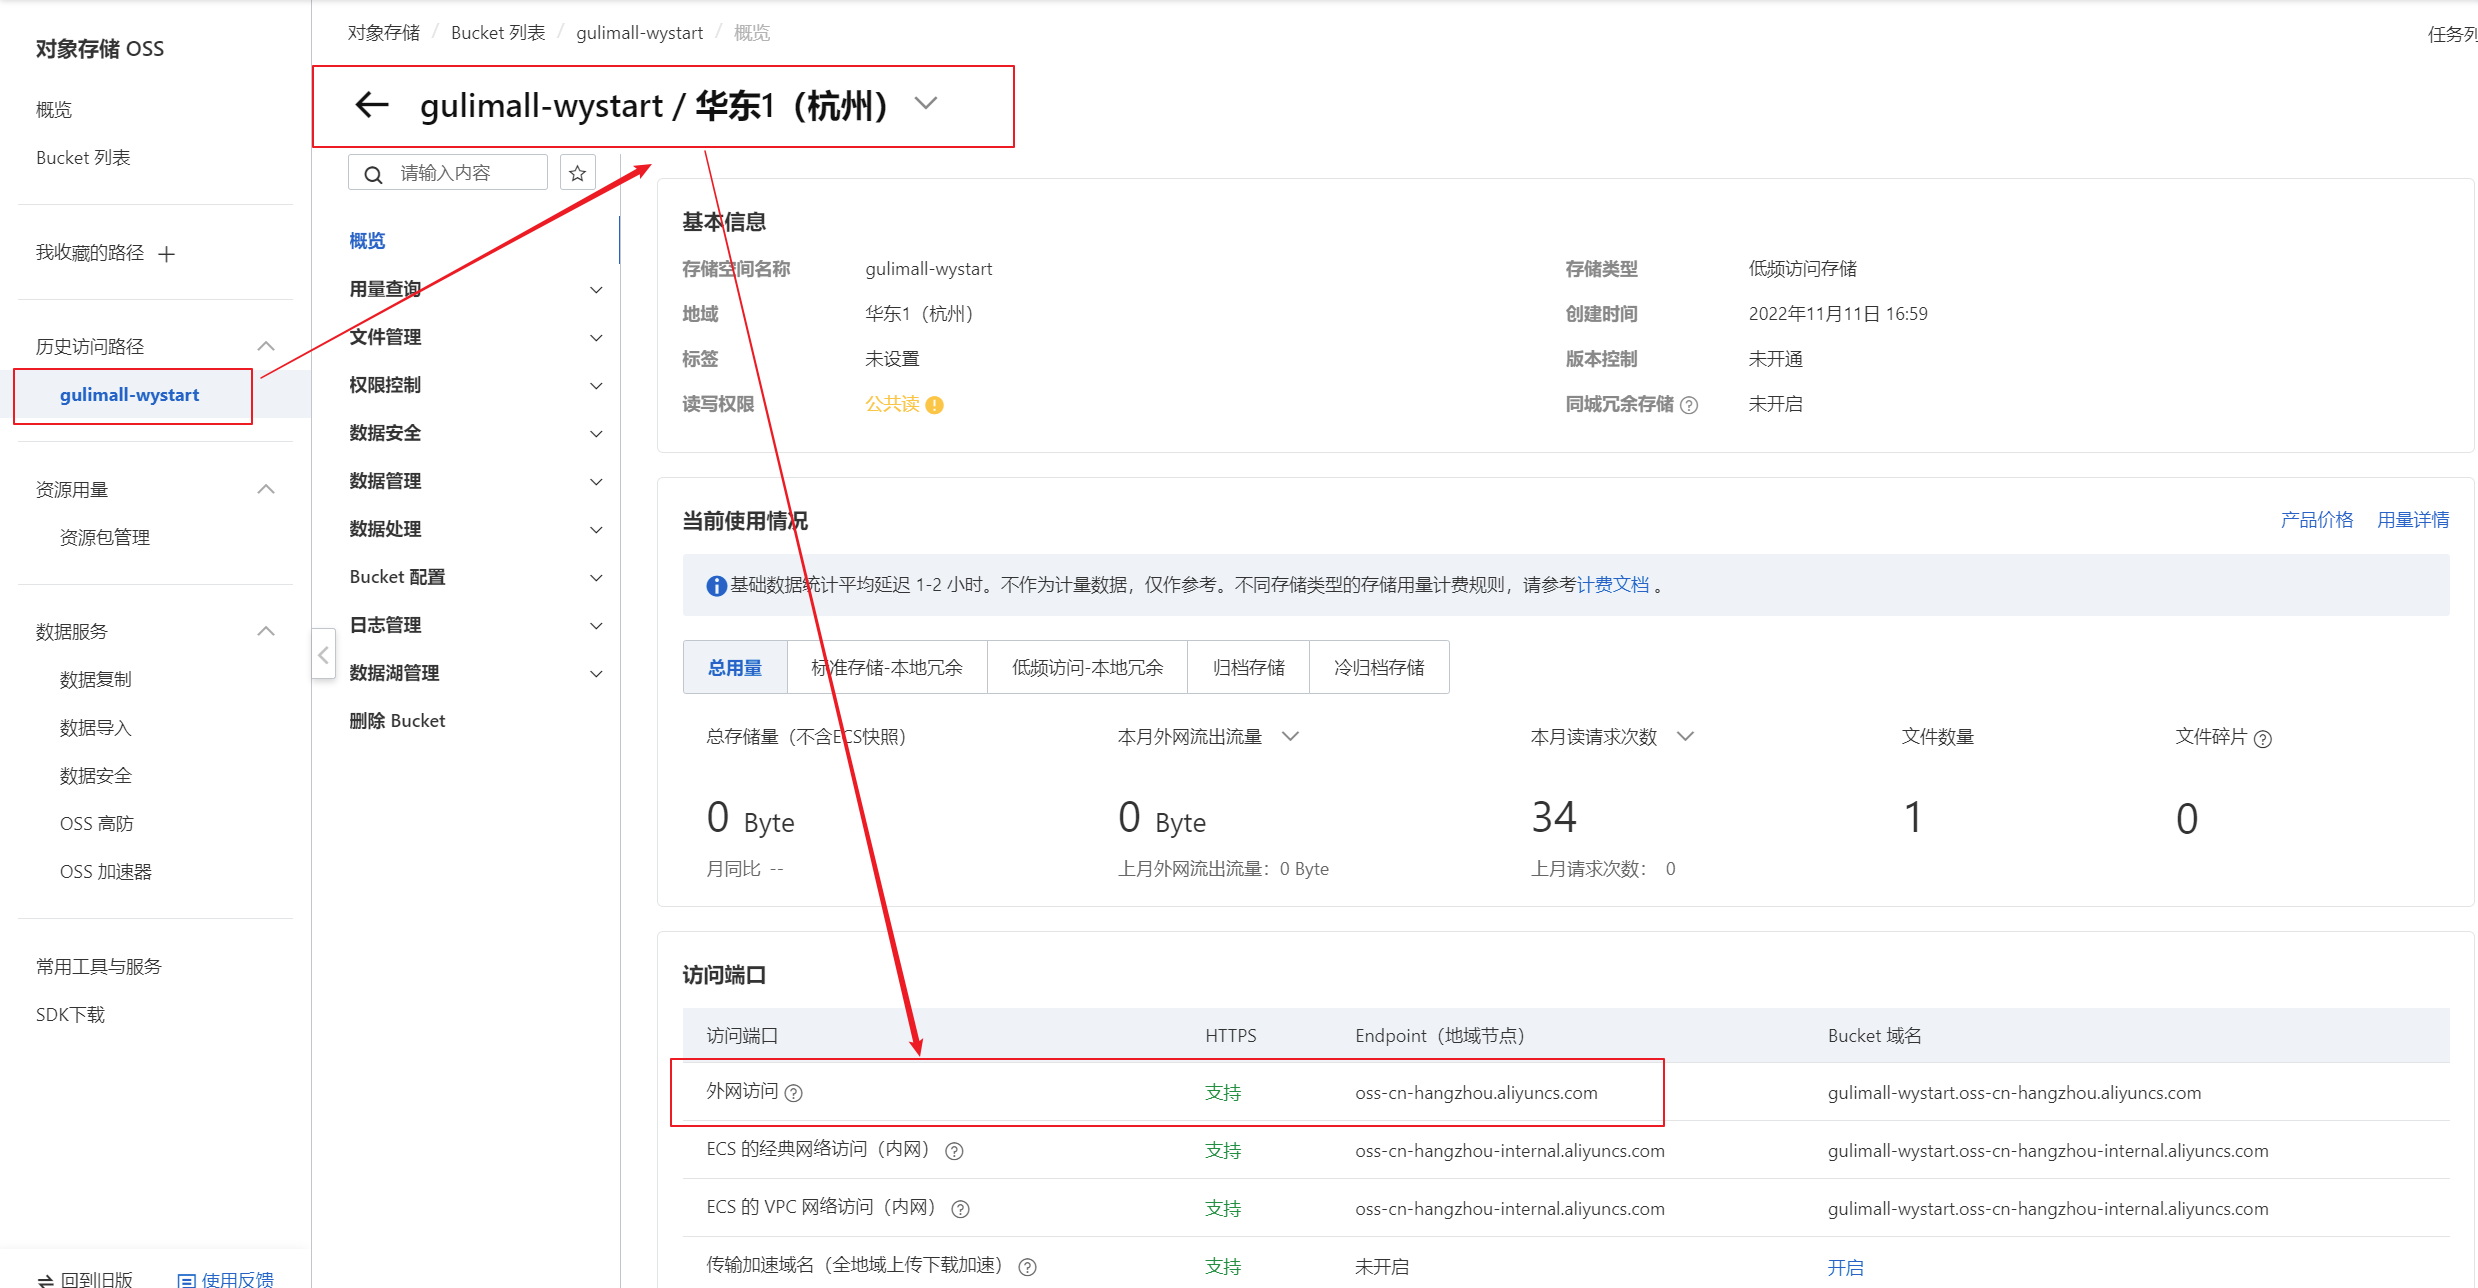
-
AccessKey ID
、AccessKey Secret 注意,这里我们需要创建阿里云的子账户,这样可以避免我们主账号直接在网络上进行暴露。
-
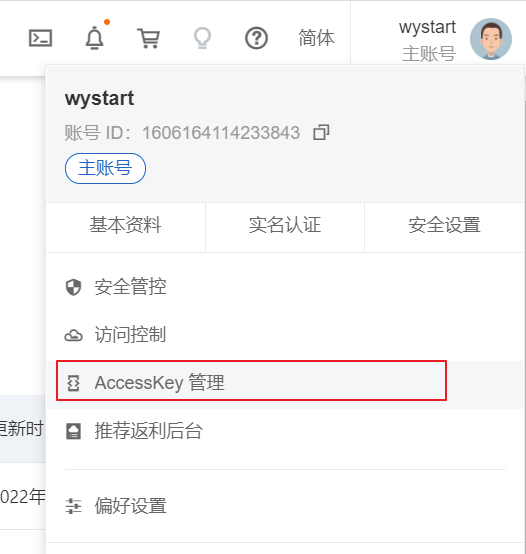
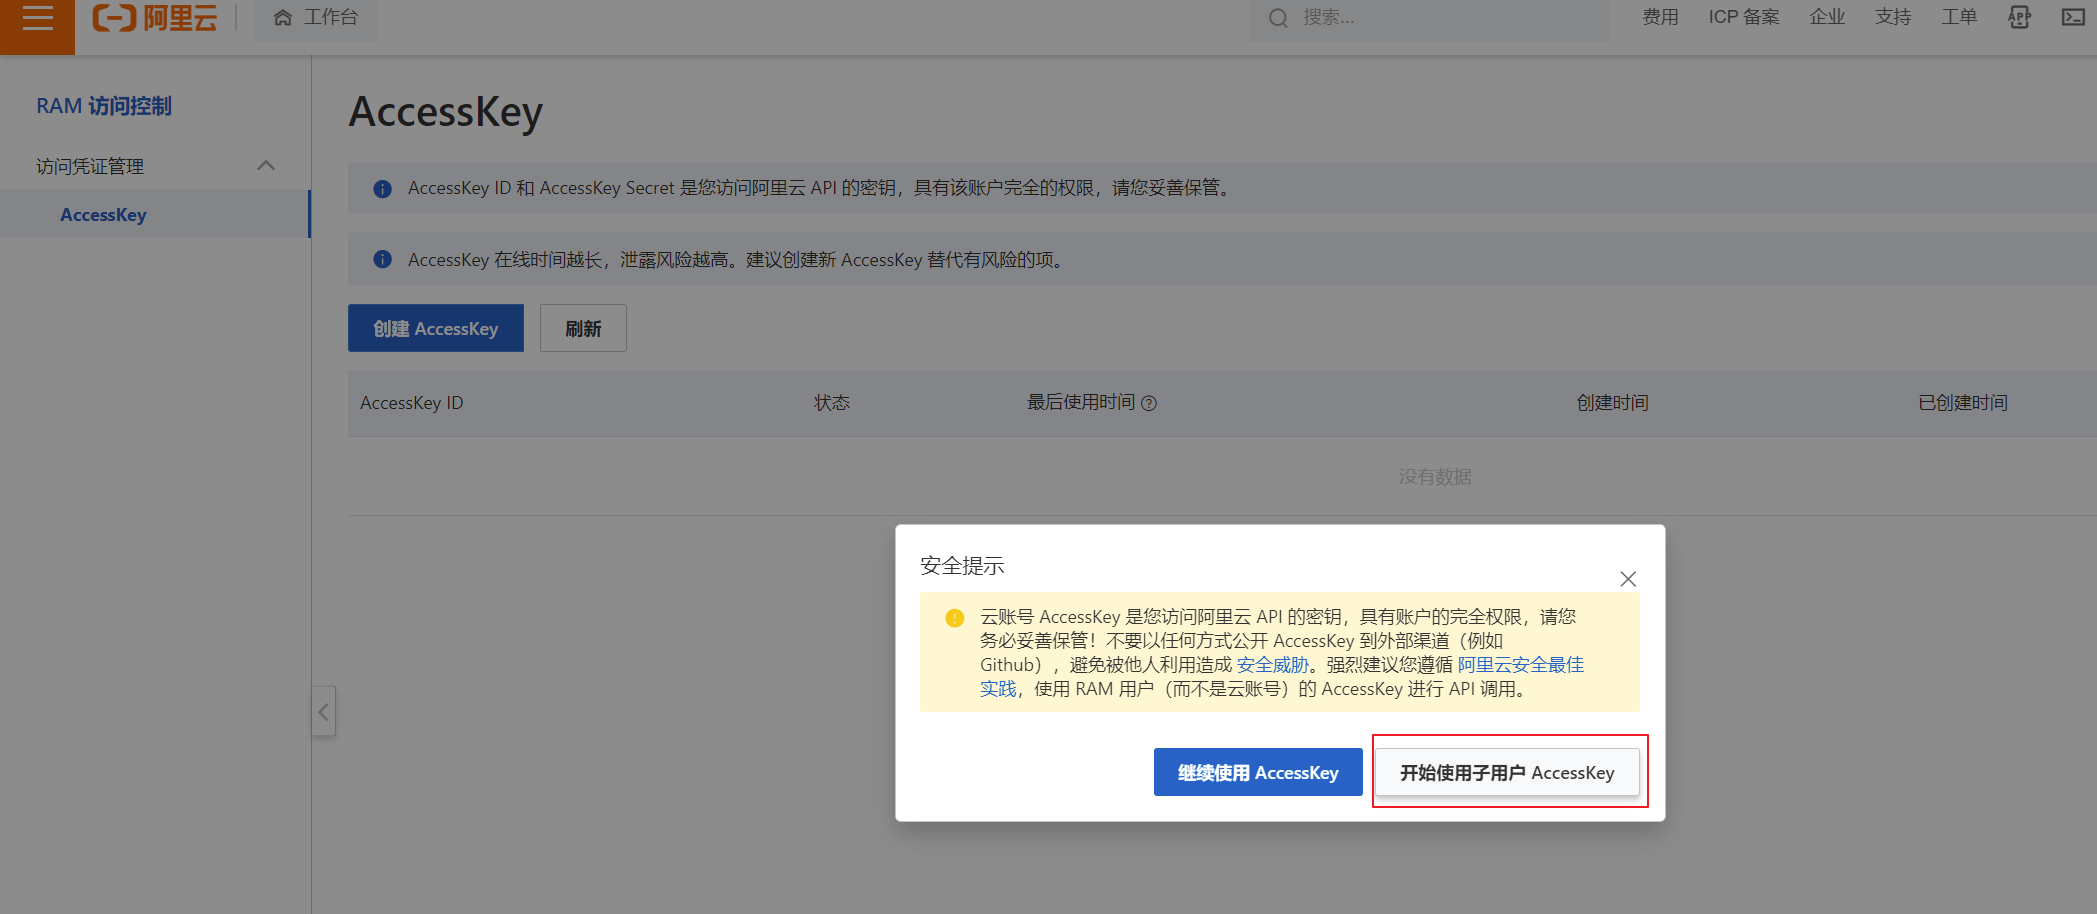
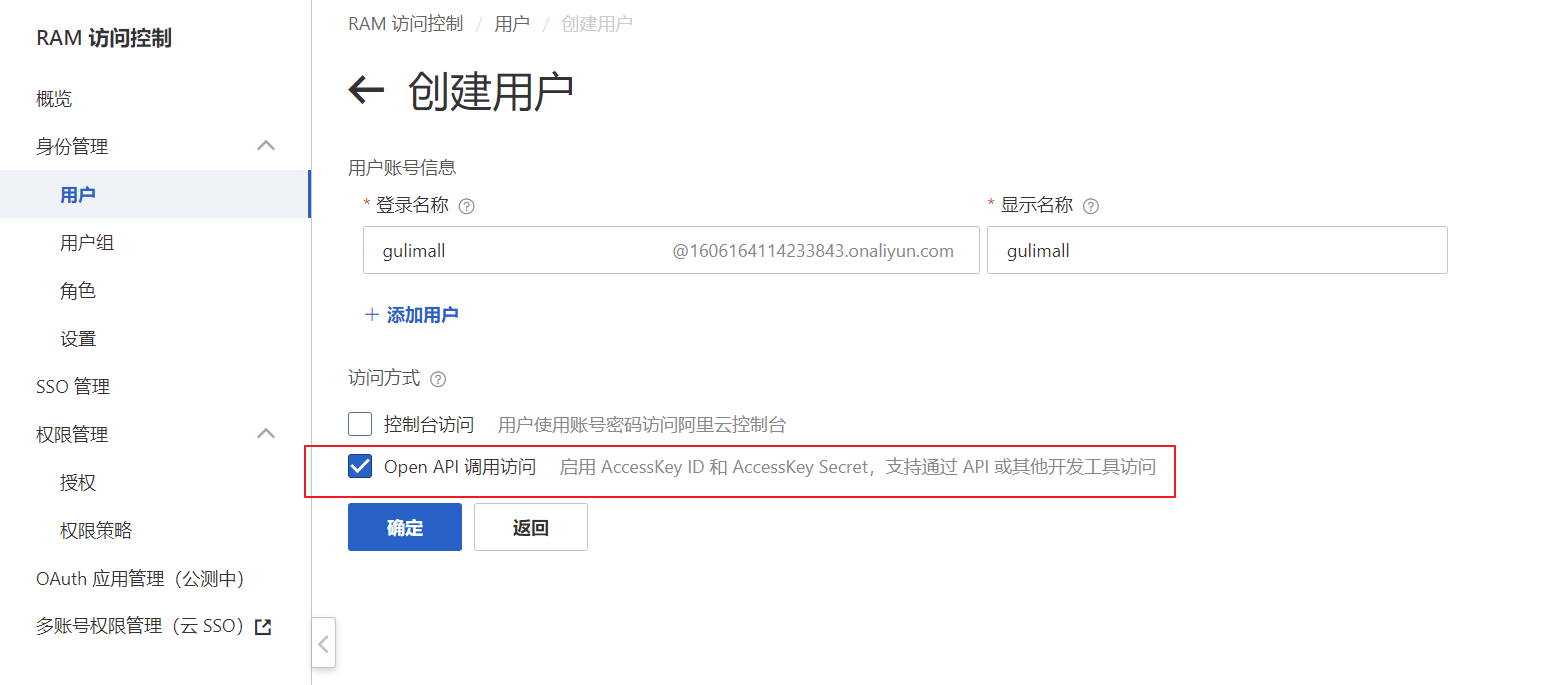
对子账户分配权限,管理OSS对象存储服务。这里我们允许读和写,方便我们实现上传功能。
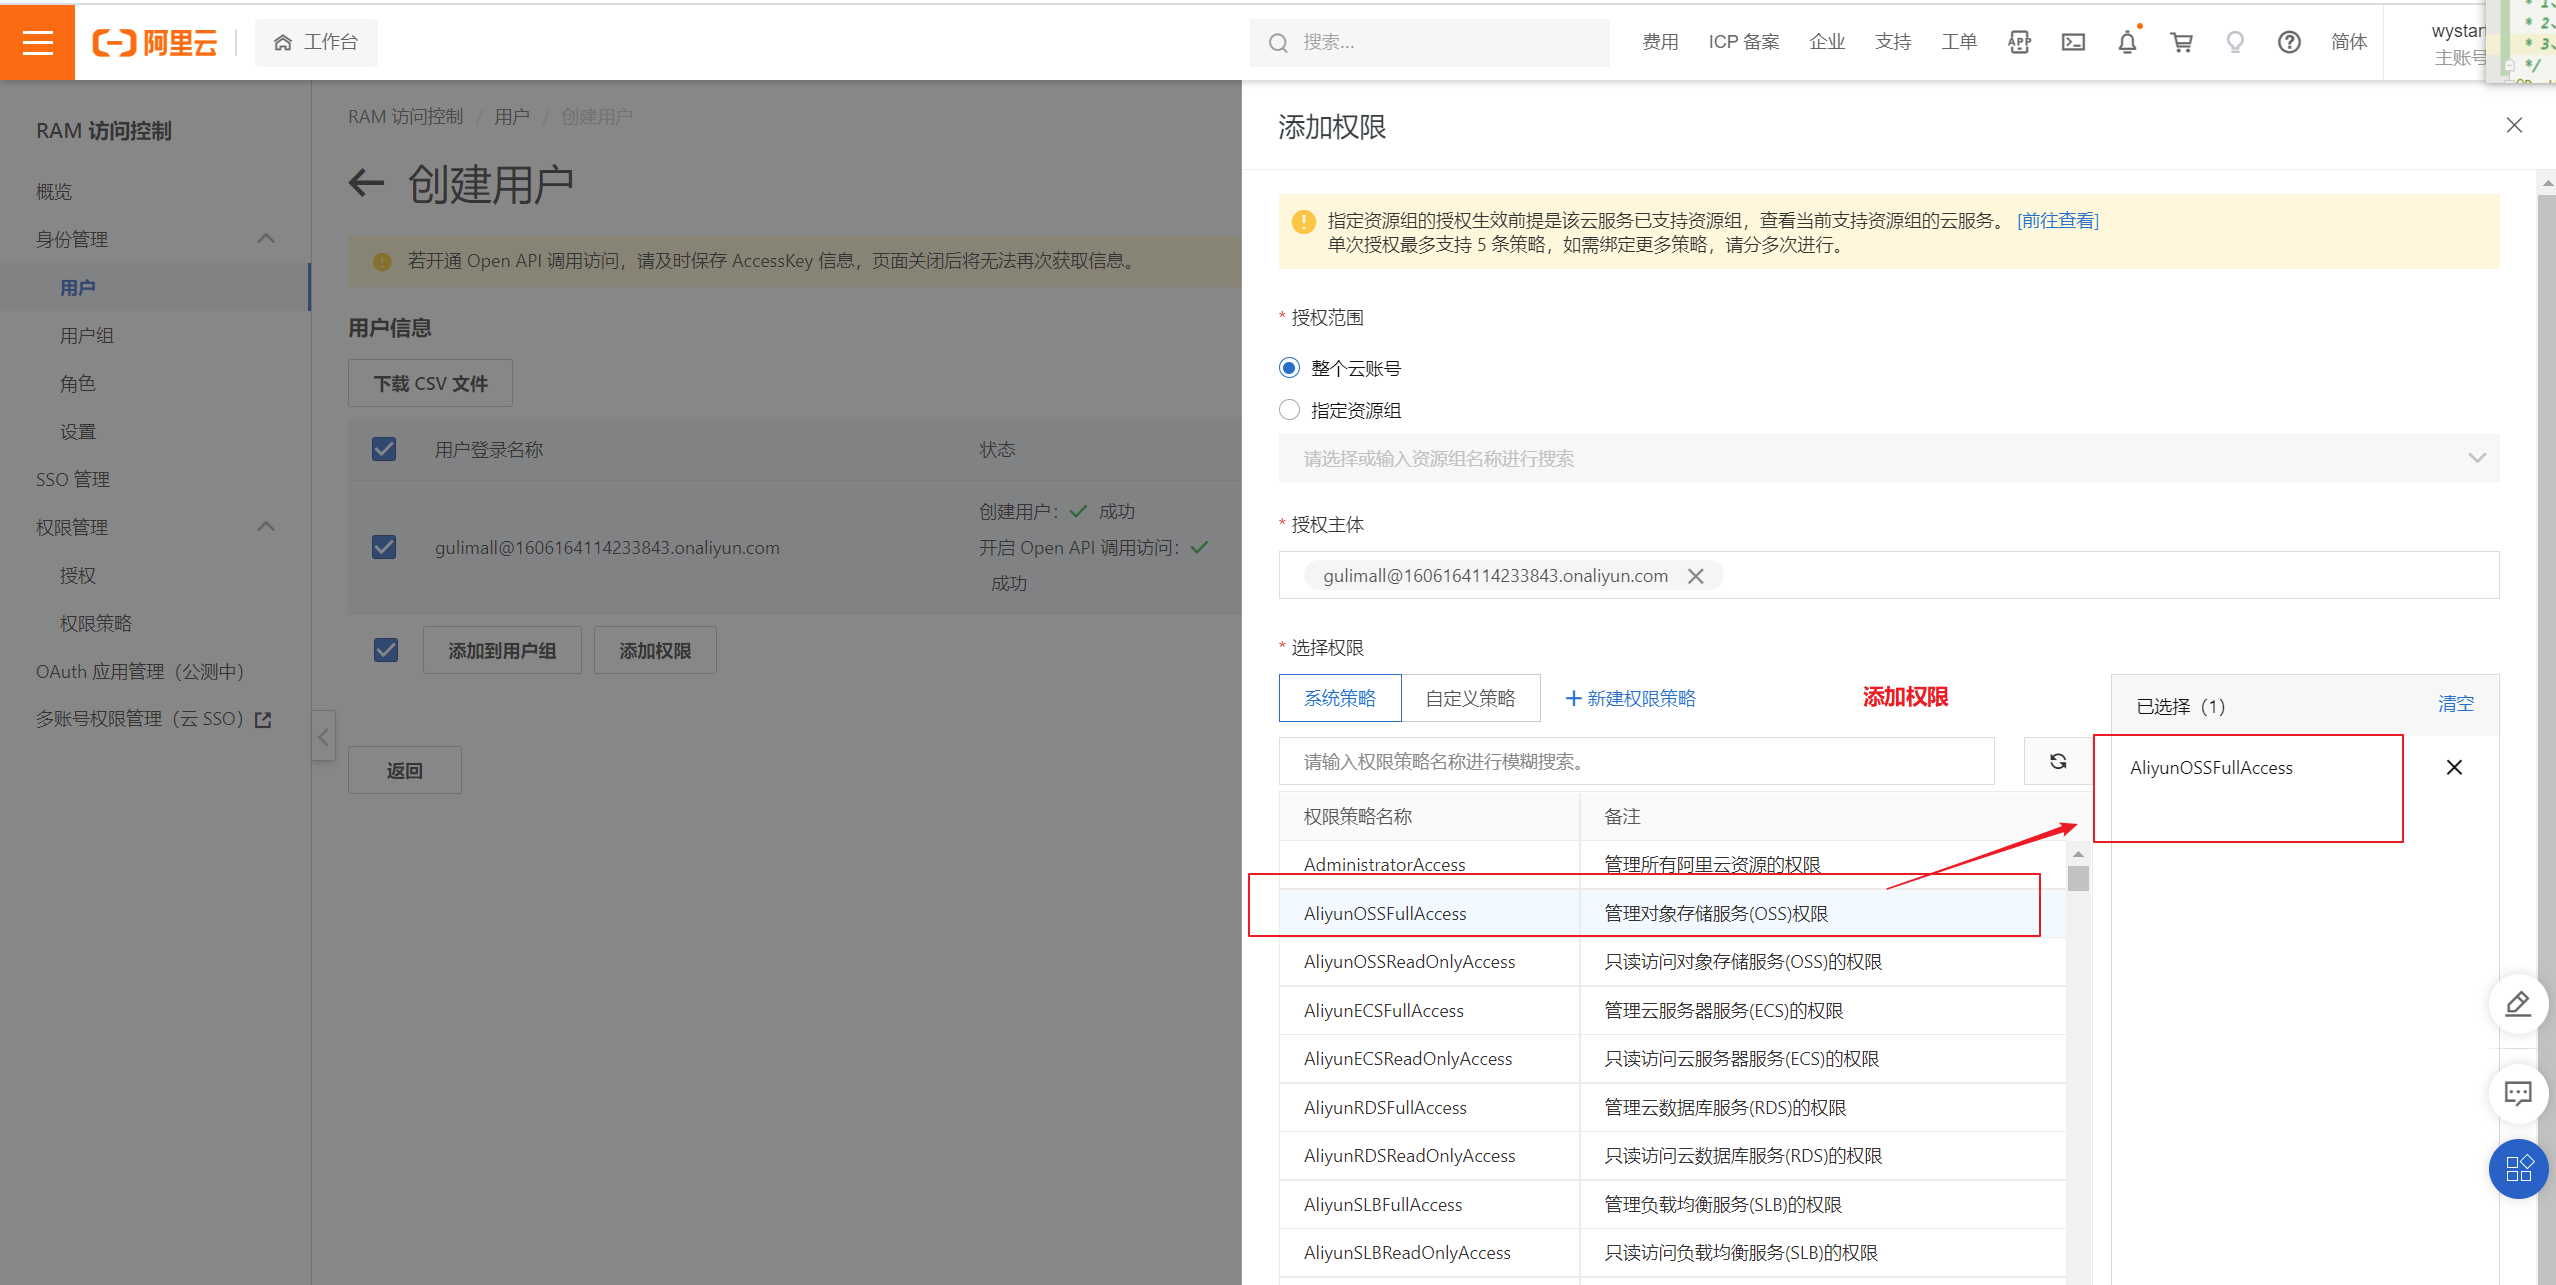
测试:

可以看到上传到云服务成功。
-
直接使用
SpringCloud Alibaba已经封装好的 oss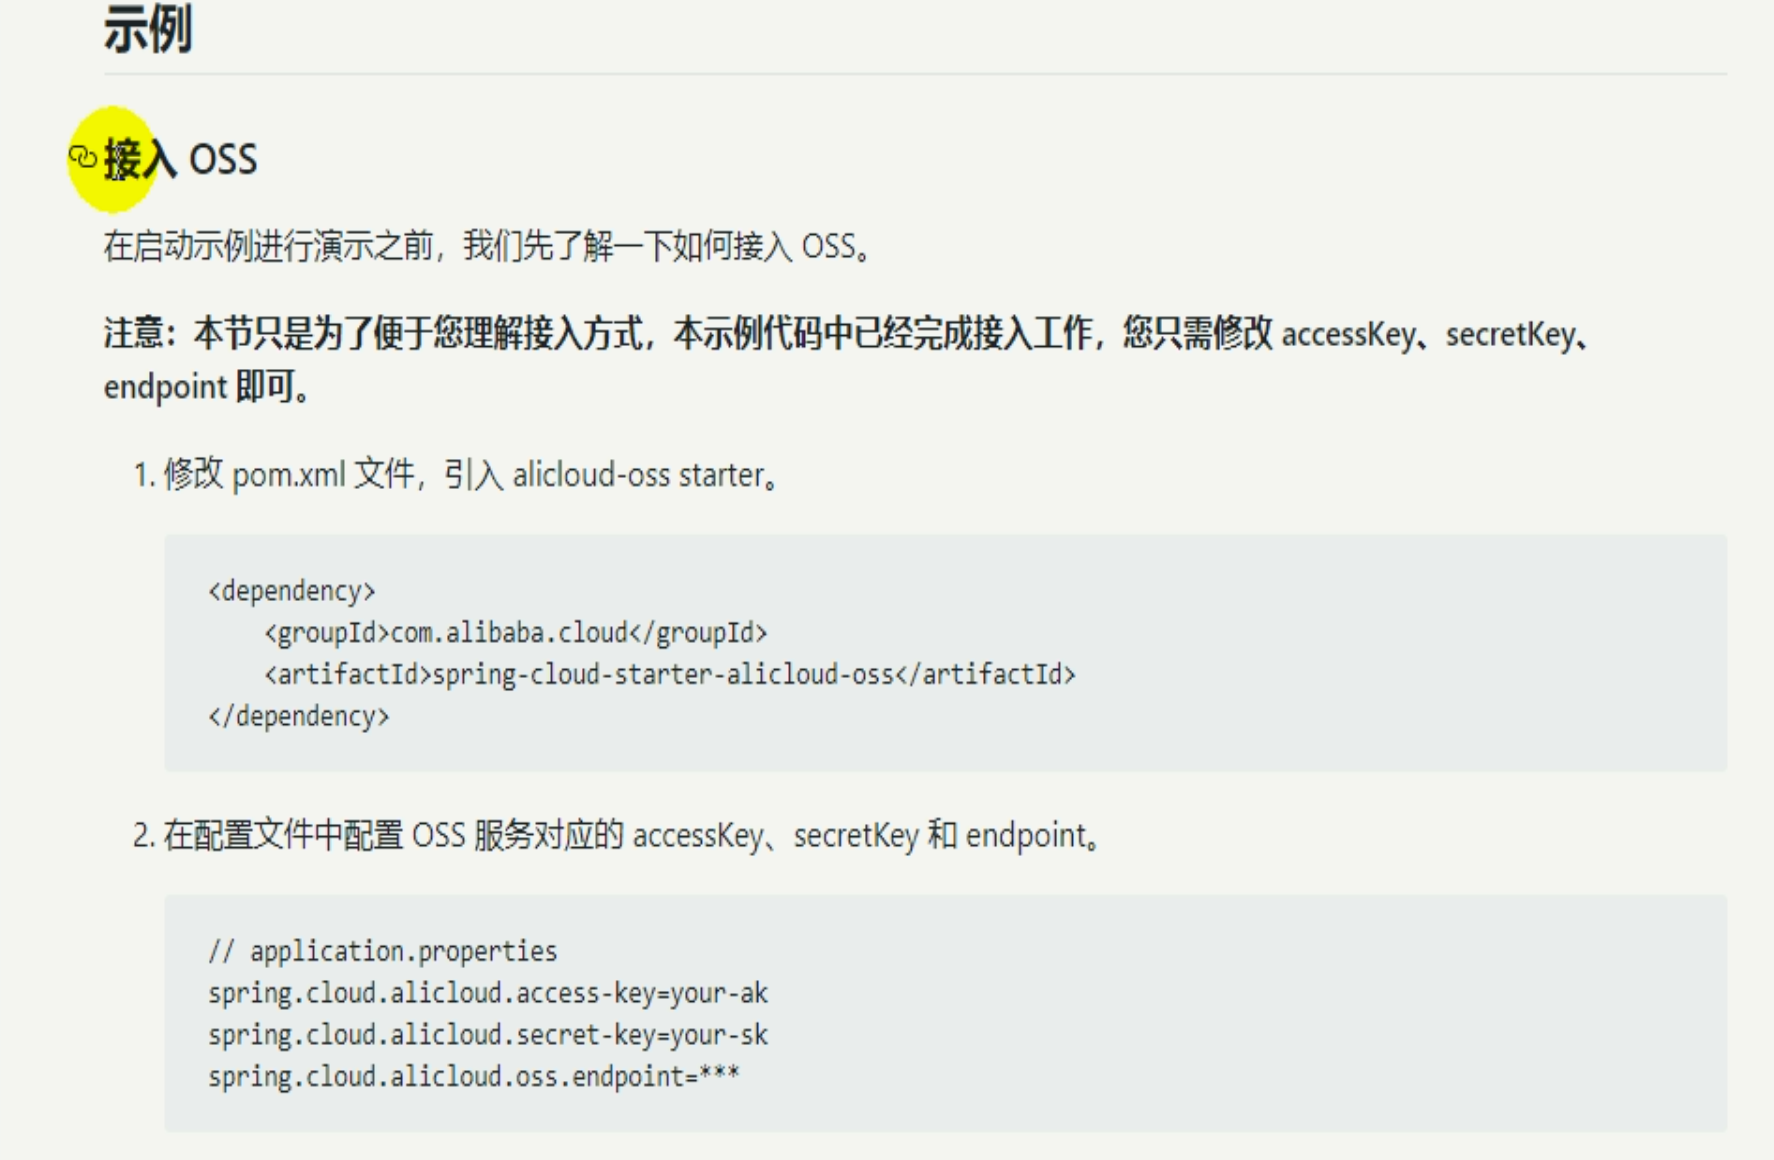
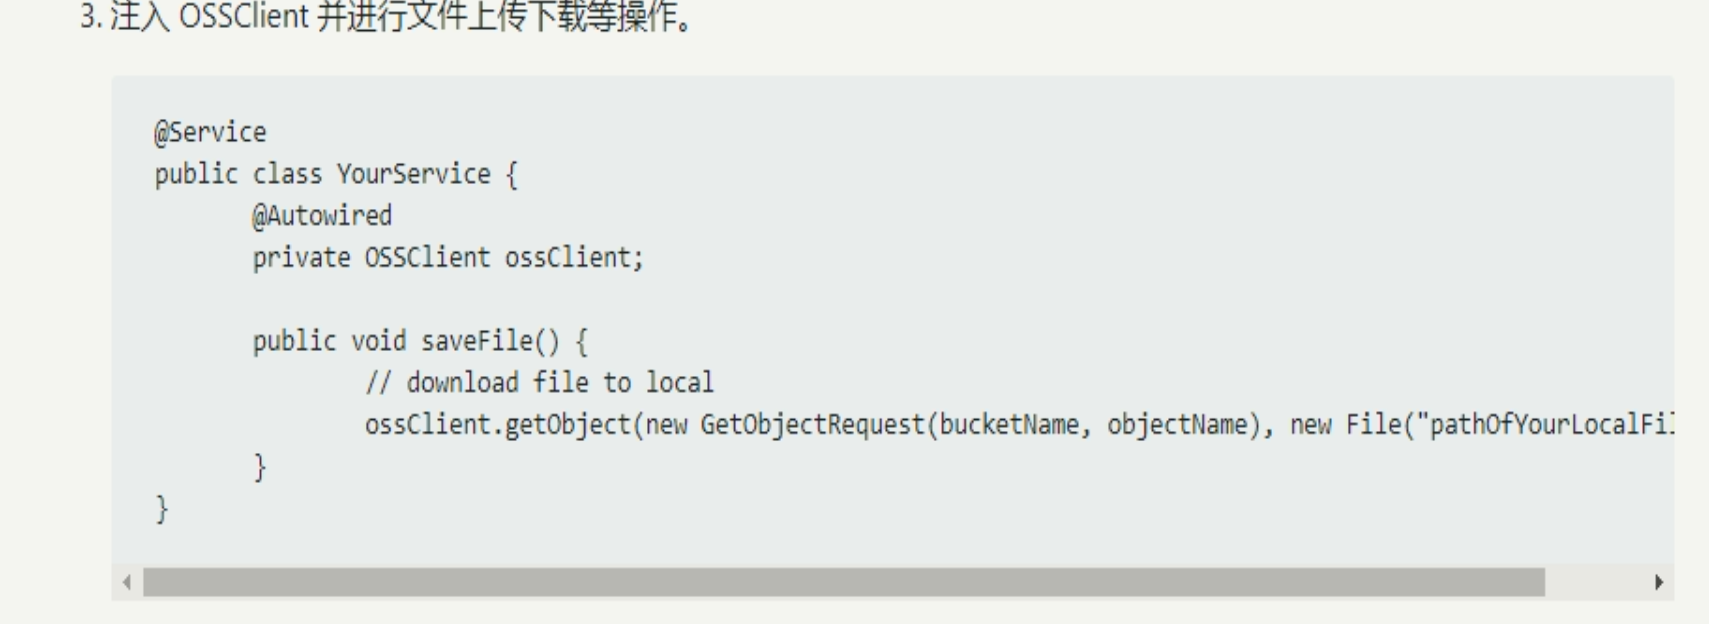
-
引入依赖(和老师版本一致)
<dependency> <groupId>com.alibaba.cloud</groupId> <artifactId>spring-cloud-starter-alicloud-oss</artifactId> <version>2.1.0.RELEASE</version> </dependency> -
在 gulimall-product 的 application.yml文件中配置
1 创建“AccessKey ID”和“AccessKeySecret”

2 配置key,secret和endpoint相关信息
    alicloud:
      access-key: LTAI5tABh1pjUprZGrKi92w1
      secret-key: enVYmXd9p1sHvVub5gBf21E3tjuIFJ
      oss:
        endpoint: oss-cn-hangzhou.aliyuncs.com
测试:
  @Autowired
    OSSClient ossClient;

    @Test
    public void testUpload() throws FileNotFoundException {
        // // Endpoint以杭州为例,其它Region请按实际情况填写。
        // String endpoint = "oss-cn-hangzhou.aliyuncs.com";
        // // 云账号AccessKey有所有API访问权限,建议遵循阿里云安全最佳实践,创建并使用RAM子账号进行API访问或日常运维,请登录 https://ram.console.aliyun.com 创建。
        // String accessKeyId = "LTAI5tABh1pjUprZGrKi92w1";
        // String accessKeySecret = "enVYmXd9p1sHvVub5gBf21E3tjuIFJ";
        //
        // // // 创建OSSClient实例。
        // OSS ossClient = new OSSClientBuilder().build(endpoint, accessKeyId, accessKeySecret);

        // 上传文件流。
        InputStream inputStream = new FileInputStream("F:\\JAVA listen\\尚硅谷Java学科全套教程(总207.77GB)\\谷粒商城\\课件\\课件和文档\\基础篇\\资料\\pics\\0d40c24b264aa511.jpg");
        ossClient.putObject("gulimall-wystart", "0d40c24b264aa511.jpg", inputStream);

        // 关闭OSSClient。
        ossClient.shutdown();
        System.out.println("上传成功");
    }
测试,同样可以成功上传。
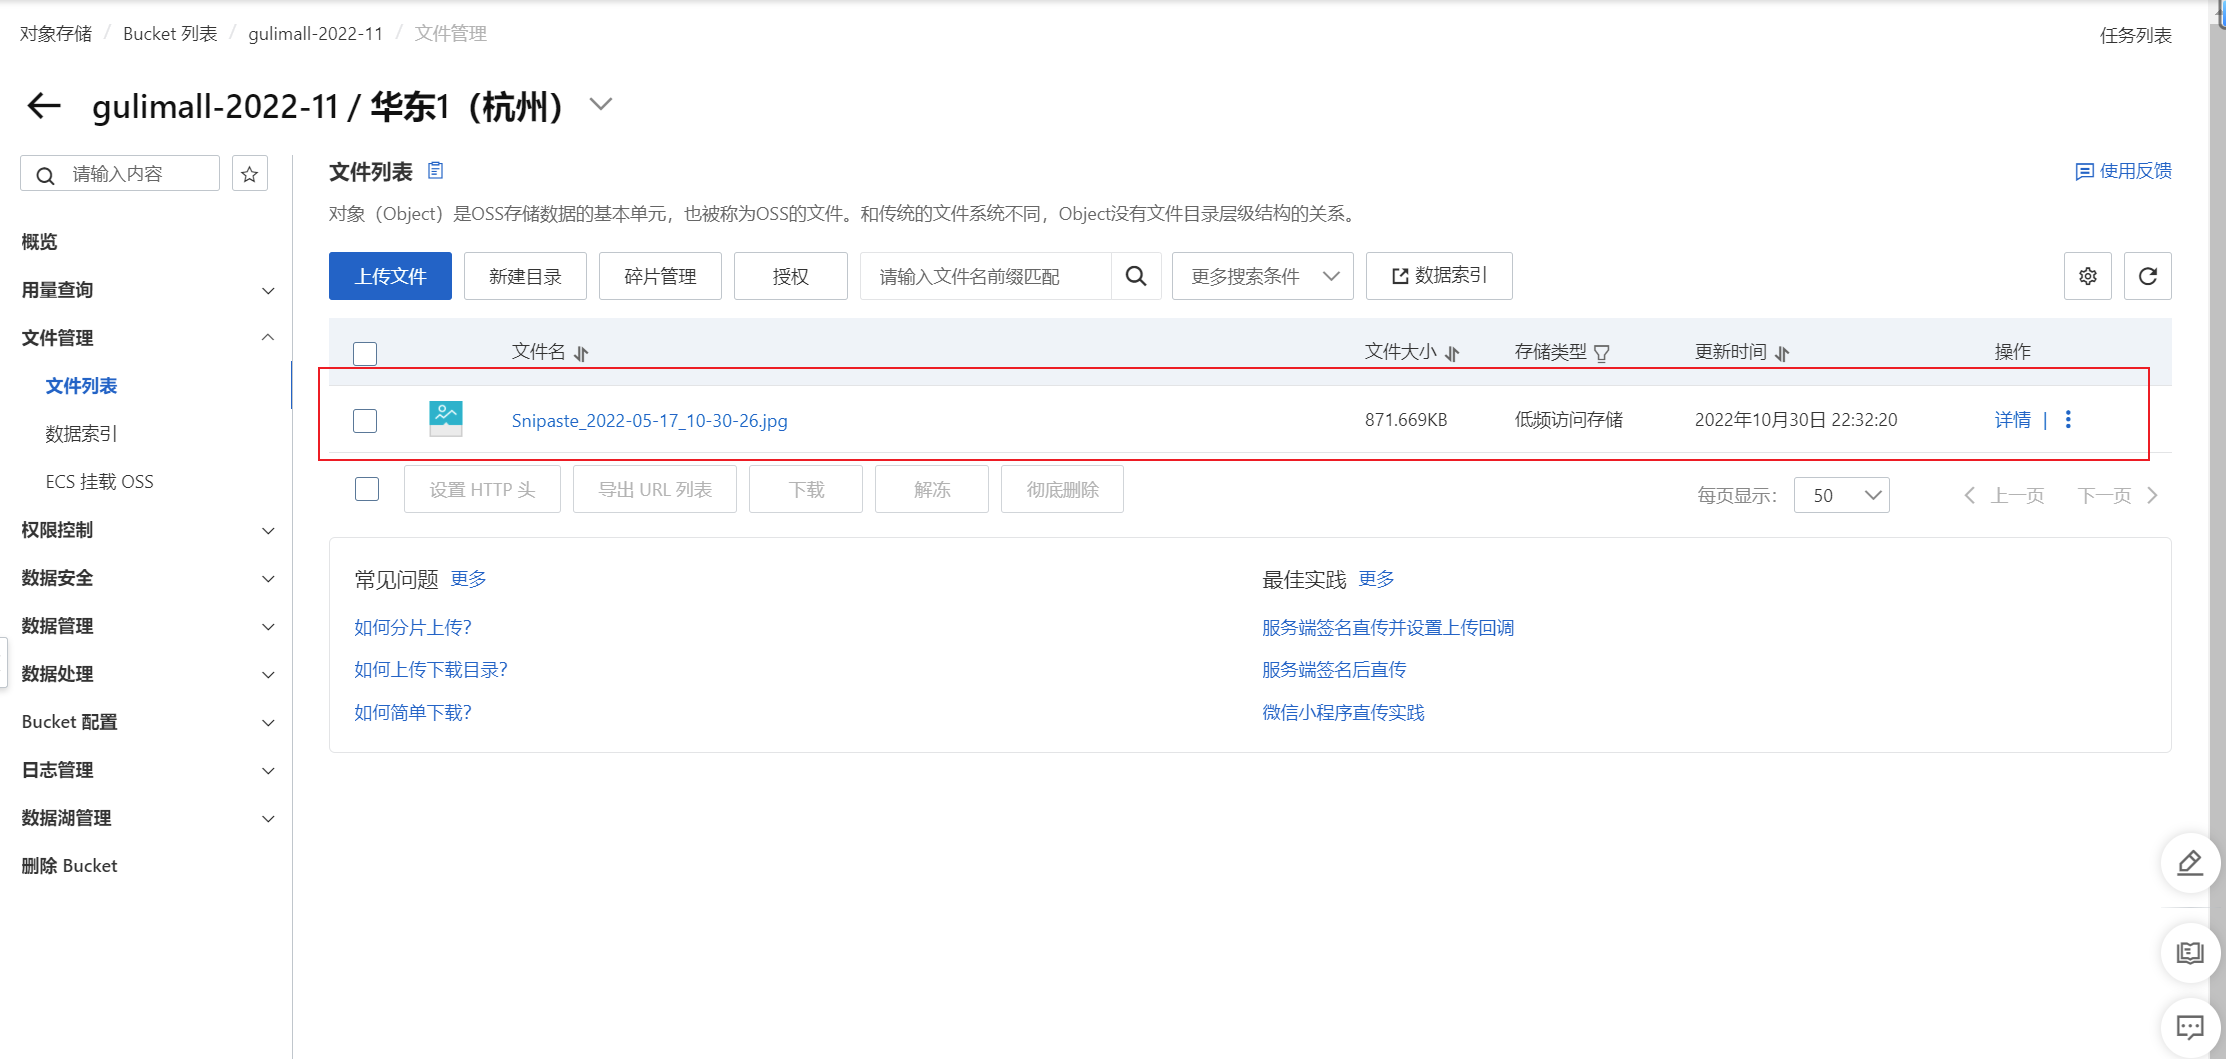
注意:
视频中将阿里巴巴oss存储服务依赖加到gulimall-common中,但是这个时候如果启动product是会报错的,原因是其他微服务都依赖了gulimall-common服务,如果其他微服务没有进行相关配置,会报依赖循环的错误,导致启动失败。但是后面我们创建一个专属于第三方服务的微服务,所以如果你要在这里跟着老师的步骤,进行测试的话,最好的建议就是将阿里云服务的oss进行单独引入到product服务,并将common中的注释掉。
6.2.4 新建第三方服务微服务工程并完成文件上传功能
我们将文件上传或者以后的短信验证这些第三方服务抽取出来放到一个专门的第三方微服务的工程项目中。gulimall-third-party

- 照例引入springweb和openfeign
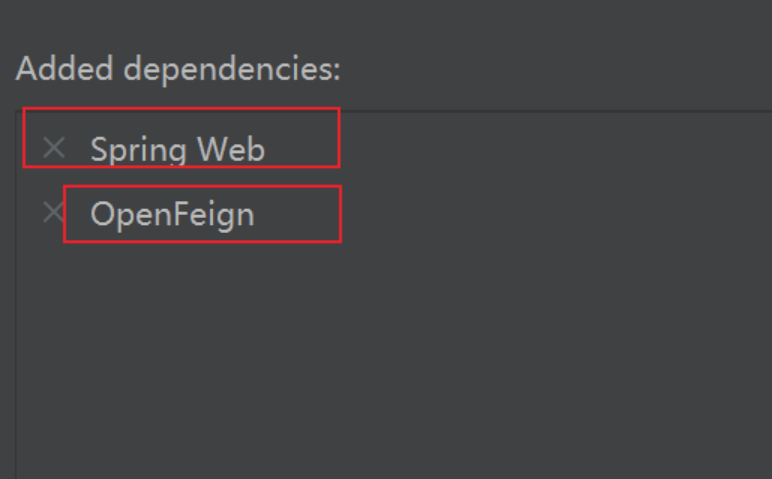
- 完善 gulimall-third-party 的 pom 文件
oss依赖
添加依赖,将原来 gulimall-common 中的“spring-cloud-starter-alicloud-oss”依赖移动到该项目中,让该微服务专门管理第三方服务
        <!--        阿里云oss存储服务-->
        <dependency>
            <groupId>com.alibaba.cloud</groupId>
            <artifactId>spring-cloud-starter-alicloud-oss</artifactId>
            <version>2.1.0.RELEASE</version>
        </dependency>

引入gulimall-common,注意在其中排除mybatisplus依赖。如果不排除,启动会报错。

         <dependency>
            <groupId>com.atguigu.gulimall</groupId>
            <artifactId>gulimall-common</artifactId>
            <version>0.0.1-SNAPSHOT</version>
            <exclusions>
                <exclusion>
                    <groupId>com.baomidou</groupId>
                    <artifactId>mybatis-plus-boot-starter</artifactId>
                </exclusion>
            </exclusions>
        </dependency>

另外也需要在“pom.xml”文件中,添加如下的依赖管理
<dependencyManagement>

        <dependencies>
            <dependency>
                <groupId>org.springframework.cloud</groupId>
                <artifactId>spring-cloud-dependencies</artifactId>
                <version>${spring-cloud.version}</version>
                <type>pom</type>
                <scope>import</scope>
            </dependency>
            <dependency>
                <groupId>com.alibaba.cloud</groupId>
                <artifactId>spring-cloud-alibaba-dependencies</artifactId>
                <version>2.1.0.RELEASE</version>
                <type>pom</type>
                <scope>import</scope>
            </dependency>
        </dependencies>
    </dependencyManagement>
-
将服务注册和配置到nacos中
-
新建 第三方服务的命名空间 ,以后相关配置我们就放在该命名空间下。

-
创建 oss.yml配置文件,以后线上生产时文件上传配置就放在此配置文件中
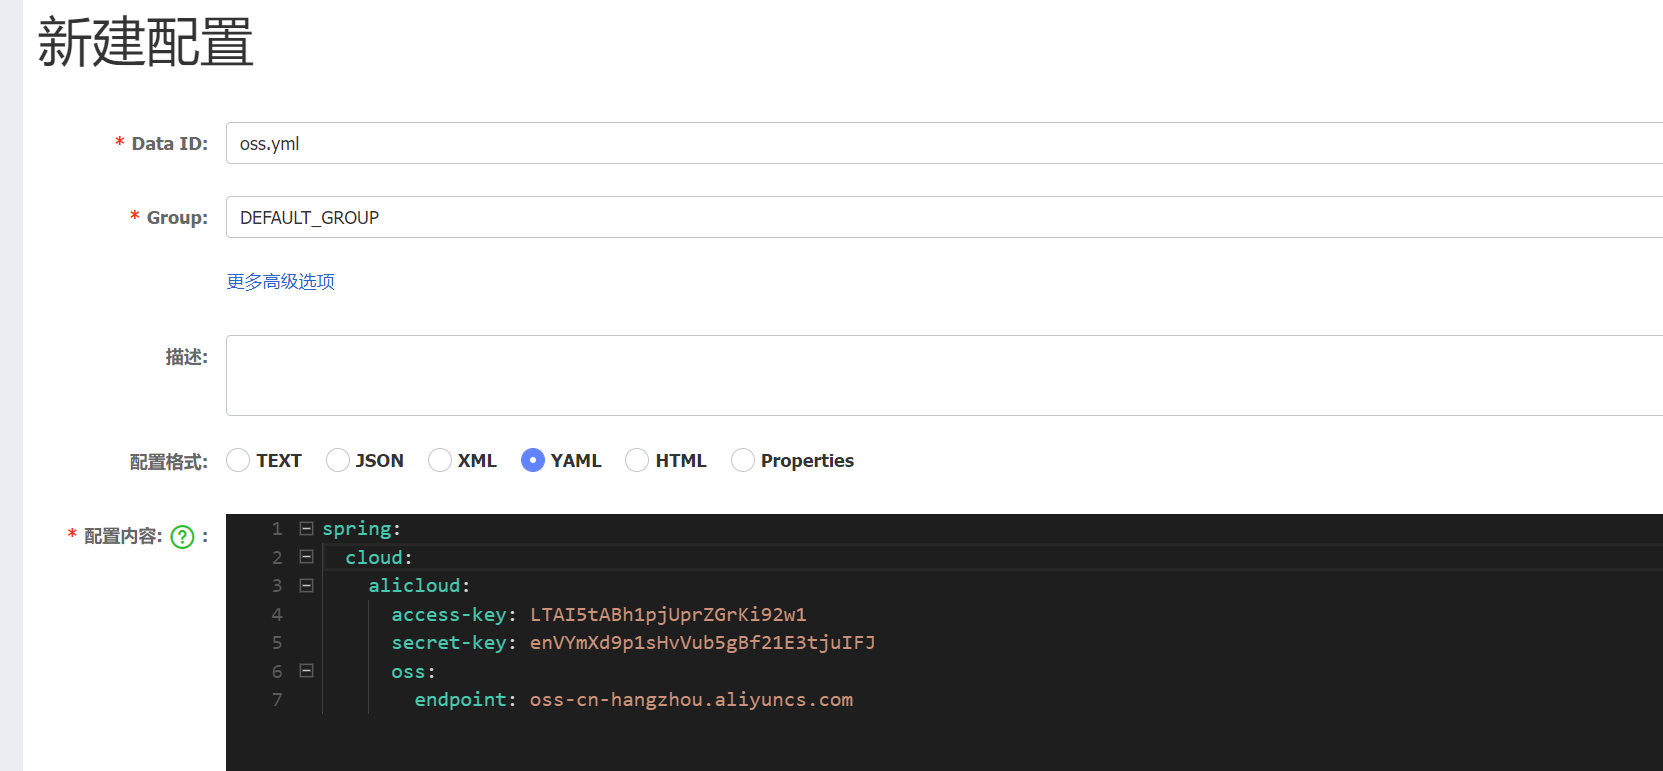
-
创建 bootstrap.properties文件,进行nacos的配置,此外每一个微服务都需要有对应的微服务名字
spring.application.name=gulimall-third-party # nacos配置中心配置 spring.cloud.nacos.config.server-addr=127.0.0.1:8848 spring.cloud.nacos.config.namespace=844086b8-9b51-4e08-a69d-1e76cfbf4485 #以后我们就将文件上传的相关配置放在oss.yml下 spring.cloud.nacos.config.ext-config[0].data-id=oss.yml spring.cloud.nacos.config.ext-config[0].group=DEFAULT_GROUP spring.cloud -
在 application.yml 文件中将服务注册进nacos:这里我们将 oss相关配置也先配置进来,以后线上生产的时候再放到 nacos 上。
spring: cloud: nacos: discovery: server-addr: 127.0.0.1:8848 alicloud: access-key: LTAI5tABh1pjUprZGrKi92w1 secret-key: enVYmXd9p1sHvVub5gBf21E3tjuIFJ oss: endpoint: oss-cn-hangzhou.aliyuncs.com bucket: gulimall-wystart application: name: gulimall-third-party server: port: 30000 -
在 主启动类中添加服务发现注解
@EnableDiscoveryClient  //服务发现
@SpringBootApplication
public class GulimallThirdPartyApplication {
-
1、单元测试
@Autowired
    OSSClient ossClient;

    //测试文件上传到云服务器
    @Test
    public void testUpload() throws FileNotFoundException {
        // // Endpoint以杭州为例,其它Region请按实际情况填写。
        // String endpoint = "oss-cn-hangzhou.aliyuncs.com";
        // // 云账号AccessKey有所有API访问权限,建议遵循阿里云安全最佳实践,创建并使用RAM子账号进行API访问或日常运维,请登录 https://ram.console.aliyun.com 创建。
        // String accessKeyId = "LTAI5tABh1pjUprZGrKi92w1";
        // String accessKeySecret = "enVYmXd9p1sHvVub5gBf21E3tjuIFJ";
        //
        // // // 创建OSSClient实例。
        // OSS ossClient = new OSSClientBuilder().build(endpoint, accessKeyId, accessKeySecret);

        // 上传文件流。
        InputStream inputStream = new FileInputStream("F:\\JAVA listen\\尚硅谷Java学科全套教程(总207.77GB)\\谷粒商城\\课件\\课件和文档\\基础篇\\资料\\pics\\0d40c24b264aa511.jpg");
        ossClient.putObject("gulimall-wystart", "hahaha.jpg", inputStream);

        // 关闭OSSClient。
        ossClient.shutdown();
        System.out.println("上传成功");
    }
成功上传。

2、服务端签名直传并设置上传回调
接下来我们仔细讲解一下 利用 服务端签名后直传的原理
背景
采用JavaScript客户端直接签名(参见JavaScript客户端签名直传)时,AccessKeyID和AcessKeySecret会暴露在前端页面,因此存在严重的安全隐患。因此,OSS提供了服务端签名后直传的方案。
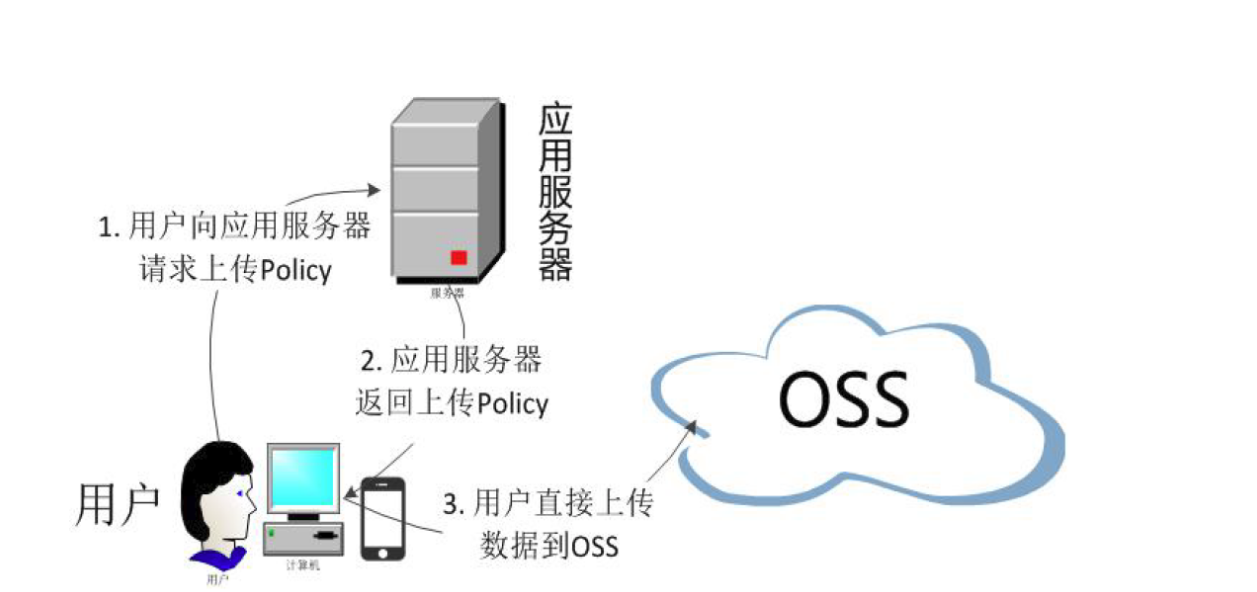
服务端签名后直传的原理如下:
用户发送上传Policy请求到应用服务器。
应用服务器返回上传Policy和签名给用户。
用户直接上传数据到OSS。
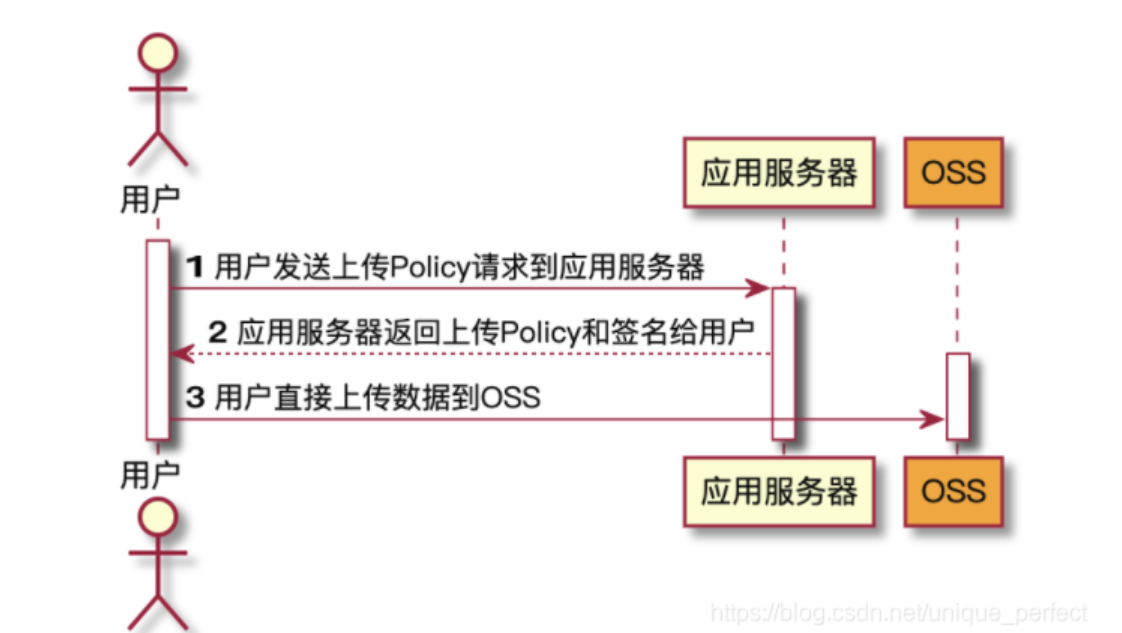
- 参考官网进行相关配置
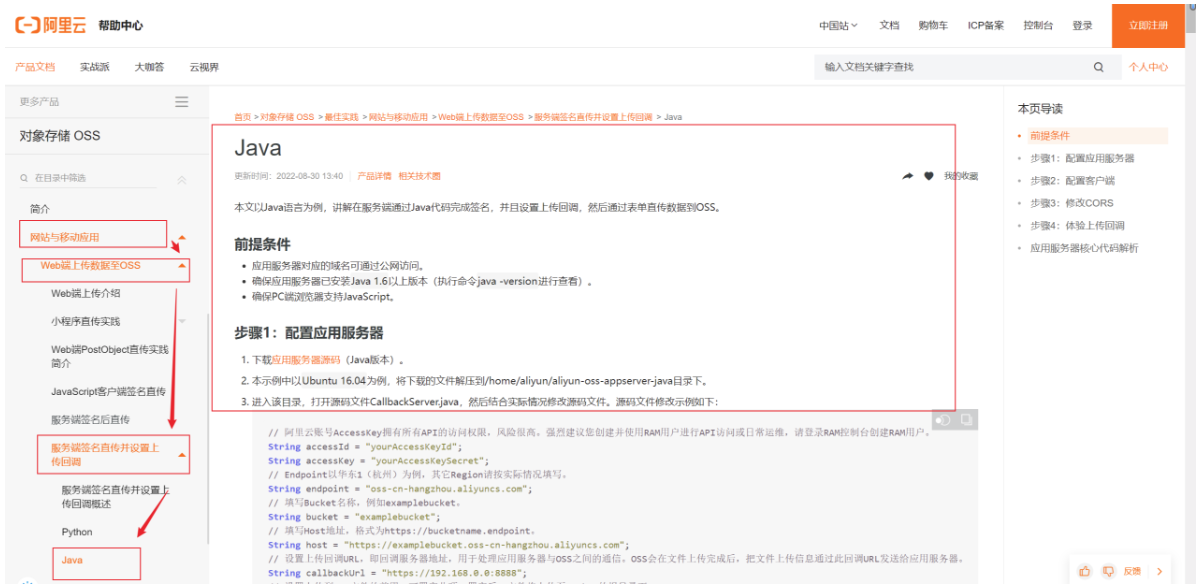
阿里云OSS存储服务中对于服务器签名直传这部分的文档。链接在下面:
我们参考这个文档创建属于我们自己的配置。
-
编写 com.atguigu.gulimall.thirdparty.controller.OssController
@RestController
public class OssController {


    @Autowired
    OSS ossClient;


    @Value("${spring.cloud.alicloud.oss.endpoint}")//从配置文件动态读取,不写死
    private String endpoint;
    @Value("${spring.cloud.alicloud.oss.bucket}")
    private String bucket;
    @Value("${spring.cloud.alicloud.access-key}")
    private String accessId;

    @RequestMapping("/oss/policy")
    public Map<String,String> policy() {

        // 填写Host地址,格式为https://bucketname.endpoint。
        String host = "https://" + bucket + "." + endpoint;

        //自定义日期格式文件夹,以后上传的文件统一放在当天的文件夹中
        String format = new SimpleDateFormat("yyyy-MM-dd").format(new Date());
        // 设置上传到OSS文件的前缀,可置空此项。置空后,文件将上传至Bucket的根目录下。
        String dir = format + "/";//用户上传时指定的前缀

        Map<String, String> respMap = null;

        try {
            long expireTime = 30;
            long expireEndTime = System.currentTimeMillis() + expireTime * 1000;
            Date expiration = new Date(expireEndTime);
            PolicyConditions policyConds = new PolicyConditions();
            policyConds.addConditionItem(PolicyConditions.COND_CONTENT_LENGTH_RANGE, 0, 1048576000);
            policyConds.addConditionItem(MatchMode.StartWith, PolicyConditions.COND_KEY, dir);

            String postPolicy = ossClient.generatePostPolicy(expiration, policyConds);
            byte[] binaryData = postPolicy.getBytes("utf-8");
            String encodedPolicy = BinaryUtil.toBase64String(binaryData);
            String postSignature = ossClient.calculatePostSignature(postPolicy);

            respMap = new LinkedHashMap<String, String>();
            respMap.put("accessId", accessId);
            respMap.put("policy", encodedPolicy);
            respMap.put("signature", postSignature);
            respMap.put("dir", dir);
            respMap.put("host", host);
            respMap.put("expire", String.valueOf(expireEndTime / 1000));
            // respMap.put("expire", formatISO8601Date(expiration));


        } catch (Exception e) {
            // Assert.fail(e.getMessage());
            System.out.println(e.getMessage());
        }
        return respMap;
    }
}
测试 http://localhost:30000/oss/policy

- 以后在上传文件时的统一访问路径为“ http://localhost:88/api/thirdparty/oss/policy”,即利用 网关统一路由,由网关来进行转发。
在“gulimall-gateway”中配置路由规则:
        - id: third_party_route
          uri: lb://gulimall-third-party
          predicates:
            - Path=/api/thirdparty/**
          filters:
            - RewritePath=/api/thirdparty(?<segment>/?.*), /$\{segment}
        #http://localhost:88/api/thirdparty/oss/policy  http://localhost:30000/oss/policy
测试是否能够正常跳转: http://localhost:88/api/thirdparty/oss/policy

成功。
-
前后端联调,实现文件上传。
-
将课件中的有关文件上传的资源复制。

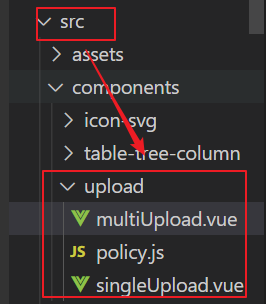
-
文件上传组件在/renren-fast-vue/src/components中
-
修改组件中
el-upload中的action属性,替换成自己的Bucket域名
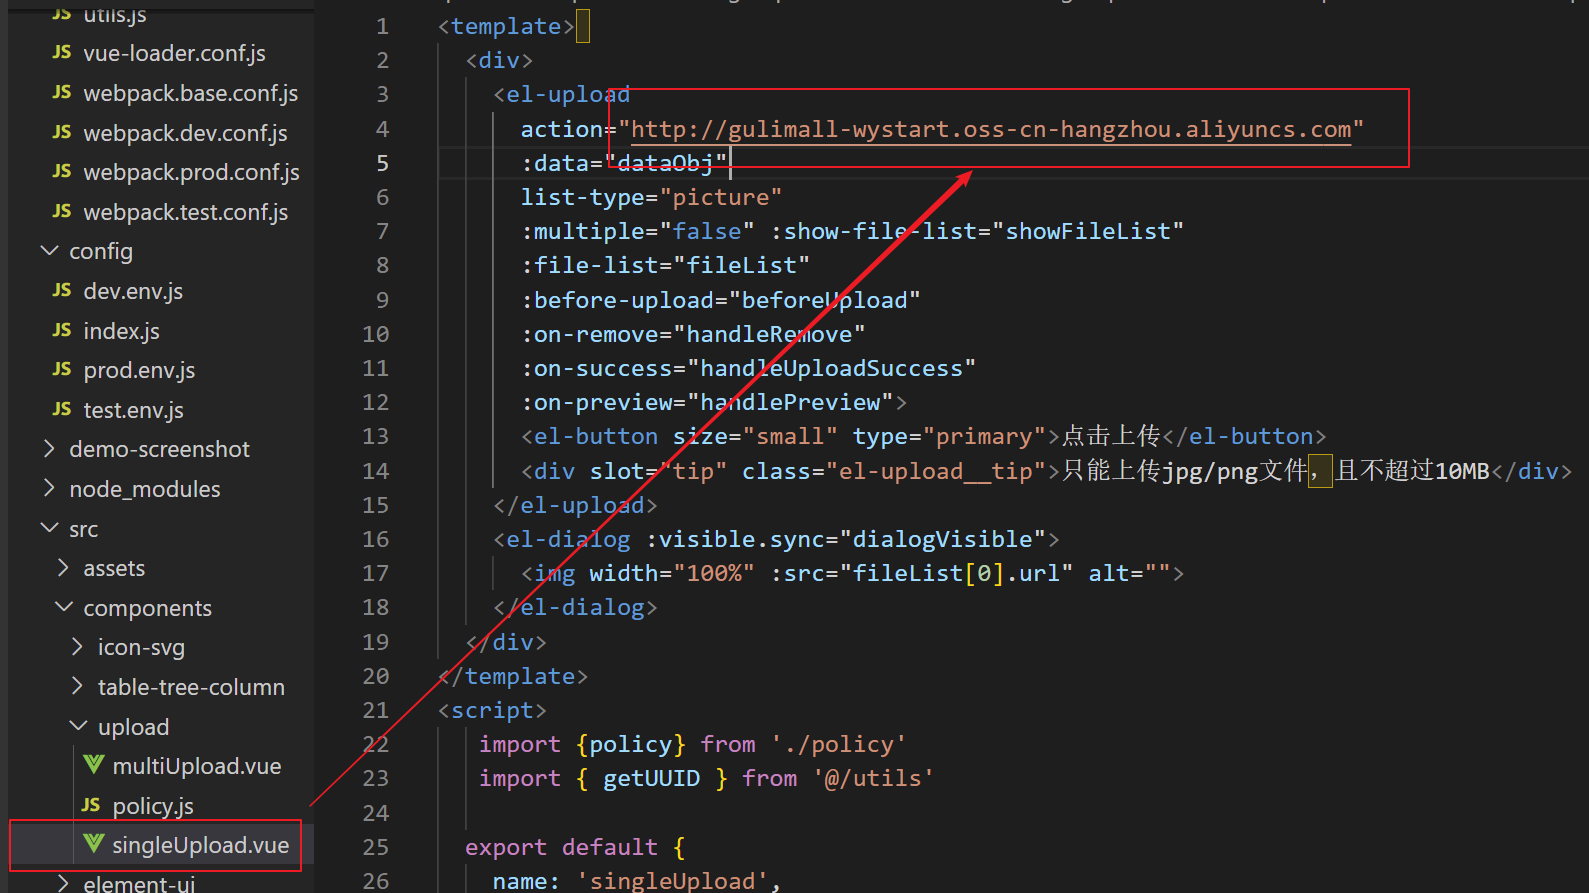
singleUpload.vue是单文件上传,multiUploca.vue是多文件上传。
- 把单个文件上传组件应用到
brand-add-or-update.vue
//在<script>标签中导入组件
import singleUpload from "@/components/upload/singleUpload"

//在export default中声明要用到的组件
  components:{
    singleUpload
  },
<!--用新的组件替换原来的输入框--> <el-form-item label="品牌logo地址" prop="logo"> <singleUpload v-model="dataForm.logo"></singleUpload> </el-form-item>我们在后端准备好了签名controller,那么前端是在哪里获取的呢 policy.js import http from '@/utils/httpRequest.js' export function policy () { return new Promise((resolve, reject) => { http({ url: http.adornUrl('/thirdparty/oss/policy'), method: 'get', params: http.adornParams({}) }).then(({ data }) => { resolve(data) }) }) } 而文件上传前调用的方法: :before-upload=“beforeUpload” 发现该方法返回了一个new Promise,调用了policy(),该方法是policy.js中的 import { policy } from "./policy"; .... beforeUpload(file) { let _self = this; return new Promise((resolve, reject) => { policy() .then(response => { // 意思是说policy获取到签名后,把签名信息保存起来 // console.log("这是什么${filename}"); _self.dataObj.policy = response.data.policy; _self.dataObj.signature = response.data.signature; _self.dataObj.ossaccessKeyId = response.data.accessid; _self.dataObj.key = response.data.dir +getUUID()+"_${filename}"; _self.dataObj.dir = response.data.dir; _self.dataObj.host = response.data.host; resolve(true); // 总的来说什么意思呢? // 上传之前先请求签名,保存起来签名 // 根据action="http://gulimall-wystart.oss-cn-hangzhou.aliyuncs.com" // 结合data信息,提交到云端 }) .catch(err => { console.log("出错了...",err) reject(false); }); }); }, 在vue中看是response.data.policy,在控制台看response.policy。所以去java里面改返回值为R.return R.ok().put(“data”,respMap);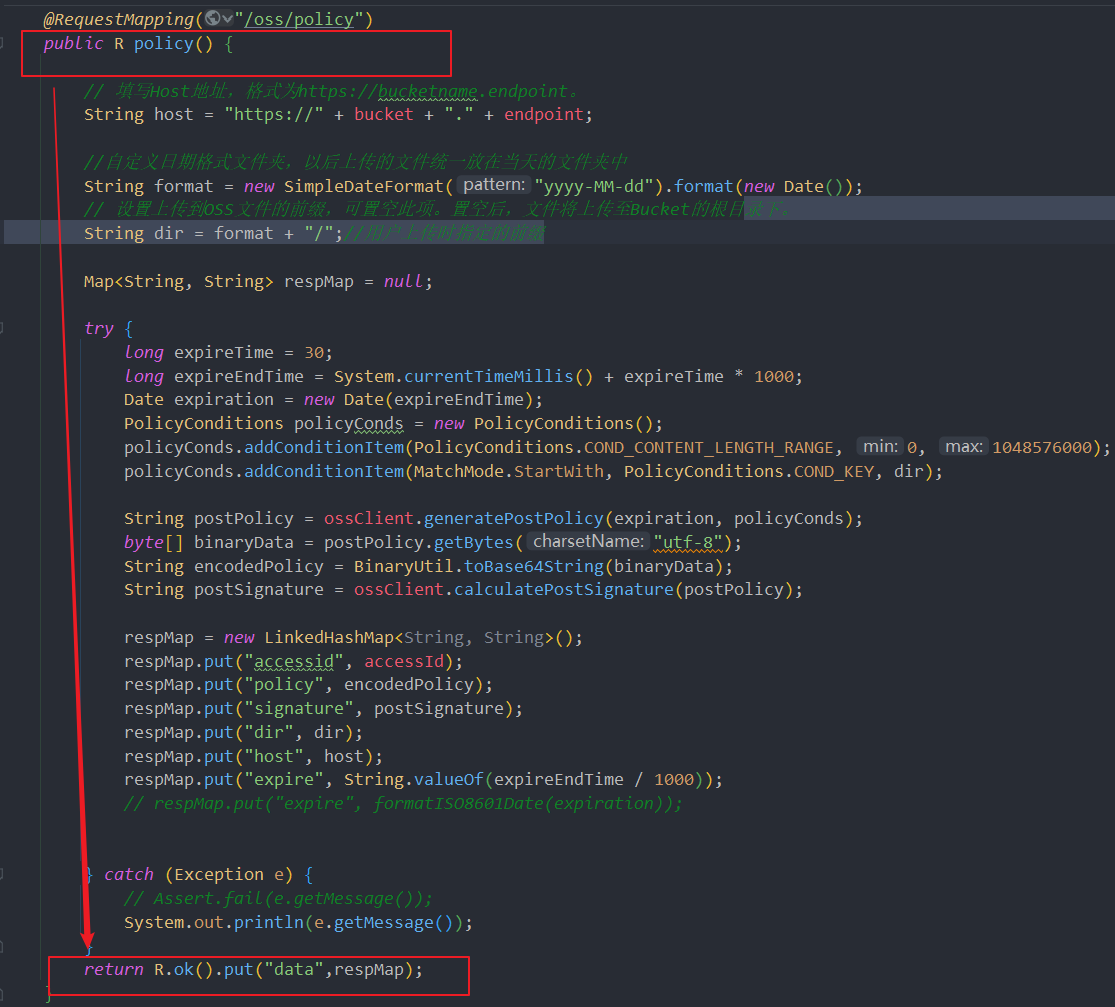
- 我们在进行启动的时候发现存在浏览器跨域问题

- 解决跨域问题,在bucket中设置跨域设置
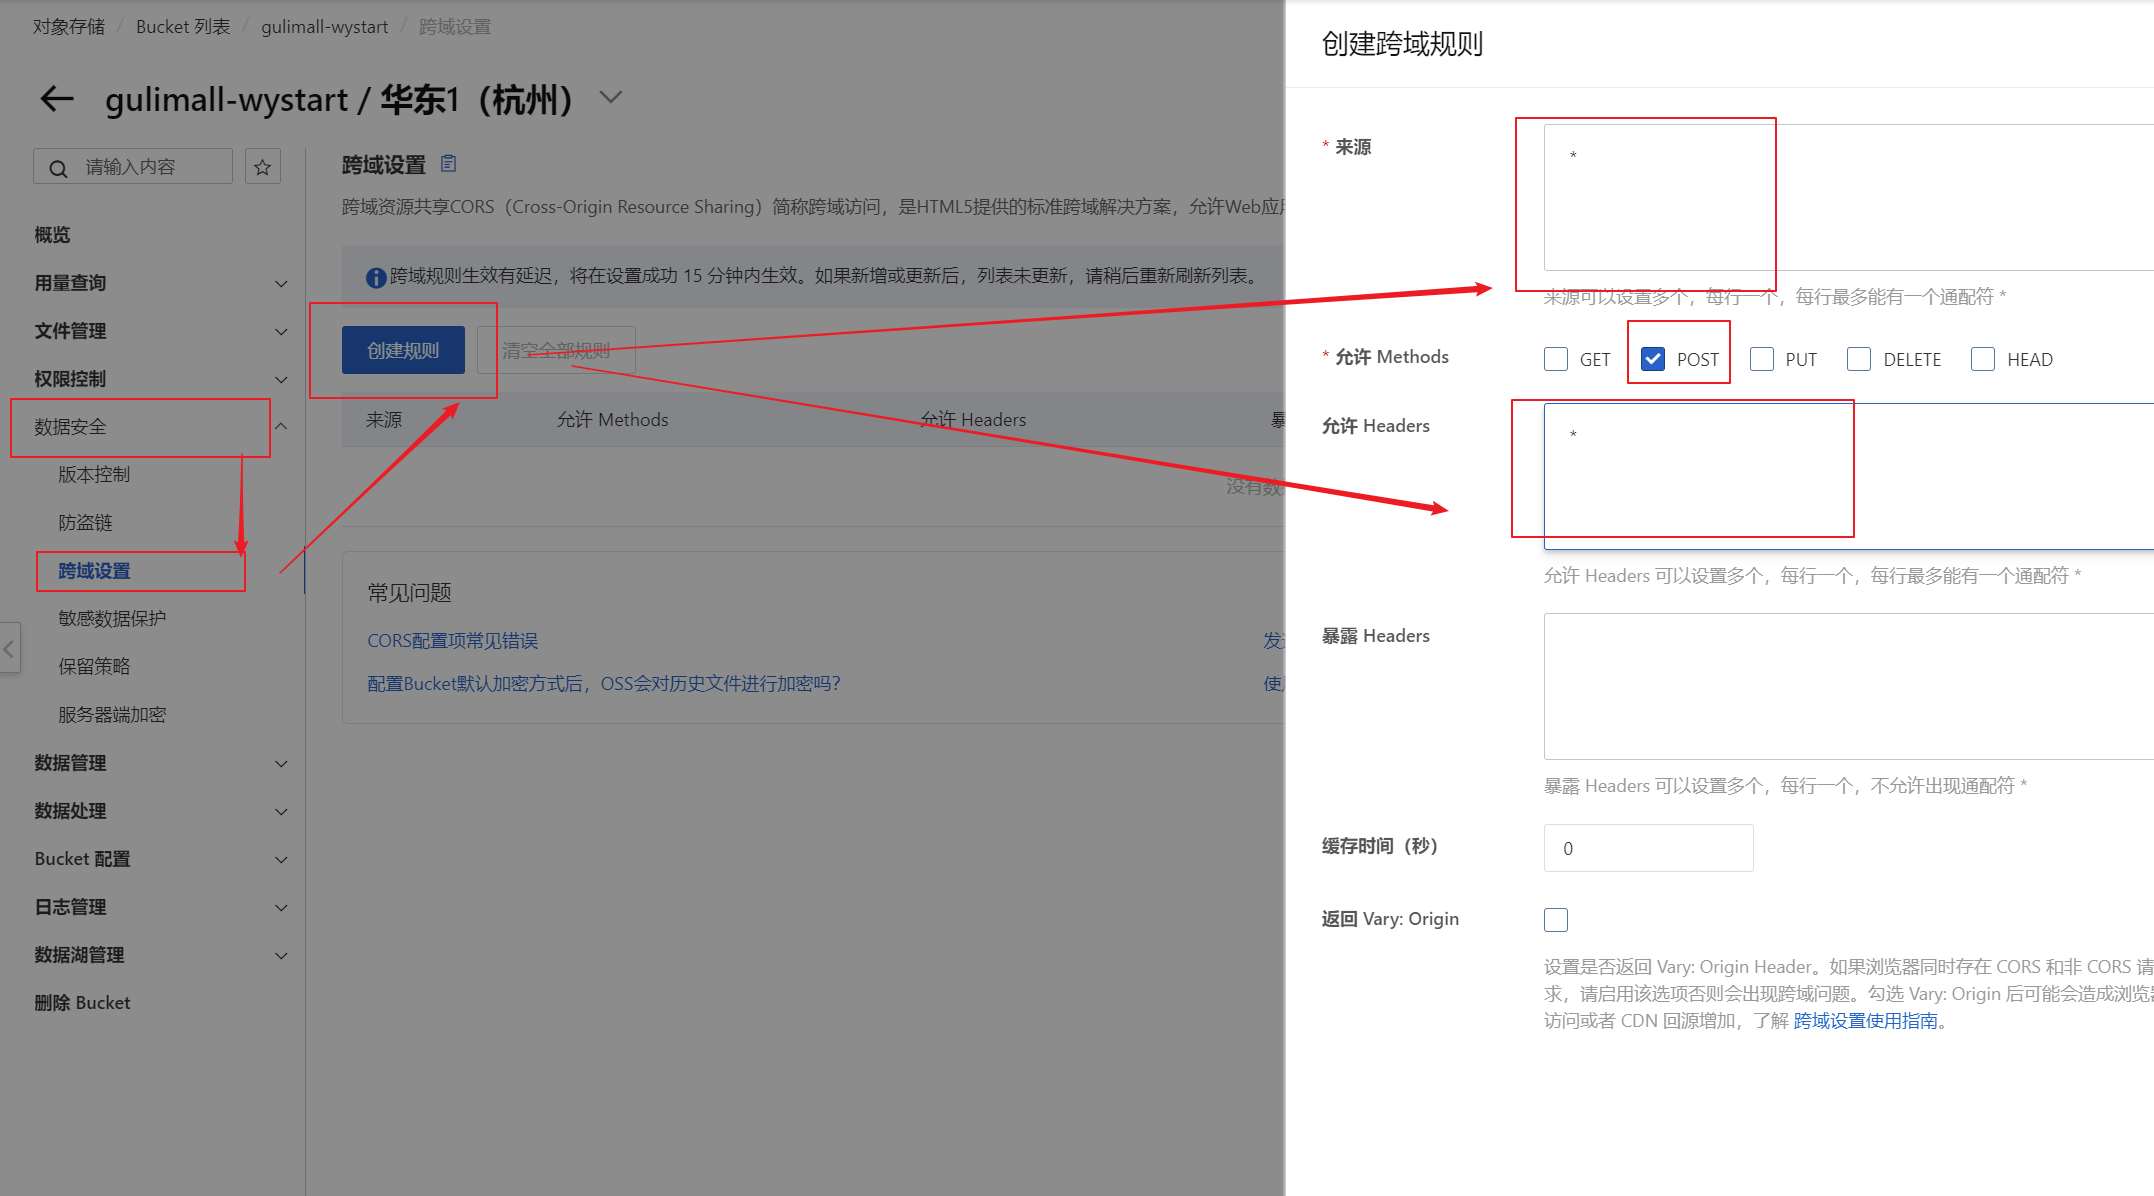
- 配置后点击图片上传,进行测试。
点击上传,拿到policy.阿里云服务器验证,上传。

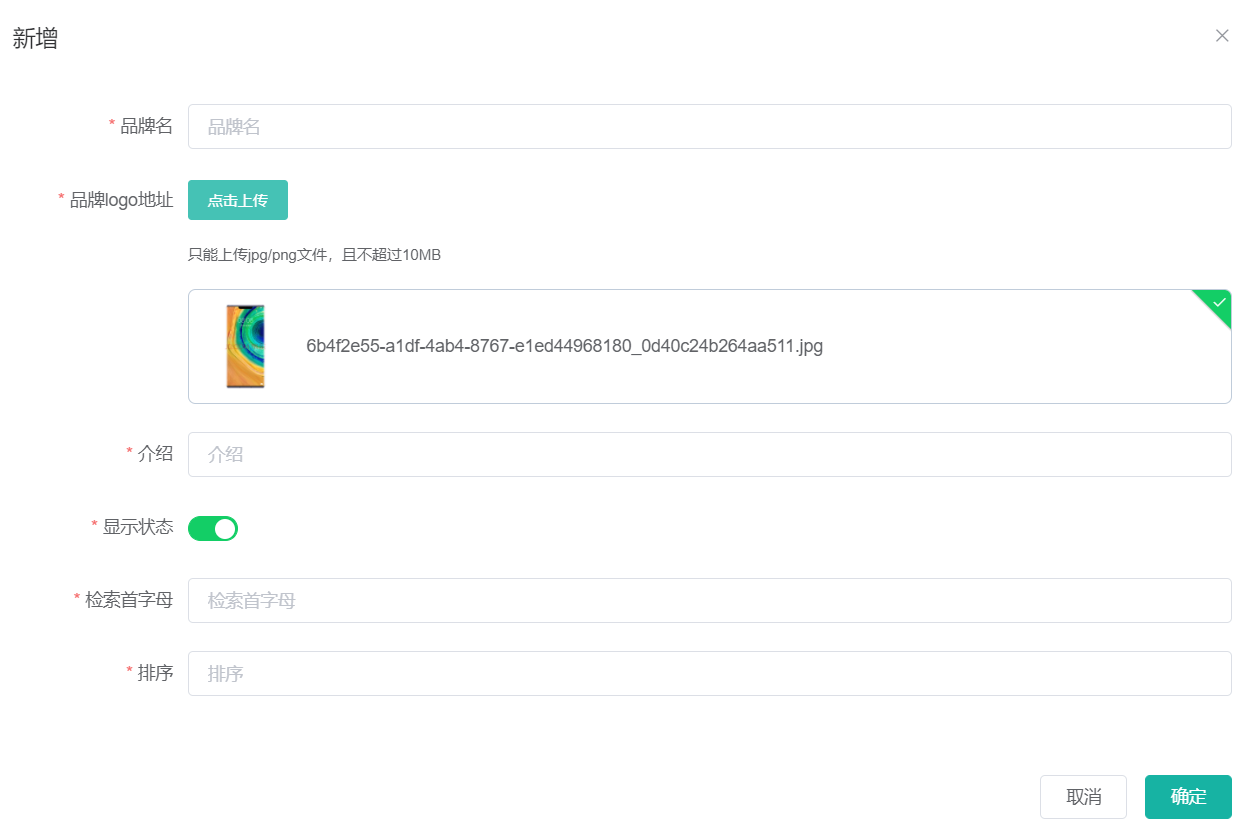
测试完成。
-
6.2.5 效果优化-显示图片
新增品牌,发现在品牌logo下面显示的是地址。应该显示图片。

- 在品牌logo下添加图片标签
<el-form-item label="品牌logo地址" prop="logo">
        <!-- <el-input v-model="dataForm.logo" placeholder="品牌logo地址"></el-input> -->
        <single-upload v-model="dataForm.logo"></single-upload>
</el-form-item>


<el-table-column prop="logo" header-align="center" align="center" label="品牌logo地址">
        <template slot-scope="scope">
          <img :src="scope.row.logo" style="width: 100px;height: 80px" />
        </template>
</el-table-column>
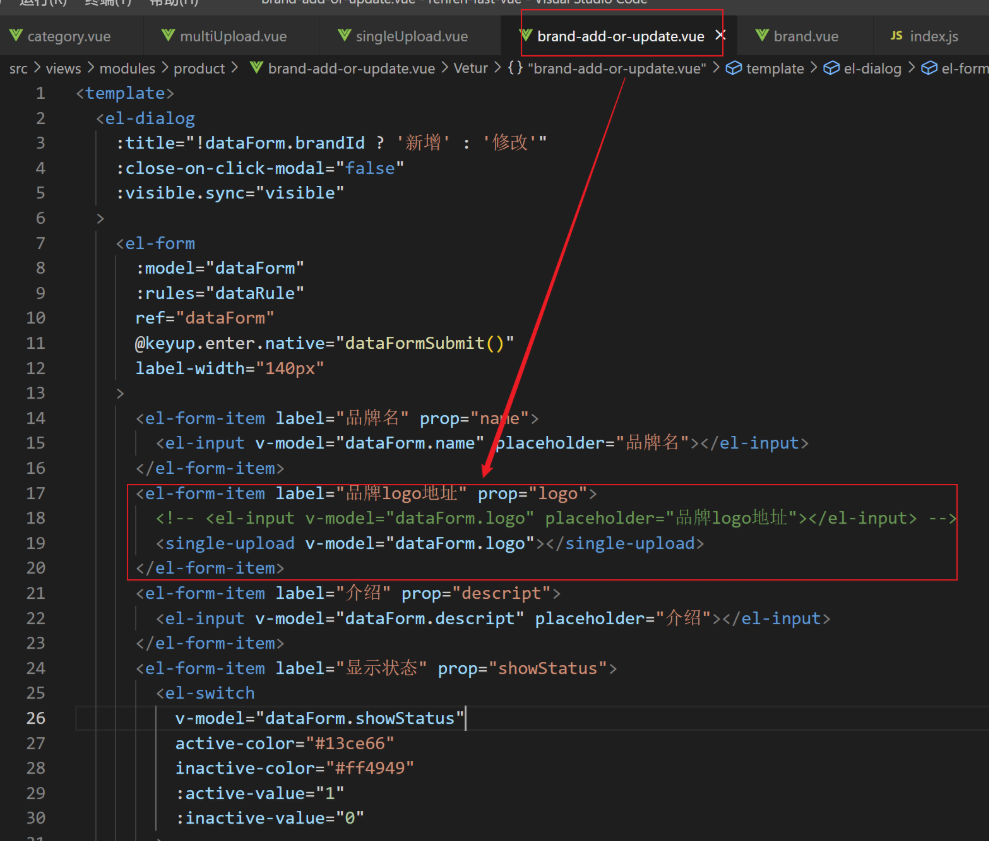
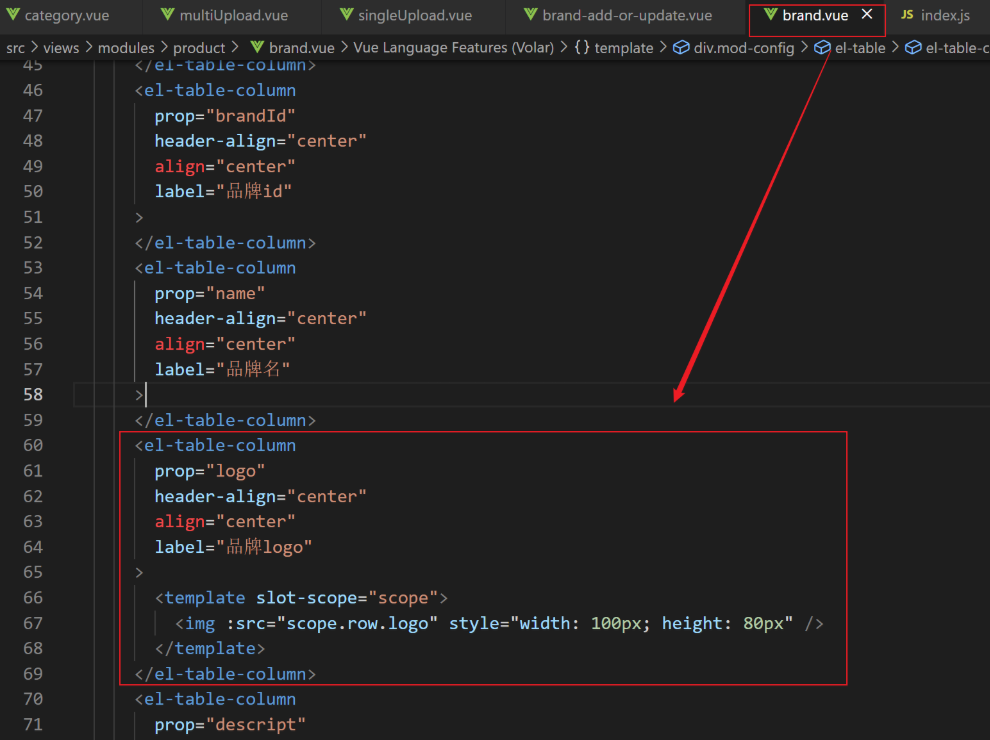
成功显示:

6.2.6 前端表单校验
- 首字母只能为a-z或者A-Z的一个字母
- 排序必须是大于等于0的一个整数
el-form中rules表示校验规则
修改brand-add-or-update如下:
 :active-value="1"         :inactive-value="0"  # 激活为1,不激活为0

<el-switch v-model="dataForm.showStatus" active-color="#13ce66" inactive-color="#ff4949" :active-value="1"  :inactive-value="0">

// 添加表单校验&自定义校验器
//排序加上.number表示要接受一个数字
<el-input v-model.number="dataForm.sort" placeholder="排序"></el-input>

        //首字母校验规则
        firstLetter: [
          {
            validator: (rule, value, callback) => {
              if (value == '') {
                callback(new Error('首字母必须填写'));
              } else if (!/^[a-zA-Z]$/.test(value)) {
                callback(new Error('首字母必须a-z或者A-Z之间'));
              } else {
                callback();
              }
            },
            trigger: 'blur',
          },
        ],
        //排序字段校验规则
        sort: [
          {
            validator: (rule, value, callback) => {
              if (value == "") {
                callback(new Error("排序字段必须填写"));
              } else if (!Number.isInteger(parseInt(value)) || parseInt(value) < 0) {
                callback(new Error("排序字段必须是一个整数"));
              } else {
                callback();
              }
            },
            trigger: 'blur'
          }
        ],
6.2.7 JSR303数字校验
JSR303
    1)、给Bean添加校验注解:javax.validation.constraints,并定义自己的message提示
 *  2)、开启校验功能@Valid
 *       效果:校验错误以后会有默认的响应;
 *  3)、给校验的bean后紧跟 一个BindingResult,就可以获取到校验的结果
 *  4)、分组校验(多场景的复杂校验)
 *   1)、@NotBlank(message = "品牌名必须提交",groups = {AddGroup.class,UpdateGroup.class})
 *        给校验注解标注什么情况需要进行校验
 *   2)、@Validated({AddGroup.class})
 *   3)、默认没有指定分组的校验注解比如@NotBlank这样,在分组校验情况@Validated({AddGroup.class})下不生效,它只会在不分组的情况下生效。
 *  5)、自定义校验
 *   1)、编写一个自定义的校验注解
 *   2)、编写一个自定义的校验器 ConstraintValidator
 *   3)、关联自定义的校验器和自定义的校验注解
         *  @Documented
         * @Constraint(validatedBy = {ListValueConstraintValidator.class【可以指定多个不同的校验器,适配不同类型的校验】})
         * @Target({ElementType.METHOD, ElementType.FIELD, ElementType.ANNOTATION_TYPE, ElementType.CONSTRUCTOR, ElementType.PARAMETER, ElementType.TYPE_USE})
         * @Retention(RetentionPolicy.RUNTIME)
 *  统一的异常处理
 * @ControllerAdvice
 * 1)、编写异常处理类,使用@ControllerAdvice。
 * 2)、使用  @ExceptionHandler 标注方法可以处理的异常。
1、基本校验实现
- 引入validation-api依赖,在gulimall-common中。
 <dependency>
            <groupId>javax.validation</groupId>
            <artifactId>validation-api</artifactId>
            <version>2.0.1.Final</version>
        </dependency>
- 在需要校验的bean上添加注解 开启校验功能
@Data
@TableName("pms_brand")
public class BrandEntity implements Serializable {
	private static final long serialVersionUID = 1L;

	/**
	 * 品牌id
	 */
	@TableId
	private Long brandId;
	/**
	 * 品牌名
	 */
	@NotBlank(message = "品牌名必须提交")
	private String name;
	/**
	 * 品牌logo地址
	 */
	@NotEmpty
	@URL(message = "logo必须是一个合法的url地址")
	private String logo;
	/**
	 * 介绍
	 */
	private String descript;
	/**
	 * 显示状态[0-不显示;1-显示]
	 */
	private Integer showStatus;
	/**
	 * 检索首字母
	 */
	@NotEmpty
	@Pattern(regexp = "^[a-zA-Z]$", message = "检索首字母必须是一个字母")
	private String firstLetter;
	/**
	 * 排序
	 */
	@NotNull
	@Min(value = 0, message = "排序必须大于等于0")
	private Integer sort;

}
- 在需要校验的方法上添加
@Valid注解,并返回提示信息 - 给校验的bean后紧跟着一个BindingResult,就可以获取到校验的结果
     @RequestMapping("/save")
    //@RequiresPermissions("product:brand:save")
    public R save(@Valid @RequestBody BrandEntity brand, BindingResult result) {
        if (result.hasErrors()) {
            Map<String, String> map = new HashMap<>();
            //1.获取校验的结果
            result.getFieldErrors().forEach((item) -> {
                //获取到错误提示
                String message = item.getDefaultMessage();
                //获取到错误属性的名字
                String field = item.getField();
                map.put(field, message);
            });
            return R.error(400,"提交的数据不合法").put("data", map);
        } else {
            brandService.save(brand);
        }
        return R.ok();
    }
- 测试
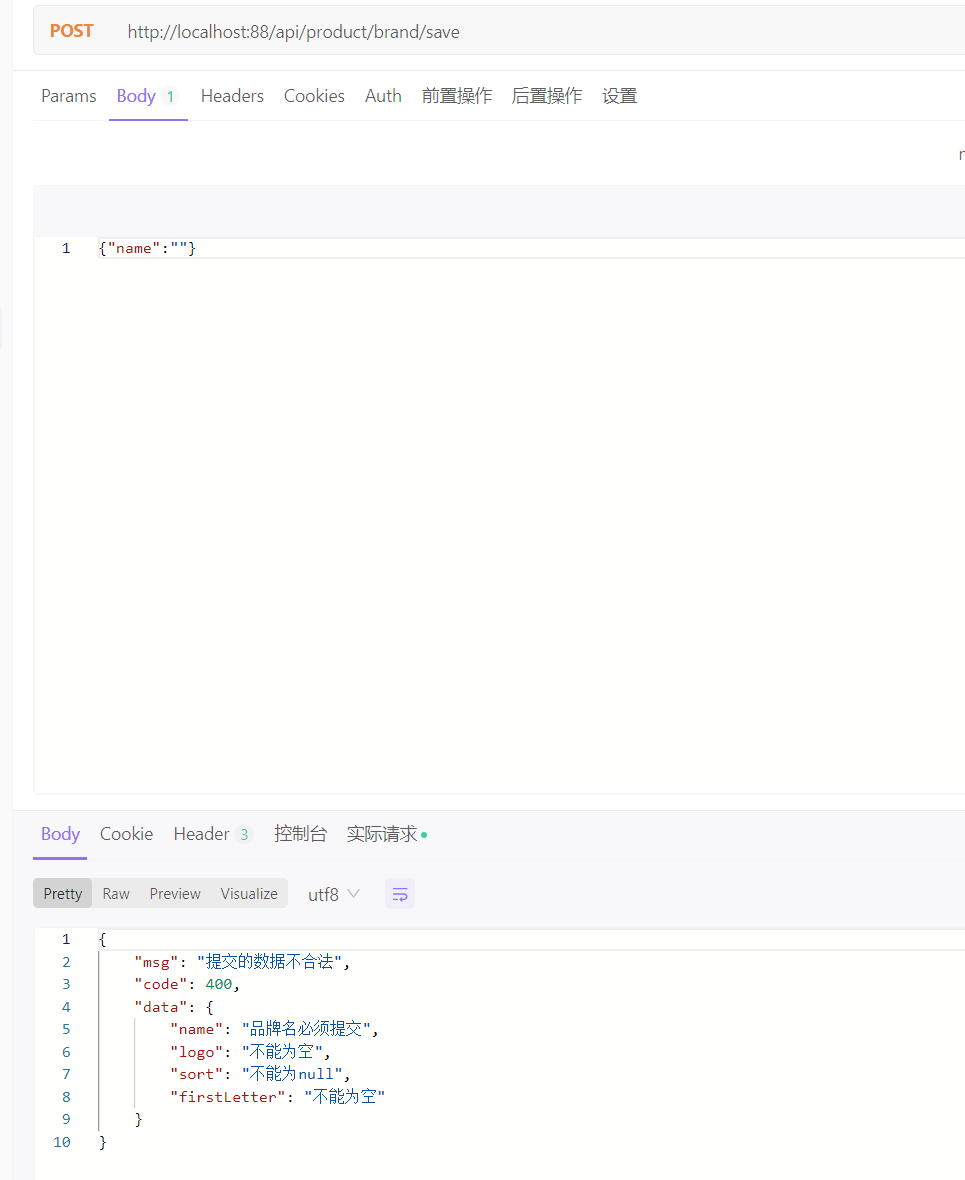
下面是其他网友的笔记,可供参考:
问题引入:填写form时应该有前端校验,后端也应该有校验
前端
前端的校验是element-ui表单验证
Form 组件提供了表单验证的功能,只需要通过 rules 属性传入约定的验证规则,并将 Form-Item 的 prop 属性设置为需校验的字段名即可。

后端
@NotNull等
步骤1:使用校验注解
在Java中提供了一系列的校验方式,它这些校验方式在“javax.validation.constraints”包中,提供了如@Email,@NotNull等注解。
<!--jsr3参数校验器-->
<dependency>
    <groupId>org.springframework.boot</groupId>
    <artifactId>spring-boot-starter-validation</artifactId>
</dependency>
里面依赖了hibernate-validator
在非空处理方式上提供了@NotNull,@NotBlank和@NotEmpty
1 @NotNull

The annotated element must not be null. Accepts any type.
注解元素禁止为null,能够接收任何类型

2 @NotEmpty

the annotated element must not be null nor empty.

该注解修饰的字段不能为null或""

Supported types are:

支持以下几种类型

CharSequence (length of character sequence is evaluated)字符序列(字符序列长度的计算)
Collection (collection size is evaluated)
集合长度的计算
Map (map size is evaluated)
map长度的计算
Array (array length is evaluated)
数组长度的计算

3 @NotBlank

The annotated element must not be null and must contain at least one non-whitespace character. Accepts CharSequence.
该注解不能为null,并且至少包含一个非空格字符。接收字符序列。

@Valid
步骤2:controller中加校验注解@Valid,开启校验,
@RequestMapping("/save")
public R save(@Valid @RequestBody BrandEntity brand){
    brandService.save(brand);

    return R.ok();
}
测试: http://localhost:88/api/product/brand/save

在postman种发送上面的请求
{
    "timestamp": "2020-04-29T09:20:46.383+0000",
    "status": 400,
    "error": "Bad Request",
    "errors": [
        {
            "codes": [
                "NotBlank.brandEntity.name",
                "NotBlank.name",
                "NotBlank.java.lang.String",
                "NotBlank"
            ],
            "arguments": [
                {
                    "codes": [
                        "brandEntity.name",
                        "name"
                    ],
                    "arguments": null,
                    "defaultMessage": "name",
                    "code": "name"
                }
            ],
            "defaultMessage": "不能为空",
            "objectName": "brandEntity",
            "field": "name",
            "rejectedValue": "",
            "bindingFailure": false,
            "code": "NotBlank"
        }
    ],
    "message": "Validation failed for object='brandEntity'. Error count: 1",
    "path": "/product/brand/save"
}
能够看到"defaultMessage": “不能为空”,这些错误消息定义在“hibernate-validator”的“\org\hibernate\validator\ValidationMessages_zh_CN.properties”文件中。在该文件中定义了很多的错误规则:
javax.validation.constraints.AssertFalse.message     = 只能为false
javax.validation.constraints.AssertTrue.message      = 只能为true
javax.validation.constraints.DecimalMax.message      = 必须小于或等于{value}
javax.validation.constraints.DecimalMin.message      = 必须大于或等于{value}
javax.validation.constraints.Digits.message          = 数字的值超出了允许范围(只允许在{integer}位整数和{fraction}位小数范围内)
javax.validation.constraints.Email.message           = 不是一个合法的电子邮件地址
javax.validation.constraints.Future.message          = 需要是一个将来的时间
javax.validation.constraints.FutureOrPresent.message = 需要是一个将来或现在的时间
javax.validation.constraints.Max.message             = 最大不能超过{value}
javax.validation.constraints.Min.message             = 最小不能小于{value}
javax.validation.constraints.Negative.message        = 必须是负数
javax.validation.constraints.NegativeOrZero.message  = 必须是负数或零
javax.validation.constraints.NotBlank.message        = 不能为空
javax.validation.constraints.NotEmpty.message        = 不能为空
javax.validation.constraints.NotNull.message         = 不能为null
javax.validation.constraints.Null.message            = 必须为null
javax.validation.constraints.Past.message            = 需要是一个过去的时间
javax.validation.constraints.PastOrPresent.message   = 需要是一个过去或现在的时间
javax.validation.constraints.Pattern.message         = 需要匹配正则表达式"{regexp}"
javax.validation.constraints.Positive.message        = 必须是正数
javax.validation.constraints.PositiveOrZero.message  = 必须是正数或零
javax.validation.constraints.Size.message            = 个数必须在{min}和{max}之间

org.hibernate.validator.constraints.CreditCardNumber.message        = 不合法的信用卡号码
org.hibernate.validator.constraints.Currency.message                = 不合法的货币 (必须是{value}其中之一)
org.hibernate.validator.constraints.EAN.message                     = 不合法的{type}条形码
org.hibernate.validator.constraints.Email.message                   = 不是一个合法的电子邮件地址
org.hibernate.validator.constraints.Length.message                  = 长度需要在{min}和{max}之间
org.hibernate.validator.constraints.CodePointLength.message         = 长度需要在{min}和{max}之间
org.hibernate.validator.constraints.LuhnCheck.message               = ${validatedValue}的校验码不合法, Luhn模10校验和不匹配
org.hibernate.validator.constraints.Mod10Check.message              = ${validatedValue}的校验码不合法, 模10校验和不匹配
org.hibernate.validator.constraints.Mod11Check.message              = ${validatedValue}的校验码不合法, 模11校验和不匹配
org.hibernate.validator.constraints.ModCheck.message                = ${validatedValue}的校验码不合法, ${modType}校验和不匹配
org.hibernate.validator.constraints.NotBlank.message                = 不能为空
org.hibernate.validator.constraints.NotEmpty.message                = 不能为空
org.hibernate.validator.constraints.ParametersScriptAssert.message  = 执行脚本表达式"{script}"没有返回期望结果
org.hibernate.validator.constraints.Range.message                   = 需要在{min}和{max}之间
org.hibernate.validator.constraints.SafeHtml.message                = 可能有不安全的HTML内容
org.hibernate.validator.constraints.ScriptAssert.message            = 执行脚本表达式"{script}"没有返回期望结果
org.hibernate.validator.constraints.URL.message                     = 需要是一个合法的URL

org.hibernate.validator.constraints.time.DurationMax.message        = 必须小于${inclusive == true ? '或等于' : ''}${days == 0 ? '' : days += '天'}${hours == 0 ? '' : hours += '小时'}${minutes == 0 ? '' : minutes += '分钟'}${seconds == 0 ? '' : seconds += '秒'}${millis == 0 ? '' : millis += '毫秒'}${nanos == 0 ? '' : nanos += '纳秒'}
org.hibernate.validator.constraints.time.DurationMin.message        = 必须大于${inclusive == true ? '或等于' : ''}${days == 0 ? '' : days += '天'}${hours == 0 ? '' : hours += '小时'}${minutes == 0 ? '' : minutes += '分钟'}${seconds == 0 ? '' : seconds += '秒'}${millis == 0 ? '' : millis += '毫秒'}${nanos == 0 ? '' : nanos += '纳秒'}

想要自定义错误消息,可以覆盖默认的错误提示信息,如@NotBlank的默认message是
public @interface NotBlank {

	String message() default "{javax.validation.constraints.NotBlank.message}";
}

可以在添加注解的时候,修改message:
@NotBlank(message = "品牌名必须非空")
private String name;


当再次发送请求时,得到的错误提示信息:
{
    "timestamp": "2020-04-29T09:36:04.125+0000",
    "status": 400,
    "error": "Bad Request",
    "errors": [
        {
            "codes": [
                "NotBlank.brandEntity.name",
                "NotBlank.name",
                "NotBlank.java.lang.String",
                "NotBlank"
            ],
            "arguments": [
                {
                    "codes": [
                        "brandEntity.name",
                        "name"
                    ],
                    "arguments": null,
                    "defaultMessage": "name",
                    "code": "name"
                }
            ],
            "defaultMessage": "品牌名必须非空",
            "objectName": "brandEntity",
            "field": "name",
            "rejectedValue": "",
            "bindingFailure": false,
            "code": "NotBlank"
        }
    ],
    "message": "Validation failed for object='brandEntity'. Error count: 1",
    "path": "/product/brand/save"
}

但是这种返回的错误结果并不符合我们的业务需要。


BindResult
步骤3:给校验的Bean后,紧跟一个BindResult,就可以获取到校验的结果。拿到校验的结果,就可以自定义的封装。
@RequestMapping("/save")
public R save(@Valid @RequestBody BrandEntity brand, BindingResult result){
    if( result.hasErrors()){
        Map<String,String> map=new HashMap<>();
        //1.获取错误的校验结果
        result.getFieldErrors().forEach((item)->{
            //获取发生错误时的message
            String message = item.getDefaultMessage();
            //获取发生错误的字段
            String field = item.getField();
            map.put(field,message);
        });
        return R.error(400,"提交的数据不合法").put("data",map);
    }else {

    }
    brandService.save(brand);

    return R.ok();
}

这种是针对于该请求设置了一个内容校验,如果针对于每个请求都单独进行配置,显然不是太合适,实际上可以统一的对于异常进行处理。
2、统一异常处理
- 针对于错误状态码,是我们进行随意定义的,然而正规开发过程中,错误状态码有着严格的定义规则,如该在项目中我们的错误状态码定义
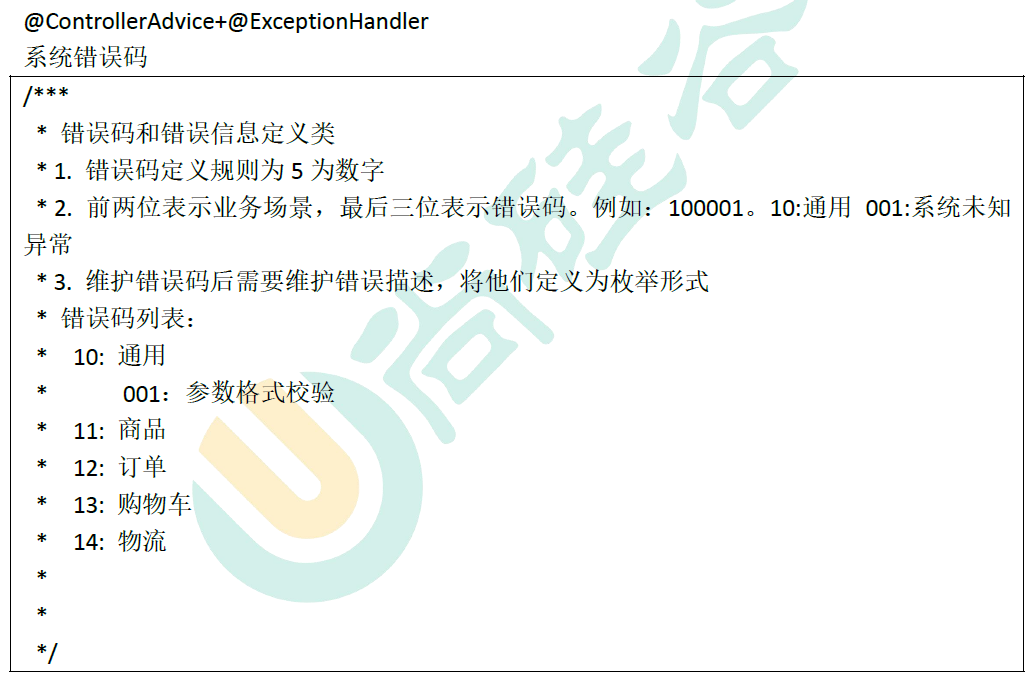
为了定义这些错误状态码,我们可以单独定义一个枚举类,用来存储这些错误状态码。
- 在gulimall-common中新建
BizCodeEnume用来存储状态码
/***
 * 错误码和错误信息定义类
 * 1. 错误码定义规则为5为数字
 * 2. 前两位表示业务场景,最后三位表示错误码。例如:100001。10:通用 001:系统未知异常
 * 3. 维护错误码后需要维护错误描述,将他们定义为枚举形式
 * 错误码列表:
 *  10: 通用
 *      001:参数格式校验
 *  11: 商品
 *  12: 订单
 *  13: 购物车
 *  14: 物流
 */
public enum BizCodeEnume {

    UNKNOW_EXCEPTION(10000,"系统未知异常"),
    VALID_EXCEPTION(10001,"参数格式校验失败");


    private int code;
    private String msg;

    BizCodeEnume(int code, String msg) {
        this.code = code;
        this.msg = msg;
    }

    public int getCode() {
        return code;
    }

    public String getMsg() {
        return msg;
    }
}
-
在product里面新建类
GulimallExceptionControllerAdvice,用来集中处理所有异常/** * 集中处理所有异常 */ @Slf4j // @ResponseBody // @ControllerAdvice(basePackages = "com.atguigu.gulimall.product.controller")可以使用SpringMvc所提供的@ControllerAdvice,通过“basePackages”能够说明处理哪些路径下的异常。 //@RestControllerAdvice 是 @ResponseBody 和 @ControllerAdvice的复合注解 @RestControllerAdvice(basePackages = "com.atguigu.gulimall.product.controller") public class GulimallExceptionControllerAdvice { // 1 抽取一个异常处理类 //具体处理某一类异常,这里以 MethodArgumentNotValidException为例 @ExceptionHandler(value = MethodArgumentNotValidException.class) public R handleValidException(MethodArgumentNotValidException e){ log.error("数据校验出现问题{},异常类型:{}",e.getMessage(),e.getClass()); BindingResult bindingResult = e.getBindingResult(); Map<String,String> errorMap = new HashMap<>(); bindingResult.getFieldErrors().forEach((fieldError)->{ errorMap.put(fieldError.getField(),fieldError.getDefaultMessage()); }); return R.error(BizCodeEnume.VALID_EXCEPTION.getCode(),BizCodeEnume.VALID_EXCEPTION.getMsg()).put("data",errorMap); } //默认异常处理 //处理全局所有异常(前提是没有精确匹配到前面的小范围的异常) @ExceptionHandler(value = Throwable.class) public R handleException(Throwable throwable){ log.error("错误",throwable); return R.error(BizCodeEnume.UNKNOW_EXCEPTION.getCode(),BizCodeEnume.UNKNOW_EXCEPTION.getMsg()); } } @RestControllerAdvice 是 @ResponseBody 和 @ControllerAdvice的复合注解 -
测试结果
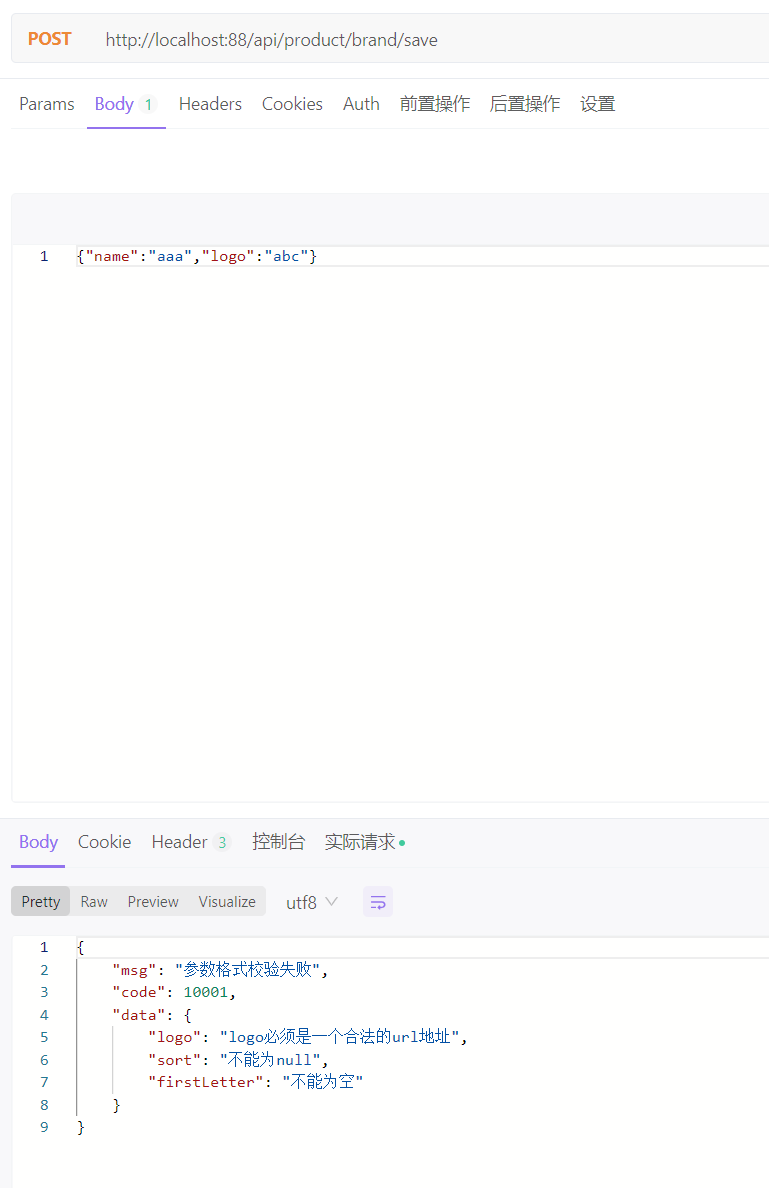
3、分组校验功能
-
在gulimall-common中新建valid包,里面新建两个空接口
AddGroup,UpdateGroup用来分组 -
给校验注解,标注上groups,指定什么情况下才需要进行校验:groups里面的内容要以接口的形式显示出来
如:指定在更新和添加的时候,都需要进行校验:新增时不需要带id,修改时必须带id
@NotNull(message = "修改必须定制品牌id", groups = {UpdateGroup.class})
@Null(message = "新增不能指定id", groups = {AddGroup.class})
@TableId
private Long brandId;
在这种情况下,没有指定分组的校验注解,默认是不起作用的。想要起作用就必须要加groups。
- 业务方法参数上使用@Validated注解,并在value中给出group接口,标记当前校验是哪个组
	 @RequestMapping("/save")
    public R save(@Valided({AddGroup.class}) @RequestBody BrandEntity brand){
        ...
    }
-
默认情况下,在分组校验情况下,没有指定指定分组的校验注解,将不会生效,它只会在不分组的情况下生效
-
可以参考其他网友的笔记:
1 groups
1 给校验注解,标注上groups,指定什么情况下才需要进行校验
groups里面的内容要以接口的形式显示出来
如:指定在更新和添加的时候,都需要进行校验。新增时不需要带id,修改时必须带id
@NotNull(message = "修改必须定制品牌id", groups = {UpdateGroup.class})
@Null(message = "新增不能指定id", groups = {AddGroup.class})
@TableId
private Long brandId;

在这种情况下,没有指定分组的校验注解,默认是不起作用的。想要起作用就必须要加groups。

2 @Validated
2 业务方法参数上使用@Validated注解

@Validated的value方法:

Specify one or more validation groups to apply to the validation step kicked off by this annotation.
指定一个或多个验证组以应用于此注释启动的验证步骤。

JSR-303 defines validation groups as custom annotations which an application declares for the sole purpose of using
them as type-safe group arguments, as implemented in SpringValidatorAdapter.

JSR-303 将验证组定义为自定义注释,应用程序声明的唯一目的是将它们用作类型安全组参数,如 SpringValidatorAdapter 中实现的那样。

Other SmartValidator implementations may support class arguments in other ways as well.

其他SmartValidator 实现也可以以其他方式支持类参数。

@RequestMapping("/save")
public R save(@Validated(AddGroup.class) @RequestBody BrandEntity brand) {
    brandService.save(brand);

    return R.ok();
}
@RequestMapping("/delete")
//@RequiresPermissions("${moduleNamez}:brand:delete")
public R delete(@RequestBody Long[] brandIds) {
    brandService.removeByIds(Arrays.asList(brandIds));

    return R.ok();
}


3 分组情况下,校验注解生效问题
3 默认情况下,在分组校验情况下,没有指定指定分组的校验注解,将不会生效,它只会在不分组的情况下生效。
4、自定义校验
gulimall-common中
- 编写一个自定义校验注解ListValue
@Documented
@Constraint(validatedBy = {})
@Target({ElementType.METHOD, ElementType.FIELD, ElementType.ANNOTATION_TYPE, ElementType.CONSTRUCTOR, ElementType.PARAMETER, ElementType.TYPE_USE})
@Retention(RetentionPolicy.RUNTIME)
public @interface ListValue {
    String message() default "{com.atguigu.common.valid.ListValue.message}";

    Class<?>[] groups() default {};

    Class<? extends Payload>[] payload() default {};

    int[] vals() default {};
}
- 新建配置文件ValidationMessages.properties保存注解信息
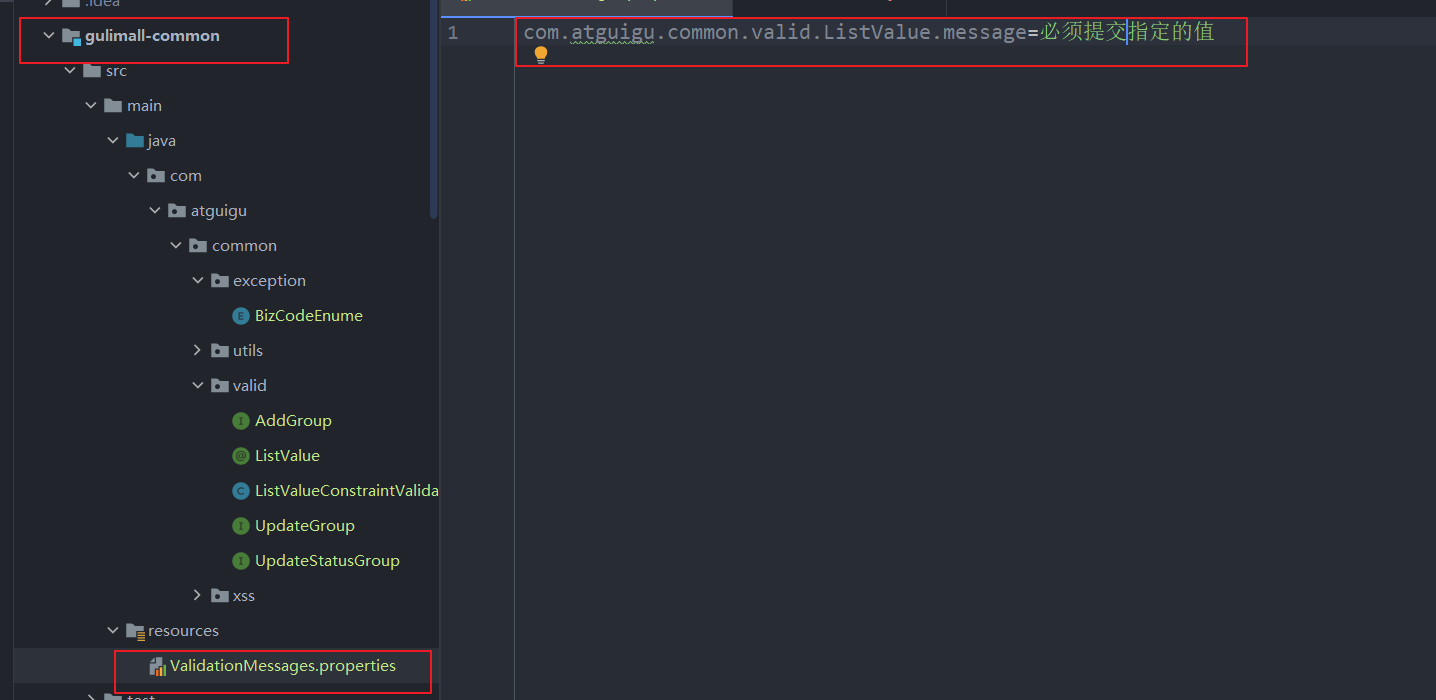
- 编写一个自定义校验器ListValueConstraintValidator
public class ListValueConstraintValidator implements ConstraintValidator<ListValue,Integer> {


    private Set<Integer> set  = new HashSet<>();

    //初始化方法
    @Override
    public void initialize(ListValue constraintAnnotation) {
         int[] vals = constraintAnnotation.vals();
        for (int val : vals) {
            set.add(val);
        }
    }

    /**
     * 判断是否校验成功
     * @param value 需要校验的值
     * @param context
     * @return
     */
    @Override
    public boolean isValid(Integer value, ConstraintValidatorContext context) {
        return set.contains(value);
    }
}
- 关联自定义的校验器和自定义的校验注解(可以指定多个不同的校验器,适配不同类型的校验)
-
关联校验器和校验注解:在校验注解的
@Constraint注解上关联校验器
-
校验注解添加到showStatus上,进行测试
这里我们新建一个 关于 修改显示状态的方法,并且新建一个 UpdateStatusGroup 来作为分组专门处理显示状态的校验。
gulimall-product 下的 BrandController 中
 /**
     * 修改显示状态
     */
    @RequestMapping("/update/status")
    //@RequiresPermissions("product:brand:update")
    public R updateStatus(@Validated(UpdateStatusGroup.class) @RequestBody BrandEntity brand) {
        brandService.updateById(brand);

        return R.ok();


    }
gulimall-common下的 valid 包下
public interface UpdateStatusGroup {
}
gulimall-product下的 BrandEntity
	@NotNull(groups = {AddGroup.class, UpdateStatusGroup.class})
	@ListValue(vals = {0,1},groups = {AddGroup.class, UpdateStatusGroup.class})
	private Integer showStatus;
前端页面也需要进行修改:
brand.vue 中
    updateBrandStatus(data) {
      console.log("最新信息", data);
      let { brandId, showStatus } = data;
      this.$http({
        url: this.$http.adornUrl("/product/brand/update/status"),
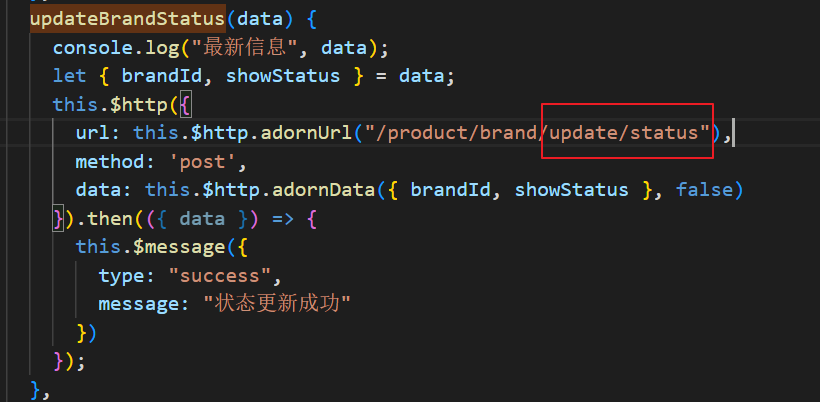
- 测试
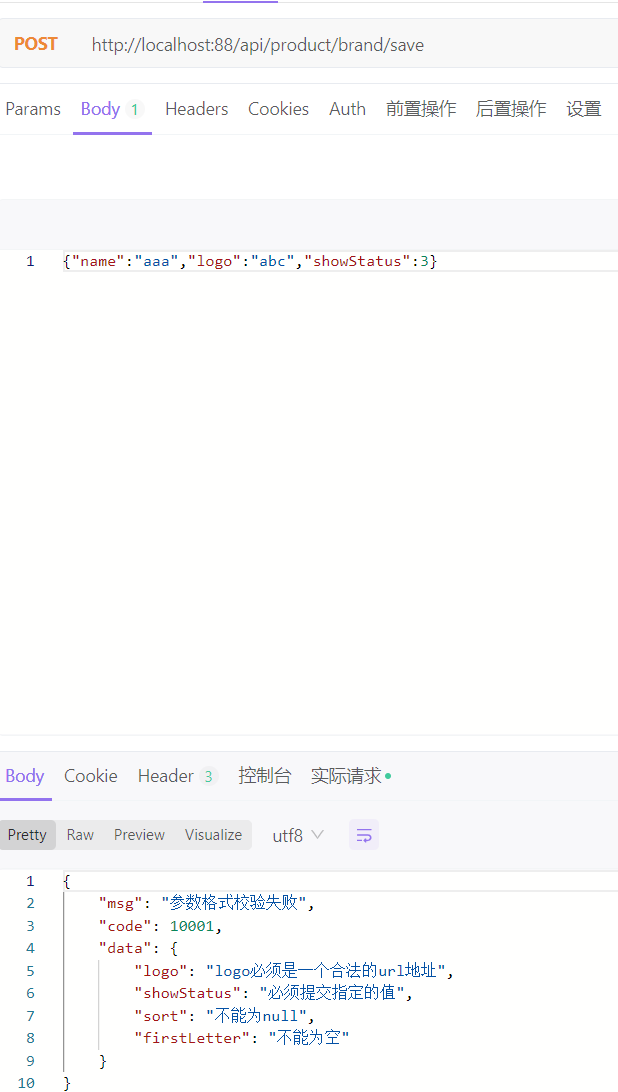
可以参考其他网友的笔记:
场景:要校验showStatus的01状态,可以用正则,但我们可以利用其他方式解决
复杂场景。比如我们想要下面的场景
/**
	 * 显示状态[0-不显示;1-显示]
	 */
@NotNull(groups = {AddGroup.class, UpdateStatusGroup.class})
@ListValue(vals = {0,1}, groups = {AddGroup.class, UpdateGroup.class, UpdateStatusGroup.class})
private Integer showStatus;

如何做:

添加依赖
<dependency>
    <groupId>javax.validation</groupId>
    <artifactId>validation-api</artifactId>
    <version>2.0.1.Final</version>
</dependency>


1 编写自定义的校验注解
必须有3个属性

message()错误信息
groups()分组校验
payload()自定义负载信息

@Documented
@Constraint(validatedBy = { ListValueConstraintValidator.class})
@Target({ METHOD, FIELD, ANNOTATION_TYPE, CONSTRUCTOR, PARAMETER, TYPE_USE })
@Retention(RUNTIME)
public @interface ListValue {
    // 使用该属性去Validation.properties中取
    String message() default "{com.atguigu.common.valid.ListValue.message}";

    Class<?>[] groups() default { };

    Class<? extends Payload>[] payload() default { };

    int[] value() default {};
}

该属性值取哪里取呢?
    common创建文件ValidationMessages.properties
    里面写上com.atguigu.common.valid.ListValue.message=必须提交指定的值 [0,1]


2 编写自定义的校验器
public class ListValueConstraintValidator implements ConstraintValidator<ListValue,Integer> {
    private Set<Integer> set=new HashSet<>();
    @Override
    public void initialize(ListValue constraintAnnotation) {
        int[] value = constraintAnnotation.value();
        for (int i : value) {
            set.add(i);
        }

    }

    @Override
    public boolean isValid(Integer value, ConstraintValidatorContext context) {


        return  set.contains(value);
    }
}

3 关联校验器和校验注解
@Constraint(validatedBy = { ListValueConstraintValidator.class})
一个校验注解可以匹配多个校验器

4 使用实例
/**
	 * 显示状态[0-不显示;1-显示]
	 */
	@ListValue(value = {0,1},groups ={AddGroup.class})
	private Integer showStatus;
6.3 属性分组
6.3.1 spu和sku
- SPU:Standard Product Unit(标准化产品单元)
是商品信息聚合的最小单位,是一组可复用、易检索的标准化信息的集合,该集合描述了一个产品的特性。


iphoneX 是SPU、MI 8 是SPU
iphoneX 64G 黑曜石是SKU
MI8 8+64G+黑色是SKU
- SKU:Stock Keeping Unit(库存量单位)
即库存进出计量的基本单元,可以是以件,盒,托盘等为单位。SKU 这是对于大型连锁超市
DC(配送中心)物流管理的一个必要的方法。现在已经被引申为产品统一编号的简称,每
种产品均对应有唯一的SKU 号。
6.3.2 基本属性【规格参数】与销售属性
同一个SPU拥有的特性叫基本属性。如机身长度,这个是手机共用的属性。而每
款手机的属性值不同
能决定库存量的叫销售属性。如颜色。
每个分类下的商品共享规格参数,与销售属性。只是有些商品不一定要用这个分类下全部的
属性;
- 属性是以三级分类组织起来的
- 规格参数中有些是可以提供检索的
- 规格参数也是基本属性,他们具有自己的分组
- 属性的分组也是以三级分类组织起来的
- 属性名确定的,但是值是每一个商品不同来决定的
PS:下面是数据库中一些表的理解:
数据库表
pms数据库下的attr属性表,attr-group表

attr-group-id:几号分组
catelog-id:什么类别下的,比如手机
根据商品找到spu-id,attr-id

属性关系-规格参数-销售属性-三级分类 关联关系
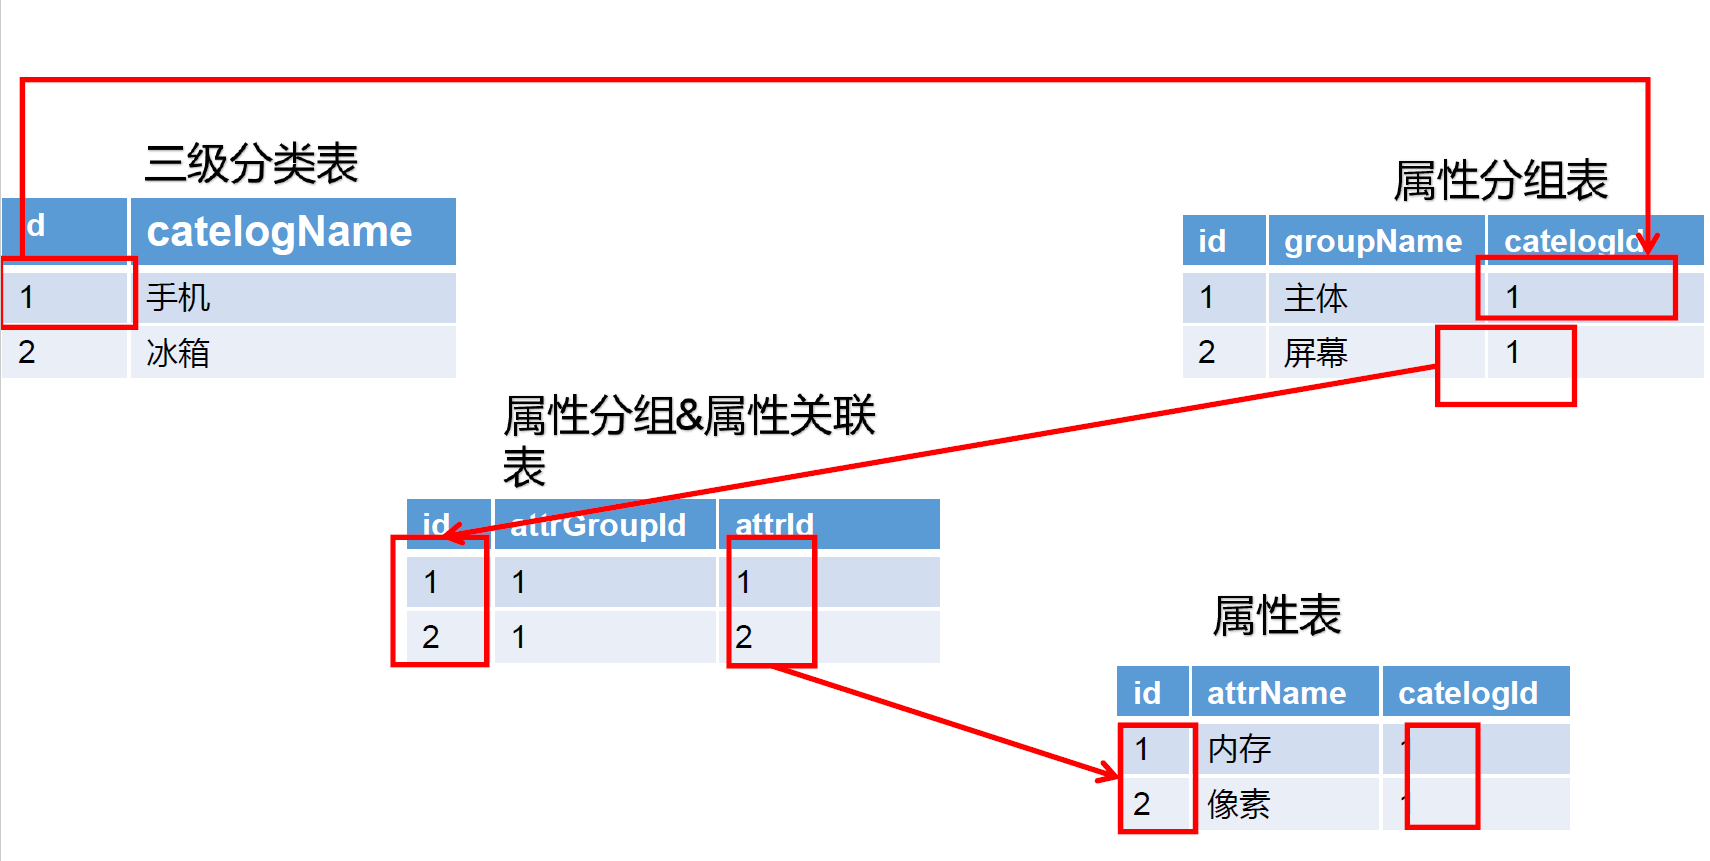
SPU-SKU属性表
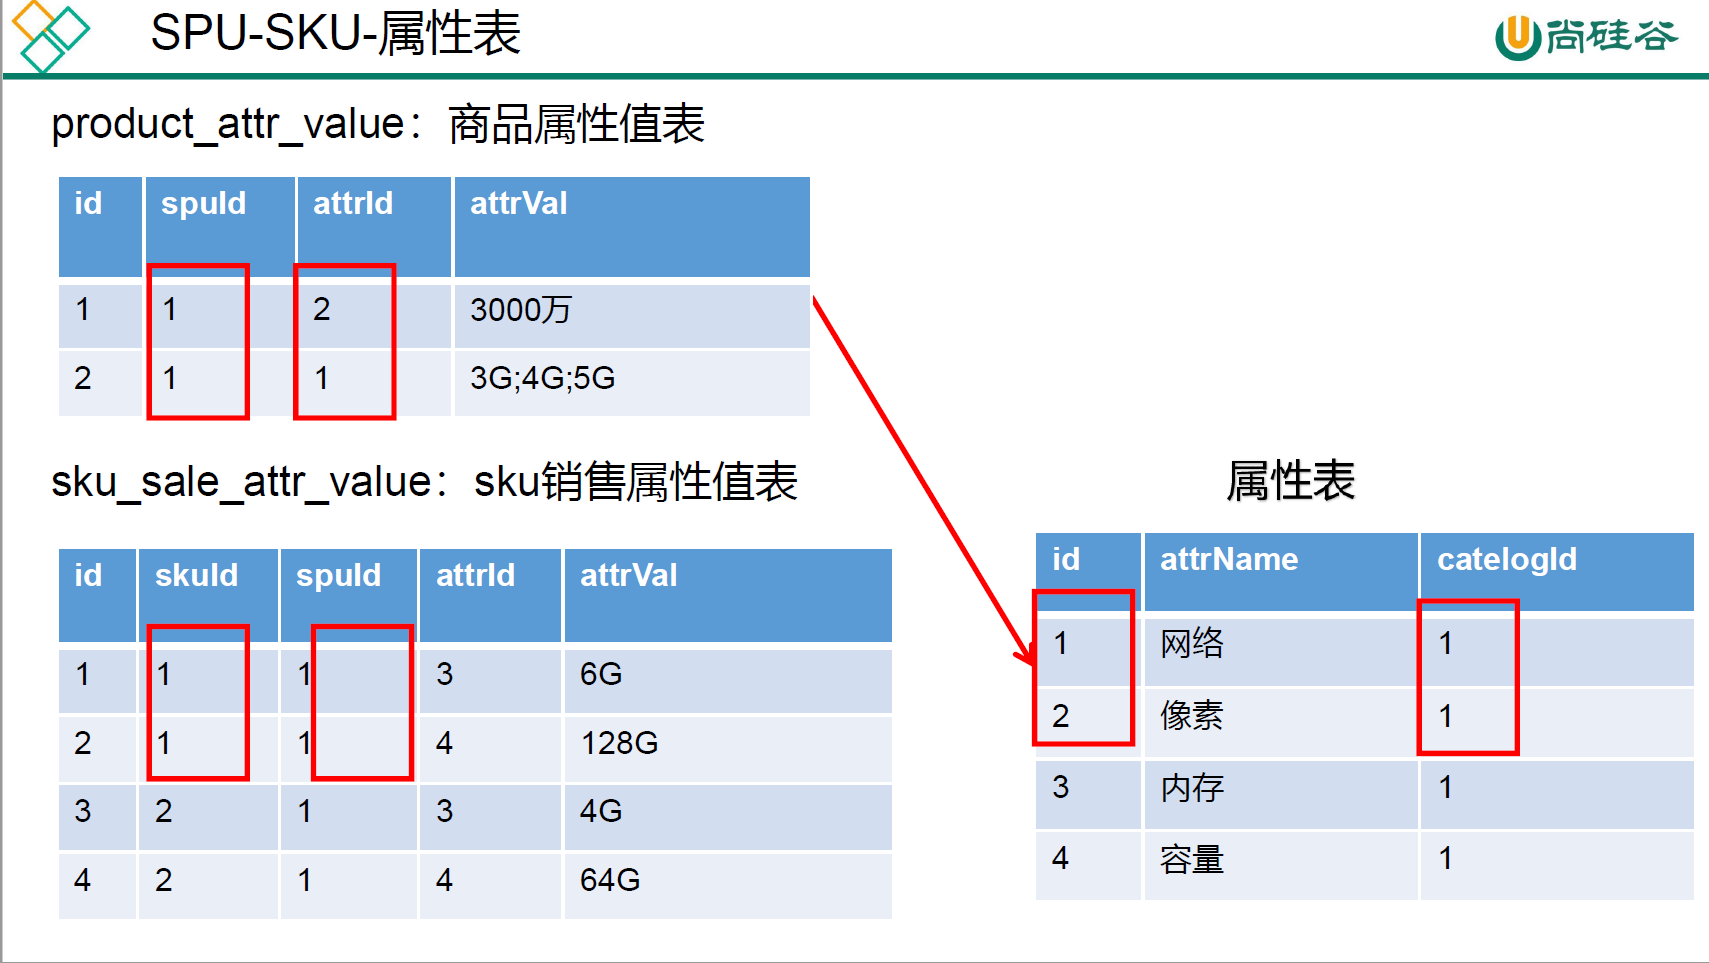
荣耀V20有两个属性,网络和像素,但是这两个属性的spu是同一个,代表是同款
手机。

sku表里保存spu是同一手机,sku可能相同可能不同,相同代表是同一款,不同
代表是不同款。

属性表说明每个属性的 枚举值

分类表有所有的分类,但有父子关系
6.3.3 属性分组准备工作
如下图,这个是属性分组的效果展示。
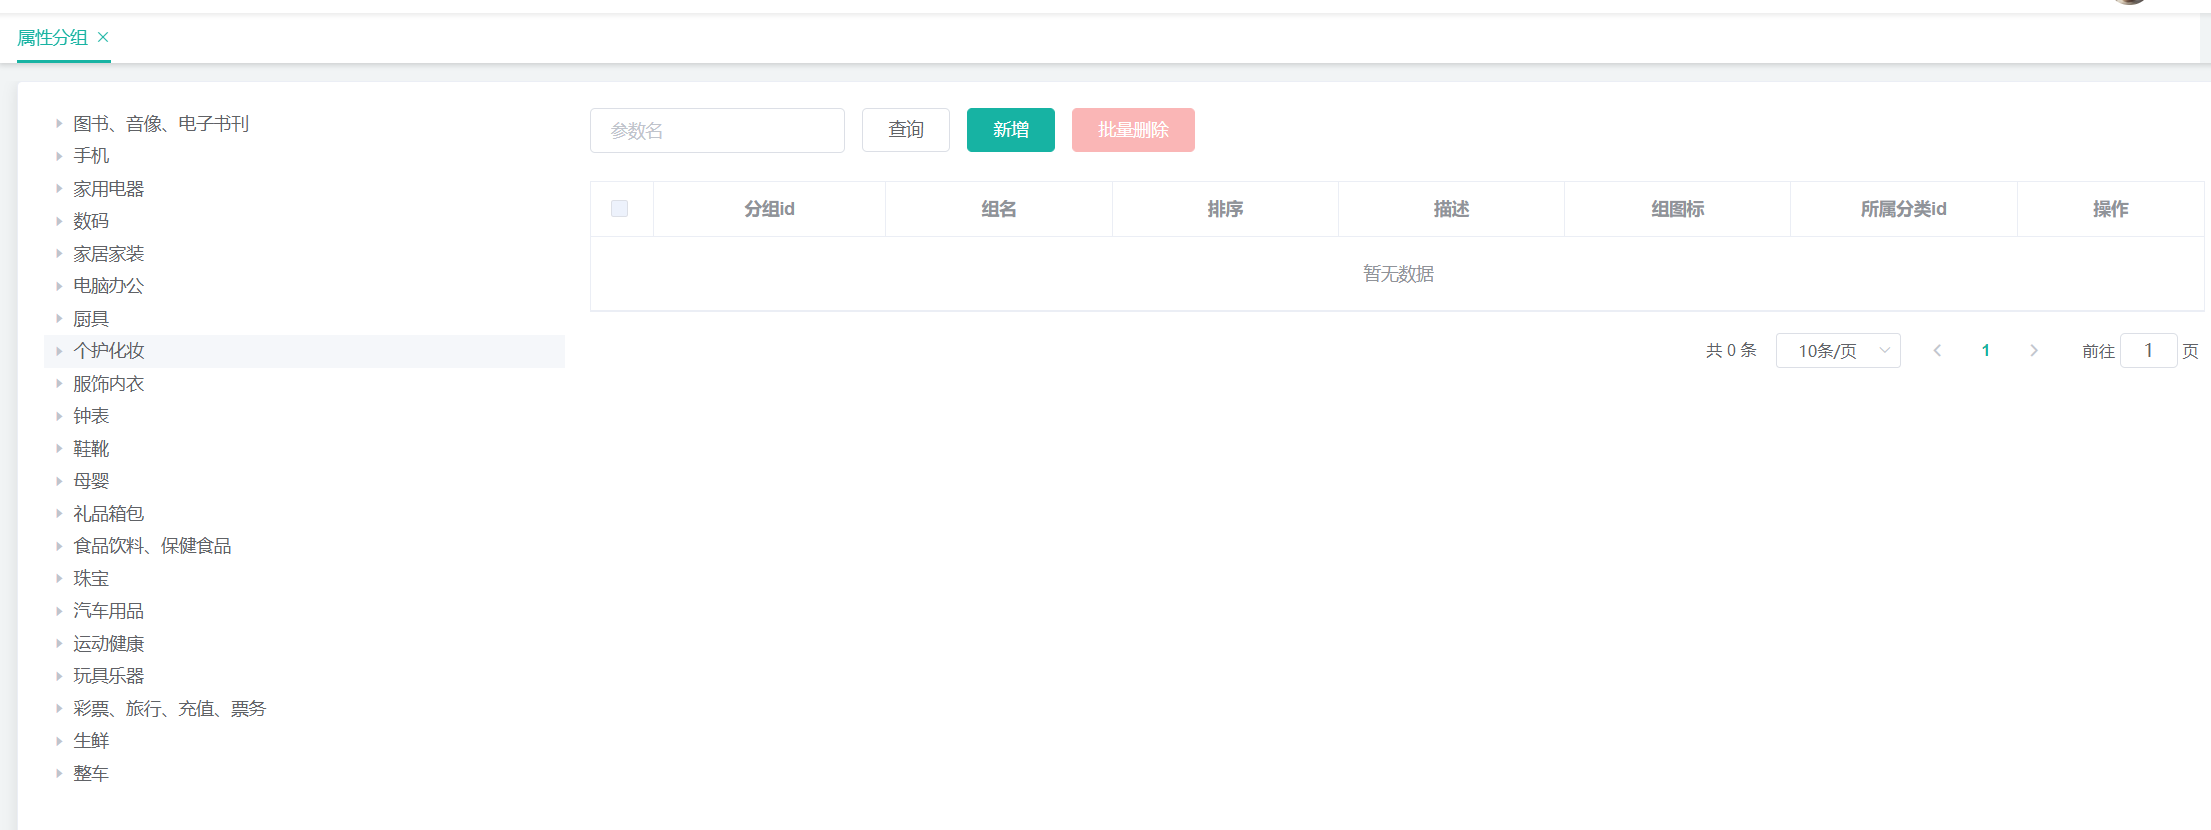
1、前端组件
从老师给的课件资源中找到sys_menus.sql,将其复制后,在数据库gulimall_admin中进行找到sys_menus这张表进行完善。即可出现。

- 在moudules下新建common/categroy.vue,这是一个公共组件,后面我们要引用他,即树形结构。这里我们可以直接将以前写过的category.vue复制,然后进行简单的删除即可。
<!--  -->
<template>
    <el-tree :data="menus" :props="defaultProps" node-key="catId" ref="menuTree" @node-click="nodeclick">
    </el-tree>
</template>

<script>
//这里可以导入其他文件(比如:组件,工具js,第三方插件js,json文件,图片文件等等)
//例如:import 《组件名称》 from '《组件路径》';

export default {
    //import引入的组件需要注入到对象中才能使用
    components: {},
    data() {
        //这里存放数据
        return {
            menus: [],
            expandedKey: [],
            defaultProps: {
                children: "children",  //子节点
                label: "name",  //name属性作为标签的值,展示出来
            },
        };
    },
    //监听属性 类似于data概念
    computed: {},
    //监控data中的数据变化
    watch: {},
    //方法集合
    methods: {
        //获取后台数据
        getMenus() {
            this.$http({
                url: this.$http.adornUrl('/product/category/list/tree'),
                method: 'get'
            }).then(({ data }) => {  //将整个对象中的data数据结构出来,因为只有data才是我们需要的
                console.log("成功了获取到菜单数据....", data.data)
                this.menus = data.data; // 数组内容,把数据给menus,就是给了vue实例,最后绑定到视图上
            })
        },
        nodeclick(data,node,component){
            console.log("子组件category的节点被点击",data,node,component);
            //向父组件发送事件
            this.$emit("tree-node-click",data,node,component);
        }

    },
    //生命周期 - 创建完成(可以访问当前this实例)
    created() {
        this.getMenus();
    },
    //生命周期 - 挂载完成(可以访问DOM元素)
    mounted() {

    },
    beforeCreate() { }, //生命周期 - 创建之前
    beforeMount() { }, //生命周期 - 挂载之前
    beforeUpdate() { }, //生命周期 - 更新之前
    updated() { }, //生命周期 - 更新之后
    beforeDestroy() { }, //生命周期 - 销毁之前
    destroyed() { }, //生命周期 - 销毁完成
    activated() { }, //如果页面有keep-alive缓存功能,这个函数会触发
}
</script>
<style scoped>

</style>
-
将逆向生成的前端代码复制到product下面。

-
在modules/product/下创建attgroup.vue组件
- 左侧6 用来显示菜单,右侧18用来显示表格
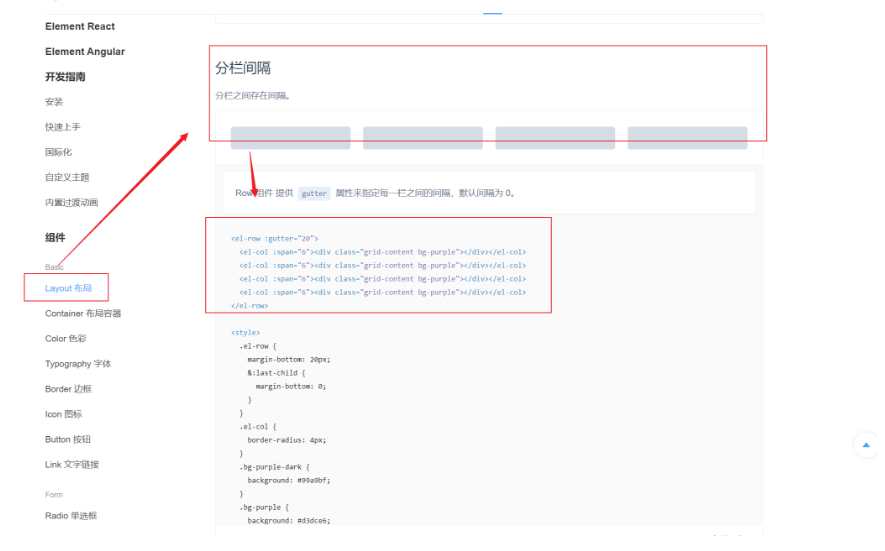
- 引入公共组件Category, AddOrUpdate
- 剩下的复制生成的
attrgroup.vue
<!--  -->
<template>
  <el-row :gutter="20">
    <el-col :span="6"><category></category></el-col>
    <el-col :span="18"
      ><div class="mod-config">
        <el-form
          :inline="true"
          :model="dataForm"
          @keyup.enter.native="getDataList()"
        >
          <el-form-item>
            <el-input
              v-model="dataForm.key"
              placeholder="参数名"
              clearable
            ></el-input>
          </el-form-item>
          <el-form-item>
            <el-button @click="getDataList()">查询</el-button>
            <el-button
              v-if="isAuth('product:attrgroup:save')"
              type="primary"
              @click="addOrUpdateHandle()"
              >新增</el-button
            >
            <el-button
              v-if="isAuth('product:attrgroup:delete')"
              type="danger"
              @click="deleteHandle()"
              :disabled="dataListSelections.length <= 0"
              >批量删除</el-button
            >
          </el-form-item>
        </el-form>
        <el-table
          :data="dataList"
          border
          v-loading="dataListLoading"
          @selection-change="selectionChangeHandle"
          style="width: 100%"
        >
          <el-table-column
            type="selection"
            header-align="center"
            align="center"
            width="50"
          >
          </el-table-column>
          <el-table-column
            prop="attrGroupId"
            header-align="center"
            align="center"
            label="分组id"
          >
          </el-table-column>
          <el-table-column
            prop="attrGroupName"
            header-align="center"
            align="center"
            label="组名"
          >
          </el-table-column>
          <el-table-column
            prop="sort"
            header-align="center"
            align="center"
            label="排序"
          >
          </el-table-column>
          <el-table-column
            prop="descript"
            header-align="center"
            align="center"
            label="描述"
          >
          </el-table-column>
          <el-table-column
            prop="icon"
            header-align="center"
            align="center"
            label="组图标"
          >
          </el-table-column>
          <el-table-column
            prop="catelogId"
            header-align="center"
            align="center"
            label="所属分类id"
          >
          </el-table-column>
          <el-table-column
            fixed="right"
            header-align="center"
            align="center"
            width="150"
            label="操作"
          >
            <template slot-scope="scope">
              <el-button
                type="text"
                size="small"
                @click="addOrUpdateHandle(scope.row.attrGroupId)"
                >修改</el-button
              >
              <el-button
                type="text"
                size="small"
                @click="deleteHandle(scope.row.attrGroupId)"
                >删除</el-button
              >
            </template>
          </el-table-column>
        </el-table>
        <el-pagination
          @size-change="sizeChangeHandle"
          @current-change="currentChangeHandle"
          :current-page="pageIndex"
          :page-sizes="[10, 20, 50, 100]"
          :page-size="pageSize"
          :total="totalPage"
          layout="total, sizes, prev, pager, next, jumper"
        >
        </el-pagination>
        <!-- 弹窗, 新增 / 修改 -->
        <add-or-update
          v-if="addOrUpdateVisible"
          ref="addOrUpdate"
          @refreshDataList="getDataList"
        ></add-or-update></div
    ></el-col>
  </el-row>
</template>

<script>
//这里可以导入其他文件(比如:组件,工具js,第三方插件js,json文件,图片文件等等)
//例如:import 《组件名称》 from '《组件路径》';
import Category from "../common/category.vue";
import AddOrUpdate from "./attrgroup-add-or-update.vue";

export default {
  //import引入的组件需要注入到对象中才能使用
  components: { Category, AddOrUpdate},
  data() {
    return {
      dataForm: {
        key: "",
      },
      dataList: [],
      pageIndex: 1,
      pageSize: 10,
      totalPage: 0,
      dataListLoading: false,
      dataListSelections: [],
      addOrUpdateVisible: false,
    };
  },
  activated() {
    this.getDataList();
  },
  methods: {
    // 获取数据列表
    getDataList() {
      this.dataListLoading = true;
      this.$http({
        url: this.$http.adornUrl("/product/attrgroup/list"),
        method: "get",
        params: this.$http.adornParams({
          page: this.pageIndex,
          limit: this.pageSize,
          key: this.dataForm.key,
        }),
      }).then(({ data }) => {
        if (data && data.code === 0) {
          this.dataList = data.page.list;
          this.totalPage = data.page.totalCount;
        } else {
          this.dataList = [];
          this.totalPage = 0;
        }
        this.dataListLoading = false;
      });
    },
    // 每页数
    sizeChangeHandle(val) {
      this.pageSize = val;
      this.pageIndex = 1;
      this.getDataList();
    },
    // 当前页
    currentChangeHandle(val) {
      this.pageIndex = val;
      this.getDataList();
    },
    // 多选
    selectionChangeHandle(val) {
      this.dataListSelections = val;
    },
    // 新增 / 修改
    addOrUpdateHandle(id) {
      this.addOrUpdateVisible = true;
      this.$nextTick(() => {
        this.$refs.addOrUpdate.init(id);
      });
    },
    // 删除
    deleteHandle(id) {
      var ids = id
        ? [id]
        : this.dataListSelections.map((item) => {
            return item.attrGroupId;
          });
      this.$confirm(
        `确定对[id=${ids.join(",")}]进行[${id ? "删除" : "批量删除"}]操作?`,
        "提示",
        {
          confirmButtonText: "确定",
          cancelButtonText: "取消",
          type: "warning",
        }
      ).then(() => {
        this.$http({
          url: this.$http.adornUrl("/product/attrgroup/delete"),
          method: "post",
          data: this.$http.adornData(ids, false),
        }).then(({ data }) => {
          if (data && data.code === 0) {
            this.$message({
              message: "操作成功",
              type: "success",
              duration: 1500,
              onClose: () => {
                this.getDataList();
              },
            });
          } else {
            this.$message.error(data.msg);
          }
        });
      });
    },
  },
};
</script>
<style scoped>
</style>
踩坑:
Can't resolve './attrgroup-add-or-update' in 'C:\Users\hxld\Desktop\renren-fast-vue\src\views\modules\product'
解决办法:
原来是绝对路径,后面改为相对路径即可。错误原因是因为版本问题可能。
2、父子组件传递数据
我们要实现的功能是点击左侧,右侧表格对应显示。
父子组件传递数据:category.vue点击时,引用它的attgroup.vue能感知到, 然后通知到add-or-update。

- 子组件发送事件
- 在category.vue中的树形控件绑定点击事件@node-click="nodeclick"
- node-click方法中有三个参数(data, node, component),data表示当前数据,node为elementui封装的数据
- 点击之后向父组件发送事件:this.$emit("tree-node-click",...) …为参数
//组件绑定事件
<el-tree :data="menus" :props="defaultProps" node-key="catId" ref="menuTree" @node-click="nodeclick">


//methods中新增方法
 nodeclick(data,node,component){
            console.log("子组件category的节点被点击",data,node,component);
            //向父组件发送事件
            this.$emit("tree-node-click",data,node,component);
        }
- 父组件接收事件
//引用的组件,可能会发散tree-node-click事件,当接收到时,触发父组件的treenodeclick方法
<category @tree-node-click="treenodeclick"></category>


//methods中新增treenodeclick方法,验证父组件是否接收到
 //感知树节点被点击
        treenodeclick(data,node,component){
            console.log("attrgroup感知到category的节点被点击:",data,node,component);
            console.log("刚才被点击的菜单id:",data.catId);
        },
3、启动测试

ps:这里可以参考其他网友的课件
根据请求地址http://localhost:8001/#/product-attrgroup

所以应该有product/attrgroup.vue。我们之前写过product/cateory.vue,现在我们
要抽象到common//cateory.vue


1 左侧内容:

要在左面显示菜单,右面显示表格复制<el-row :gutter="20">,放到attrgroup.vue的<template>。20表示列间距

去element-ui文档里找到布局,
<el-row :gutter="20">
    <el-col :span="6"><div class="grid-content bg-purple"></div></el-col>
    <el-col :span="18"><div class="grid-content bg-purple"></div></el-col>
</el-row>


分为2个模块,分别占6列和18列

有了布局之后,要在里面放内容。接下来要抽象一个分类vue。新建
common/category,生成vue模板。把之前写的el-tree放到<template>

<el-tree :data="menus" :props="defaultProps" node-key="catId" ref="menuTree"
@node-click="nodeClick"	></el-tree>
所以他把menus绑定到了菜单上,
所以我们应该在export default {中有menus的信息
该具体信息会随着点击等事件的发生会改变值(或比如created生命周期时),
tree也就同步变化了


common/category写好后,就可以在attrgroup.vue中导入使用了
<script>
import Category from "../common/category";
export default {
  //import引入的组件需要注入到对象中才能使用。组件名:自定义的名字,一致可以省略
  components: { Category},


导入了之后,就可以在attrgroup.vue中找合适位置放好
<template>
<el-row :gutter="20">
    <el-col :span="6">
        <category @tree-node-click="treenodeclick"></category>
    </el-col>


2 右侧表格内容:

开始填写属性分组页面右侧的表格

复制gulimall-product\src\main\resources\src\views\modules\product\attrgroup.vue中的部分内
容div到attrgroup.vue

批量删除是弹窗add-or-update

导入data、结合components


父子组件
要实现功能:点击左侧,右侧表格对应内容显示。

父子组件传递数据:category.vue点击时,引用它的attgroup.vue能感知到, 然后
通知到add-or-update

比如嵌套div,里层div有事件后冒泡到外层div(是指一次点击调用了两个div的点
击函数)

子组件(category)给父组件(attrgroup)传递数据,事件机制;

去element-ui的tree部分找event事件,看node-click()

在category中绑定node-click事件,
<el-tree :data="menus" :props="defaultProps" node-key="catId" ref="menuTree" @node-click="nodeClick"	>
</el-tree>

this.$emit()
子组件给父组件发送一个事件,携带上数据;
nodeClick(data,Node,component){
    console.log("子组件被点击",data,Node,component);
    this.$emit("tree-node-click",data,Node,component);
},
第一个参数事件名字随便写,
后面可以写任意多的东西,事件发生时都会传出去

this.$emit(事件名,“携带的数据”);

父组件中的获取发送的事件
在attr-group中写
<category @tree-node-click="treeNodeClick"></category>
表明他的子组件可能会传递过来点击事件,用自定义的函数接收传递过来的参数

 父组件中进行处理
//获取发送的事件数据
    treeNodeClick(data,Node,component){
     console.log("attgroup感知到的category的节点被点击",data,Node,component);
     console.log("刚才被点击的菜单ID",data.catId);
},
6.3.4 获取分类属性分组
接口在线文档地址:https://easydoc.net/s/78237135/ZUqEdvA4/OXTgKobR
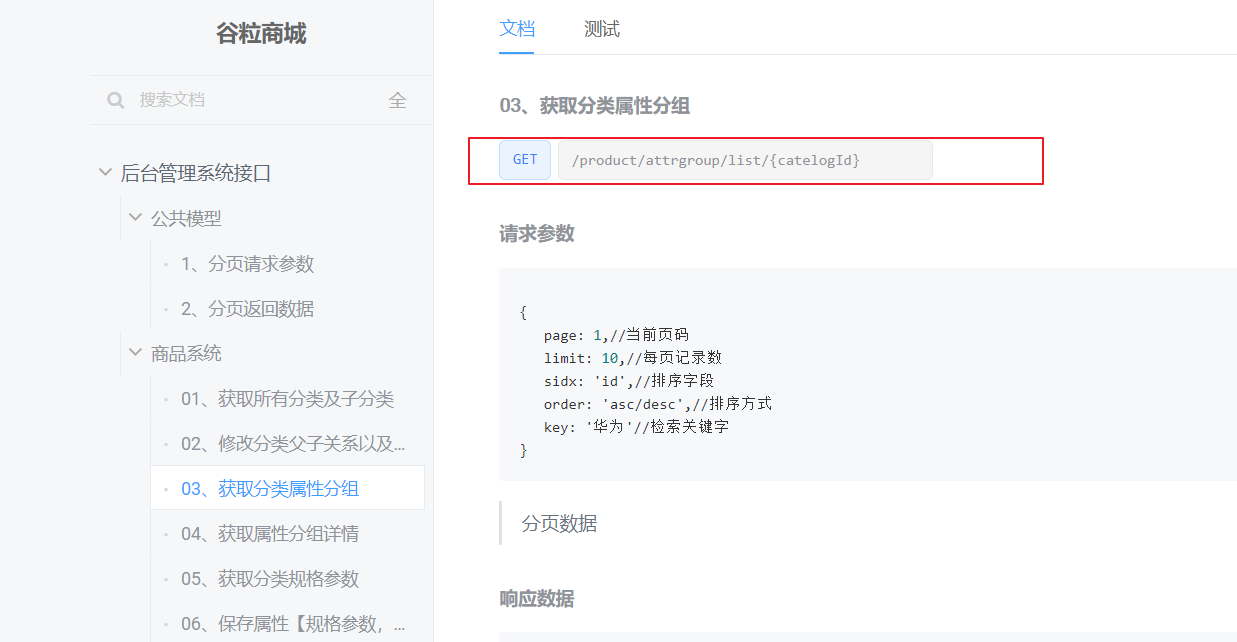
接口地址:/product/attrgroup/list/{catelogId}
- 修改product下的controller
 /**
     * 列表
     * catelogId 0的话查所有
     */
    @RequestMapping("/list/{catelogId}")
    //@RequiresPermissions("product:attrgroup:list")
    public R list(@RequestParam Map<String, Object> params,
                  @PathVariable("catelogId") Long catelogId){
        // PageUtils page = attrGroupService.queryPage(params);

        PageUtils page = attrGroupService.queryPage(params,catelogId);
        return R.ok().put("page", page);
    }
-
service新增接口及其实现,实现类新增方法
Query里面就有个方法getPage(),传入map,将map解析为mybatis-plus的IPage对象;
自定义PageUtils类用于传入IPage对象,得到其中的分页信息;
AttrGroupServiceImpl extends ServiceImpl,其中ServiceImpl的父类中有方法page(IPage, Wrapper)。对于wrapper而言,没有条件的话就是查询所有;
queryPage()返回前还会return new PageUtils(page);,把page对象解析好页码信
息,就封装为了响应数据;
AttrGroupServiceImpl下:
@Override
    public PageUtils queryPage(Map<String, Object> params, Long catelogId) {
        if (catelogId == 0) {//如果传过来的id是0,则查询所有属性
            // this.page两个参数:
            // 第一个:查询页码信息,其中 Query<>().getPage 方法传入一个map,会自动封装成 Ipage
            // 第二个:查询条件,空的wapper 就是查询全部
            IPage<AttrGroupEntity> page = this.page(new Query<AttrGroupEntity>().getPage(params),
                    new QueryWrapper<AttrGroupEntity>());
            return new PageUtils(page);
        } else {
            String key = (String) params.get("key");
            // select * from pms_attr_group where catelog_id =? and (attr_group_name like key or attr_group_id = key)
            QueryWrapper<AttrGroupEntity> wrapper = new QueryWrapper<AttrGroupEntity>().eq("catelog_id", catelogId);
            if (!StringUtils.isEmpty(key)) {
                wrapper.and((obj) -> {
                    obj.like("attr_group_name", key).or().eq("attr_group_id", key);
                });
            }
            IPage<AttrGroupEntity> page = this.page(new Query<AttrGroupEntity>().getPage(params), wrapper);
            return new PageUtils(page);
        }


    }
-
测试 localhost:88/api/product/attrgroup/list/1 localhost:88/api/product/attrgroup/list/1?page=1&key=aa { "msg": "success", "code": 0, "page": { "totalCount": 0, "pageSize": 10, "totalPage": 0, "currPage": 1, "list": [] } } -
我们不让一级和二级分类下,点击的时候也出现表格,只让三级分类的时候才出现相应的表格,所以我们可以设置一个判断。
调整前端
发送请求时url携带id信息,${this.catId},get参数携带page信息
点击第3级分类时才查询,修改attr-group.vue中的函数即可
修改前端代码
- 修改getDataList()中的请求路径
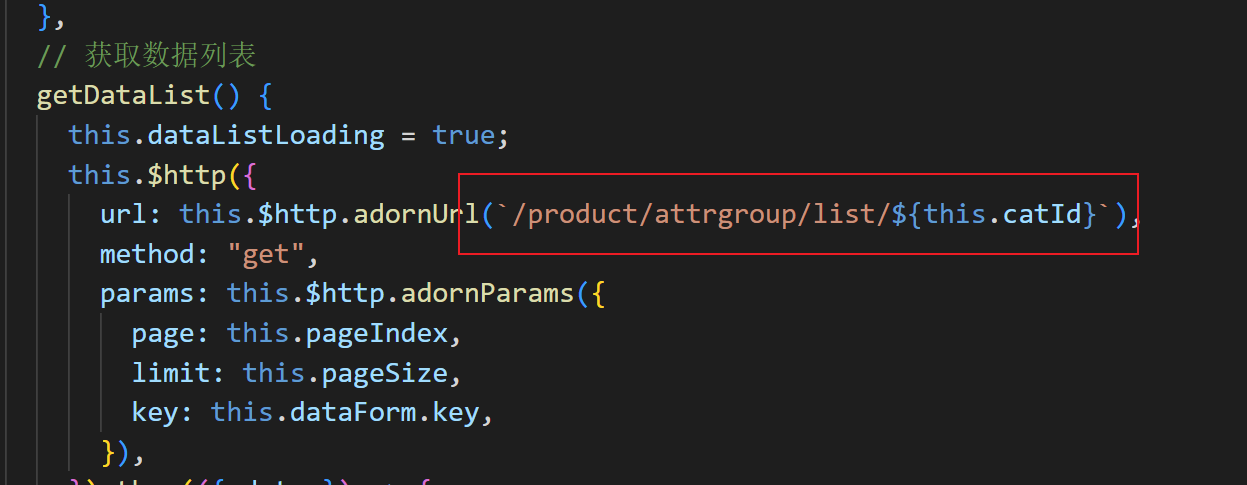
-
data中新增
catId,设置默认为0
-
methods中修改点击方法
    treenodeclick(data, node, component) {
		....

      //必须是三级分类,才显示属性
     if(node.level == 3){
                this.catId = data.catId;
                this.getDataList();//重新查询
            }
    },
- 数据库中新增数据,进行测试。

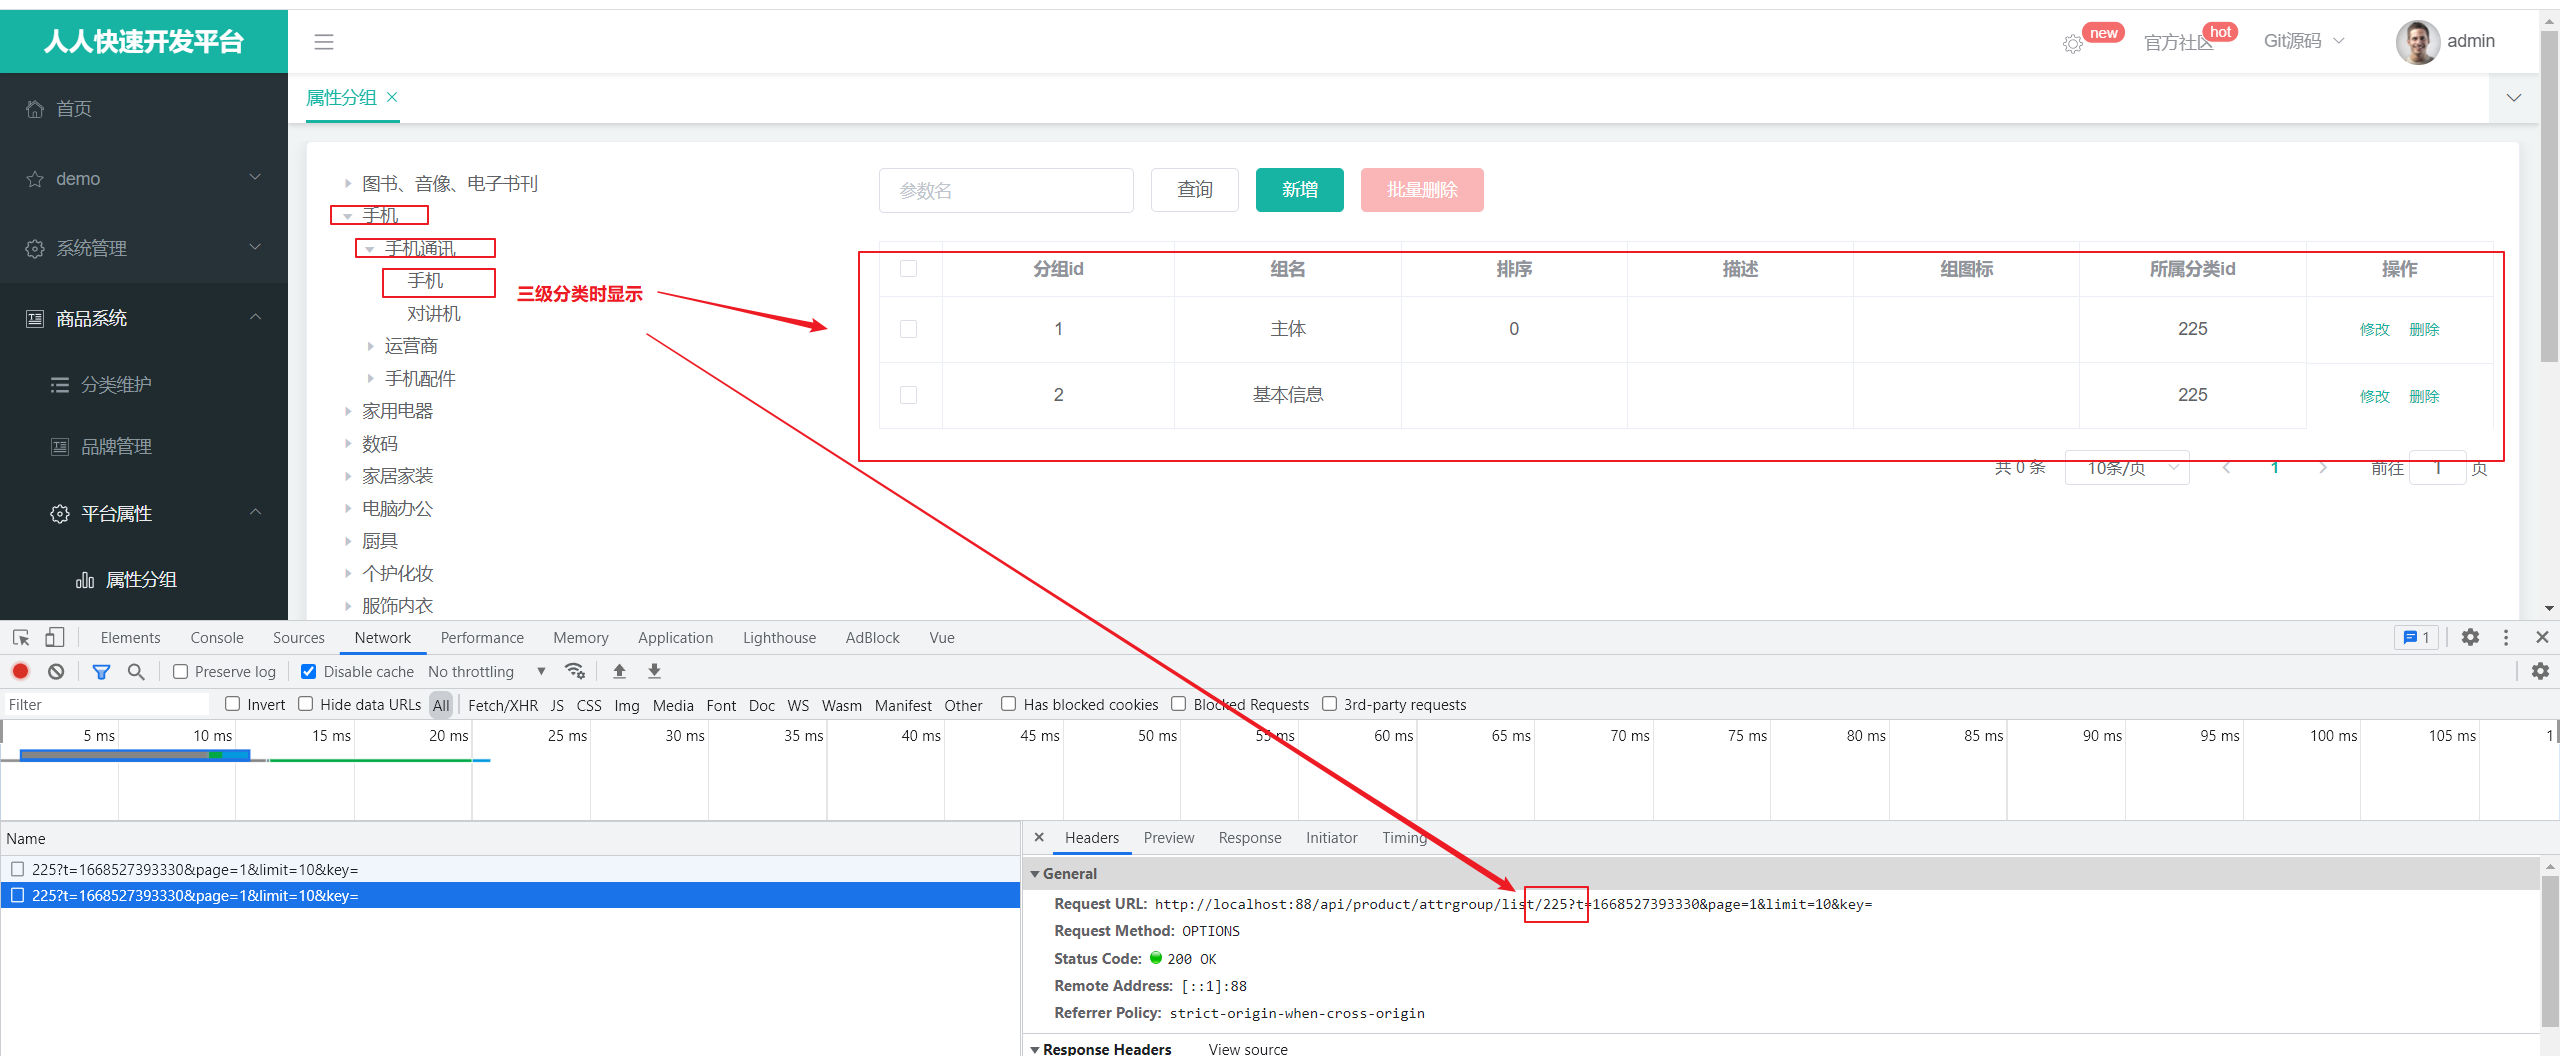
6.3.5 属性分组新增功能
新增时,所属分类id改换为级联选择框
- 新增选择框,添加菜单数据

-
我们发现可以选择分类,但是分类显示的是空白,这个是因为 显示的属性是 label,通过props属性进行绑定
修改attrgroup-add-or-update.vue
<!--v-model 绑定要提交的数据,options绑定选择菜单, props绑定选择框的参数-->
      <el-form-item label="所属分类id" prop="catelogId">
        <!-- <el-input v-model="dataForm.catelogId" placeholder="所属分类id" @change="handleChange"></el-input> -->
        <el-cascader v-model="dataForm.catelogPath" :options="categorys" :props="props" ></el-cascader>
      </el-form-item>
//data中新增属性,props用来绑定选择框的参数,categorys用来保存菜单 props: { value: "catId", label: "name", children: "children" }, categorys: [], //方法中新增getCategorys(),用来获取选择菜单的值 getCategorys() { this.$http({ url: this.$http.adornUrl('/product/category/list/tree'), method: 'get' }).then(({ data }) => { //将整个对象中的data数据结构出来,因为只有data才是我们需要的 console.log("成功了获取到菜单数据....", data.data) this.categorys = data.data; // 数组内容,把数据给menus,就是给了vue实例,最后绑定到视图上 }) }, //组件创建的时候就要获取菜单的值 created() { this.getCategorys(); }
-
发现返回的数据,三级菜单下面也有children(为空)
@JsonInclude去空字段
优化:没有下级菜单时不要有下一级空菜单,在java端把children属性空值去掉,
空集合时去掉字段,- 解决方法:在 后端
CategoryEntity中设置相应的属性不为空既可。当children为空时,不返回children字段
在children字段上添加注解:当值为空时,不返回当前字段
- 解决方法:在 后端

	//自定义的属性:用来表示子分类
	@JsonInclude(JsonInclude.Include.NON_EMPTY) //这个可以判断 是否是字段为空
	@TableField(exist = false)  //表示数据库表中不存在
	private List<CategoryEntity>  children;

- 修改之后仍然报错的原因是:el-cascader 绑定的
dataForm.catelogId是一个数组,其中包含选择框的父节点id和自己的id。而我们要提交的只是他自己的id。
//修改data中的dataFrom
     dataForm: {
        attrGroupId: 0,
        attrGroupName: '',
        sort: '',
        descript: '',
        icon: '',
        catelogId: 0, ///保存要提交的子节点的id
        catelogPath: [] //保存父节点和子节点的id
      },

//修改表单提交方法,要传送的数据,只传最后一个子id
// 表单提交
    dataFormSubmit() {
        if (valid) {
              ...
              'catelogId': this.dataForm.catelogPath[this.dataForm.catelogPath.length - 1]
            })
6.3.6 修改回显分类功能
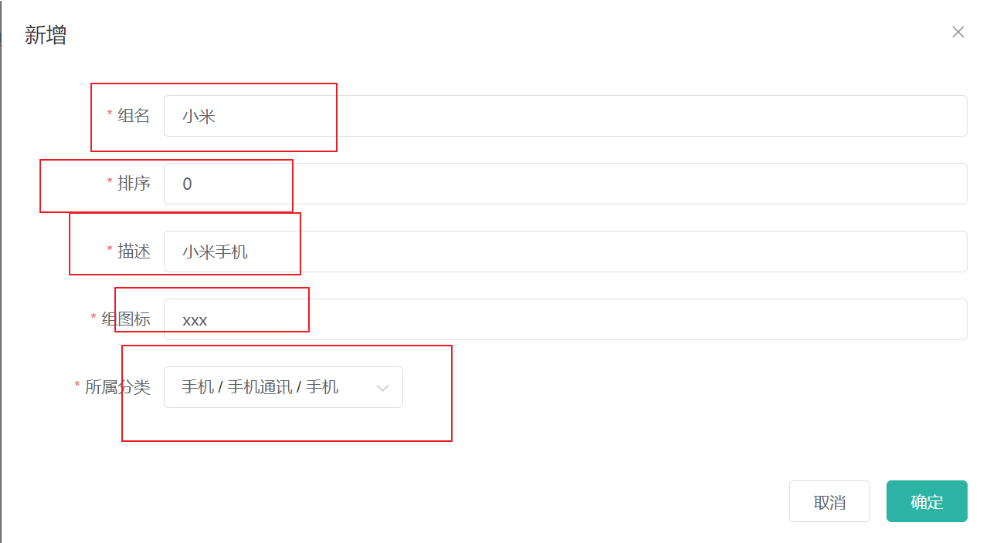
我们要设置选择进行修改的时候将原来本属于这个原信息回显出来。
- 前端 attrgroup-add-or-update.vue新增完整路径
 init(id) {
      this.dataForm.attrGroupId = id || 0
      this.visible = true
      this.$nextTick(() => {
        this.$refs['dataForm'].resetFields()
        if (this.dataForm.attrGroupId) {
          this.$http({
            url: this.$http.adornUrl(`/product/attrgroup/info/${this.dataForm.attrGroupId}`),
            method: 'get',
            params: this.$http.adornParams()
          }).then(({ data }) => {
            if (data && data.code === 0) {
              this.dataForm.attrGroupName = data.attrGroup.attrGroupName
              this.dataForm.sort = data.attrGroup.sort
              this.dataForm.descript = data.attrGroup.descript
              this.dataForm.icon = data.attrGroup.icon
              this.dataForm.catelogId = data.attrGroup.catelogId;
              //查出categoryId的完整路径
              this.dataForm.catelogPath = data.attrGroup.catelogPath;
            }
          })
        }
      })
    },
- 后端
AttrGroupEntity新增完整路径属性
/**
* 查出categoryId的完整路径
*/
@TableField(exist = false) //表示数据库中不存在
private Long[] catelogPath;
- 修改 AttrGroupController
@Autowired
private CategoryService categoryService;
/**
* 信息
*/
@RequestMapping("/info/{attrGroupId}")
//@RequiresPermissions("product:attrgroup:info")
public R info(@PathVariable("attrGroupId") Long attrGroupId){
AttrGroupEntity attrGroup = attrGroupService.getById(attrGroupId);
Long catelogId = attrGroup.getCatelogId();
//设置catelogId的完整路径
Long[] path = categoryService.findCatelogPath(catelogId);
// 用当前当前分类id查询完整路径并写入 attrGroup
attrGroup.setCatelogPath(path);
return R.ok().put("attrGroup", attrGroup);
}
- 修改categoryService,新增接口,实现方法
//categoryService接口
/**
* 找到catelogId的完整路径
* [父/子/孙]
* @param catelogId
* @return
*/
Long[] findCatelogPath(Long catelogId);
//categoryServiceImpl实现方法
//查找完整路径方法
//[2,25,225]
@Override
public Long[] findCatelogPath(Long catelogId) {
List<Long> paths = new ArrayList<>();
List<Long> parentPath = findParentPath(catelogId,paths);
// 收集的时候是顺序 前端是逆序显示的 所以用集合工具类给它逆序一下
//逆序
Collections.reverse(parentPath);
return parentPath.toArray(new Long[parentPath.size()]);
}
//递归查找父节点id
// 225,25,2
private List<Long> findParentPath(Long catelogId,List<Long> paths){
//1.收集当前节点id
paths.add(catelogId);
CategoryEntity byId = this.getById(catelogId);
if (byId.getParentCid() !=0){
findParentPath(byId.getParentCid(),paths);
}
return paths;
}
测试
在 GulimallProductApplicationTests下:
@Autowired
CategoryService categoryService;
@Test
public void testFindPath(){
Long[] catelogPath = categoryService.findCatelogPath(225L);
log.info("完整路径:{}", Arrays.asList(catelogPath));
}

5、 attrgroup-add-or-update.vue 当对话框关闭时,清空数据,防止不合理回显
<el-dialog
:title="!dataForm.attrGroupId ? '新增' : '修改'"
:close-on-click-modal="false"
:visible.sync="visible"
@closed="dialogClose" //关闭时,绑定方法dialogClose
>
//新增方法
dialogClose() {
//关闭时清空之前的路径
this.dataForm.catelogPath = [];
},
- 选择框加上搜索功能:
filterable, 显示提示信息placeholder="试试搜索:手机"
<el-cascader v-model="dataForm.catelogPath" :options="categorys" :props="props" placeholder="试试搜索:手机" filterable></el-cascader>
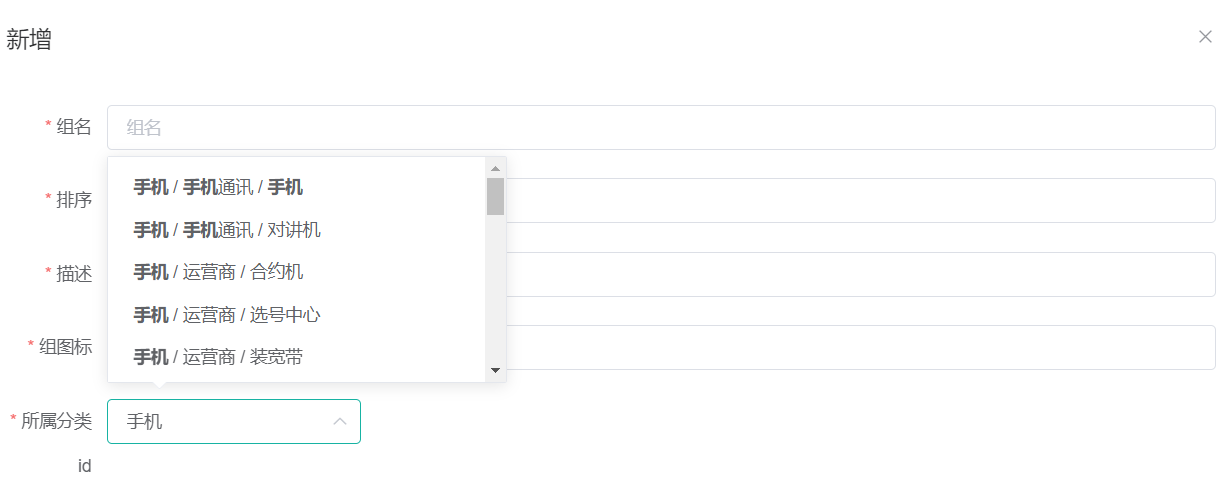
6.3.7 实现分页-引入插件
发现自动生成的分页条不好使,原因是没有引入mybatis-plus的分页插件。新建配置类,引入如下配置

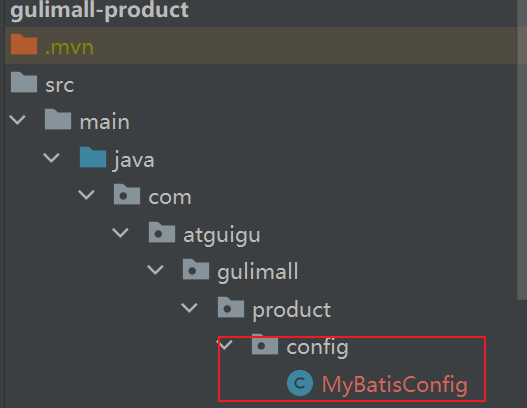
@Configuration
public class MybatisPlusConfig {
// 最新版
@Bean
public MybatisPlusInterceptor mybatisPlusInterceptor() {
MybatisPlusInterceptor interceptor = new MybatisPlusInterceptor();
interceptor.addInnerInterceptor(new PaginationInnerInterceptor(DbType.H2));
return interceptor;
}
}
上面这个是最新版本的分页插件的配置信息。
下面这个是老师课件上的配置信息
@Configuration
@EnableTransactionManagement //开启事务
@MapperScan("com.atguigu.gulimall.product.dao")
public class MyBatisConfig {
//引入分页插件 显示页码
@Bean
public PaginationInterceptor paginationInterceptor(){
PaginationInterceptor paginationInterceptor = new PaginationInterceptor();
//设置请求的页面大于最大页后操作,true调回到首页,false继续请求,默认false
paginationInterceptor.setOverflow(true);
//设置最大单页限制数量,默认500条,-1不受限制
paginationInterceptor.setLimit(1000);
return paginationInterceptor;
}
}
6.3.8 完善模糊匹配
查询的时候,根据 品牌名字 或品牌id可以进行模糊查询。
首先,通过 BrandController 中的 list 方法,该方法因为是逆向生成的,所以查询功能不太完善。这里因为 调用 了 queryPage 方法进行查询,所以我们修改 queryPage 方法。
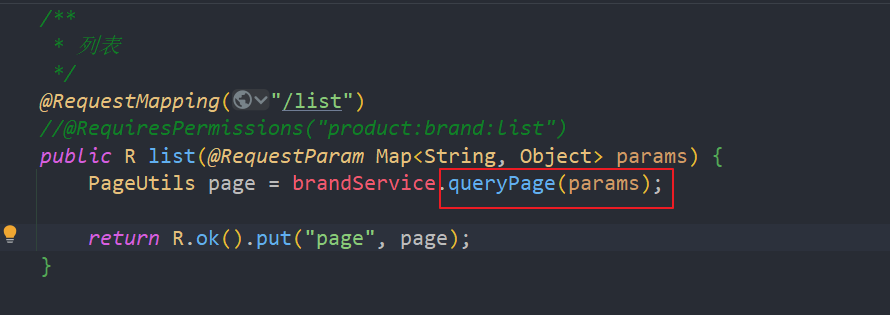
修改 BrandServiceImpl:
@Service("brandService")
public class BrandServiceImpl extends ServiceImpl<BrandDao, BrandEntity> implements BrandService {
@Override
public PageUtils queryPage(Map<String, Object> params) {
//1.获取key
String key = (String) params.get("key");
QueryWrapper<BrandEntity> queryWrapper = new QueryWrapper<>();
if (!StringUtils.isEmpty(key)){
queryWrapper.eq("brand_id",key).or().like("name",key);
}
IPage<BrandEntity> page = this.page(
new Query<BrandEntity>().getPage(params),
queryWrapper
);
return new PageUtils(page);
}
}
效果:


6.4 关联分类
6.4.1 品牌分类关联
- 复制老师的前端代码到 views下替换逆向生成的前端代码。
文件资料在工程目录下docs文件夹内


成功显示 关联分类

- 小米品牌下面可能包括手机、电器等分类,同样手机分类可能包括小米、华为等多个品牌。所以品牌与分类是多对多的关系。表pms_category_brand_relation保存品牌与分类的多对多关系。
- 查看文档,获取品牌关联的分类: /product/categorybrandrelation/catelog/list
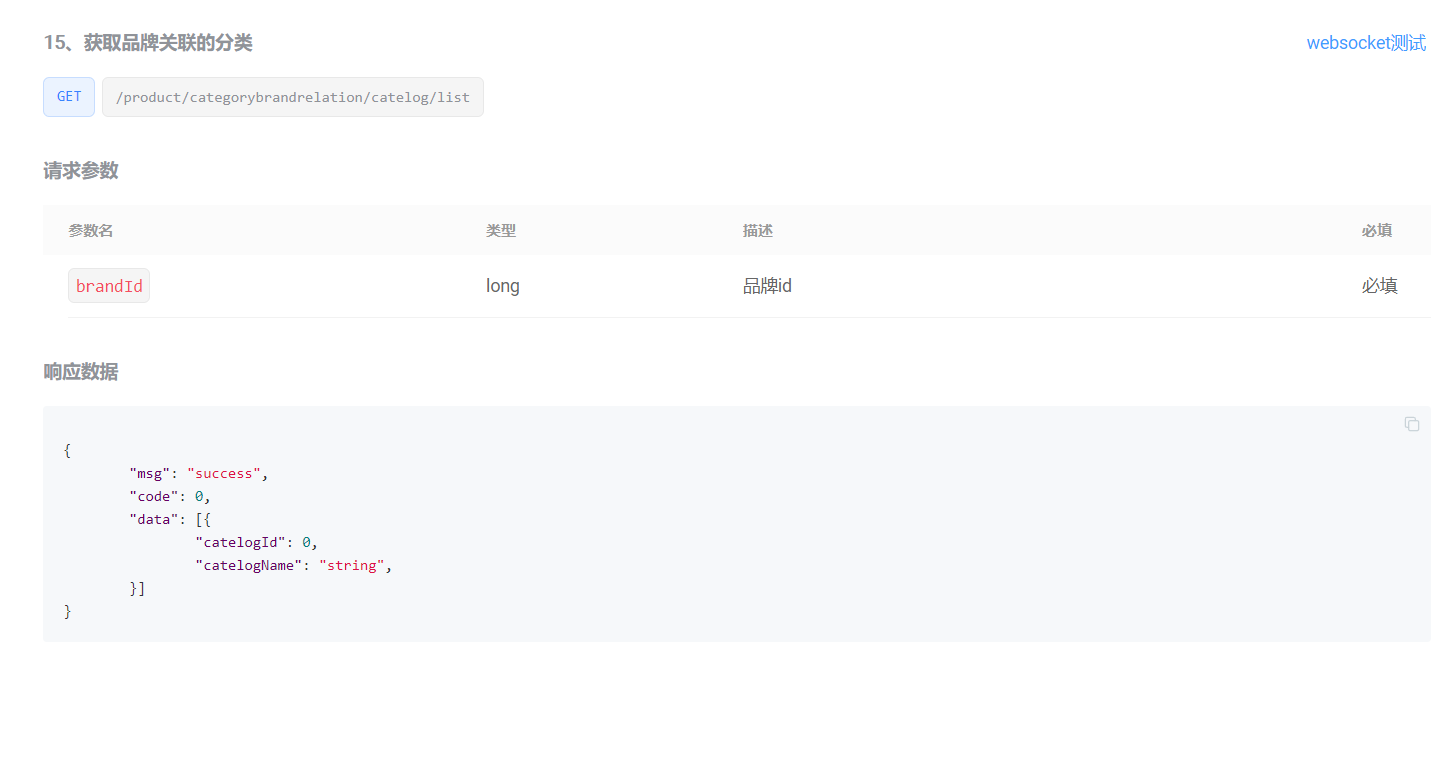
根据传过来的brandId,查找所有的分类信息
CategoryBrandRelationController下
/**
* 获取当前品牌关联的所有分类列表
*/
// @RequestMapping(value = "/catelog/list",method = RequestMethod.GET)
@GetMapping("/catelog/list")
//@RequiresPermissions("product:categorybrandrelation:list")
public R cateloglist(@RequestParam("brandId") Long brandId ){
List<CategoryBrandRelationEntity> data = categoryBrandRelationService.list(
new QueryWrapper<CategoryBrandRelationEntity>().eq("brand_id", brandId));
return R.ok().put("data", data);
}
- 新增品牌与分类关联关系:
product/categorybrandrelation/save
保存的时候,前端传过来brandid和categoryid,存储的时候还要存brandName和categoryName,所以在保存之前进行查找
CategoryBrandRelationController
/**
* 保存
*/
@RequestMapping("/save")
//@RequiresPermissions("product:categorybrandrelation:save")
public R save(@RequestBody CategoryBrandRelationEntity categoryBrandRelation){
categoryBrandRelationService.saveDetail(categoryBrandRelation);
return R.ok();
}
service(CategoryBrandRelationServiceImpl)
@Autowired
BrandDao brandDao;
@Autowired
CategoryDao categoryDao;
@Override
public void saveDetail(CategoryBrandRelationEntity categoryBrandRelation) {
Long brandId = categoryBrandRelation.getBrandId();
Long catelogId = categoryBrandRelation.getCatelogId();
//1.查询详细名字
BrandEntity brandEntity = brandDao.selectById(brandId);
CategoryEntity categoryEntity = categoryDao.selectById(catelogId);
categoryBrandRelation.setBrandName(brandEntity.getName());
categoryBrandRelation.setCatelogName(categoryEntity.getName());
this.save(categoryBrandRelation);
}
效果展示:
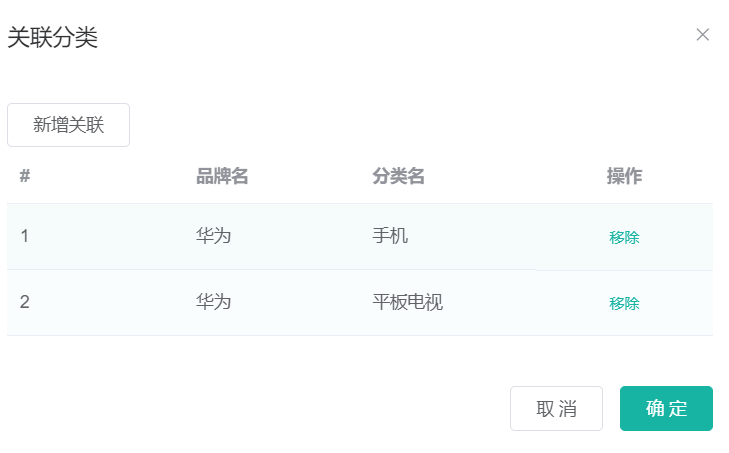
数据库中同样更新成功:

6.4.2 级联更新
-
要对品牌(分类)名字进行修改时,品牌分类关系表之中的名字也要进行修改
SQL数据库中大表尽量不关联,尽量多查询,可以设置冗余字段。
数据同步:冗余字段所在表,真正表 ---所有冗余表都需要进行更新
-
品牌名字修改同时修改表数据
BrandController
/**
* 修改
*/
@RequestMapping("/update")
//@RequiresPermissions("product:brand:update")
public R update(@Validated(UpdateGroup.class) @RequestBody BrandEntity brand) {
brandService.updateDetail(brand);
return R.ok();
}
BrandServiceImpl
@Autowired
CategoryBrandRelationService categoryBrandRelationService;
@Transactional
@Override
public void updateDetail(BrandEntity brand) {
//保证冗余字段的数据一致
this.updateById(brand);
if (!StringUtils.isEmpty(brand.getName())){
//同步更新其他关联表中的数据
categoryBrandRelationService.updateBrand(brand.getBrandId(),brand.getName());
//TODO 更新其他关联
}
}
CategoryBrandRelationServiceImpl
@Override
public void updateBrand(Long brandId, String name) {
CategoryBrandRelationEntity relationEntity = new CategoryBrandRelationEntity();
relationEntity.setBrandId(brandId);
relationEntity.setBrandName(name);
this.update(relationEntity,new UpdateWrapper<CategoryBrandRelationEntity>().eq("brand_id",brandId));
}
效果展示:修改品牌管理中华为的名字,关联分类中同样修改成功
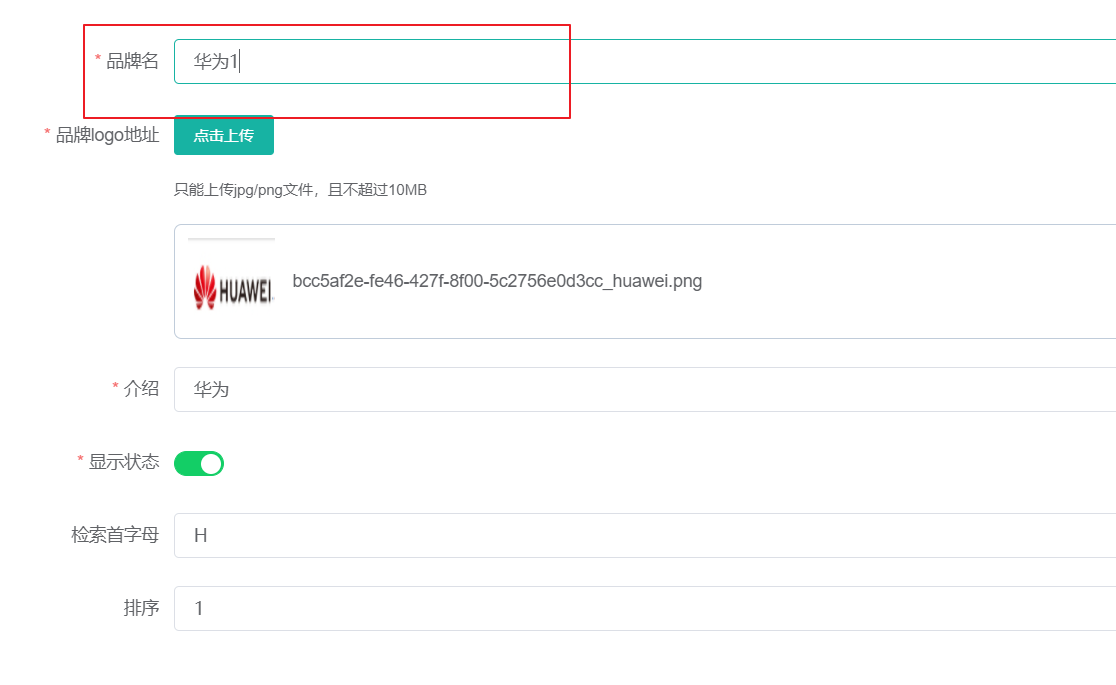


-
分类名字修改同时修改表数据
CategoryController
/**
* 修改
*/
@RequestMapping("/update")
//@RequiresPermissions("product:category:update")
public R update(@RequestBody CategoryEntity category) {
categoryService.updateCascade(category);
return R.ok();
}
CategroyServiceImpl
@Autowired
CategoryBrandRelationService categoryBrandRelationService;
/**
* 级联更新所有关联的数据
* @param category
*/
@Transactional
@Override
public void updateCascade(CategoryEntity category) {
this.updateById(category);
categoryBrandRelationService.updateCategory(category.getCatId(),category.getName());
}
CategoryBrandRelationServiceImpl
@Override
public void updateCategory(Long catId, String name) {
this.baseMapper.updateCategory(catId,name);
}
CategoryBrandRelationDao
void updateCategory(@Param("catId") Long catId, @Param("name") String name);
CateBrandRelationDao.xml
<update id="updateCategory">
UPDATE `pms_category_brand_relation` SET catelog_name = #{name} WHERE catelog_id = #{catId}
</update>
对于品牌 更新,我们使用了 UpdateWrapper ; 对于 分类更新,我们使用了自定义的 SQL语句。
效果展示:
在分类维护中修改,品牌管理处的关联分类也同时更新
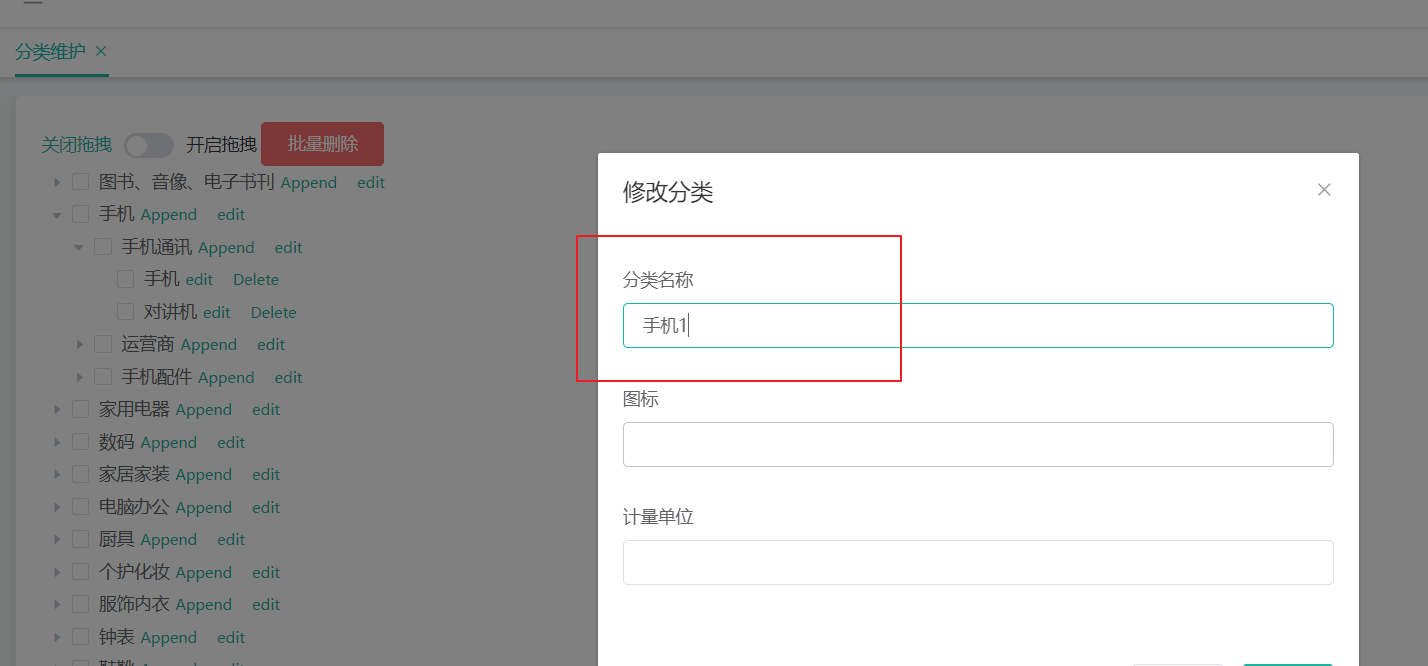
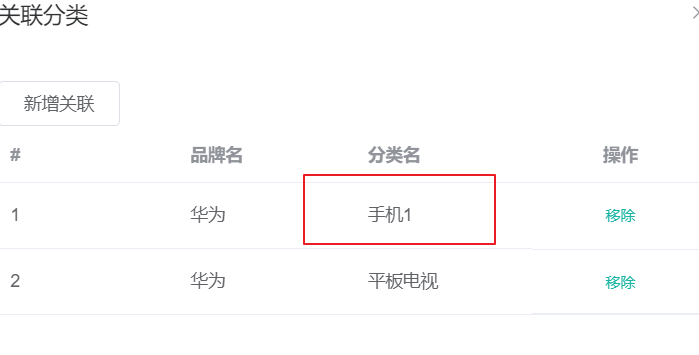
6.4.3 完善属性分组的模糊查询
修改 AttrGroupServiceImpl下的 queryPage方法,实现模糊查询
@Override
public PageUtils queryPage(Map<String, Object> params, Long catelogId) {
String key = (String) params.get("key");
// select * from pms_attr_group where catelog_id =? and (attr_group_name like key or attr_group_id = key)
QueryWrapper<AttrGroupEntity> wrapper = new QueryWrapper<AttrGroupEntity>();
if (!StringUtils.isEmpty(key)) {
wrapper.and((obj) -> {
obj.like("attr_group_name", key).or().eq("attr_group_id", key);
});
}
if (catelogId == 0) {//如果传过来的id是0,则查询所有属性
// this.page两个参数:
// 第一个:查询页码信息,其中 Query<>().getPage 方法传入一个map,会自动封装成 Ipage
// 第二个:查询条件,空的wapper 就是查询全部
IPage<AttrGroupEntity> page = this.page(new Query<AttrGroupEntity>().getPage(params),
wrapper);
return new PageUtils(page);
} else {
wrapper.eq("catelog_id", catelogId);
IPage<AttrGroupEntity> page = this.page(new Query<AttrGroupEntity>().getPage(params),
wrapper);
return new PageUtils(page);
}
}
效果展示:

6.5 规格参数
知识点补充:
1、Object 划分
- PO(persistant object) 持久对象
PO 就是对应数据库中某个表中的一条记录,多个记录可以用PO 的集合。PO 中应该不包
含任何对数据库的操作。 - DO(Domain Object)领域对象
就是从现实世界中抽象出来的有形或无形的业务实体。 - TO(Transfer Object) ,数据传输对象
不同的应用程序之间传输的对象 - DTO(Data Transfer Object)数据传输对象
这个概念来源于J2EE 的设计模式,原来的目的是为了EJB 的分布式应用提供粗粒度的数据实体,以减少分布式调用的次数,从而提高分布式调用的性能和降低网络负载,但在这里,泛指用于展示层与服务层之间的数据传输对象。 - VO(value object) 值对象
通常用于业务层之间的数据传递,和PO 一样也是仅仅包含数据而已。但应是抽象出的业务对象, 可以和表对应, 也可以不, 这根据业务的需要。用new 关键字创建,由GC 回收的。
View object:视图对象;
接受页面传递来的数据,封装对象
将业务处理完成的对象,封装成页面要用的数据 - BO(business object) 业务对象
从业务模型的角度看, 见UML 元件领域模型中的领域对象。封装业务逻辑的java 对象, 通过调用DAO 方法, 结合PO,VO 进行业务操作。business object: 业务对象主要作用是把业务逻辑封装为一个对象。这个对象可以包括一个或多个其它的对象。比如一个简历,有教育经历、工作经历、社会关系等等。我们可以把教育经历对应一个PO ,工作经历对应一个PO ,社会关系对应一个PO 。建立一个对应简历的BO 对象处理简历,每个BO 包含这些PO 。这样处理业务逻辑时,我们就可以针对BO 去处理。 - POJO(plain ordinary java object) 简单无规则java 对象
传统意义的java 对象。就是说在一些Object/Relation Mapping 工具中,能够做到维护数据库表记录的persisent object 完全是一个符合Java Bean 规范的纯Java 对象,没有增加别的属性和方法。我的理解就是最基本的java Bean ,只有属性字段及setter 和getter方法!。
POJO 是DO/DTO/BO/VO 的统称。 - DAO(data access object) 数据访问对象
是一个sun 的一个标准j2ee 设计模式, 这个模式中有个接口就是DAO ,它负持久层的操作。为业务层提供接口。此对象用于访问数据库。通常和PO 结合使用, DAO 中包含了各种数据库的操作方法。通过它的方法, 结合PO 对数据库进行相关的操作。夹在业务逻辑与数据库资源中间。配合VO, 提供数据库的CRUD 操作.
6.5.1 规格参数新增
-
规格参数新增时,请求的URL:Request URL:/product/attr/save
-
当有新增字段时,我们往往会在entity实体类中新建一个字段,并标注数据库中不存在该字段,然而这种方式并不规范。比较规范的做法是,新建一个vo文件夹,将每种不同的对象,按照它的功能进行了划分。
-
查看前端返回的数据,发现比数据库中的attr多了attrGroupId字段, 所以新建AttrVo
{ "attrGroupId": 0, //属性分组id "attrName": "string",//属性名 "attrType": 0, //属性类型 "catelogId": 0, //分类id "enable": 0, //是否可用 "icon": "string", //图标 "searchType": 0, //是否检索 "showDesc": 0, //快速展示 "valueSelect": "string", //可选值列表 "valueType": 0 //可选值模式 } -
查看后端的save方法,只保存的attr,并没有保存attrGroup的信息。所以稍微修改一下。
1)创建Vo:接收前端页面传来的值,并且与 AttrEntity 对应,此外添加一个字段 Long attrGroupId,作为级联属性
View object:视图对象;
接受页面传递来的数据,封装对象
将业务处理完成的对象,封装成页面要用的数据
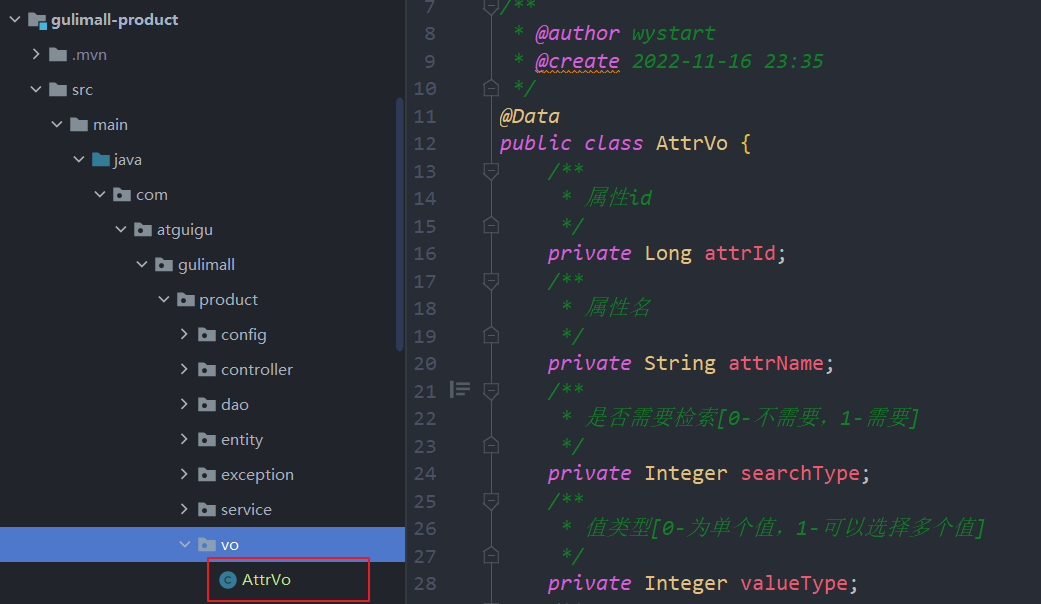
@Data
public class AttrVo {
/**
* 属性id
*/
private Long attrId;
/**
* 属性名
*/
private String attrName;
/**
* 是否需要检索[0-不需要,1-需要]
*/
private Integer searchType;
/**
* 值类型[0-为单个值,1-可以选择多个值]
*/
private Integer valueType;
/**
* 属性图标
*/
private String icon;
/**
* 可选值列表[用逗号分隔]
*/
private String valueSelect;
/**
* 属性类型[0-销售属性,1-基本属性,2-既是销售属性又是基本属性]
*/
private Integer attrType;
/**
* 启用状态[0 - 禁用,1 - 启用]
*/
private Long enable;
/**
* 所属分类
*/
private Long catelogId;
/**
* 快速展示【是否展示在介绍上;0-否 1-是】,在sku中仍然可以调整
*/
private Integer showDesc;
private Long attrGroupId;
}
2)AttrController
/**
* 保存
*/
@RequestMapping("/save")
//@RequiresPermissions("product:attr:save")
public R save(@RequestBody AttrVo attr){
attrService.saveAttr(attr);
return R.ok();
}
3)AttrServiceImpl
@Autowired
AttrAttrgroupRelationDao relationDao;
@Transactional
@Override
public void saveAttr(AttrVo attr) {
AttrEntity attrEntity = new AttrEntity();
// attrEntity.setAttrName(attr.getAttrName());
BeanUtils.copyProperties(attr, attrEntity);//第一个参数 是页面传递过来的值:vo ; 第二个参数是 数据库对应的实体,是 PO
//1、保存基本数据
this.save(attrEntity);
//2、保存关联关系
if (attr.getAttrType() == ProductConstant.AttrEnum.ATTR_TYPE_BASE.getCode() && attr.getAttrGroupId() != null){ //基本属性才保存
AttrAttrgroupRelationEntity relationEntity = new AttrAttrgroupRelationEntity();
relationEntity.setAttrGroupId(attr.getAttrGroupId());
relationEntity.setAttrId(attrEntity.getAttrId());
relationDao.insert(relationEntity);
}
}
4)测试
注意有坑:

老师给的文件生成的数据库中 pms_attr 少了一个字段 value_type
ALTER TABLE `pms_attr` ADD value_type TINYINT(4)
效果展示:
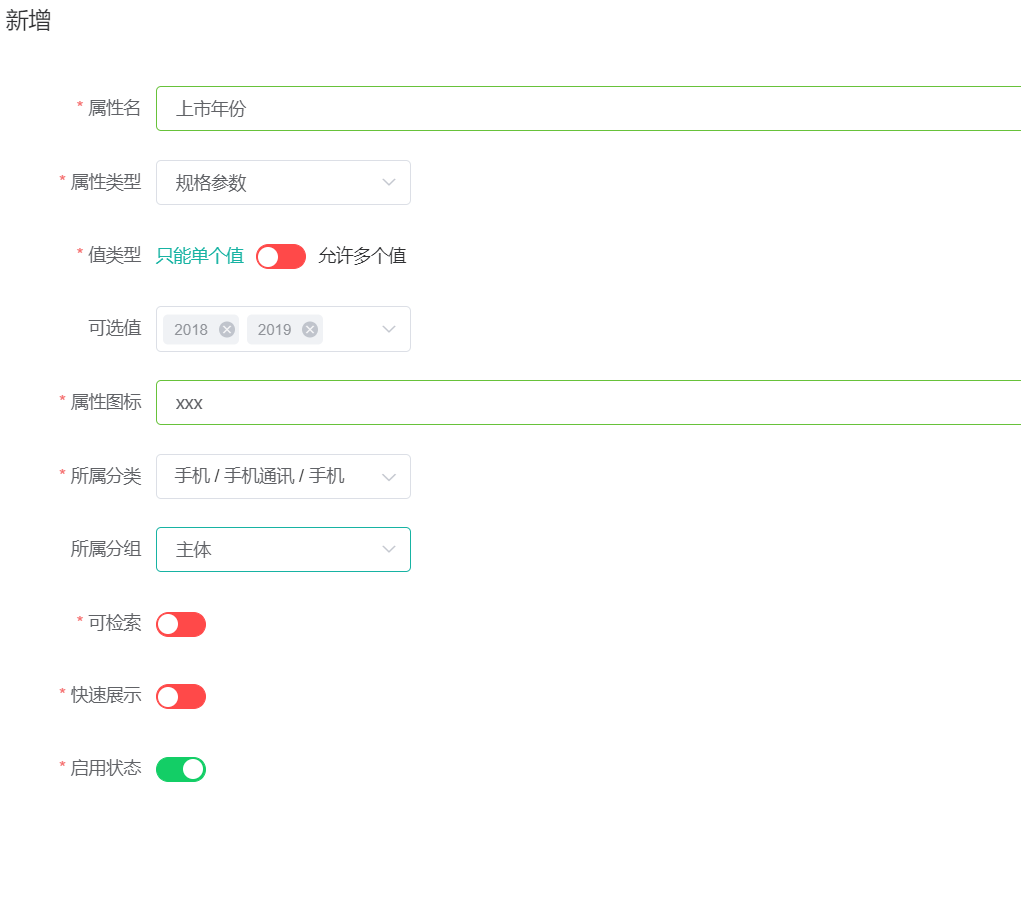
pms_attr

pms_attr_attrgroup_relation

属性 和 属性分组 关联在一起了。
6.5.2 获取分类规格参数
1、URL:/product/attr/base/list/{catelogId}
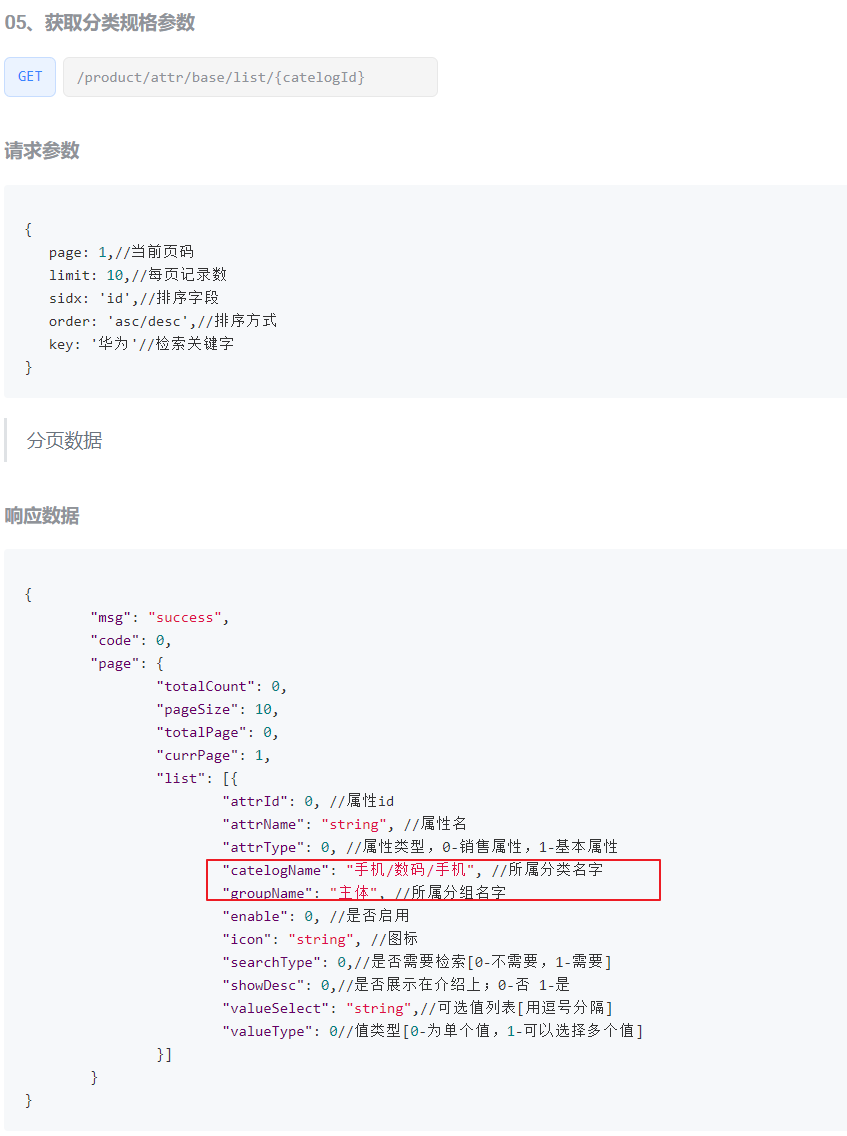
AttrController
// /product/attr/base/list/{catelogId}
@RequestMapping("/base/list/{catelogId}")
//@RequiresPermissions("product:attr:list")
public R baseAttrList(@RequestParam Map<String, Object> params,
@PathVariable("catelogId") Long catelogId){
PageUtils page = attrService.queryBaseAttrPage(params,catelogId);
return R.ok().put("page", page);
}
AttrServiceImpl
@Override
public PageUtils queryBaseAttrPage(Map<String, Object> params, Long catelogId) {
QueryWrapper<AttrEntity> queryWrapper = new QueryWrapper<>();
//模糊查询
if (catelogId != 0){
queryWrapper.eq("catelog_id",catelogId);
}
//检索条件 key
String key = (String) params.get("key");
if (!StringUtils.isEmpty(key)){
// attr_id attr_name
queryWrapper.and((wrapper)->{
wrapper.eq("attr_id",key).or().like("attr_name",key);
});
}
IPage<AttrEntity> page = this.page(
new Query<AttrEntity>().getPage(params),
queryWrapper
);
return new PageUtils(page);
}
效果展示:

所属分类和所属分组没有查询出来,完善 所属分类和所属分组。
不推荐连表查询,在大数据情况下,造成大量中间表生成,所以通过中间表进行pms_attr_attrgroup_relation多次查询即可。
修改AttrServiceImpl
@Override
public PageUtils queryBaseAttrPage(Map<String, Object> params, Long catelogId) {
QueryWrapper<AttrEntity> queryWrapper = new QueryWrapper<>();
//模糊查询
if (catelogId != 0){
queryWrapper.eq("catelog_id",catelogId);
}
//检索条件 key
String key = (String) params.get("key");
if (!StringUtils.isEmpty(key)){
// attr_id attr_name
queryWrapper.and((wrapper)->{
wrapper.eq("attr_id",key).or().like("attr_name",key);
});
}
IPage<AttrEntity> page = this.page(
new Query<AttrEntity>().getPage(params),
queryWrapper
);
PageUtils pageUtils = new PageUtils(page);
List<AttrEntity> records = page.getRecords();
//封装attrRespVo
List<AttrRespVo> respVos = records.stream().map((attrEntity) -> {
AttrRespVo attrRespVo = new AttrRespVo();
BeanUtils.copyProperties(attrEntity, attrRespVo);//将AttrEntity中的属性拷贝到AttrRespVo
//1.设置分类和分组的名字
//通过 属性id---attrId 查出 分组id ---attrGroupId
AttrAttrgroupRelationEntity attrId = relationDao.selectOne(new QueryWrapper<AttrAttrgroupRelationEntity>().eq("attr_id", attrEntity.getAttrId()));
//判断下,可能没有设置分组信息
if (attrId != null) {
AttrGroupEntity attrGroupEntity = attrGroupDao.selectById(attrId.getAttrGroupId());
attrRespVo.setGroupName(attrGroupEntity.getAttrGroupName());
}
//分类
CategoryEntity categoryEntity = categoryDao.selectById(attrEntity.getCatelogId());
if (categoryEntity != null) {
attrRespVo.setCatelogName(categoryEntity.getName());
}
return attrRespVo;
}).collect(Collectors.toList());
//采用最新的结果集
pageUtils.setList(respVos);
return pageUtils;
}
效果展示:
所属分类和所属分组展示出来

模糊查询也可以

6.5.3 查询属性详情
1、url地址:/product/attr/info/{attrId}
2、修改AttrRespVo
@Data
public class AttrRespVo extends AttrVo{
// "catelogName": "手机/数码/手机", //所属分类名字
// "groupName": "主体", //所属分组名字
private String catelogName;
private String groupName;
private Long[] catelogPath;
}
3、AttrController
// /product/attr/info/{attrId}
/**
* 信息
*/
@RequestMapping("/info/{attrId}")
//@RequiresPermissions("product:attr:info")
public R info(@PathVariable("attrId") Long attrId){
// AttrEntity attr = attrService.getById(attrId);
AttrRespVo respVo = attrService.getAttrInfo(attrId);
return R.ok().put("attr", respVo);
}
4、AttrServiceImpl
@Override
public AttrRespVo getAttrInfo(Long attrId) {
AttrRespVo respVo = new AttrRespVo();
AttrEntity attrEntity = this.getById(attrId);
BeanUtils.copyProperties(attrEntity, respVo);
//1.设置分组信息
AttrAttrgroupRelationEntity attrgroupRelation = relationDao.selectOne(new QueryWrapper<AttrAttrgroupRelationEntity>().eq("attr_id", attrId));
if (attrgroupRelation != null) {
respVo.setAttrGroupId(attrgroupRelation.getAttrGroupId());//得到分组 id
AttrGroupEntity attrGroupEntity = attrGroupDao.selectById(attrgroupRelation.getAttrGroupId());
if (attrGroupEntity != null) {
respVo.setGroupName(attrGroupEntity.getAttrGroupName()); //得到分组 名字
}
}
//2.设置分类信息
Long catelogId = attrEntity.getCatelogId();
Long[] catelogPath = categoryService.findCatelogPath(catelogId);
respVo.setCatelogPath(catelogPath);
CategoryEntity categoryEntity = categoryDao.selectById(catelogId);
if (categoryEntity != null) {
respVo.setCatelogName(categoryEntity.getName());
}
return respVo;
}
4、效果展示:
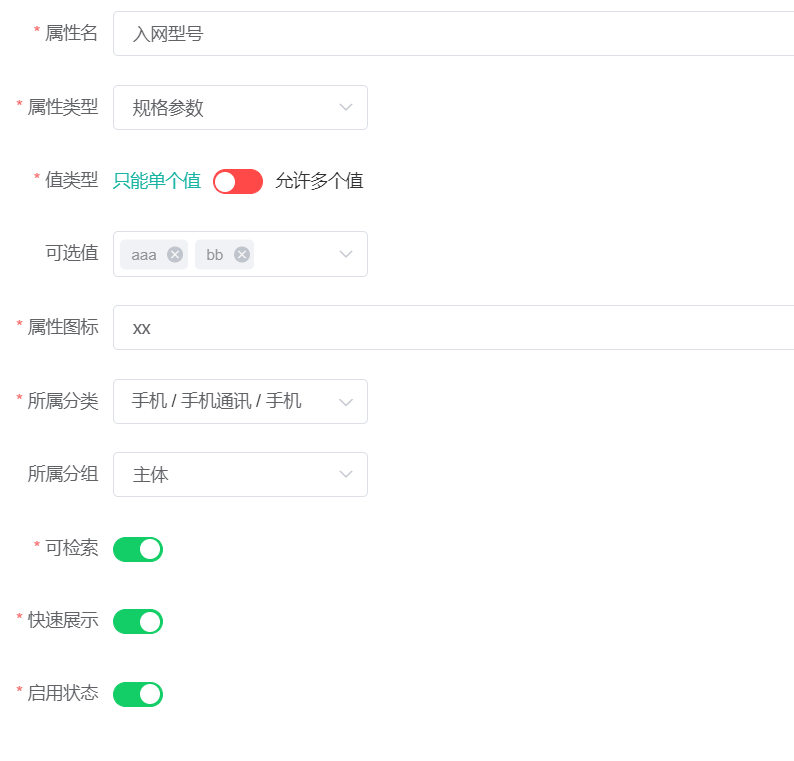
但是我们发现 修改不成功,这是因为 修改操作 是 更新操作,所以接下来我们完善更新操作。
6.5.4 修改属性
1、url:/product/attr/update
2、AttrController
// /product/attr/update
/**
* 修改
*/
@RequestMapping("/update")
//@RequiresPermissions("product:attr:update")
public R update(@RequestBody AttrVo attr){
attrService.updateAttr(attr);
return R.ok();
}
3、AttrServiceImpl
//保存时,要修改两张表
@Transactional
@Override
public void updateAttr(AttrVo attr) {
AttrEntity attrEntity = new AttrEntity();
BeanUtils.copyProperties(attr, attrEntity);//封装页面传来的基本信息
this.updateById(attrEntity);
//1.修改分组关联
AttrAttrgroupRelationEntity relationEntity = new AttrAttrgroupRelationEntity();
relationEntity.setAttrGroupId(attr.getAttrGroupId());
relationEntity.setAttrId(attr.getAttrId());
//判断饰新增还是修改
Integer count = relationDao.selectCount(new QueryWrapper<AttrAttrgroupRelationEntity>().eq("attr_id", attr.getAttrId()));
if (count > 0) {//修改
relationDao.update(relationEntity, new UpdateWrapper<AttrAttrgroupRelationEntity>().eq("attr_id", attr.getAttrId()));
} else {//新增
relationDao.insert(relationEntity);
}
}
4、效果展示
新增所属分组

修改所属分组


6.6 平台属性
6.6.1 销售属性
1、url:/product/attr/sale/list/{catelogId}
2、可以通过在添加路径变量{attrType}同时用一个方法查询销售属性和规格参数
注意:销售属性,没有分组信息,所以复用方法的时候,要判断是销售属性还是规格参数
AttrController
// /product/attr/base/list/{catelogId}
// /product/attr/sale/list/{catelogId}
/**
*
* @param params
* @param catelogId
* @return
*/
@RequestMapping("/{attrType}/list/{catelogId}")
//@RequiresPermissions("product:attr:list")
public R baseAttrList(@RequestParam Map<String, Object> params,
@PathVariable("catelogId") Long catelogId,
@PathVariable("attrType") String type){
PageUtils page = attrService.queryBaseAttrPage(params,catelogId,type);
return R.ok().put("page", page);
}
AttrServiceImpl
PS:ctrl + alt +b 查看接口的实现
@Override
public PageUtils queryBaseAttrPage(Map<String, Object> params, Long catelogId, String type) {
//"attr_type","base".equalsIgnoreCase(type)?1:0 类型是基本类型就查1,否则查0
QueryWrapper<AttrEntity> queryWrapper = new QueryWrapper<AttrEntity>().eq("attr_type","base".equalsIgnoreCase(type)?ProductConstant.AttrEnum.ATTR_TYPE_BASE.getCode():ProductConstant.AttrEnum.ATTR_TYPE_SALE.getCode());
//模糊查询
if (catelogId != 0) {
queryWrapper.eq("catelog_id", catelogId);
}
//检索条件 key
String key = (String) params.get("key");
if (!StringUtils.isEmpty(key)) {
// attr_id attr_name
queryWrapper.and((wrapper) -> {
wrapper.eq("attr_id", key).or().like("attr_name", key);
});
}
IPage<AttrEntity> page = this.page(
new Query<AttrEntity>().getPage(params),
queryWrapper
);
PageUtils pageUtils = new PageUtils(page);
List<AttrEntity> records = page.getRecords();
//封装attrRespVo
List<AttrRespVo> respVos = records.stream().map((attrEntity) -> {
AttrRespVo attrRespVo = new AttrRespVo();
BeanUtils.copyProperties(attrEntity, attrRespVo);//将AttrEntity中的属性拷贝到AttrRespVo
//如果是基本属性才有分组,销售属性不需要分组
if ("base".equalsIgnoreCase(type)){
//1.设置分类和分组的名字
//通过 属性id---attrId 查出 分组id ---attrGroupId
AttrAttrgroupRelationEntity attrId = relationDao.selectOne(new QueryWrapper<AttrAttrgroupRelationEntity>().eq("attr_id", attrEntity.getAttrId()));
//判断下,可能没有设置分组信息
if (attrId != null && attrId.getAttrGroupId() != null) {
AttrGroupEntity attrGroupEntity = attrGroupDao.selectById(attrId.getAttrGroupId());
attrRespVo.setGroupName(attrGroupEntity.getAttrGroupName());
}
}
//分类
CategoryEntity categoryEntity = categoryDao.selectById(attrEntity.getCatelogId());
if (categoryEntity != null) {
attrRespVo.setCatelogName(categoryEntity.getName());
}
return attrRespVo;
}).collect(Collectors.toList());
//采用最新的结果集
pageUtils.setList(respVos);
return pageUtils;
}
3、当新增/修改规格参数时,会在pms_attr_attrgroup_relation表之中新增数据,但是销售属性没有分组信息。所以在新增/修改时,进行判断
在Common中新建类ProductConstant,用来商品服务中的保存常量
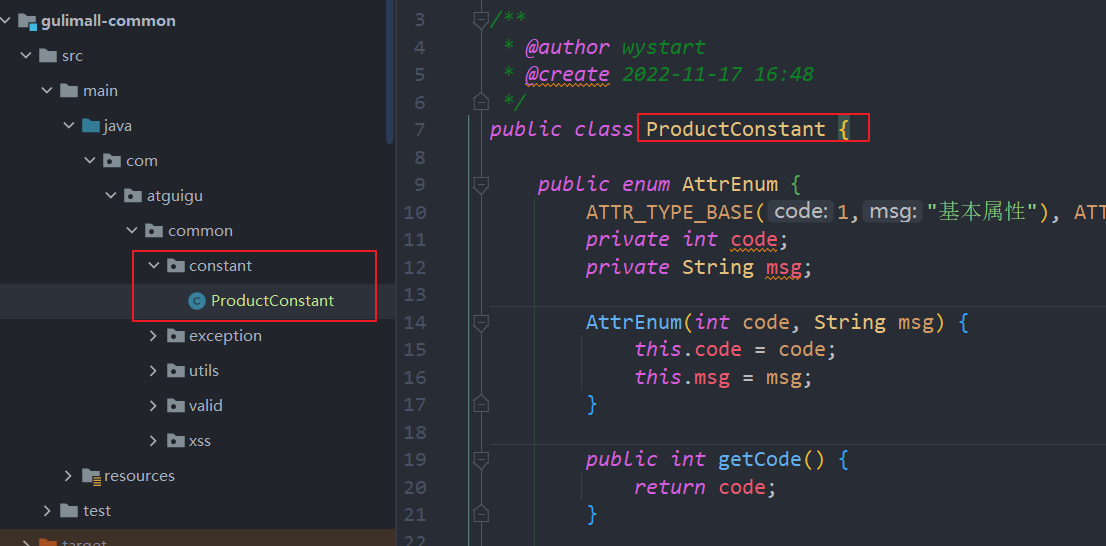
public class ProductConstant {
public enum AttrEnum {
ATTR_TYPE_BASE(1,"基本属性"), ATTR_TYPE_SALE(0,"销售属性");
private int code;
private String msg;
AttrEnum(int code, String msg) {
this.code = code;
this.msg = msg;
}
public int getCode() {
return code;
}
public String getMsg() {
return msg;
}
}
}
在saveAttr,getAttrInfo,updateAttr这三个方法中,设计分组信息之前做判断
if (attr.getAttrType() == ProductConstant.AttrEnum.ATTR_TYPE_BASE.getCode()){ //基本属性才保存
}
5、效果展示:
添加销售属性,数据库 pms_attr_attrgroup_relation表中没有新增信息
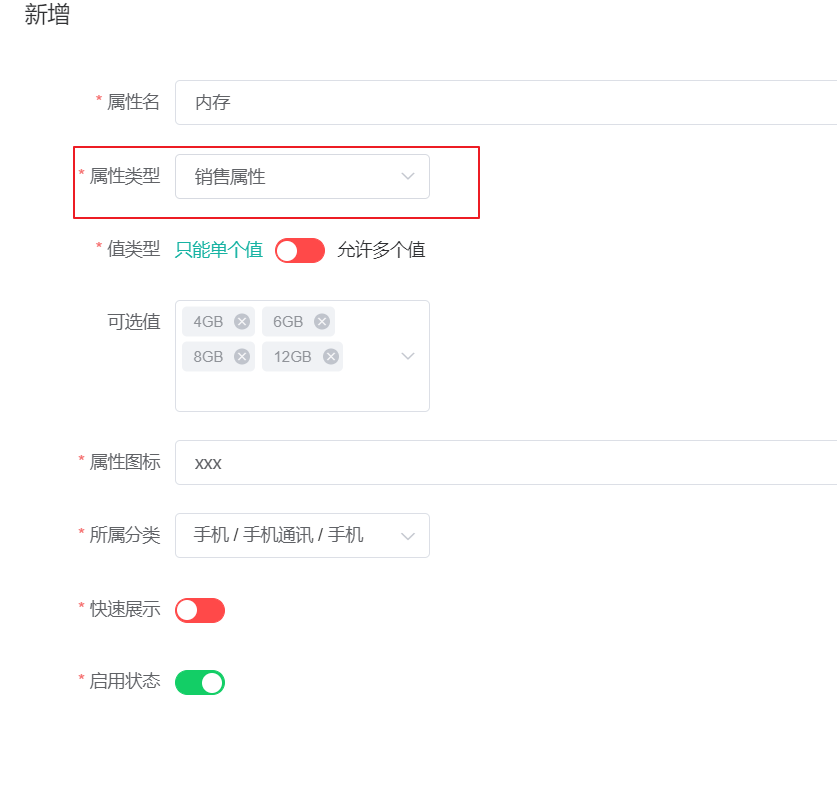

注意:如果前端页面展示没有 快速展示 ,在前端代码中将 attr-add-or-update 和 baseattr这两个 vue文件中,删除 v-if="type == 1" -----这一步也可以不修改,不使用快速展示这个功能。

6.6.2 获取属性分组的关联的所有属性
1、URL10:/product/attrgroup/{attrgroupId}/attr/relation
AttrgroupController
///product/attrgroup/{attrgroupId}/attr/relation
@GetMapping("/{attrgroupId}/attr/relation")
public R attrRelation(@PathVariable("attrgroupId") Long attrgroupId){
List<AttrEntity> entities = attrService.getRelationAttr(attrgroupId);
return R.ok().put("data",entities);
}
AttrServiceImpl
/**
* 根据分组 id查找关联的所有基本属性
* @param attrgroupId
* @return
*/
@Override
public List<AttrEntity> getRelationAttr(Long attrgroupId) {
List<AttrAttrgroupRelationEntity> entities = relationDao.selectList(new QueryWrapper<AttrAttrgroupRelationEntity>().eq("attr_group_id", attrgroupId));
List<Long> attrIds = entities.stream().map((attr) -> {
return attr.getAttrId();
}).collect(Collectors.toList());
if (attrIds == null || attrIds.size() == 0){
return null;
}
Collection<AttrEntity> attrEntities = this.listByIds(attrIds);
return (List<AttrEntity>) attrEntities;
}
2、效果展示:查出 主体关联的属性
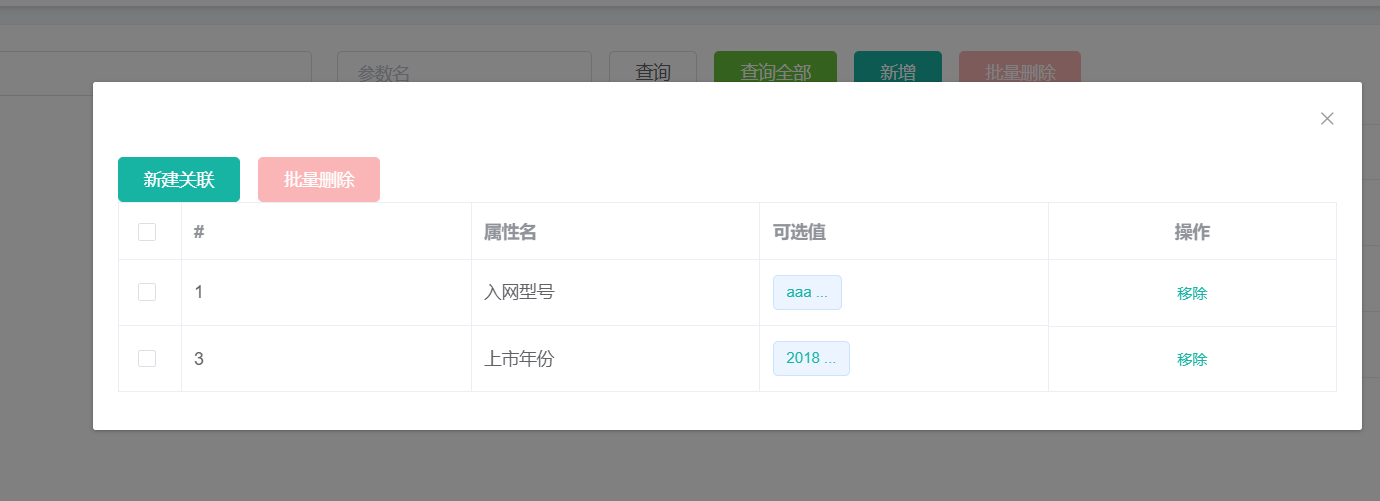
6.6.3 删除属性与分组的关联关系
1、url12:/product/attrgroup/attr/relation/delete
2、新建AttrGroupRelationVo
@Data
public class AttrGroupRelationVo {
// [{"attrId":1,"attrGroupId":2}]
private Long attrId;
private Long attrGroupId;
}
3、AttrGroupController
// /product/attrgroup/attr/relation/delete
@PostMapping("/attr/relation/delete")
public R deleteRelation(@RequestBody AttrGroupRelationVo[] vos){
attrService.deleteRelation(vos);
return R.ok();
}
4、AttrServiceImpl
public void deleteRelation(AttrGroupRelationVo[] vos) {
List<AttrAttrgroupRelationEntity> entities = Arrays.asList(vos).stream().map((item) -> {
AttrAttrgroupRelationEntity relationEntity = new AttrAttrgroupRelationEntity();
BeanUtils.copyProperties(item, relationEntity);
return relationEntity;
}).collect(Collectors.toList());
//根据 attrId,attrGroupId批量删除关联关系
relationDao.deleteBatchRelation(entities);
}
5、AttrAttrgroupRelationDao
@Mapper
public interface AttrAttrgroupRelationDao extends BaseMapper<AttrAttrgroupRelationEntity> {
void deleteBatchRelation(@Param("entities") List<AttrAttrgroupRelationEntity> entities);
}
6、AttrAttrgroupRelationDao.xml
<delete id="deleteBatchRelation">
DELETE FROM `pms_attr_attrgroup_relation` WHERE
<foreach collection="entities" item="item" separator=" OR ">
(attr_id=#{item.attrId} AND attr_group_id=#{item.attrGroupId})
</foreach>
</delete>
7、效果展示:成功移除

6.6.4 获取属性分组没有关联的其他属性
1、url13:/product/attrgroup/{attrgroupId}/noattr/relation
获取属性分组里面还没有关联的本分类里面的其他基本属性,方便添加新的关联
2、AttrGroupController
// /product/attrgroup/{attrgroupId}/noattr/relation
@GetMapping("/{attrgroupId}/noattr/relation")
public R attrNoRelation(@PathVariable("attrgroupId") Long attrgroupId,
@RequestParam Map<String, Object> params){
PageUtils page = attrService.getNoRelationAttr(params,attrgroupId);
return R.ok().put("page",page);
}
3、AttrServiceImpl
- 当前分组只能关联自己所属分类里面的所有属性
- 当前分组只能关联别的分组没有引用的属性
- 当前分类下的其他分组
- 这些分组关联的属性
- 从当前分类的所有属性中移除这些属性
/**
* 获取当前分组没有关联的所有属性
* @param params
* @param attrgroupId
* @return
*/
@Override
public PageUtils getNoRelationAttr(Map<String, Object> params, Long attrgroupId) {
//1.当前分组只能关联自己所属的分类里面的所有属性
//查询出当前分组所属的分类
AttrGroupEntity attrGroupEntity = attrGroupDao.selectById(attrgroupId);
Long catelogId = attrGroupEntity.getCatelogId();
//2.当前分组只能冠梁别的分组没有引用的属性
//2.1 当前分类下的其他分组
List<AttrGroupEntity> group = attrGroupDao.selectList(new QueryWrapper<AttrGroupEntity>().eq("catelog_id", catelogId));
List<Long> collect = group.stream().map((item) -> {
return item.getAttrGroupId();
}).collect(Collectors.toList());
//2.2 这些分组关联的属性
List<AttrAttrgroupRelationEntity> groupId = relationDao.selectList(new QueryWrapper<AttrAttrgroupRelationEntity>().in("attr_group_id", collect));
List<Long> attrIds = groupId.stream().map((item) -> {
return item.getAttrId();
}).collect(Collectors.toList());
//2.3 从当前分类的所有属性中移除这些属性;
QueryWrapper<AttrEntity> wrapper = new QueryWrapper<AttrEntity>().eq("catelog_id", catelogId).eq("attr_type", ProductConstant.AttrEnum.ATTR_TYPE_BASE.getCode());
if (attrIds != null && attrIds.size() > 0){
wrapper.notIn("attr_id",attrIds);
}
//模糊查询
String key = (String) params.get("key");
if (!StringUtils.isEmpty(key)){
wrapper.and((w)->{
w.eq("attr_id",key).or().like("attr_name",key);
});
}
IPage<AttrEntity> page = this.page(new Query<AttrEntity>().getPage(params), wrapper);
PageUtils pageUtils = new PageUtils(page);
return pageUtils;
}
4、效果展示:
给 2号分组关联 1号属性

1号分组 新建关联 就不会出现 1号属性,因为已经被 2号分组关联
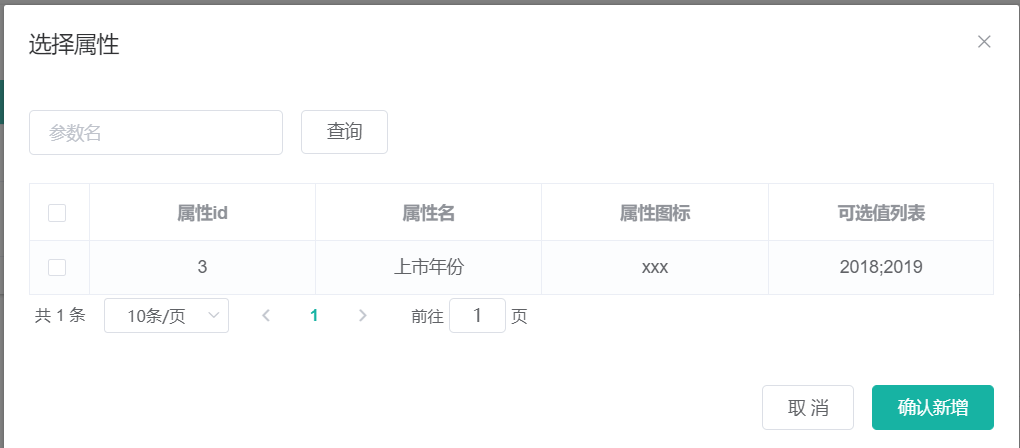
查看2号分组,其关联了1号属性

ps:这里只展示部分效果。
6.6.5 添加属性与分组关联关系
1、url11:/product/attrgroup/attr/relation
2、AttrGroupController
@Autowired
AttrAttrgroupRelationService relationService;
// /product/attrgroup/attr/relation
@PostMapping("/attr/relation")
public R addRelation(@RequestBody List<AttrGroupRelationVo> vos){
relationService.saveBatch(vos);
return R.ok();
}
3、AttrAttrgroupRelationServiceImpl
@Override
public void saveBatch(List<AttrGroupRelationVo> vos) {
List<AttrAttrgroupRelationEntity> collect = vos.stream().map(item -> {
AttrAttrgroupRelationEntity relationEntity = new AttrAttrgroupRelationEntity();
BeanUtils.copyProperties(item, relationEntity);
return relationEntity;
}).collect(Collectors.toList());
this.saveBatch(collect);
}
4、效果展示

6.7 新增商品
6.7.1 调试会员等级相关接口
1、url:/member/memberlevel/list 获取所有会员等级(这个方法已经自动生成了,启动会员服务即可)
-
把gulimall-member添加到服务注册中心,然后启动gulimall-member服务
-
配置网关路由(在 gulimall-gateway下)
- id: member_route uri: lb://gulimall-member predicates: - Path=/api/member/** filters: - RewritePath=/api/(?<segment>/?.*), /$\{segment}
2、点击 用户系统-会员等级,进行测试
添加一些数据

注意:如果我们想要使用这些前端功能,需要将老师课件中的前端代码 复制 到 modules这个下面。
6.7.2 获取分类关联的品牌
1、url:/product/categorybrandrelation/brands/list
- 新增商品时,点击商品的分类,要获取与该分类关联的所有品牌
2、新建BrandVo
@Data
public class BrandVo {
//
// "brandId": 0,
// "brandName": "string",
private Long brandId;
private String brandName;
}
3、CategoryBrandRelationController
/**
* // /product/categorybrandrelation/brands/list
*
1.Controller :处理请求,接受和校验数据
2.Service接受controller 传来的数据,进行业务处理
3.Controller 接受 Service处理完的数据,封装页面指定的vo
*/
@GetMapping("/brands/list")
public R relationBrandsList(@RequestParam(value = "catId", required = true) Long catId){
List<BrandEntity> vos = categoryBrandRelationService.getBrandsByCatId(catId);
List<BrandVo> collect = vos.stream().map(item -> {
BrandVo brandVo = new BrandVo();
brandVo.setBrandId(item.getBrandId());
brandVo.setBrandName(item.getName());
return brandVo;
}).collect(Collectors.toList());
return R.ok().put("data", collect);
}
4、CategoryBrandRelationServiceImpl
public List<BrandEntity> getBrandsByCatId(Long catId) {
List<CategoryBrandRelationEntity> catelogId = relationDao.selectList(new QueryWrapper<CategoryBrandRelationEntity>().eq("catelog_id", catId));
List<BrandEntity> collect = catelogId.stream().map(item -> {
Long brandId = item.getBrandId();
BrandEntity byId = brandService.getById(brandId);
return byId;
}).collect(Collectors.toList());
return collect;
}
5、效果展示
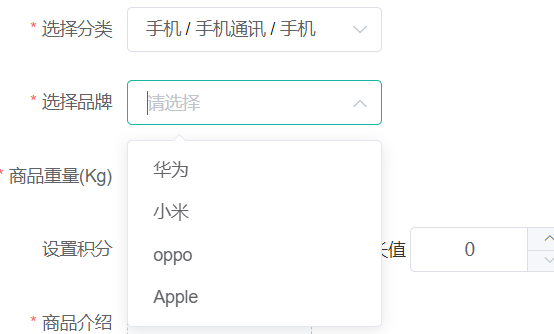
PS:1. 这里需要在品牌管理处添加一些测试数据
pms_category_brand_relation
2.这里前端会报错:
pubsub、publish报错
解决如下:1、npm install --save pubsub-js(如果不行的话,可以使用 cnpm install --save pubsub-js)
- 如果 cnpm 命令报错
解决:cnpm : 无法将“cnpm”项识别为 cmdlet、函数、脚本文件或可运行程序的名称:https://blog.csdn.net/ArthurCaoMH/article/details/89535757
解决:cnpm : 无法加载文件 C:\Users\XXX\AppData\Roaming\npm\cnpm.ps1,因为在此系统上禁止运行脚本——解决办法:https://blog.csdn.net/shadow_yi_0416/article/details/116212997
2、在src下的main.js中引用:
import PubSub from 'pubsub-js'
Vue.prototype.PubSub = PubSub

6.7.3 获取分类下所有分组&关联属性
1、url:/product/attrgroup/{catelogId}/withattr
2、新建AttrGroupWithAttrsVo
@Data
public class AttrGroupWithAttrsVo {
/**
* 分组id
*/
private Long attrGroupId;
/**
* 组名
*/
private String attrGroupName;
/**
* 排序
*/
private Integer sort;
/**
* 描述
*/
private String descript;
/**
* 组图标
*/
private String icon;
/**
* 所属分类id
*/
private Long catelogId;
private List<AttrEntity> attrs;
}
3、AttrGroupController
// /product/attrgroup/{catelogId}/withattr
@GetMapping("/{catelogId}/withattr")
public R getAttrGroupWithAttrs(@PathVariable("catelogId") Long catelogId){
//1.查出当前分类下的所有属性分组
//2.查出每个属性分组的所有属性
List<AttrGroupWithAttrsVo> vos = attrGroupService.getAttrGroupWithAttrsByCatelogId(catelogId);
return R.ok().put("data",vos);
}
4、AttrGroupServiceImpl
/**
* 根据 分类id 查出所有的分组以及这些组里面的属性
* @param catelogId
* @return
*/
@Override
public List<AttrGroupWithAttrsVo> getAttrGroupWithAttrsByCatelogId(Long catelogId) {
//1.查询分组信息
List<AttrGroupEntity> attrGroupEntities = this.list(new QueryWrapper<AttrGroupEntity>().eq("catelog_id", catelogId));
//2.查询所有属性
List<AttrGroupWithAttrsVo> collect = attrGroupEntities.stream().map(group -> {
AttrGroupWithAttrsVo attrsVo = new AttrGroupWithAttrsVo();
BeanUtils.copyProperties(group, attrsVo);
List<AttrEntity> attrs = attrService.getRelationAttr(attrsVo.getAttrGroupId());
attrsVo.setAttrs(attrs);
return attrsVo;
}).collect(Collectors.toList());
return collect;
}
5、效果展示
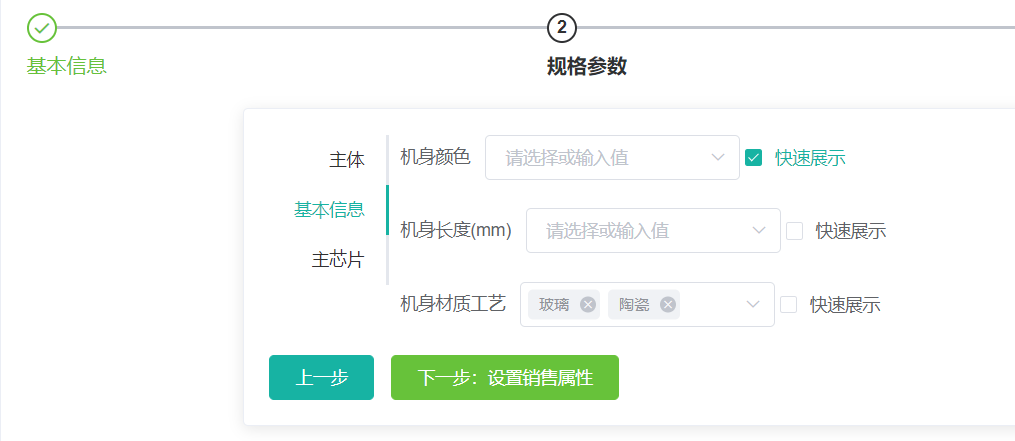
PS :1.如果只想要测试效果,不想填写一些基本信息,例如

可以在 spuadd.vue 这个前端代码中 将 required: true 设置为 required: false 就行了。
2.控制台foreach报错null
解决如下:
在spuadd.vue的showBaseAttrs()方法中在 //先对表单的baseAttrs进行初始化加上非空判断 if (item.attrs != null)就可以了
data.data.forEach(item => {
let attrArray = [];
if (item.attrs != null) { //加上非空判断
item.attrs.forEach(attr => {
attrArray.push({2
attrId: attr.attrId,
attrValues: "",
showDesc: attr.showDesc
});
});
}
this.dataResp.baseAttrs.push(attrArray);
});
6.7.4 新增商品
1、url:/product/spuinfo/save
2、按照视频添加测试数据,复制要提交的json
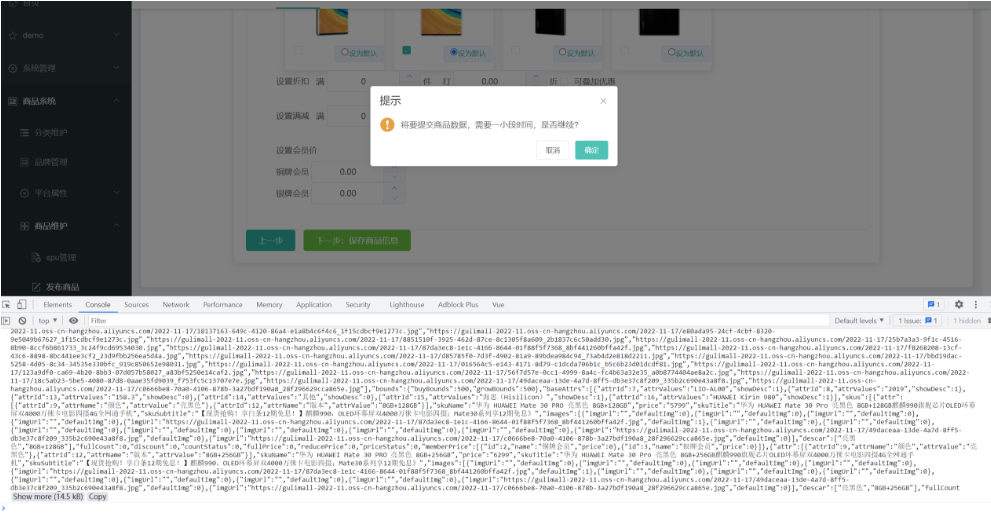
ps:在第4步发布 SKU 信息的时候,添加商品图集控制台报错:
解决办法:将
标签注释掉
3、生成SpuSaveVo
json格式化工具:https://www.bejson.com/,
json生成java类:https://www.bejson.com/json2javapojo/new/
利用json生成SpuSaveVo,生成代码,复制到vo包下
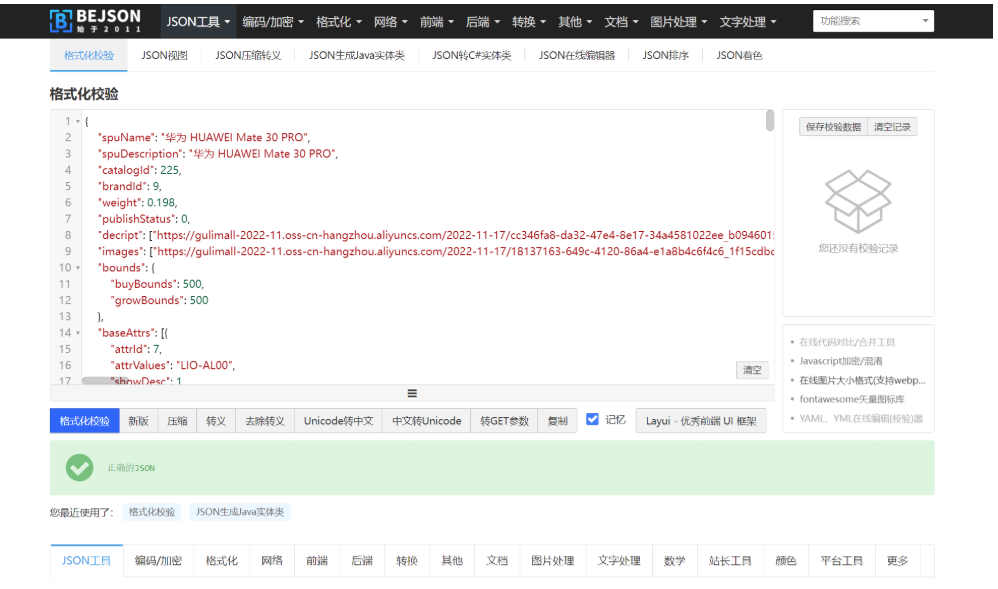
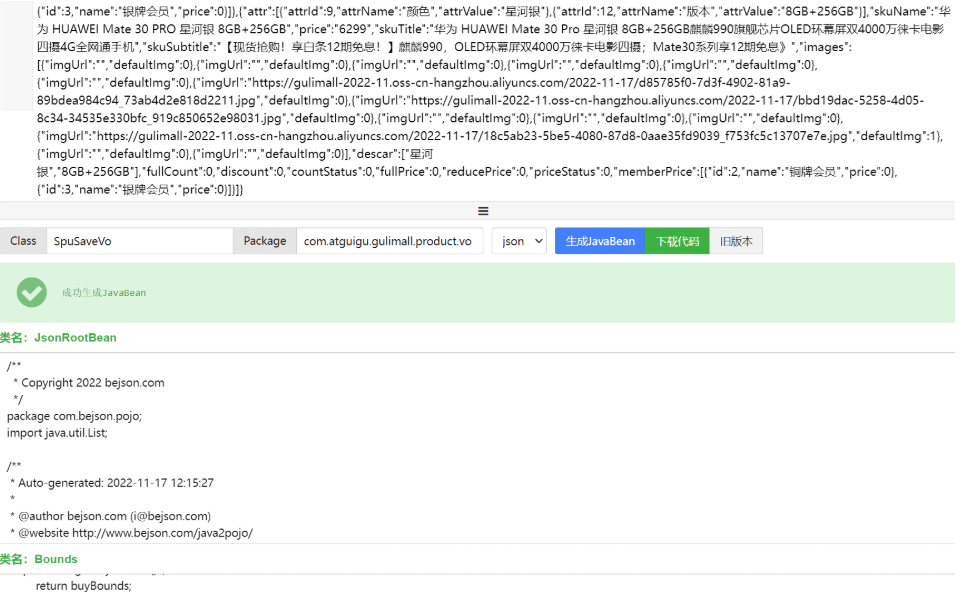
微调vo,把所有id字段改成Long类型,把所有double类型改成BigDecimal类型,将类中的 get和 set方法 使用 lombok中的@Data 注解即可。
真实项目要加上数据校验,校验是当传过来的数据不符合之后,给前端返回相应的异常错误代码。
4、下面是新增商品的接口文档。
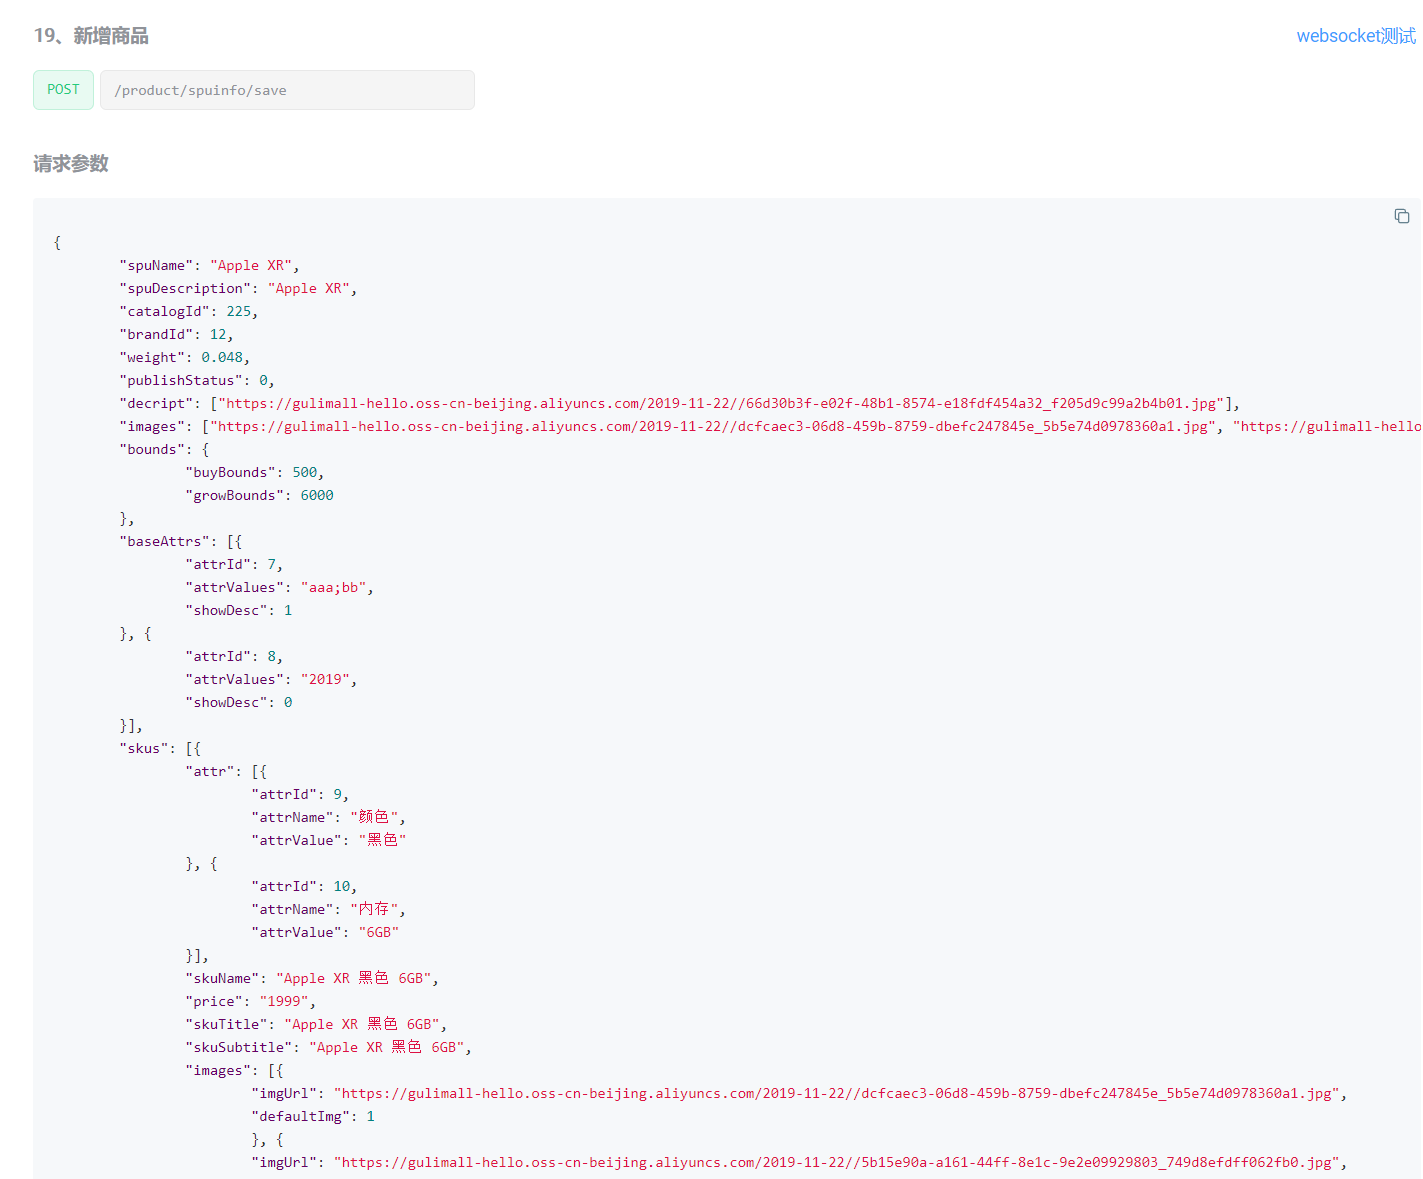
5、保存商品涉及到多个表之间的关系。我们先要搞清楚到底需要保存哪些东西?
- 保存spu基本信息 --- pms_spu_info
- 保存spu的描述图片 --- pms_spu_info_desc
- 保存spu的图片集 --- pms_spu_images
- 保存spu的规格参数 --- pms_product_attr_value
- 保存spu的积分信息 --- gulimall_sms->sms_spu_bounds
- 保存spu对应的所有sku信息
- sku的基本信息 --- pms_sku_info
- sku的图片信息 --- pms_sku_images
- sku的销售属性信息 --- pms_sku_sale_attr_value
- sku的优惠、满减等信息 --- gulimall_sms>sms_sku_ladder/sms_sku_full_reduction/sms_member_price
6、 具体实现 (这些基础是要将数据库中表的字段要熟悉)
SpuInfoController
/**
* 保存
*/
@RequestMapping("/save")
//@RequiresPermissions("product:spuinfo:save")
public R save(@RequestBody SpuSaveVo vo){
// spuInfoService.save(spuInfo);
spuInfoService.saveSpuInfo(vo);
return R.ok();
}
SpuInfoServiceImpl(此处代码是下一步debug之后完整可正常运行的代码,和老师讲课正常章节有所出入)
/**
* //TODO 高级部分完善
* @param vo
*/
@Transactional
@Override
public void saveSpuInfo(SpuSaveVo vo) {
//1.保存spu基本信息 pms_spu_info
SpuInfoEntity infoEntity = new SpuInfoEntity();
BeanUtils.copyProperties(vo,infoEntity); //属性对拷
infoEntity.setCreateTime(new Date());
infoEntity.setUpdateTime(new Date());
this.saveBaseSpuInfo(infoEntity);
//2.保存spu的描述图片 pms_spu_info_desc
List<String> decript = vo.getDecript();
SpuInfoDescEntity descEntity = new SpuInfoDescEntity();
descEntity.setSpuId(infoEntity.getId());
descEntity.setDecript(String.join(",",decript));
spuInfoDescService.saveSpuInfoDesc(descEntity);
//3.保存spu的图片集 pms_spu_images
List<String> images = vo.getImages();
imagesService.saveImages(infoEntity.getId(),images);
//4.保存spu的规格参数 pms_product_attr_value
List<BaseAttrs> baseAttrs = vo.getBaseAttrs();
List<ProductAttrValueEntity> collect = baseAttrs.stream().map(attr -> {
ProductAttrValueEntity valueEntity = new ProductAttrValueEntity();
valueEntity.setAttrId(attr.getAttrId());
AttrEntity id = attrService.getById(attr.getAttrId());
valueEntity.setAttrName(id.getAttrName());
valueEntity.setAttrValue(attr.getAttrValues());
valueEntity.setQuickShow(attr.getShowDesc());
valueEntity.setSpuId(infoEntity.getId());
return valueEntity;
}).collect(Collectors.toList());
attrValueService.saveProductAttr(collect);
//5.保存spu的积分信息 gulimall_sms->sms_spu_bounds
Bounds bounds = vo.getBounds();
SpuBoundTo spuBoundTo = new SpuBoundTo();
BeanUtils.copyProperties(bounds,spuBoundTo);
spuBoundTo.setSpuId(infoEntity.getId());
R r = couponFeignService.saveSpuBounds(spuBoundTo);
if (r.getCode() != 0){
log.error("远程保存spu积分信息失败");
}
//6.保存spu对应的所有sku信息
List<Skus> skus = vo.getSkus();
if (skus != null && skus.size()>0){
skus.forEach(item ->{
String defaultImg = "";
//查找出默认图片
for (Images image :item.getImages()){
if (image.getDefaultImg() == 1){
defaultImg = image.getImgUrl();
}
}
SkuInfoEntity skuInfoEntity = new SkuInfoEntity();
BeanUtils.copyProperties(item,skuInfoEntity);
skuInfoEntity.setBrandId(infoEntity.getBrandId());
skuInfoEntity.setCatalogId(infoEntity.getCatalogId());
skuInfoEntity.setSaleCount(0L);
skuInfoEntity.setSkuId(infoEntity.getId());
skuInfoEntity.setSkuDefaultImg(defaultImg);
//6.1 sku的基本信息 pms_sku_info
skuInfoService.saveSkuInfo(skuInfoEntity);
//自增主键
Long skuId = skuInfoEntity.getSkuId();
List<SkuImagesEntity> imagesEntities = item.getImages().stream().map(img -> {
SkuImagesEntity skuImagesEntity = new SkuImagesEntity();
skuImagesEntity.setSkuId(skuId);
skuImagesEntity.setImgUrl(img.getImgUrl());
skuImagesEntity.setDefaultImg(img.getDefaultImg());
return skuImagesEntity;
}).filter(entity ->{
//返回 true 就是需要 ,false就是剔除
return !StringUtils.isEmpty(entity.getImgUrl());
}).collect(Collectors.toList());
//6.2 sku的图片信息 pms_sku_images
skuImagesService.saveBatch(imagesEntities);
//TODO 没有图片的路径无需保存
List<Attr> attr = item.getAttr();
List<SkuSaleAttrValueEntity> skuSaleAttrValueEntities = attr.stream().map(a -> {
SkuSaleAttrValueEntity attrValueEntity = new SkuSaleAttrValueEntity();
BeanUtils.copyProperties(a, attrValueEntity);
attrValueEntity.setSkuId(skuId);
return attrValueEntity;
}).collect(Collectors.toList());
//6.3 sku的销售属性信息 pms_sku_sale_attr_value
skuSaleAttrValueService.saveBatch(skuSaleAttrValueEntities);
//6.4 sku的优惠、满减等信息 gulimall_sms->sms_sku_ladder/sms_sku_full_reduction/sms_member_price
SkuReductionTo skuReductionTo = new SkuReductionTo();
BeanUtils.copyProperties(item,skuReductionTo);
skuReductionTo.setSkuId(skuId);
if (skuReductionTo.getFullCount() >0 || skuReductionTo.getFullPrice().compareTo(new BigDecimal("0"))== 1){
R r1 = couponFeignService.saveSkuReduction(skuReductionTo);
if (r1.getCode() != 0){
log.error("远程保存sku优惠信息失败");
}
}
});
}
}
其中一些自动注入的service方法的实现,主要是使用的保存方法。我们使用service方法自动注入,因为其功能比dao更加全一些。
1. SpuInfoDescServiceImpl
@Override
public void saveSpuInfoDesc(SpuInfoDescEntity descEntity) {
this.baseMapper.insert(descEntity);
}
2. SpuImagesServiceImpl
@Override
public void saveImages(Long id, List<String> images) {
if (images == null || images.size() == 0){
}else {
List<SpuImagesEntity> collect = images.stream().map(img -> {
SpuImagesEntity spuImagesEntity = new SpuImagesEntity();
spuImagesEntity.setSpuId(id);
spuImagesEntity.setImgUrl(img);
return spuImagesEntity;
}).collect(Collectors.toList());
this.saveBatch(collect);
}
}
3. ProductAttrValueServiceImpl
@Override
public void saveProductAttr(List<ProductAttrValueEntity> collect) {
this.saveBatch(collect);
}
4. SkuInfoServiceImpl
@Override
public void saveSkuInfo(SkuInfoEntity skuInfoEntity) {
this.baseMapper.insert(skuInfoEntity);
}
7、对于远程调用,其实就是跨表操作。我们可以创建一个TO来做远程调用

- 在common微服务中创建一个SkuReductionTo用作远程调用
@Data
public class SkuReductionTo {
private Long skuId;
private int fullCount;
private BigDecimal discount;
private int countStatus;
private BigDecimal fullPrice;
private BigDecimal reducePrice;
private int priceStatus;
private List<MemberPrice> memberPrice;
}
-
同时将json自动生成的memberPrice这个vo也复制到common中
@Data public class MemberPrice { private Long id; private String name; private BigDecimal pric; }
8、在product包中新建fegin.CouponFeignService用来远程调用Coupon服务
一共调用了两个服务
"coupon/spubounds/save"和"coupon/skufullreduction/saveInfo"对于这些远程调用服务接口,其实最简单的做法就是直接将 对方服务这个 controller中的方法直接复制过来即可。
@FeignClient("gulimall-coupon")
public interface CouponFeignService {
/**
* 远程调用理解:
* 1.CouponFeignService.saveSpuBounds(spuBoundTo);
* 1.1 @RequestBody将这个对象转为json。
* 1.2 找到 gulimall-coupon 服务,给 /coupon/spubounds/save 发送请求。
* 将上一步转的json放在请求体位置,发送请求;
* 1.3 对方服务收到请求,请求体里面有json数据。
* (@RequestBody SpuBoundsEntity spuBounds);将请求体的json转为 SpuBoundsEntity
*
* 只要json数据模型是兼容的,双方服务无需使用同一个to:即不需要将 SpuBoundsController中的 save方法中的参数--SpuBoundsEntity spuBounds
* 改为 和 CouponFeignService 中的save 方法的参数 SpuBoundTo spuBoundTo 。
*
* 所有的方法都返回 R对象,前后端分离
* @param spuBoundTo
* @return
*/
@PostMapping("/coupon/spubounds/save")
R saveSpuBounds(@RequestBody SpuBoundTo spuBoundTo);
// @RequestBody 将参数转换为json 数据放在请求体中
@PostMapping("/coupon/skufullreduction/saveinfo")
R saveSkuReduction(@RequestBody SkuReductionTo skuReductionTo);
}
1)、第一个服务使用自动生成,直接调用即可
2)、第二个服务在SkuFullReductionController中新建方法
/**
* 列表
*/
@PostMapping("/saveinfo")
//@RequiresPermissions("coupon:skufullreduction:list")
public R saveInfo(@RequestBody SkuReductionTo reductionTo){
skuFullReductionService.saveSkuReduction(reductionTo);
return R.ok();
}
3)、在SkuFullReductionServiceImpl中实现
@Override
public void saveSkuReduction(SkuReductionTo reductionTo) {
//1、 ////6.4 sku的优惠、满减等信息 gulimall_sms->sms_sku_ladder/sms_sku_full_reduction/sms_member_price
// sms_sku_ladder
SkuLadderEntity skuLadderEntity = new SkuLadderEntity();
skuLadderEntity.setSkuId(reductionTo.getSkuId());
skuLadderEntity.setFullCount(reductionTo.getFullCount());
skuLadderEntity.setDiscount(reductionTo.getDiscount());
skuLadderEntity.setAddOther(reductionTo.getCountStatus());
if (reductionTo.getFullCount() >0){
skuLadderService.save(skuLadderEntity);
}
//2、sms_sku_full_reduction
SkuFullReductionEntity reductionEntity = new SkuFullReductionEntity();
BeanUtils.copyProperties(reductionTo,reductionEntity);
if (reductionEntity.getFullPrice().compareTo(new BigDecimal("0")) == 1){
this.save(reductionEntity);
}
//3、sms_member_price
List<MemberPrice> memberPrice = reductionTo.getMemberPrice();
List<MemberPriceEntity> collect = memberPrice.stream().map(item -> {
MemberPriceEntity priceEntity = new MemberPriceEntity();
priceEntity.setSkuId(reductionTo.getSkuId());
priceEntity.setMemberLevelId(item.getId());
priceEntity.setMemberLevelName(item.getName());
priceEntity.setMemberPrice(item.getPrice());
priceEntity.setAddOther(1);
return priceEntity;
}).filter(item ->{
return item.getMemberPrice().compareTo(new BigDecimal("0")) == 1;
}).collect(Collectors.toList());
memberPriceService.saveBatch(collect);
}
4)、在给前端返回的R这个类中添加一个getCode方法,方便判断远程调用是否成功(注意这里有坑,后面debug的时候修正)
public Integer getCode(){
return Integer.parseInt((String) this.get("code"));
}
5)、GulimallProductApplication
添加扫描注解,指定扫描那个包下的feign服务
@EnableFeignClients(basePackages = "com.atguigu.gulimall.product.feign")
6.7.5内存调优及一键启停
1.新建Compound
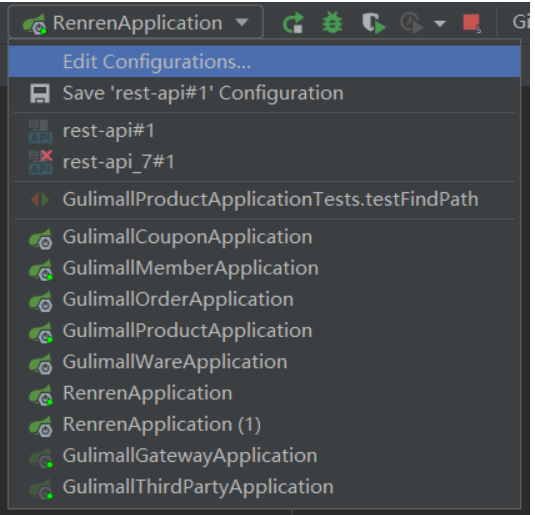

2.把服务添加到新建的compound里
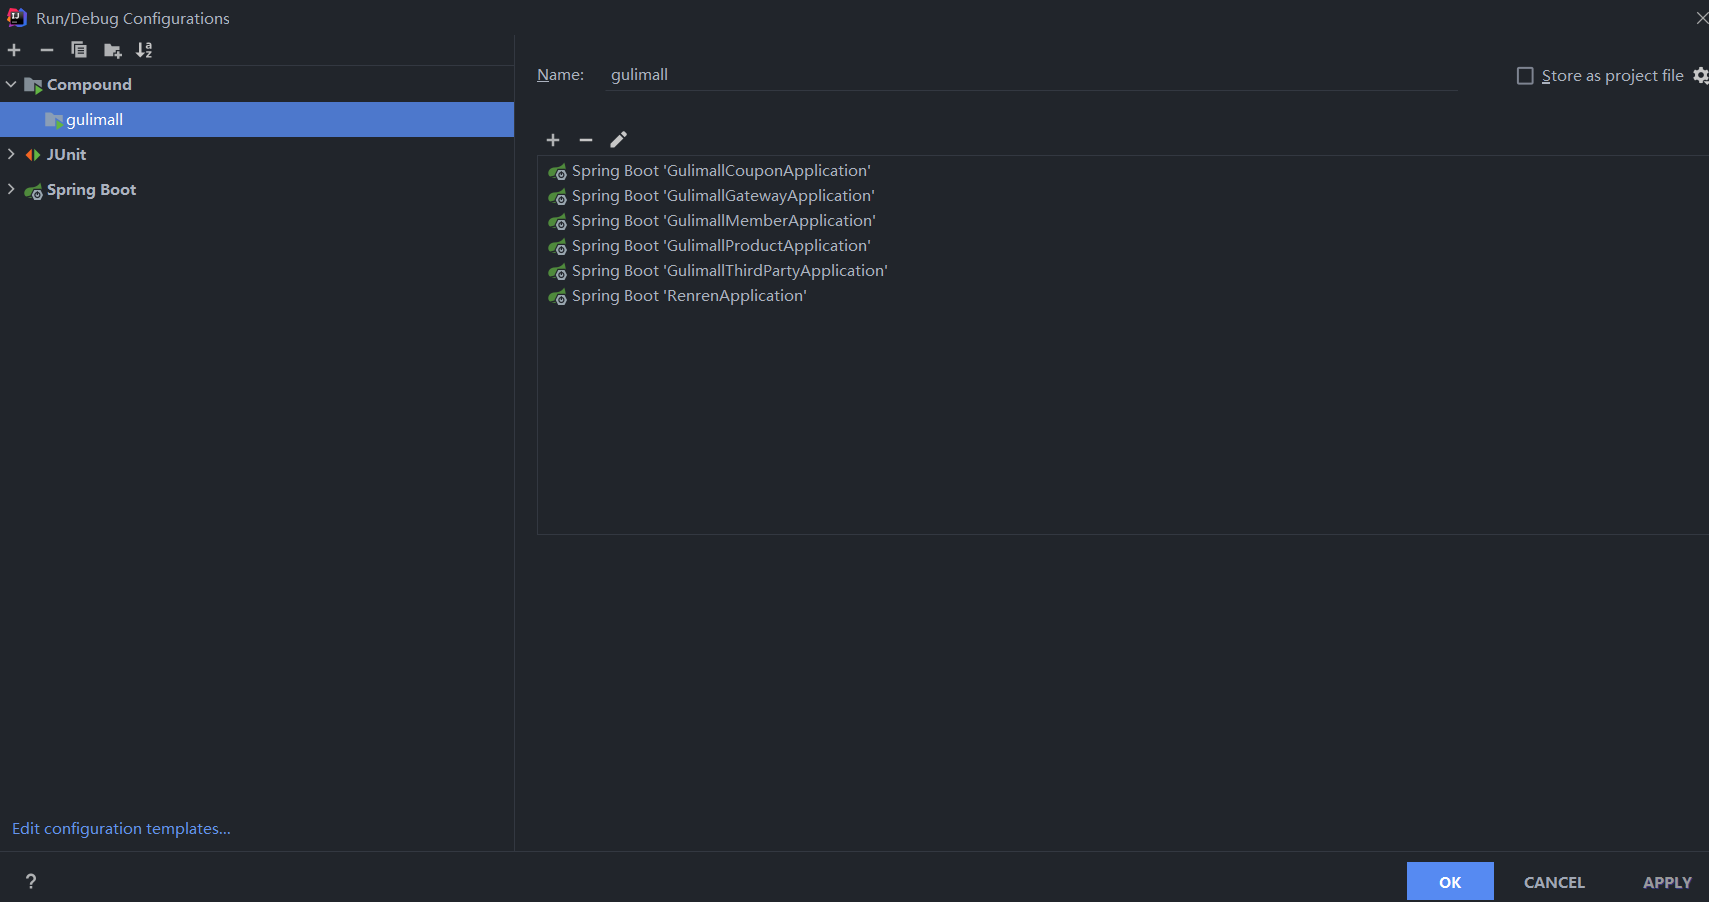
3.设置每个项目最大占用内存为100M
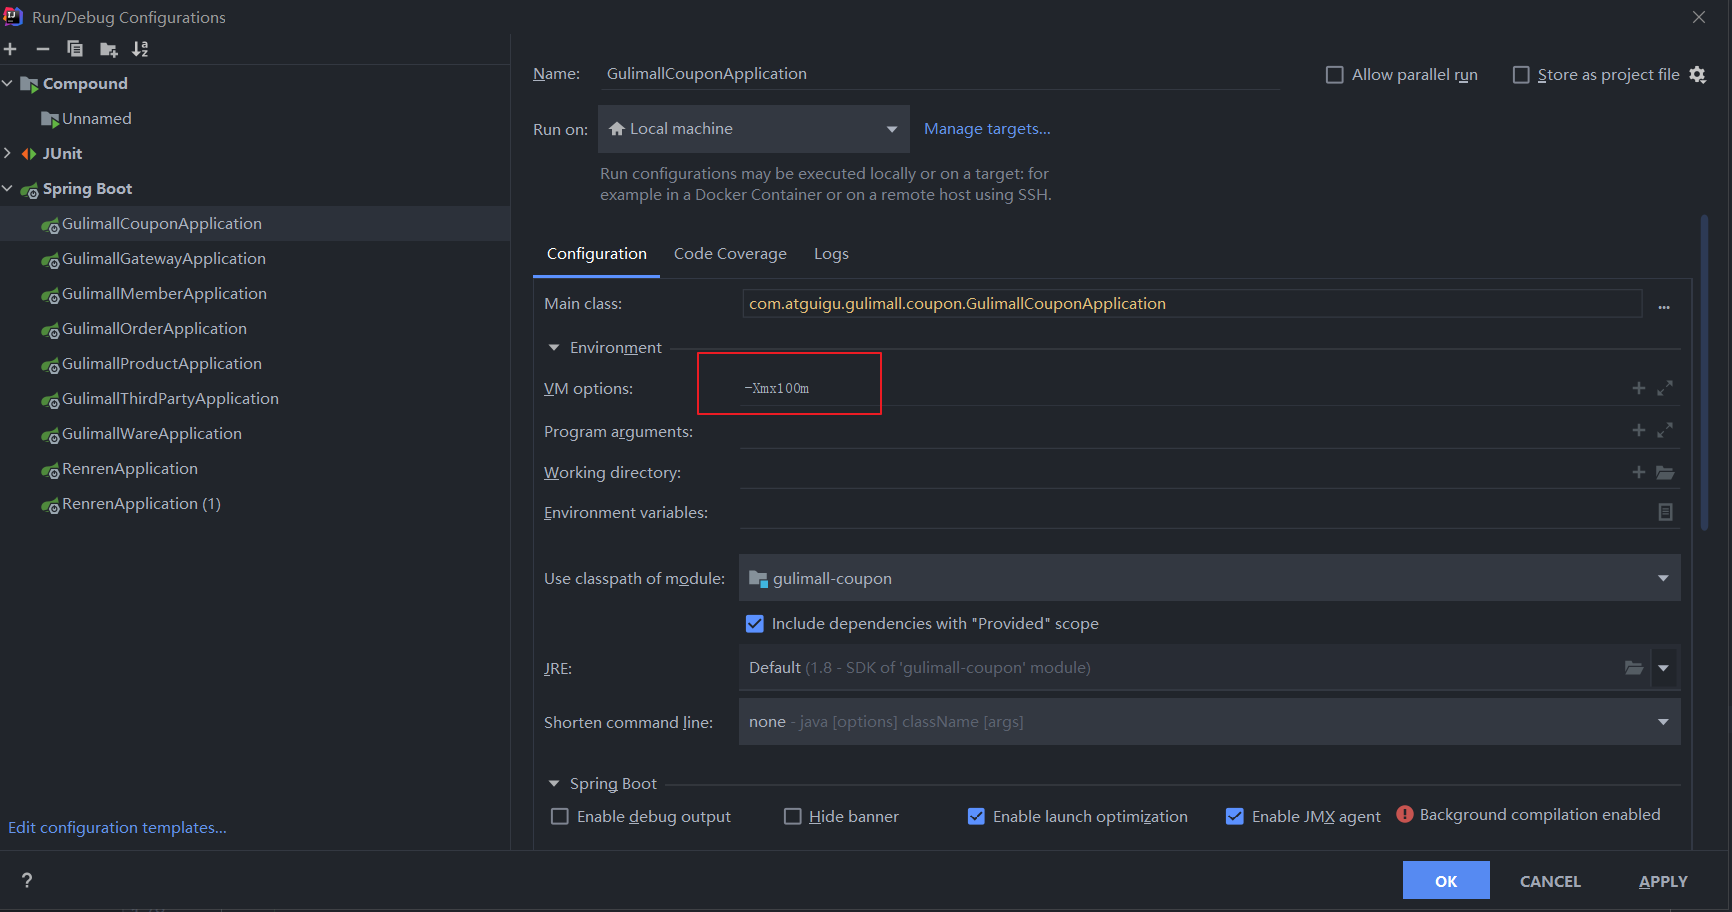
这样可以大大减少内存占用。
6.7.6商品保存debug
- 我们在进行debug的时候,因为我们在上面设置了事务的原因,而mysql默认是可重复读(REPEATABLE READ),所以我们可以暂时设置隔离级别。
如果我们使用@Transactional,不指定隔离级别,就会使用数据库的默认隔离级别
SET SESSION TRANSACTION ISOLATION LEVEL READ UNCOMMITTED
-
出现问题
SpuInfoDescEntity,mybatis默认主键为自增的,而SpuInfoDescEntity中的主键为自己输入的,所以修改主键注释

/**
* 商品id
*/
@TableId(type = IdType.INPUT)
private Long spuId;
- 抛出异常,修改
R中的getCode方法
public Integer getCode(){
return (Integer) this.get("code");
}
- 出现问题,保存sku图片时,有些图片是没有路径的,没有路径的图片,无需保存。
解决办法:在收集图片的时候进行过滤
List<SkuImagesEntity> skuImagesEntities = item.getImages().stream().map(img -> {
SkuImagesEntity skuImagesEntity = new SkuImagesEntity();
skuImagesEntity.setSkuId(skuId);
skuImagesEntity.setImgUrl(img.getImgUrl());
skuImagesEntity.setDefaultImg(img.getDefaultImg());
return skuImagesEntity;
}).filter(entity -> {
//返回true是需要,返回false是过滤掉
return !StringUtils.isNullOrEmpty(entity.getImgUrl());
}).collect(Collectors.toList());
skuImagesService.saveBatch(skuImagesEntities);
- 保存折扣信息的时候,满0元打0折这种都是无意义的,要过滤掉
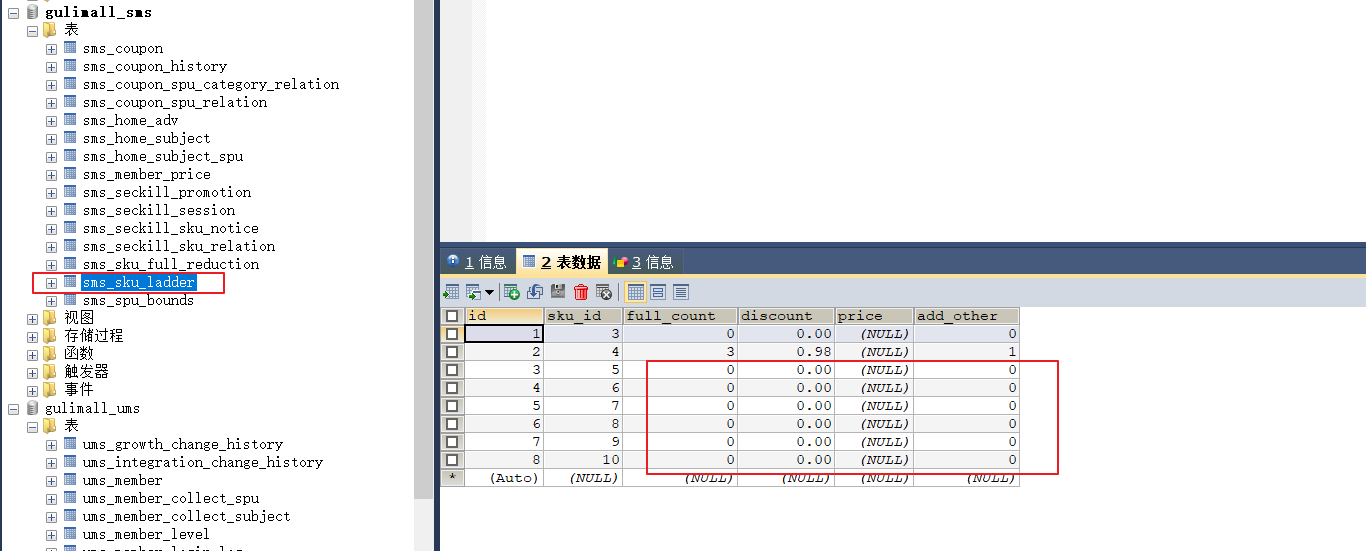
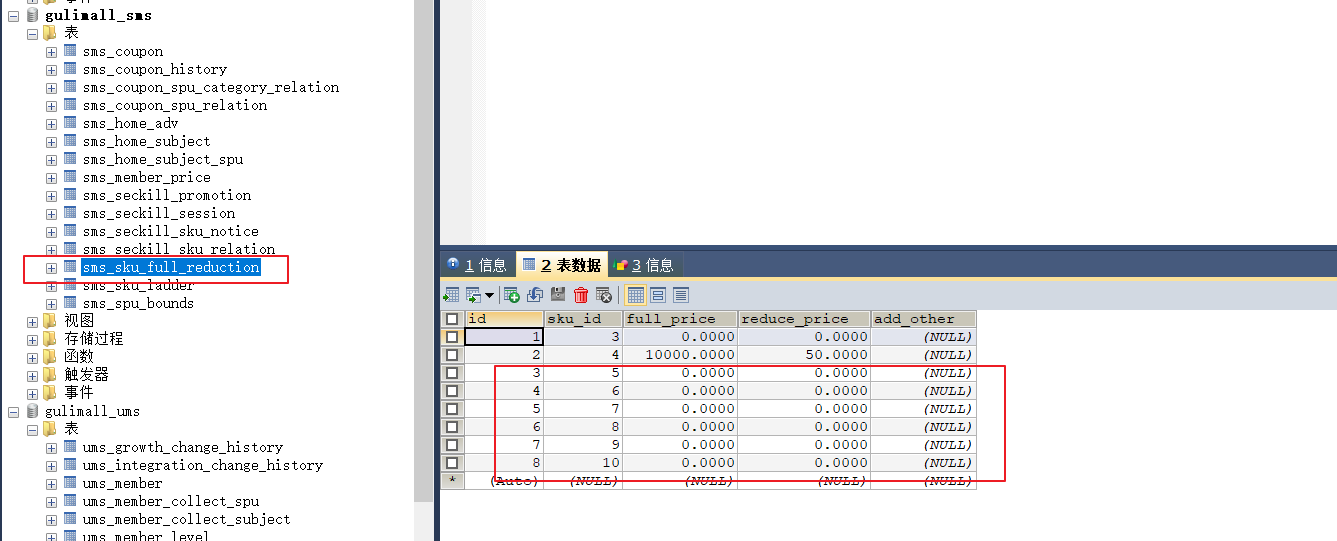
解决方法:在保存之前做判断,过滤掉小于等于0的无意义信息(不贴代码了),要注意的是判断BigDecimal进行判断时,要用compareTo函数。如果是普通的,就不需要做判断。
下面举例:
if(reductionTo.getFullCount() > 0){
skuLadderService.save(skuLadderEntity);
}
if (skuReductionTo.getFullCount() > 0 || skuReductionTo.getFullPrice().compareTo(new BigDecimal("0")) == 1){
R r1 = couponFeignService.saveSkuReduction(skuReductionTo);
if (r1.getCode() != 0){
log.error("远程保存优惠信息失败");
}
}
- 保存失败,原因【系统未知异常】的原因及解决办法


保存的时候出现上面这个原因,我们去控制台中查看得知是调用远程服务超时导致。因为会去nacos中进行寻找,我们所要做的就是等待feign稳定即可。
- 按照华为mate30pro新增方法,新增一个apple 11到数据库中。

6.8 商品管理
6.8.1 spu检索
- url:
/product/spuinfo/list
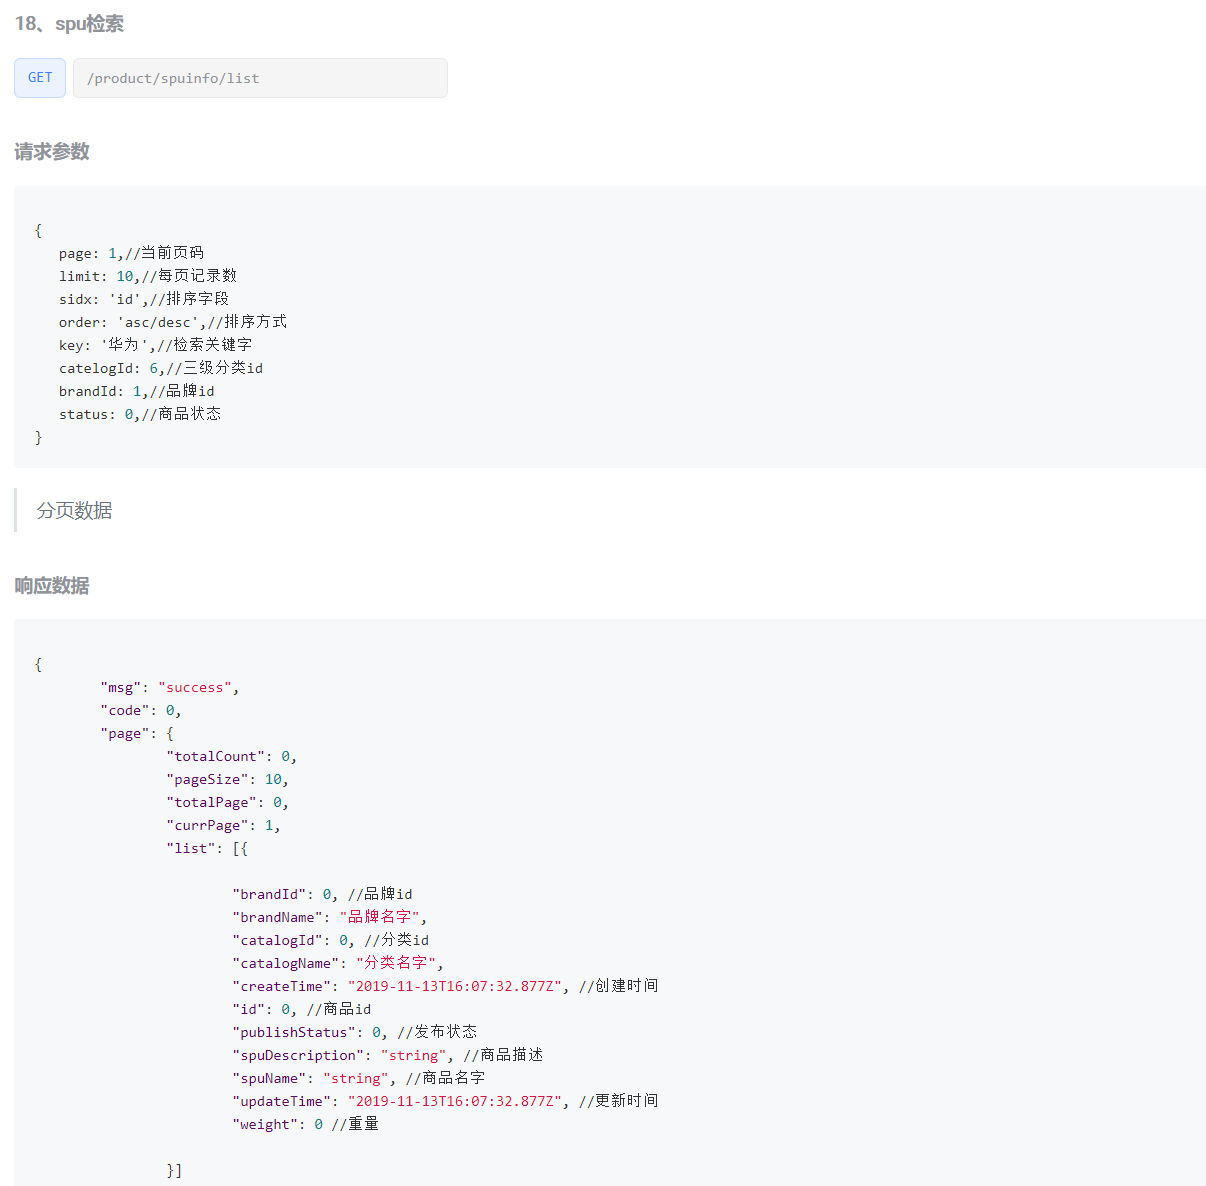
- SpuInfoController.java
@RequestMapping("/list")
//@RequiresPermissions("product:spuinfo:list")
public R list(@RequestParam Map<String, Object> params){
PageUtils page = spuInfoService.queryPageByCondition(params);
return R.ok().put("page", page);
}
- SpuInfoServiceImpl
@Override
public PageUtils queryPageByCondition(Map<String, Object> params) {
QueryWrapper<SpuInfoEntity> wrapper = new QueryWrapper<>();
/**
* status:2
* key:
* brandId:9
* catelogId:225
*/
//检索关键字不为空
String key = (String) params.get("key");
if (!StringUtils.isEmpty(key)){
wrapper.and((w) ->{
w.eq("id",key).or().like("spu_name",key);
});
}
//状态
String status = (String) params.get("status");
if (!StringUtils.isEmpty(status)){
wrapper.eq("publish_status",status);
}
//品牌id
String brandId = (String) params.get("brandId");
if (!StringUtils.isEmpty(brandId) && !"0".equalsIgnoreCase(brandId)){
wrapper.eq("brand_id",brandId);
}
//分类id
String catelogId = (String) params.get("catelogId");
if (!StringUtils.isEmpty(catelogId) && !"0".equalsIgnoreCase(catelogId)){
wrapper.eq("catalog_id",catelogId);
}
IPage<SpuInfoEntity> page = this.page(
new Query<SpuInfoEntity>().getPage(params),
wrapper
);
return new PageUtils(page);
}
- 测试

成功。
2022-11-19 21:25:16.559 DEBUG 28484 --- [io-10000-exec-7] c.a.g.product.dao.SpuInfoDao.selectPage : ==> Preparing: SELECT COUNT(1) FROM pms_spu_info WHERE (((id = ? OR spu_name LIKE ?)) AND publish_status = ? AND brand_id = ? AND catalog_id = ?)
2022-11-19 21:25:16.560 DEBUG 28484 --- [io-10000-exec-7] c.a.g.product.dao.SpuInfoDao.selectPage : ==> Parameters: 华(String), %华%(String), 0(String), 1(String), 225(String)
2022-11-19 21:25:16.565 DEBUG 28484 --- [io-10000-exec-7] c.a.g.product.dao.SpuInfoDao.selectPage : ==> Preparing: SELECT id,spu_description,spu_name,catalog_id,create_time,brand_id,weight,update_time,publish_status FROM pms_spu_info WHERE (( (id = ? OR spu_name LIKE ?) ) AND publish_status = ? AND brand_id = ? AND catalog_id = ?) LIMIT ?,?
2022-11-19 21:25:16.565 DEBUG 28484 --- [io-10000-exec-7] c.a.g.product.dao.SpuInfoDao.selectPage : ==> Parameters: 华(String), %华%(String), 0(String), 1(String), 225(String), 0(Long), 10(Long)
2022-11-19 21:25:16.566 DEBUG 28484 --- [io-10000-exec-7] c.a.g.product.dao.SpuInfoDao.selectPage : <== Total: 1
- 测试发现时间格式不对,如下图:
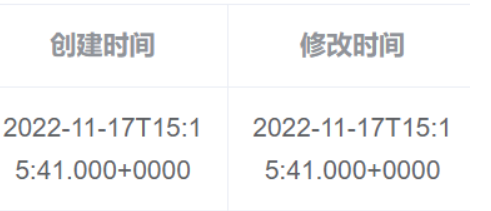
我们可以在配置文件中进行设置:

重启进行测试,结果如下,时间格式正确。
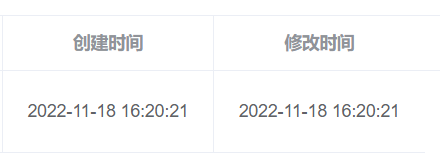
6.8.2 sku检索
1、商品系统21,url:/product/skuinfo/list
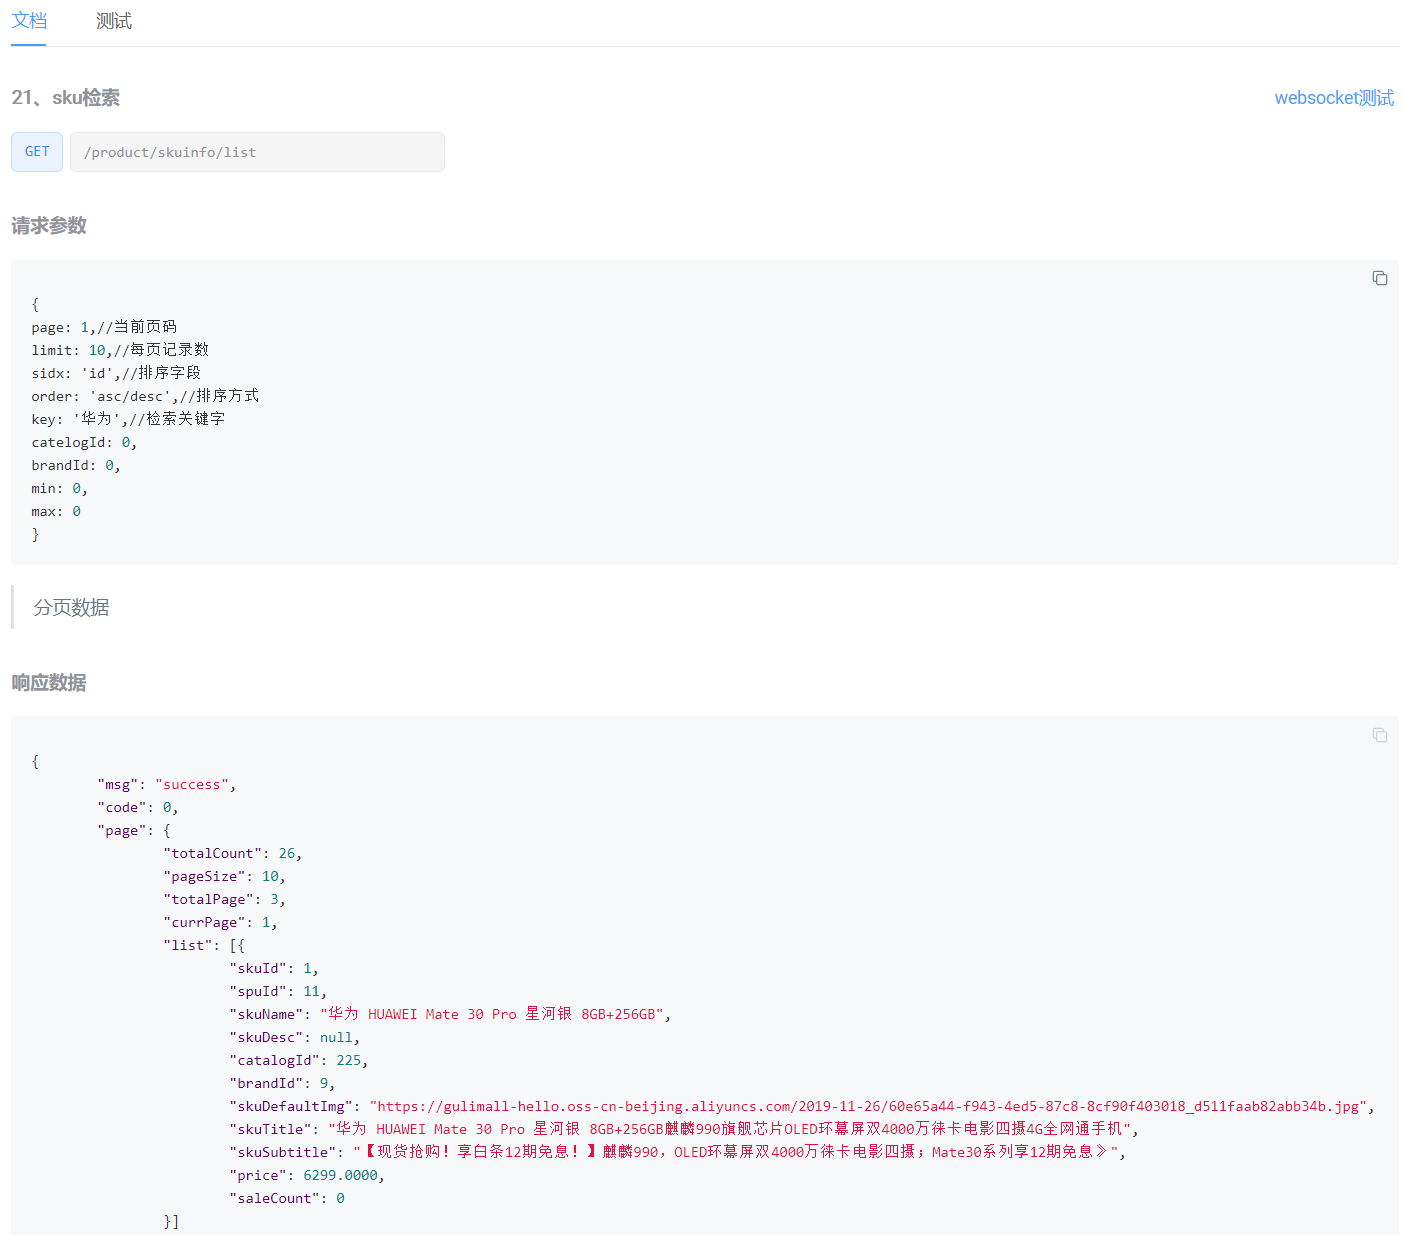
2、SkuInfoController
/**
* 列表
* /product/skuinfo/list
* sku检索
*/
@RequestMapping("/list")
//@RequiresPermissions("product:skuinfo:list")
public R list(@RequestParam Map<String, Object> params){
PageUtils page = skuInfoService.queryPageByCondition(params);
return R.ok().put("page", page);
}
3、SkuInfoServiceImpl
@Override
public PageUtils queryPageByCondition(Map<String, Object> params) {
QueryWrapper<SkuInfoEntity> queryWrapper = new QueryWrapper<>();
/**
* key:
* catelogId: 225
* brandId: 1
* min: 0
* max: 0
*/
String key = (String) params.get("key");
if (!StringUtils.isEmpty(key)) {
queryWrapper.and((wrapper) -> {
wrapper.eq("sku_id", key).or().like("sku_name", key);
});
}
String catelogId = (String) params.get("catelogId");
if (!StringUtils.isEmpty(catelogId) && !"0".equalsIgnoreCase(catelogId)) {
queryWrapper.eq("catalog_id", catelogId);
}
String brandId = (String) params.get("brandId");
if (!StringUtils.isEmpty(brandId) && !"0".equalsIgnoreCase(brandId)) {
queryWrapper.eq("brand_id", brandId);
}
String min = (String) params.get("min");
if (!StringUtils.isEmpty(min)) {
queryWrapper.ge("price", min);
}
String max = (String) params.get("max");
if (!StringUtils.isEmpty(max)) {
try {
BigDecimal bigDecimal = new BigDecimal(max);
if (bigDecimal.compareTo(new BigDecimal("0")) == 1) {
queryWrapper.le("price", max);
}
} catch (Exception e) {
}
}
IPage<SkuInfoEntity> page = this.page(
new Query<SkuInfoEntity>().getPage(params),
queryWrapper
);
return new PageUtils(page);
}
4、效果展示:

7 仓库服务
7.1 数据表的说明
用到gulimall_wms数据库中的的两张表,第一张是wms_ware_info,表示有几个仓库
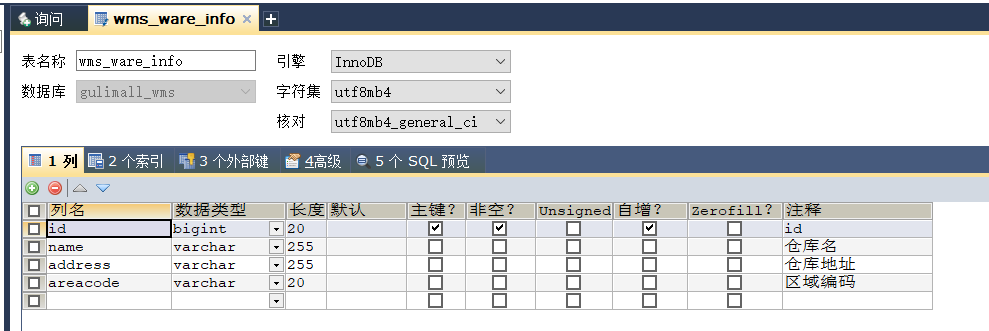
第二张表是wms_ware_sku,表每个仓库有几个sku商品
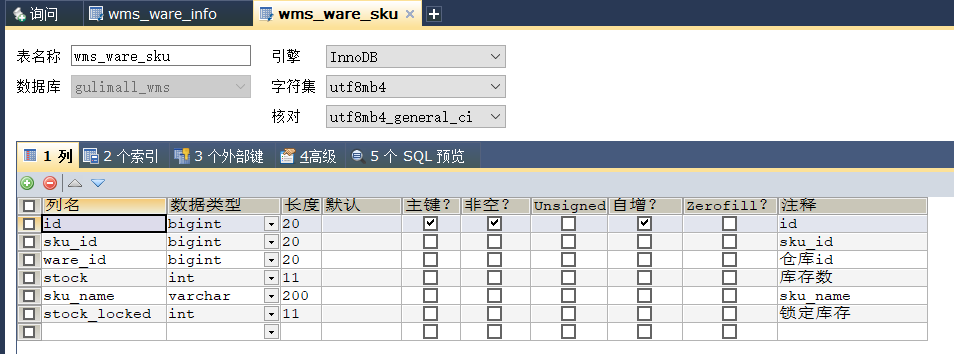
7.2 整合仓库服务
1、要整合仓库服务,首先把仓库服务注册到nacos中
spring:
cloud:
nacos:
discovery:
server-addr: 127.0.0.1:8848
application:
name: gulimall-ware
2、配置网关
- id: ware_route
uri: lb://gulimall-ware
predicates:
- Path=/api/ware/**
filters:
- RewritePath=/api/(?<segment>/?.*), /$\{segment}
3、配置后测试仓库维护

4、实现仓库模糊查询功能
点击查询,查看url
http://localhost:88/api/ware/wareinfo/list?t=1633696575331&page=1&limit=10&key=
WareInfoController.java
/**
* 列表
*/
@RequestMapping("/list")
//@RequiresPermissions("ware:wareinfo:list")
public R list(@RequestParam Map<String, Object> params){
PageUtils page = wareInfoService.queryPage(params);
return R.ok().put("page", page);
}
WareInfoServiceImpl.java
@Override
public PageUtils queryPage(Map<String, Object> params) {
QueryWrapper<WareInfoEntity> wareInfoEntityQueryWrapper = new QueryWrapper<>();
// 模糊查询
String key = (String) params.get("key");
if (!StringUtils.isEmpty(key)){
wareInfoEntityQueryWrapper.eq("id",key).or()
.like("name",key)
.or().like("address",key)
.or().like("areacode",key);
}
IPage<WareInfoEntity> page = this.page(
new Query<WareInfoEntity>().getPage(params),
wareInfoEntityQueryWrapper
);
return new PageUtils(page);
}
设置日志输出级别,方便查看sql语句
logging:
level:
com.atguigu: debug
效果展示

7.3 查询库存的模糊查询
1、库存系统02,url:/ware/waresku/list
2、实现库存模糊查询功能,WareSkuServiceImpl.java
@Override
public PageUtils queryPage(Map<String, Object> params) {
// skuId: 1
// wareId: 2
QueryWrapper<WareSkuEntity> queryWrapper = new QueryWrapper<>();
String skuId = (String) params.get("skuId");
if (!StringUtils.isEmpty(skuId)){
queryWrapper.eq("sku_id",skuId);
}
String wareId = (String) params.get("wareId");
if (!StringUtils.isEmpty(wareId)){
queryWrapper.eq("ware_id",wareId);
}
IPage<WareSkuEntity> page = this.page(
new Query<WareSkuEntity>().getPage(params),
queryWrapper
);
return new PageUtils(page);
}
3、效果展示:

7.4 采购需求的模糊查询
1、库存系统03,url:/ware/purchasedetail/list
2、PurchaseDetailServiceImpl.java
@Override
public PageUtils queryPage(Map<String, Object> params) {
QueryWrapper<PurchaseDetailEntity> queryWrapper = new QueryWrapper<>();
// status: 0,//状态
//wareId: 1,//仓库id
//模糊查询
String key = (String) params.get("key");
if (!StringUtils.isEmpty(key)){
// purchase_id sku_id
queryWrapper.and(w ->{
w.eq("purchase_id",key).or().eq("sku_id",key);
});
}
//状态
String status = (String) params.get("status");
if (!StringUtils.isEmpty(status)){
queryWrapper.eq("status",status);
}
//仓库
String wareId = (String) params.get("wareId");
if (!StringUtils.isEmpty(wareId)){
queryWrapper.eq("ware_id",wareId);
}
IPage<PurchaseDetailEntity> page = this.page(
new Query<PurchaseDetailEntity>().getPage(params),
queryWrapper
);
return new PageUtils(page);
}
7.5 合并采购流程
1、采购逻辑,新建采购需求后还要可以提供合并采购单,比如一个仓库的东西可以合并到一起,让采购人员一趟采购完
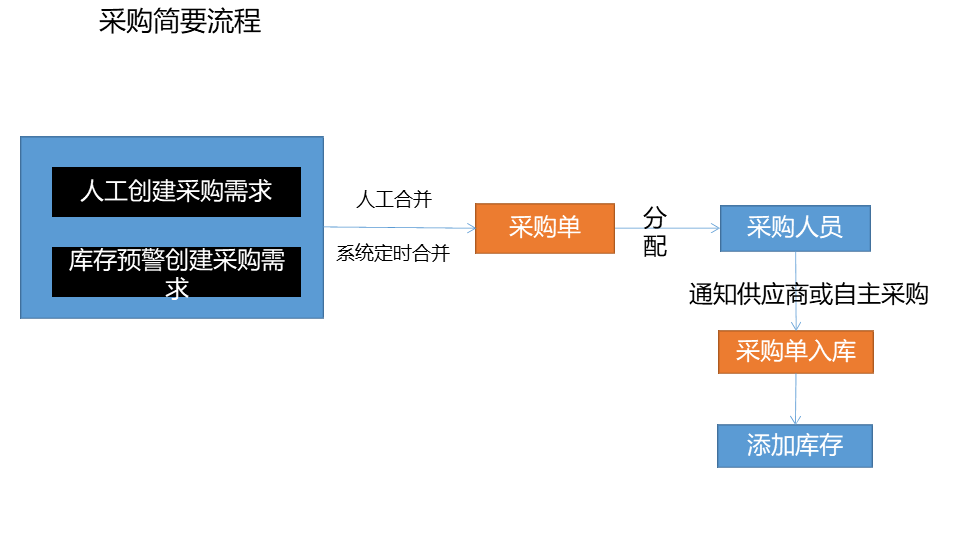
新建采购需求后还要可以提供合并采购单,比如一个仓库的东西可以合并到一起,让采购人员一趟采购完

新建采购单,可以在采购单后面分配给员工,员工可以在系统管理->管理员列表中新建

7.6 查询未领取的采购单
1、库存系统05、url:/ware/purchase/unreceive/list, 查询未领取的采购单

2、PurchaseController.java
/**
* 查询未领取的采购单
* ///ware/purchase/unreceive/list
* @param params
* @return
*/
@RequestMapping("/unreceive/list")
//@RequiresPermissions("ware:purchase:list")
public R unreceivelist(@RequestParam Map<String, Object> params){
PageUtils page = purchaseService.queryPageUnreceive(params);
return R.ok().put("page", page);
}
3、在 gulimall-common 服务下新建常量枚举类constant.WareConstant
public class WareConstant {
/** 采购单状态枚举 */
public enum PurchaseStatusEnum {
CREATED(0,"新建"), ASSIGNED(1,"已分配"),
RECEIVE(2,"已领取"), FINISH(3,"已完成"),
HASERROR(4,"有异常");
private int code;
private String msg;
PurchaseStatusEnum(int code, String msg) {
this.code = code;
this.msg = msg;
}
public int getCode() {
return code;
}
public String getMsg() {
return msg;
}
}
/** 采购需求枚举 */
public enum PurchaseDetailStatusEnum {
CREATED(0,"新建"), ASSIGNED(1,"已分配"),
RECEIVE(2,"正在采购"), FINISH(3,"已完成"),
HASERROR(4,"采购失败");
private int code;
private String msg;
PurchaseDetailStatusEnum(int code, String msg) {
this.code = code;
this.msg = msg;
}
public int getCode() {
return code;
}
public String getMsg() {
return msg;
}
}
}
4、queryPageUnreceive.java
@Override
public PageUtils queryPageUnreceive(Map<String, Object> params) {
IPage<PurchaseEntity> page = this.page(
new Query<PurchaseEntity>().getPage(params),
new QueryWrapper<PurchaseEntity>().eq("status",0).or().eq("status",1)
);
return new PageUtils(page);
}
5、效果展示

7.7 合并采购需求
1、库存系统04,url:/ware/purchase/merge
选择要合并的采购需求,然后合并到整单

如果不选择整单id,则自动创建新的采购单
2、新建MergerVo.java
@Data
public class MergeVo {
private Long purchaseId; //整单id
private List<Long> items; //[1,2,3,4] //合并项集合
}
3、分配,就是修改【采购需求】里对应的【采购单id、采购需求状态】,即purchase_detail表
并且不能重复分配采购需求给不同的采购单,如果还没去采购,或者采购失败,就可以修改
PurchaseController.java
/**
* 合并采购需求
* // /ware/purchase/merge
* @param mergeVo
* @return
*/
@PostMapping("/merge")
public R merge(@RequestBody MergeVo mergeVo){
purchaseService.mergePurchase(mergeVo);
return R.ok();
}
PurchaseServiceImpl.java
@Override
public void mergePurchase(MergeVo mergeVo) {
Long purchaseId = mergeVo.getPurchaseId();
if (purchaseId == null){ //说明是新增的
//1.新建一个
PurchaseEntity purchaseEntity = new PurchaseEntity();
purchaseEntity.setStatus(WareConstant.PurchaseStatusEnum.CREATED.getCode());
purchaseEntity.setCreateTime(new Date());
purchaseEntity.setUpdateTime(new Date());
this.save(purchaseEntity);
purchaseId = purchaseEntity.getId();
}
//合并
List<Long> items = mergeVo.getItems();
Long finalPurchaseId = purchaseId;
List<PurchaseDetailEntity> collect = items.stream().map(i -> {
PurchaseDetailEntity detailEntity = new PurchaseDetailEntity();
detailEntity.setId(i);
detailEntity.setPurchaseId(finalPurchaseId);
detailEntity.setStatus(WareConstant.PurchaseDetailStatusEnum.ASSIGNED.getCode());
return detailEntity;
}).collect(Collectors.toList());
detailService.updateBatchById(collect);
//修改一些更新日期
PurchaseEntity purchaseEntity = new PurchaseEntity();
purchaseEntity.setId(purchaseId);
purchaseEntity.setUpdateTime(new Date());
this.updateById(purchaseEntity);
}
在配置文件中对时间json进行格式化
jackson:
date-format: yyyy-MM-dd HH:mm:ss
4、效果展示
合并

新建

7.8 领取采购单
采购单分配给了采购人员,采购人员在手机端领取采购单,此时的采购单应该为新建或已分配状态,在采购人员领取后采购单的状态变为已领取,采购需求的状态变为正在采购
1、库存系统06、url:/ware/purchase/received
2、PurchaseController.java
/*
//ware/purchase/received
* 领取采购单
* @param ids
* @return
*/
@PostMapping("/received")
public R received(@RequestBody List<Long> ids){
purchaseService.received(ids);
return R.ok();
}
3、PurchaseServiceImpl.java
/**
*
* @param ids 采购单id
*/
@Override
public void received(List<Long> ids) {
//1.确认当前采购单是新建或者已分配状态
List<PurchaseEntity> collect = ids.stream().map(id -> {
PurchaseEntity byId = this.getById(id);
return byId;
}).filter(item -> {
//判断状态
if (item.getStatus() == WareConstant.PurchaseStatusEnum.CREATED.getCode() ||
item.getStatus() == WareConstant.PurchaseStatusEnum.ASSIGNED.getCode()) {
return true;
}
return false;
}).map(item ->{
item.setStatus(WareConstant.PurchaseStatusEnum.RECEIVE.getCode()); //设置最新的状态
item.setUpdateTime(new Date()); //设置修改的时间
return item;
}).collect(Collectors.toList());
//2.改变采购单的状态
this.updateBatchById(collect);
//3.改变采购项的状态
collect.forEach((item) ->{
List<PurchaseDetailEntity> entities = detailService.listDetailByPurchaseId(item.getId());
List<PurchaseDetailEntity> detailEntities = entities.stream().map(entity -> {
PurchaseDetailEntity entity1 = new PurchaseDetailEntity();
entity1.setId(entity.getId());
entity1.setStatus(WareConstant.PurchaseDetailStatusEnum.RECEIVE.getCode());//更新状态
return entity1;
}).collect(Collectors.toList());
detailService.updateBatchById(detailEntities);
});
}
其中用到的 listDetailByPurchaseId 方法(PurchaseDetailServiceImpl)
@Override
public List<PurchaseDetailEntity> listDetailByPurchaseId(Long id) {
List<PurchaseDetailEntity> purchaseId = this.list(new QueryWrapper<PurchaseDetailEntity>().eq("purchase_id", id));
return purchaseId;
}
4、用 APIfox 进行 采购人员领取采购单测试
http://localhost:88/api/ware/purchase/received
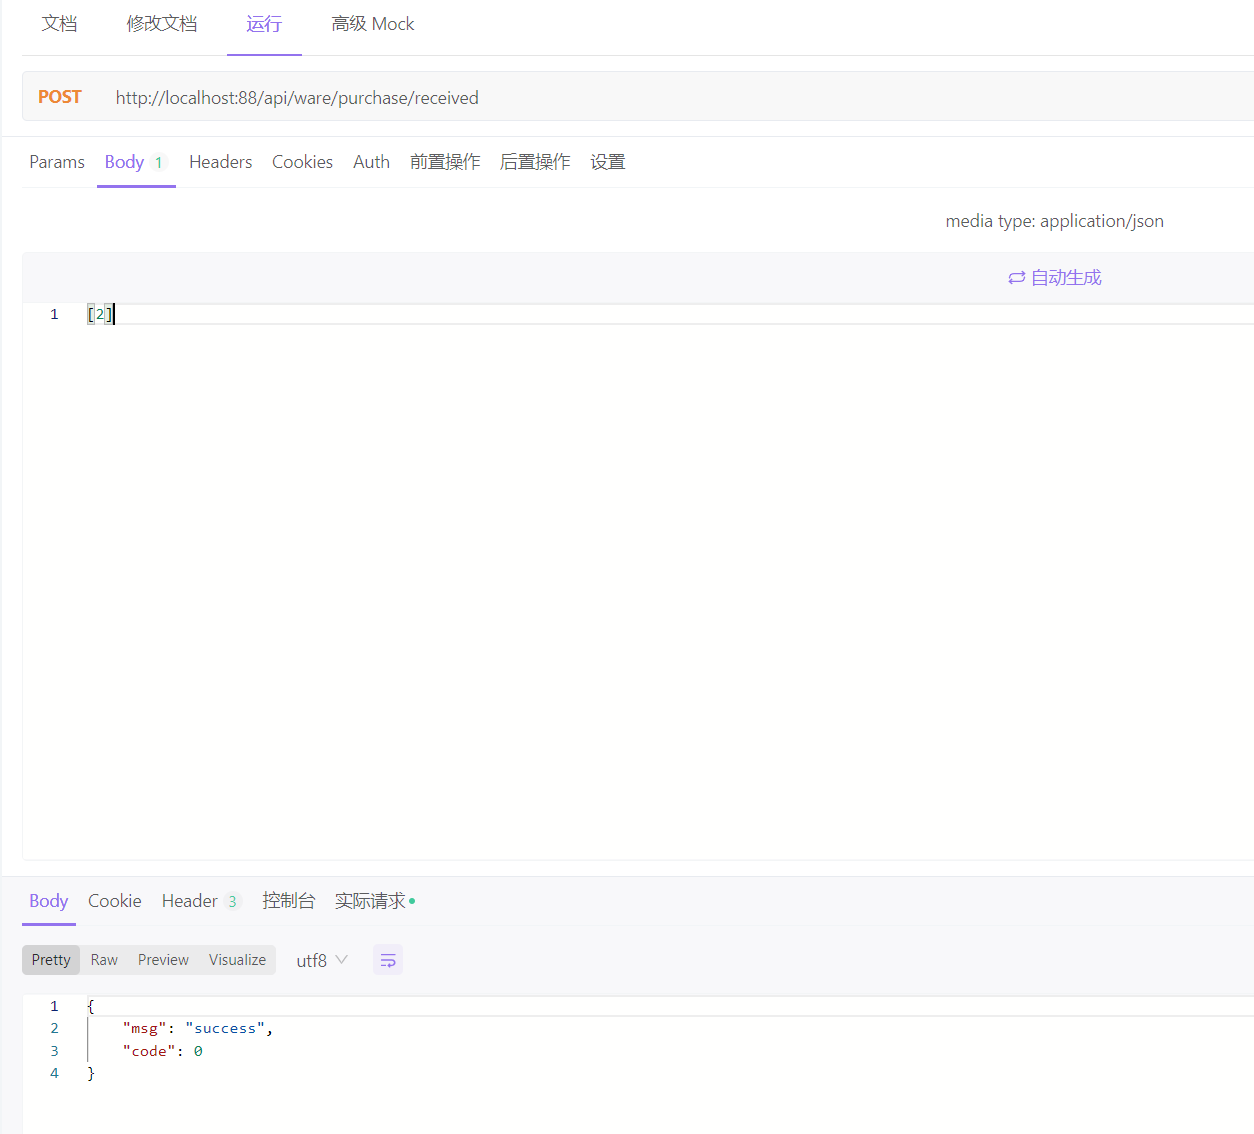
5、效果展示
采购需求变为 正在采购

采购单2号变成 已领取

7.9 完成采购
完成采购的步骤:
判断所有采购需求的状态,采购需求全部完成时,采购单状态才为完成
采购项完成的时候,增加库存(调用远程获取skuName)
加上分页插件
1、库存系统07,url:/ware/purchase/done
2、新建PurchaseItemDoneVo,PurchaseDoneVo
@Data
public class PurchaseDoneVo {
@NotNull
private Long id;//采购单id
private List<PurchaseItemDoneVo> items;////完成/失败的需求详情
}
@Data
public class PurchaseItemDoneVo {
// [{itemId:1,status:4,reason:""}]
private Long itemId;
private Integer status;
private String reason;
}
3、PurchaseController.java
/**
* 完成采购
* // /ware/purchase/done
* @param doneVo
* @return
*/
@PostMapping("/done")
public R finish(@RequestBody PurchaseDoneVo doneVo){
purchaseService.done(doneVo);
return R.ok();
}
4、PurchaseServiceImpl.java
@Autowired
PurchaseDetailService detailService;
@Autowired
WareSkuService wareSkuService;
@Transactional
@Override
public void done(PurchaseDoneVo doneVo) {
Long id = doneVo.getId();
//2.改变采购项的状态
Boolean flag = true;
List<PurchaseItemDoneVo> items = doneVo.getItems();
List<PurchaseDetailEntity> updates = new ArrayList<>();
for (PurchaseItemDoneVo item : items) {
PurchaseDetailEntity detailEntity = new PurchaseDetailEntity();
//采购需求失败
if (item.getStatus() == WareConstant.PurchaseDetailStatusEnum.HASERROR.getCode()){
flag = false;
detailEntity.setStatus(item.getStatus());
}else{
detailEntity.setStatus(WareConstant.PurchaseDetailStatusEnum.FINISH.getCode());
//3.将成功采购的进行入库
PurchaseDetailEntity entity = detailService.getById(item.getItemId());//查出当前采购项的详细信息
wareSkuService.addStock(entity.getSkuId(),entity.getWareId(),entity.getSkuNum());
}
////采购需求成功
detailEntity.setId(item.getItemId());
updates.add(detailEntity);
}
detailService.updateBatchById(updates);
//1.改变采购单的状态
PurchaseEntity purchaseEntity = new PurchaseEntity();
purchaseEntity.setId(id);
purchaseEntity.setStatus(flag?WareConstant.PurchaseStatusEnum.FINISH.getCode() : WareConstant.PurchaseStatusEnum.HASERROR.getCode());
this.updateById(purchaseEntity);
}
5、新建feign.ProductFeignService接口,用来远程获取skuName
ProductFeignService.java
@FeignClient("gulimall-product")
public interface ProductFeignService {
/**
* 这里路径有两种写法
* 1.让所有请求过网关:
* 1)、@FeignClient("gulimall-gateway"):给gulimall-gateway所在的机器发请求
* 2)、/api/product/skuinfo/info/{skuId}
*
* 2.直接让后台指定服务器
* 1)、@FeignClient("gulimall-product")
* 2)、/product/skuinfo/info/{skuId}
*
* @return
*/
@RequestMapping("/product/skuinfo/info/{skuId}")
//@RequiresPermissions("product:skuinfo:info")
public R info(@PathVariable("skuId") Long skuId);
}
6、主启动类加上注解@EnableFeignClients
7、WareSkuServiceImpl.java 实现入库操作
@Autowired
WareSkuDao wareSkuDao;
@Autowired
ProductFeignService productFeignService;
@Override
public void addStock(Long skuId, Long wareId, Integer skuNum) {
//1.判断如果还没有这个库存记录就新增
List<WareSkuEntity> entities = wareSkuDao.selectList(new QueryWrapper<WareSkuEntity>().eq("sku_id", skuId).eq("ware_id", wareId));
if (entities == null || entities.size() == 0){ //如果仓库中没有商品的话新增
WareSkuEntity skuEntity = new WareSkuEntity();
skuEntity.setSkuId(skuId);
skuEntity.setStock(skuNum);
skuEntity.setWareId(wareId);
skuEntity.setStockLocked(0);
//TODO 远程查询sku的名字,如果失败,整个事务无需回滚
//1.自己catch异常
try {
R info = productFeignService.info(skuId);
Map<String,Object> data = (Map<String, Object>) info.get("skuInfo");
if (info.getCode() == 0){
skuEntity.setSkuName((String) data.get("skuName"));
}
}catch(Exception e){
}
//TODO 还可以用什么办法让异常出现以后不会滚? 高级
skuEntity.setSkuName("");
wareSkuDao.insert(skuEntity);
}else { //如果仓库中有商品的话更新,增加库存
wareSkuDao.addStock(skuId,wareId,skuNum);
}
}
8、WareInfoDao.xml
<update id="addStock">
UPDATE `wms_ware_sku` SET stock = stock +#{skuNum} WHERE sku_id =#{skuId} AND ware_id =#{wareId}
</update>
9、添加分页插件,复制product服务中的即可
MyBatisConfig.java
@EnableTransactionManagement //开启事务
@MapperScan("com.atguigu.gulimall.ware.dao")
@Configuration
public class MyBatisConfig {
//引入分页插件
@Bean
public PaginationInterceptor paginationInterceptor(){
PaginationInterceptor paginationInterceptor = new PaginationInterceptor();
//设置请求的页面大于最大页后操作,true调回到首页,false继续请求,默认false
paginationInterceptor.setOverflow(true);
//设置最大单页限制数量,默认 500 条,-1 不受限制
paginationInterceptor.setLimit(1000);
return paginationInterceptor;
}
}
10、效果展示:
POST http://localhost:88/api/ware/purchase/done
Content-Type: application/json
{
"id": 2,
"items": [
{"itemId":1,"status":3,"reason":"完成"},
{"itemId":2,"status":4,"reason":"无货"}
]
}


7.10 获取spu规格
1、商品系统22、url:/product/attr/base/listforspu/{spuId}
2、AttrController.java
/**
* 获取spu规格
* @param spuId
* @return
*/
// /product/attr/base/listforspu/{spuId}
@GetMapping("/base/listforspu/{spuId}")
public R baseAttrlistforspu(@PathVariable("spuId") Long spuId){
List<ProductAttrValueEntity> entities = productAttrValueService.baseAttrlistforspu(spuId);
return R.ok().put("data",entities);
}
3、ProductAttrValueServiceImpl.java
@Override
public List<ProductAttrValueEntity> baseAttrlistforspu(Long spuId) {
List<ProductAttrValueEntity> entities = this.baseMapper.selectList(new QueryWrapper<ProductAttrValueEntity>().eq("spu_id", spuId));
return entities;
}
4、效果展示:测试,点击规格

ps:如果出现 400 页面提示:
点击规格找不到页面,解决如下:往数据库中插入信息
INSERT INTO sys_menu (menu_id, parent_id, name, url, perms, type, icon, order_num) VALUES (76, 37, '规格维护', 'product/attrupdate', '', 2, 'log', 0);

7.11修改商品规格
1、商品系统23,url:/product/attr/update/{spuId}
2、AttrController.java
/**
* // /product/attr/update/{spuId}
* 修改商品规格
* @param spuId
* @param entities
* @return
*/
@PostMapping("/update/{spuId}")
public R updateSpuAttr(@PathVariable("spuId") Long spuId,
@RequestBody List<ProductAttrValueEntity> entities){
productAttrValueService.updateSpuAttr(spuId,entities);
return R.ok();
}
3、ProductAttrValueServiceImpl.java
因为修改的时候,有新增有修改有删除。 所以就先把spuId对应的所有属性都删了,再新增
@Transactional
@Override
public void updateSpuAttr(Long spuId, List<ProductAttrValueEntity> entities) {
//1. 删除这个 spuId之前对应的所有属性
this.baseMapper.delete(new QueryWrapper<ProductAttrValueEntity>().eq("spu_id",spuId));
//2.保存最新的 spu 属性
List<ProductAttrValueEntity> collect = entities.stream().map(item -> {
item.setSpuId(spuId);
return item;
}).collect(Collectors.toList());
this.saveBatch(collect);
}
4、效果展示:添加机身材质工艺

8 项目中的分页逻辑分析
1、以spu检索为例,请求参数为:
{
page: 1,//当前页码
limit: 10,//每页记录数
sidx: 'id',//排序字段
order: 'asc/desc',//排序方式
key: '华为',//检索关键字
catelogId: 6,//三级分类id
brandId: 1,//品牌id
status: 0,//商品状态
}
2、响应参数为:
{
"msg": "success",
"code": 0,
"page": {
"totalCount": 0,
"pageSize": 10,
"totalPage": 0,
"currPage": 1,
"list": [{
"brandId": 0, //品牌id
"brandName": "品牌名字",
"catalogId": 0, //分类id
"catalogName": "分类名字",
"createTime": "2019-11-13T16:07:32.877Z", //创建时间
"id": 0, //商品id
"publishStatus": 0, //发布状态
"spuDescription": "string", //商品描述
"spuName": "string", //商品名字
"updateTime": "2019-11-13T16:07:32.877Z", //更新时间
"weight": 0 //重量
}]
}
}
3、page中的数据由common里com.xmh.common.utils.PageUils类封装而成,PageUils的构造器中要传入参数:Ipage接口的实现类page,从page中读取到数据
/**
* 分页工具类
*
* @author Mark sunlightcs@gmail.com
*/
public class PageUtils implements Serializable {
private static final long serialVersionUID = 1L;
/**
* 总记录数
*/
private int totalCount;
/**
* 每页记录数
*/
private int pageSize;
/**
* 总页数
*/
private int totalPage;
/**
* 当前页数
*/
private int currPage;
/**
* 列表数据
*/
private List<?> list;
/**
* 分页
* @param list 列表数据
* @param totalCount 总记录数
* @param pageSize 每页记录数
* @param currPage 当前页数
*/
public PageUtils(List<?> list, int totalCount, int pageSize, int currPage) {
this.list = list;
this.totalCount = totalCount;
this.pageSize = pageSize;
this.currPage = currPage;
this.totalPage = (int)Math.ceil((double)totalCount/pageSize);
}
/**
* 分页
*/
public PageUtils(IPage<?> page) {
this.list = page.getRecords();
this.totalCount = (int)page.getTotal();
this.pageSize = (int)page.getSize();
this.currPage = (int)page.getCurrent();
this.totalPage = (int)page.getPages();
}
4、构造一个page需要传入两个参数,第一个参数是page,第二个参数是QueryWrapper(查询条件)
@Override
public PageUtils queryPageByCondition(Map<String, Object> params) {
QueryWrapper<SpuInfoEntity> wrapper = new QueryWrapper<>();
IPage<SpuInfoEntity> page = this.page(
new Query<SpuInfoEntity>().getPage(params),
wrapper
);
return new PageUtils(page);
}
page的方法,返回根据QueryWrapper和page查出的封装好的IPage实现类
@Override
public IPage<T> page(IPage<T> page, Wrapper<T> queryWrapper) {
return baseMapper.selectPage(page, queryWrapper);
}
5、第一个参数page,由com.atguigu.common.utils.Query类封装,调用Query类的getPage方法,根据前端传来的参数返回一个IPage实现类
/**
* 查询参数
*
* @author Mark sunlightcs@gmail.com
*/
public class Query<T> {
public IPage<T> getPage(Map<String, Object> params) {
return this.getPage(params, null, false);
}
public IPage<T> getPage(Map<String, Object> params, String defaultOrderField, boolean isAsc) {
//分页参数
long curPage = 1;
long limit = 10;
if(params.get(Constant.PAGE) != null){
curPage = Long.parseLong((String)params.get(Constant.PAGE));
}
if(params.get(Constant.LIMIT) != null){
limit = Long.parseLong((String)params.get(Constant.LIMIT));
}
//分页对象
Page<T> page = new Page<>(curPage, limit);
//分页参数
params.put(Constant.PAGE, page);
//排序字段
//防止SQL注入(因为sidx、order是通过拼接SQL实现排序的,会有SQL注入风险)
String orderField = SQLFilter.sqlInject((String)params.get(Constant.ORDER_FIELD));
String order = (String)params.get(Constant.ORDER);
//前端字段排序
if(StringUtils.isNotEmpty(orderField) && StringUtils.isNotEmpty(order)){
if(Constant.ASC.equalsIgnoreCase(order)) {
return page.addOrder(OrderItem.asc(orderField));
}else {
return page.addOrder(OrderItem.desc(orderField));
}
}
//没有排序字段,则不排序
if(StringUtils.isBlank(defaultOrderField)){
return page;
}
//默认排序
if(isAsc) {
page.addOrder(OrderItem.asc(defaultOrderField));
}else {
page.addOrder(OrderItem.desc(defaultOrderField));
}
return page;
}
}
总的流程就是:
- 前端传过来分页的参数
- 根据参数新建IPage接口的实现类page,需要两个参数(page,wrapper)
- 第一个参数用com.atguigu.common.utils.Query中的.getpage(param)方法生成
- 第二个参数就是查询条件
- 生成的page,传入com.atguigu.common.utils.PageUils中,封装成PageUils
最后在controller中把返回的PageUtils封装成R返回给前端
9 bug收集
下面是其他网友出现的一些bug问题,这里简单收集了一下,希望有用!
84 pubsub、publish报错
解决如下:
1 npm install --save pubsub-js
2 在src下的main.js中引用:
import PubSub from 'pubsub-js'
Vue.prototype.PubSub = PubSub
85 数据库里少了value_type字段
解决如下:
在数据库的 pms_attr 表加上value_type字段,类型为tinyint就行;
在代码中,AttyEntity.java、AttrVo.java中各添加:private Integer valueType,
在AttrDao.xml中添加:<result property="valueType" column="value_type"/>
85 规格参数显示不出来页面,原因是要在每个分组属性上至少关联一个属性。控制台foreach报错null
解决如下:
在spuadd.vue的showBaseAttrs()方法中在 //先对表单的baseAttrs进行初始化加上非空判断 if (item.attrs != null)就可以了
data.data.forEach(item => {
let attrArray = [];
if (item.attrs != null) {
item.attrs.forEach(attr => {
attrArray.push({
attrId: attr.attrId,
attrValues: "",
showDesc: attr.showDesc
});
});
}
this.dataResp.baseAttrs.push(attrArray);
});
92 feign超时异常导致读取失败
解决如下:
在gulimall-product的application.yml添加如下即可解决(时间设置长点就行了)
ribbon:
ReadTimeout: 30000
ConnectTimeout: 30000
100 点击规格找不到页面,以及规格回显问题解决
1 点击规格找不到页面,解决如下:
INSERT INTO sys_menu (menu_id, parent_id, name, url, perms, type, icon, order_num) VALUES (76, 37, '规格维护', 'product/attrupdate', '', 2, 'log', 0);
2 规格回显问题不出来
原因:
因为那个属性的值类型是多选而pms_product_attr_value这个表里面的属性值存的单个值。前端展示将这个值用;切割成数组来展示的。切完数组里面只有一个值就转成字符串。所以在多选下拉就赋不了值
解决如下:
将页面attrupdate.vue中showBaseAttrs这个方法里面的代码
if (v.length == 1) {
v = v[0] + ''
}
换成下面这个
if (v.length == 1 && attr.valueType == 0) {
v = v[0] + ''
}
10 分布式基础篇总结
- 分布式基附概念
- 微服务、注册中心、配置中心、远程调用、 Feign、网关
- 基础开发
- springboot2.0、 SpringCloud、 Mybatis-Plus、Vue组件化、阿里云对象存储
- 环境
- Vmware/Vagrant、 Linux、 Docker、 MYSQL、 Redis、逆向工程&人人开源
- 开发规范
- 数据校验JSR303、全局异常处理、全局统一返回、全局跨域处理
- 枚举状态,业务状态码、VO与TO与PO划分,逻组删除
- Lombok: @Data @Slf4j

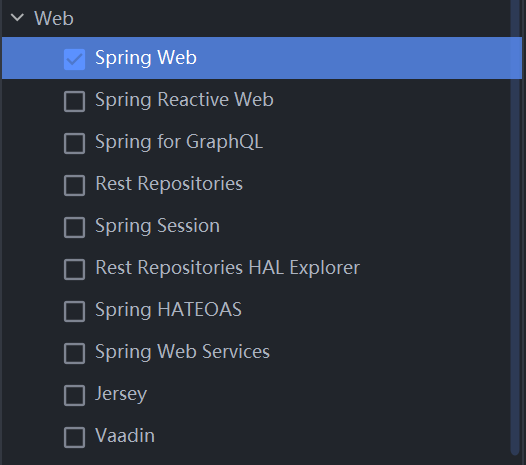

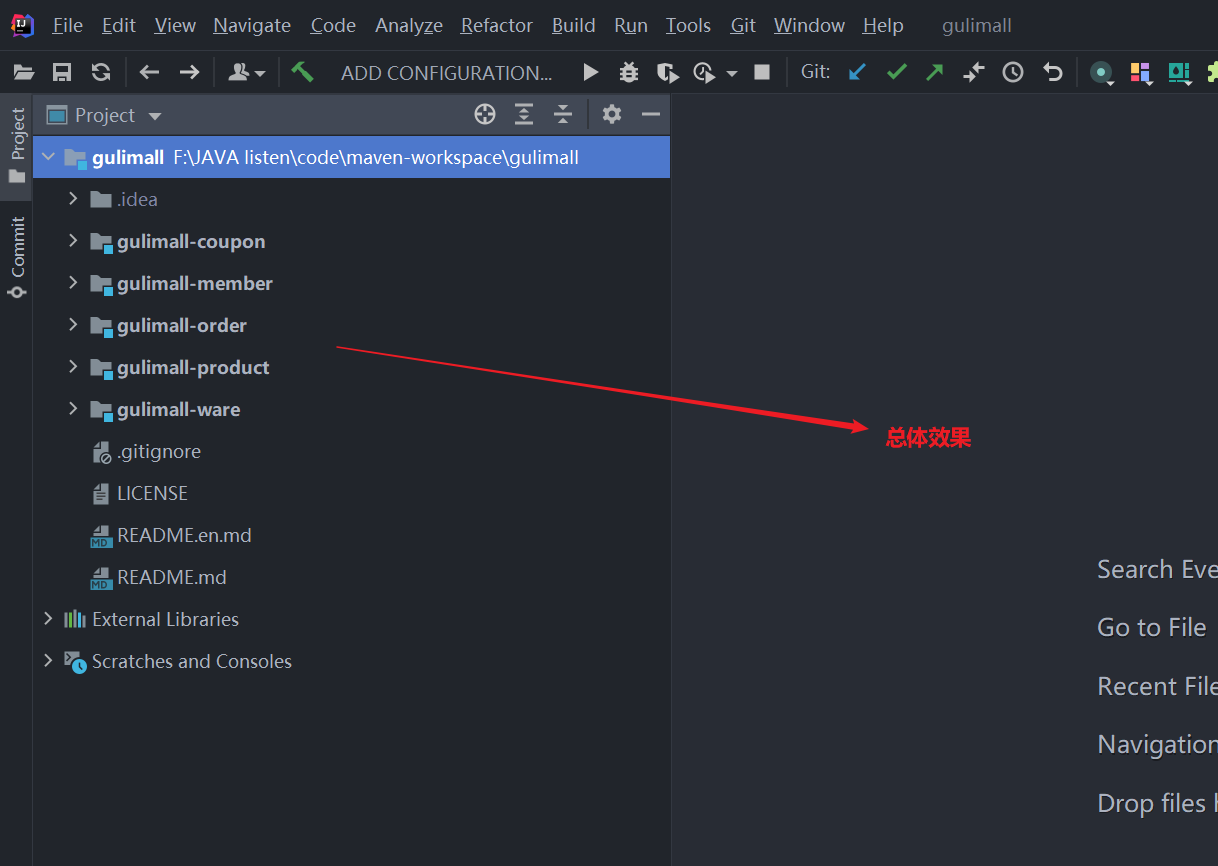


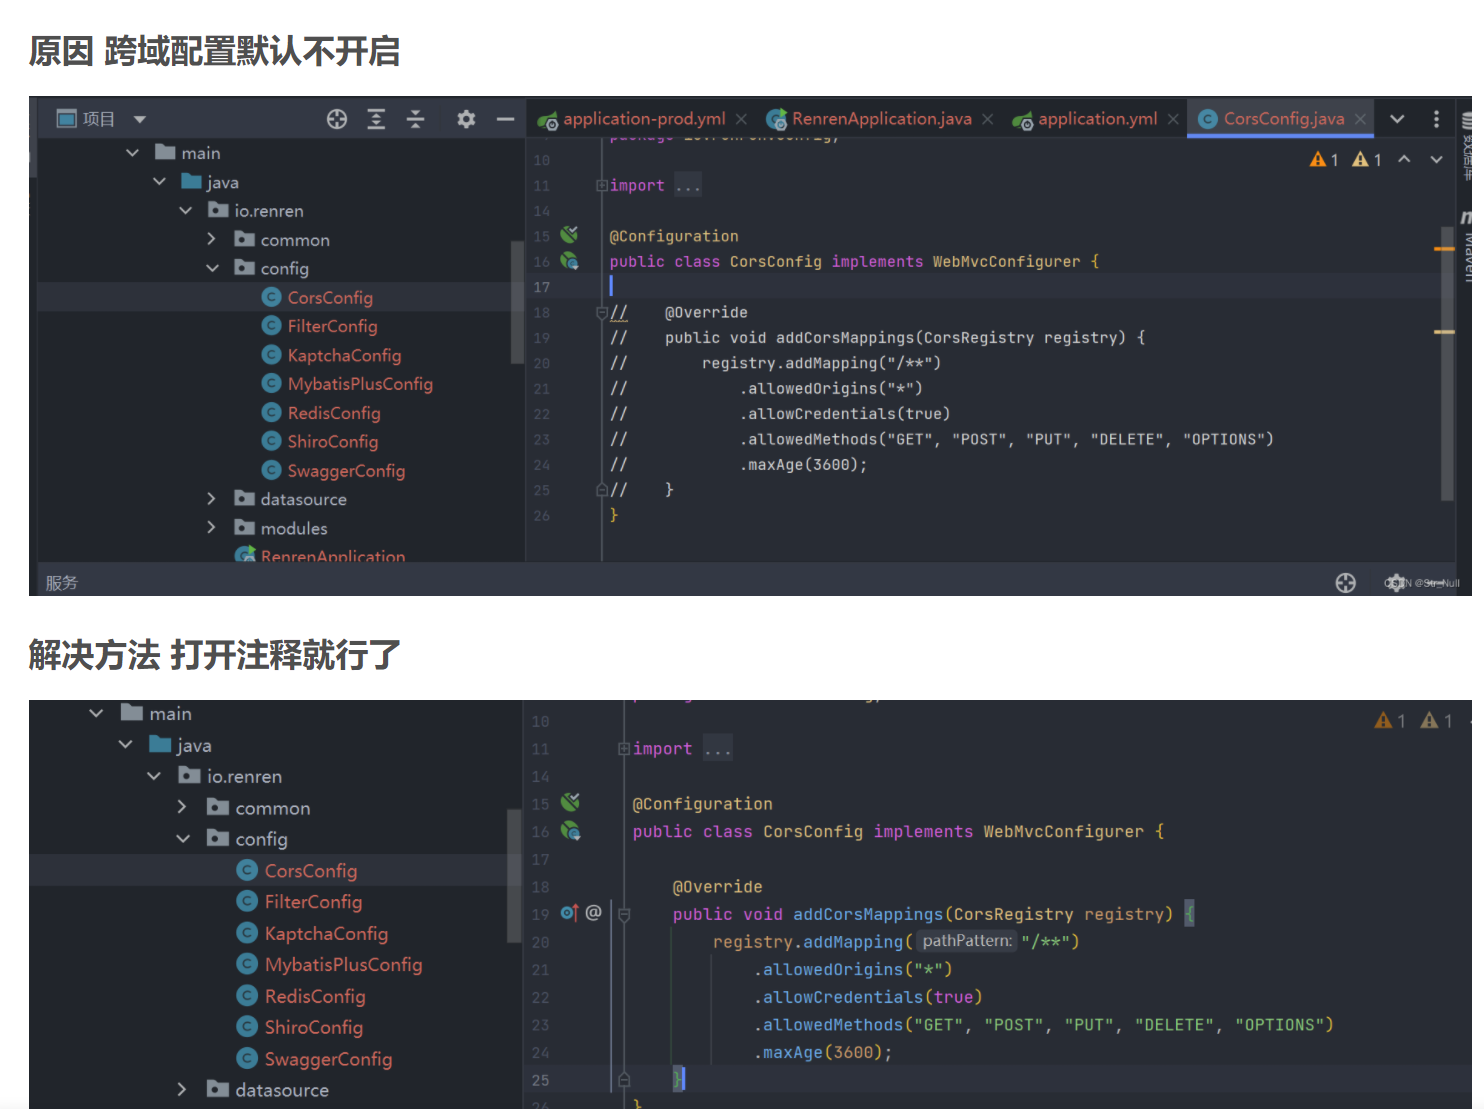
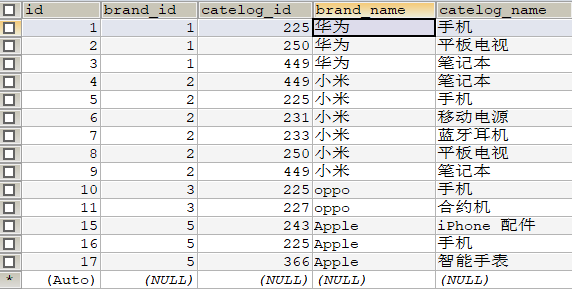


 浙公网安备 33010602011771号